

For Quick
Start Installation
see page 29
Model 3086FR
G.SHDSL Frame Relay over
ATM IAD
User Guide
Sales Office: +1 (301) 975-1000
Technical Support: +1 (301) 975-1007
E-mail: support@patton.com
WWW: www.patton.com
Document Number: 033301U Rev. A
Part Number: 07M3086FR-UG
Revised: January 28, 2004

Patton Electronics Company, Inc.
7622 Rickenbacker Drive
Gaithersburg, MD 20879 USA
tel: +1 (301) 975-1000
fax: +1 (301) 869-9293
support: +1 (301) 975-1007
web: www.patton.com
e-mail: support@patton.com
Copyright © 2004, Patton Electronics Company. All rights reserved.
The information in this document is subject to change without notice. Patton Electronics assumes no liability for errors that may appear in this document.
Warranty Information
The software described in this document is furnished under a license and may be used
or copied only in accordance with the terms of such license.
Patton Electronics warrants all Model 3086FR components to be free from defects,
and will—at our option—repair or replace the product should it fail within one year
from the first date of the shipment.
This warranty is limited to defects in workmanship or materials, and does not cover
customer damage, abuse or unauthorized modification. If the product fails to perform
as warranted, your sole recourse shall be repair or replacement as described above.
Under no condition shall Patton Electronics be liable for any damages incurred by
the use of this product. These damages include, but are not limited to, the following:
lost profits, lost savings and incidental or consequential damages arising from the use
of or inability to use this product. Patton Electronics specifically disclaims all other
warranties, expressed or implied, and the installation or use of this product shall be
deemed an acceptance of these terms by the user.

Contents
Contents ......................................................................................................................................................... 3
Compliance Information ................................................................................................................................ 9
Radio and TV Interference ...............................................................................................................................9
CE Notice .........................................................................................................................................................9
FCC Part 68 (ACTA) Statement .......................................................................................................................9
Industry Canada Notice ..................................................................................................................................10
Service ............................................................................................................................................................10
About this guide ........................................................................................................................................... 11
Audience............................................................................................................................................................... 11
Structure............................................................................................................................................................... 11
Precautions ........................................................................................................................................................... 12
Factory default parameters.................................................................................................................................... 12
Typographical conventions used in this document................................................................................................ 13
General conventions .......................................................................................................................................13
Mouse conventions .........................................................................................................................................13
1 General Information...................................................................................................................................... 15
Model 3086FR Frame Relay over ATM IAD overview..........................................................................................16
General attributes ............................................................................................................................................16
G.SHDSL Characteristics ...............................................................................................................................17
Ethernet ..........................................................................................................................................................17
TDM Interface ...............................................................................................................................................17
Protocol support .............................................................................................................................................17
PPP Support ...................................................................................................................................................18
ATM Protocols ...............................................................................................................................................18
Frame Relay to ATM conversion protocols .....................................................................................................18
Protocol Support .............................................................................................................................................18
Management ...................................................................................................................................................19
Security ...........................................................................................................................................................19
Front Panel Status LEDs, Test Mode Switches, and Console Port ..................................................................20
Rear panel connectors and switches .................................................................................................................22
2 Product Overview.......................................................................................................................................... 25
Product Overview..................................................................................................................................................26
Applications Overview ....................................................................................................................................26
3 Quick Start Installation................................................................................................................................. 29
Hardware installation ............................................................................................................................................30
What you will need .........................................................................................................................................30
Installing the AC power cord ..........................................................................................................................30
Connecting network cables .............................................................................................................................31
IP address Quick Start modification ................................................................................................................32
3

4
Model 3086FR ATM IAD User Guide
Contents
Web Operation and Configuration .................................................................................................................32
4 Connecting the DSL and data ports.............................................................................................................. 37
Introduction..........................................................................................................................................................38
DSL port ...............................................................................................................................................................38
TDM Port.............................................................................................................................................................39
V.35 and X.21 ports..............................................................................................................................................41
Connecting the 3086FR serial port to a DTE .................................................................................................41
Connecting the 3086FR serial port to a DCE .................................................................................................41
T1 Interface...........................................................................................................................................................43
T1 Interface Connection .................................................................................................................................43
T1 Interface Configuration .............................................................................................................................43
E1 Interface...........................................................................................................................................................44
E1 Interface Connection .................................................................................................................................45
5 Configuring the DSL and serial ports ........................................................................................................... 47
Introduction..........................................................................................................................................................48
Configuring the DSL interface ..............................................................................................................................48
Circuit ID .......................................................................................................................................................48
Clear Error Counters ......................................................................................................................................48
Intended DSL Data Rate ................................................................................................................................49
Actual DSL Rate .............................................................................................................................................49
DSL Rate ........................................................................................................................................................49
Terminal Type ................................................................................................................................................49
Interface Type .................................................................................................................................................49
Test Modes .....................................................................................................................................................49
Annex Type ....................................................................................................................................................49
Line Probe ......................................................................................................................................................50
Configuring the DSL interface using the CLI........................................................................................................50
DSL Data Rate ...............................................................................................................................................50
Data Link Interface .........................................................................................................................................50
Annex Type ....................................................................................................................................................50
Line Probe ......................................................................................................................................................51
Error Monitors ................................................................................................................................................51
Configuring the serial port.....................................................................................................................................52
Configuration variables available .....................................................................................................................52
CLI Configuration Methods ...........................................................................................................................52
Web Interface Configurations .........................................................................................................................54
6 Configuring FR and ATM features................................................................................................................ 55
Introduction..........................................................................................................................................................57
Frame Relay Network (FRN) Interworking (FRF.5)..............................................................................................59
FRN configuration options .............................................................................................................................60
Web configuration methods for FRF.5 port and channel level configuration ..................................................60
FRN configuration options .............................................................................................................................63
CLI Configuration Methods for Port Level Management ...............................................................................66

5
Model 3086FR ATM IAD User Guide
Contents
Configuration Management of the Channel Level Variables ...........................................................................67
Frame Relay Service Interworking (FRF.8)............................................................................................................68
FRS Configuration Options ............................................................................................................................69
CLI Configuration Method ............................................................................................................................73
Web Configuration Methods ..........................................................................................................................74
Frame Relay (Ethernet-based) operations...............................................................................................................76
Frame Relay Configuration Options ...............................................................................................................76
Frame Relay CLI Configuration Options ........................................................................................................76
Web Based Configuration of the Frame Relay Channel ..................................................................................77
7 Local Management Interface ......................................................................................................................... 79
Introduction..........................................................................................................................................................80
LMI Configuration Options..................................................................................................................................80
managementType: (Default Value: no_maintenance) .....................................................................................80
mgtAutoStart: (Default Value: FALSE) ...........................................................................................................81
T391_Value: (Default Value: 10) ...................................................................................................................81
T392_Value: (Default Value: 16) ...................................................................................................................81
fullReportCycle: (Default Value: 6) ................................................................................................................81
netErrorWindowSize: (Default Value: 4) ........................................................................................................81
netMaxErrors: (Default Value: 3) ....................................................................................................................81
userErrorWindowSize: (Default Value: 4) .......................................................................................................81
userMaxErrors: (Default Value: 3) ..................................................................................................................81
CLI Configuration Methods..................................................................................................................................82
Show current configuration .............................................................................................................................82
Set configuration variable ................................................................................................................................82
Web Configuration Methods.................................................................................................................................83
8 3086FR routed and bridged ATM connections............................................................................................. 85
Introduction..........................................................................................................................................................86
DSLAM Connections with remote CPE units.......................................................................................................86
Bridged application configurations to a DSLAM ............................................................................................86
Routed application configurations to a DSLAM .............................................................................................91
9 IP Configurations........................................................................................................................................ 117
IP Configurations................................................................................................................................................118
Router ...........................................................................................................................................................118
DHCP Server and Relay ...............................................................................................................................119
10 Security ....................................................................................................................................................... 123
Introduction........................................................................................................................................................124
Configuring the IAD...........................................................................................................................................124
Configuring the security interfaces.......................................................................................................................125
Deleting a Firewall Policy .............................................................................................................................126
Enabling the Firewall...........................................................................................................................................127
Firewall Portfilters ...............................................................................................................................................127
Security Triggers..................................................................................................................................................128

6
Model 3086FR ATM IAD User Guide
Contents
Intrusion Detection System (IDS) .......................................................................................................................130
11 NAT (Network Address Translation) .......................................................................................................... 133
Introduction........................................................................................................................................................134
Enabling NAT ..............................................................................................................................................134
Global address pool and reserved map ...........................................................................................................135
12 Monitoring Status ....................................................................................................................................... 137
Status LEDs.........................................................................................................................................................138
13 Diagnostics.................................................................................................................................................. 139
Introduction........................................................................................................................................................140
Ping.....................................................................................................................................................................140
Software Upgrades...............................................................................................................................................140
Configuration ...............................................................................................................................................140
Procedure ......................................................................................................................................................140
Operating Local Analog Loopback (LAL)—Serial Port Loop...............................................................................141
Operating Remote Digital Loopback (RDL)—DSL Loop...................................................................................141
T1/E1 Diagnostics...............................................................................................................................................142
Network Loop ..............................................................................................................................................142
T1/E1 Local Loop .........................................................................................................................................143
QRSS—BIT Error Rate Diagnostics .............................................................................................................144
T1/E1 connection Status ..............................................................................................................................145
BIT Error Rate (V.52) Diagnostics......................................................................................................................146
14 Contacting Patton for assistance ................................................................................................................. 147
Introduction........................................................................................................................................................148
Contact information............................................................................................................................................148
Warranty Service and Returned Merchandise Authorizations (RMAs).................................................................148
Warranty coverage ........................................................................................................................................148
RMA numbers ..............................................................................................................................................149
A Specifications .............................................................................................................................................. 151
General Characteristics ........................................................................................................................................152
G.SHDSL Characteristics....................................................................................................................................152
Ethernet ..............................................................................................................................................................152
Sync Serial Interface ............................................................................................................................................153
T1/E1 Interface (3086FR/RIK and RIT models only).........................................................................................153
64K/G.703 Port (3086FR/RIF Model) ..............................................................................................................153
Protocol Support .................................................................................................................................................153
PPP Support........................................................................................................................................................154
ATM Protocols....................................................................................................................................................154
Management .......................................................................................................................................................154
Security ...............................................................................................................................................................155
Compliance Standard Requirements....................................................................................................................155
Dimensions .........................................................................................................................................................155
Power and Power Supply Specifications...............................................................................................................155

7
Model 3086FR ATM IAD User Guide
Contents
B Cable Recommendations ............................................................................................................................ 157
DSL Cable...........................................................................................................................................................158
Ethernet Cable ....................................................................................................................................................158
Adapter................................................................................................................................................................158
C Physical Connectors ................................................................................................................................... 159
RJ-45 shielded 10/100 Ethernet port...................................................................................................................160
RJ-11 non-shielded port ......................................................................................................................................160
RJ-45 non-shielded RS-232 console port (EIA-561)............................................................................................160
Serial port............................................................................................................................................................161
V.35 (M/34 Connector) ...............................................................................................................................161
V.35 (DB-25 Female Connector) ..................................................................................................................161
X.21 (DB-15 Connector) ..............................................................................................................................162
E1/T1 (RJ-48C Connector) ..........................................................................................................................162
Power input.........................................................................................................................................................162
D Command Line Interface (CLI) Operation ................................................................................................ 163
Introduction........................................................................................................................................................164
CLI Terminology ................................................................................................................................................164
Local (VT-100 emulation) ............................................................................................................................164
Remote (Telnet) ............................................................................................................................................164
Using the Console .........................................................................................................................................165
Administering user accounts................................................................................................................................166
Adding new users ..........................................................................................................................................166
Setting user passwords ...................................................................................................................................166
Changing user settings ..................................................................................................................................167
G.SHDSL Commands: .................................................................................................................................167

8
Model 3086FR ATM IAD User Guide
Contents

Compliance Information
and TV
Radio
The Model 3086FR generates and uses radio frequency energy, and if not installed and used properly-that is, in
strict accordance with the manufacturer’s instructions-may cause interference to radio and television reception.
The Models 3086FR have been tested and found to comply with the limits for a Class A computing device in
accordance with specifications in Subpart B of Part 15 of FCC rules, which are designed to provide reasonable
protection from such interference in a commercial installation. However, there is no guarantee that interference will not occur in a particular installation. If the Model 3086FR does cause interference to radio or television reception, which can be determined by disconnecting the unit, the user is encouraged to try to correct the
interference by one or more of the following measures: moving the computing equipment away from the
receiver, re-orienting the receiving antenna and/or plugging the receiving equipment into a different AC outlet
(such that the computing equipment and receiver are on different branches).
CE Notice
The CE symbol on your Patton Electronics equipment indicates that it is in compliance with the Electromagnetic Compatibility (EMC) directive and the Low Voltage Directive (LVD) of the European Union (EU). A
Certificate of Compliance is available by contacting Technical Support.
FCC Part 68 (ACTA) Statement
Interference
The Model 3086FR is not intended to be connected to the public
telephone network.
This equipment complies with Part 68 of FCC rules and the requirements adopted by ACTA. On the bottom
side of this equipment is a label that contains—among other information—a product identifier in the format
US: AAAEQ##TXXXX . If requested, this number must be provided to the telephone company.
A plug and jack used to connect this equipment to the premises wiring and telephone network must comply
with the applicable FCC Part 68 rules and requirements adopted by the ACTA.
This equipment uses a Universal Service Order Code (USOC) jack: RJ-11C.
If this equipment causes harm to the telephone network, the telephone company will notify you in advance
that temporary discontinuance of service may be required. But if advance notice isn’t practical, the telephone
company will notify the customer as soon as possible. Also, you will be advised of your right to file a complaint
with the FCC if you believe it is necessary.
The telephone company may make changes in its facilities, equipment, operations or procedures that could
affect the operation of the equipment. If this happens the telephone company will provide advance notice in
order for you to make necessary modifications to maintain uniterrupted service.
If trouble is experienced with this equipment, for repair or warranty information, please contact our company.
If the equipment is causing harm to the telephone network, the telephone company may request that you disconnect the equipment until the problem is resolved.
9

10
Model 3086FR ATM IAD User Guide
Compliance Information
Connection to party line service is subject to state tariffs. Contact the state public utility commission, public
service commission or corporation commission for information.
Industry Canada Notice
Note
This equipment meets the applicable Industry Canada Terminal
Equipment Technical Specifications. This is confirmed by the registration number. The abbreviation, IC , before the registration number
signifies that registration was performed based on a Declaration of
conformity indicating that Industry Canada technical specifications
were met. It does not imply that Industry Canada approved the
equipment.
Service
All warranty and non-warranty repairs must be returned freight prepaid and insured to Patton Electronics. All
returns must have a Return Materials Authorization number on the outside of the shipping container. This
number may be obtained from Patton Electronics Technical Services at:
• Tel: +1 (301) 975-1007
• Email: support@patton.com
• URL: http://www.patton.com
Note
Packages received without an RMA number will not be accepted.

About this guide
This guide describes installing and configuring a Patton Electronics Model 3086FR Frame Relay to ATM Converter. The instructions in this guide are based on the following assumptions:
• The Frame Relay to ATM Converter may connect to a serial DTE device
• There is a LAN connected to the Ethernet port of the IAD
• Users will be connected to remote IADs
Audience
This guide is intended for the following users:
• Operators
• Installers
• Maintenance technicians
Structure
This guide contains the following chapters and appendices:
• Chapter 1 provides information about Frame Relay to ATM Converter features and capabilities
• Chapter 2 contains an overview describing Frame Relay to ATM Converter operation
• Chapter 3 provides quick start installation procedures
• Chapter 4 describes connecting the DSL and data ports
• Chapter 6 describes configure Frame Relay and ATM features
• Chapter 7 describes the Local Management Interface
• Chapter 8 describes setting up 3086FR routed and bridged ATM connections
• Chapter 9 describes configuring the Frame Relay to ATM Converter for specialized applications
• Chapter 10 describes configuring security for the IAD
• Chapter 11 describes configuring for network address translation (NAT)
• Chapter 12 contains definitions for the LED status indicators
• Chapter 13 describes Frame Relay to ATM Converter diagnostics
• Appendix A contains specifications for the IADs
• Appendix B provides cable recommendations
• Appendix C describes the IAD’s physical ports
• Appendix D describes how to use the command line interface (CLI)
For best results, read the contents of this guide before you install the IAD.
11
12
Model 3086FR ATM IAD User Guide
About this guide
Precautions
Notes and cautions, which have the following meanings, are used throughout this guide to help you become
aware of potential Frame Relay to ATM Converter problems. Warnings relate to personal injury issues, and
Cautions refer to potential property damage.
Note
Calls attention to important information.
The shock hazard symbol and WARNING heading indicate a potential electric
shock hazard. Strictly follow the warning instructions to avoid injury caused
by electric shock.
The alert symbol and WARNING heading indicate a potential safety hazard.
Strictly follow the warning instructions to avoid personal injury.
The shock hazard symbol and CAUTION heading indicate a
potential electric shock hazard. Strictly follow the instructions to
avoid property damage caused by electric shock.
The alert symbol and CAUTION heading indicate a potential hazard. Strictly follow the instructions to avoid property damage.
Factory default parameters
The Model 3086FR Frame Relay to ATM Converter has the following factory default parameters.
• Ethernet IP address: 192.168.200.10/24
• Autonegotiate the G.SHDSL speed
• Annex B
• Remote (CPE)
13
Model 3086FR ATM IAD User Guide
Typographical conventions used in this document
This section describes the typographical conventions and terms used in this guide.
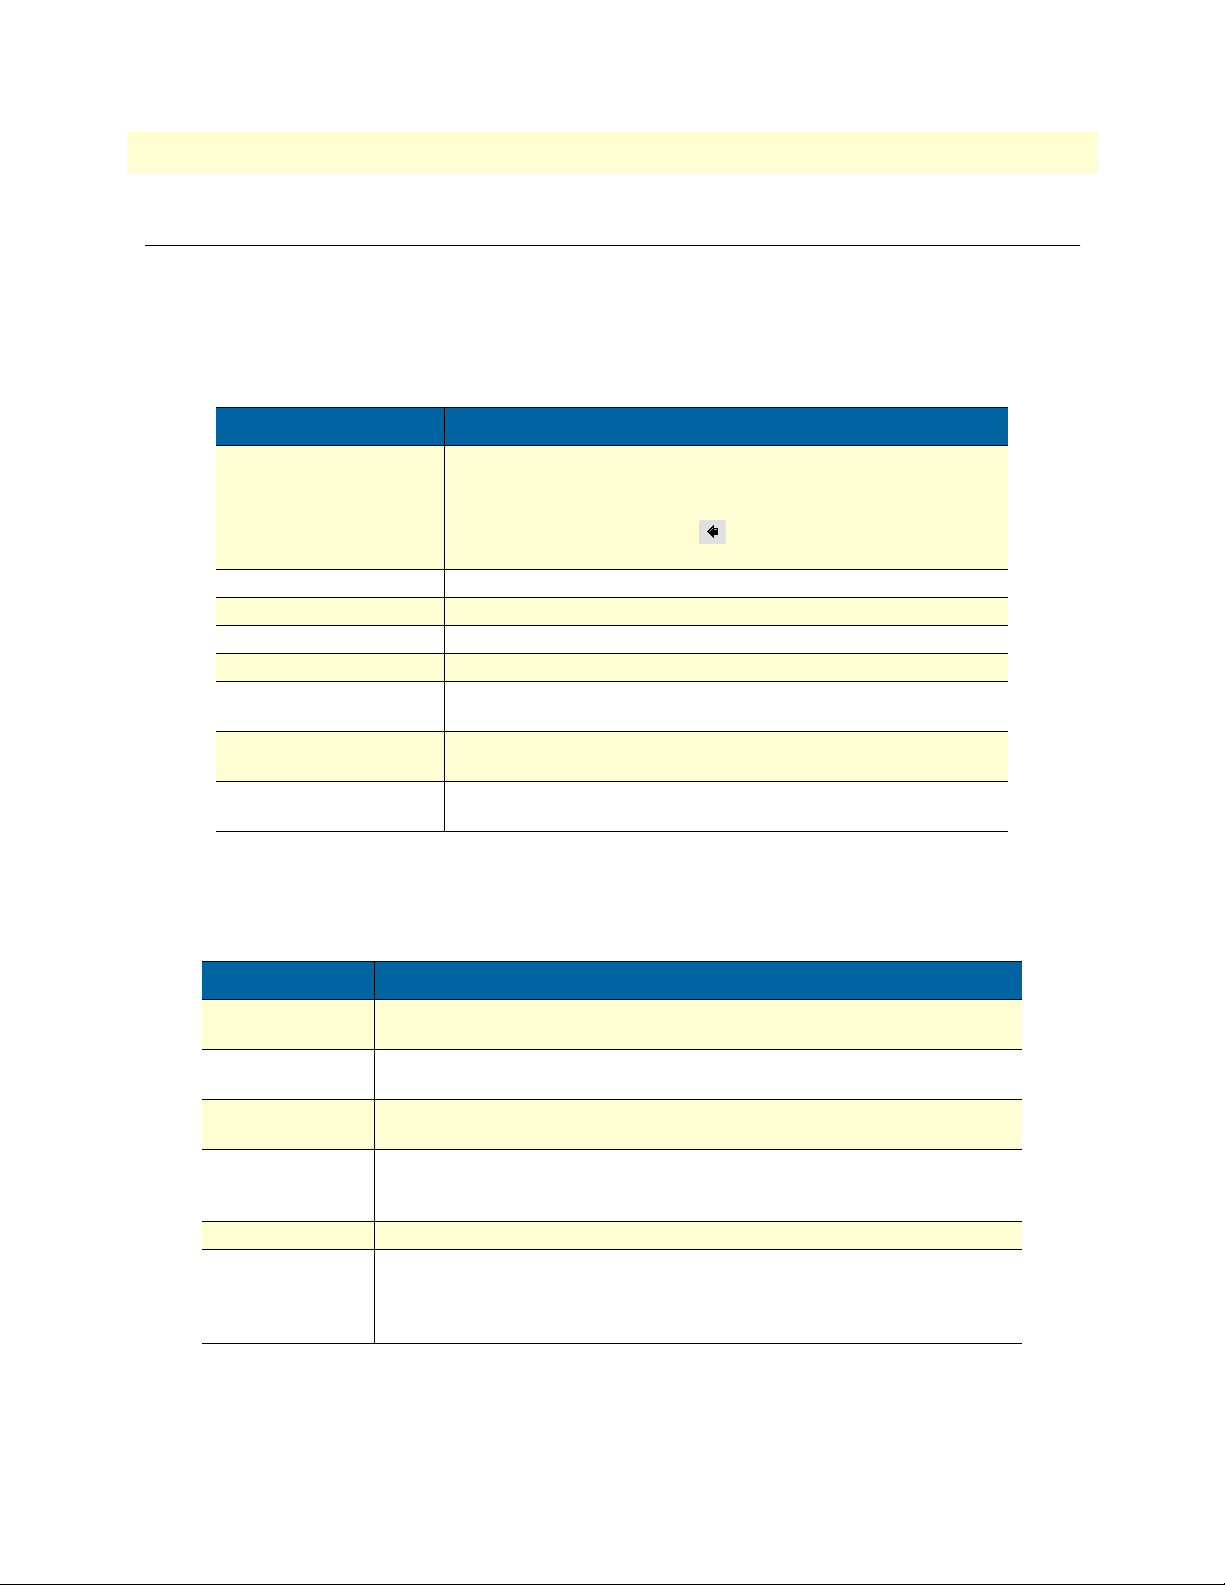
General conventions
The procedures described in this manual use the following text conventions:
Table 1. General conventions
Convention Meaning
Garamond blue type
Futura bold type
Italicized Futura type
Futura type Indicates the names of fields or windows.
Garamond bold type
< > Angle brackets indicate function and keyboard keys, such as <SHIFT>,
Are you ready?
% dir *.*
Indicates a cross-reference hyperlink that points to a figure, graphic,
table, or section heading. Clicking on the hyperlink jumps you to the reference. When you have finished reviewing the reference, click on the
Go to Previous View button in the Adobe® Acrobat® Reader
toolbar to return to your starting point.
Indicates the names of menu bar options.
Indicates the names of options on pull-down menus.
Indicates the names of command buttons that execute an action.
<CTRL>, <C>, and so on.
All system messages and prompts appear in the Courier font as the
system would display them.
Bold Courier font indicates where the operator must type a response or
command
About this guide
Mouse conventions
The following conventions are used when describing mouse actions:
Table 2. Mouse conventions
Convention Meaning
Left mouse button This button refers to the primary or leftmost mouse button (unless you have
changed the default configuration).
Right mouse button This button refers the secondary or rightmost mouse button (unless you have
changed the default configuration).
Point This word means to move the mouse in such a way that the tip of the pointing
arrow on the screen ends up resting at the desired location.
Click Means to quickly press and release the left or right mouse button (as instructed in
the procedure). Make sure you do not move the mouse pointer while clicking a
mouse button.
Double-click Means to press and release the same mouse button two times quickly
Drag This word means to point the arrow and then hold down the left or right mouse but-
ton (as instructed in the procedure) as you move the mouse to a new location.
When you have moved the mouse pointer to the desired location, you can release
the mouse button.

Model 3086FR ATM IAD User Guide About this guide
14

Chapter 1 General Information
Chapter contents
Model 3086FR Frame Relay over ATM IAD overview..........................................................................................16
General attributes ............................................................................................................................................16
G.SHDSL Characteristics ...............................................................................................................................17
Ethernet ..........................................................................................................................................................17
TDM Interface ...............................................................................................................................................17
Protocol support .............................................................................................................................................17
PPP Support ...................................................................................................................................................18
ATM Protocols ...............................................................................................................................................18
Frame Relay to ATM conversion protocols .....................................................................................................18
Protocol Support .............................................................................................................................................18
Management ...................................................................................................................................................19
Security ...........................................................................................................................................................19
Front Panel Status LEDs, Test Mode Switches, and Console Port ..................................................................20
Console port (outlined in red) ...................................................................................................................22
Rear panel connectors and switches .................................................................................................................22
Power connector .......................................................................................................................................22
AC universal power supply .................................................................................................................. 22
48 VDC power supply ........................................................................................................................ 22
Ethernet port (outlined in green) ...............................................................................................................23
MDI-X ......................................................................................................................................................23
Line port (outlined in yellow) ....................................................................................................................23
15

Model 3086FR ATM IAD User Guide 1 • General Information
Model 3086FR Frame Relay over ATM IAD overview
The Model 3086FR is a G.SHDSL Integrated Access Device that combines high speed IP routing and access
via ATM /PPP. In addition, the Model 3086FR serial port converts FR legacy traffic to ATM traffic using
FRF.5 (Frame Relay/ATM PVC Network Internetworking Implementation) and FRF.8 (Frame Relay/ATM
PVC Service Internetworking Implementation). The Model 3086FR offers direct connection to a
10/100Base-T Ethernet environment, a V.35 or X.21 serial direct connection to a router or FRAD. The
3086FR combines traffic from the Serial and Ethernet ports over a single pair DSL connection.
The Model 3086FR complies with ETSI/ITU standard G.991.2 and allows full duplex, up to 2.3 Mbps speed
over a single twisted pair. In addition, the Model 3086FR works at up to 4.6 Mbps over 2-wire. Whereas
G.991.2 specifies 4-wire for data rates from 2.3 to 4.6 Mbps, the 3086FR is able to operate up to 4.6 Mbps
over just 2 wires! Speed setting ranges are user selectable in nx64 kbps increments from 64 kbps.
The following sections describe Model 3086FR features and capabilities:
• General attributes, see page 16
• G.SHDSL Characteristics (Model 3086FR), see page 17
• Ethernet, see page 17
• Protocol support, see page 17
• PPP support, see page 18
• ATM protocols, see page 18
• Frame Relay to ATM support, see page 18
• Management, see page 18
• TDM Interface, see page 17
• Security, see page 19
• Front panel status LEDs, switches, etc., see page 20
General attributes
• Compact, low cost IAD
• 10/100 Ethernet
• Unlimited host support.
• Comprehensive hardware diagnostics, works with any operating system, easy maintenance and effortless
installation.
• Plug-and-Play operation for fast and seamless turn-up with pre-configured WAN and LAN options.
• Built-in web configuration.
• Setup allows for standard IP address and unique method for entering an IP address and mask WITHOUT
use of a console connection. Default IP address of 192.168.1.1/24.
• Simple software upgrade using FTP into FLASH memory.
Model 3086FR Frame Relay over ATM IAD overview 16

Model 3086FR ATM IAD User Guide 1 • General Information
• Twelve front panel LEDs indicate , DSL WAN, Sync Serial, Ethernet LAN speed and status, and Test mode
status.
• Convenient and standard RJ connectors for Ethernet, Line, and Console.
• Field Factory Default Option.
• Standard 1 year warranty.
• Convenient and standard RJ connectors for Ethernet, Line, and Console.
G.SHDSL Characteristics
• Full duplex 2.3 Mbps speed over 2-wire (in accordance with ETSI/ITU standard G.991.2). 2.3 Mbps to
4.6 Mbps, full duplex, over 2-wire.
• DTE rates 64 kbps to 2.3 Mbps operation (Sync serial can work in increments of 64 kbps up to a band-
width of 2.3 Mbps, n=32).
• Distance from 24,900 feet (7,590 m) at 192 kbps to 10,200 ft (3,109 m) at 2.3 Mbps on 26 AWG (0.4
mm) wire
• Annex A (ANSI), Annex B (ETSI) PSD selection.
• CO and CP modes supported
• TC-PAM based DSL modulations.
• EOC Management channel for remote end-to-end management.
Ethernet
• Auto-sensing Full-Duplex 10Base-T/100Base-TX Ethernet.
• Standard RJ-45 connector
• Built-in MDI-X cross-over switch.
• IEEE 8021.d transparent learning bridge up to 1,024 addresses and Spanning Tree.
• 8 IP address/subnets on Ethernet interface.
TDM Interface
• V.35, X.21, or T1/E1 interface
• Available with female M/34, DB-25, DB-15, and RJ-48C connectors
• User configurable DTE/DCE for X.21
Protocol support
• Complete internetworking with IP (RFC 741), TCP (RFC 793), UDP (RFC 768), ICMP (RFC 950),
ARP (RFC 826).
• IP Router with RIP (RFC 1058), RIPv2 (RFC 2453) for up to 64 static routes.
• Built-in Ping and Traceroute facilities.
• Integrated DHCP Server (RFC 2131).
Model 3086FR Frame Relay over ATM IAD overview 17

Model 3086FR ATM IAD User Guide 1 • General Information
• DHCP relay agent (RFC 2132/RFC 1542) with 8 individual address pools.
• DNS Relay with primary and secondary Name Server selection.
• NAT (RFC 3022) with Network Address Port Translation (NAPT), MultiNat with 1:1, Many:1,
Many:Many mapping, Port/IP redirection and mapping.
PPP Support
• Point-to-Point Protocol over HDLC
• PPPoA (RFC 2364) Point-to-Point Protocol over ATM.
• PPPoE (RFC 2516) Client for autonomous network connection. Eliminates the requirement of installing
client software on a local PC and allows sharing of the connection across a LAN.
• User configurable PPP PAP (RFC 1661) or CHAP (RFC 1994) authentication..
ATM Protocols
• Multiprotocol over ATM AAL5 and Multiprotocol Bridged encapsulation RFC 2684 (Formerly RFC
1483) and RFC 1577 Classical IP over ATM. Default RFC-1483 route mode. Logical Link Control
(LLC)/ Subnetwork Access Protocol (SNAP) encapsulation. Default VC mux mode.
• ATM UNI 3.0, 3.1, and 4.0 signaling ATM QoS with UBR, CBR, nrt-VBR, and rt-VBR.
• Peak cell rate shaping on a per-VCC basis up to 32 active VCCs across VPI 0-255, VCI 0-65525. Single
default PVC: 8/35 with PCR=5,500 cells.
Frame Relay to ATM conversion protocols
• FRF.5 (Frame Relay/ATM PVC Network Internetworking Implementation)
• FRF.8 (Frame Relay/ATM PVC Service Internetworking Implementation)
Protocol Support
• Complete internetworking with IP (RFC 741), TCP (RFC 793), UDP (RFC 768), ICMP (RFC 950),
ARP (RFC 826).
• IP Router with RIP (RFC 1058), RIPv2 (RFC 2453),
• Up to 64 static routes with user selectable priority over RIP/OSPF routes.
• Built-in ping facilities.
• Integrated DHCP Server (RFC 2131). Selectable general IP leases and user specific MAC/IP parings.
Selectable lease period.
• DHCP relay agent (RFC 2132/RFC 1542) with 8 individual address pools.
• DNS Relay with primary and secondary Name Server selection.
• NAT (RFC 3022) with Network Address Port Translation (NAPT) for cost-effective sharing of a single
DSL connection. Integrated Application Level Gateway with support for over 80 applications.
• NAT MultiNat with 1:1 mapping.
• NAT Many:1.
• NAT Many:Many mapping.
• NAT Port/IP redirection and mapping.
Model 3086FR Frame Relay over ATM IAD overview 18

Model 3086FR ATM IAD User Guide 1 • General Information
• uPNP controlled device for seamless networked device interconnectivity and Windows XP integration.
• IGMPv2 Proxy support (RFC 2236).
• Frame Relay with Annex A/D/LMI, RFC 1490 MpoFR and FRF.12 Fragmentation.
Management
• User selectable ATM, PPP, or Frame Relay WAN datalink connection.
• Web-Based configuration via embedded web server
• CLI menu for configuration, management, and diagnostics.
• Local/Remote CLI (VT-100 or Telnet).
• SNMPv1 (RFC 1157) MIB II (RFC 1213)
• Quick Start Setup runs through common options to simplify circuit turn-up.
• Logging via SYSLOG, and VT-100 console. Console port set at 9600 bps 8/N/1 settings no flow control.
• EOC access for End-To-End management, configuration, and control.
Security
• Packet filtering firewall for controlled access to and from LAN/WAN. Support for 255 rules in 32 filter sets.
16 individual connection profiles.
• DoS Detection/protection. Intrusion detection, Logging of session, blocking and intrusion events and
Real-Time alerts. Logging or SMTP on event.
• Password protected system management with a username/password for console and virtual terminal. Sepa-
rate user selectable passwords for SNMP RO/RW strings.
• Access list determining up to 5 hosts/networks which are allowed to access management system
SNMP/HTTP/TELNET.
• Logging or SMTP on events: POST, POST errors, line/DSL, PPP/DHCP, IP.
Model 3086FR Frame Relay over ATM IAD overview 19

Model 3086FR ATM IAD User Guide 1 • General Information
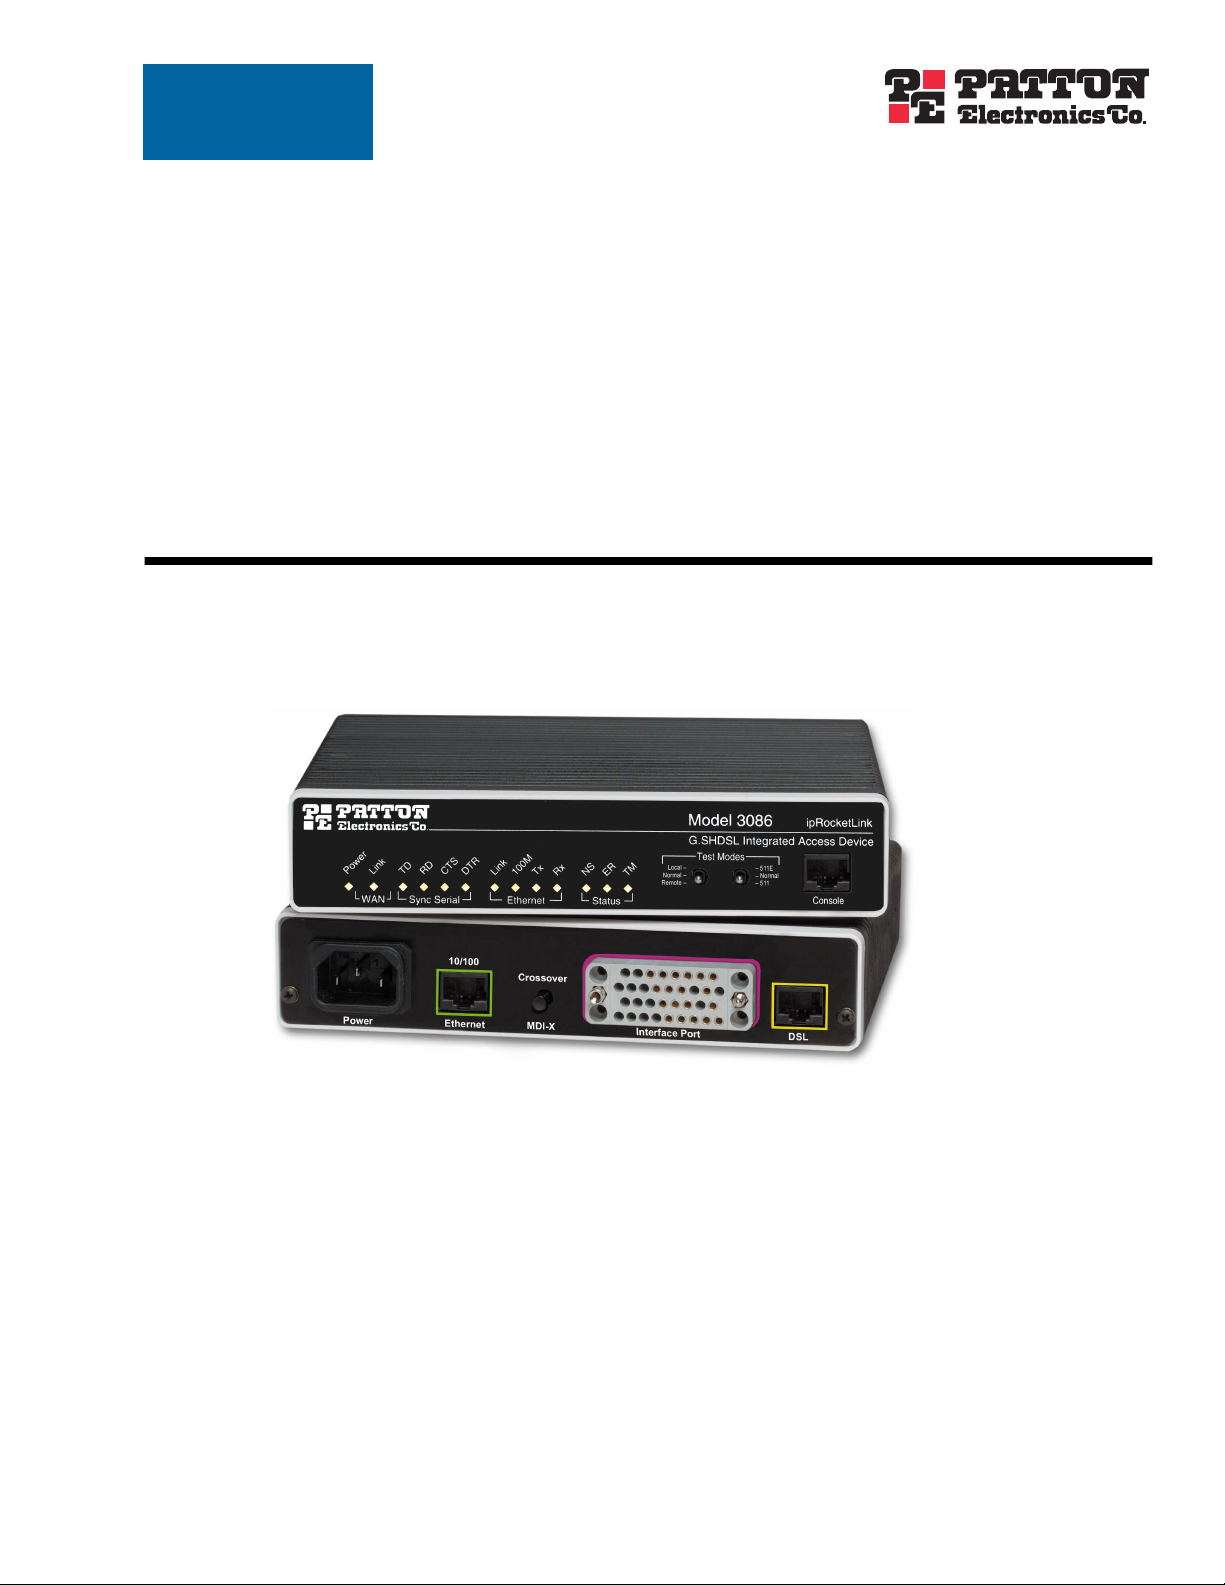
Front Panel Status LEDs, Test Mode Switches, and Console Port
The IpRocketLink routers have all status LEDs and console port on the front panel of the unit, and all other
electrical connections are located on the rear panel.
Figure 1. Model 3086FR
The status LEDs from left to right are (see table 3 for LED descriptions):
• Power
• WAN Link (DSL)
• Sync Serial (TD, RD, CTS, and DTR) or T1/E1 (Link, LOSS, TD, and RD)
• Ethernet Link, 100M, Tx, and Rx
• Status NS, ER, and TM
Model 3086FR Frame Relay over ATM IAD overview 20

Model 3086FR ATM IAD User Guide 1 • General Information
Table 3. Status LED descriptions
Power Green ON indicates that power is applied. Off indicates
that no power is applied.
WAN (DSL) Link Green Solid green: connected
Off: disconnected
Sync Serial TD Green Green: indicates a binary ‘0’ condition
off
: indicates a binary ‘1’or idle condition
RD Green Green: indicates a binary ‘0’condition
off: indicates a binary ‘1’ or idle condition
CTS Green ON: indicates the CTS signal from the Frame Relay
to ATM Converter is active, binary ‘1’
off: indicates CTS is binary ‘0’
DTR Green ON: indicates the DTR signal from the DTE device
attached to the serial port is active, binary ‘1’
T1/E1 Link Green On: indicates the T1/E1 interface is connected to a
live T1/E1 line
LOS Red On: indicates a T1/E1 loss-of-frame condition. It
also indicates that no T1/E1 signal is detected.
TD Green Green: indicates a binary ‘0’ condition
off
: indicates a binary ‘1’or idle condition
RD Green Green: indicates a binary ‘0’condition
off: indicates a binary ‘1’ or idle condition
Ethernet Link Green ON: indicates an active 10/100 BaseT connection
100M Green ON: connected to a 100BaseT LAN
Off: connected to a 10BaseT LAN
Tx Green Flashing: when transmitting data from the Frame
Relay to ATM Converter to the Ethernet
Rx Green Flashing: when transmitting data from the Ethernet
to the IAD.
Status NS Red ON: incidates absence of a valid DSL connection
ER Red flashes once: indicates bit errors occurring during
511/511E tests
TM Yellow ON: is under one of the test modes (local loop,
remote loop, or V.54 BER pattern)
The test mode switches are:
• Normal, Local, and Remote Loopbacks
• Normal, 511, and 511E pseudo-random bit patterns
Model 3086FR Frame Relay over ATM IAD overview 21

Model 3086FR ATM IAD User Guide 1 • General Information
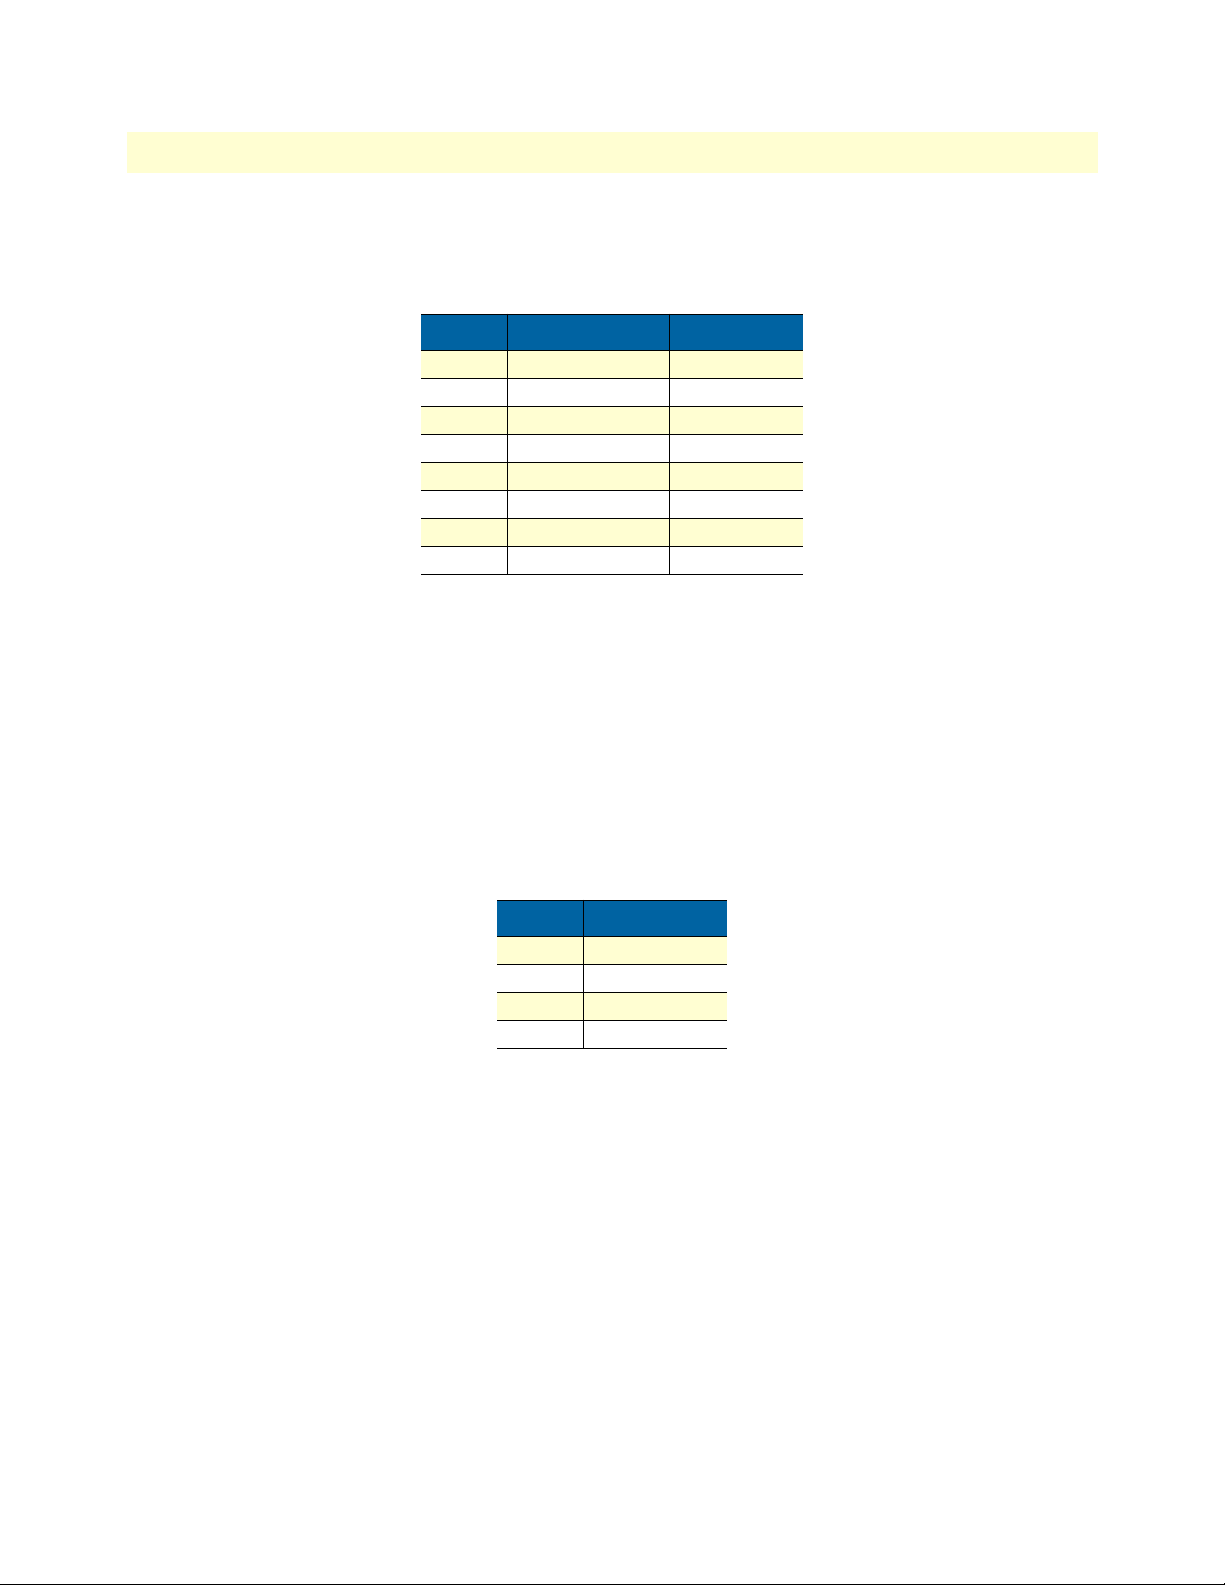
Console port (outlined in red)
The unshielded RJ-45 RS-232 console DCE port (EIA-561) with the pin-out listed in the following table:
Pin No. Signal Direction Signal Name
1 Out DSR
2 Out CD
3 In DTR
4 — Signal Ground
5 Out RD
6 In TD
7 Out CTS
8 In RTS
Rear panel connectors and switches
On the rear panel from left to right are the following:
• Power input connector
• Ethernet connector
• MDI-X switch
• TDM port. V.35 (3086FR/RIC), X.21 (3086FR/RID), T1/E1 (3086FR/RIK)
• Line connector
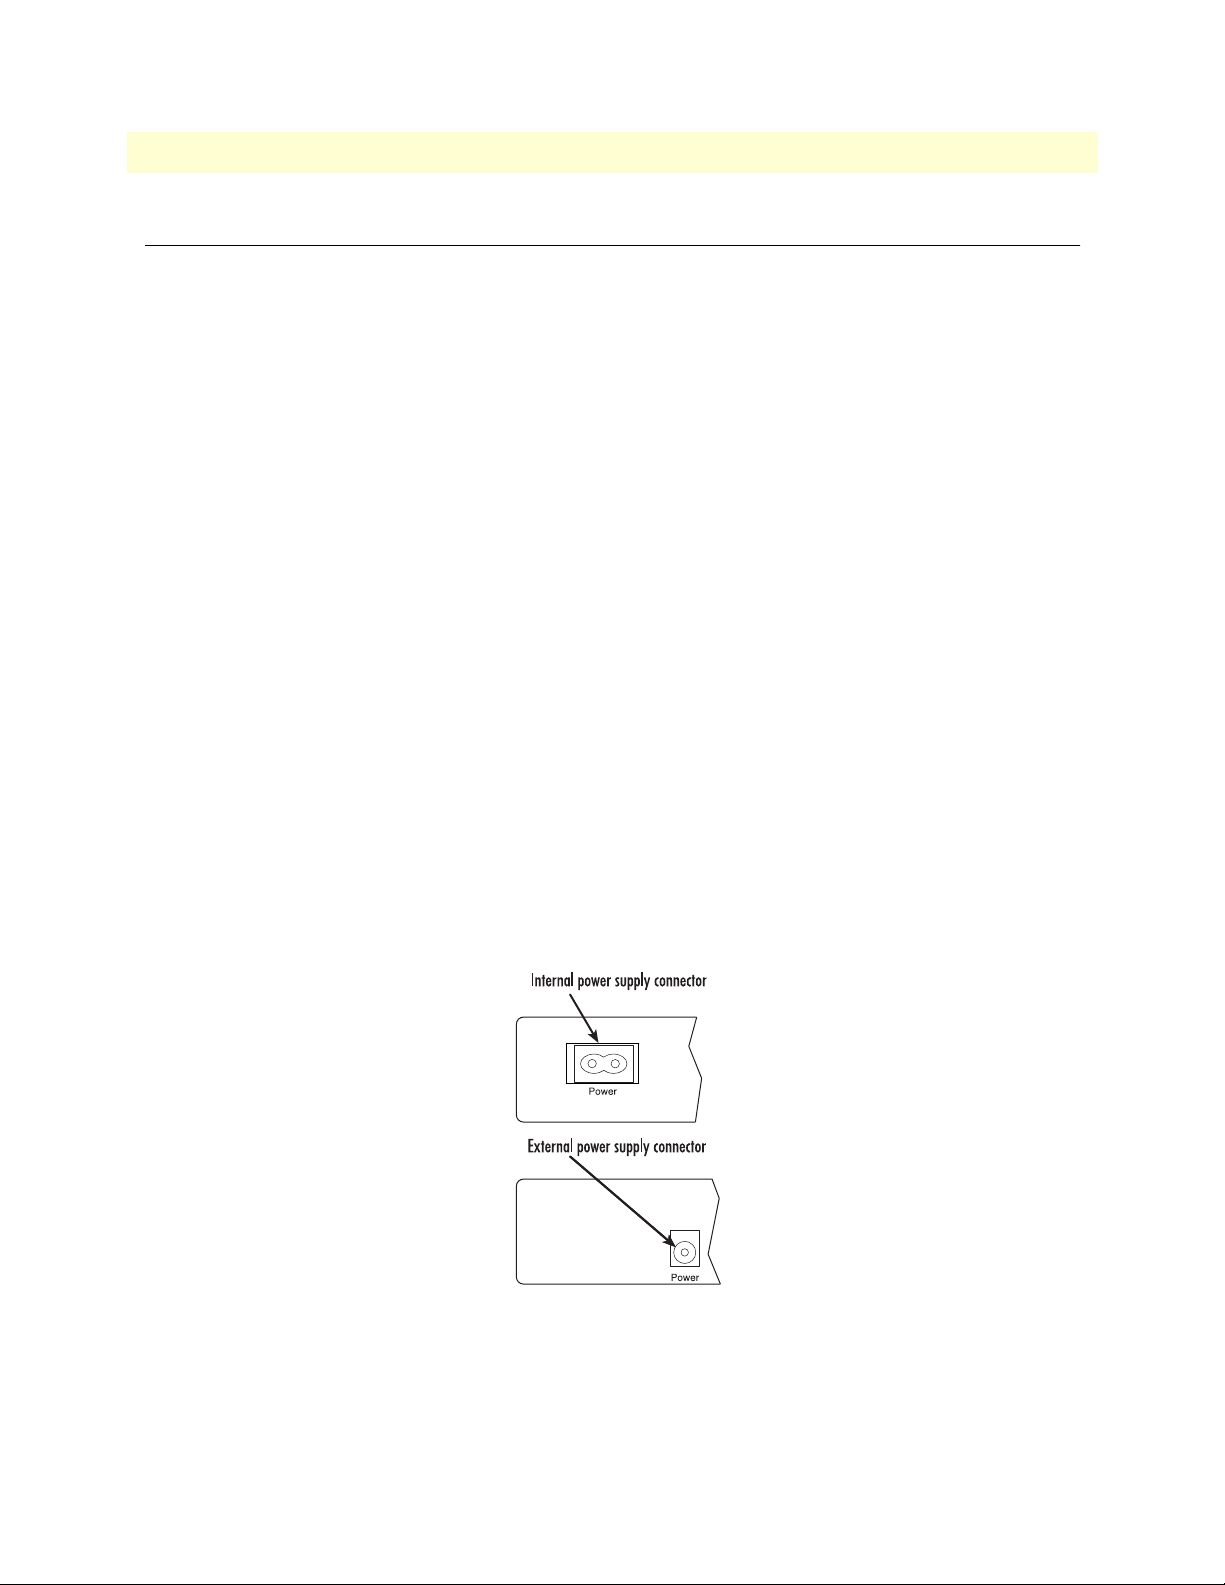
Power connector
AC universal power supply.
The Model 3086FR offers internal or external AC power supply options.
• The internal power supply connects to an AC source via an IEC-320 connector (100–240 VAC, 200 mA,
50/60 Hz)
• The external power supply connects to an external source providing +5 VDC via a barrel-type connector
48 VDC power supply.
• Rated voltage and current: 36–60 VDC, 400 mA
• Fuse rating: 250 Volts, 400 mA, time delay
Connect the equipment to a 36–60 VDC source that is electrically isolated from the AC source. The 36–60 VDC source is to
be reliably connected to earth.
Model 3086FR Frame Relay over ATM IAD overview 22
Model 3086FR ATM IAD User Guide 1 • General Information
Ethernet port (outlined in green)
Shielded RJ-45 10Base-T/100Base-TX Ethernet port using pins 1,2,3, & 6. See MDI-X switch for hub or transceiver configuration.The following table defines conditions that occur when the MDI-X switch is in the out position.
Pin No. Signal Direction Signal Name
1 Output TX+
2 Output TX3 Input RX+
4 — —
5 — —
6 Input RX7 — —
8 — —
MDI-X
The MDI-X push switch operates as follows:
• When in the default “out” position, the Ethernet circuitry takes on a straight-through MDI configuration
and functions as a transceiver. It will connect directly to a hub.
• When in the “in” position, the Ethernet circuitry is configured in cross-over MDI-X mode so that a
straight-through cable can connect the Model 3086FR DSL modem’s Ethernet port directly to a PC’s NIC
card.
Line port (outlined in yellow)
The RJ-11/4 DSL line port uses pins 2 and 3 of the RJ-11 port.
Pin No. Signal Name
1 —
2 In/Out-A
3 In/Out-B
4 —
Model 3086FR Frame Relay over ATM IAD overview 23

Model 3086FR ATM IAD User Guide 1 • General Information
Model 3086FR Frame Relay over ATM IAD overview 24

Chapter 2 Product Overview
Chapter contents
Product Overview..................................................................................................................................................26
Applications Overview ....................................................................................................................................26
FR over ATM ...........................................................................................................................................27
Integrated access ........................................................................................................................................27
25

Model 3086FR ATM IAD User Guide 2 • Product Overview
Product Overview
The Model 3086FR IAD operates as a Frame Relay to ATM converter (via serial port), as a bridge or a router
and has three ports for communication:
• The Ethernet port—Connects to the LAN side of the connection
• The Line port—Provides the G.SHDSL transmission connection between the CPE and CO DSL IAD
• The TDM port—Connects to local device for Frame Relay to ATM conversion and data uplink via the
DSL link
The IAD provides all layers 2 and layer 3 protocols required for end-to-end-link communication.
When configuring the 3086FR, questions must be answered so the 3086FR functions as desired. For example,
when a router or bridge module needs to be activated, some questions would be:
• Is a default gateway required?
• Which encapsulation technique is best for this application: PPPoA, IPoA, or another?
These decisions can be made and implemented more easily if the Model 3086FR’s fundamental architecture is
understood. Also, while configuring the Model 3086FR via a browser using the built-in HTTP server is very
intuitive, an understanding of the architecture is essential when using the command-line interface (CLI) commands.
The fundamental building blocks comprise a router or bridge, interfaces, and transports. The router and bridge
each have interfaces. A transport provides the path between an interface and an external connection. For example, the Ethernet transport attaches to an Internet Protocol (IP) interface. A transport consists of layer 2 and
everything below it. Creating a transport and attaching it to a bridge or router’s interface enables data to be
bridged or routed. The supported transports are PPPoA, RFC 1483 (Multiprotocol Encapsulation over ATM
AAL5), and IPoA.
Configuring an interface and transport for the router or bridge requires naming the interface and transport before
attaching them. When using the built-in HTTP server web browser, this is done automatically. But when configuring the Model 3086FR via CLI commands through the RS-232 control port, it must be done manually.
Model 3086FR IADs can connect over an ATM PVC transport.
The PVC requires the configuration of the virtual path identifier (VPI) and virtual circuit identifier (VCI). The
VPI can be any integer between 0–4095 inclusive. The general rule for the VCI is an integer between 1–65,535
inclusive. Examples in this manual use a VCI of 600 or above. The main restriction in choosing a VCI is that
VCIs below 32 are reserved for such predefined functions as ILMI. The VCI values of 600 and above used in
this manual are also above the range used by many signaling implementations for SVCs.
The HDLC is a packet-based transmission across the DSL Link.
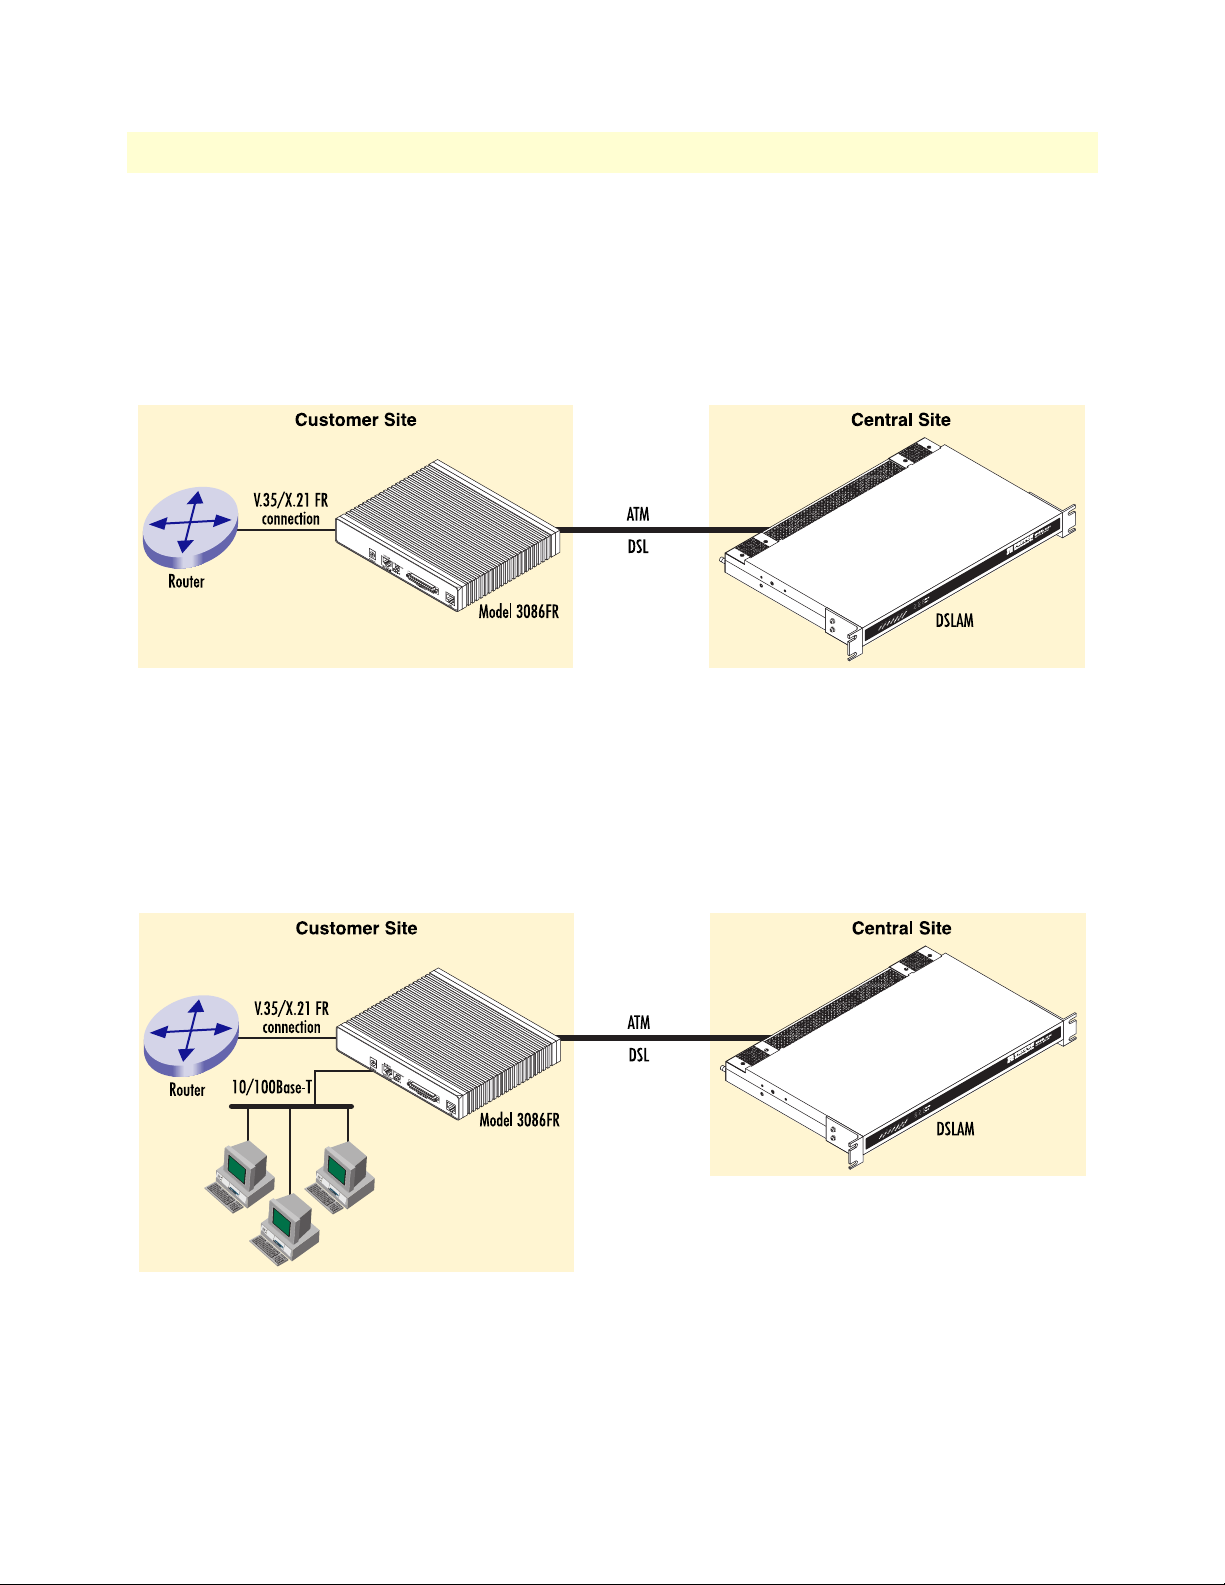
Applications Overview
The Model 3086FR is used in FR over ATM applications connecting FRAD equipment to ATM based
DSLAMs. In addition, the 3086FR is used in the connection of small to medium size enterprise to internet
services (connection to ISP), or connection to remote branches using DSL access using PPP over ATM. In
most applications, the Model 3086 works with Patton’s 3096RC ForeFront System, but it will also connect to
third-party G.SHDSL devices.
Product Overview 26
Model 3086FR ATM IAD User Guide 2 • Product Overview
FR over ATM
The Model 3086FR primary function is the conversion of legacy ports running FR traffic to ATM. In many
instances, customers have older but functioning equipment, and need to connect to newer technology offerings from service providers or telcos. Customers are not ready to make a significant investment in new and
expensive equipment. The Patton model 3086FR fills that gap providing seamless and economical FR to ATM
conversion, allowing customers to keep using their legacy equipment.
Integrated access
In addition to FR to ATM conversion and transport over DSL, the 3086FR is a full feature router allowing
routed or bridged services between the DSL interface and the 10/100Base-T port. The 3086 can simultaneously transport traffic from the serial port and the 10/100Base-T Ethernet port over a single pair DSL link.
In this case, the 3086FR operates in split mode DSL bandwidth allocating dedicated timeslots in the DSL
frame for the serial port, and for the Ethernet traffic.
Product Overview 27

Model 3086FR ATM IAD User Guide 2 • Product Overview
Product Overview 28

Chapter 3 Quick Start Installation
Chapter contents
Hardware installation ............................................................................................................................................30
What you will need .........................................................................................................................................30
Installing the AC power cord ..........................................................................................................................30
Connecting network cables .............................................................................................................................31
IP address Quick Start modification ................................................................................................................32
Web Operation and Configuration .................................................................................................................32
PC Configuration .....................................................................................................................................32
Web Browser .............................................................................................................................................32
29
Model 3086FR ATM IAD User Guide 3 • Quick Start Installation
Hardware installation
If you are already familiar with Model 3086FR Frame Relay to ATM Converter installation and configuration,
this chapter will enable you to finish the job quickly. Installation consists of the following:
• Preparing for the installation (see section “What you will need”)
• Hooking up cables, verifying that the unit will power up, and running a HyperTerminal session (see section
“Connecting network cables” on page 31)
• Changing the IP address from the factory default setting (see section “IP address Quick Start modification”
on page 32)
• Launching a web browser in preparation for configuring the modem (see “Web Operation and Configura-
tion” on page 32)
What you will need
• Model 3086FR G.SHDSL IAD
• Ethernet cable with RJ45 plugs on each end (included with IAD)
• DB9-RJ45 Adapter (included with IAD)
• RJ45/RJ45 straight-through cable for connecting to control port (included with IAD)
• PC computer with HyperTerminal or equivalent VT-100 emulation program, or an ASCII (“dumb”) terminal.
Installing the AC power cord
This section describes installing the power cord into the IEC-320 connector on the 3086FR. Do not connect
the male end of the power cord to the power outlet at this time. Do the following:
1. Install the power cable into Power connector (see figure 2). The AC main socket outlet shall be within 10
feet (3 meters) of the equipment and shall be easily accessible.
Figure 2. Power connector location on rear panel
Hardware installation 30

Model 3086FR ATM IAD User Guide 3 • Quick Start Installation
To avoid the risk of injury from electric shock, the power cord connected to the
IEC-320 connectors must be a grounded power cord.
The 3086FR power supply automatically adjusts to accept an
input voltage from 100 to 240 VAC (50/60 Hz).
Verify that the proper voltage is present before plugging the
power cord into the receptacle. Failure to do so could result in
equipment damage.
2. Verify that the AC power cord included with your 3086FR is compatible with local standards. If it is not,
refer to Chapter 14, “Contacting Patton for assistance” on page 29 to find out how to replace it with a
compatible power cord.
3. Connect the male end of the power cord to an appropriate power outlet.
4. Verify that the green POWER LED is lit.
5. Unplug the AC power cord from the Model 3086FR to power down the unit.
Connecting network cables
Except for the Console port, all connectors are on the rear panel of the ipRocketLink with the exception of the
power connection. The Ethernet port is Green and the Line is Yellow. The Console port is the only electrical
connection on the front panel.
Do the following:
1. Connect the DB9-RJ45 adapter to the DB-9 serial port on the PC or dumb terminal. Use the RJ45-RJ45
straight-through cable between the adapter and the red marked RJ45 port on the 3086FR IAD.
2. Do NOT connect the Frame Relay to ATM Converter to the Ethernet LAN now.
3. On the PC, start a HyperTerminal session at 9600 bps, 8 data bits, 1 stop bit, and no parity.
4. Plug the AC power cord into the Model 3086FR to power up the IAD.
5. Type superuser for Login:, and press Enter.
6. Then type superuser for the password, press Enter.
7. A message will display, “Login Successful.” By typing the character “?”, all the commands will be dis-
played. Any commands parameters may be seen by entering the command followed by a space and a question mark.
→
ethernet ?
add
delete
set
show
list
clear
[The following parameters appear]
Hardware installation 31

Model 3086FR ATM IAD User Guide 3 • Quick Start Installation
IP address Quick Start modification
The first parameter to change is the IP address from the default IP address of 192.168.1.1/24 (for the CP
units) or 192.168.200.11 (for CO units) to your selected IP address. Follow these steps. Comments are in
brackets […].
→
ip list interfaces <enter>
IP Interfaces:
ID | Name | IP Address | DHCP | Transport
-------|---------------|------------------|-------------|----------------- 1 | ip1 | 192.168.200.10 | disabled | <bridge>
---------------------------------------------------------------------------
→
ip set interface ip1 ipaddress 192.168.100.2 255.255.255.0 <enter>
[lists the characteristics of the different interfaces]
[Sets the new IP address which you have selected.
The IP address in this example is for illustrative purposes only.]
→
ip list interfaces <enter>
→
system config save <enter>
Wait for “configuration saved” message…
Saving configuration
→
Configuration saved.
<enter>
→
[To see if the change in IP address is correct]
[To save the new IP address in flash memory.]
The IP address has now been successfully changed.
Web Operation and Configuration
Now that the IP address has been configured for your application, you can complete the configuration using
any standard web browser.
PC Configuration
In order to connect the PC to the Ethernet LAN to communicate with the Model 3086FR, the PC’s IP address
should be on the same subnet as the modem.
Connect a straight-through Ethernet cable between the PC’s NIC or PCMCIA Ethernet card and an Ethernet
hub or switch.
Web Browser
Do the following:
1. Launch a standard web browser such as Netscape Communicator or Internet Explorer (IE).
2. Enter the 3086FR’s IP address into the URL or Address field of the browser.
Hardware installation 32

Model 3086FR ATM IAD User Guide 3 • Quick Start Installation
The Model 3086FR home page displays (see figure 3).
SS
Figure 3. Model 3086FR home page
The Model 3086FR menu structure for models RIC and RID is shown in figure 4 on page 34, the menu structure for Model RIK is shown in figure 5 on page 35.
Hardware installation 33

Model 3086FR ATM IAD User Guide 3 • Quick Start Installation
Figure 4. Model 3086FR Menu Structure (Models RIC and RID)
Hardware installation 34

Model 3086FR ATM IAD User Guide 3 • Quick Start Installation
Figure 5. Model 3086FR Menu Structure (Model RIK)
Hardware installation 35

Model 3086FR ATM IAD User Guide 3 • Quick Start Installation
Hardware installation 36

Chapter 4 Connecting the DSL and data ports
Chapter contents
Introduction..........................................................................................................................................................38
DSL port ...............................................................................................................................................................38
TDM Port.............................................................................................................................................................39
V.35 and X.21 ports..............................................................................................................................................41
Connecting the 3086FR serial port to a DTE .................................................................................................41
Connecting the 3086FR serial port to a DCE .................................................................................................41
V.35 interfaces. .........................................................................................................................................41
X.21 interfaces. .........................................................................................................................................41
T1 Interface...........................................................................................................................................................43
T1 Interface Connection .................................................................................................................................43
T1 Interface Configuration .............................................................................................................................43
Web Interface Configuration ....................................................................................................................43
E1 Interface...........................................................................................................................................................44
E1 Interface Connection .................................................................................................................................45
Web Interface Configuration ....................................................................................................................46
37

Model 3086FR ATM IAD User Guide 4 • Connecting the DSL and data ports
Introduction
The model 3086FR comes with a DSL port, 2 data ports: serial (V.35, X.21, or T1/E1), and a 10/100Base-T
Ethernet port. Frame Relay data from the serial port is passed to the FR to ATM converter engine and is prepared
for transmission over the DSL link – data from or to the serial port does not enter the router core of the 3086FR.
Data from the Ethernet port is processed by the router or bridge core before entering the ATM encapsulation layer.
The 3086FR can be used as FR to ATM converter (ATM transport over DSL). In this case, configuration of
the unit involves the following steps:
• Configure the DSL interface (assigning all bandwidth to the serial port).
• Configure the serial port
• Configure the FR to ATM conversion
When the 3086FR Ethernet port is used to route data from and to the Ethernet port, the following steps are
required to configure the unit:
• Configure the DSL interface (assign bandwidth required to the serial port, the 3086FR will assign the
remaining bandwidth to the Ethernet port)
• Configure the serial port
• Configure the FR to ATM conversion
• Configure the WAN link layer 2 ( ATM)
DSL port
The DSL port (see figure 6) is located on the back of the unit, and is presented on an RJ-11 female jack. The
interface has a nominal impedance of 135-ohms. The Model 3086FR supports DSL communication between
a customer location and a central office from 192kbps to 2.3 Mbps.
10/100
Power
Ethernet
V.35 Interface
DSL
connector
Figure 6. DSL port location
Introduction 38

Model 3086FR ATM IAD User Guide 4 • Connecting the DSL and data ports
To function properly, the Model 3086FR needs one twisted pair of metallic wire. This twisted pair must be
unconditioned, dry, metallic wire, between 19 (.9mm) and 26 AWG (.4mm) (the higher number gauges will
limit distance). Standard dial-up telephone circuits, or leased circuits that run through signal equalization
equipment, or standard, flat modular telephone type cable, are not acceptable. The female RJ-11 connector on
the Model 3086FR’s twisted pair interface is polarity insensitive and is wired for a two-wire interface.
Figure 7. RJ-11 pinout
TDM Port
Model 3086FR units enable V.35, X.21, or T1/E1 interface connection to local routers, multiplexers, and other
Frame Relay devices. The V.35 interface is presented either on a M/34, or DB-25 female connectors. The X.21
interface is presented on a female DB-15 connector, while the T1/E1 interface is presented on an RJ-48C jack,
additionally the E1 interface is presented on dual BNC. Figure 8 on page 40 shows the different connectors
offered for the serial port.
TDM Port 39

Model 3086FR ATM IAD User Guide 4 • Connecting the DSL and data ports
Figure 8. Rear panel power and interface connectors
TDM Port 40

Model 3086FR ATM IAD User Guide 4 • Connecting the DSL and data ports
V.35 and X.21 ports
The serial port in the 3086FR is simple to configure. The V.35 interface is wired as a DCE, the X.21 interface
can be configured as a DCE (factory default), or as a DTE via internal configuration jumper. The following
sections describe the 3086FR X.21 and V.35 port connection to DTE and DCE devices.
Connecting the 3086FR serial port to a DTE
The serial port on the Model 3086FR is configured as a DCE so it connects directly to a DTE using a standard
straight through cable. The cable should present either a male M/34 or DB-25 connector on one end, for V.35
interfaces, or a male DB-15 for X.21 interface connection. The other end should be terminated with the appropriate connector ( check your DTE equipment manual for pinout, gender, and DTE/DCE port configuration).
Connecting the 3086FR serial port to a DCE
V.35 interfaces.
The V.35 interface in the 3086FR is wired as a DCE, no DTE configuration is possible. If the equipment that
the 3086FR is connecting to locally does not have the option for DTE configuration, a tail-circuit cable will be
required (this cable is available from most datacomm supply vendors). The tail-circuit cable will cross most
interface signals, so that the DCE interface of the 3086FR and the DCE interface of the third party equipment
can function properly. Please be aware that some third party equipment will not be able to work properly in
DCE to DCE configurations even when using a tail circuit cable (please refer to your third party equipment
user manual for information on DCE-to DCE operation). The 3086FR requires a cable with a male M/34 or
male DB-25 connector.
X.21 interfaces.
The Model 3086FR’s X.21 interface configuration can be modified, by the user, as DCE (factory default) or
DTE, via an internal jumper board. When the local third party equipment is configured as DCE, the Model
3086FR X.21 serial port can be configured as DTE, and a regular straight through cable can then be used. Do
the following to configure the X.21 port as a DTE:
1. Open the 3086FR’s case by inserting a screwdriver into the slots and twist the screwdriver head slightly.
The top half of the case will separate from the lower half of the case (see Figure 9). Take caution not to
damage any of the PC board mounted components.
Figure 9. Case being opened with screwdriver
V.35 and X.21 ports 41

Model 3086FR ATM IAD User Guide 4 • Connecting the DSL and data ports
2. Locate the small daughter board on the 3086FR board between the DSL port (RJ-45) connector and the
serial port connector (Figure 10 shows location of DTE/DCE daughter board).
Figure 10. Location of DCE/DTE board
3. The DTE/DCE daughter board is installed at the factory with the DCE label and arrows pointing towards
the X.21 connector (DCE configuration). To change to DTE configuration, lift the daughter board from
the connector, turn it around so that the DTE label an arrows point to the X.21 connector, and place it
back on the connector. The X.21 port is now configured as a DTE.
Note When the X.21 port is configured as a DTE, the clocking mode for the port
must be set for external clock.
V.35 and X.21 ports 42

Model 3086FR ATM IAD User Guide 4 • Connecting the DSL and data ports
T1 Interface
The 3086FR enables T1 or E1 device located at customer locations to access a carrier’s network over two wire,
long reach DSL links. This capability allows providers to offer T1/E1 services at customer locations that were
previously outside the reach of standard T1/E1 lines.
The 3086FR/K offers a user configurable T1 or E1 interface. Selection of the interface is done via DIP
switches, HTTP/SNMP, or command line interface (CLI).
The T1 interface is an eight position keyed modular jack configured as a RJ-48C for connection to 100-ohm
twisted pair lines.
Figure 11. 3086FR T1 port pinout
T1 Interface Connection
The 3086FR will usually connect either to a local T1 device, or to a Telco terminated T1 line jack.
• To connect the 3086FR’s T1 port to a local T1 device ( PBX, router, mux) use a T1 ‘crossover’ twisted pair
cable. A crossover cable connects the transmit pins of the Model 3086FR’s T1 port to the receive pins of the
device attached to this port and vice versa. Check the third party T1 equipment documentation for pinout
information and cable requirements.
• To connect the 3086FR’s T1 port to a Telco terminated T1 line jack, use a straight through twisted pair
patch cable. Consult with your T1 service provider for exact pinout information and cable requirements.
T1 Interface Configuration
The 3086FR T1 interface can be configured via HTTP/SNMP, or command line interface (CLI). This section
discusses HTTP (web server) configuration. For CLI, see Appendix D, “Command Line Interface (CLI) Oper-
ation” on page 163.
Web Interface Configuration
The T1 interface page is accesed from the Main Menu > E1/T1. This page allows configuration of T1
paraemeters as follows:
Time Slot Select. For a T1 using all 24 time slots, enter 1-24, for fractional T1 enter in any format for example: 1,2,3,5; or 1-5,10-24. Any entry for timeslots above 24 will return and invalid selection message.
Line Options: Fractional T1
Line Code: The 3086FR T1 interface uses B8ZS
T1 Interface 43

Model 3086FR ATM IAD User Guide 4 • Connecting the DSL and data ports
Line Build Out: Select from 100 ohm (0dB), 100 ohm (-7.5dB), 100 ohm (-15dB), and 100 ohm (-22.5dB).
For CSU/DSU application use 100 0dB option, consult your T1 service provider for more information.
FDL Mode: Options are ANSI-T1-403, ATT-54016, and Fdl-none. Consult your T1 service provider or third
party equipment for FDL mode required.
Idle code: Enabled, Disabled. When enabled, the 2603 inserts idle codes on unused timeslots. Set this option
to ‘Disabled’ unless instructed otherwise.
Power Down: Normal, Powered Down. When powered down, T1/E1 transceiver input and output lines will
be set to high impedance to protect the device—set unit to “Normal” for regular operation.
Once all options have been selected, click on the
Configure and Activ ate at the bottom of the screen. Addition-
ally, save the configuration by going to the Configuration > Save Config menu.
E1 Interface
The 3086FR enables T1 or E1 device located at customer locations to access a carrier’s network over two wire,
long reach DSL links. This capability allows providers to offer T1/E1 services at customer locations that were
previously outside the reach of standard T1/E1 lines.
The 3086FR offers a user configurable T1 or E1 interface. Selection of the interface is done via HTTP/SNMP
or command line interface (CLI).
The E1 interface is presented on both a modular, 8-pin RJ-48C jack for connection to 120-ohm twisted pair
lines, and dual BNC female connectors for connection to 75-ohm coaxial lines.
E1 Interface 44

Model 3086FR ATM IAD User Guide 4 • Connecting the DSL and data ports
Figure 12. E1 interface with RJ-48C jack (120–ohm) and dual BNC (75-ohm) connectors
E1 Interface Connection
The 3086FR will usually connect either to a local E1 device, or to a Telco terminated E1 line jack.
• To connect to the 3086FR E1 port and a local E1 device, use an E1 crossover twisted-pair cable. A crossover
cable connects the transmit pins of the Model 3086FR’s E1 port to the receive pins of the device attached to
this port and vice versa. Check the third party E1 equipment documentation for pinout information and
cable requirements. If the E1 connection is made via the BNC connectors, connect the TX BNC of the
3086FR to Recive (RX) BNC of the local E1 device, and vice versa.
• To connect the 3086FR’s E1 port to a Telco terminated E1 line jack, use a straight through twisted pair
patch cable. Consult with your E1 service provider for exact pinout information and cable requirements.
The 3086FR T1/E1 port can be configured via HTTP/SNMP or command line interface (CLI). This section
discusses HTTP (web server) configuration, for CLI and SNMP information see Appendix D on page 163.
E1 Interface 45

Model 3086FR ATM IAD User Guide 4 • Connecting the DSL and data ports
Web Interface Configuration
Launch Internet Explorer or similar web browser, type the IP address of the 2603, enter username ‘superuser’
and password ‘superuser’. From the main page click on the E1/T1 option > Configuration. This page allows
configuration of E1 parameters as follows:
Time Slot Select. For unframed E1 service (Clear Channel) enter time slots 0-31. For a full framed E1 enter 131, for partially filled E1 enter the range of timeslots using the format for example: 1,2,3,5; or 1-5,10-31. Any
entry for timeslots above 31 will return and invalid selection message.
Line Options: Choose from Clear Channel E1, Fractional E1, Fractional E1, Multi-Frame(CAS) E1, MultiFrame(CAS) E1 with CRC. Consult with your service provider which option is required.
Line Code: Choose from AMI or HDB3. Most E1 applications use HDB3
Line Build Out: Select 120 ohm if the E1 connection is made via the RJ-48C connector, select 75 Ohm if the
E1 connection is made via the Dual BNC connectors.
FDL Mode: FDL is a T1 application, therefore select ‘Fdl- none’ for E1 applications.
Idle code: Options are Enabled or Disabled. When idle code is Enabled, the 3086FR/K inserts idle codes on
E1unused timeslots. Set this option to ‘Disabled’ unless instructed otherwise.
Power Down: Options are Normal and Powerdown. When the 3086FR is set to powered down, it will set the
E1 interface pins to high impedance to protect the device – set unit to “Normal” for regular operation.
Once all options have been selected, click on the
Configure and Activate button at the bottom of the screen.
Additionally, save the configuration by going to the Configuration > Save Config menu.
E1 Interface 46

Chapter 5 Configuring the DSL and serial ports
Chapter contents
Introduction..........................................................................................................................................................48
Configuring the DSL interface ..............................................................................................................................48
Circuit ID .......................................................................................................................................................48
Clear Error Counters ......................................................................................................................................48
Intended DSL Data Rate ................................................................................................................................49
Actual DSL Rate .............................................................................................................................................49
DSL Rate ........................................................................................................................................................49
Terminal Type ................................................................................................................................................49
Interface Type .................................................................................................................................................49
Test Modes .....................................................................................................................................................49
Annex Type ....................................................................................................................................................49
Line Probe ......................................................................................................................................................50
Configuring the DSL interface using the CLI........................................................................................................50
DSL Data Rate ...............................................................................................................................................50
Data Link Interface .........................................................................................................................................50
Annex Type ....................................................................................................................................................50
Line Probe ......................................................................................................................................................51
Error Monitors ................................................................................................................................................51
Error Monitor Max Interval Errors ............................................................................................................51
Error Monitor Interval Time (sec) .............................................................................................................51
Error Monitor Interval Count ...................................................................................................................51
Error Monitor Total Intervals ...................................................................................................................51
Error Monitor Start Up Delay ...................................................................................................................51
Configuring the serial port.....................................................................................................................................52
Configuration variables available .....................................................................................................................52
Clock Mode ..............................................................................................................................................52
Clock Invert Functions: (rxClkInv – receive clock, txClkInv – transmit clock) ..........................................52
Speed ........................................................................................................................................................52
CLI Configuration Methods ...........................................................................................................................52
Set configuration variable ..........................................................................................................................52
Show current configuration settings ..........................................................................................................52
Gain help about the Serial Interface ..........................................................................................................53
Web Interface Configurations .........................................................................................................................54
47

Model 3086FR ATM IAD User Guide 5 • Configuring the DSL and serial ports
Introduction
Configuration of the 3086FR can be broken down into the following steps:
• Configuring the DSL interface (see section “Configuring the DSL interface”)
• Configuring the serial interface (see section “Configuring the serial port” on page 52)
• Configuring the ATM/FR features (see chapter “Configuring FR and ATM features” on page 55)
• Configuring the LMI ( local management interface) (see chapter “Configuring the DSL and serial ports” on
page 47)
Configuration can be done via web browser, or via command line interface (CLI) through local terminal
or Telnet.
Configuring the DSL interface
Configuring DSL interface using the web browser.
To go to the G.SHDSL attributes page, from the main menu click on the G.SHDSL option, then click on the
configuration option.
Circuit ID
User can enter up to 30 alphanumeric characters for circuit identification
Clear Error Counters
Selecting “Clear” will reset the error counters displayed in the “Status” screen.
Introduction 48

Model 3086FR ATM IAD User Guide 5 • Configuring the DSL and serial ports
Intended DSL Data Rate
DSL line rate at which you wish to connect. In a CPE to DSLAM configuration, the 3086FR (CPE) will
have the DSL rate dictated by the DSLAM (CO). The model 3086FR will connect at nx64kbps speeds from
192kbps to 2.3Mbps.
Actual DSL Rate
This field displays the DSL rate connection; it displays the payload rate plus 8kbps automatically assigned to a
DSL management channel. For instance, if a DSL rate of 512kbps is selected in the “Intended DSL Data Rate”
window, the actual DSL Data rate field will display 520kbps, this corresponds to 512kbps payload plus 8kbps
management channel.
DSL Rate
Number of i Bit: The i bit increments DSL speed by 8kbps in addition to the DSL rate selected in the
“Intended DSL Data Rate” window. Most applications use nx64kbps DSL speeds, leave this setting at “0”,
unless your application calls for a non-nx64 speed. Selections for the I bit are 0 through 7 as follows:
0 = no increment
1 = Intended DSL data rate + 8 kbps
2 = Intended DSL data rate + 16 kbps
3 = Intended DSL data rate + 24 kbps
4 = Intended DSL data rate + 32 kbps
5 = Intended DSL data rate + 40 kbps
6 = Intended DSL data rate + 48 kbps
7 = Intended DSL data rate + 56 kbps
Terminal Type
Select between Remote and Central. Use the “Remote” setting for 3086s located at customer premises and
which connect to a DSLAM.
Note The unit set to “Central” will act as master and will impose DSL rate on the
unit set as “Remote”
Interface Type
The 3086FR is set to ATM transport.
Test Modes
The 3086 use a series of loopbacks to test the serial, Ethernet, and DSL links, please refer to the Diagnostics
section for more information.
Annex Type
Annex type refers to spectral compatibility between DSL and T1 or E1 signals. For North America and other
areas where T1 lines are used, select Annex A, for areas where E1 lines are used select Annex B.
Configuring the DSL interface 49

Model 3086FR ATM IAD User Guide 5 • Configuring the DSL and serial ports
Line Probe
Line probe is a tool used to determine maximum achievable rate when initially connecting 3086 to a copper
line of unknown quality. Set this feature to “Enable” on both 3086s at each end of the link.
Note Once line probe measurements have been completed set this feature to
“Disabled”
The bottom four fields in the G.SHDSL Attributes page correspond to error monitors. Error monitor will
watch the DSL line parameters and determine whether or not the current DSL link is capable of passing error
free data. The error monitor will accumulate DSL line statistics (CRC count, FIFO errors, LOSW count,
etc..) and make a determination on whether or not to drop DSL link and retrain based on the thresholds setup
by the user
• Error Monitor Max Interval Errors: Number of allowable errors per interval. Default = 3
• Error Monitor Interval Time (sec): Length in seconds of the current interval. Default = 1
• Error Monitor Interval Count: Number of intervals in error before the DSL link is restarted. Default = 3
• Error Monitor Start Up Delay: Amount of time to wait, after the link is up, before monitoring the DSL
link. Default = 5
Once you have entered your selections or changes, click on the “Configure” button at the bottom of the screen.
Additional go to the G.SHDSL > Action link on the left side of the screen, and hit “action” to start the DSL
interface with the new settings.
Refer to section “Configuring the serial port” on page 52.
Configuring the DSL interface using the CLI
Access the command line interface via local terminal or Telnet. To configure the DSL interface enter the following commands.
DSL Data Rate
Set the DSL rate by entering bandwidth in number of timeslots (each timeslot (TS) equals 64kbps) for example to select a DSL bandwidth of 512kbps enter 8 timeslots as follows:
--> gshdsl set dslrateTS 8
DSL timeslot options go from 3 = 192kbps to 36= 4.6Mbps
Data Link Interface
The datalink interface for the 3086FR is ATM. Enter the command as follows:
--> gshdsl set interface atm
Annex Type
Annex type refers to spectral compatibility between DSL and T1 or E1 lines traveling in the same bundle. For
North America and other areas where T1 lines are used, select Annex A, for areas where E1 lines are used select
Annex B.
Configuring the DSL interface using the CLI 50

Model 3086FR ATM IAD User Guide 5 • Configuring the DSL and serial ports
To enter annex B type:
--> gshdsl set ghsannex AnnexB
For Annex A type:
--> gshdsl set ghsannex AnnexA
Line Probe
This is not a required step. Line probe is a tool used to determine maximum achievable rate when initially connecting 3086 to a copper line of unknown quality. Set this feature to “Enable” on both 3086s at each end of
the link. Once line probe measurements have been completed set this feature to “Disabled”
--> gshdsl set LineProbe
Disable
Enable
--> gshdsl set LineProbe Disable
Error Monitors
Error monitor will watch the DSL line parameters and determine whether or not the current DSL link is capable of passing error free data. The error monitor will accumulate DSL line statistics (CRC count, FIFO errors,
LOSW count, etc..) and make a determination on whether or not to drop DSL link and retrain based on the
thresholds setup by the user
Error Monitor Max Interval Errors
Number of allowable errors per interval. Default = 3
--> gshdsl set errMonIntervalThreshold 3
Error Monitor Interval Time (sec)
Length in seconds of the current interval. Default = 1
--> gshdsl set errMonIntervalTime 1
Error Monitor Interval Count
Number of intervals in error before the DSL link is restarted. Default = 3
--> gshdsl set errMonIntervalCnt 3
Error Monitor Total Intervals
TBD
Error Monitor Start Up Delay
Amount of time to wait, after the link is up, before monitoring the DSL link. Default = 5
--> gshdsl set errMonStartupDelay 5
Once you have entered the options, at the command prompt type:
-->system config save to save the configuration.
Configuring the DSL interface using the CLI 51

Model 3086FR ATM IAD User Guide 5 • Configuring the DSL and serial ports
Refer to section “Configuring the serial port” on page 52.
Configuring the serial port
This section defines the configuration options available for the serial interface on the Model 3086FR. This
information could be used to configure the V.35 or X.21 interface available on the unit.
Configuration variables available
Click on Serial > Configuration to configure variables. The following variables are configurable through the CLI
or web interface on the unit.
Clock Mode
Determines the source of timing for the unit.
• Internal: The unit will generate the appropriate clock speed defined by the speed setting of the interface.
• External: The unit will accept the clock from the interface and will use that clock to receive and transmit
data across the interface
Clock Invert Functions: (rxClkInv – receive clock, txClkInv – transmit clock)
Setting this variable will invert the appropriate clock at the interface. This should only be used under direction
of Patton Electronics technical support in order to trouble shoot system installations. Possible settings include
both normal and inverted
Speed
The speed setting function will determine the clock rate that will be used by the interface. Appropriate settings
include any n x 64K speed setting between 64–2048 kbps.
CLI Configuration Methods
The following section defines how to configure the serial interface using the CLI. All serial interface functions
are available under the “serial” directive of the CLI.
Set configuration variable
Command: serial set <variable> <value>
The following shows the user setting the speed of the serial interface to a value of 2048MHz.
→
serial speed 2048
Show current configuration settings
Command: serial show
The “serial show” command will tell the system to display the current configuration settings for the serial interface. The following shows the output of the “serial show” command.
→
serial show
Clock Source : internal
Intf Speed : 2048
Tx Sample Point : txclk
Tx Clk Inv : normal
Configuring the serial port 52

Model 3086FR ATM IAD User Guide 5 • Configuring the DSL and serial ports
Rx Clk Inv : normal
Gain help about the Serial Interface
Command: serial help
This command will request that the system provide help about each of the configuration variables that are
available in the serial interface. The following shows the output of the “serial help” command.
→
serial help
Serial Interface Help Screen
>serial show:
> Show the current configuration of the
> serial interface
>serial help:
> Show this help screen
>serial clock:
> Defines the clock mode or source of timing
> for the serial interface.
> options: internal - internal timing
> external - external timing
> notes: For X.21 devices this setting must match
> the DTE/DCE jumper inside the unit
>serial speed:
> Defines the clock speed for the serial interface
> options: n x 64K speed (n= 1..32), example: "1536" or "256"
>
> serial txClkInv:
> Allows the user to invert the clock source
> options: normal - use normal clock
> inverted - use the inverted version of the clock
> serial rxClkInv:
> Allows the user to invert the clock source
> options: normal - use normal clock
> inverted - use the inverted version of the clock
> serial txSamplePoint:
> Determines whether the TxData will use the External
> Clock or the Transmit clock to sample data
> options: txClk - use Transmit Clock
> extClk - use External Clock
>
Configuring the serial port 53

Model 3086FR ATM IAD User Guide 5 • Configuring the DSL and serial ports
Web Interface Configurations
The serial interface can be configured using the web interface by following the “Serial” hyperlink on the web
management screen. The following screen shot shows the configuration variables as they are displayed on the
web management screen.
Configuring the serial port 54

Chapter 6 Configuring FR and ATM features
Chapter contents
Introduction..........................................................................................................................................................57
Frame Relay Network (FRN) Interworking (FRF.5)..............................................................................................59
FRN configuration options .............................................................................................................................60
Web configuration methods for FRF.5 port and channel level configuration ..................................................60
Port Level Information screen ...................................................................................................................62
Channel Level Information screen .............................................................................................................62
Packet Information screen .........................................................................................................................63
FRN configuration options .............................................................................................................................63
Port Level Configuration Options: ............................................................................................................63
Channel Level Configuration Options ......................................................................................................65
CLI Configuration Methods for Port Level Management ...............................................................................66
List all ports available to the system ...........................................................................................................66
Show detailed information about a specific port ........................................................................................66
Set configuration variables associated with the specified port .....................................................................67
Configuration Management of the Channel Level Variables ...........................................................................67
Understanding the Channel Level View ....................................................................................................67
Set Configuration Variables associated with the channels ..........................................................................68
Frame Relay Service Interworking (FRF.8)............................................................................................................68
FRS Configuration Options ............................................................................................................................69
Translation Mode .....................................................................................................................................70
DE Mapping .............................................................................................................................................72
FECN Mapping ........................................................................................................................................72
FRS Name ................................................................................................................................................72
CLI Configuration Method ............................................................................................................................73
Show one of the eight groups ....................................................................................................................73
Set variable attributes on a specified group ................................................................................................73
Set variable attributes on a specified channel .............................................................................................74
Web Configuration Methods ..........................................................................................................................74
FRS Overview Screen ................................................................................................................................74
Group/Channel Level Configuration Screen .............................................................................................75
Frame Relay (Ethernet-based) operations...............................................................................................................76
Frame Relay Configuration Options ...............................................................................................................76
Channel Segment Size ...............................................................................................................................76
DLCI: Data Link Connection Identifier ...................................................................................................76
Encapsulation Type ...................................................................................................................................76
Port ...........................................................................................................................................................76
Rxmaxpdu .................................................................................................................................................76
Txmaxpdu .................................................................................................................................................76
Frame Relay CLI Configuration Options ........................................................................................................76
55

6 • Configuring FR and ATM features Model 3096RC G.SHDSL T-DAC Administrators’ Reference Guide
Build a new Frame Relay Transport ..........................................................................................................76
Clear all Frame Relay Transports ...............................................................................................................77
Delete the specified transport ....................................................................................................................77
List all active Frame Relay Channels ..........................................................................................................77
Set configuration variables for the specified frame relay transport ..............................................................77
Show detailed configuration information on the specified channel ............................................................77
Web Based Configuration of the Frame Relay Channel ..................................................................................77
56

Model 3096RC G.SHDSL T-DAC Administrators’ Reference Guide 6 • Configuring FR and ATM features
Introduction
This chapter explains the three basic Frame Relay (FR)/ATM configurations of the 3086FR IAD and how to
configure them. They are:
• Frame Relay Network (FRN) interworking (FRF.5)
• Frame Relay Service (FRS) interworking (FRF.8)
• Ethernet-based Frame Relay/ATM operation
FRF.5 and FRF.8 are two agreements between the FR Forum and ATM Forum that enable FR and ATM networks to be used together; along with the Ethernet-based Frame Relay operation configuration, the three ports
may be configured as Ethernet, FR/PPP and ATM with the ability to route between these three ports. Consult
the specific sections for each type of application.
Frame Relay Network (FRN) Interworking (FRF.5) provides a mapping and encapsulation mechanism
between FR and ATM networks so an ATM network may be used to transport FR from end-to-end. The ATM
network is completely transparent to the FR network and equipment. The IWF (Interworking Function
equipment) implements this function; in this case, done by the Model 3086FR.
If transport speeds higher than the typical FR network are desired or if only an ATM network is available for
transport between two locations running FR, FRF.5 provides the capability for joining these two types of networks together. Obviously there are significant differences between FR and ATM networks. FR uses variablelength frames while ATM uses a fixed-length cells (53 octets). They also have different parameters and variables
in their headers and trailers. Figure 13 is a typical application in which both end locations have FR equipment
but uses an ATM network for transport. The IWF is equipment which implements the Interworking Function,
which in this case is FRF.5. The IWF is the Model 3086FR IAD.
Figure 13. Application with both end locations having FR equipment but using ATM for transport
Introduction 57

6 • Configuring FR and ATM features Model 3096RC G.SHDSL T-DAC Administrators’ Reference Guide
Figure 14 is a variation upon the previously described application. Here one end has FR equipment but the
other location has special ATM equipment which recognizes FR. Specifically it must support the FR Service
Specific Convergence Sublayer (FR-SSCS).
Figure 14. Application with one location having FR equipment and the other ATM
equipment that recognizes FR
One advantage of using FRF.5 over FRF.8 is that one VCC (and one VCI/VPI within the VCC) in the ATM
network is used to transport multiple DLCIs (PVCs) between two FR locations. For additional details, see section “Frame Relay Network (FRN) Interworking (FRF.5)” on page 59.
With Frame Relay Service (FRS) Interworking (FRF.8), ATM CPE equipment on one end may operate with
FR CPE equipment on the other end. The FRS IWF occurs between the ATM and FR networks and/or equipment. FRF.8 provides a conversion mechanism so FR and ATM networks may function seamlessly. Neither
network has no knowledge of the other. It is essentially a complete conversion of the parameters between
Frame Relay and ATM. For additional details, see section “Frame Relay Service Interworking (FRF.8)” on
page 68.
Figure 15 shows the service interworking between FR and ATM services.
Figure 15. Service interworking between FR and ATM services
58 Introduction

Model 3096RC G.SHDSL T-DAC Administrators’ Reference Guide 6 • Configuring FR and ATM features
Observe from the stack that a true conversion has occurred between the FR and ATM networks. In FRF.5 the
uppermost sublayer is FR-SSCS, but in the FRF.8 Interworking Agreement, it is null SSCS.
The third application is called Ethernet-based Frame Relay/ATM. While FRF.5 and FRF.8 has a fixed mapping of DLCI PVCs to ATM VCI/VPIs, with Ethernet-based FR/ATM there is not a fixed mapping from FR
to ATM. We now have the ability to do routing between any of the three ports—Ethernet, serial (PPP or FR),
and DSL (ATM) ports. Nevertheless FRF.5/FRF.8 may operate simultaneously. An example of Ethernet-based
FR/ATM is a 3086FR in a company’s office. All three ports are connected through the integrated router. The
serial port (PPP or FR) with the WAN connection (ATM) via the DSL port. See figure 16. For additional
details, see section “Frame Relay (Ethernet-based) operations” on page 76.
Figure 16. Example Ethernet-based FR/ATM application
The PCs on the private side of the firewall have access to the web server in the DMZ and the Internet. Outside
users have access to the web server in the DMZ but cannot access the PCs on the company’s private network
(intranet) unless first accessed by one of the company’s PCs behind the firewall.
Frame Relay Network (FRN) Interworking (FRF.5)
Frame Relay Networking (FRN) Interworking (FRF.5) is a mapping and encapsulation mechanism by which
Frame Relay networks can communicate with ATM networks for transporting Frame Relay traffic. As
described in the introduction to this chapter, there are two scenarios. One characteristic of FRF.5—as opposed
to FRF.8—is the necesity to support the Frame Relay Service Specific Convergence Sublayer (FR-SSCS). The
Model 3086FR in FRF.5 mode supports all of the required Interworking Functions (IWF) required for Frame
Relay Network Interworking operation.
The Frame Relay Network Interworking functions are defined by the Frame Relay Forum specification Frame
Relay/ATM PVC Network Interworking Implementation Agreement FRF.5.
Frame Relay Network (FRN) Interworking (FRF.5) 59

6 • Configuring FR and ATM features Model 3096RC G.SHDSL T-DAC Administrators’ Reference Guide
FRN configuration options
The Frame Relay Network Interworking functions on the Patton Electronics Model 3086FR are defined by
ports and channels. It is important to understand the implementation of FRF.5 in the Model 3086FR. There
are 8 ATM Ports (called VCC or channel in FRF.5). Each port can be configured to have one channel (DLCI)
or up to 8 channels (DCLIs). The Mux Mode variable controls the selection of one-to-one or many-to-one multiplexing. When the connection multiplexing is configured for one-to-one, each port can carry one channel
(DLCI or PVC). However when many-to-one is selected, up to 8 channels (DLCIs) can be carried in one ATM
port. Since each of the 8 ports may be configured to have 8 channels, up to 64 channels (DLCIs) can be transported over the ATM network. Figure 17 shows the organization of the ports and channels with the associated
variables in the Model 3086FR.
Figure 17. Organization of the Model 3086FR ports and channels with the associated variables
Web configuration methods for FRF.5 port and channel level configuration
The following information can be used to configure and manage the Frame Relay Network Interworking functions using the web interface. All FRN configuration options can be found under the IWF link.
60 Frame Relay Network (FRN) Interworking (FRF.5)

Model 3096RC G.SHDSL T-DAC Administrators’ Reference Guide 6 • Configuring FR and ATM features
Figure 18. FRN Setup (FRF.5) link location
Once FRN Setup (FRF.5) is selected (see figure 18), the Port Level Configuration screen is displayed (see
figure 19).
Figure 19. FRN Configuration: Port Level Configuration window
Frame Relay Network (FRN) Interworking (FRF.5) 61

6 • Configuring FR and ATM features Model 3096RC G.SHDSL T-DAC Administrators’ Reference Guide
The screen gives an overview of the FRN connections that are available. Each Port Number in the left column
is a hyperlink that will display the
Port X Configuration window (where x is the port number selected) (see
figure 20), a more detailed view of the port along with the configuration of the channel level information.
Figure 20. Port X Configuration window
This screen is divided into the following sections:
Port Level Information screen
The Port Level Configuration information allows the user to configure Port Level variables (see figure 20). After
configuration changes have been made, use the
Configure Port button to set those parameters.
Channel Level Information screen
The Channel Level configuration section of the screen allows the user to setup and configure the individual
channels associated with the specified port. Note that in figure 20 only a single channel is available for configuration. This is because the port is set to a MuxMode of one to one.
62 Frame Relay Network (FRN) Interworking (FRF.5)

Model 3096RC G.SHDSL T-DAC Administrators’ Reference Guide 6 • Configuring FR and ATM features
Packet Information screen
Figure 21 shows the packet information that is available for each channel. Note that the direction of the data is
referenced to the ATM link. Thus Tx Data is data that is received on the Frame Relay link and transmitted out
the ATM Link.
Figure 21. Channel Level Packet Information window
FRN configuration options
The Frame Relay Network Interworking functions on the Patton Model 3086FR are defined by CHANNELS
and VPI/VCI. Ports are used to define the lower level Interworking Functions. First a port must be created that
defines such items as the ATM VPI/VCI and the type of mapping that will be used to make the connection.
Once the port is created, channels can be attached to the ports that will allow data channels to pass from the
Frame Relay interface to the ATM interface. Channel configuration variables options include the Frame Relay
DLCI that will be used to communicate with the Frame Relay Network.
Port Level Configuration Options:
Ports are used to define the lower level Interworking Functions. The port configuration defines the following
variables:
• VPI—Virtual Path Identifier: ATM side Virtual Path Identifier for the specified connection.
• VCI—Virtual Channel Identifier: ATM side Virtual Channel Identifier for the specified connection
• DE Mapping—The DE Mapping variable is used to determine how the Frame Relay DE field (Discard Eli-
gibility) will be mapped to the ATM CLPI (Cell Loss Priority Indication). This variable is only used in the
Frame Relay to ATM mapping direction. Note that the DE bit from the core Q.922 (Frame Relay) packet
will always be copied unchanged into the FR-SSCS PDU header cell. The following options define how the
DE will be mapped to the ATM CLPI bit:
- Always_zero: All ATM cells will have the CLPI field set to a constant value of 0.
- Always_one: ATM: All ATM cells will have the CLPI field set to a constant value of 1.
Frame Relay Network (FRN) Interworking (FRF.5) 63

6 • Configuring FR and ATM features Model 3096RC G.SHDSL T-DAC Administrators’ Reference Guide
- Convert: The system will convert the DE field received from the Frame Relay packet into the CLPI field
of the outgoing ATM cell that is generated by the segmentation process.
• CLPI Mapping: The CLPI Mapping variable is used to determine how the ATM CLPI (Cell Loss Priority
Indication) bit in the ATM cell will be mapped to the DE (Discard Eligibility) bit of the resulting Frame
Relay packet. There are two options available.
- Fr_sscs_only: The FR-SSCS removed from the ATM header PDU is used to set the DE bit in the out-put
Frame Relay packet. The CLPI bit from the ATM cell is ignored.
- Fr_sscs_and_clpi: Both the DE bit from the ATM header PDU and the CLPI bit from the received ATM
cells are used to determine the output state of the resulting Frame Relay packet. The following table
defines how.
CLPI received from ATM cell DE from FR-SSCS of ATM cell Outgoing DE bit of FR Packet
0 0 0
1 X 1
X 1 1
• Multiplexing Mode: The MuxMode variable allows multiple channels to be multiplexed onto a single port.
A port is defined by its’ VPI/VCI of the ATM rfc1483 data path. Channels are defined by their Frame Relay
DLCI. Thus, the multiplexing mode will allow multiple Frame Relay channels to be transported over a single ATM VPI/VCI link. There are two options available.
– Mux_many_to_one: The “many to one” option allows multiple DLCI channels to be transported over a
single ATM rfc1483 connection. Note that if the MuxMode is not set to “many to one” trying to add
multiple DLCI connections will result in errors.
– Mux_one_to_one: The “one to one” option notifies the system that there will be a one to one mapping
between a single ATM port VPI/VCI and a single Frame Relay DLCI.
• FRN Name: Allows the user to name the FRN port. This is helpful when viewing multiple connections to
determine which VPI/VCI is associated with each port.
• FRS state: The state variable allows the user to enable or disable the port for operation. Note that port level
configuration variables are not changeable “on the fly”. If it is required that configuration changes are
required, the user should disable the port, make the configuration changes, and then re-enable the port.
• Port Level Maintenance: Port level maintenance creates an LMI session across the ATM link. This is useful
to determine the status of the link. There are three options available for Port Level Maintenance. The
description of these variables is identical to that described in the beginning of this document. Note that in
each case the only option available is “both”. This means that the system is performing both “Network” and
“User” side LMI functions.
– 933A_both
– 617D_both
– LMI_both
• Port Level Mgt State: This variable defines the state of the Port Level Maintenance.
- Mgt_Port_DOWN: Currently the LMI on the DTE side is DOWN
64 Frame Relay Network (FRN) Interworking (FRF.5)

Model 3096RC G.SHDSL T-DAC Administrators’ Reference Guide 6 • Configuring FR and ATM features
– Mgt_Port_UP: Currently the LMI on the DTE side is UP
Channel Level Configuration Options
The Channel Level Configuration variables are used to define the channels that are attached to the ATM port.
The following variables are used to define each channel configuration.
• DLCI—Data Link Connection Identifier: Frame Relay side DLCI for the associated channel.
• FRN Channel Name: Allows the user to name the FRN channel. This is helpful when viewing multiple
channel connections to determine which DLCI is associated with each channel.
• FRN Channel State: The state variable allows the user to enable or disable the channel for operation. Note
that the port that the channel is connected to must be enabled before the channel can be enabled for operation.
• Network DLCI: The network DLCI allows the system to transport data over the atm link using a different
DLCI than is used on the DTE side. If the network DLCI is set to “0”, then the DTE side DLCI will be
used. If the Network DLCI is set to any other value, that value will be used to transport data across the link
using the FR-SSCS.
• Mgt State: The Mgt State variables defines the state of the Channel using the Port Level Management infor-
mation. The following options are available
- N/A: The port associated with this channel is disabled.
- n/a: There is no Port Level Management function enabled for the port associated with this channel.
- Down: The Port Level Management is currently in the “down” state.
- active-congested: The Port Level Management is reporting that this channel is active and it has detected
that the channel is congested.
- Active: The Port Level Management is reporting that this channel is active
- Deleted: The Port Level Management is reporting that this channel has been deleted. This could also
result if the associated channel at the remote end is not configured
- not active: No information has been received from the management port related to this channel
Frame Relay Network (FRN) Interworking (FRF.5) 65

6 • Configuring FR and ATM features Model 3096RC G.SHDSL T-DAC Administrators’ Reference Guide
CLI Configuration Methods for Port Level Management
The following information can be used to configure the Port Level information associated with the FRN connections. The CLI uses the frn directive of the CLI interface for Port Level configuration.
List all ports available to the system
Command: frn list
The frn list command will display the current high level state of each port available in the system. More infor-
mation about each specific port can be gained by the show port command described below. The following
shows the output of the frn list command.
→
frn list
---------------------------------------------------------------------|Port | Name | VPI | VCI | DLCI | Activate | Mux Mode
|port1 | main | 0 | 100 | 100 | disable | mux_one_to_one |
|port2 | backup | 10 | 110 | 110 | disable | mux_one_to_one |
|port3 | none | 20 | 120 | 120 | disable | mux_one_to_one |
|port4 | none | 30 | 130 | 130 | disable | mux_one_to_one |
|port5 | none | 40 | 140 | 140 | disable | mux_one_to_one |
|port6 | none | 50 | 150 | 150 | disable | mux_one_to_one |
|port7 | none | 60 | 160 | 160 | disable | mux_one_to_one |
|port8 | none | 70 | 170 | 170 | disable | mux_one_to_one |
----------------------------------------------------------------------
Show detailed information about a specific port
Command: frn show port#
The frn show port# command will display detailed information about the port defined in the command. The
following shows the actual output of the configuration of port 3. Note that the “frn show port” will also display information about the channels that are associated with that port.
→
frn show port1 command output
Port Level Information: Port 1
FRN Port Name: none
FRN VPI: 0
FRN VCI: 100
FRN DE Mapping: zero
FRN CLPI Mapping: fr_sscs_only
FRN Mux Mode: mux_one_to_one
FRN Header Type: 2_byte
FRN DC Mapping: zero
FRN State: enable
FRN Core Name: FRN0
FRN Tx Packets: 146/1
FRN Rx Packets: 145/0
FRN Network Mgt: lmi_both
FRN Net Mgt State: port_mgt_UP
66 Frame Relay Network (FRN) Interworking (FRF.5)

Model 3096RC G.SHDSL T-DAC Administrators’ Reference Guide 6 • Configuring FR and ATM features
Channel Level Information:
--------------------------------------------------------------------|Chn1 |DLCI|Net DLCI|Activate| Tx Pkt G/B | Rx Pkt G/B |Status
|chn1 |100 |0 |enable | 0/0 | 0/0 |active
|chn2 |101 |0 |disable | N/A | N/A |N/A
|chn3 |102 |0 |disable | N/A | N/A |N/A
|chn4 |103 |0 |disable | N/A | N/A |N/A
|chn5 |104 |0 |disable | N/A | N/A |N/A
|chn6 |105 |0 |disable | N/A | N/A |N/A
|chn7 |106 |0 |disable | N/A | N/A |N/A
|chn8 |107 |0 |disable | N/A | N/A |N/A
-------------------------------------------------------------------
Set configuration variables associated with the specified port
Command: frn set port# <variable> <value>
The frn set port# command allows the user to set port level specific variables to their optional values. All vari-
ables described above for the port level configurations are available from the frn set port# command screen.
The following example shows the setting of port #5 MuxMode to mux_many_to_one.
Note After the first line the “?” was used to determine the possible configuration
options available to the user.
Note At any point during the typing of the command selecting the “?” will display
the possible options available to the user.
Note After the first several letters of the command are typed pressing the Tab key
will tell the system to complete the variable or command name.
→
frn set port5 MuxMode
mux_many_to_one
mux_one_to_one
→
frn set port5 MuxMode mux_many_to_one
Configuration Management of the Channel Level Variables
The following information can be used to configure the Channel Level information associated with the FRN
connections. The CLI uses the frn directive of the CLI interface for Channel Level configuration.
Note The frn show port and frn list commands already discussed at the port level
are also useful to gain detailed and overview information about the channels.
Understanding the Channel Level View
The Model 3086FR supports up to 8 individual FRN ports. Each port can support up to 8 channels while set
to the “many to one” multiplexing mode. To access the port level information the user must first define the
Frame Relay Network (FRN) Interworking (FRF.5) 67

6 • Configuring FR and ATM features Model 3096RC G.SHDSL T-DAC Administrators’ Reference Guide
port number that is being configured and then the channel number that is being configured. The following
chart shows how the ports and channels are viewed by the system:
Set Configuration Variables associated with the channels
Command: frn set port# channel # <variable> <value>
The frn set port# channel # command allows the user to set channel level variables. Note that the port num-
ber must be specified along with the channel # as described in the above chart. The following screen capture
shows the setting of the DLCI for port #5 channel #1. Note that after the channel number was input the ? key
was used to request that the system displays the possible variables that the user has access to.
→
frn set port5 channel 1
ChannelName
DLCI
state
→
frn set port5 channel 1 DLCI 180
Frame Relay Service Interworking (FRF.8)
FRF.8 is a conversion mechanism by which Frame Relay networks can communicate directly with ATM-based
networks. Neither the ATM nor the Frame Relay networks require any understanding of the other network
protocols involved. This conversion is performed within the Model 3086FR’s IWF at the transport service
level. Frame Relay Service Interworking functions are defined by the Frame Relay Forum specification Frame
Relay/ATM PVC Service Interworking Implementation Agreement FRF.8.1.
68 Frame Relay Service Interworking (FRF.8)

Model 3096RC G.SHDSL T-DAC Administrators’ Reference Guide 6 • Configuring FR and ATM features
FRS Configuration Options
The Model 3086FR supports 64 FRF.8 connections (divided into 8 groups of 8 channels each). The IWF are
configured by group and channel. The group level configuration options are applied to eight channels that are
related to that group. The following list of variables are configured at the group level.
Figure 22. FRS Configuration—Top Level Configuration Menu
Once FRS Setup (FRF.8) is selected (see figure 18 on page 61), the FRS Configuration—Top Level Configuration
screen is displayed (see figure 22). The screen gives an overview of the FRS connections that are available. Each
Frame Relay Service Interworking (FRF.8) 69

6 • Configuring FR and ATM features Model 3096RC G.SHDSL T-DAC Administrators’ Reference Guide
Group in the left column is a hyperlink that will display the Group
group selected) (see figure 23).
X
Configuration window (where x is the
Figure 23. Groups X Configuration: Channels 1 – 8
Translation Mode
The Translation Mode variable defines the encapsulation mechanism that will be required to convert the ATM cells
(encapsulated per RFC2684) to the Frame Relay packets (encapsulated per RFC1490) and back. This is required
because ATM and Frame Relay encapsulate packets in different formats as defined by their respective RFC. There
are two options available for the Translation Mode setting within the Model 3086FR as defined below:
• Translate: When the connection channel is set to translate, the IWF converts between Frame Relay encap-
sulated frame and the ATM encapsulated cells. This conversion is performed by inspecting each frame/cell
and determining the PID (Protocol Identification) field within the packet. (Using this information, the
frame/cell is routed through an encapsulation conversion utility that creates the encapsulation required for
the destination network.) The Model 3086FR supports all 22 protocol types as defined by the FRF.8.1
70 Frame Relay Service Interworking (FRF.8)

Model 3096RC G.SHDSL T-DAC Administrators’ Reference Guide 6 • Configuring FR and ATM features
specification. See figure 24 for the encapsulation types and includes an example where a Routed IP packet is
received on both the Frame Relay and ATM sides of the connection. When the packet is received is checked
against the known PID fields, and then the packet is routed to the appropriate encapsulation conversion
station before being sent out the opposite interface.
Figure 24. FRS encapsulation conversion using Translate Mode
• Transparent: The second translation mode option is to set the protocol value to transparent. Transparent is
used when the Protocol being used is not one of the 22 predefined encapsulation types, such as is the case
for voice based systems. When the translation mode is set to transparent, the packet data will be transparently passed from one network to the other without any encapsulation conversions.
Frame Relay Service Interworking (FRF.8) 71

6 • Configuring FR and ATM features Model 3096RC G.SHDSL T-DAC Administrators’ Reference Guide
DE Mapping
The DE Mapping variable is used to determine how the Frame Relay DE field (Discard Eligi-bility) will be
mapped to the ATM CLPI (Cell Loss Priority Indication) and vise versa. The following options are available:
• Always_zero:
- Frame Relay: All Frame Relay packets will have the DE field in the header set to a constant value of 0.
- ATM: All ATM cells will have the CLPI field set to a constant value of 0.
• Always_one:
- Frame Relay: All Frame Relay packets will have the DE field in the header set to a constant value of 1.
- ATM: All ATM cells will have the CLPI field set to a constant value of 1.
• Convert:
- Frame Relay to ATM Direction: The system will convert the DE field received from the Frame Relay
packet into the CLPI field of the outgoing ATM cell.
- ATM to Frame Relay Direction: The system will convert the CLPI bit received from the ATM cells into
the DE field of the outgoing Frame Relay packet.
FECN Mapping
The FECN Mapping variable is used to determine how the Frame Relay FECN (Forward Explicit Congestion
Notification) bit will be mapped to the ATM EFCI (Explicit Forward Congestion Indica-tion) bit and vise
versa. The following options are available:
• Always_zero:
- Frame Relay: All Frame Relay packets will have the FECN bit in the header set to a constant value of 0.
- ATM: All ATM cells will have the EFCI bit set to a constant value of 0.
• Always_one:
- Frame Relay: All Frame Relay packets will have the FECN bit in the header set to a constant value of 1.
- ATM: All ATM cells will have the EFCI bit set to a constant value of 1.
• Convert:
- Frame Relay to ATM Direction: The system will convert the FECN bit received from the Frame Relay
packet into the EFCI bit of the outgoing ATM cell.
- ATM to Frame Relay Direction: The system will convert the EFCI bit received from the ATM cells into
the FECN bit of the outgoing Frame Relay packet.
FRS Name
Allows the user to name the FRS channel. This is helpful when viewing multiple connections to determine
which DLCI/VPI/VCI combination is associated with each channel.
• FRS state: The state variable allows the user to enable or disable the channel for operation.
The Frame Relay Service Interworking functions on the Patton Electronics Model 3086FR are also defined
as sixty-four channels. Each channel creates a connection between a single DLCI on the Frame Relay net-
72 Frame Relay Service Interworking (FRF.8)

Model 3096RC G.SHDSL T-DAC Administrators’ Reference Guide 6 • Configuring FR and ATM features
work and a VPI/VCI on the ATM network. The following configuration options are available for each
channel in the system.
• VPI—Virtual Path Identifier: ATM side Virtual Path Identifier for the specified connection.
• VCI—Virtual Channel Identifier: ATM side Virtual Channel Identifier for the specified connection
• DLCI—Data Link Connection Identifier: Frame Relay side DLCI for the specified connection
CLI Configuration Method
The following section describes how to configure FRS channel connections using the CLI interface.
The system is made up of eight groups and 64 channels. The group configuration variables apply to all eight
channels within that group. Each channel is configured independently and will all run over as single LMI session or with no LMI running. The FRS (FRF.8) connections are configured using the “frs” directive in the CLI
interface. The following commands are available:
Show one of the eight groups
Command: frs show group #
The frs show group # command shows the configuration of te group defined by the # directive. Possible
options are 1–8. The following shows an example setup:
→
frs show group 1
Group Level Information: Group A
Group Name:
Group DE Mapping: zero
Group Trans Mode: translate
Group FECN Mapping: zero
Channel Level Information: Channels 1 - 8
--------------------------------------------------------------------|Chn |VPI |VCI |DLCI| Activate | Tx Pkt G/B | Rx Pkt G/B
|chn1 |100 |200 |172 |enable |0/0 |0/0
|chn2 |1 |101 |101 |disable |N/A |N/A
|chn3 |2 |102 |102 |disable |N/A |N/A
|chn4 |3 |103 |103 |disable |N/A |N/A
|chn5 |4 |104 |104 |disable |N/A |N/A
|chn6 |5 |105 |105 |disable |N/A |N/A
|chn7 |6 |106 |106 |disable |N/A |N/A
|chn8 |7 |107 |107 |disable |N/A |N/A
Set variable attributes on a specified group
Command: frs set group # <variable> <value>
Note At any point during the typing of the command selecting the “?” will display
the possible options available to the user.
Note After the first several letters of the command are typed pressing the Tab key
will tell the system to complete the variable or command name.
Frame Relay Service Interworking (FRF.8) 73

6 • Configuring FR and ATM features Model 3096RC G.SHDSL T-DAC Administrators’ Reference Guide
The frs set group command allows the user to setup the configuration of the group variables. The following
example could be used to set the DEMapping variable to “convert”.
Note At the end of the first line the ? was selected and the system prompted the
user with the possible options available.
→
frs set group 1 DEMapping ?
convert
one
zero
→
frs set chn1 DEMapping convert
Set variable attributes on a specified channel
Command: frs set channel # <variable> <value>
The following example could be used to set the DLCI variable to 171.
→
frs set channel 1 DLCI 171
Web Configuration Methods
The following documentation defines how to configure the FRS channel connections using the web interface
on the Model 3086FR. All web interface screens our found under the IWF link.
FRS Overview Screen
By selecting the “FRS Setup (FRF.8)” link below the IWF heading will bring up an overview of the FRS connection available within the system. This page shows a top level view of the eight groups available. The “Group
#” column along the left side of the screen is a hyperlink that will bring up detailed configuration information
about each group and the channels available in the group.
Figure 25. Top Level Configuration Menu
74 Frame Relay Service Interworking (FRF.8)

Model 3096RC G.SHDSL T-DAC Administrators’ Reference Guide 6 • Configuring FR and ATM features
Figure 26. FRF.8 Group Level Configuration window
Group/Channel Level Configuration Screen
By selecting the “Group #” link in the FRS Overview screen, the detailed channel level information screen is
displayed as shown below. This screen allows configuration of all variables associated with the group and channels. The screen is broken down into three sections; the first section allows configuration of the group level
information, the second section allows configuration of the channels associated with the group, the last screen
shows the packet counters.
Figure 27. FRF.8 Channel Level Configuration Screen
Figure 28. FRF.8 Channel Level Packet Information
Frame Relay Service Interworking (FRF.8) 75

6 • Configuring FR and ATM features Model 3096RC G.SHDSL T-DAC Administrators’ Reference Guide
Frame Relay (Ethernet-based) operations
Ethernet-based (or basic) Frame Relay is also available within the Model 3086FR. This Frame Relay service can
be used in a similar fashion to other Ethernet-based transports within the system such as PPP or the Ethernet
transport. Multiple Frame Relay transports, with different DLCI numbers, can be built upon the HDLC controller that is available with the 3086FR. The Frame Relay Interface is available at the serial interface for transport out of the Ethernet Interface or the ATM link.
Frame Relay Configuration Options
The Frame Relay transport is configurable from both the CLI and the web interface. The following configurable variables are available through both interfaces.
Channel Segment Size
The channel segment size is used to define fragmentation of the packets based on the Frame Relay Forum IA
FRF.12. If this variable is set to 0 then FRF.12 “Frame Relay Fragmentation” will be disabled. If set to any
other value it will set the fragmentation size used.
DLCI: Data Link Connection Identifier
The Frame Relay DLCI used for the specified channel. Must be set to a non-zero number as agreed upon by
the Frame Relay connection.
Encapsulation Type
Defines the FRC1490 encapsulation type that will be used by the channel.
Port
Defines the port that should be used to setup the Frame Relay Connection. For routed applications the port
should be set to “frf”. For bridged applications the port should be set to “fr”.
Rxmaxpdu
Receive side max PDU
Txmaxpdu
Transmit side max PDU
Frame Relay CLI Configuration Options
The following information describes how to configure the frame relay transport on the 3086FR through the
CLI interface.
Build a new Frame Relay Transport
Command: framerelay add transport <name> <port> <dlci>
Add a new frame relay transport to the system
• Name: Any name can be given to the transport. This name will be used to reference the transport in later
commands.
• Port: This variable defines the low layer port that will be used to transport data across the frame relay inter-face.
For routed application the “frf” port should be used. For bridged applications the “fr” port should be used.
76 Frame Relay (Ethernet-based) operations

Model 3096RC G.SHDSL T-DAC Administrators’ Reference Guide 6 • Configuring FR and ATM features
• DLCI: This variable can be set to any positive value less than 8196
Clear all Frame Relay Transports
Command: framerelay clear transport
This command can be used to clear all of the transports in the system
Delete the specified transport
Command: framerelay delete transport <name | number>
Delete a single frame relay connection using either the connection name or number
• name: the name used when creating the transport
• number: the ID number found when listing the transports
List all active Frame Relay Channels
Command: framerelay list transports
List all transports currently defined in the system
Set configuration variables for the specified frame relay transport
Command: framerelay set transport <name | number> <variable> <value>
Set a value for a specific frame relay variable
1. name | number: specify the connection that you would like to change
2. variable: any variable from the above list
3. value: value that you would like to set
Show detailed configuration information on the specified channel
Command: framerelay show transport <name | number>
Display specific information about the frame relay connection
Web Based Configuration of the Frame Relay Channel
This section defines the configuration of the Frame Relay Service through the web interface. The Frame Relay
channel is created through the Configuration->WAN link.
Frame Relay (Ethernet-based) operations 77

6 • Configuring FR and ATM features Model 3096RC G.SHDSL T-DAC Administrators’ Reference Guide
78 Frame Relay (Ethernet-based) operations

Chapter 7 Local Management Interface
Chapter contents
Introduction..........................................................................................................................................................80
LMI Configuration Options..................................................................................................................................80
managementType: (Default Value: no_maintenance) .....................................................................................80
MgtState ............................................................................................................................................. 81
mgtAutoStart: (Default Value: FALSE) ...........................................................................................................81
T391_Value: (Default Value: 10) ...................................................................................................................81
T392_Value: (Default Value: 16) ...................................................................................................................81
fullReportCycle: (Default Value: 6) ................................................................................................................81
netErrorWindowSize: (Default Value: 4) ........................................................................................................81
netMaxErrors: (Default Value: 3) ....................................................................................................................81
userErrorWindowSize: (Default Value: 4) .......................................................................................................81
userMaxErrors: (Default Value: 3) ..................................................................................................................81
CLI Configuration Methods..................................................................................................................................82
Show current configuration .............................................................................................................................82
Set configuration variable ................................................................................................................................82
Web Configuration Methods.................................................................................................................................83
79

Model 3086FR ATM IAD User Guide 7 • Local Management Interface
Introduction
The Frame Relay Local Management Interface (LMI) is a mechanism that enables two separate frame relay systems to communicate the status of the interface. The LMI interface supports dynamic updates on the status of
the DLCI connections and the congestion state of the network. The Model 3086FR fully supports the LMI
versions listed in table 4.
Table 4. LMI Implementation on the 3086FR
Protocol Specification Options Available
LMI Frame Relay Forum Implementation Agreement
(IA) FRF.1 superceded by FRF.1.1
Annex D ANSI T1.617
Annex A ITU Q.933 referenced in FRF.1.1
Cisco Cisco implementation of LMI
• Network side
• User side
• Both
• Network side
• User side
• Both
• Network side
• User side
• Both
• Network
• User side
• Both
LMI Configuration Options
LMI is configurable via the CLI or web interface.
Note Although the Model 3086FR supports LMI implementations for network,
user, and both, configuration options are limited to network for FRF.8 appli-
cations, and both for FRF.5 applications.
managementType: (Default Value: no_maintenance)
the managementType variable defines the LMI protocol that will be used. The following options are available.
• no_maintenance: No maintenance interface will be used for this frame relay connection.
• ITU_Network: The ITU Q.933 protocol will be used. The unit will operate as the Network side of the
connection
• ITU_User: The ITU Q.933 protocol will be used. The unit will operate as the User side of the connection
• ITU_Both: The ITU Q.933 protocol will be used. The unit will operate as both the Network and User side
of the connection.
• ANSI_Network: The ANSI T1.617 protocol will be used. The unit will operate as the Network side of the
connection
• ANSI_User: The ANSI T1.617 protocol will be used. The unit will operate as the User side of the connection
Introduction 80

Model 3086FR ATM IAD User Guide 7 • Local Management Interface
• ANSI_Both: The ANSI T1.617 protocol will be used. The unit will operate as both the Network and User
side of the connection.
• Cisco_Network: The Cisco LMI implementation will be used. The unit will operate as the Network side of
the connection.
• Cisco_User: The Cisco LMI implementation will be used. The unit will operate as the User side of the con-
nection
• Cisco_Both: The Cisco LMI implementation will be used. The unit will operate as both the Network and
User side of the connection.
MgtState. Defines the current state of the DTE side LMI. Possible options are as follows:
• Mgt_Port_DOWN: Currently the LMI on the DTE side is DOWN
• Mgt_Port_UP: Currently the LMI on the DTE side is UP
mgtAutoStart: (Default Value: FALSE)
The management Auto Start variable allows the user to start the LMI session before any DLCI connections are
created within the unit. If this variable is set to FALSE, the LMI session will begin when the first DLCI channel
is created. If this variable is set to TRUE the LMI session will begin immediately.
T391_Value: (Default Value: 10)
This variable sets the T391 timers in seconds.
T392_Value: (Default Value: 16)
This variable sets the T392 timers in seconds.
fullReportCycle: (Default Value: 6)
This variable represents the N391 protocol value
netErrorWindowSize: (Default Value: 4)
Network side N393 protocol value
netMaxErrors: (Default Value: 3)
Network side N392 protocol value
userErrorWindowSize: (Default Value: 4)
User side N393 protocol value
userMaxErrors: (Default Value: 3)
Network side N392 protocol value
LMI Configuration Options 81

Model 3086FR ATM IAD User Guide 7 • Local Management Interface
CLI Configuration Methods
The following describes how to configure the LMI using the CLI. All LMI commands are contained under the
“lmi” directive of the CLI interface. The following options are available:
Show current configuration
Command: “lmi show”
→
lmi show
FR_Mgt Type : no_maintenance
FR_Mgt State : Mgt_Port_DOWN
Full Report Cycle : 6
User Max Errors : 3
Net Max Errors : 3
User Error Window Size : 4
Net Error Window Size : 4
T391_Value : 10
T392_Value : 16
Mgt Auto Start : false
Set configuration variable
Command: “lmi set <variable> <value>”
Variable: Any variable from the above list
Value: Value as defined by the variable
→
lmi set managementType 933A_Network
CLI Configuration Methods 82

Model 3086FR ATM IAD User Guide 7 • Local Management Interface
Web Configuration Methods
The following describes how to configure the LMI using the web interface. All LMI configuration variables are
contained under the “LMI Management” window found through the IWF link. The following image shows
the configuration variables available.
Web Configuration Methods 83

Model 3086FR ATM IAD User Guide 7 • Local Management Interface
Web Configuration Methods 84

Chapter 8 3086FR routed and bridged
ATM connections
Chapter contents
Introduction..........................................................................................................................................................86
DSLAM Connections with remote CPE units.......................................................................................................86
Bridged application configurations to a DSLAM ............................................................................................86
RFC 1483 Bridged Configuration. ............................................................................................................87
PPPoA Bridged (RFC 2364) Configuration ..............................................................................................89
Routed application configurations to a DSLAM .............................................................................................91
RFC 1483 Routed .....................................................................................................................................92
PPPoA Routed (RFC 2364) ......................................................................................................................98
IPoA Routed (RFC 1577) ......................................................................................................................110
85

Model 3086FR ATM IAD User Guide 8 • 3086FR routed and bridged ATM connections
Introduction
In addition to FR to ATM conversion and transport over DSL, the 3086FR is a full feature ATM router,
allowing routed or bridged services between the DSL interface and the 10/100Base-T. The Model 3086FR can
simultaneously transport traffic from the serial port and the 10/100Base-T Ethernet port over a single-pair
DSL link. In this case, the 3086FR operates in split-mode DSL bandwidth allocating dedicated timeslots in
the DSL frame for the serial port, and for the Ethernet traffic.
When routing or bridging data from the 10/100Base-T port, keep in mind that data from the 3086FR serial
port is converted from Frame Relay to ATM encapsulation only, this traffic does not go thru the router or
bridge core in the 3086FR. When enabling the router or bridge for traffic from the 10/100Base-T, a separate
PVC and dedicated DSL timeslots have to be configured for this traffic.
The main configuration steps for this scenario are as follows:
1. Configure the DSL interface. Assign DSL bandwidth to the serial port, and the remaining DSL bandwidth
will be assigned to 10/100Base-T port. For instance, if you select a DSL rate of 512 kbps and 256 kbps are
assigned to the serial port, the remaining 256 kbps of DSL bandwidth will be automatically assigned to
10/100Base-T traffic.
2. Configure the serial port. Assign the DSL bandwidth required for the traffic on this port.
3. Configure the FR to ATM features for the serial port.
4. Configure the LMI
If you are using the 10/100Base-T port to route or bridge data:
1. Create a bridged or routed ATM connection.
2. Configure the bridge or router, and ATM parameters (including a PVC)
3. Configure DHCP, NAT, Authentication, Security features, etc, if needed, for this routed or bridged con-
nection.
The following ATM routed and bridged connections are available with the 3086FR:
• RFC 1483 bridged
• PPPoA (PPP over ATM) bridged
• RFC 1483 routed
• IPoA (IP over ATM) routed
• PPPoA (PPP over ATM) routed
DSLAM Connections with remote CPE units
Bridged application configurations to a DSLAM
Two bridged services are offered, RFC 1483 Bridged and PPPoA Bridged.
The configurations show a desktop on one end and a laptop on the other. The laptop and its Model 3086FR
would be replaced with a DSLAM.
Introduction 86

Model 3086FR ATM IAD User Guide 8 • 3086FR routed and bridged ATM connections
RFC 1483 Bridged Configuration.
No additional IP addresses are needed other than the IP address chosen earlier. In fact, if you are configuring and
managing the model 3086FR only from the CLI (Command Line Interface), an IP address is not needed at all.
The limitation of no IP address precludes the user from doing web management of the 3086FR since management is done via the Ethernet port.
As in the PPPoA Bridged application, both sides of the RFC 1483 bridged connection are on the same subnet.
Model 3086FR (Remote) Configuration Steps (RFC 1483 Bridged)
From the command line interface (CLI) via the RS-232 control port,
→
ip list interfaces
One IP interface is called ip1 with an IP address of 192.168.1.1
Change the IP address so it is in the same subnet as both PCs. For example, to 192.168.100.2
→
ip set interface ip1 ipaddress 192.168.100.2 255.255.255.0
1. Now you can bring up the web-page management system on your browser by entering the IP address of
the 3086FR.
2. On the Menu, go to Configuration, then to WAN Connections. Delete the factory default WAN services
already defined.
Click on
Create a new service in the main window, select RFC_1483_Bridged and click on the Configure button.
In the Description field, enter the description you wish. In this example, it is called RFC 1483 B.
Leave VCI as 35 and Encapsulation Method as LLC/SNAP. Then click on
3. Go to
DSLAM Connections with remote CPE units 87
G.SHDSL in the Configuration Menu, then the submenu Configuration.
Apply.

Model 3086FR ATM IAD User Guide 8 • 3086FR routed and bridged ATM connections
Change Terminal Type to Remote and Interface Type to atm. Click on the Configure button.
In the Action submenu under G.SHDSL, change Action to
Return to Action, select
Start and click on Action.
Deactivate, then click on Action.
Model 3086FR (Central) Configuration Steps (RFC 1483 Bridged)
Although the some parametric values may vary from the desktop’s Model 3086FR, the process is identical.
From the command line interface (CLI) via the RS-232 control port,
→
ip list interfaces
One IP interface is called ip1 with an IP address of 192.168.1.1
Change the IP address so it is in the same subnet as both PCs. For example, to 192.168.100.3
→
ip set interface ip1 ipaddress 192.168.100.3 255.255.255.0
1. Now you can bring up the web-page management system on your browser by entering the IP address of
the 3086FR.
2. On the Menu, go to Configuration, then to WAN Connections. Delete the factory default WAN services
already defined.
Click on
Create a new service in the main window, select RFC_1483_Bridged and click on the Configure button.
In the Description field, enter the description you wish. In this example, it is called RFC 1483 B.
Leave VCI as 35 and Encapsulation Method as LLC/SNAP. Then click on
Apply.
DSLAM Connections with remote CPE units 88

Model 3086FR ATM IAD User Guide 8 • 3086FR routed and bridged ATM connections
3. Go to G.SHDSL in the Configuration Menu, then the submenu Configuration.
Leave Terminal Type as Remote, but change Interface Type to atm. Click on the
In the Action submenu under G.SHDSL, change Action to
Deactivate, then click on Action.
Configure button.
Return to Action, select Start and click on Action.
PPPoA Bridged (RFC 2364) Configuration
The user data for transmission is in the form of IP packets but encapsulated in a PPP packet, transmitted and
received through a PPP session to the connection. The PPP packets are encapsulated according to RFC 2364 for
transmission over the ATM link. The packets are de-encapsulated on the receive side so that the IP data can be
delivered to the end user.
Model 3086FR (Remote) Configuration Steps (PPPoA Bridged)
From the command line interface (CLI) via the RS-232 control port,
→
ip list interfaces
One IP interface is called ip1 with an IP address of 192.168.1.1
Change the IP address so it is in the same subnet as both PCs. For example, to 192.168.100.2
→
ip set interface ip1 ipaddress 192.168.100.2 255.255.255.0
1. Now you can bring up the web-page management system on your browser by entering the IP address of
the 3086FR.
DSLAM Connections with remote CPE units 89

Model 3086FR ATM IAD User Guide 8 • 3086FR routed and bridged ATM connections
2. On the Menu, go to Configuration, then to WAN Connections. Delete the factory default WAN services
already defined.
Click on
Create a new service in the main window, select PPPoA_Bridged and click on the Configure button.
In the Description field, enter the description you wish. In this example, it is called PPPoA Bridged.
– VPI = 0
– VCI = 300
– LLC header mode = off
– HDLC header mode = off
– No authentication
– Leave User name and Password blank.
Click on
Apply.
3. Go to G.SHDSL in the Configuration Menu, then the submenu Configuration.
Change Terminal Type to Remote and Interface Type to atm. Click on the
In the Action submenu under G.SHDSL, change Action to
Return to Action, select
Start and click on Action.
Deactivate, then click on Action.
Configure button.
Model 3086FR (Central)Configuration Steps (PPPoA Bridged)
From the command line interface (CLI) via the RS-232 control port,
→
ip list interfaces
DSLAM Connections with remote CPE units 90

Model 3086FR ATM IAD User Guide 8 • 3086FR routed and bridged ATM connections
One IP interface is called ip1 with an IP address of 192.168.1.1
Change the IP address so it is in the same subnet as both PCs. For example, to 192.168.100.3
→
ip set interface ip1 ipaddress 192.168.100.3 255.255.255.0
1. Now you can bring up the web-page management system on your browser by entering the IP address of
the 3086FR.
2. On the Menu, go to Configuration, then to WAN Connections. Delete the factory default WAN services
already defined.
Click on
Create a new service in the main window, select PPPoA_Bridged and click on the Configure button.
In the Description field, enter the description you wish. In this example, it is called PPPoA Bridged.
– VPI = 0
– VCI = 300
– LLC header mode = off
– HDLC header mode = off
– No authentication
– Leave User name and Password blank.
Click on
Apply.
3. Go to G.SHDSL in the Configuration Menu, then the submenu Configuration.
Leave Terminal Type as Central.
Change Interface Type to atm. Click on the
In the Action submenu under G.SHDSL, change Action to Deactivate, then click on
Return to Action, select
Start and click on Action.
Configure button.
Action.
Routed application configurations to a DSLAM
Five routed WAN services are offered, RFC 1483, IPoA, and PPPoA.
DSLAM Connections with remote CPE units 91

Model 3086FR ATM IAD User Guide 8 • 3086FR routed and bridged ATM connections
RFC 1483 Routed
RFC 1483 provides the simplest method of connecting end stations over an ATM network. User data in the
form of Ethernet packets is encapsulated into AAL-5 PDUs for transport over ATM. RFC 1483 provides no
authentication and configuration that would be provided by PPP.
Model 3086FR (Remote) Configuration Steps (RFC 1483 Routed)
From the command line interface (CLI) via the RS-232 control port,
→
ip list interfaces
One IP interface was called ip1 with an IP address of 192.168.1.1 Change it to an IP address which is in the
same subnet as the Desktop PC. For example, to 192.168.100.2. The default IP mask is 255.255.255.0.
→
ip set interface ip1 ipaddress 192.168.100.2 255.255.255.0
1. Now you can bring up the web-page management system on your browser by entering the IP address of
the 3086FR.
Click on G.SHDSL in the Configuration Menu > Configuration > verify that Terminal Type is Central
and Interface Type is atm. If changed, then click on
Configure.
Click on Action > Select deactivate for Action > Click on the Action button.
2. On the Menu, go to Configuration, then to WAN Connections.
Delete both default WAN services already defined.
Click on
Create a new service in the main window, select RFC 1483 Routed and click on the Configure button.
DSLAM Connections with remote CPE units 92

Model 3086FR ATM IAD User Guide 8 • 3086FR routed and bridged ATM connections
In the Description field, enter the description you wish. In this example, it is called RFC 1483 Routed.
Change the configuration parameters to match the following.
Description:RFC 1483 Routed
– VPI:0
– VCI:35
– Encapsulation Method: LLC/SNAP
– WAN IP Address:192.168.164.2
Click on
Configure.
DSLAM Connections with remote CPE units 93

Model 3086FR ATM IAD User Guide 8 • 3086FR routed and bridged ATM connections
3. Configuration Menu > Configuration > IP Routes > Click on Create new Ip V4 Route > Create the gate-
way to the remote 3086FR by entering the WAN IP address of the remote 3086FR, in this example, enter
192.168.164.3 in the Gateway field > OK
The other fields should be:
– Destination:0.0.0.0
– Gateway:192.168.164.3
– Mask:0.0.0.0
– Cost:1
– Interface:[blank]
4. Go to G.SHDSL in the Configuration Menu, then the submenu Status. The Modem State should be
“deactivated.” (If not, go to the Action and change it to deactivate.)
Then in the Action submenu under G.SHDSL, change Action to
Start, then click on Action.
Model 3086FR (Central) Configuration Steps (RFC 1483 Routed)
From the command line interface (CLI) via the RS-232 control port,
→
ip list interfaces
→
pppoh clear transports
DSLAM Connections with remote CPE units 94

Model 3086FR ATM IAD User Guide 8 • 3086FR routed and bridged ATM connections
One IP interface was called ip1 with an IP address of 192.168.1.1
Change the IP address so it is in the same subnet as the laptop PC. The laptop’s IP address is
192.168.172.229, so in this example, change the IP address of the 3086FR to 192.168.172.3. The default IP
mask is 255.255.255.0.
→
ip set interface ip1 ipaddress 192.168.100.2 255.255.255.0
1. Now you can bring up the web-page management system on your browser by entering the IP address of
the 3086FR.
Click on G.SHDSL in the Configuration Menu > Configuration > verify that Terminal Type is Remote and
Interface Type is atm. If changed, then click on
Configure.
DSLAM Connections with remote CPE units 95

Model 3086FR ATM IAD User Guide 8 • 3086FR routed and bridged ATM connections
Click on Action > Select deactivate for Action > Click on the Action button.
2. On the Menu, go to Configuration, then to WAN Connections.
Delete both default WAN services already defined.
Click on
Create a new service in the main window, select RFC 1483 Routed and click on the Configure button.
In the Description field, enter the description you wish. In this example, it is called RFC 1483 Routed.
Description:RFC 1483 Routed
– VPI:0
– VCI:35
– Encapsulation Method: LLC/SNAP
– WAN IP Address:192.168.164.3
Click on
Configure.
DSLAM Connections with remote CPE units 96

Model 3086FR ATM IAD User Guide 8 • 3086FR routed and bridged ATM connections
3. Configuration Menu > Configuration > IP Routes > Click on Create new Ip V4 Route > Create the gate-
way to the remote 3086FR by entering the WAN IP address of the remote 3086FR, in this example, enter
192.168.164.2 in the Gateway field > OK
The other fields should be:
– Destination:0.0.0.0
– Gateway:192.168.164.2
– Mask:0.0.0.0
– Cost:1
– Interface:[blank]
DSLAM Connections with remote CPE units 97

Model 3086FR ATM IAD User Guide 8 • 3086FR routed and bridged ATM connections
4. Go to G.SHDSL in the Configuration Menu, then the submenu Status. The Modem State should be
“deactivated.” (If not, go to the Action and change it to deactivate.)
Then in the Action submenu under G.SHDSL, change Action to Start, then click on Action.
The modems should link up within 30 seconds or so and the link is ready for communication.
PPPoA Routed (RFC 2364)
This routed application is very similar to the PPPoA Bridged application. The user data for transmission is in
the form of IP packets but encapsulated in a PPP packet, transmitted and received through a PPP session to the
connection. The PPP packets are encapsulated according to RFC 2364 for transmission over the ATM link.
The packets are de-encapsulated on the receive side so that the IP data can be delivered to the end user.
The Central (Model 3086FR) end functions as a local ISP which will authenticate the Remote user (Model
3086FR). The CPE side, with Remote and 3086FR-A, may represent a home PC which is connecting to a centralized PPP server (Local and 3086FR—B).
Since this is a routed application, there are differences to be noted. Referring to the application diagram, three
unique subnets exist. The Ethernet LAN on the 3086FR and Remote side, the Ethernet LAN on the 3086FR
and Central side, and lastly, the subnet of the ATM’s PVC link between the two modems, 3086FR-A and
3086FR-B. The 3086FR-B and Local end (the Central side) may also be a DSLAM.
DSLAM Connections with remote CPE units 98

Model 3086FR ATM IAD User Guide 8 • 3086FR routed and bridged ATM connections
Model 3086FR (Remote—Client) Configuration Steps (PPPoA Routed)
1. From the command line interface (CLI) via the RS-232 control port,
→
ip list interfaces
One IP interface was called ip1 with an IP address of 192.168.1.1 Change it to an IP address which is in
the same subnet as the Desktop PC. For example, to 192.168.100.2. The default IP mask is
255.255.255.0.
→
ip set interface ip1 ipaddress 192.168.100.2 255.255.255.0
Now you can bring up the web-page management system on your browser by entering the IP address of
the 3086FR.
Click on G.SHDSL in the Configuration Menu > Configuration > verify that Terminal Type is Central
and Interface Type is atm. If changed, then click on
Click on Action > Select deactivate for Action > Click on the
Configure.
Action button.
2. On the Menu, go to Configuration, then to WAN Connections
Delete both default WAN services already defined.
Click on
DSLAM Connections with remote CPE units 99
Create a new service in the main window, select PPPoA Routed and click on the Configure button.

Model 3086FR ATM IAD User Guide 8 • 3086FR routed and bridged ATM connections
In the Description field, enter the description you wish. In this example, it is called PPPoA Routed.
Change the configuration parameters to match the following.
– Description:PPPoA Routed
– VPI:0
– VCI:800
– WAN IP Address:0.0.0.0
– LLC Header Mode:off
– HDLC Header Mode:off
– CHAP
– User Name:fred
– Passwood:fredspass
Click on
Configure.
3. In the Configuration Menu, click on Configuration then > WAN Connections > Edit (for the WAN Ser-
vice ppp1) > Edit ‘PPP’ and verify or change the following parameters on the Edit PPP webpage.
– Server:false
– Create Route:true
– Specific Route:false
– Subnet Mask:0.0.0.0
– Route Mask:0.0.0.0
– Hdlc:false
– LLC:false
– Lcp Max Configure:10
– Lcp Max Failure:5
DSLAM Connections with remote CPE units 100
 Loading...