

Patterson Versa II Quick Start Manual
Versa II Anesthesia System
Remove the anesthesia machine
Quick-Start Guide – Pole Mount Option
(if installing as a tabletop unit go to www.pattersonscientific.com/manuals and
download the quick-start guide for tabletop option.)
Base and casters Universal F Circuit
Items included:
Machine pole MJR Circuit
Anesthesia machine head Absorber canister (boxed)
Hardware bag (contents documented by label on bag)
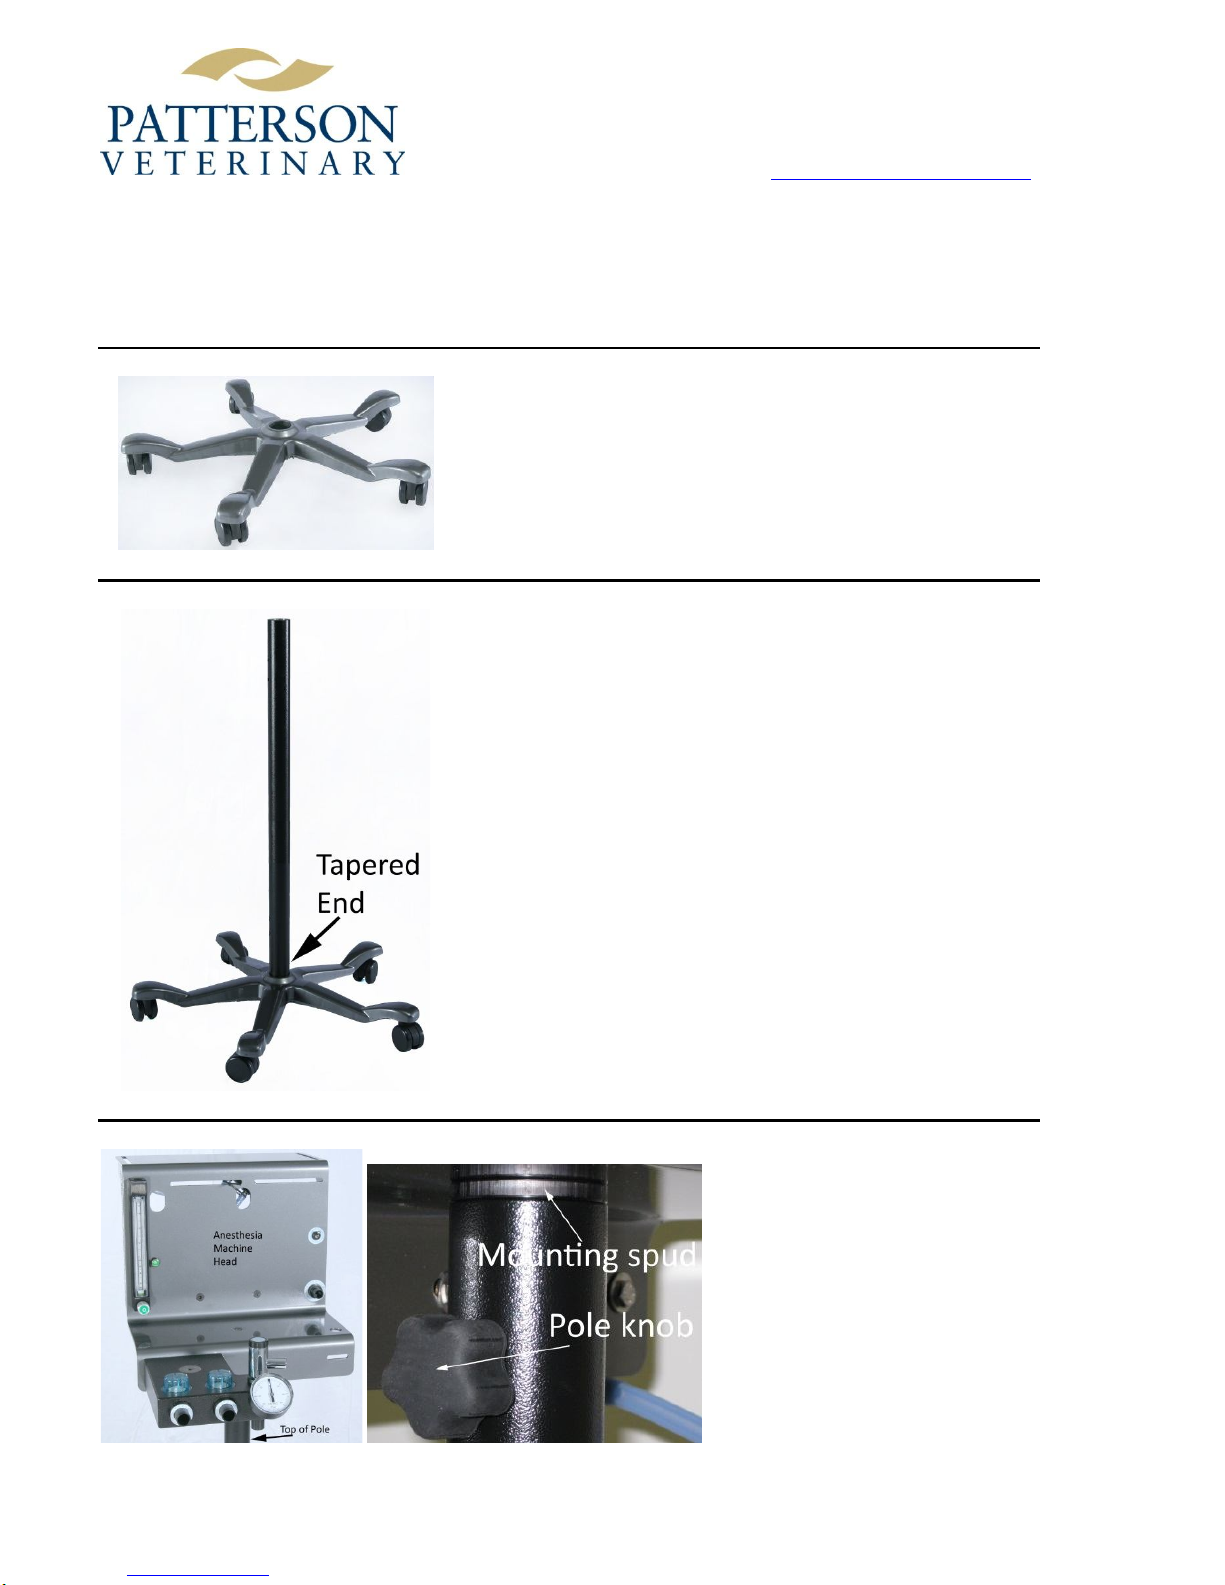
Remove the base and casters from the packaging and place
on the floor.
Remove the pole from the packaging. Place the pole into the
base (tapered end into base). Tap firmly to seat pole into
base.
Page 1 of 2 Rev. 3 Customer Service: 1-800-225-7911 Tech Support: 1-866-825-6076
head from the packaging and
place the mounting “spud” into
the top of the pole.
Align the hole in the “spud” with
the hole in the top of the pole.
Insert and tighten using the pole
knob found in the hardware bag.

Fill absorber canister with CO
absorbent to the designated fill line and secure to anesthesia machine (with
Cut the cable tie securing
the
vaporizer endcaps
Perform a “leak check” test
on the anesthesia machine prior to use.
To download a full operations manual for this machine please visit:
2
Patterson logo facing the front of the anesthesia machine) with the knob from the hardware bag. Make sure the
divider in the absorber canister lines up with and goes into the slot on the bottom of the absorber block so it
seals against the gasket before fully tightening the knob.
Check inhalation/exhalation flutter disks. During
shipping these disks MAY have come dislodged
from their normal positions. They should be
oriented flat on top of the valves beneath the
dome caps as shown in the photo. If they are not
as shown remove the dome caps, place the disks
flat on the valves, and replace the dome caps
BEFORE using the anesthesia machine.
to the machine frame. Install vaporizer to the
anesthesia machine using the mounting hardware
provided with the vaporizer (may be easier with 2
people). If needed use spacers between
vaporizer and frame to allow clearance for
endcaps. Place endcaps onto vaporizer inlet and
outlet ports.
1. Close the pop-off valve and cover the end of the Re-breathing circuit with your palm or thumb.
2. Push the oxygen flush button until the bag is fully distended and/or manometer reads 30-40cm of H
3. If the manometer reading drops rapidly (i.e., more than 5 increments in 20 seconds), or the bag deflates rapidly, or
if you hear a hissing sound, you have a leak.
Check hose, bag, vaporizer inlet and outlet, dome caps, and the seal on your absorber canister for any potential leaks
(Windex can be used).
4. Re-open the pop-off valve.
O pressure.
2
www.pattersonscientific.com/manuals
and click on the link for your operations manual.
Page 2 of 2 Rev. 3 Customer Service: 1-800-225-7911 Tech Support: 1-866-825-6076
 Loading...