

Patrol Eyes PHD-1080W User Manual

PHD-1080W
User Manual
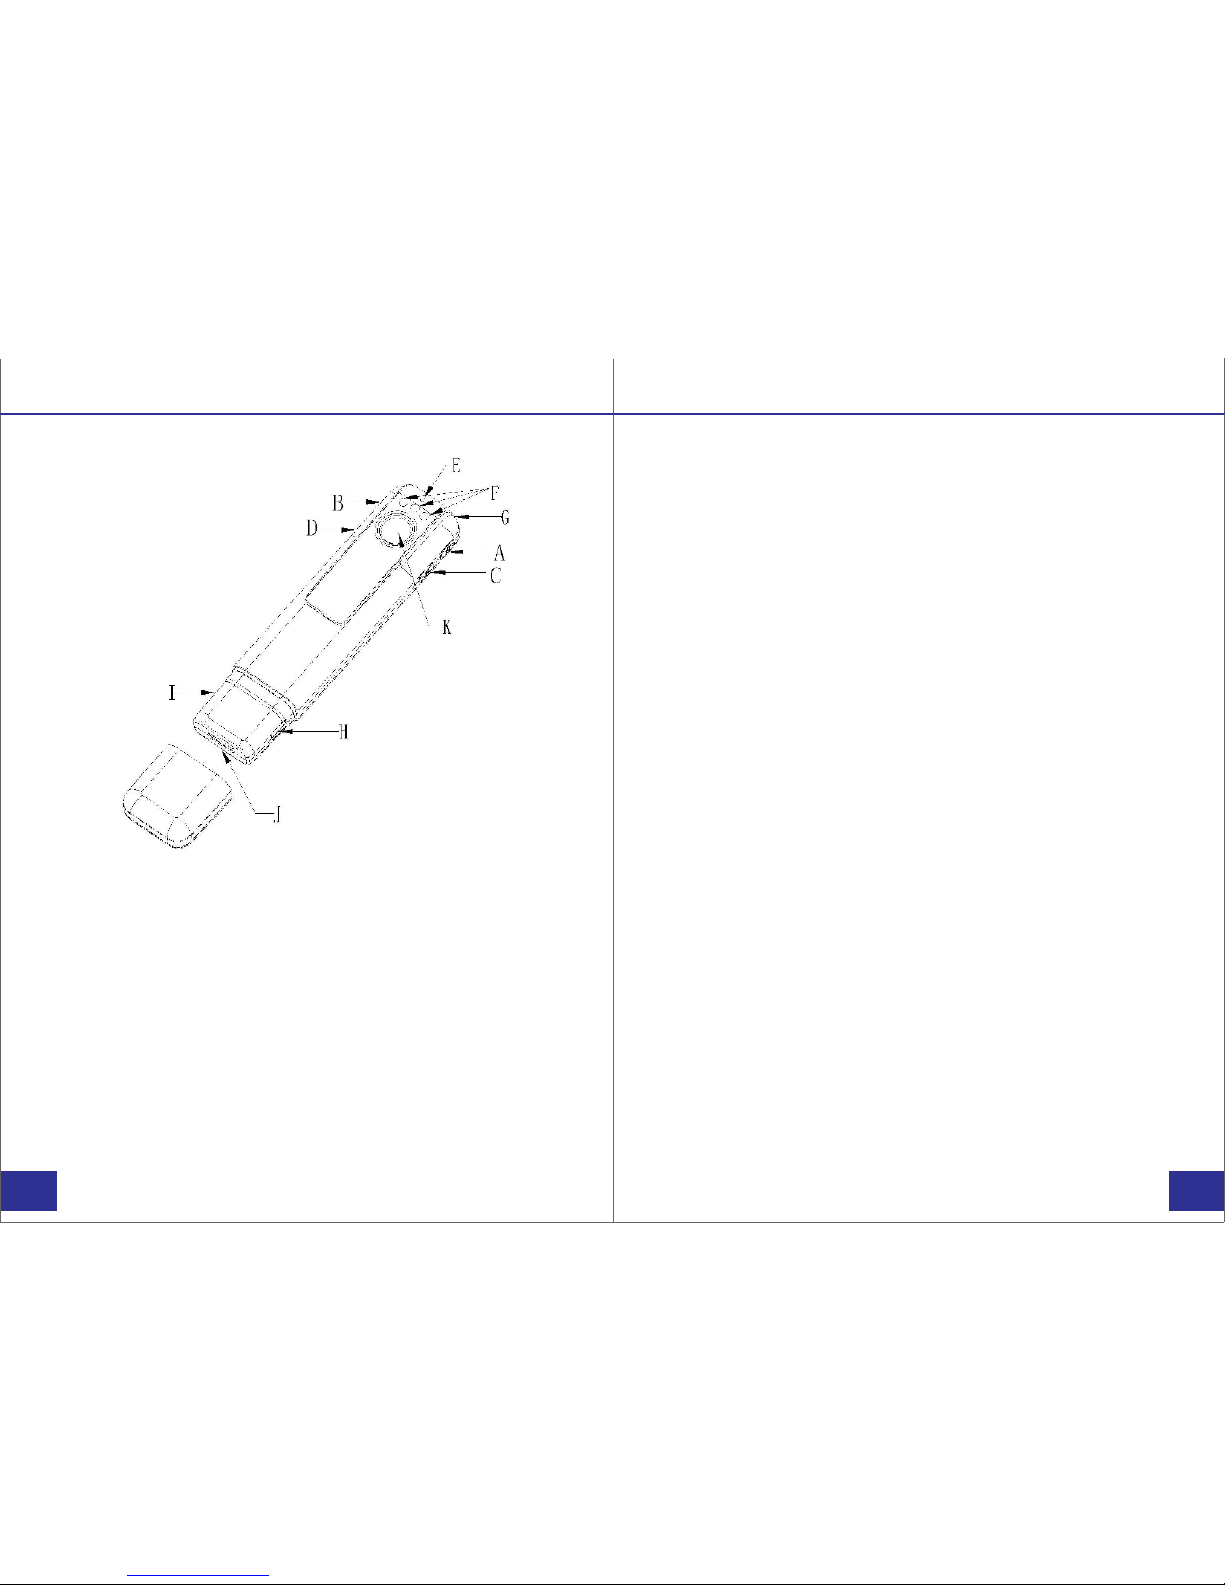
A. Power/confirm button
B. Mode button
C. Infrared switch
D. WIFI button
E. Microphone
F. Infrared illuminators
G. Indicator light
H. USB port
I. SD card slot
J. HDMI port
K. Camera lens
Overview
Before Use:
Fully charge the camera using the included USB cable
and charger for 3-4 hours. The blue and red indicators will
turn on when the camera is charging. When the camera is
fully charged, only the red light will turn off.
Powering on your device:
1) Press and hold the power button (located on the
right side of the device near the top) for three seconds
to start up the camera.
2) The device will enter into standby mode and
the blue indicator light will turn on. From this mode you
can record video, change to picture mode, or turn
infrared on and off.
3) To power the device back off, press and hold the
power button for three seconds.
Transfer and manage files on your computer
(Compatible with Windows XP, Vista, 7, 8, 10 & Apple)
1) Connect the camera to your computer via the USB cable.
2) Open the related Removable Disk drive (usually D: or E:
drive) in “My Computer”.
3) Double click to view the folder contents then click on
each file to view, transfer, or delete the media files.
Getting Started
PAGE
PAGE
01/14

Video Recording:
1) To record video, press the power button while the
camera is in standby mode. The blue indicator light will
flash 5 times before turning off. The camera will now begin
recording video.
2) To stop recording, press the power button again. The
camera will stop recording and enter back into standby
mode.
Photo Taking:
1) While the camera is in standby mode, press the mode
switch (located on the left side of the device, near the top)
to enter photo mode. The indicator light will change to red
while in photo mode.
2) Short press the power button to take a picture. Each
time the power button is pressed the red light will flash
and the picture will be saved. (Images captured through
the smartphone app will be instantly downloaded to your
phone).
3) Press the mode button to re-enter standby mode, the
blue indicator light will turn back on.
Recording:
Audio Recording:
1) To record audio only, press the mode button twice. The
indicator light will turn green, and the camera will enter
audio mode. Short press the power button, the indicator
light will begin flashing and the camera will record audio.
(Even while voice recording is disabled in the smartphone
app settings, the camera will still record an audio file).
2) Press the power button to stop recording. The indicator
light will stop flashing and the audio file will be saved.
3) Press the mode button to re-enter standby mode, the
blue indicator light will turn back on.
Motion Detection:
1) Press the mode button three times to enter into motion
detection mode and the red and blue light will turn on.
Short press the power button, the lights will flash five times
and the camera will begin motion detection.
2) When the camera detects movement it will begin
recording video. Press the power button to stop the
recording and save the video file.
3) Press the mode button to re-enter standby mode, the
blue indicator light will turn back on.
Recording:
PAGE
PAGE
 Loading...