

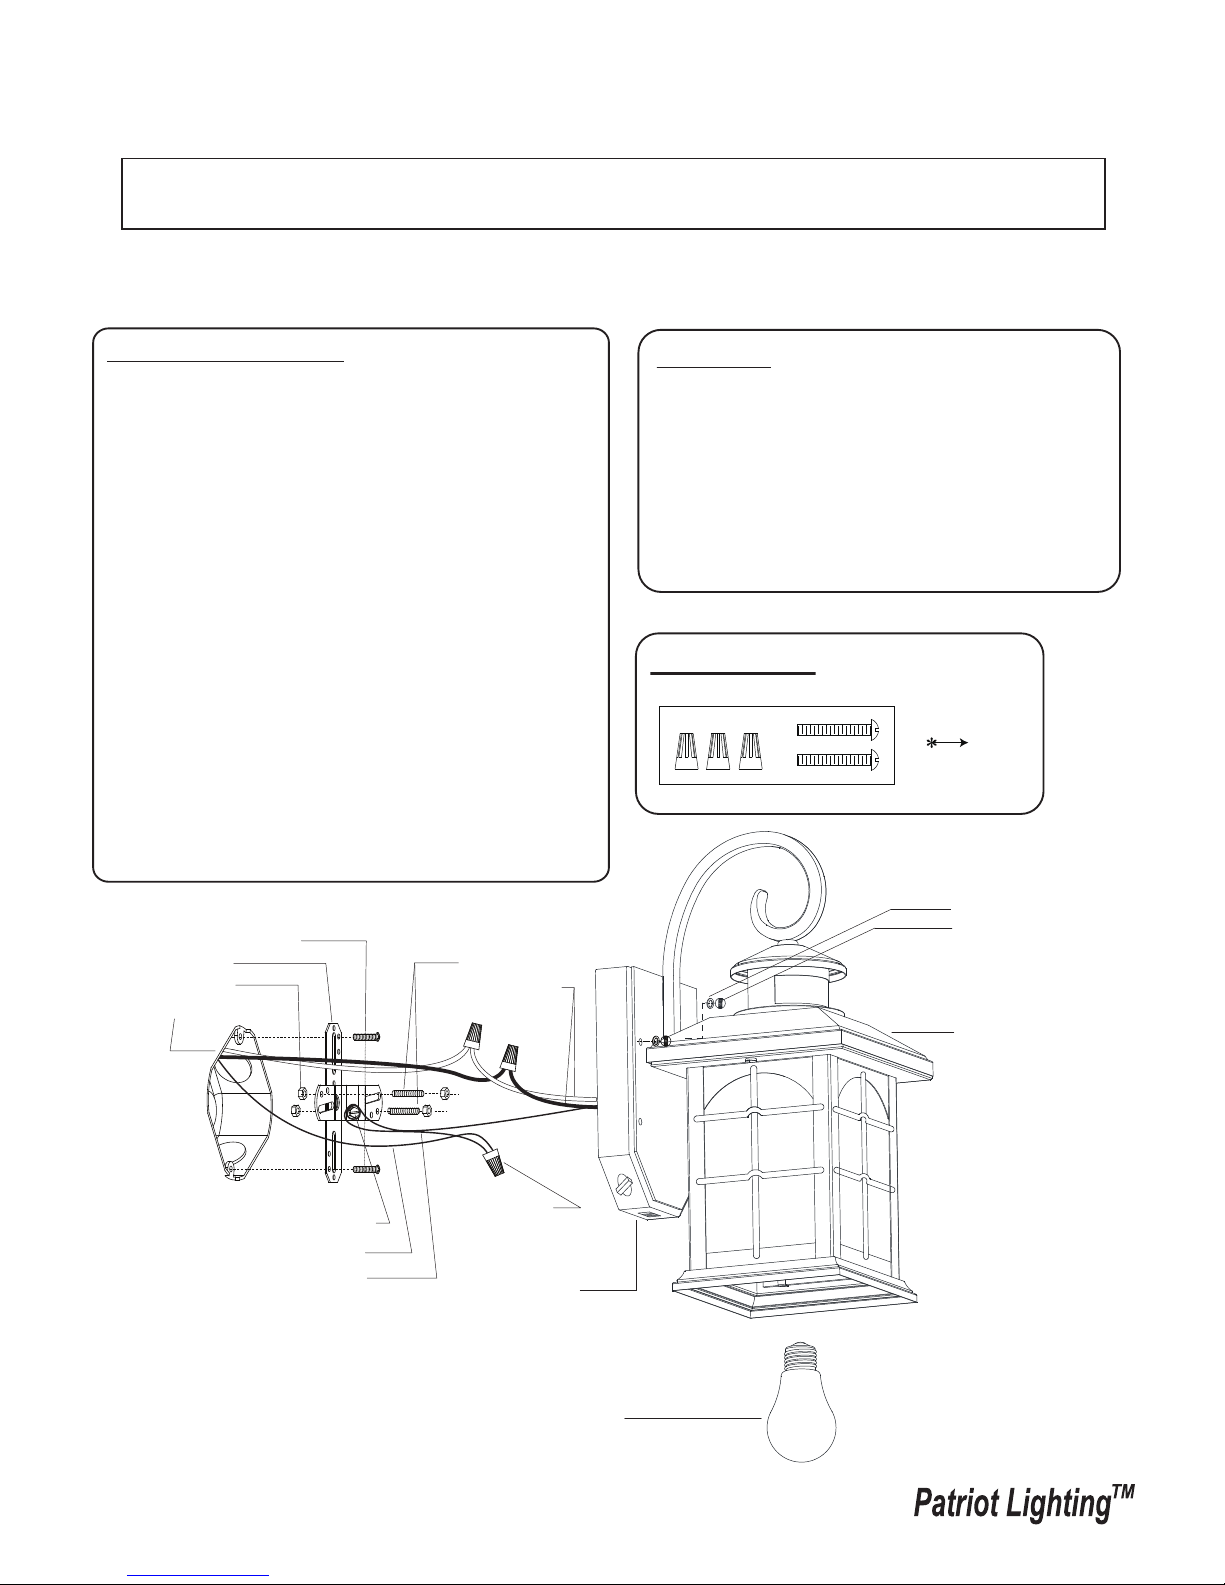
Main Fixture
Cross Bar
House Grounding Wire
Green Grounding Screw
Fixture Grounding Wire
Wire Nut
Outlet Box
Fixture Wire
Back Plate
Important to Know
1. Read all instructions carefully before installation
and operation.
2. If you are not familiar with state and local electrical
codes, it is recommended that you consult with a
qualified electrician.
3. Before installation, shut off power at the main fuse
or circuit breaker box. Be aware that simply turning
off the wall switch is not sufficient to prevent
an electrical shock.
4. This fixture requires a 120 VAC, 60 Hz power
source. Maximum wattage is 60W per socket.
5. Do not attempt to take the lantern apart; there are
no serviceable parts inside.
6. To avoid sensor damage by lighting or electrical
surge, make sure the grounding wire is
securely connected.
7. For general safety and to avoid any possible
damage to the sensor, be sure the power is
switched "off" before replacing the bulb.
Maximum Wattage: 1x60W
Mounting Screw
Headless Screw
Lock Nut
Bulb Type A Max.60W
(not included)
ASSEMBLY AND INSTALLATION
INSTRUCTIONS
WARNING: BE SURE TO SHUT OFF POWER AT THE MAIN FUSE OR CIRCUIT
BREAKER BOX BEFORE INSTALLING OR SERVICING THIS FIXTURE.
NOTE: 1. Before installing, consult local electrical codes for wiring and grounding requirements.
2. Customer Service: 1-800-887-6326 (weekdays 9 a.m. – 5 p.m. CST)
3. READ AND SAVE THESE INSTRUCTIONS.
356-4027
130910
Features
1. The motion be detected only at night.
2. Light will turn off automatically after motion is
no longer detected.
3. PC' Mode provides illumination from dusk
to dawn.
4. When in manual override mode, use wall
switch to keep the light ON all night long.
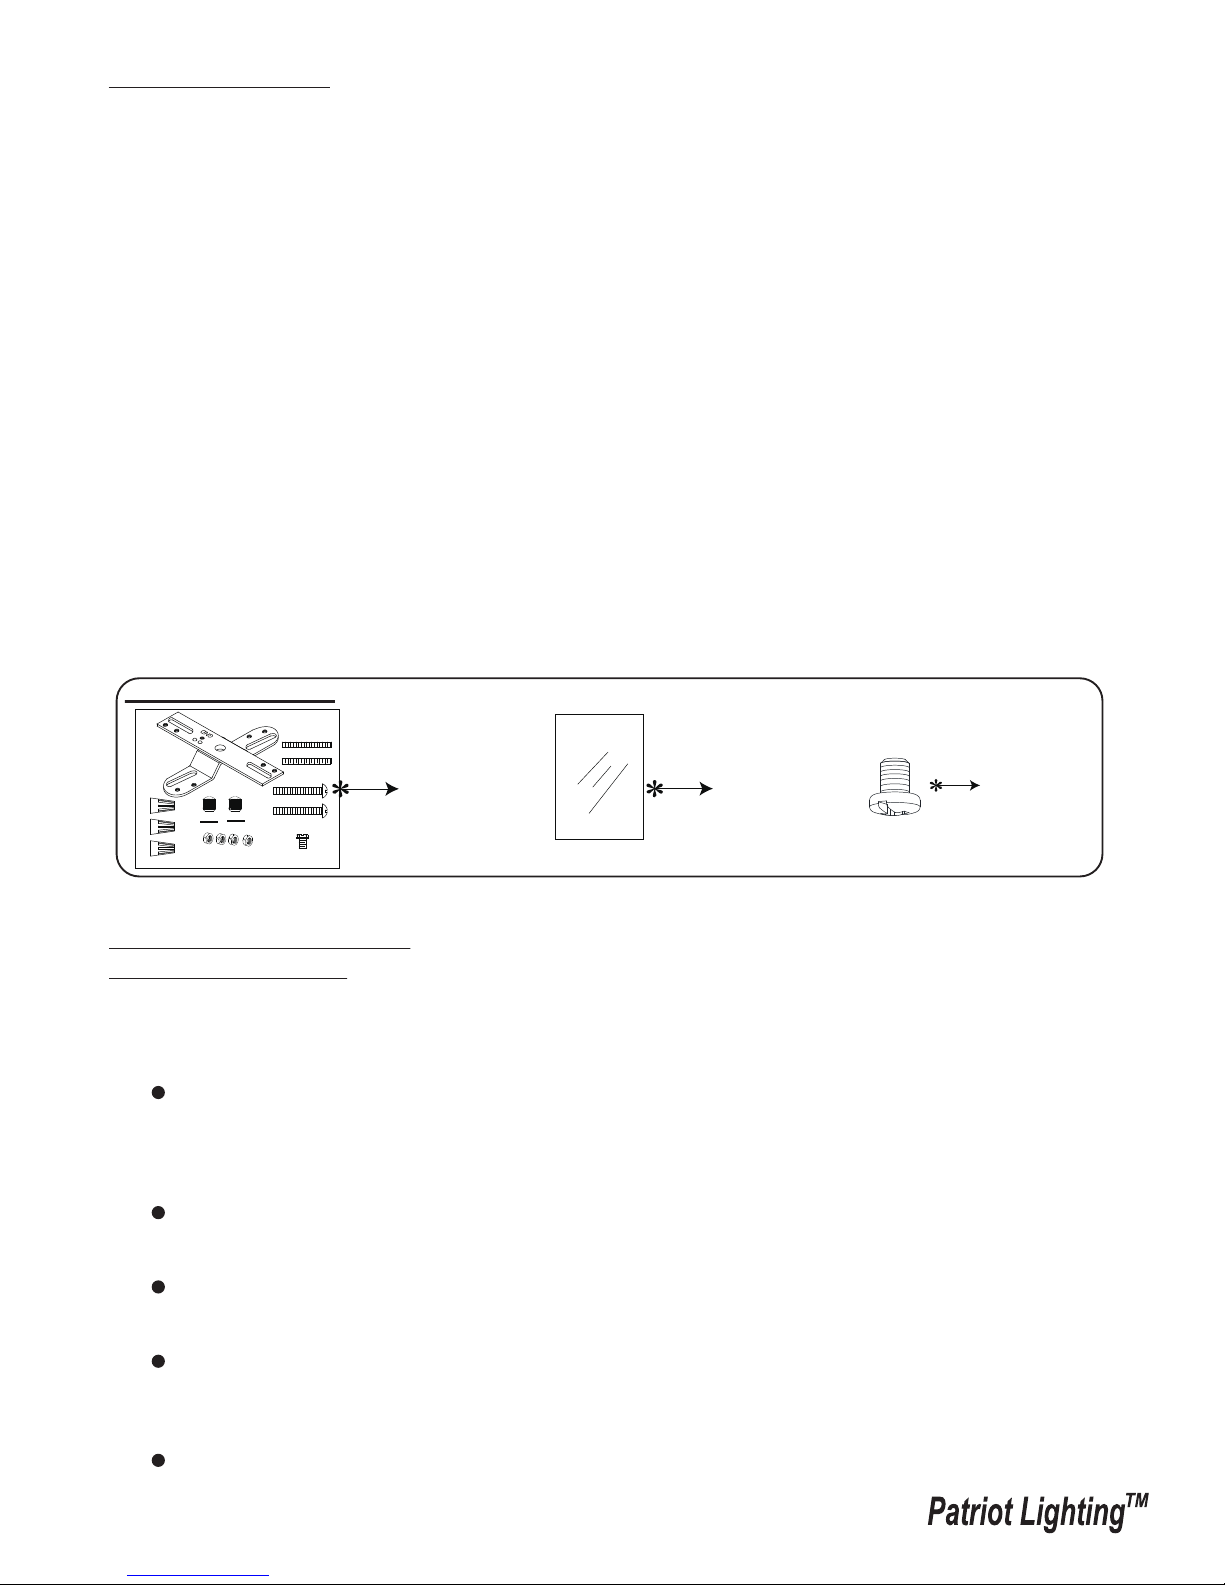
1 SET
Hardware Package:
Ball Nut
Rubber Pad
Installation Steps
1. Shut off power at the circuit breaker of where the fixture is to be installed.
2. Thread two headless screws through the cross bar, then secure them with four lock nuts. Adjust the length
of the headless screws if necessary.
3. Attach the cross bar to the outlet box using two mounting screws.
4. Pull out the outlet wires and the house grounding wire from the outlet box. Make wire connections using the
wire nuts:
---Connect the black wire from the fixture to the black wire from the power source.
---Connect the white wire from the fixture to the white wire from the power source.
---Attach the fixture grounding wire to the cross bar with the green grounding screw. Then connect it to the
house grounding wire with a wire nut.
Carefully put the wires back into the outlet box.
5. Attach the back plate to the cross bar by inserting the headless screws, then secure it with rubber pads and
ball nuts.
6. With silicone caulking compound, caulk completely around where the back plate meets with the wall surface.
CAUTION: Be sure to caulk completely where the back plate meets the wall surface to prevent water
from seeping into the outlet box.
7. Install a bulb (not included). See relamping label at socket area or packaging for maximum allowed wattage.
Note: Make sure CFL bulbs are not being used with this light.
8. Turn on the power at the main fuse or circuit breaker box.
In case of damaged or missing parts, please call toll-free at 1-800-887-6326
130910
Function and Operation
MODES OF OPERATION
Choose a mode by sliding the switch on the bottom of the back plate of the fixture. (See FIG.2 on page 3)
When power is first applied, the light will turn on immediately. Wait for 15 seconds to allow the sensor to
warm up.
1. TEST mode (daytime and nighttime operation.)
The light will turn to low level brightness (30% brightness). The light will turn to high level brightness
(100% brightness) when motion is detected, and stays on as long as the motion is continuing. The
light will revert to low level brightness about 5 seconds after motion is no longer detected.
2. OFF mode (nighttime operation only; on at dusk, off at dawn)
At dusk, the sensor will turn lights on automatically when motion is detected, and stays on as long as
the motion is continuing. When the motion stops, the lights will remain on for the predetermined time
as you set (5 ~ 180 seconds), then all lights will turn off automatically.
Light will turn off automatically at dawn.
3. AUTO mode (nighttime operation only; on at dusk, off at dawn)
At dusk, the light will turn to low level brightness (30% brightness). The light will turn to high level
brightness (100% brightness) when motion is detected, and stay on as long as the motion is continuing.
When the motion stops, the light will remain on for the predetermined time as you set (5 ~ 180 seconds),
and then revert to low level brightness.
Light will turn off automatically at dawn.
Assembly Kit
(1 SET)
(4857MM)
Contents of Spare Parts:
Glass Panel
(3 PCS)
(9491CS)
Set Screw
(2 PCS)
(4857SS)
 Loading...