

Page 1
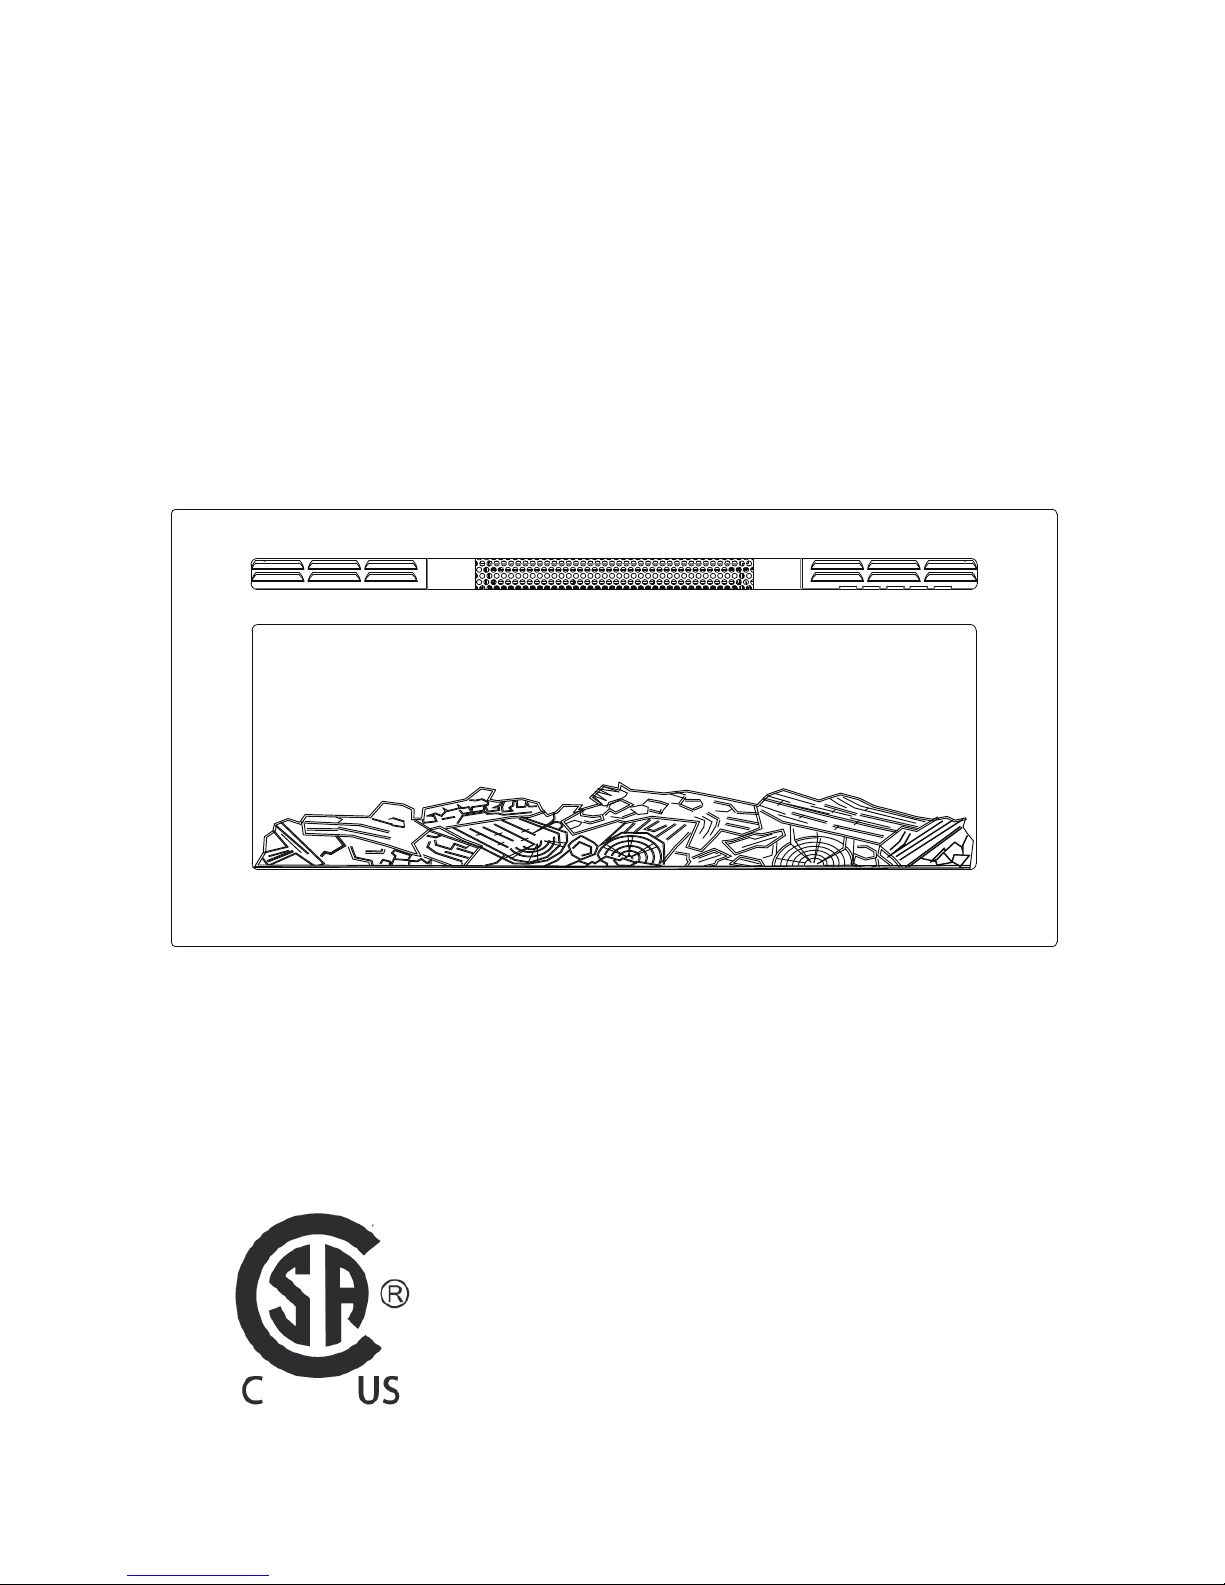
32 INELECTRICFIREPLACE
MODEL SF103 35#
MODEL PD3216W
Page 2

28/
Rev 0 3 10./
TABLE OF CONTENTS
Safety Information.........................................................3
Preparation....................................................................4
Preparation Installation)...............................................5(
Operating Instruction......................................................6
Care and Maintenance....................................................7
Troubleshooting.............................................................8
Page 3

SAFETY INFORMATION
Please read and understand this entire manual before attempting to assemble , operate or install the
product.
Any use of this appliance other than that recommended by the manufacturer in
this owners manual may cause fire, burns, electric shock and/or other serious injuries or death.
When using electrical appliances, basic precautions should always be followed to reduce the risk of fire, electric shock
and injury to persons including the following:
1. Read the manufacturers instructions completely before using this appliance.
2. This appliance will become hot when in use. To avoid burns, do not let bare skin touch hot surfaces. The grill
at the top of this heater in particular will become hot when the heater is active. Take special care not to block
the air intake or exhaust vents.
3. Extreme caution is necessary when the appliance is used by or near children or invalids and whenever the heater
is left operating and unattended.
4.
Do not operate the heater if the power cord or plug has been damaged or the heater has been damaged or
malfunctioned in any way. Take the appliance to an authorized service facility for examination, electrical or
mechanical adjustment or repair.
5. Do not use outdoors.
6. This heater is not intended for use in bathrooms, laundry areas and similar indoor locations. Never locate heater
where it may fall into a bathtub or other water container.
7. To disconnect the appliance, turn all controls “OFF”, and then remove the plug from the electrical outlet.
8. The appliance comes equipped with a 3 prong-grounding plug. Do not cut the grounding prong. Connect to
properly grounded 120V outlets only.
9. Do not insert or allow foreign objects to enter any ventilation or exhaust openings as this may cause an electric
shock or fire, or damage the appliance.
10. To prevent a possible fire, do not block air intakes or exhausts in any manner. Do not use on soft surfaces, like
a bed, where openings may become blocked.
11. All electrical heaters have hot and arching or sparking parts inside. Do not use in areas where gasoline, paint,
or flammable liquids are used or stored or where the appliance will be exposed to flammable vapors.
12. Avoid using the appliance with an extension cord. Extension cords may overheat and cause a risk of fire. If an
extension cord MUST be used, the cord must be No. 16AWG minimum size and rated not less than 1875 Watts.
The extension cord must be a 3-prong cord with grounding type plug and cord connection and should not
exceed 20’ (6m) in length.
13. When transporting or storing the heater, take care to keep both the unit and power cord/plug dry, free from
excessive vibration and away from heat sources.
14. Use the heater only as described in this manual. Any other use not recommended by the manufacturer may
cause fire, electric shock, or injury to persons.
15. Do not attempt to burn wood or other materials in this heater.
3
Page 4
48/
Rev 0 3 10./
PREPARATION
CAUTION:
This heater has front panel made of GLASS Always use extreme caution when!
handling glass Failure to do so could result in personal injury or personal damage..
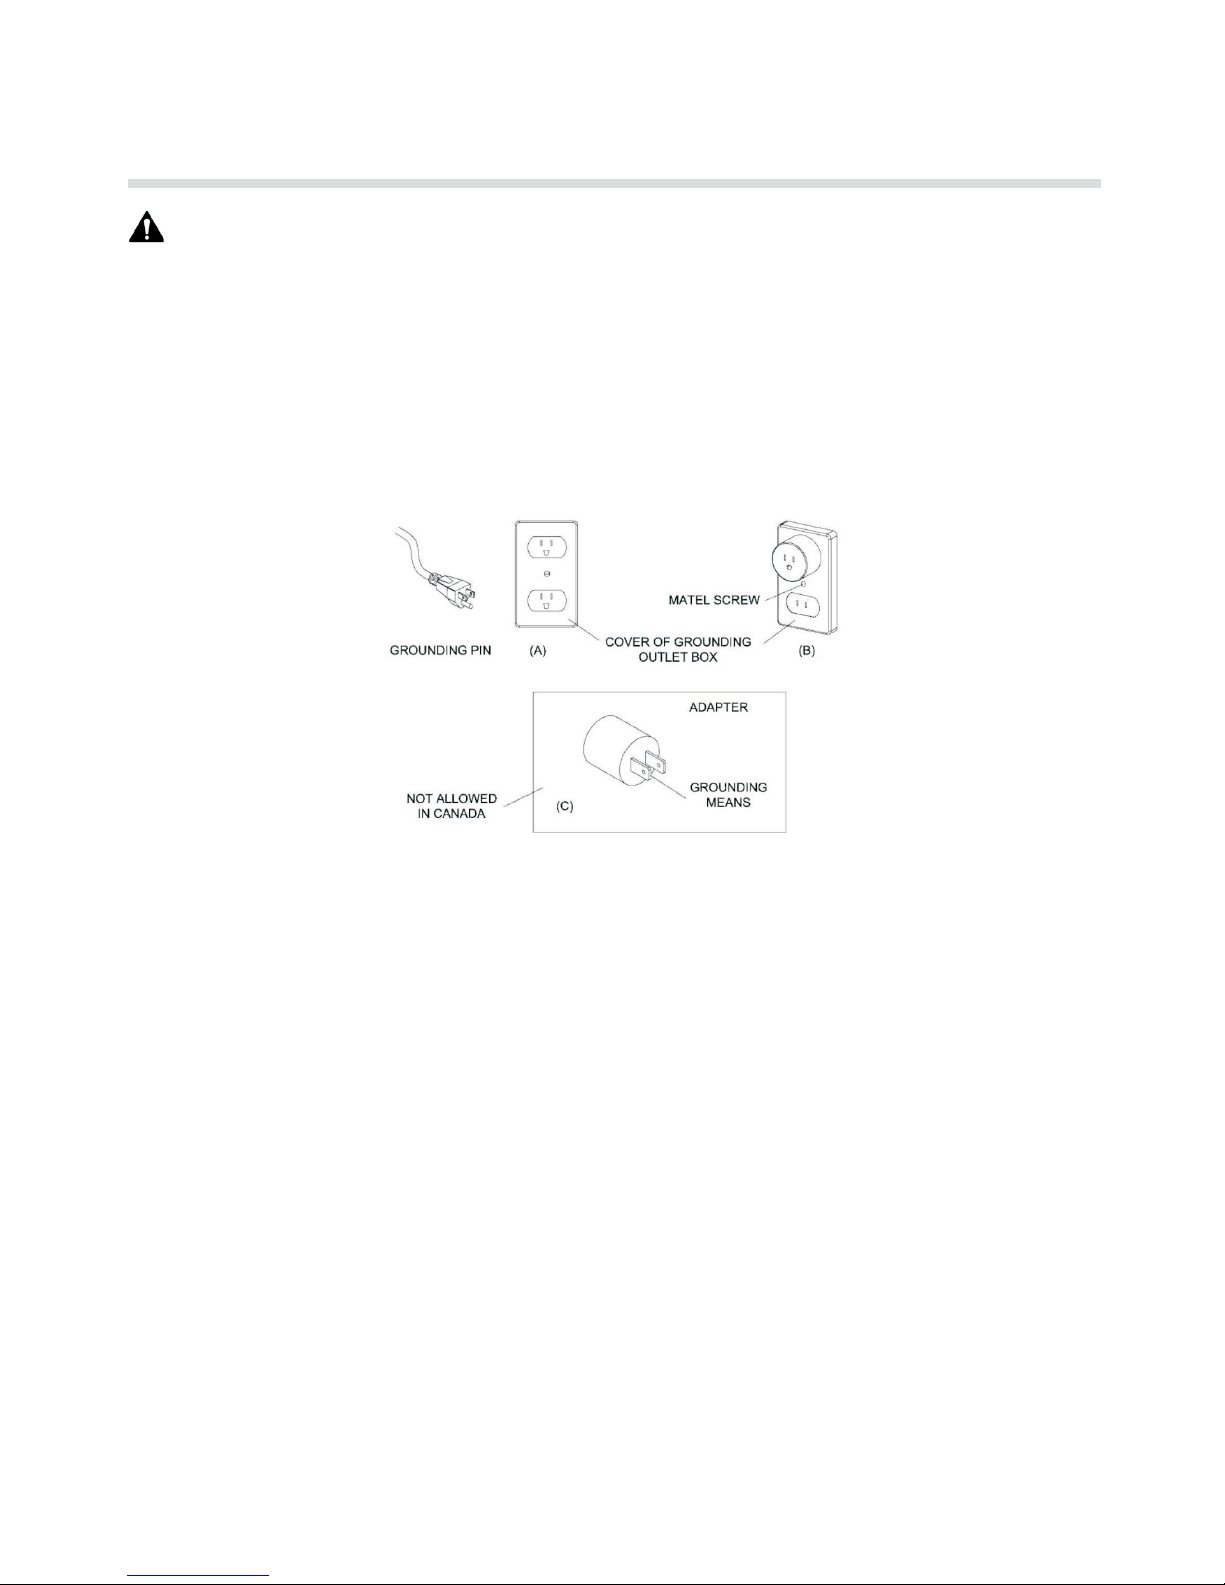
This heater is for use on 120 Volts The heater has a 3 prong grounded plug Figure 2 A If your
.- (.).
electrical outlet has only 2 slots Figure 2 B you will have to use an adapter Figure 2 C to(.), (.)
convert from the 3 prong power cord to a 2 slot receptacle The green grounding plug extending
--.
from the adapter must be securely connected to a permanent ground such as a properly grounded
outlet box The adapter should only be used if a proper 3 slot receptacle is not available.-.
NOTE Adapters are not allowed for use in Canada
:.
A 15 AMP circuit is required to operate this appliance If the breaker trips when the appliance is
.
running you may need to move the appliance to another location or unplug other appliances that
,
are on the same circuit
.
The electric fireplace has zero clearance safety technology, with the advanced zero clearance
safety sensor, if there is something covering or closing the slide outs, after about 20 seconds,
the appliance will switch off power automatically. Then pull the plug out, Let the appliance
cool down for 3 minutes, Plug the power cord again, the fireplace will be working again.
Zero Clearance Fireplace
Page 5
58/
Rev 0 3 10./
PREPARATION
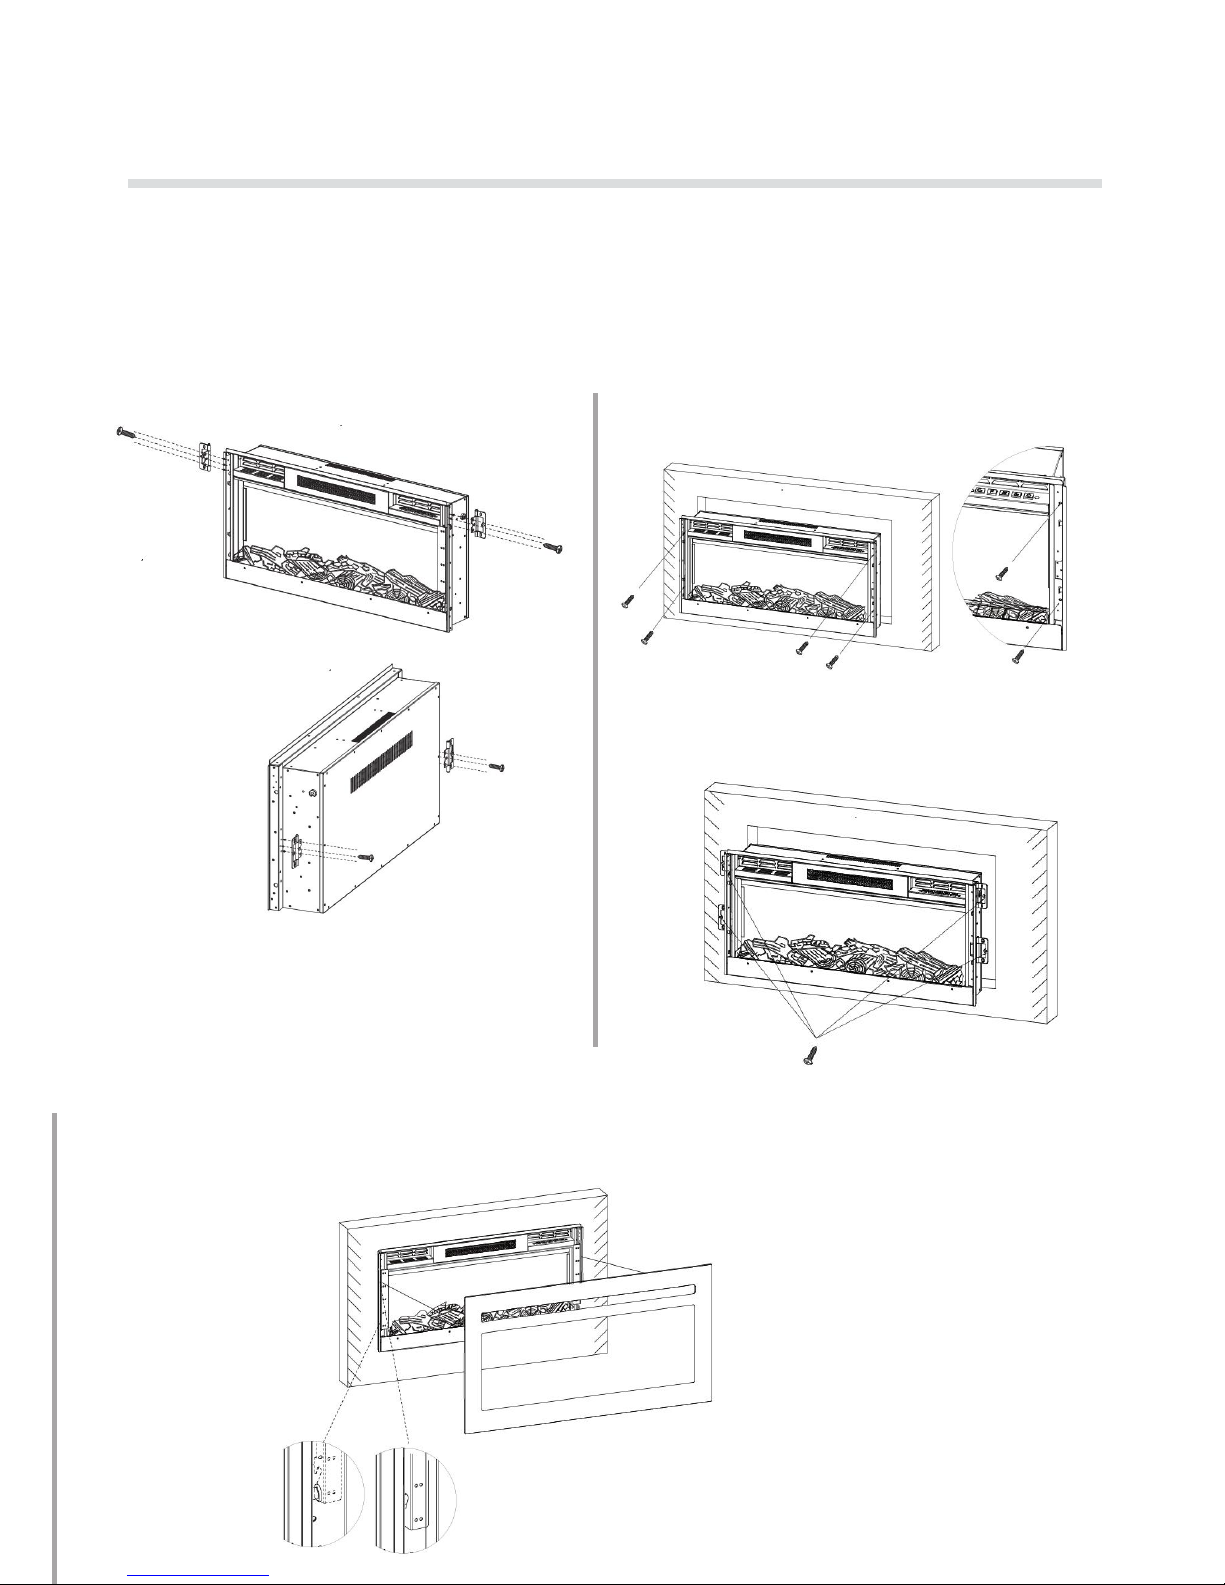
Installation:
Please assemble on soft and clean surface to prevent damage or scratch.
1 Fastening the Hinges
Fasten the mounting hinges with 4pcs of 4x8mm screws
2 Installing the Fireplace
Secure the fireplace to the wall using Anchor Screws 6x25mm
Secure the hinges with Anchor Screws 6x25mm
3 Hanging the Front Frame
Hang the Front Frame on the fireplace and gently push on the lower part of the frame
Until it snaps into place
Page 6
68/
Rev 0 3 10./
OPERATING INSTRUCTION
Read all instructions and warning prior to operating the appliance.Ensure that all controls
areinthe
“OFF”
position before plugging the appliance in to a properly grounded electrical outlet.
Flame and heater can be presenting separately or at the same time.
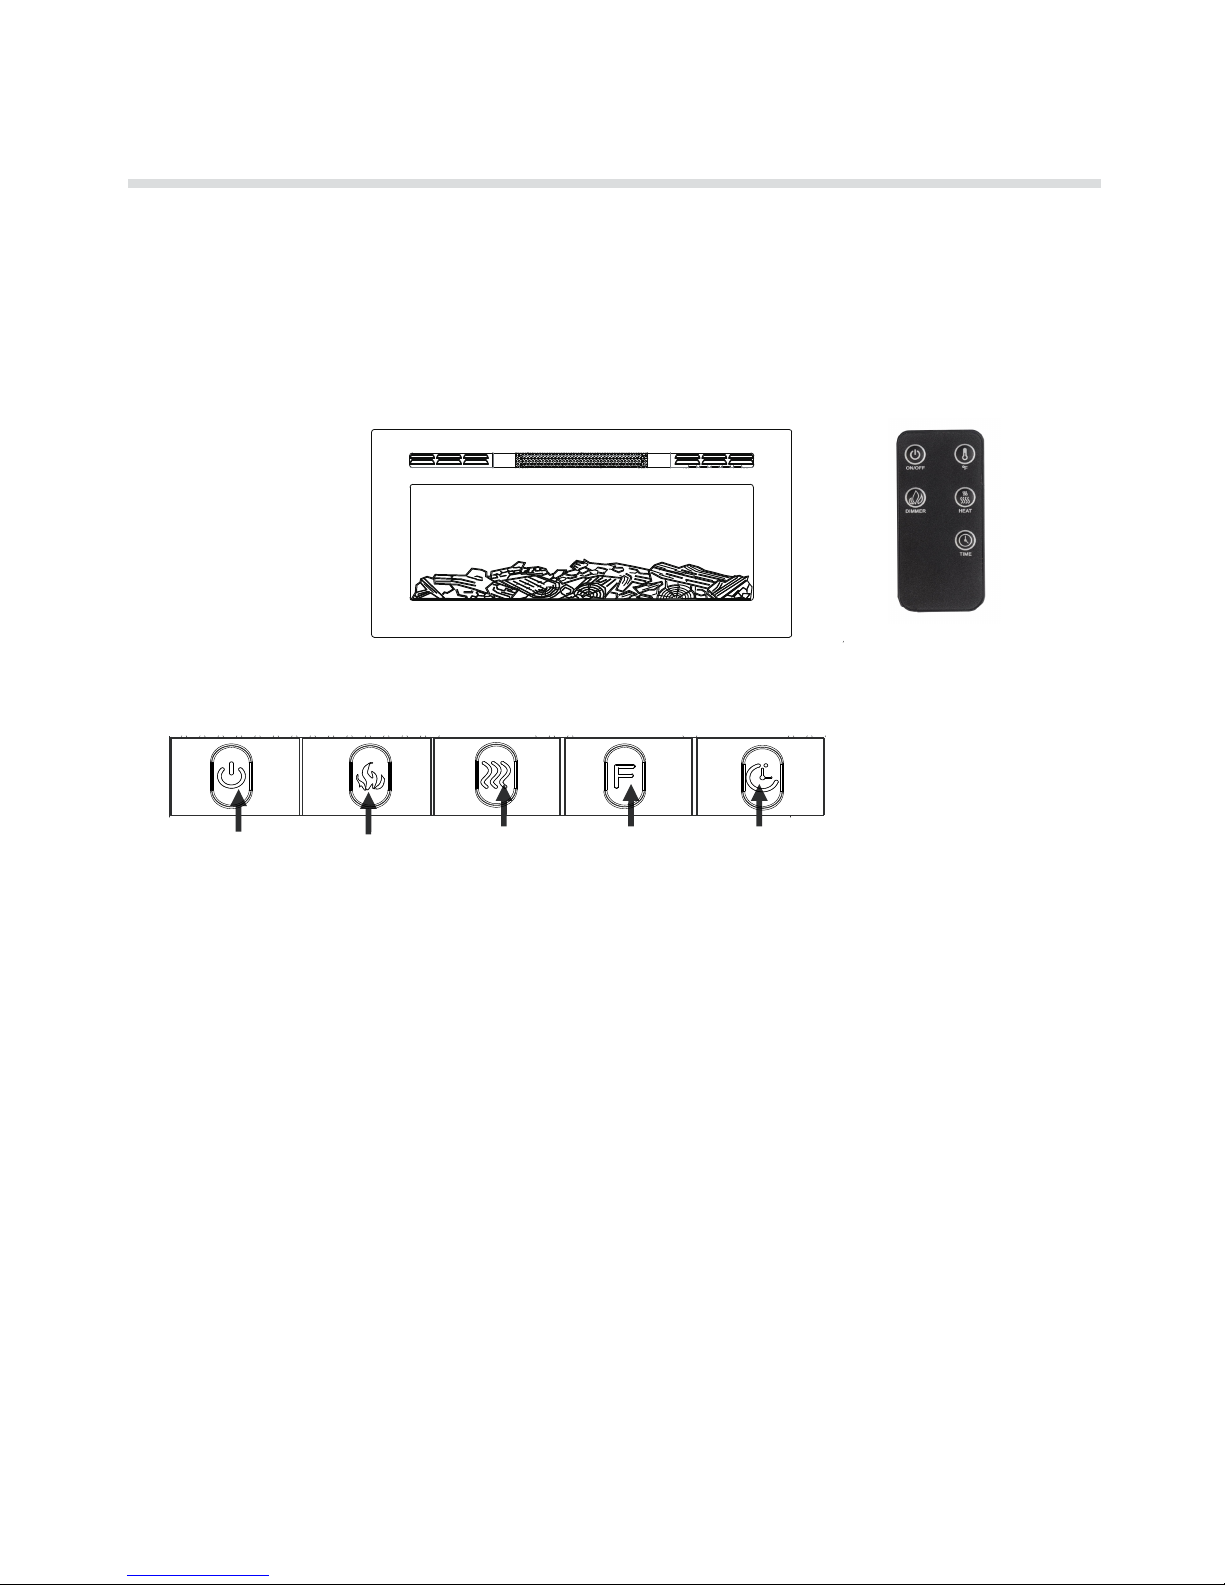
TheFireplacecontrolfunctionscanbeaccessedintwoways :
1 Using the touchpad control panel located on the upper right hand of the fireplace Figure 4.,-()
2 Using the multi function remote control Figure 5 functions same as control panel.- (),
Using the Control Panel
Temperature
Flame
Heat
Timmer
ON//\ OFF
Figure 4
Figure 6
Figure 5
/
A B C D E
e
Power(Figure6.A):
PressthePOWERbutton toturn onthe unit. Pressagaintoturnofftheunit. As longastheunitis poweredon,
the log-set will be alightand all functions areaccessable.
Flamebutton(Figure 6.B):
Flamebuttoncontrols thebrightness of flame effectfromthehighest tolowest setting. Thereare 5levels of the
famebrightness.
Heater(Figure6.C):
Pressonceto activethe lowHeat setting (L), press the button a secondtime toactivate theHigh heat setting(
H).
Anda third timeto activatethe“Auto”function.
Temperature(Figure6.D):
Thehighest temperatureof thermostat is 82F°and thelowestis 62F°.Once the HEATER isactivated, the display
screenwill display the heatersettingin use. Youmayturn off the HEATERusingthis button as well.
Timer (Figure6.E)
Pressonceto activatetheTIMER. Use the TIMER tohavetheunitturn off automaticallyafter1Hupto 8 hours.
Thedisplayscreen will displaythe settingshortly.
Page 7

78/
Rev 0 3 10./
CARE AND MAINTENANCE
WARNING:
Before attempting to perform any maintenance on this unit turn all controls to,
the position and unplug A.""OFF
llow the unit to be for at""OFF
least 10 minutes before any
maintenance applied in order to allow all components to cool down properly.
Cleaning:
1 To remove dust fingerprints or other marks from glass window use clean damp cloth Do not., , .
spray glass cleaner or other liquids directly onto the glass.
2 Clean metal surfaces with a clean damp cloth making sure not to push dust or debris into any.
air intake or exhaust vents.
3 Do not use abrasive cleaners or spray liquids on any part of the appliance. .
4 Periodic cleaning vacuuming of the fan heater unit is strongly recommended to ensure that no./ /
dirt or foreign objects build up.
Replacing Remote Control Battery
If the remote controls stops functioning or operate poorly the battery should be replaced with new,
one model CR2025(# ).
1 The battery compartment can be found on the back side of the remote control. .
2 Press and slide the battery door to open and remove the old battery..
3 Insert a new CR2025 coin battery making sure that the polarity a atches properly as.,"+" "-"nd
illustration showing.
4 Close the battery door..
LED Bul
bReplacement
Note: Theflame effecton this electricfireplace is createdby LED Bulbs.
Thelife ofthese LEDbulbs willbe 100,000hours. The usersarenot recommendedto
replace the LED Bulbs. For any reasonshouldthebulbs stop workingproperly,contacta
qualifiedtechnician.
Warning:
Like with any remote control unit, the remote control unit included with your
fireplace may unwantedly affect or control other electric products such as TVs.
If this occurs, you can change the encryption on your fireplace remote so that it
will not affect other products. To change the settings on your fireplace remote,
hold down the Timer button on the fireplace remote for 3 seconds. To test, use
your fireplace remote and see if your other products are still affected. If so, you
may change your fireplace remote to a third encryption by again holding down
the Timer button on the remote for 3 seconds. To test this third encryption
setting, use your fireplace remote and see if your other products are still
affected. To get back to the original encryption setting, hold down the Timer
button on the fireplace remote for 3 seconds.
Page 8
88/
Rev 0 3 10./
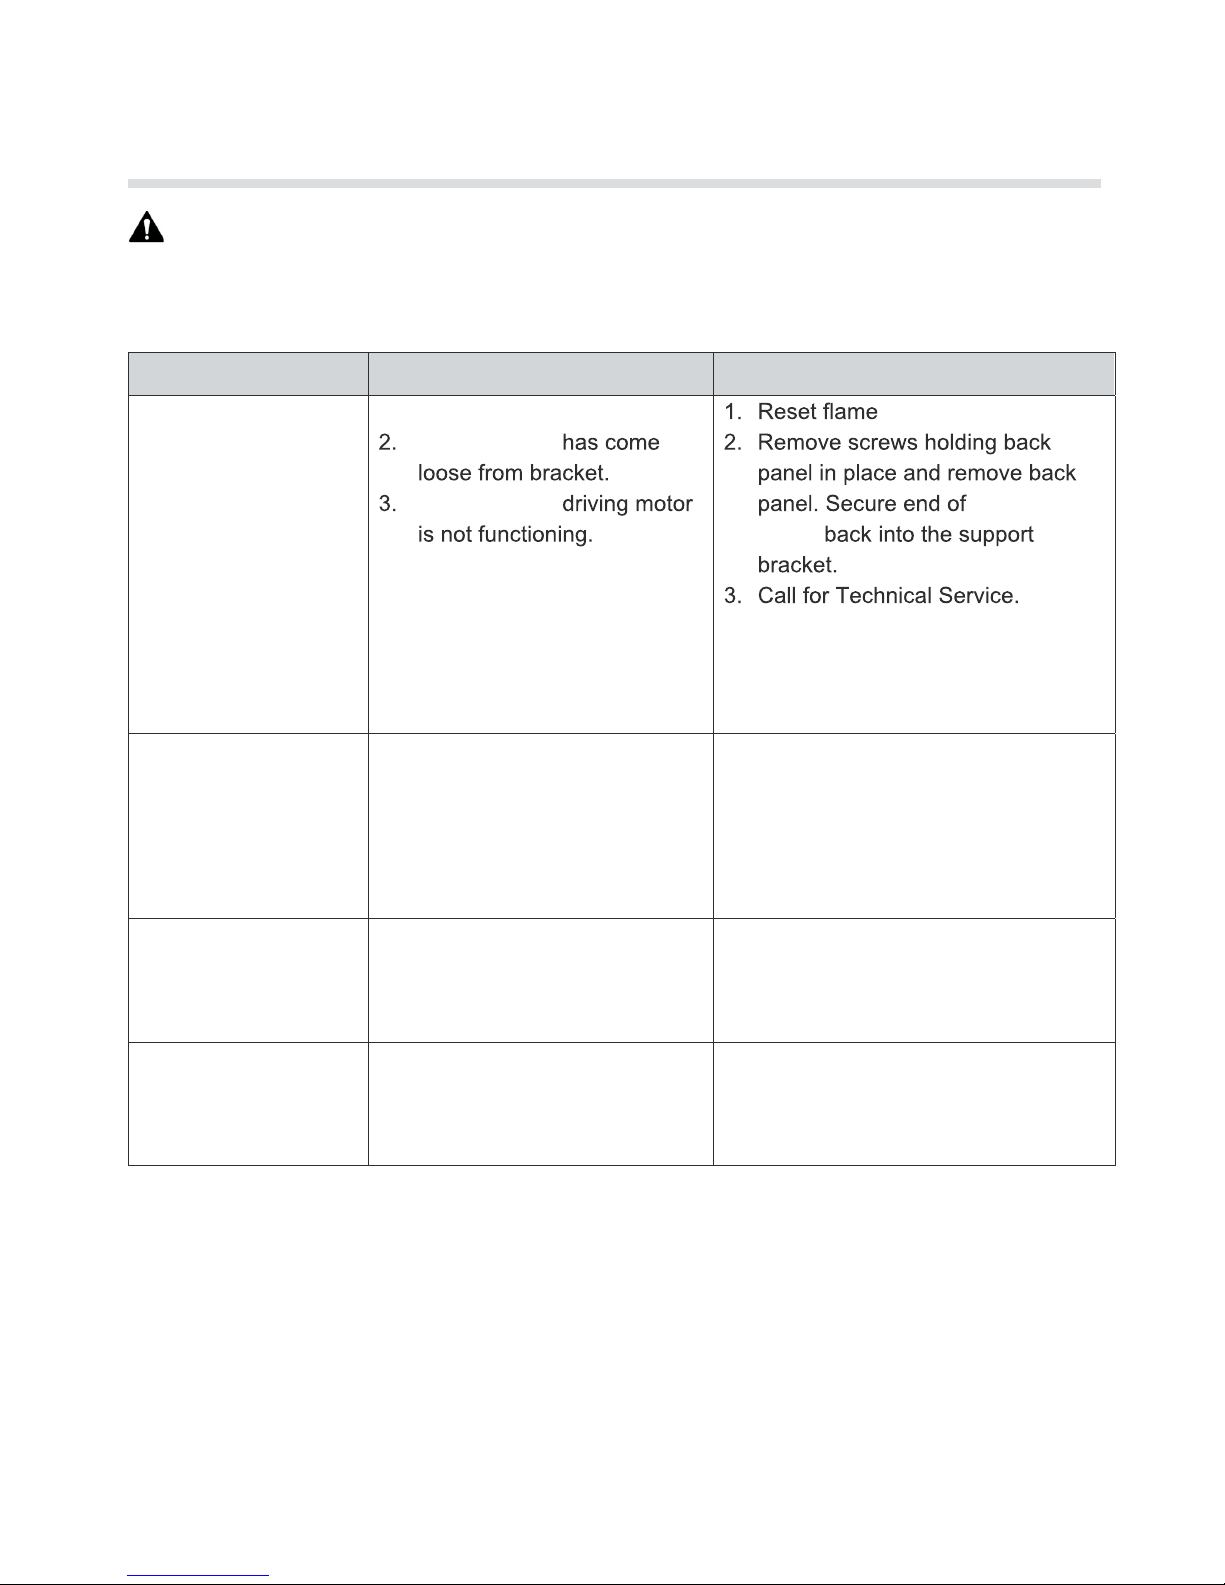
Trouble Shooting
WARNING:
Turn off the unit unplug and allow the unit to cool for at least 10 minutes before,
attempting to perform any service Only a qualified professional should attempt to service or repair.
the unit.
PROBLEM POSSIBLE CAUSE SOLUTION
Simulated flame is
dim or not presenting
The appliance turns
off and will not turn
back on
1 The overheat protection.
device in the appliance has
been triggered.
2 House circuit breaker has.
been tripped.
1 Turn off and unplug the.
appliance allow the insert to,
cool down for at least 10
minutes then plug in and,
restart.
2 Reset house circuit breaker..
The appliance does
not turn on when the
appliance setup to be
1 The overheat protection.
device in the appliance has
been triggered.
1 Turn off and unplug the.
appliance allow the insert to,
cool down for at least 10
minutes then plug in and restart,.
Remote Control does
not work
1 Low batteries..
2 Turn on the unit by control.
panel manually before using
remote control
1 Replacing with new battery.
2 Turn on the unit by control panel.
manually before using remote
control
flame
wand
“Flame wand”
3. Flame setting incorrect
“Flame wand”
“ON”
4. LED light burn out"
4.Call for technical service
 Loading...