

Page 1

Getting the Variable Rate files to the BlackBox
PWdoc0007 rev.2.3
1) Plug the memory device supplied with
your unit into your PC.
2) Log on to your WebTrack account and go
to your Start Page. Under the Files section
check to see if you have received the files
from the soil mapping company.
3) If the files are present, open the WebSync
tool on the PC (Found under - Windows Start
> Programs > Patchwork Technology).
Left mouse click Configure, ensure your
WebTrack Username is in the box and left
mouse click on OK.
Left mouse click on Sync and WebSync will
automatically transfer the files from
WebTrack to the memory device.
4) Once the Sync is complete, eject the
memory device from your personal computer
and insert it back into the BlackBox unit.
If you do not have a WebTrack account, insert the memory device into the
PC and copy the files sent by the soil mapping company into the relevant
folder on the memory device.
VRT and Auto Shut Off
Quick Start Guide
Page 2
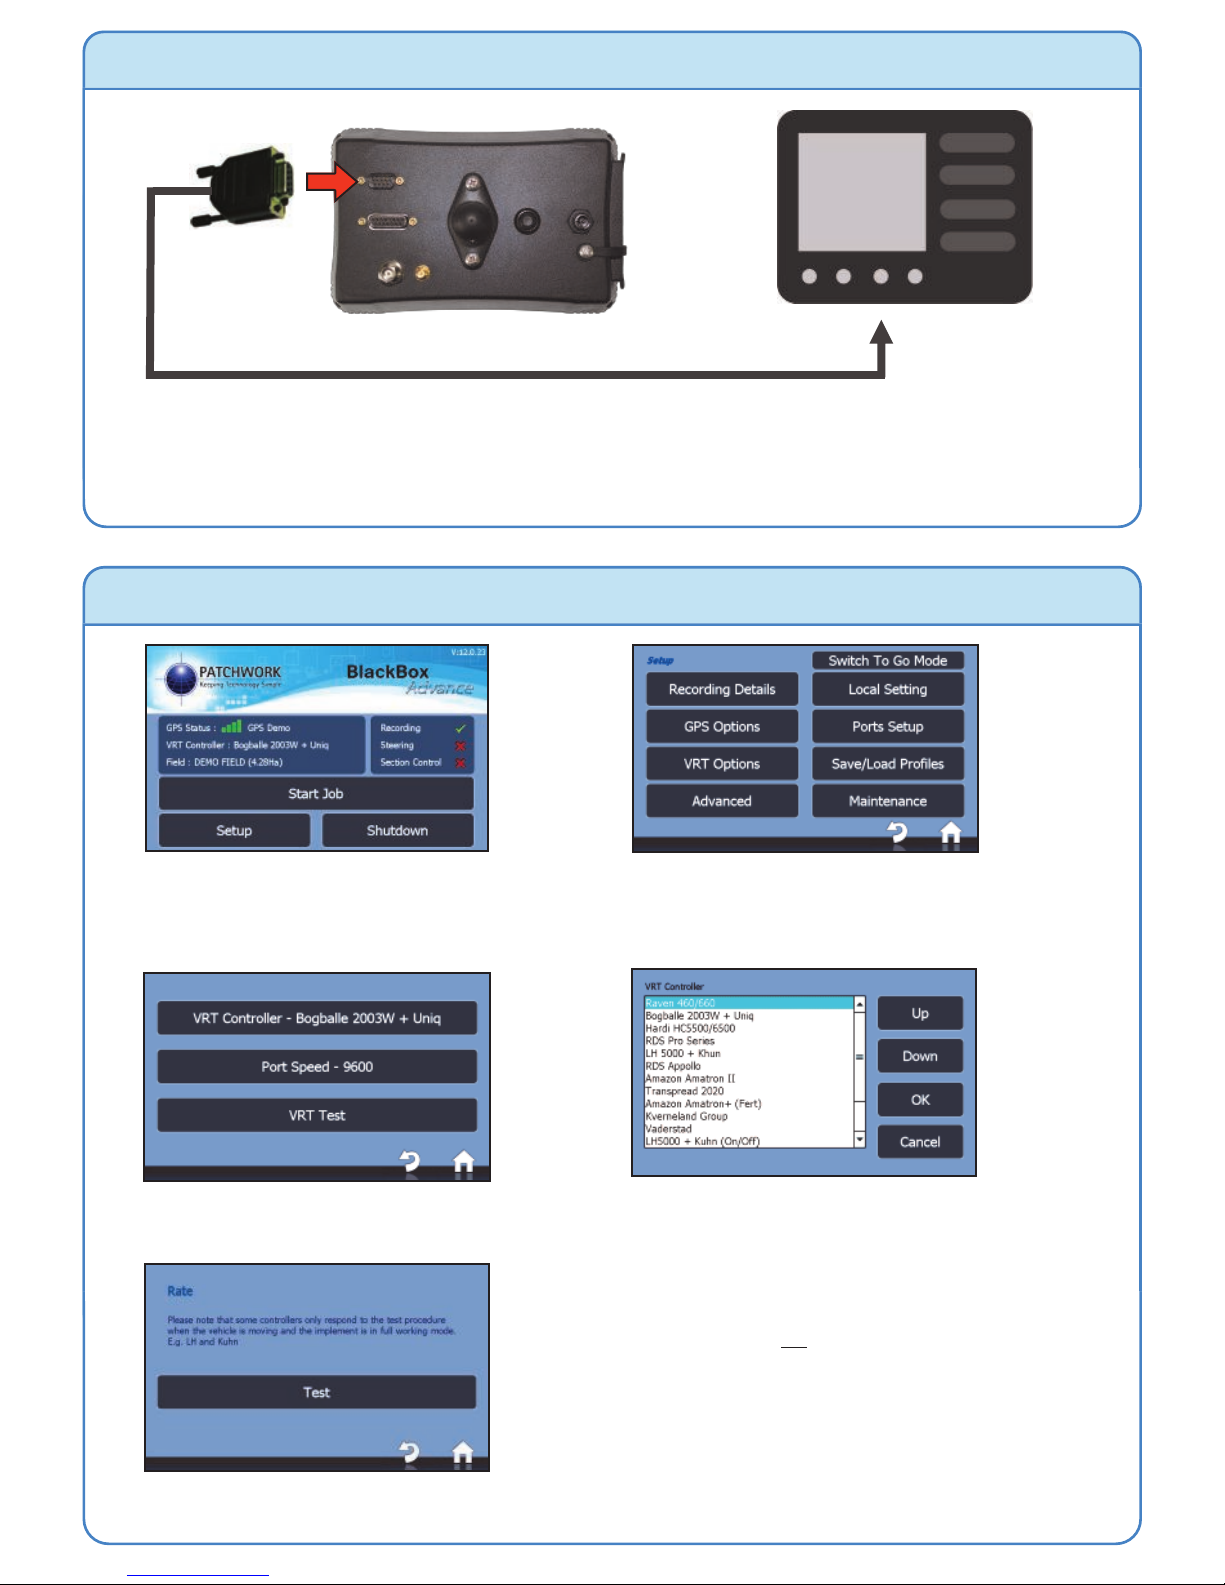
Connecting the Cable
Setup - Variable Rate
1) Once the cable(s) are connected,
power up the BlackBox (not the spreader
controller) and press Setup.
2) Press VRT Options.
3) Press VRT Controller.
4) Select Controller and press OK.
To serial port
on controller
Supplied Cable
5) Press VRT Test, then power up the spreader controller
and put the spreader into full working mode (It is advised
that the test is done with no product in the spreader).
When ready press Test, then check that the rates are
changing on the BlackBox and Controller (may not be in
sync due to delay). If unsuccessful, power down both
units, check all connections and follow from step 1.
If successful press Home.
Page 3

Setup - Auto Shut Off (Needs to be Unlocked)
1) From the home screen
press Setup, then Advanced.
2) Press Implement Control.
3) Press Section Control
and then Enable.
5) Select ‘Spreader Autoshutoff’ and
press OK.
6) Ensure the correct Width is
entered.
7) Press Prefs, Percentage Overlap and
enter amount required. Press Home.
For Auto Shut Off to work the steps under ‘Setup - VRT’ need to be followed.
Important - It is vital that the Auto Shut Off feature is checked in the field to ensure that
it is shutting off at the correct times when entering and leaving the worked area. In most
cases this is a two person check, one to operate the equipment and the other to observe
when the equipment is shutting off.
Adjust the ‘Percentage Overlap’ and/or ‘Antenna Offset’ (Setup > GPS Options) to
achieve the correct shut off placement.
When starting a job with
Auto Shut Off enabled a
disclaimer needs to be
agreed to use the feature
and for non VRT jobs a rate
can be entered.
4) Select Section Control System,
select ‘Fert Spreader’ and press OK.
Page 4

Starting a Job - Variable Rate
Follow ‘Starting a Job’ in the Quick Start Guide if using Auto Shut Off without a Variable rate plan.
1) Press Start Job
5) Enter the working Width, select Guidance
Mode and press Confirm. Opens Job screen.
3) If the file type is ‘BBA’ or ‘XML’ select Farm, Field, Plan or if using ‘SHP’, press Switch
to Shapefile, then select Shape File, plan Column and Confirm.
4) Check/edit recording details and
Confirm
2) Select Variable Rate Plan.
OR
In the Job Screen
PWdoc0036 v1.3
Follow ‘Setting and Using a Guidance Line’ in the Quick Start Guide for instructions on setting a
guidance line.
Variable Rate Plan overview
Purge - Overrides the Auto shut Off (if
enabled) feature for 5 seconds.
Purge Settings - Opens new screen
Current application rate
-Adjust application rate
-As ‘Purge’ button
-Auto Shut Off on/off
-Return to job
 Loading...