

Page 1
Quick Start Guide
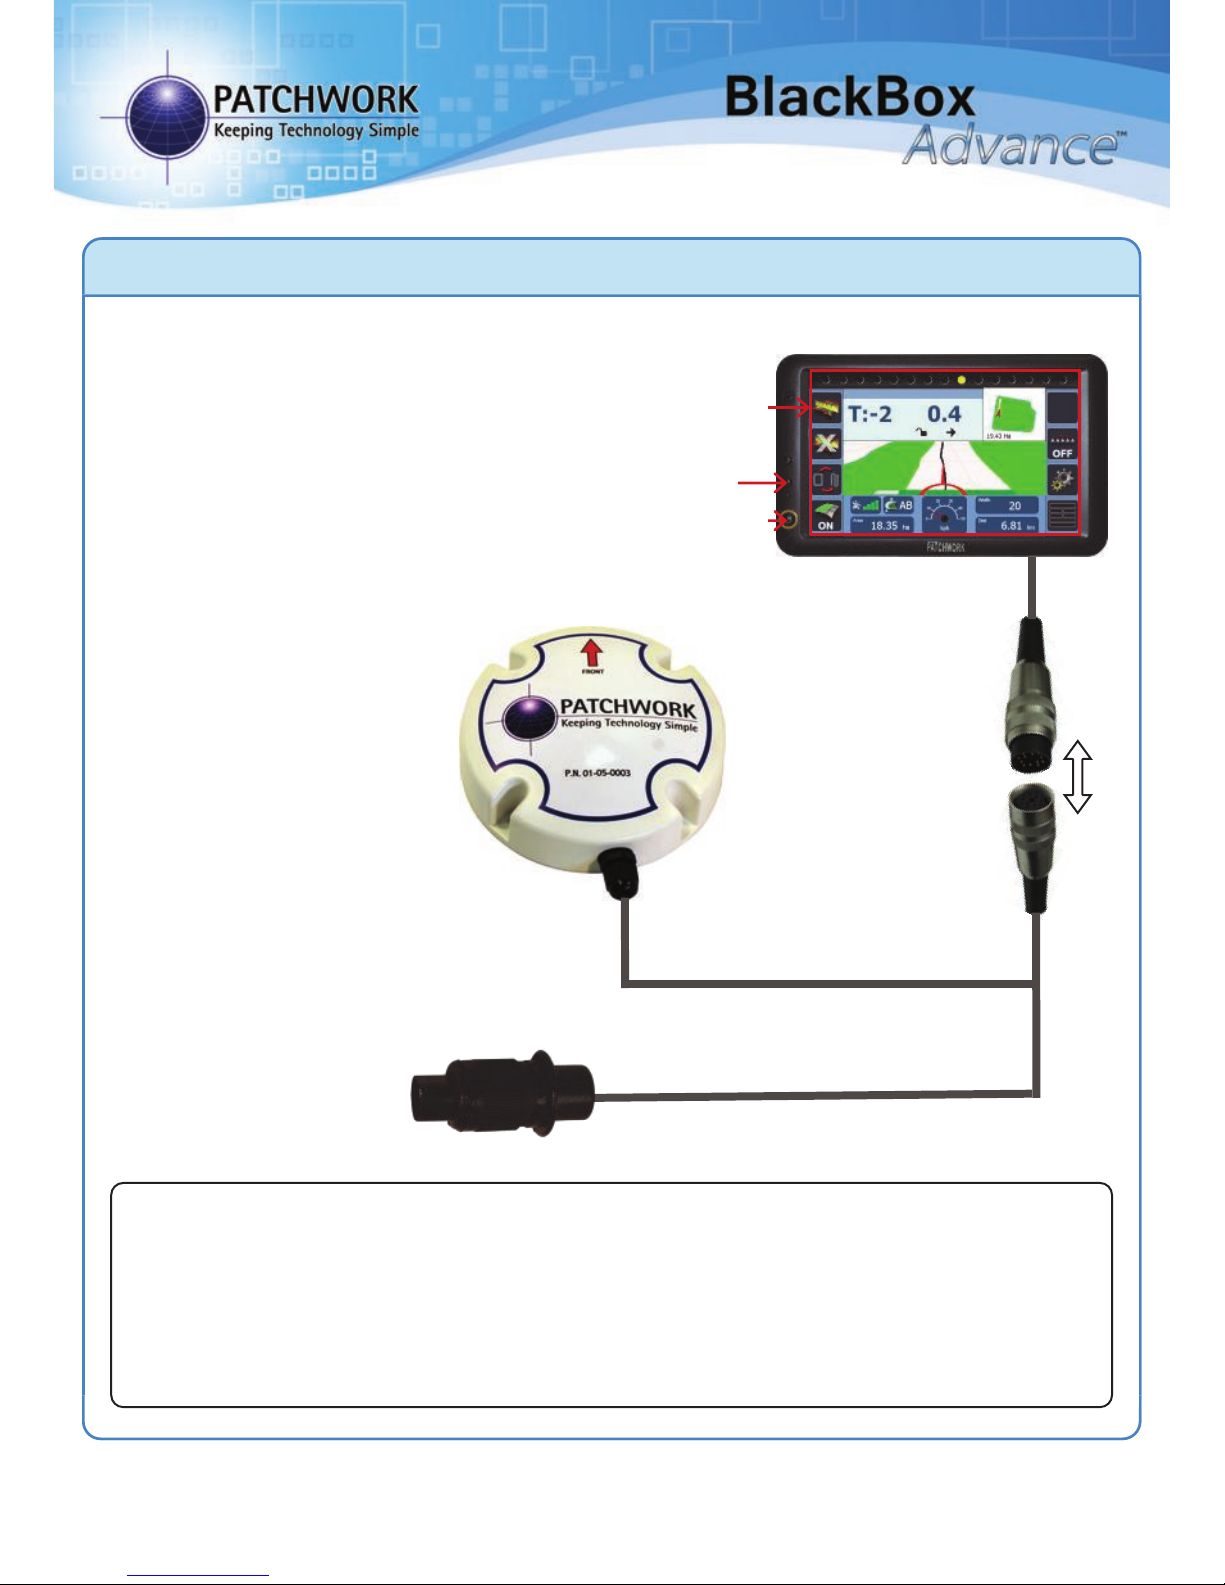
Installing the Unit
Guidance Screen
Mount to the windscreen using suction
mount and ram arm, or unscrew the
ball from the suction mount and use
this for a permanent fixture.
Warning – Please disconnect the unit from the power
supply, if you need to jump start your vehicle.
PWdoc0007 rev.2.3
12v DC Plug
Plug into 3 pin socket
on vehicle. (If hard
wiring do not remove
the fuse).
Magnetic Receiver
Install on the roof of the
vehicle with arrow
pointing to the front (if
the roof is not metal use
the roof mount plate
supplied).
Warranty Void if suction mount fails !! - Its is advised that the suction mount
is removed from the windscreen when the unit is not in operation and reattached on a day to day basis.
For a more permanent fixing please detach the ram ball from the suction mount
and secure down in the vehicle.
Brightness
Power On/Off
Touch Screen
Page 2
Setup
When launching the BlackBox for the first time the ‘Setup Wizard’ will run through
the essential settings ready for guidance and area measurement.
Navigation Bar
N.B. The wizard can be re-accessed via Setup > Save/Load Profile > Run Initial
Setup Wizard.
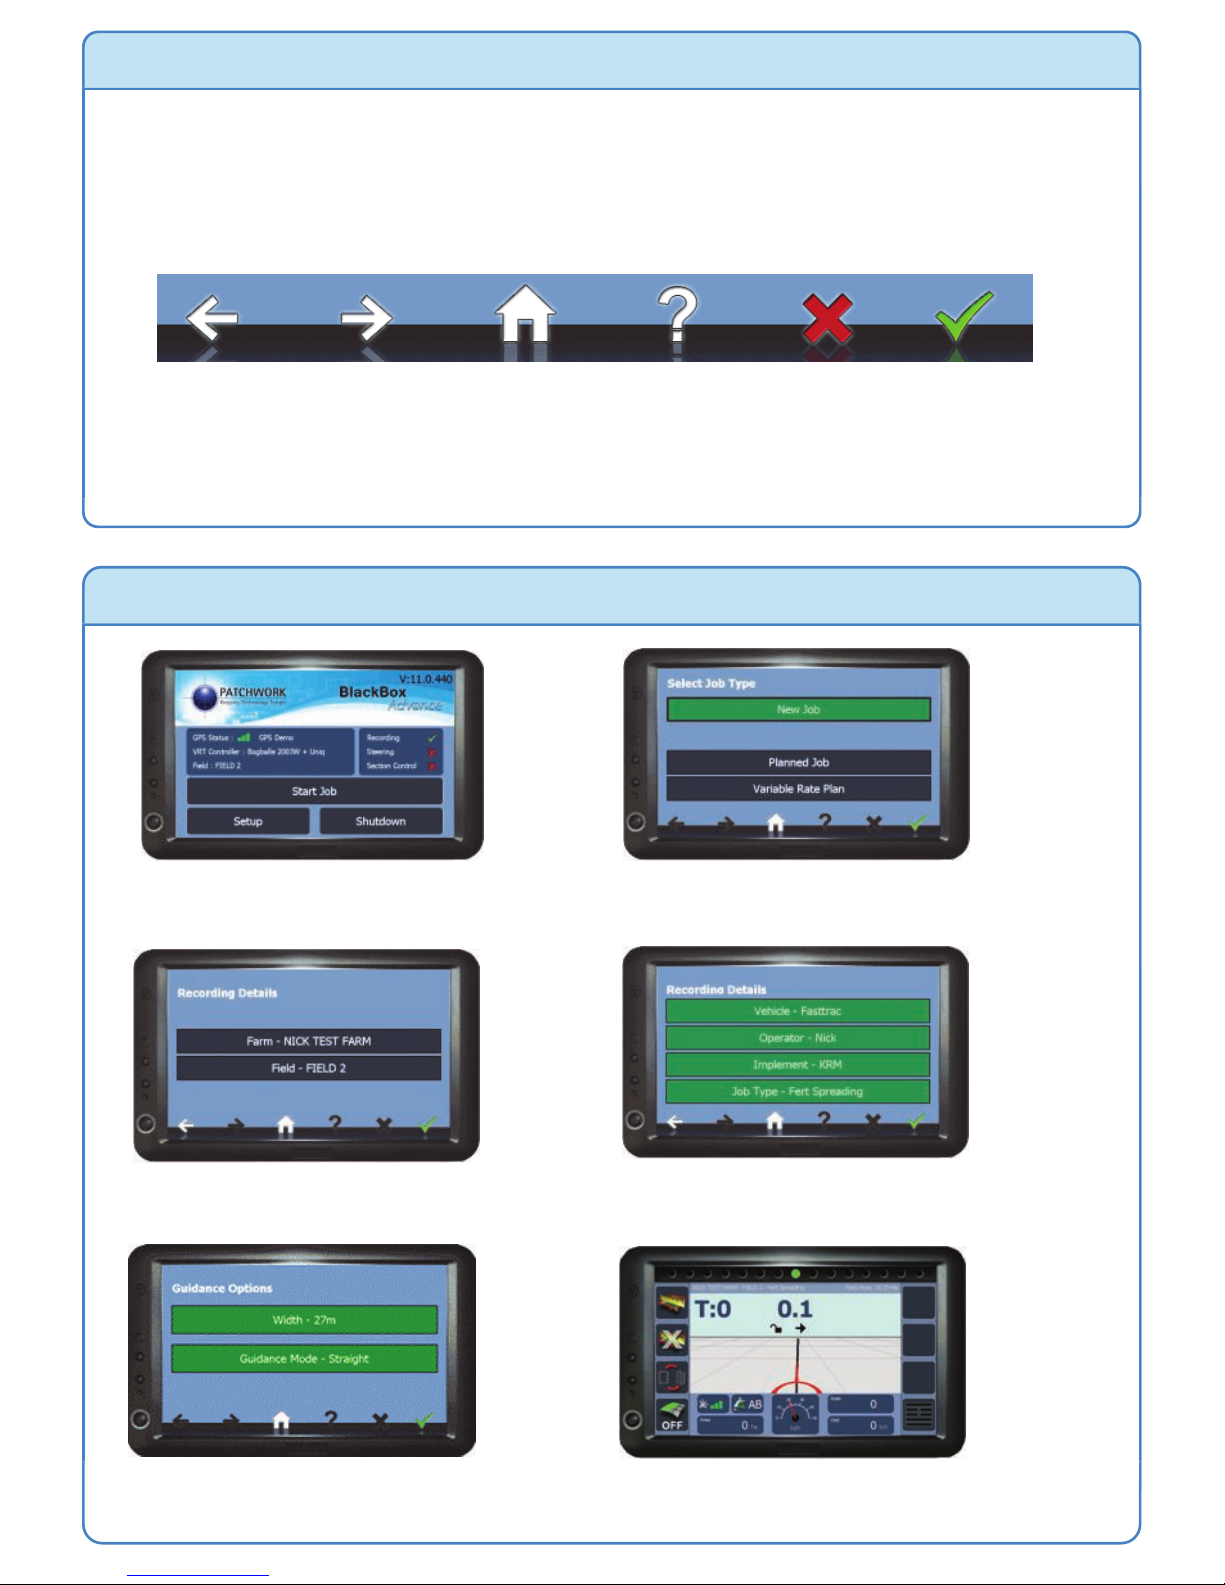
Starting a Job
Previous Next Home Information
Cancel Confirm
1) Press Start Job
5) Enter the working Width, select the
Guidance Mode and press Confirm.
2) Select New Job and Confirm. If
Recording = NO the unit will go to step 5.
3) Enter Farm/Field and Confirm
4) Check/edit recording details and
Confirm
6) Guidance screen opens ready to
begin job.
Page 3

Guidance Screen
Measuring the Area of a Field
1) After starting a new job, position your vehicle at the edge of the field and press the
Start/Pause Boundary.
2) Change the settings as required:-
Boundary Type – set to Boundary.
Offset – the distance that the antenna
is from the field edge.
Direction – Where the edge of the field is
when you are facing forward.
3) Press Start and drive around the field edge until the start point is reached. The
BlackBox will automatically close and save the boundary map, displaying the field
shape and area size in the mini map. If the boundary doesn’t close, press the Close
Boundary button.
N.B. During the boundary run the boundary recording can be paused and restarted
using the Start/Pause Boundary button, if there is a need to drive around obstacles.
To do a new boundary map redo steps 1) to 3).
Start/Pause
Boundary
Close
Boundary
Guidance
Toggle
Recording
On/Off
Menu
Information Panel
GPS Strength
Coverage Area
Guidance Status Speed (Toggle Speedometer / Digital)
Distance Travelled
*Purge
Settings
*Purge
On/Off
Current Rate/Width
*Only available
when using
section control
Page 4

Setting and Using a Guidance Line
Finishing a Job
To complete a field boundary map or guidance job to start a new one, press the Menu
button and then Finished Job. This returns to the BlackBox menu screen where a
new job can be started by pressing Start Job.
To power off the BlackBox press Shutdown, then press Yes and disconnect from
power supply.
1) Position the vehicle in the field where the job will begin. (When using a curved
line it is important to use the longer edge of the field to set a guide line).
2) At the beginning of a straight run press
the Grid area to set point A.
3) Drive to the end of the run and press
the Grid area to set B. The guidance line
will appear ready for guidance.
4) If working the headland pass, continue
around then line up to the set AB line and
use the guidance to work the inner areas of
the field.
5) When turning in the headland the next
AB line will appear.
Grid
area
Grid
area
N.B. The green coverage recording can be turned off and on using the ‘Recording
On/Off’ button or selected method.
PWdoc0035 v1.0
Pressing the Grid area a third time allows the guidance line to be reset and also if
using the ‘Straight’ guidance mode, recalibrated to align with current location.
 Loading...