

Page 1
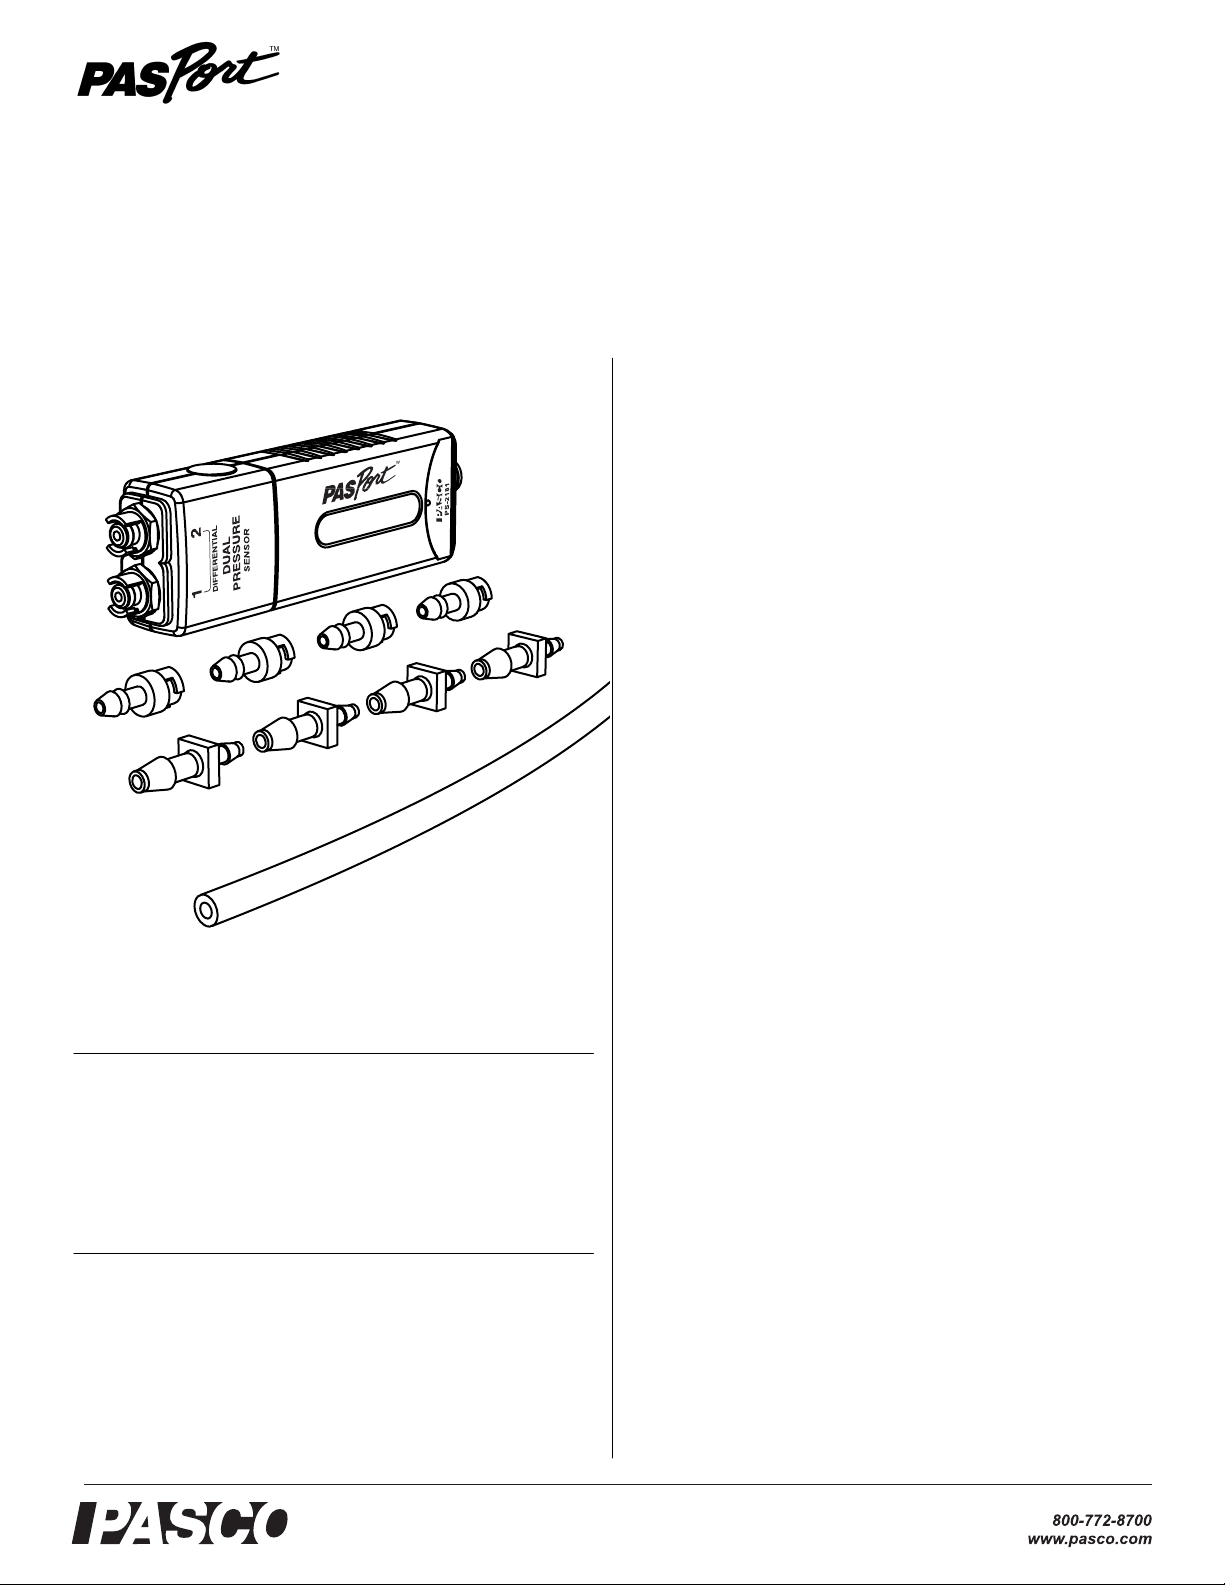
Dual Pressure Sensor
PS-2181
Quick Start
1. Connect the Dual Pressure Sensor to your PASPORT inter-
face.
2. If you are using a computer, connect the PASPORT interface
to it and start DataStudio.
3. Use the included tubing and quick-release connectors to con-
nect a device to one or both or the sensor’s pressure ports.
Instruction Sheet
012-09969A
Included Equipment Part Number
Dual Pressure Sensor
Quick-release Connectors (4 pieces)
Tubing Connectors (4 pieces)
Polyurethane Tubing (length 2.4 m)
Required Equipment
PASPORT Interface
PS-2181
640-021
640-030
640-023
See PASCO catalog
or www.pasco.com
4. Press or click the start button to begin recording data.
Introduction
The Dual Pressure Sensor is capable of reading up to two absolute pressures, one differential pressure, or one gauge pressure.
Dynamic variable over-sampling automatically reduces measurement noise at low sampling rates. Sample rates up to 1000 Hz
make studies of both transient and steady-state pressure possible.
The sensor measures pressure in units of kPa, N/m
per square inch (psi).
2
, and pounds
Setup
Types of Pressure Measurements
To measure pressure in an apparatus, connect one or both of the
pressure ports using the included tubing and connectors. The way
that you connect the Dual Pressure Sensor depends on whether
you will measure absolute pressure, differential pressure, or
gauge pressure.
Absolute Pressure The sensor can measure up to two absolute pressures simultaneously. One connection is required for
each measurement, and either of the pressure ports may be used.
Differential Pressure The sensor measures differential pressure by determining the pressure difference between ports 1
and 2. Differential Pressure is positive when the pressure in port
1 is higher than port 2. (See “DataStudio Setup” on page 2 for
instructions on making this measurement available.)
®
Page 2
Dual Pressure Sensor PS-2181
Gauge Pressure Gauge pressure is a special case of differential pressure in which port 2 is left unconnected. The sensor
measures the pressure difference between port 1 (connected to
the apparatus) and port 2 (left open to the atmosphere).
Sensor Setup
measure. For more instructions on using DataStudio, press F1 to
open DataStudio’s on-line help.
Xplorer GLX Setup
If you are using an Xplorer GLX in standalone mode, press
to start data collection. By default, the GLX displays the absolute
pressure from port 1 (“Absolute Pressure 1”) in units of kPa, but
you can select the other absolute measurement or the differential
measurement for display. For more instructions on using the
Xplorer GLX, refer to the GLX Users’ Guide.
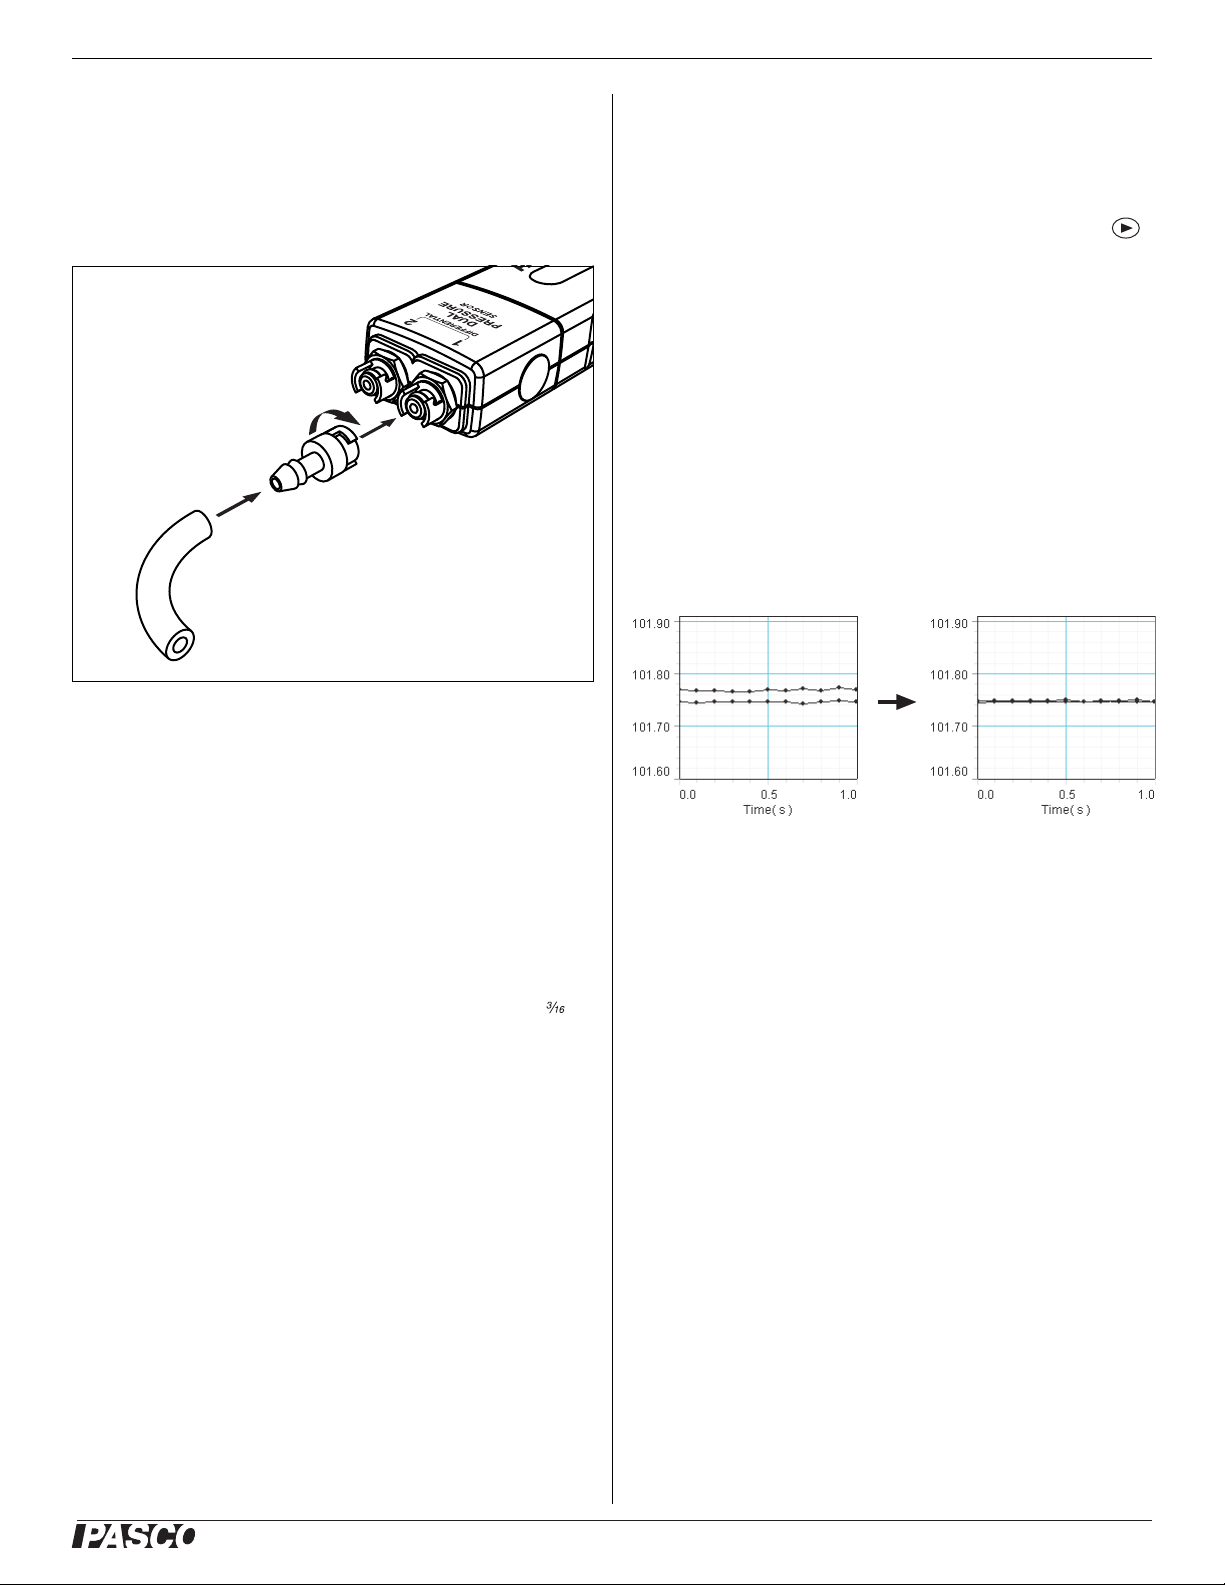
Multiple-measurement Alignment
When you are using both pressure ports, you may find that their
readings differ slightly when they are measuring the same thing.
In the example illustrated below, measurements from both ports
open to the atmosphere differ by about 0.02 kPa. The multiple-measurement alignment procedure adjusts the calibrations of
the measurements so they agree more closely.
1. Cut a piece (or pieces) of tubing to the desired length.
2. Insert a quick-release connector into each piece of tubing.
3. Connect each piece of tubing to the sensor by inserting the
quick-release connector into one of the pressure ports and
twisting clockwise.
4. Connect the free ends of the tubing to the apparatus using
connectors supplied with the apparatus or the tubing connectors include with the Dual Pressure Sensor.
You can use the included tubing connectors to connect to a 5 mm (
inch) hole in a rubber stopper.
5. Connect the sensor to your PASPORT interface.
DataStudio Setup
If you are using a computer, connect the PASPORT interface to
the computer and start DataStudio. (Refer to the documentation
that came with your PASPORT interface for instructions on connecting it to your computer.) In DataStudio, click Star t to begin
data collection; click Stop to stop data collection.
By default, DataStudio displays the absolute pressures (in units
of kPa) measured by both ports in a Graph display. To make the
differential measurement available for display, click Setup to
open the Experiment Setup window; in that window, select the
1-2 Differential Pressure check box. There you can also change
the sampling rate (up to 1000 Hz) and select different units of
The procedure described here for DataStudio can also be performed on
the Xplorer GLX. See the Xplorer GLX Users’ Guide for detailed instructions.
1. Click Setup to open the Experiment Setup window. Click
Calibrate Sensors to open the calibration dialog box.
2. From the Sensor field, select the Dual Pressure Sensor.
(See screenshot on page 3.)
3. Select the Calibrate all similar measurements simulta-
neously check box.
4. From the Calibration Type menu, select 1 Point (Adjust
Offset Only).
5. Apply the same pressure to both ports (for instance by open-
ing them to the atmosphere).
6. Click the Read From Sensor button for Point 1.
7. Click OK to accept the new calibration.
®
2
Page 3

Dual Pressure Sensor PS-2181
Specifications
Select Dual Pressure Sensor
Select Calibrate all...
Select 1 Point (Adjust Offset Only)
Click Read From Sensor
Click OK
One-point and Two-point Calibrations
Range Absolute pressure: 0 to 200 kPa
Resolution 0.01 kPa at 10 Hz
Repeatability 1 kPa
Units of Measure kPa, N/m
Max. Sample Rate 1000 Hz
Included tubing Material: polyurethane
Differential pressure: −100 kPa to +100 kPa
2
, psi
Inside diameter: 3.2 mm ( inch)
Length: 2.4 m (8 feet)
Technical Support
For assistance with any PASCO product, contact PASCO at:
Address: PASCO scientific
10101 Foothills Blvd.
Roseville, CA 95747-7100
Phone: 916-786-3800 (worldwide)
800-772-8700 (U.S.)
Fax: (916) 786-7565
Web: www.pasco.com
Email: support@pasco.com
Though it is usually not necessary, a one-point or two-point calibration can be performed on any of the measurements to make
them more accurate. To do so, you must have a very accurate,
independent means of measuring pressure such as a barometer.
For step-by-step instructions refer to the documentation for
DataStudio, the Xplorer, or the Xplorer GLX.
Over-sampling
The Dual Pressure Sensor uses dynamic variable over-sampling
to reduce noise, produce smoother data, and improve the measurement resolution. This effect is especially noticeable when
very small pressure changes or differences are measured. The
degree of dynamic variable over-sampling that takes place within
the sensor depends on the sample rate. To maximize the
over-sampling, set the sample rate as low as possible for a given
application. Maximum over-sampling occurs at sample rates of
1 Hz or slower.
Limited Warranty For a description of the product warranty, see the
PASCO catalog.
Copyright The PASCO scientific 012-09969A
Instruction Sheet
granted to non-profit educational institutions for reproduction of any part of
this manual, providing the reproductions are used only in their laboratories
and classrooms, and are not sold for profit. Reproduction under any other
circumstances, without the written consent of PASCO scientific, is prohibited.
Trademarks PASCO, PASCO scientific, DataStudio, PASPORT, Xplorer,
and Xplorer GLX are trademarks or registered trademarks of PASCO scientific, in the United States and/or in other countries. All other brands,
products, or service names are or may be trademarks or service marks of,
and are used to identify, products or services of, their respective owners.
For more information visit www.pasco.com/legal.
is copyrighted with all rights reserved. Permission is
Dual Pressure Sensor
®
3
 Loading...