

Page 1
Instruction Manual
012-08867A
Temperature Array
PS-2157
1
4
3
2
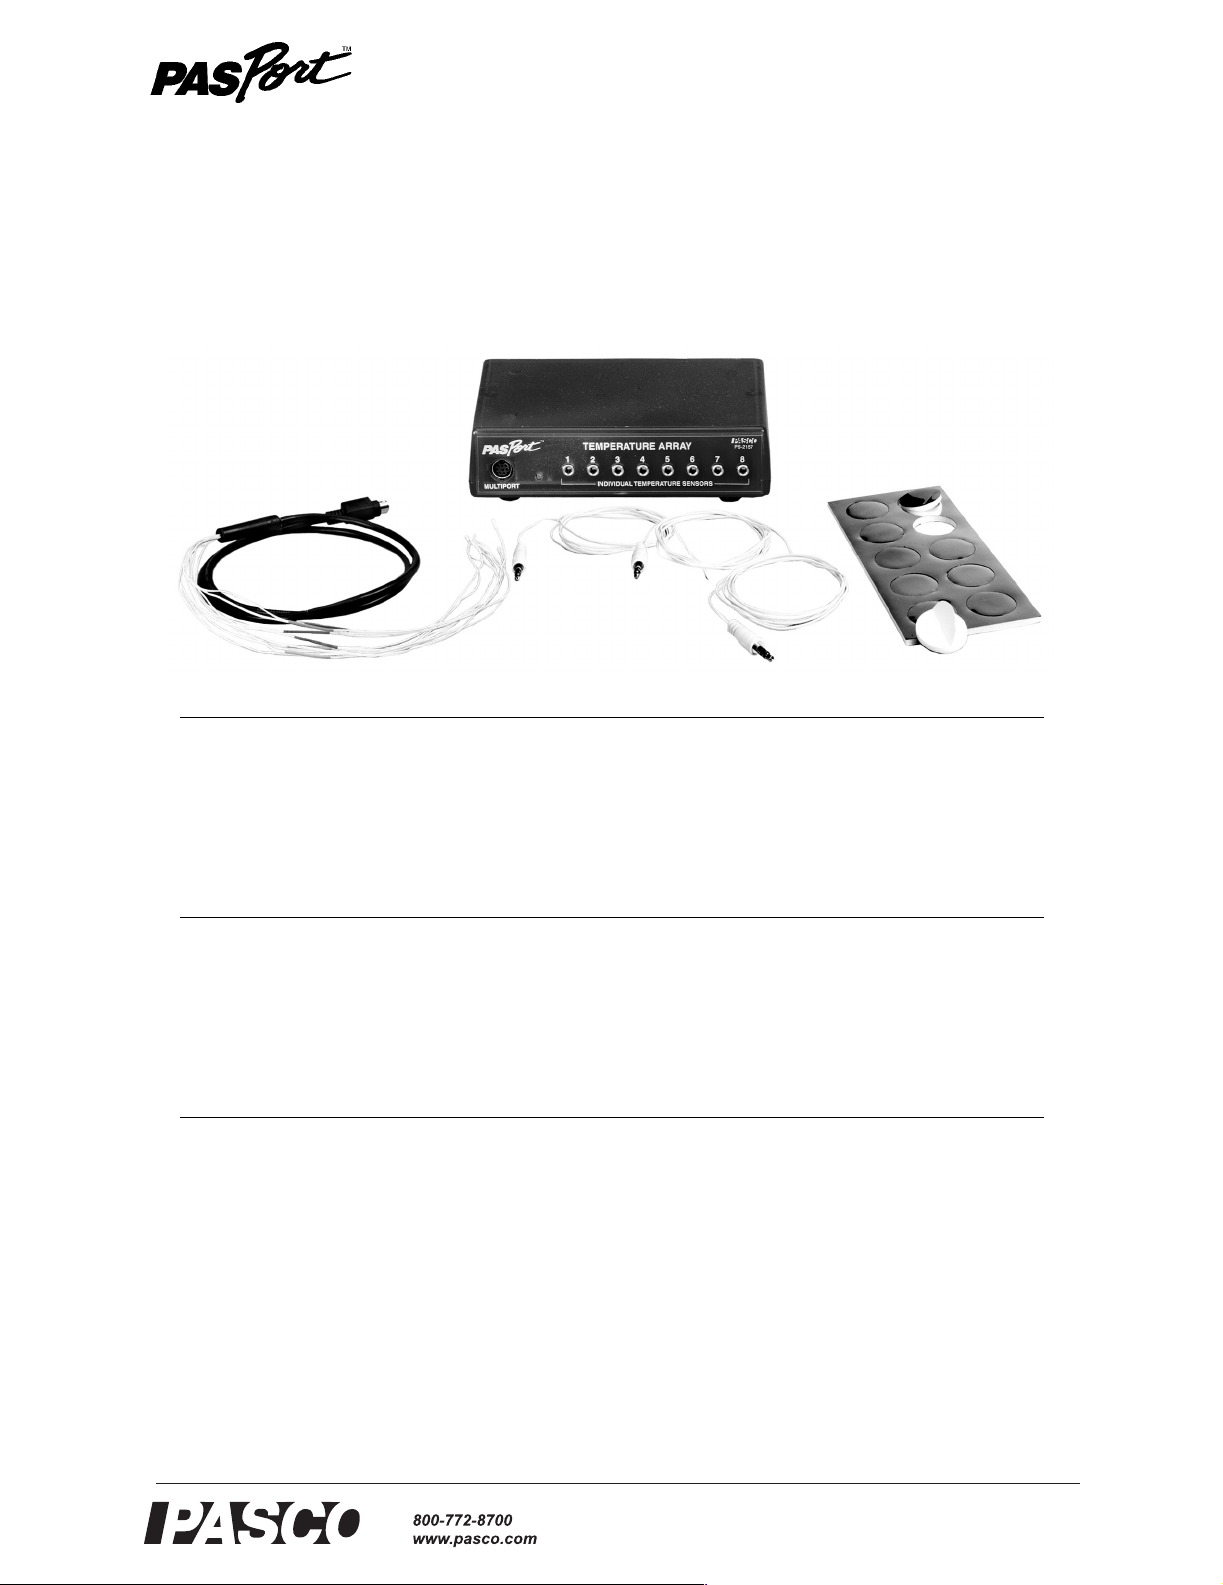
Included Equipment Part Number
1. Temperature Array
2. Eight-probe Bundle
3. Fast Response Temperature Probes (qty. 3)
4. Adhesive Patches (qty. 10)
PS-2157
514-09083
PS-2135 (3-pack)
PS-2525 (100-pack)
Compatible Temperature Probes
Fast-response Temperature Probes
Stainless Steel Temperature Probe
Skin/Surface Temperature Probe
10 kΩ thermistors embedded in other PASCO devices
PS-2135 (3-pack)
PS-2153
PS-2131
see PASCO catalog or www.pasco.com
Compatible PASPORT Interfaces
Xplorer GLX
Xplorer
Power Link
USB Link
PS-2002
PS-2000
PS-2001
PS-2100
Introduction
The PASPORT Temperature Array works with up to eight temperature probes and a PASPORT interface to collect multiple streams of temperature data at up to 200 samples per second per channel.
®
Page 2
Temperature Array Setup
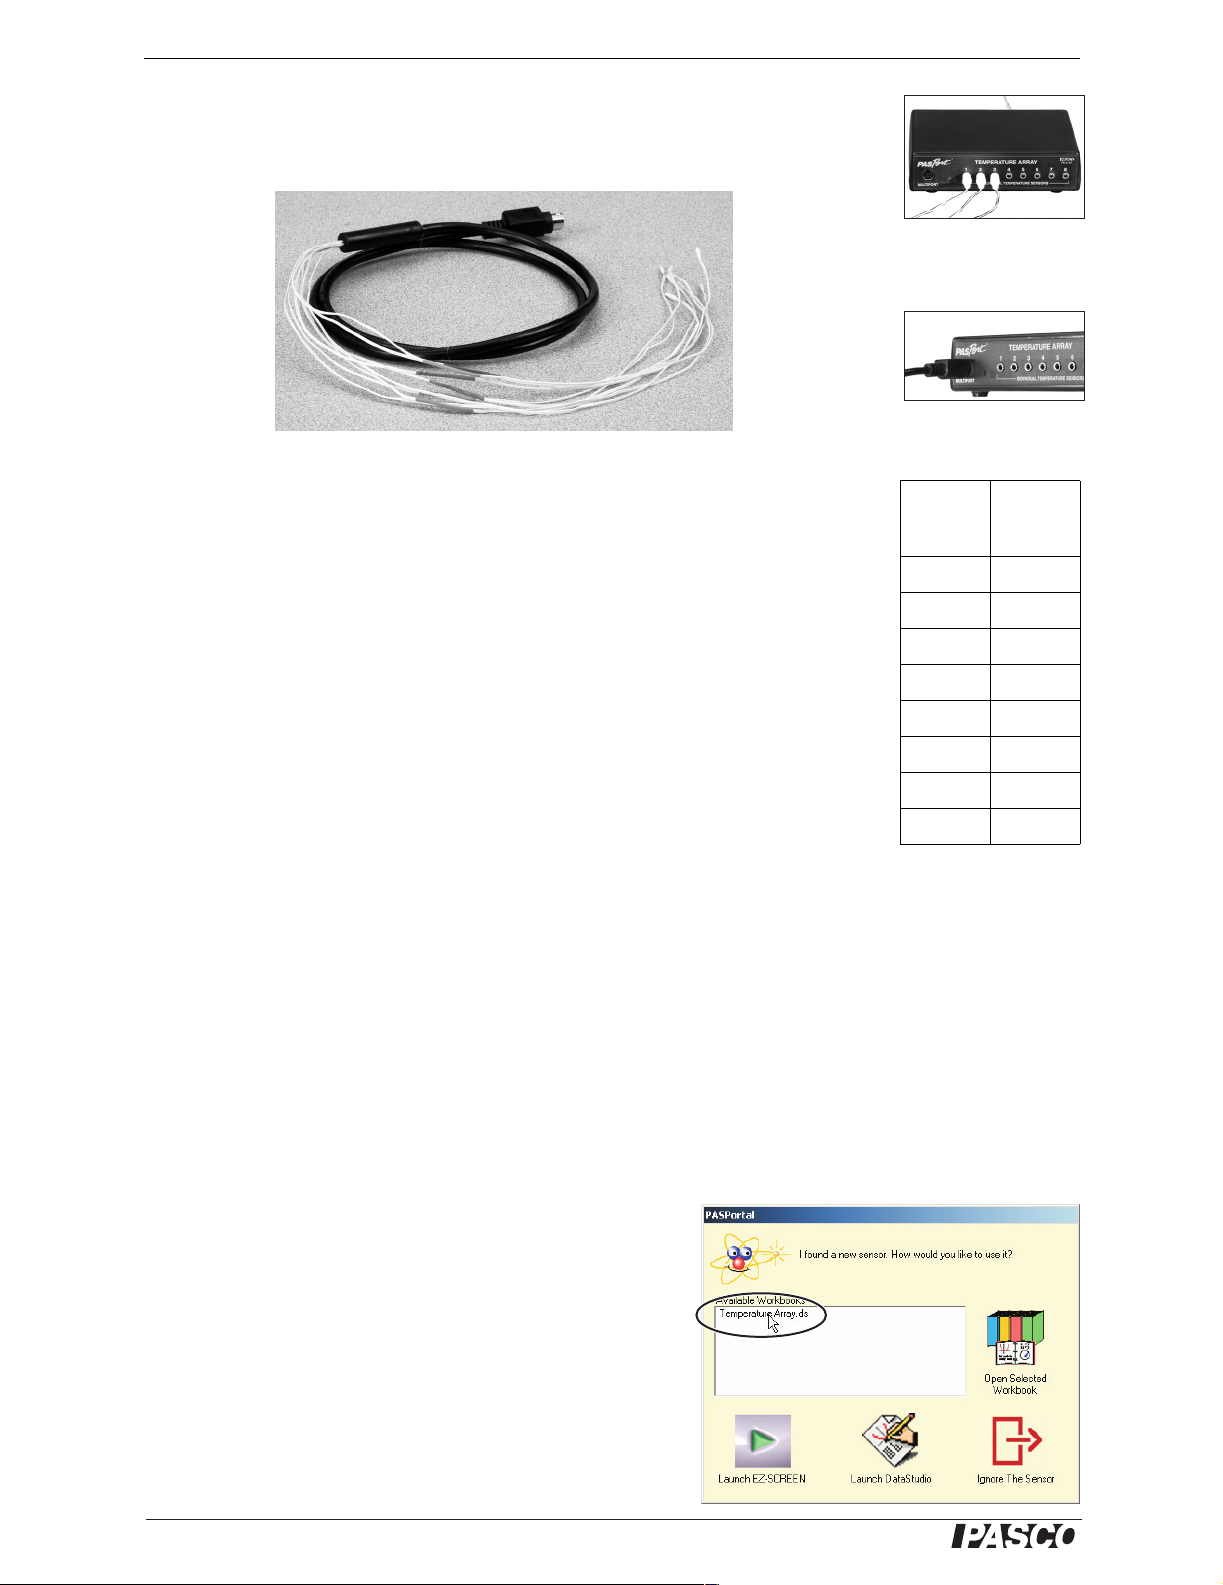
Separate temperature probes (such as the three included fast-response probes) can be
connected to the individual input ports, numbered 1 through 8 (right); or the special
eight-probe bundle (below) can be connected to the multiport (below right).
Three probes
connected to
individual ports
Eight-probe bundle
Eight-probe bundle
connected to multiport
Each of the probes in the eight-probe bundle is identified by a colored band. The colors correspond to the Temperature Array’s data channel numbers as shown in the
table (right).
When measuring the surface temperature of a person or object, use the included adhesive patches to attach the probes.
Other PASCO devices containing embedded 10 kΩ thermistors (such as the Heat
Conduction Apparatus, TD-8513) can be connected to the individual ports or the multiport of the Temperature Array using the cables included with those devices.
Setup
Hardware Setup
The following three steps can be performed in any order.
1. Connect the eight-probe bundle to the multiport or connect up to eight separate
temperature probes to the individual input ports.
Probes can be connected to the individual ports in any order (you don’t have to start with port 1),
and any of the ports can be left unconnected.
Do not use the individual ports and the multiport at the same time.
Data
Color
Brown 1
Red 2
Orange 3
Yellow 4
Green 5
Blue 6
Violet 7
Gray 8
The color scheme is similar to the one commonly
used to identify resistor
values.
Channel
Number
2. Connect the cable of the Temperature Array to a PASPORT interface.
3. If you will be using a computer, connect the PASPORT interface to the com-
puter’s USB port.
DataStudio Setup
If you will be using the Temperature Array with a computer, install
DataStudio version 1.9.5 first.
1. When you connect the Temperature Array to the computer
through a PASPORT interface, the PASPortal window will
launch automatically (if DataStudio is not already running.
2. Double click Temperature Array.ds to open the Tempera-
ture Array’s configured file in DataStudio.
2
double click
®
Page 3

Model No. PS-2157 Setup
To open to configuration file directly, navigate to the folder
c:\Program Files\DataStudio\eLabs\Sensors\ (Windows) or
HD:Aplications:DataStudio:eLabs:Sensors (Mac).
3. The configuration file contains a run of sample
data showing the data color corresponding to each
data channel.
To delete the sample data before collecting your own data,
press Alt+Minus (Windows) or +Minus (Mac).
4. Click to begin data collection.
To view and change the sample rate, units of measure,
and other sensor properties, click .
DataStudio configuration file,
Temperature Array.ds
Xplorer and Xplorer GLX Setup
If you will be using an Xplorer or Xplorer GLX in logging mode (not connected to a
computer), connect the Temperature Array to the Xplorer or Xplorer GLX and press
to begin data collection.
Multiple-measurement Alignment
When you are using multiple temperature probes, you
may find that their reading differ slightly when they are
measuring the same thing. In the example illustrated
(right), measurements from eight probes in the same
container of water vary by about 0.3 °C. The multiple-measurement alignment procedure adjusts the calibrations of the probes so they agree more closely.
The procedure described here for DataStudio can also be performed on the Xplorer GLX. See the
Xplorer GLX Users’ Guide for detailed instructions.
1. Click to open the Experiment Setup window. Click
to open the calibration dialog box.
2. From the Sensor field, select the Temperature Array.
3. Select the “Calibrate all similar measurements simulta-
neously” option.
4. Place all of the probes in a container of room-temperature
water. (If you are calibrating thermistors embedded in a
device, allow the thermistors to come to equilibrium at room
temperature.)
5. Observe the Present Sensor Measurement and wait until it
has stabilized.
6. From the Calibration Type menu, select 1 Point (Adjust Off-
set Only).
7. Click the Read From Sensor button for Point 1.
8. Click OK to accept the new calibration; or click Cancel to
revert to the previous or default calibration.
®
3
Page 4

Temperature Array Specifications
Two-point calibration
Though it is usually not necessary, a two-point calibration can be performed on a single probe, or on all probes simultaneously, to make the measurements more accurate.
For step-by-step instructions refer to the documentation for DataStudio version 1.9.5,
the Xplorer, or the Xplorer GLX.
Oversampling
The degree of oversampling that takes place within the Temperature Array depends
on the sample rate and the number of connected probes. To maximize the oversampling, set the sample rate as low as possible and disconnect any unused probes. In
many cases, increased oversampling reduces noise, produces smoother data, and
improves the measurement resolution. This effect is especially noticeable when very
small temperature changes are measured.
Measurement Repetition
At high sample rates, the Temperature Array may occasionally repeat a measured
value in order to maintain the flow of data without exceeding its processing capacity.
The maximum sample rate at which this does not occur depends on the number of
connected probes, as shown in the table (right).
At sample rates above these thresholds, you may notice that a rapidly changing temperature graph has occasional plateaus where the sampled temperature remains constant for two or more points in a row. To reduce the effect of measurement repetition,
use the smooth(n, x) function in DataStudio’s calculator. (For information about the
smooth function, open the Help menu in DataStudio and search for “smooth.”)
Specifications
Measurement Range -35 °C to 135 °C (probe dependent)
Maximum Range of Fast-response Probes
and Eight-probe Bundle
Accuracy ±0.5 °C
Resolution 0.0025 °C
Repeatability 0.01 °C
Maximum Sample Rate 200 Hz per Temperature Sensor
Unit Options °C, °F, K
-35 °C to 70 °C
Maximum Sample Rate
Measurement Repetition
without
Number of
Probes
1 200
2 or 3 100
4 to 8 50
Rate
(Hz)
4
®
Page 5

Model No. PS-2157 Technical Support
Technical Support
For assistance with any PASCO product, contact PASCO at:
Address: PASCO scientific
10101 Foothills Blvd.
Roseville, CA 95747-7100
Phone: 916-786-3800 (worldwide)
800-772-8700 (U.S.)
Fax: (916) 786-3292
Web: www.pasco.com
Email: support@pasco.com
Limited Warranty
For a description of the product warranty, see the PASCO catalog.
Copyright
The PASCO scientific 012-08867A
granted to non-profit educational institutions for reproduction of any part of this manual, providing the reproductions are used only in
their laboratories and classrooms, and are not sold for profit. Reproduction under any other circumstances, without the written consent of PASCO scientific, is prohibited.
Temperature Array Instruction Manual
is copyrighted with all rights reserved. Permission is
Trademarks
PASCO, PASCO scientific, DataStudio, PASPORT, Xplorer, and Xplorer GLX are trademarks or registered trademarks of PASCO scientific, in the United States and/or in other countries. For more information visit www.pasco.com/legal. Windows is a registered trademark of Microsoft Corporation in the United States and/or other countries. Mac is trademark of Apple Computer, Inc., registered in the
U.S. and other countries.
®
5
 Loading...