

Page 1
Instruction Sheet
Threaded
Hole
Sensor
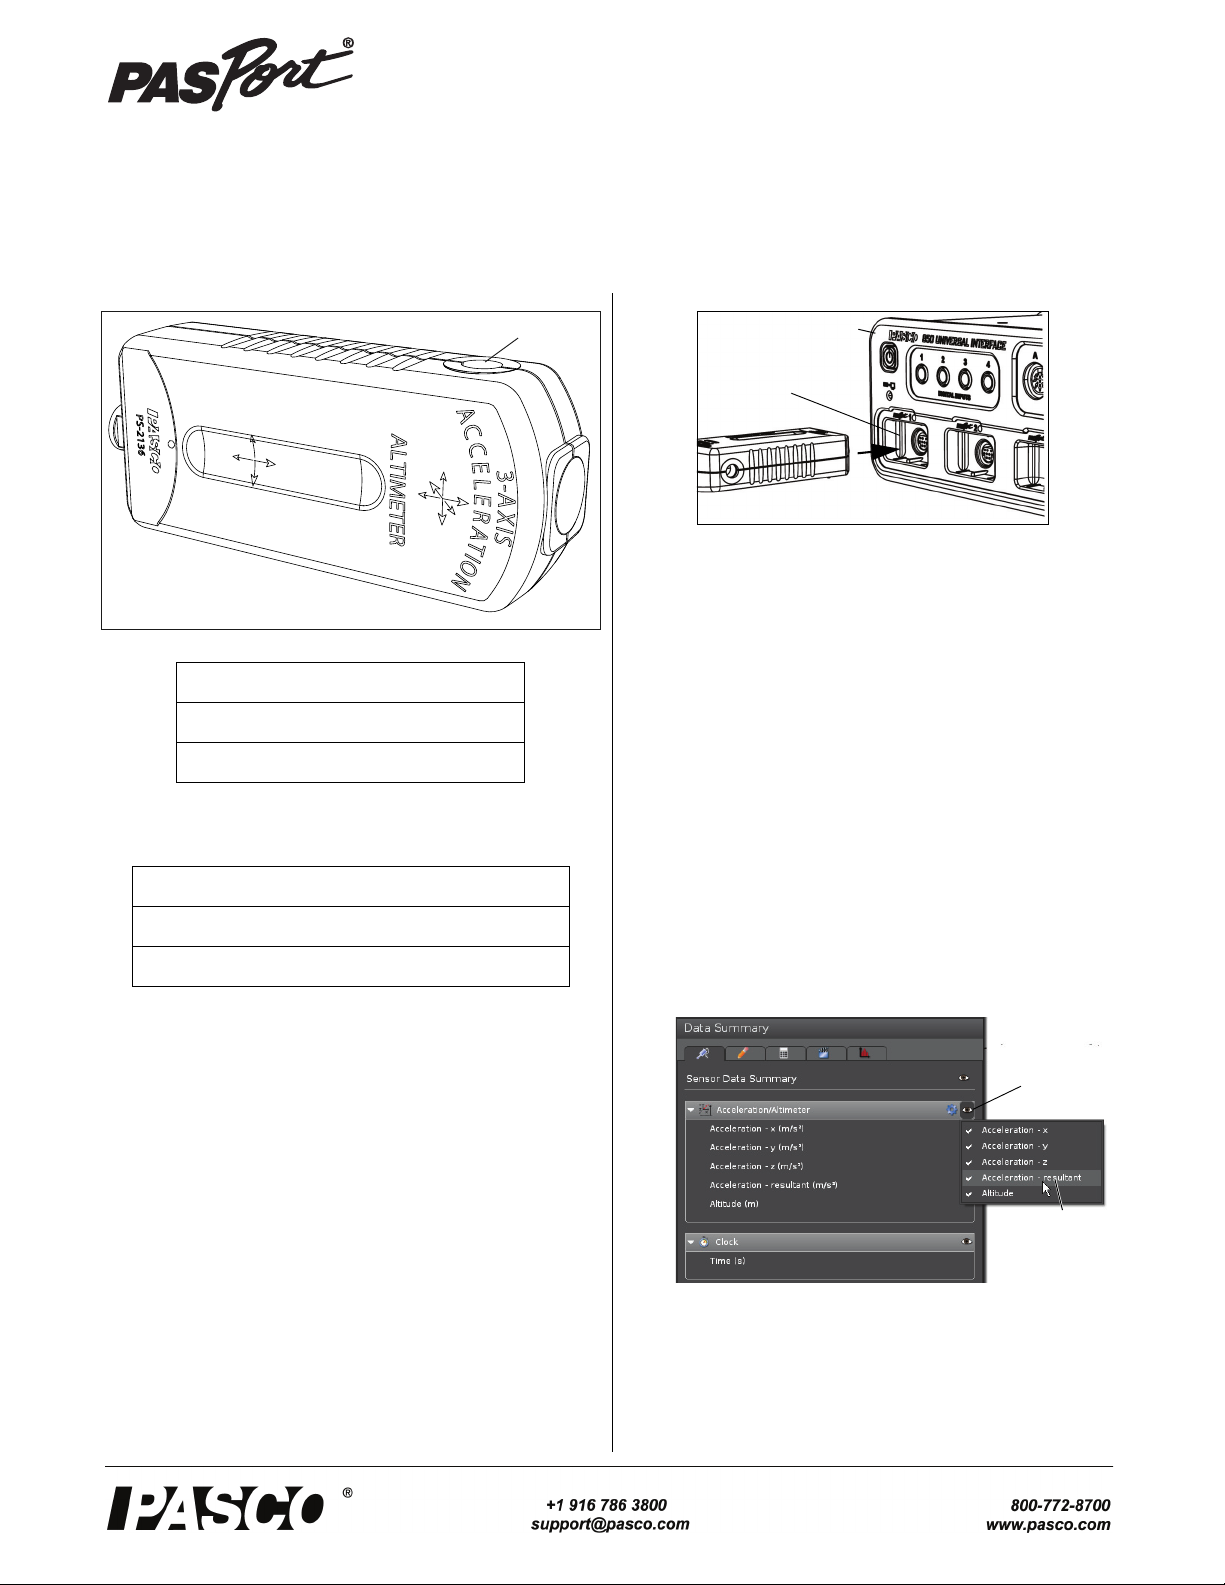
PASPORT
Input Port
Interface
Click the
Visibility
icon
Click a
measurement
to change its
visibility
3-Axis Acceleration/Altimeter Sensor
PS-2136
NOTE: If more distance is needed between the sensor and
the interface or datalogger, you can plug the sensor into the a
PASPORT Sensor Extension Cable (not included), and then
plug the cable into the interface or datalogger.
.
Required Items*
PASCO Interface or Datalogger
PASCO Data Acquisition Software
*See the PASCO catalog or the PASCO web site at www.pasco.com
for more information.
• If you are using an interface, start the PASCO data
acquisition software. Set up a data display in the software.
Using PASCO Capstone Software
• Click the “Hardware Setup” icon in the Tools palette to
open the “Hardware Setup” panel. Confirm that the sensor icon appears with the interface’s icon.
012-08511B
Other Items*
PASPORT Sensor Extension Cable (PS-2500)
PASCO Xplorer GLX Vest (PS-2517)
Introduction
The PS-2136 3-Axis Acceleration/Altimeter Sensor measures acceleration (change of velocity with respect to time)
in three axes: x, y, and z, resultant acceleration, and altitude.
The units of measure for acceleration are “g” (acceleration
due to Earth gravity) or m/s
and the units for altitude are meters or feet.
The sensor is designed to work with a PASPORT-compatible
interface (such as the UI-5100 850 Universal Interface or
PS-2008A SPARK Science Learning System) and PASCO
data acquisition software (such as PASCO Capstone or
SPARKvue), or a PASCO datalogger (such as the PS-2002
Xplorer GLX).
Setup the 3-Axis Acceleration Sensor
• Plug the sensor into one of the PASPORT input ports of
a PASCO PASPORT-compatible device.
2
(meters per second squared),
• Click the “Data Summary” icon in the Tools palette to
open the “Data Summary” panel. The panel lists the sensor’s measurements.
• Click the “Visibility” icon in the “Data Summary” panel
to see the list of measurements that will be visible by
default. Click a measurement to change its visibility.
• Click one of the display templates in the Capstone workbook page, or double-click an icon in the “Displays”
palette to open a data display.
Page 2
3-Axis Acceleration/Altimeter Sensor Introduction
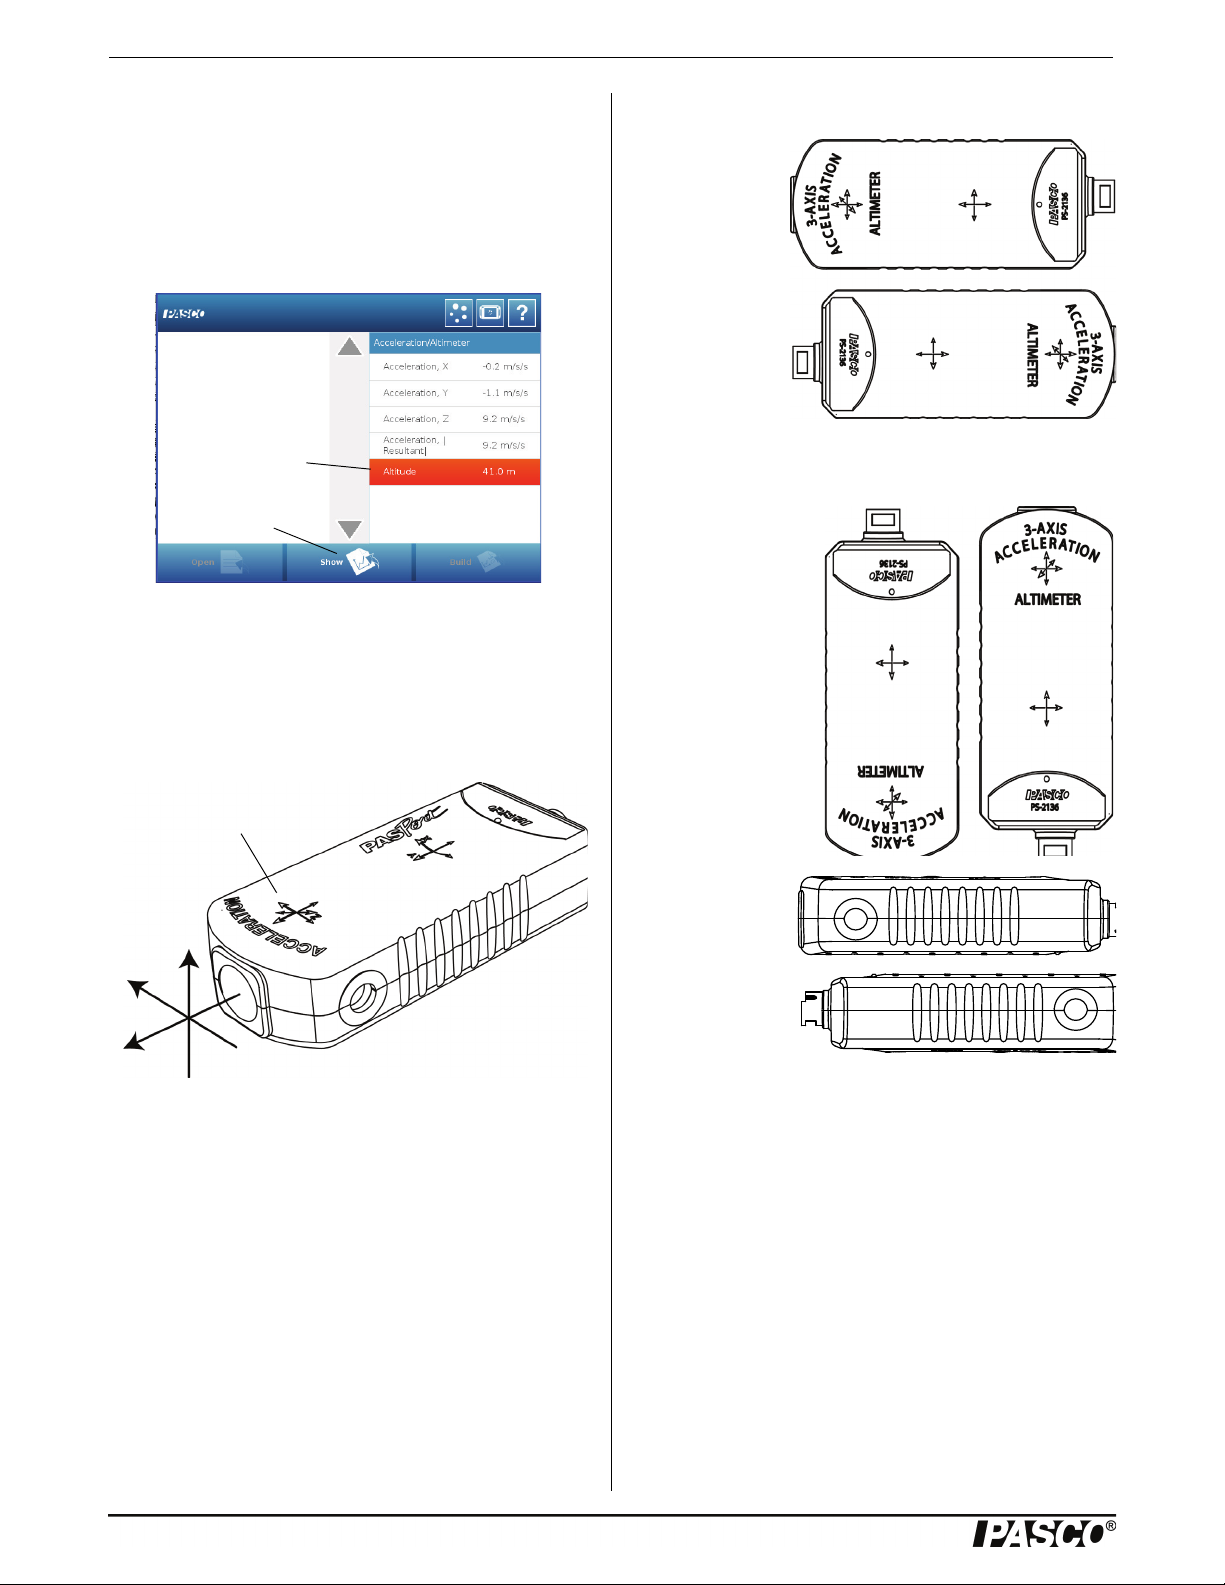
Touch a
measurement
Touch “Show”
Arrows indicate direction
of acceleration
Z
X
Y
1.0 g
-1.0 g
-1.0 g 1.0 g
-1.0 g
1.0 g
Using SPARKvue Software
• Connect the sensor to a SPARKvue-compatible device
and start the software. The sensor parameter screen
opens and shows the list of measurements for the sensor.
• In the sensor parameter screen, touch a measurement
such as ‘Altitude’ to highlight it, and then touch ‘Show’
to open a graph display.
Record Data
• Click “Record” or tap ‘Start’ to begin recording data.
Direction of Sensitivity
The acceleration sensing units inside the sensor are oriented
so that the lines of greatest sensitivity follow the three
arrows indicating the direction of acceleration.
Test the Sensor’s Output Using Earth’s Gravity
For example, if
the sensor is on its
side and oriented
with its long axis
horizontal as
shown, the Acceleration X-axis
reading is 1.0 g. If
the sensor is oriented with the
X-axis arrow
pointing down,
the Acceleration
X-axis reading is
-1.0 g.
If the sensor is oriented with its the
Y-axis arrow
pointing up, the
Acceleration
Y-axis reading is
1.0 g. If the sensor
is oriented with the
Y-axis pointing
down, the Acceleration Y-Axis reading is -1.0 g.
In this orientation, the X-axis direction is ‘positive’ to the
right, the Y-axis direction is ‘positive’ toward the end plate,
and the Z-axis direction is ‘positive’ perpendicular to the
label on top.
If the sensor is oriented with the
label facing up, the
Acceleration
Z-axis reading will
read 1.0 g. If the
label is facing
down, the reading
is -1.0 g.
Zeroing the Sensor
The Acceleration Sensor can be set up so that it will automatically zero itself when you start to record data. Or, the
sensor could be mounted in the specific orientation needed
for an experiment, and then set to zero from within the data
acquisition software,
2
Page 3

Model No.PS-2136 Specifications
Using PASCO Capstone Software
Click the “Hardware Setup” icon in the Tools palette and
click the “Properties” icon (that looks like a gear) to open the
sensor “Properties” window.
Select the needed option. NOTE: The “Remove Sensor Zero
Offset” option will undo the “Zero Sensor Now” option.
Using SPARKvue Software
After SPARKvue starts, the Sensor Parameter screen shows
the measurements that the sensor can make. Touch one of the
measurements, and then touch “Show” to open a page with a
graph display.
In the graph page, touch the “Tools” icon ( ) to open the
Experiment Tools page.
“Acceleration/Altimeter” to open the “Edit Sensor Properties” page.
The options are “Zero Sensor Automatically On Start:” (default choice), or “Zero Sensor Now”. Change the default choice if necessary and then touch “OK”. Touch “Done” and then “OK” in order to return to the graph page.
Specifications
Item Value
Range: Acceleration: ± 10 g
Altitude: 0 to 7000 meters
Touch “Configure Sensor” to open the “Sensor Configuration” page. Touch “Edit Sensor Properties…” and then touch
Accuracy: Acceleration: ± 1% of full scale
Altitude: ± 1% with calibration
Resolution: Acceleration: 0.01 g
Altitude: 0.3 m
Default sample rate: 20 samples/second
Suggested Activities
Acceleration on an Inclined Plane
• Roller coaster amusement park physics.
• Hiking, mountain biking, skiing.
• Starting, stopping, turning a vehicle.
Sample Data
Acceleration and altitude data from a roller coaster.
3
Page 4

3-Axis Acceleration/Altimeter Sensor Technical Support
More Information
For the latest information about the sensor, visit the PASCO
web site at www.pasco.com and enter “PS-2136” or the
product name in the Search window.
Technical Support
For assistance with any PASCO product, contact PASCO at:
Address: PASCO scientific
10101 Foothills Blvd.
Roseville, CA 95747-7100
Phone: +1 916-786-3800 (worldwide)
800-772-8700 (U.S.)
E-mail: support@pasco.com
Web www.pasco.com
Limited Warranty For a description of the product warranty, see the
PASCO catalog. Copyright The PASCO scientific Instruction Sheet
is copyrighted with all rights reserved. Permission is granted to
non-profit educational institutions for reproduction of any part of this
manual, providing the reproductions are used only in their laboratories and classrooms, and are not sold for profit. Reproduction under
any other circumstances, without the written consent of PASCO scientific, is prohibited. Trademarks PASCO, PASCO Capstone,
PASPORT, SPARK Science Learning System, SPARK SLS, and
SPARKvue are trademarks or registered trademarks of PASCO scientific, in the United States and/or in other countries. For more information visit www.pasco.com/legal.
Product End of Life Disposal Instructions:
This electronic product is subject to disposal and recycling
regulations that vary by country and region. It is your
responsibility to recycle your electronic equipment per your
local environmental laws and regulations to ensure that it
will be recycled in a manner that protects human health and
the environment. To find out where you can drop off your
waste equipment for recycling, please contact your local
waste recycle/disposal service, or the place where you purchased the product.
The European Union WEEE (Waste Electronic and Electrical Equipment) symbol
(to the right) and on the product or its
packaging indicates that this product must
not be disposed of in a standard waste container.
4
 Loading...