

Page 1
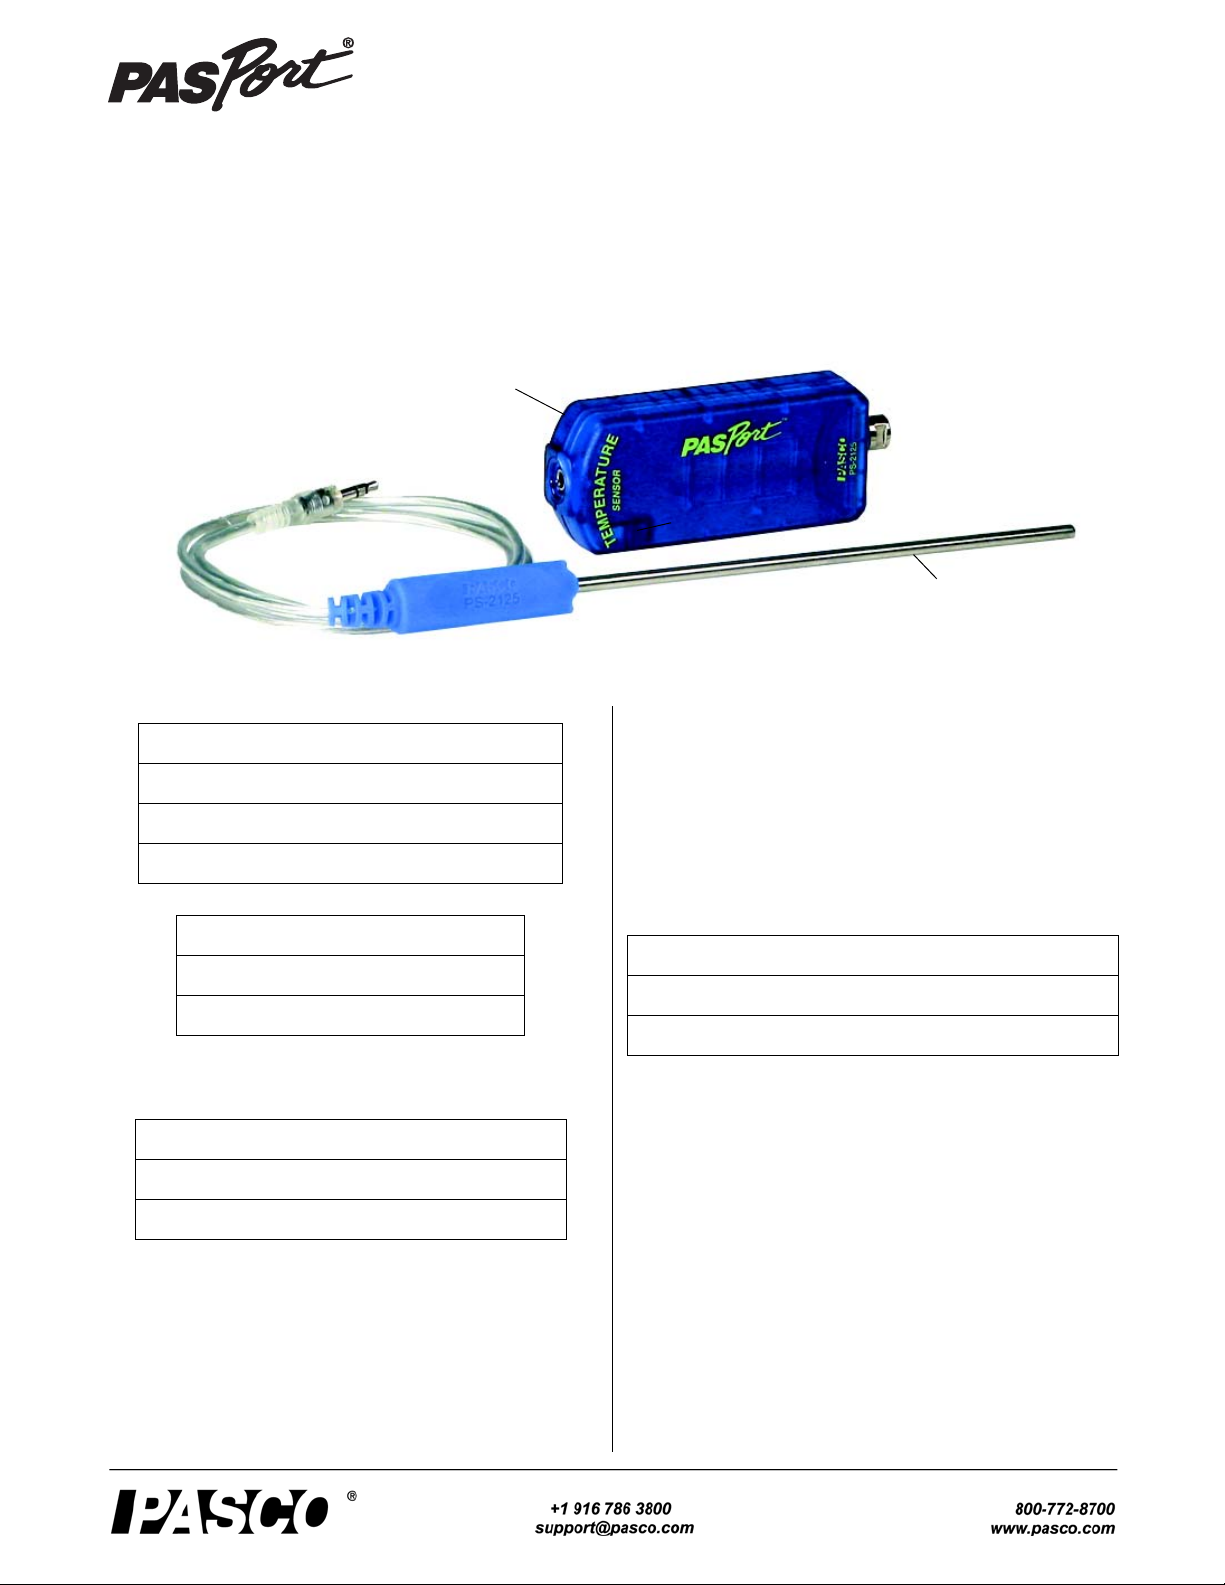
Temperature Sensor
Stainless Steel
Temperature
Probe
Temperature
Sensor Box
PS-2125
Instruction Sheet
012-07971E
.
Included Items
Temperature Sensor
Stainless Steel Temperature Probe PS-2153
Polyurethane tubing, 1/4” O.D. (not shown)
Required Items*
PASCO Interface
PASCO Data Acquisition Software
*See the PASCO catalog or the PASCO web site at www.pasco.com
for more information.
Other Items*
Teflon Sensor Covers CI-6549 (pack of 10)
PASPORT Sensor Extension Cable PS-2500
Introduction
The PS-2125 Temperature Sensor measures temperature in
degrees fahrenheit (°F) or celsius (°C), or in kelvin (K). The
included Stainless Steel Temperature Probe has a wide
range, and the included tubing allows the probe to fit inside a
standard 0.25” diameter stopper hole.
The sensor is designed to work with a PASPORT -compatible
interface (such as the UI-5100 850 Universal Interface) and
PASCO data acquisition software (such as PASCO Capstone
or SPARKvue) to measure temperature.
Optional Temperature Probes
The sensor can also be used with other temperature probes.
(See the PASCO catalog or visit www.paseo.com for more
information.).
Other Temperature Probes
Fast Response Temperature Probe PS-2135
Skin/Surface Temperature Probe PS-2131
The Fast Response T emperature Probe has a smaller size and
thermal mass and a range from -30 to 105 °C. The Skin/Surface Temperature Probe has a range from -10 to 70 °C.
Sensor Usage
• Do not place the sensor box or the cable of the probe in
liquids.
• Do not place the probe in a flame or on a hot plate.
• Do not use the probe in liquids other than water or
mildly acidic solutions*.
(*Put a Teflon Sensor Cover - available separately - on the
probe if you plan to use it with strong acids, etc. The cover
has a Chemical Resistance Classification of “E” (acetaldehyde to zinc stearate.))
Page 2
Temperature Sensor Introduction
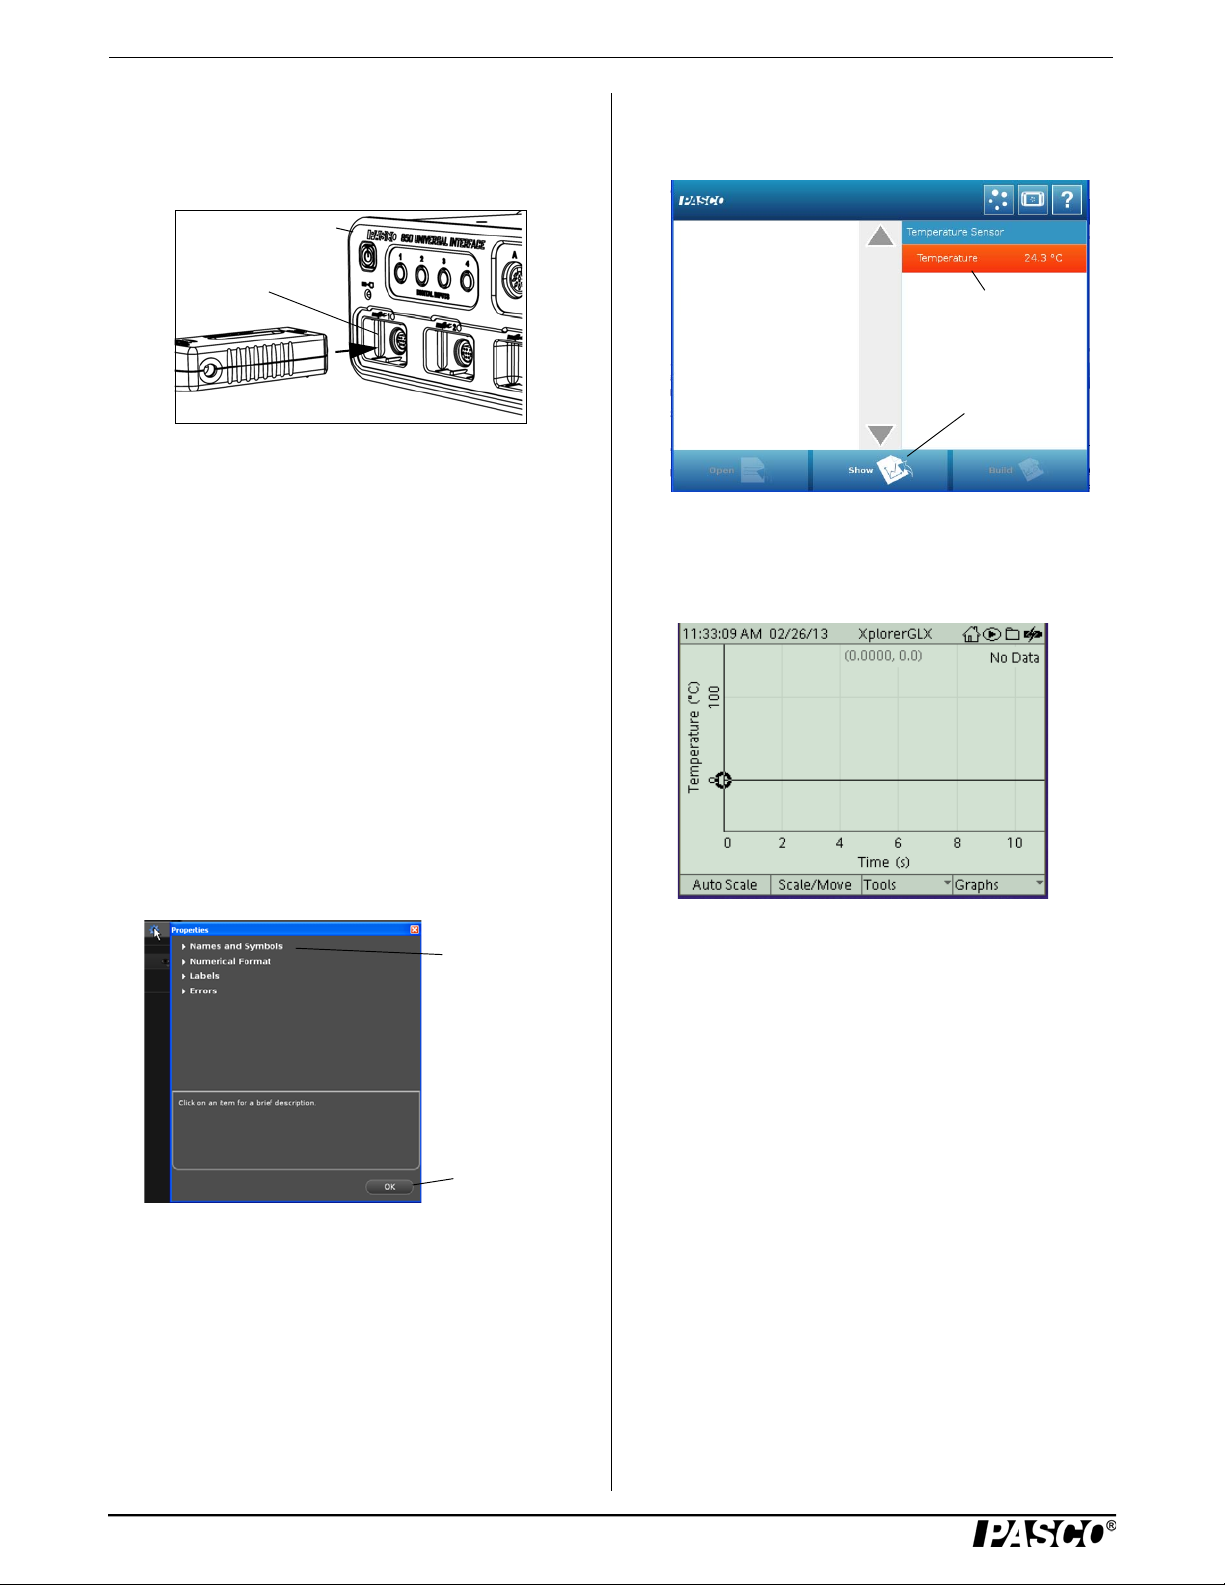
Sensor
PASPORT
Input Port
Interface
Click “Names
and Symbols” to
change the
default unit.
Click “OK” to close
the Properties
panel
Touch a
measurement
Touch “Show”
Setup the Sensor
• Plug the sensor into a PASPORT input port of a PASCO
PASPORT-compatible interface.
NOTE: If more distance is needed between the sensor and
the interface, plug the sensor into a Sensor Extension Cable
(PS-2500), and then plug the cable into the interface.
• Connect the temperature probe to the sensor box.
• Start the PASCO data acquisition software. Set up a data
display in the software.
Using PASCO Capstone Software
• Click the “Hardware Setup” icon in the Tools palette to
open the “Hardware Setup” panel. Confirm that the
Temperature Sensor icon appears with the interface’s
icon.
• In the sensor parameter screen, touch a measurement to
highlight it, and then touch ‘Show’ to open a graph display.
Using Xplorer GLX Datalogger
• When you connect the sensor to the Xplorer GLX Datalogger, a Graph display of temperature versus time automatically opens.
• Click the “Data Summary” icon in the Tools palette to
open the “Data Summary” panel.
• Click the “Properties” icon (that looks like a small gear)
in the “Data Summary” panel to see the “Properties”
panel. Click “Names and Symbols” to change the
default unit from degrees celsius.
• Click one of the display templates in the Capstone workbook page, or double-click an icon in the “Displays”
palette to select a specific data display.
Using SPARKvue Software
• Connect the sensor to a SP ARK Science device and start
the software. In SP ARKvue, the sens or parameter screen
opens and shows the list of measurements for the sensor.
Record Data
• Click “Record”, touch ‘Start’, or press the ‘Record’ button to begin recording data.
Calibrating the Sensor
The Temperature Sensor is factory calibrated, but it can be
calibrated using the following: ice water, hot water, thermometer.
Using PASCO Capstone Software
• Click the “Calibration” icon in the Tools palette to open
the “Calibration” panel. For step 1, confirm that “Temperature” is selected and click “Next”.
• For step 2, confirm that the selected probe is “Temperature Measurement” and click “Next”.
• For step 3, confirm that “Two Standards” is the type of
calibration, and click “Next”.
• For step 4, put the probe and the thermometer in ice
water. When the temperature on the thermometer is at or
close to 0 °C, enter the thermometer reading in the
“Standard Value” text box. Click “Set Current Value to
Standard Value” and click “Next”.
2
Page 3

Model No.PS-2125 Specifications
• For step 5, put the probe and thermometer into hot water
(boiling hot, if available). When the thermometer
reaches its highest point, enter the thermometer reading
in the “Standard Value” text box. Click “Set Current
Value to Standard Value” and click “Next”.
• In the final step, review your calibration and click “Finish”.
Using SPARKvue Software
After SPARKvue starts, the Sensor Parameter screen shows
the measurements that the sensor can make.
• Touch “Temperature” and then touch “Show” to open a
page with a graph display.
• In the graph page, touch the “SPARKvue Help” icon
( ) to open the SP ARKvue User’ s Guide page.
• Touch “Setting up an experiment” and then touch “Calibrating sensors”.
• Touch “Performing a calibration” and then touch “Performing a 2-point calibration”.
• Put the probe and the thermometer in ice water. Follow
the instructions in the SPARKvue Help page about “Calibration Point 1”. (Use the keypad window that opens to
enter the thermometer reading and then touch “OK”).
• Put the probe and thermometer into hot water (boiling
hot, if available). Follow the instructions in the SPARKvue Help page about “Calibration Point 2”.
• When finished, touch “OK” until you return to the graph
page.
Using Xplorer GLX Datalogger
• Refer to the Xplorer GLX Datalogger User’s Guide for
calibration instructions.
Specifications
Item Value
Technical Support
For assistance with any PASCO product, contact PASCO at:
Address: PASCO scientific
10101 Foothills Blvd.
Roseville, CA 95747-7100
Phone: +1 916-786-3800 (worldwide)
800-772-8700 (U.S.)
E-mail: support@pasco.com
Web www.pasco.com
Limited Warranty For a description of the product warranty, see the
PASCO catalog. Copyright The PASCO scientific Instruction Sheet
is copyrighted with all rights reserved. Permission is granted to
non-profit educational institutions for reproduction of any part of this
manual, providing the reproductions are used only in their laboratories and classrooms, and are not sold for profit. Reproduction under
any other circumstances, without the written consent of PASCO scientific, is prohibited. Trademarks PASCO, PASCO Capstone,
PASPORT, SPARK Science Learning System, SPARK SLS, and
SPARKvue are trademarks or registered trademarks of PASCO scientific, in the United States and/or in other countries. For more information visit www.pasco.com/legal.
Product End of Life Disposal Instructions:
This electronic product is subject to disposal and recycling
regulations that vary by country and region. It is your
responsibility to recycle your electronic equipment per your
local environmental laws and regulations to ensure that it
will be recycled in a manner that protects human health and
the environment. To find out where you can drop off your
waste equipment for recycling, please contact your local
waste recycle/disposal service, or the place where you purchased the product.
The European Union WEEE (Waste Electronic and Electrical Equipment) symbol
(to the right) and on the product or its
packaging indicates that this product must
not be disposed of in a standard waste container.
Range: -35 to 135°C
Accuracy: ±0.5°C
Resolution: 0.01°C or better
Response TIme Wait 15 seconds for stable
readings in liquids, and wait
30 to 60 seconds for stable
readings in gases.
More Information
For the latest information about the Temperature Sensor,
visit the PASCO web site at www.pasco.com and enter
“PS-2125” in the Search window.
3
 Loading...