

Page 1
Instruction Sheet
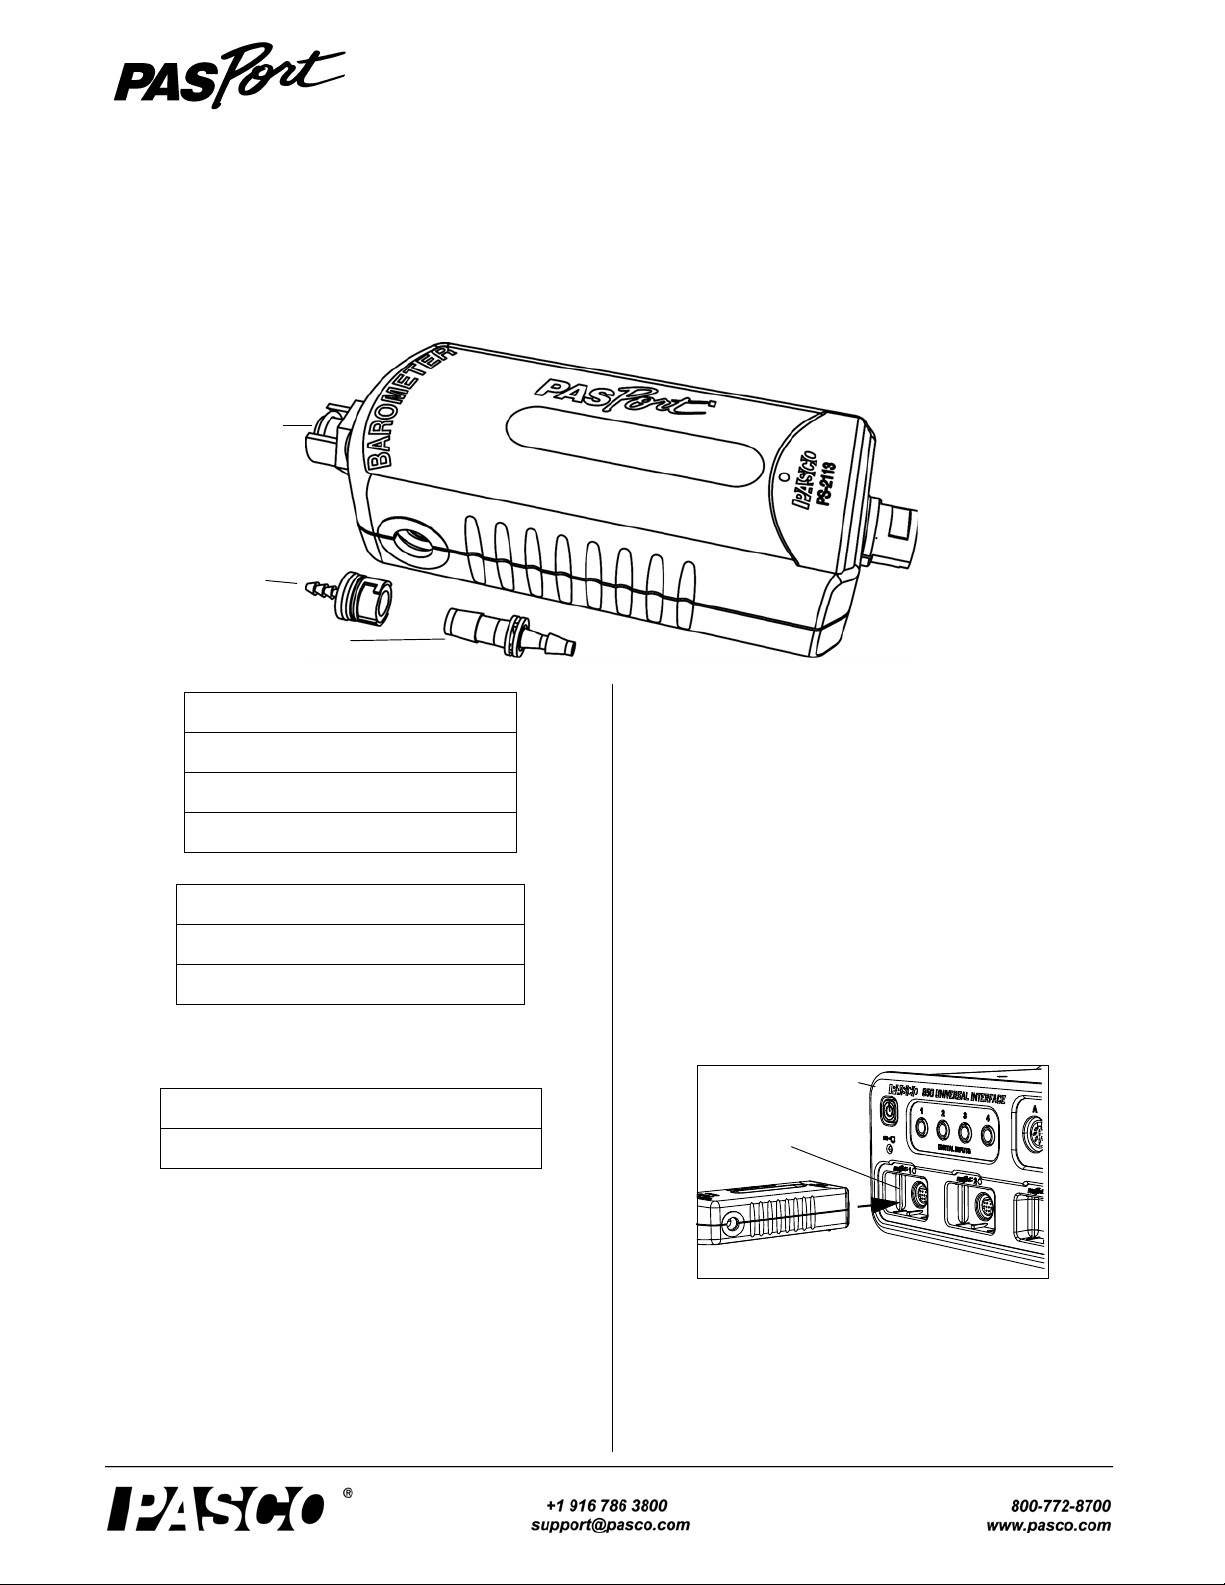
Quick Connector
Inline Connector
Quick Connector
Pressure Port
Sensor
PASPORT
Input Port
Interface
012-07578F
Barometer/Low Pressure Sensor
PS-2113A
.
Included Items
Tubing, 60 cm (2 ft) - not shown
Connector, inline (4)
Connector, quick (4)
Required Items*
PASCO Interface
PASCO Data Acquisition Software
*See the PASCO catalog or the PASCO web site at www.pasco.com
for more information.
Other Item*
PS-2500 PASPORT Extension Cable
Introduction
be used to measure the barometric pressure over a period of
time, the difference in air pressure related to a change in altitude, or the the change in pressure inside a plant due to transpiration.
The sensor includes plastic tubing, four inline connectors,
and four quick connectors. The quick connector attaches to
the pressure port on the front end of the sensor. The inline
connector can be used to attach a piece of tubing to a
one-hole stopper, for example.
Set-Up
• Plug the Barometer/Low Pressure Sensor into one of the
PASPORT input ports of a PASCO interface.
The PS-2113A Barometer/Low Pressure Sensor measures
atmospheric pressure in inches of mercury (Hg), hectopascals (hPa), kilopascals (kPa), and millibars (mBar).
The sensor is designed to work with a PASPORT-compatible interface (such as the UI-5100 850 Universal Interface)
and PASCO data acquisiition software (such as PASCO
Capstone). With the data acquisition software, the sensor can
NOTE: If more distance is needed between the sensor and
the interface, plug the sensor into a PASPORT Extension
Cable, and then plug the cable into the interface.
• Start the P ASCO data acquisition software. Set up a data
display in the software. Begin recording data.
Page 2
Barometer/Low Pressure Sensor Suggested Activities
Barometric Pressure Over Three Daysw
Petroleum
Jelly
Plastic
Tubing
Air Gap
Setup for Plant Transpiration
Clamp
Specifications
Item Value
Range: 150 to 1090 hPa
150 to 1090 mBar
15 to 109 kPa
4.4 to 34 inches Hg
Accuracy: ±0.03 inches Hg
Resolution 0.001 inches Hg
Operating Temperature: 0 to 40 °C
Relative Humidity Range 5 to 95%, non-condensing*
*Condensation on the unit will negatively affect performance.
Suggested Activities
Measure Pressure Differences
Use the sensor to measure the difference in air pressure from
the floor to the ceiling of the classroom.
the sensor’s pressure port. (WARNING: Do not allow fluid
to enter the pressure port, as this will damage the sensor.)
Using a rod stand and two clamps, build the setup shown
below. Keep the sensor’s pressure port 5–7 cm higher than
the plant’s end of the tube.
Measure Barometric Pressure
Set up the sensor and the data acquisition software to record
barometric pressure for a long period of time (24 to 48
hours). Compare the barometric pressure.
Plant Transpiration
Obtain a healthy plant seedling and soak its stem in a bowl of
water. Make a 45° cut near the end of the stem.
Plant-Tube Joint: Fill a foot-long piece of the supplied tubing with water. To avoid air bubbles in the tube, submerge
the tubing in the water bowl, and insert the seedling stem
into the tube under water. Seal the joint with petroleum jelly.
Quick
Connector
Click the Start button to record pressure data for at least 400
seconds.
Repeat data recording, but place a blowing fan next to the
plant to simulate transpiration conditions on a windy day.
Compare the two graphs of pressure versus time.
Setup the Barometer/Low Pressure Sensor
Using the PASCO Capstone Software
• In the PASCO Capstone software, click the “Hardware
Setup” icon in the Tools palette to open the “Hardware
Setup” panel. Confirm that the Barometer/Low Pressure
Sensor icon appears with the interface’s icon.
• Click the “Data Summary” icon in the Tools palette to
open the “Data Summary” panel. The panel lists the sensor’s measurements.
• To select the units of measure or make other changes to
the measurement properties, select the parameter in the
Sensor Data Summary panel, and then click the “Properties” icon (shaped like a gear) to open the Properties
panel.
Using the SPARK Science Learning System
Sensor-Tube Joint: Create a 2–3 cm air pocket at the other
end of the tube. Using a quick connector, connect the tube to
2
• Start the interface and plug the sensor into a port on the
SPARK SLS.
Page 3

Model No.PS-2113A Technical Support
Tools
button
Record
button
• In the sensor parameter screen, tap ‘Barometric Pressure’ to highlight it, and then tap ‘Show’ to open a graph
display.
• Tap the ‘Start’ button to start recording data.
NOTE: To change the parameter or units, tap the ‘Tools’
button in the graph display to open the ‘Experiment Tools’
menu, and tap ‘Data Properties’ to open the Data Properties
screen. Tap ‘Select Measurement...’.
local environmental laws and regulations to ensure that it
will be recycled in a manner that protects human health and
the environment. To find out where you can drop off your
waste equipment for recycling, please contact your local
waste recycle/disposal service, or the place where you purchased the product.
The European Union WEEE (Waste Electronic and Electrical Equipment) symbol
(to the right) and on the product or its
packaging indicates that this product must
not be disposed of in a standard waste container.
Technical Support
For assistance with any PASCO product, contact PASCO at:
Address: PASCO scientific
10101 Foothills Blvd.
Roseville, CA 95747-7100
Phone: +1 916-786-3800 (worldwide)
800-772-8700 (U.S.)
E-mail: support@pasco.com
Web www.pasco.com
For the latest information about the Barometer/ Low Pressure Sensor, visit the PASCO web site at www.pasco.com
and enter “PS-2113A” in the Search window.
Limited Warranty For a description of the product warranty, see the
PASCO catalog. Copyright The PASCO scientific Instruction Sheet
is copyrighted with all rights reserved. Permission is granted to
non-profit educational institutions for reproduction of any part of this
manual, providing the reproductions are used only in their laboratories and classrooms, and are not sold for profit. Reproduction under
any other circumstances, without the written consent of PASCO scientific, is prohibited. Trademarks PASCO, PASCO Capstone,
PASPORT, SPARK Science Learning System, SPARK SLS, and
SPARKvue are trademarks or registered trademarks of PASCO scientific, in the United States and/or in other countries. For more information visit www.pasco.com/legal.
Product End of Life Disposal Instructions:
This electronic product is subject to disposal and recycling
regulations that vary by country and region. It is your
responsibility to recycle your electronic equipment per your
3
 Loading...