

Page 1
Instruction Manual
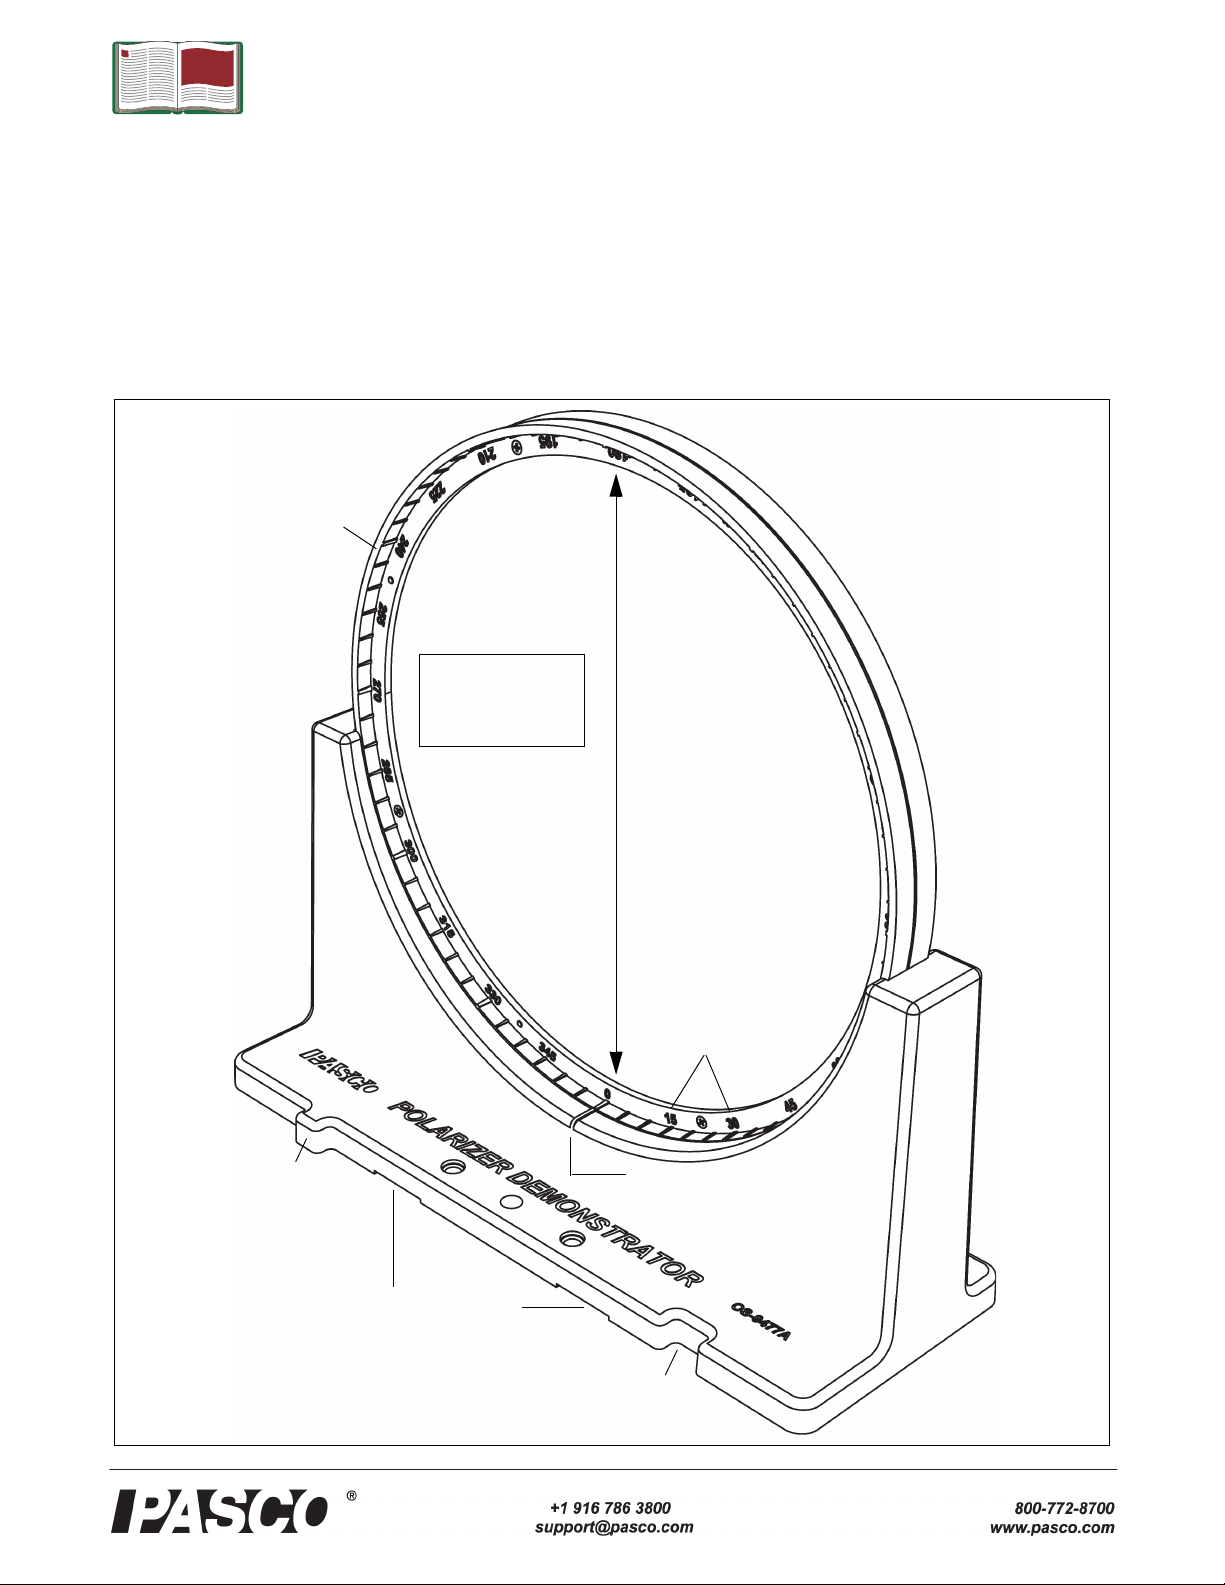
Polarizer Disk
(2)
Polarizer Base
(2)
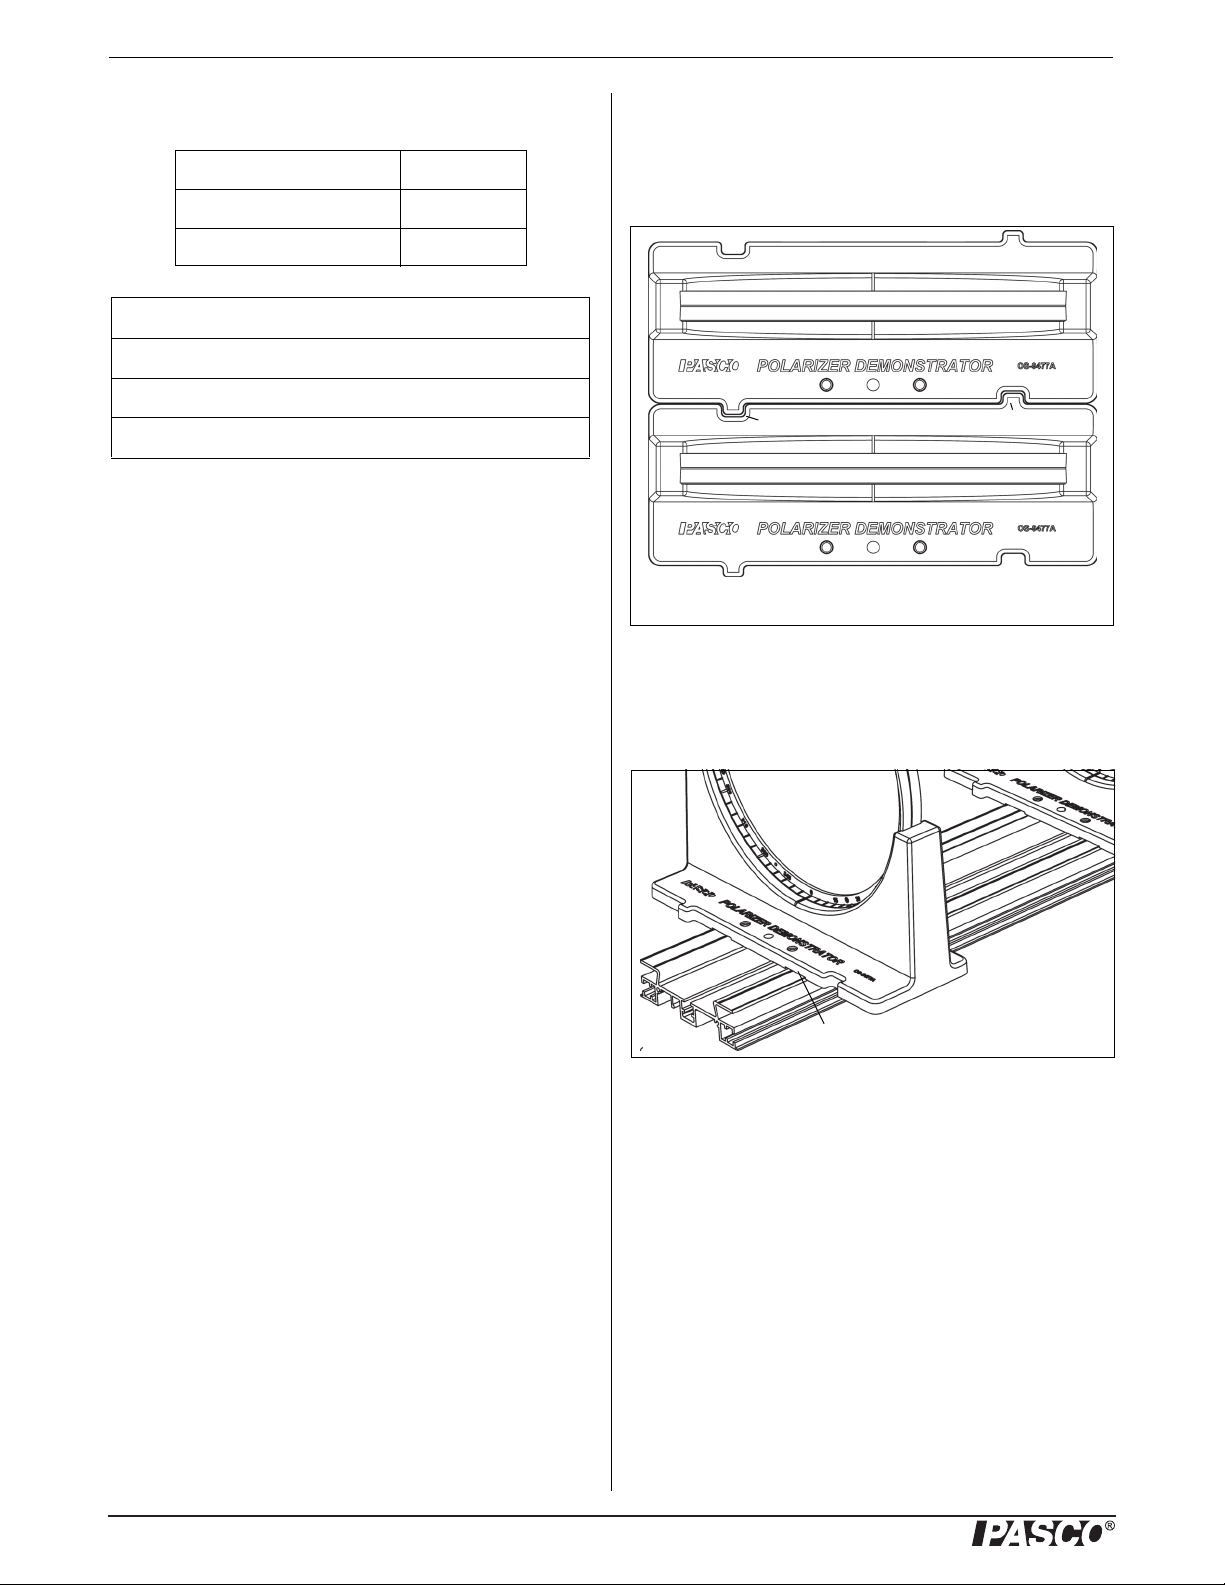
Notches fit on
PASCO Optics
Track
Alignment Tab
Alignment Notch
Angle Alignment
Mark
Diameter = 19 cm (7.4 in)
Degree Indicators
WARNING: Avoid
touching the
polarizer material!
Polarizer Demonstrator
OS-9477A
012-14146B
Page 2
Polarizer Demonstrator Introduction
Figure: Top View
Ta b
Notch
Notch in base fits on Optics Track
Polarizer Demonstrator (OS-9477A)
.
Included Items Quantity
Polarizer Disk 2
Polarizer Base 2
Recommended Items*
PASCO 60 cm Optics Track (OS-8541)
PASCO 1.2 m Optics Track (OS-8508)
Polarizer Demonstrator Accessory (OS-8172)
*See the PASCO catalog or web site at
WWW.PASCO.COM
Introduction
The Polarizer Demonstrator can be used for easily visible
classroom demonstrations. They can show how the intensity
of transmitted light through two polarizers varies with the
angle of one polarizer compared to the other. The Polarizer
Demonstrator can be used to investigate stress distribution
patterns by viewing clear plastic objects between crossed
polarizers.
The Polarizer Demonstrator has two Polarizer Disks and two
Polarizer Bases. The plastic frame of the Polarizer Disk has
degree indicators every five degrees. The plastic frame fits
into the curved portion of the Polarizer Base and can be
rotated easily in the base. The Polarizer Base has an Angle
Alignment Mark on both sides. The base has notches on its
bottom edge that fit on top of a PASCO Optics Track. Each
base also has an alignment tab and an alignment notch on
both sides. The base has two threaded holes (1/4” - 20
threads per inch) for mounting accessories, and a hole that
can be used to attach the base to an optics track if necessary
(mounting hardware not included).
Setup
1. Place each Polarizer Disk in a Polarizer Base. Place the
bases so that the alignment tabs fit into the alignment
notches.
2. For use with a PASCO Optics Track: Place each
Polarizer Disk into a Polarizer Base. Place both bases on
the PASCO Optics Track so that the notches in the bottom of the bases fit on top of the optics track. Adjust the
distance between the polarizers as needed.
WARNING: Handle the Polarizer Disks carefully. Avoid
touching the polarizer material of the Polarizer Disk.
Cleaning
To remove finger prints from the polarizer material, use only
lens cleaning tissue or a soft cloth that is specifically
designed for cleaning eyeglasses. Do not put liquids on the
polarizer material.
2
Operation
Set each Polarizer Disk so that the zero degree mark is next
to the angle alignment mark on the Polarizer Base. Look
through both disks at an object or light source. Slowly turn
one of the Polarizer Disks and observe what happens to the
intensity of light transmitted through the disks. Note the
angle of the disk that you turned. Continue turning the Polarizer Disk until the 180 degrees mark is next to the angle
alignment mark on the base. Compare the intensity of light
transmitted through the disks to the intensity of light transmitted at zero degrees.
Suggestions
Set one Polarizer Disk at zero degrees and the second at 90
degrees. (This is called “cross-polarized”.) Adjust the second
Page 3

Polarizer Demonstrator Technical Support
Sample
Bottle
Bottle
Support
Diffuser
Screen
Polarizer
Stands
disk until the light transmitted through the disks is at a minimum. Put a small piece of polarizer material between the
two Polarizer Disks, and adjust its angle until the light transmitted through the three polarizers is a maximum. Note the
angle of the piece of polarizer material.
Set up the Polarizer Disks so that they are cross-polarized as
before. Put a pair of sunglasses between the two polarizers
and rotate the sunglasses from horizontal to vertical. Note
any change in appearance of the light transmitted through the
two polarizers and the pair of sunglasses.
Observe a light source through both Polarizer Disks. Set one
Polarizer Disk at zero degrees and the second at 90 degrees.
Next, put a clear piece of plastic between the two Polarizer
Disks. Note the appearance of the clear plastic object. Flex
or twist the plastic object and note any change in appearance
of the object.
Polarizer Demonstrator Accessory
The PASCO Model OS-8172 Polarizer Demonstrator Accessory works with the Polarizer Demonstrator to show the
property of optical activity - the ability to rotate plane-polarized light. In 1874, the Dutch chemist Jacobus Henricus
van’t Huff proposed that the tetrahedral structure of the carbon atoms in optically active materials was responsible for
the behavior.
The OS-8172 includes a bottle support, two rectangular sample bottles with lids, a diffuser screen, and thumbscrews for
attaching the bottle support and diffuser screen to the Polarizer Demonstrator stands.
Technical Support
For assistance with any PASCO product, contact PASCO at:
Address: PASCO scientific
10101 Foothills Blvd.
Roseville, CA 95747-7100
Phone: +1 916-462-8384 (worldwide)
877-373-0300 (U.S.)
E-mail: support@pasco.com
Web www.pasco.com
For the latest information about the Polarizer Demonstration
or the replacement items and accessories, go to the PASCO
web site at www.pasco.com and enter the model number in
the search window.
Limited Warranty For a description of the product warranty, see the
PASCO catalog. Copyright The PASCO scientific Instruction Manual
is copyrighted with all rights reserved. Permission is granted to
non-profit educational institutions for reproduction of any part of this
manual, providing the reproductions are used only in their laboratories and classrooms, and are not sold for profit. Reproduction under
any other circumstances, without the written consent of PASCO scientific, is prohibited. Trademarks PASCO, PASCO Capstone,
PASPORT, SPARK Science Learning System, SPARK SLS, and
SPARKvue are trademarks or registered trademarks of PASCO scientific, in the United States and/or in other countries. For more information visit www.pasco.com/legal.
3
 Loading...