

Page 1
®
10101 Foothill Blvd.
Roseville, CA. 95747 USA
Instruction Sheet
for the PASCO
Model OS-8527A
LASER SIGHT ACCESSORY
Complies with FDA
performance standards for
laser products except for
deviations pursuant to Laser
Notice No. 50, dated June 24, 2007
LASER LIGHT
DO NOT STARE
INTO BEAM
CLASS 2 LASER PRODUCT
650nm, <1mW CW (Red)
CLASSIFIED 60825-1 2007
LASER LIGHT
INTO BEAM
DO NOT STARE
CLASS 2 LASER PRODUCT
650nm, <1mW CW (Red)
Complies with FDA
performance standards for
Warning Label
527A
-8
S
O
LASER SIGHT
CLASSIFIED 60825-1 2007
laser products except for
deviations pursuant to Laser
o
F
1
0
ACCESSORY
1
v
y:
0
e
b
1
s
o
R
ctured
anufa
M
RED DIODE LASER
LASER LIGHT IS EMITTED
FROM THIS APERTURE
Notice No. 50, dated June 24, 2007
o
ille
AVOID EXPOSURE
ill B
th
C
,
003-10496
012-12247A
®
A
S
.
U
d
lv
7
4
7
5
9
A
®
Introduction
The OS-8527A Laser Sight Accessory is designed for
use with PASCO projectile launchers and is an effective accompaniment to Shoot-the-Target experiments.
Equipment
– Laser Sight Accessory
– 9VDC adapter
Additional equipment recommended:
– PASCO ME-6800 (short range) or ME-6801
(long range) Projectile Launcher
– PASCO ME-6853 Shoot-the-Target
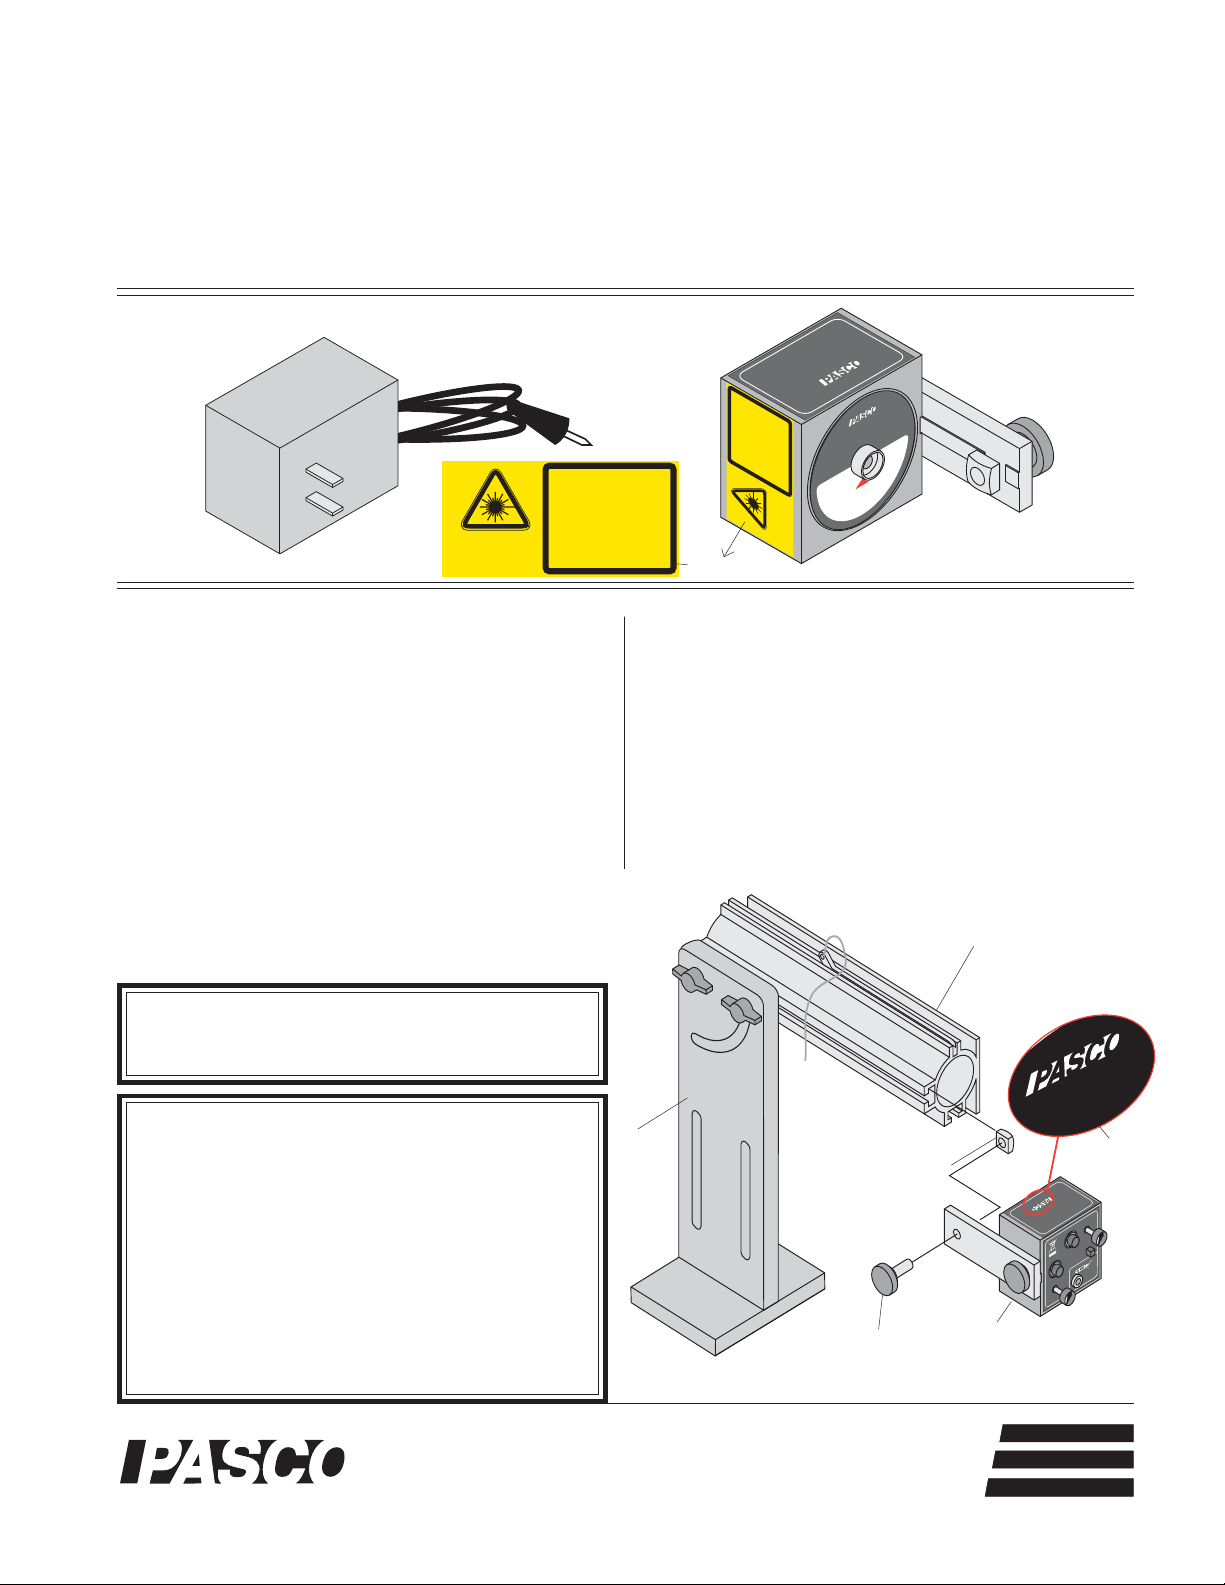
➤ WARNING: Always wear safety goggles
when you are in a room where the Projectile
Launcher is being used.
➤ CAUTION - use of controls or adjustments
or performance of procedures other than those
specified herein may result in hazardous radiation exposure.
• LASER LIGHT - DO NOT STARE INTO BEAM.
• CLASS 2 LASER PRODUCT
• This Laser Product is designated as Class 2
during all procedures of operation.
• Do not point the laser or allow the laser to be
directed or reflected toward people or animals.
The base of the Projectile Launcher must be clamped
to a sturdy surface using the clamp of your choice.
Please refer to the instruction manual for your PASCO
Projectile Launcher for more information.
Replacement parts:
Description PASCO part no.
Laser Sight Mount 648-06147
long thumbscrew 617-002
short thumbscrew 617-015
ME-6800 or ME-6801
Projectile Launcher
(not included)
launcher
base
Figure 1: Laser Sight Accessory Setup
square nut
thumbscrew
R
o
s
e
v
1
i
0
l
l
e
1
,
F
C
o
A
o
t
9
h
5
i
l
l
7
B
4
7
l
v
d
U
.
S
A
®
OS-8527A Laser
Sight Accessory
1
0
Mfg. I.D. Label
M
a
n
u
fa
c
tu
re
d
b
y
:
ACCESSORY
LASER SIGHT
OS-8527A
IZONTAL
R
HO
ADJUST
N
O
F
F
O
ER
POW
+9VDC
m
m
5
.
3
GND
A
C 500m
9 VD
ST
VERTICAL
JU
AD
10101 Foothills Blvd. Roseville, CA 95678-9011 USA
®
Phone (916) 786-3800 FAX (916) 786-8905 web: www.pasco.com
better
ways to
teach science
Page 2
Laser Sight Accessory 012-12247A
➤ CAUTION: This is a relatively safe, low
power laser. Nevertheless, we strongly recommend the following precautions:
• Never look directly into the laser beam, either
directly, or as it is reflected from a mirror.
• Set up experiments so the laser beam is NOT at
eye level (for spectators who may be either sitting or standing).
Assembly
➀
Set up Projectile Launcher as required.
➁ Attach Laser Sight Accessory to rear of Projectile
Launcher with supplied thumbscrew and square nut.
See Figure 1. Face of laser diode unit must be flush
against rear of launcher barrel.
➤ NOTE: A greater range of inclination angle for
the launcher can be achieved by attaching the Laser
Sight Accessory to the lower channel of the Projectile Launcher. This, in effect, rotates the Laser Sight
Accessory and changes the direction of the horizontal and vertical adjustments as labeled in back of the
laser diode unit.
➂ Plug the 9VDC adapter phone plug into the back
of the laser and turn on the laser.
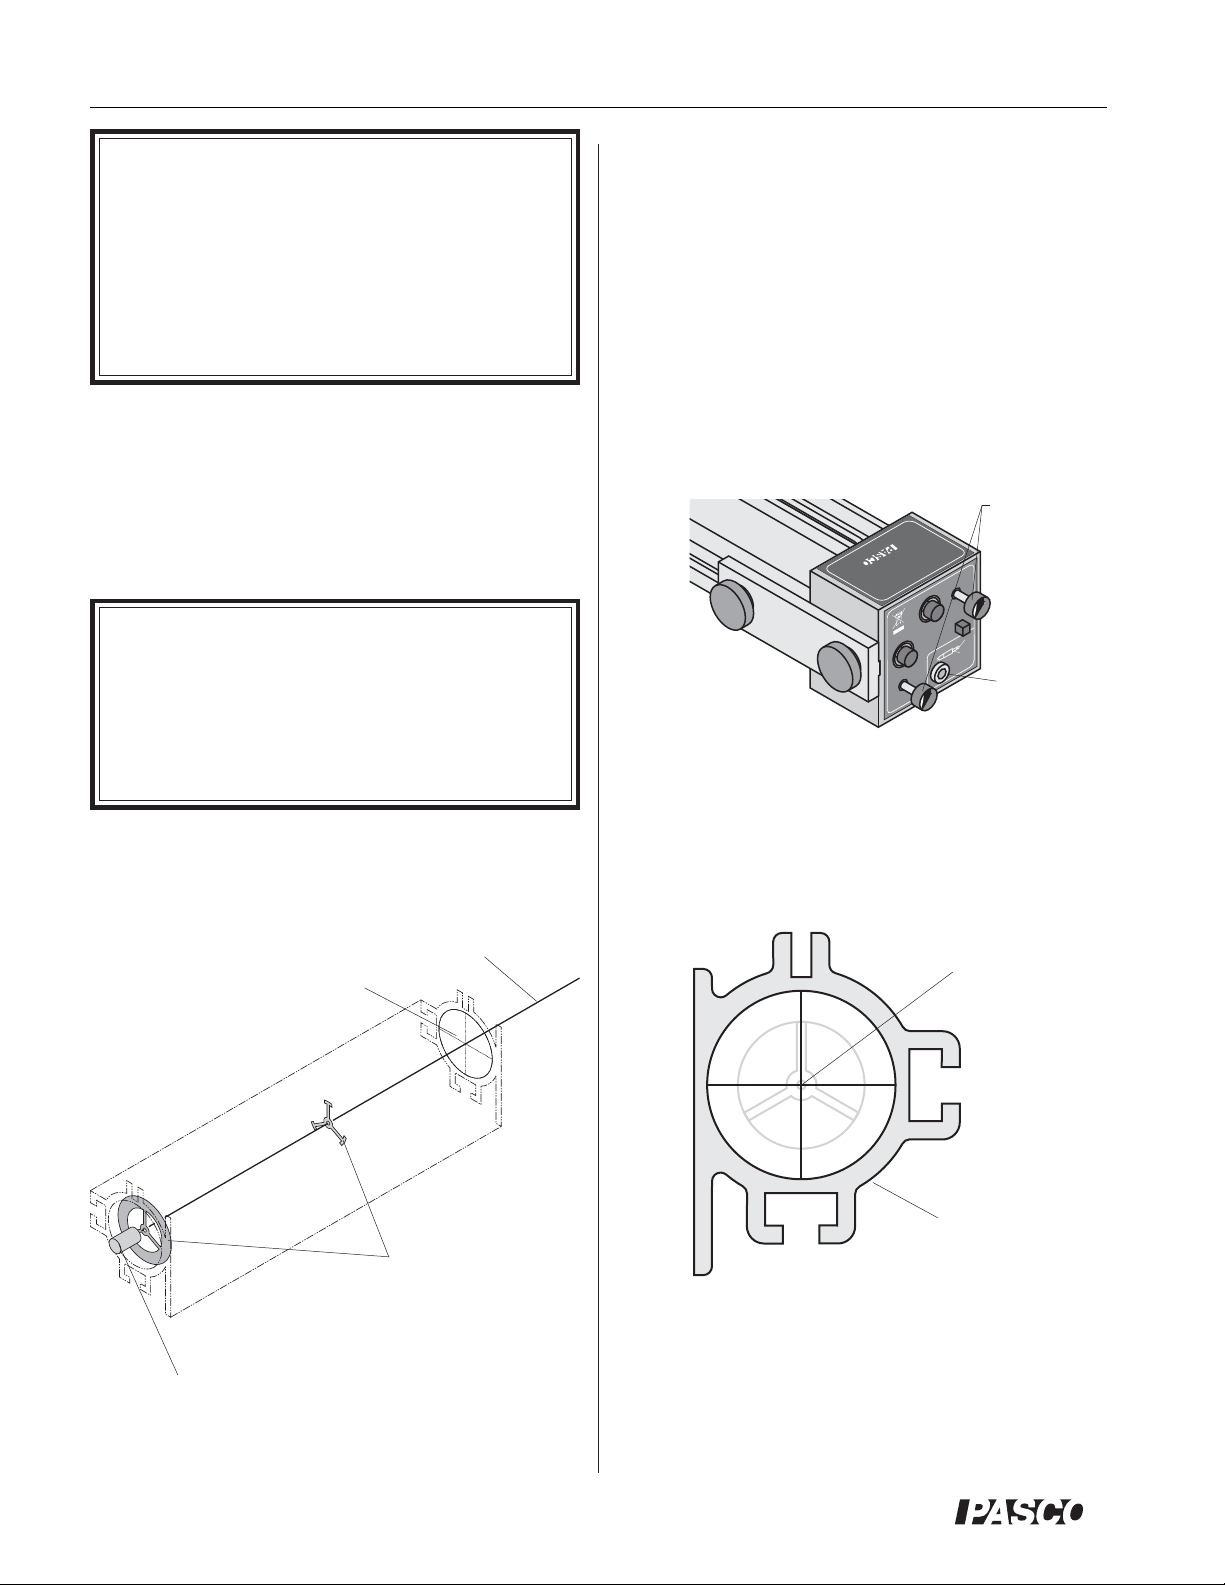
Laser Alignment
It is necessary to align the laser beam so it passes precisely through the center of both bore-sights inside the
launcher barrel. See Figure 2.
Projectile Launcher must not be loaded during this procedure.
➀ Cutout the supplied laser target fixture (see Figure
5) and place at the exit end of the Projectile
Launcher. Orientation is not critical.
adjustment
R
O
A
R
E
V
9
N
O
IZ
S
U
J
D
5
C
D
L
A
T
T
ON
OFF
C
D
V
9
+
D
N
G
A
m
0
0
screws
input jack
M
a
n
u
f
a
c
t
Roseville, CA 95747 USA
u
r
e
d
10101 Foothill Blvd.
b
y
:
ACCESSORY
LASER SIGHT
®
O
S
-8
52
7
A
H
W
O
P
3.5mm
L
A
C
I
T
T
R
S
E
U
V
J
D
A
Figure 3: Laser Beam Alignment
➁ Use the horizontal and vertical adjustment screws
to adjust the direction of the laser beam from leftto-right and up-and down until the beam is in
properly aligned. See Figure 3.
laser beam
laser target
fixture
bore-sights of
launcher
laser module at
rear of launcher
Figure 2: Laser Alignment Diagram
center of laser
target fixture
front of Projectile
Launcher barrel
Figure 4: Laser Target Fixture Detail
➂ Proper alignment is achieved when a single beam
is observed at the center of the face of the laser target fixture. See Figure 4.
®
2
Page 3

012-12247A Laser Sight Accessory
➤ CAUTION: Proper laser beam alignment
can adequately be determined by viewing the
laser target fixture from the front of the launcher
barrel, at a reasonable angle, away from the
path of the laser beam.
Technical Support
For assistance with any PASCO product, contact
PASCO at:
Address: PASCO scientific
10101 Foothills Blvd.
Roseville, CA 95747-7100
Phone: 916-786-3800 (worldwide)
800-772-8700 (U.S.)
Fax: (916) 786-7565
Web: www.pasco.com
Email: support@pasco.com
Limited Warranty
For a description of the product warranty, see the
PASCO catalog.
➃ Remove the laser target fixture and continue with
your experiments.
Copyright
The PASCO scientific OS-8528A Diode Laser is
copyrighted with all rights reserved. Permission is
granted to non-profit educational institutions for reproduction of any part of this manual, providing the
reproductions are used only in their laboratories and
classrooms, and are not sold for profit. Reproduction
under any other circumstances, without the written
consent of PASCO scientific, is prohibited.
Trademarks
PASCO and PASCO scientific are trademarks or registered trademarks of PASCO scientific, in the United
States and/or in other countries. All other brands,
products, or service names are or may be trademarks
or service marks of, and are used to identify, products
or services of, their respective owners. For more information visit www.pasco.com/legal.
➤ ➤
➤ NOTE: NO service or maintenance is al-
➤ ➤
lowed, on this product, by the customer. Return
unit to the factory for service or repair.
Unit is NOT to be opened or modified by the
Customer
®
3
Page 4

Laser Sight Accessory 012-12247A
Notes:
®
4
Page 5

012-12247A Laser Sight Accessory
Figure 5: Laser Target Fixture
®
5
 Loading...