

Page 1
Instruction Manual and
Experiment Guide for
the PASCO scientific
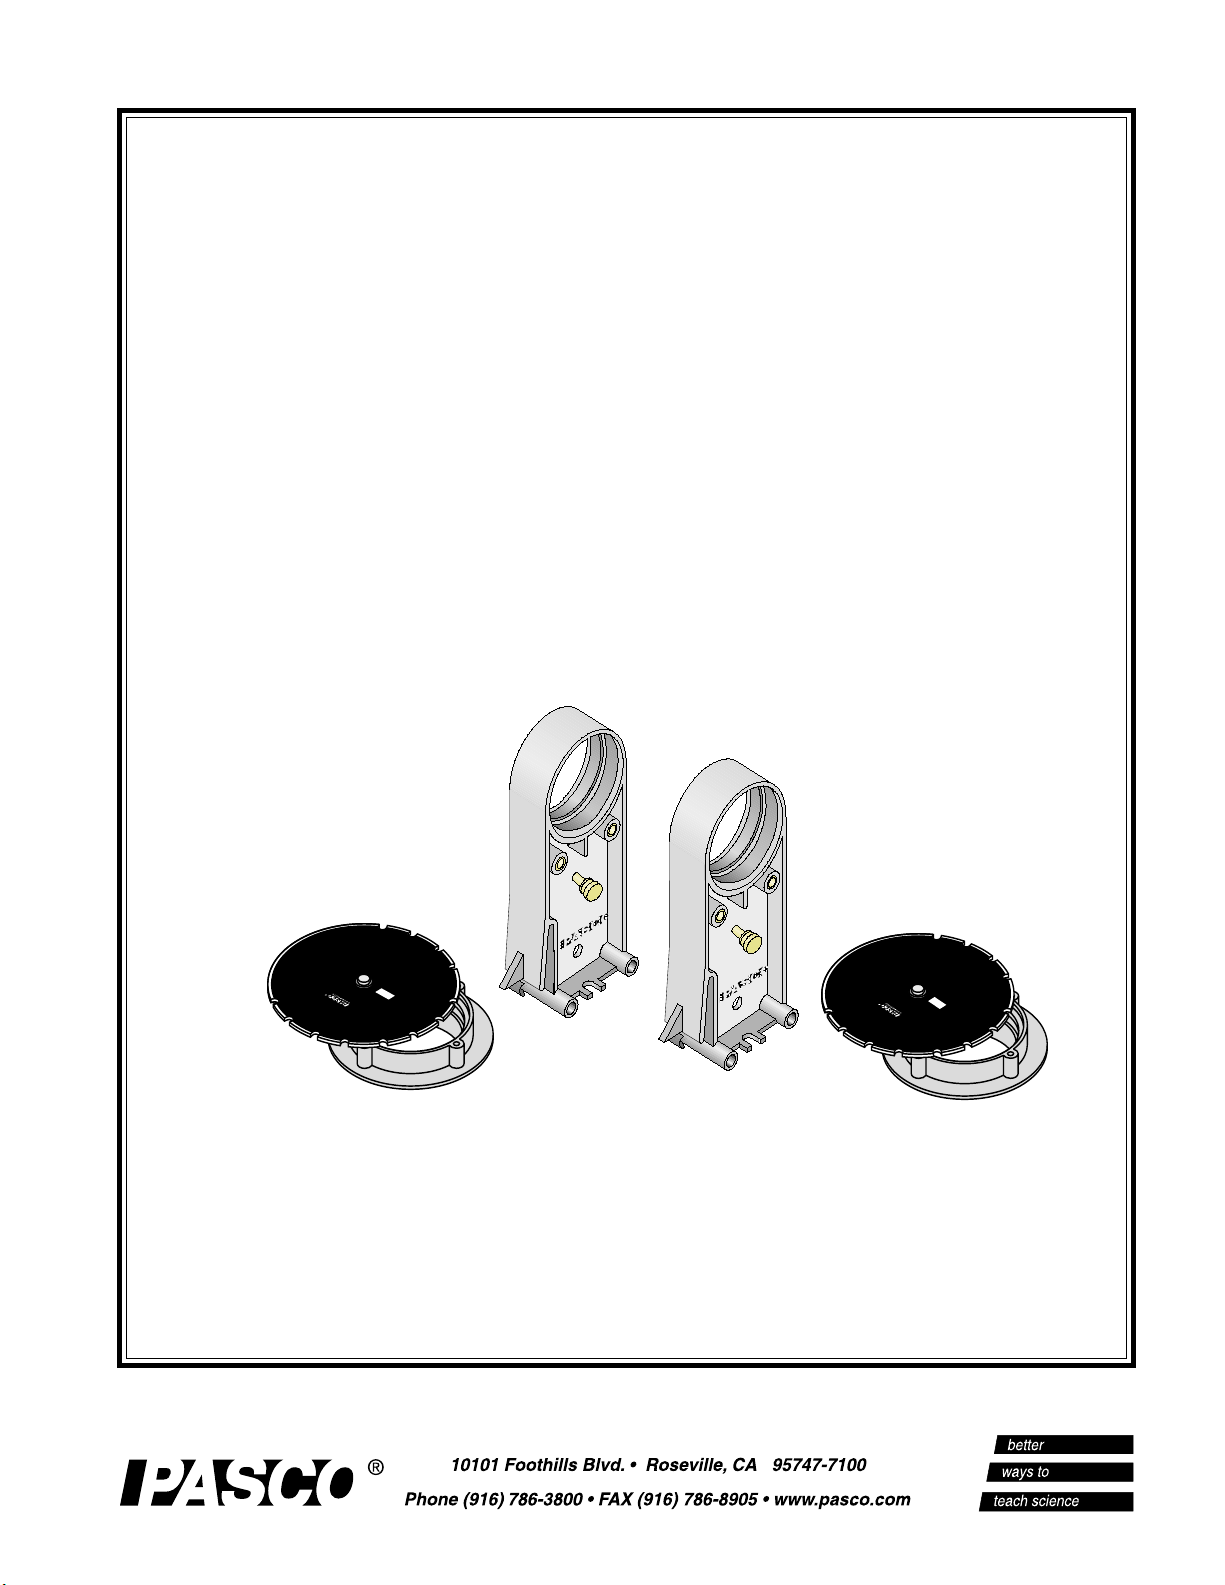
Model OS-8523
SLIT ACCESSORY
FOR THE BASIC OPTICS SYSTEM
012-05880D
E
R
T
N
T
S
A
P
m
m
n
i
h
t
d
i
w
t
i
l
s
:
=
a
T
I
L
S
E
L
B
A
I
R
A
V
Y
R
O
S
IC
T
T
E
S
LIT
3
2
5
E S
-8
L
S
G
O
S
T
I
L
L
E
S
L
I
N
E
/
S
S
P
O
IN
S
G
S
L
E
I
T
C
C
A
IC
IT
S
L
A
S
B
A
P
C
E
I
R
R
C
T
U
646-05865-B
U
L
R
A
E
R
S
S
I
N
T
I
L
S
E
L
B
U
O
D
E
L
B
A
I
R
A
V
I
R
S
A
O
P
N
M
S
O
C
RY
OS-8523
S
U
T
I
B
L
L
E
S
-B
5
6
8
MULTIPLE SLIT SET
O
5
-0
6
4
6
D
SLIT ACCESSO
BASIC OPTICS
i
t
s
e
l
p
i
t
a
w
r
a
i
t
d
i
o
t
h
n
i
i
n
n
m
m
m
m
M
U
L
T
I
P
L
E
S
L
I
T
S
d
=
:
s
a
l
=
:
s
Page 2

012-05880D Slit Accessory
Table of Contents
Section Page
Copyright, Warranty, and Equipment Return.....................................................ii
Introduction ......................................................................................................1
Equipment ........................................................................................................2
Assembly..........................................................................................................3
Experiments
Exp. 1: Diffraction from a Single Slit ..........................................................5
Exp. 2: Interference from a Double Slit ....................................................... 9
Exp. 3: Comparisons of Diffraction and Interference Patterns .....................13
Technical Support ......................................................................... Inside Back Cover
®
i
Page 3
012-05880D Slit Accessory
Copyright, W arranty and Equipment Return
Please—Feel free to duplicate this
manual subject to the copyright restrictions below.
Copyright Notice
The PASCO scientific Model OS-8523 Slit Accessory
manual is copyrighted and all rights reserved. However, permission is granted to non-profit educational
institutions for reproduction of any part of the Slit
Accessory manual providing the reproductions are
used only for their laboratories and are not sold for
profit. Reproduction under any other circumstances,
without the written consent of PASCO scientific, is
prohibited.
Limited Warranty
PASCO scientific warrants the product to be free from
defects in materials and workmanship for a period of
one year from the date of shipment to the customer.
PASCO will repair or replace, at its option, any part of
the product which is deemed to be defective in
material or
workmanship. The warranty does not cover damage
to the product caused by abuse or improper use.
Determination of whether a product failure is the
result of a manufacturing defect or improper use by
the customer shall be made solely by PASCO scientific.
Responsibility for the return of equipment for warranty repair belongs to the customer. Equipment must
be properly packed to prevent damage and shipped
postage or freight prepaid. (Damage caused by
improper packing of the equipment for return shipment will not be covered by the warranty.) Shipping
costs for returning the equipment after repair will be
paid by PASCO scientific.
Equipment Return
Should the product have to be returned to PASCO
scientific any reason notify, PASCO scientific by
letter or phone BEFORE returning the product. Upon
notification, the return authorization and shipping
instructions will be promptly issued.
NOTE:
NO EQUIPMENT WILL BE ACCEPTED FOR
RETURN WITHOUT AN AUTHORIZATION.
When returning equipment for repair, the units must
be packed properly. Carriers will not accept responsibility for damage caused by improper packing. To be
certain the unit will not be damaged in shipment,
observe the following rules:
➀ The shipping carton must be strong enough for the
item shipped.
➁ Make certain there are at least two inches of pack-
ing material between any point on the apparatus
and the inside walls of the carton.
➂ Make certain that the packing material can not shift
in the box, or become compressed, allowing the
instrument come in contact with the edge of the
shipping carton.
Address: PASCO scientific
10101 Foothills Blvd.
P.O. Box 619011
Roseville, CA 95678-9011
Credits
Authors: Ann & Jon Hanks
Editor: Sunny Bishop
®
Phone: (916) 786-3800
FAX: (916) 786-8905
email: techsupp@PASCO.com
i
Page 4
012-05880D Slit Accessory
Introduction
The PASCO OS-8523 Slit Accessory is used with the
PASCO OS-8525 Laser Diode on the optics bench in the
PASCO OS-8515 Basic Optics System. This set of two
disks has many different types of slits for diffraction and
interference experiments. The special comparison
patterns have two different slits spaced close enough
together so they can both be illuminated by a single laser
beam at the same time. This allows the student to
compare the two different patterns side-by-side so they can
see their similarities and differences.
OS-8523 Slit Accessory specifications:
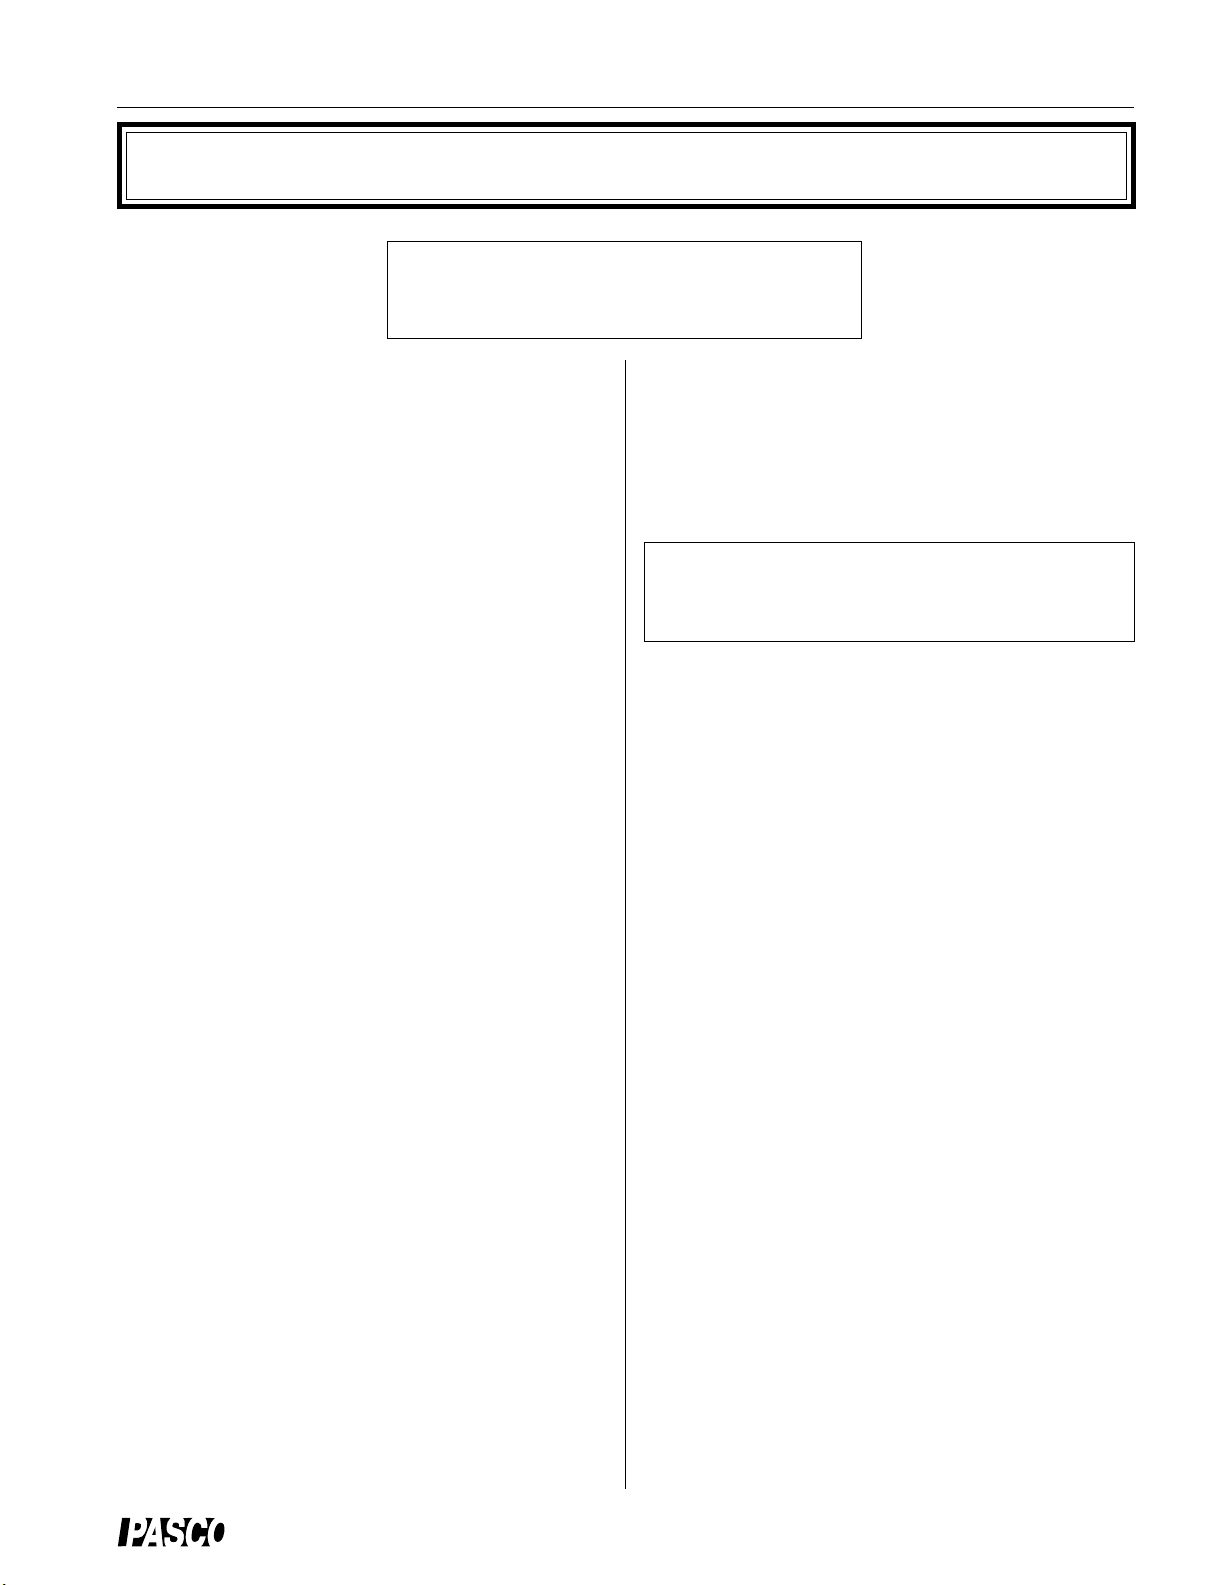
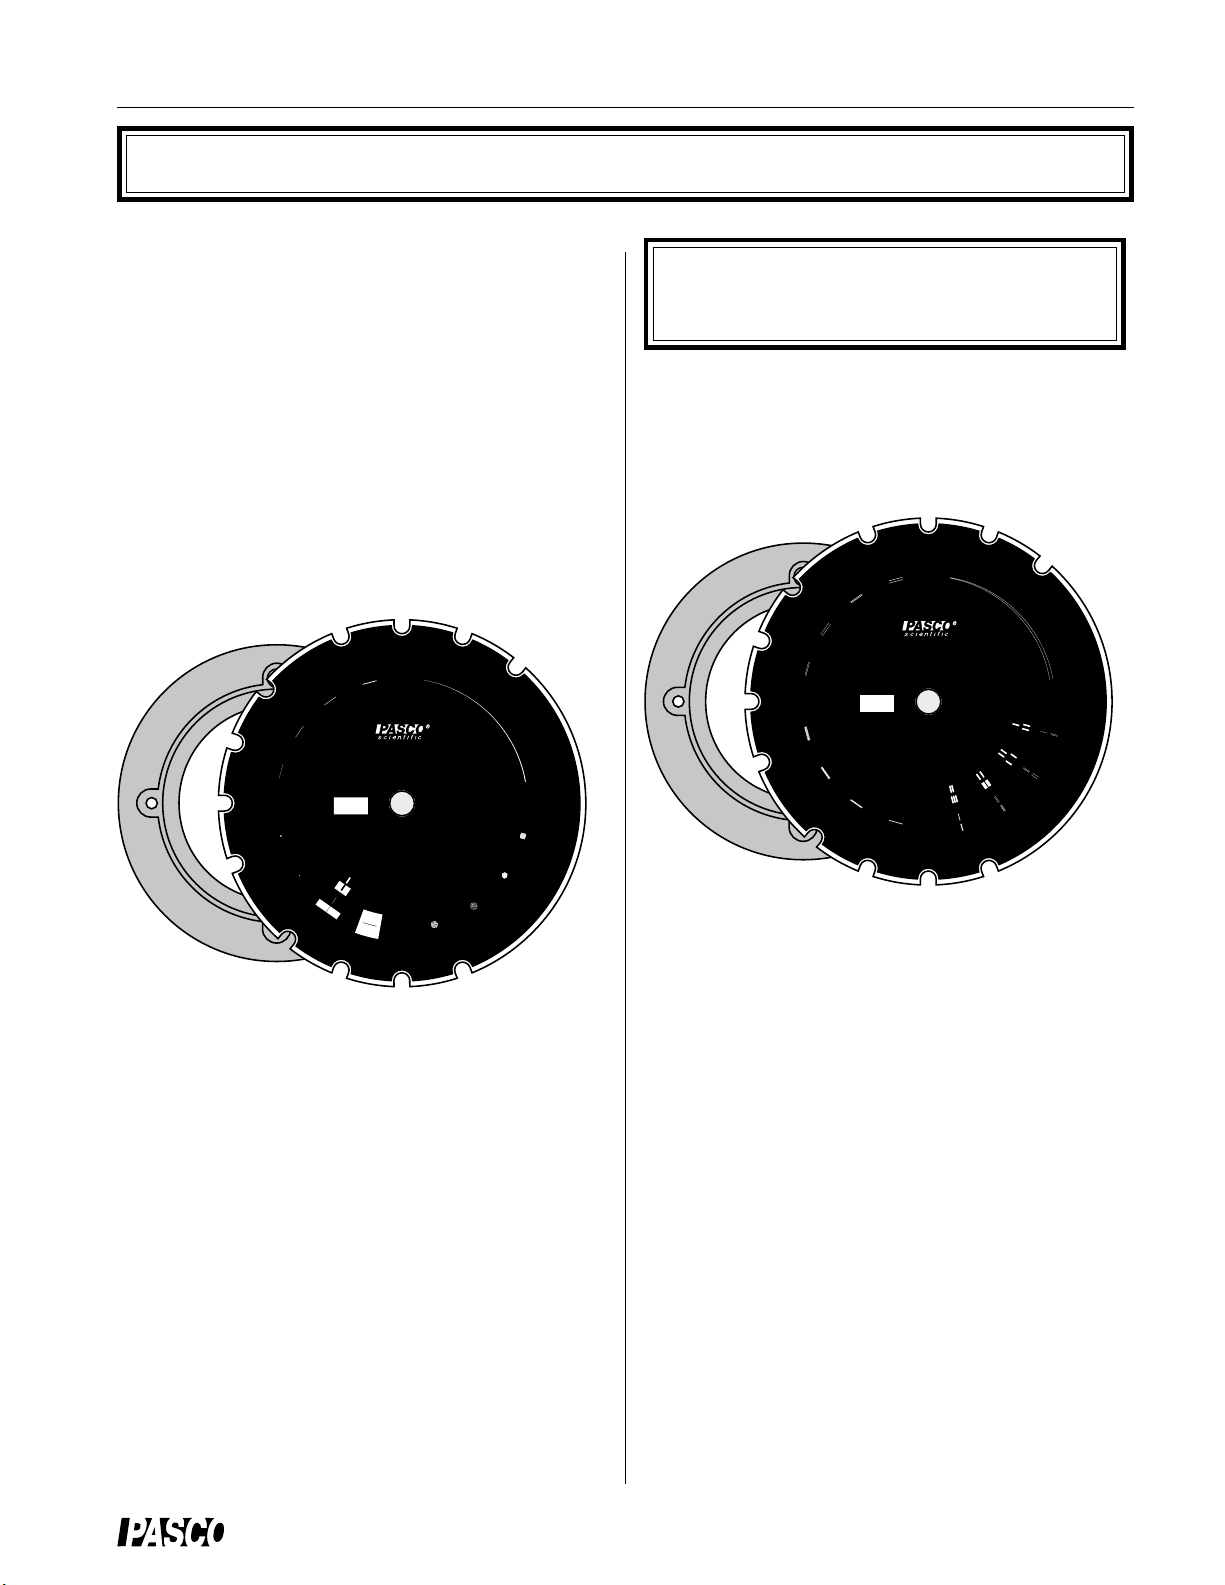
The contents of the Single Slit Disk are: (See Figure 1)
V
S
T
I
L
S
E
L
G
N
I
S
.
0
2
0
.
0
:
=
a
m
A
I
m
D
4
S
.
0
E
R
R
A
m
U
L
T
U
R
C
E
R
I
P
A
C
6
1
.
0
8
0
.
0
4
0
OS-8523
SINGLE SLIT SET
646-05865
BASIC OPTICS
SLIT ACCESSORY
A
I
D
m
2
.
0
E
N
I
L
8
0
.
0
=
a
T
I
L
S
/
E
N
I
L
A
R
I
A
B
L
E
a
E
N
S
I
O
N
S
H
O
L
E
S
S
=
0
L
.
0
I
2
T
t
o
0
.
2
0
a
=
:
s
l
i
t
w
i
d
t
h
S
i
n
Q
U
m
S
A
m
E
R
E
E
S
M
A
N
H
U
E
A
X
L
E
F
S
O
R
D
I
M
T
S
P
D
O
A
T
T
E
R
N
S
Figure 1: Single Slit Disk
– 4 single slits (slit widths 0.02, 0.04, 0.08, 0.16 mm)
– 1 variable slit (slit width varies from 0.02 to 0.20
mm)
– 1 square pattern
NOTE: Due to limitations of the photographic process used to produce the slit film, the line and slit
may not be exactly the same width.
The contents of the Multiple Slit Disk are: (See Figure 2)
V
A
R
I
d=0.1
a= 0.04 0.04
25
0.12
A
B
L
E
D
O
U
0
.
d
0
.0
4
5
0
a
=
1
0
2
5
t
o
a= 0.04 0.04
d= 0.25
a
=
0
=
0
.2
0.08
.2
5
B
L
E
.
0
S
4
L
0
I
.
T
7
5
.0
4
0
.0
5
4
0
.5
0
C
O
M
P
A
R
I
S
O
N
S
d
=
a
=
d
=
0
.2
5
S
T
I
L
S
E
L
B
U
O
D
0
.
0
m
4
m
5
m
0
2
.
n
i
.
m
0
0
n
n
i
:
:
o
i
=
=
t
h
t
a
a
d
r
d
i
a
w
p
t
e
i
l
s
s
t
i
:
l
5
=
s
a
:
=
d
5
S
T
I
L
S
E
L
P
I
T
8
0
.
0
0
5
.
0
8
0
.
0
5
2
.
0
4
0
5
.
OS-8523
0
MULTIPLE SLIT SET
646-05865
BASIC OPTICS
SLIT ACCESSORY
2
1
.
0
4
=
d
4
0
.
0
=
3
a
2
L
U
M
Figure 2: Multiple Slit Disk
– 4 double slits (slit width/separation in mm: 0.04/
0.25, 0.04/0.50, 0.08/0.25, 0.08/0.50)
– 1 variable double slit (slit separation varies from
0.125 to 0.75 mm with constant slit width 0.04
mm)
– 4 comparisons: single/double slit with same slit
width (0.04 mm)
– 1 hexagonal pattern
– 1 random opaque dot pattern (dot diameter = 0.06
mm)
– 1 random hole pattern (hole diameter = 0.06 mm)
– 1 opaque line of width 0.08 mm
– 1 slit/line comparison, line and slit have similar width
(0.04 mm)
– 2 circular apertures (diameters 0.2 mm and 0.4
mm)
®
– double/double slit with same slit width (0.04
mm), different separation (0.25 mm/0.50 mm)
– double/double slit with different slit widths (0.04,
0.08 mm), same separation (0.25 mm)
– double/triple slit with same slit width (0.04 mm),
same separation (0.125 mm)
– set of 4 multiple slits (2, 3, 4, 5 slits) with same
slit width (0.04 mm), same separation (0.125
mm)
1
Page 5
Slit Accessory 012-05880D
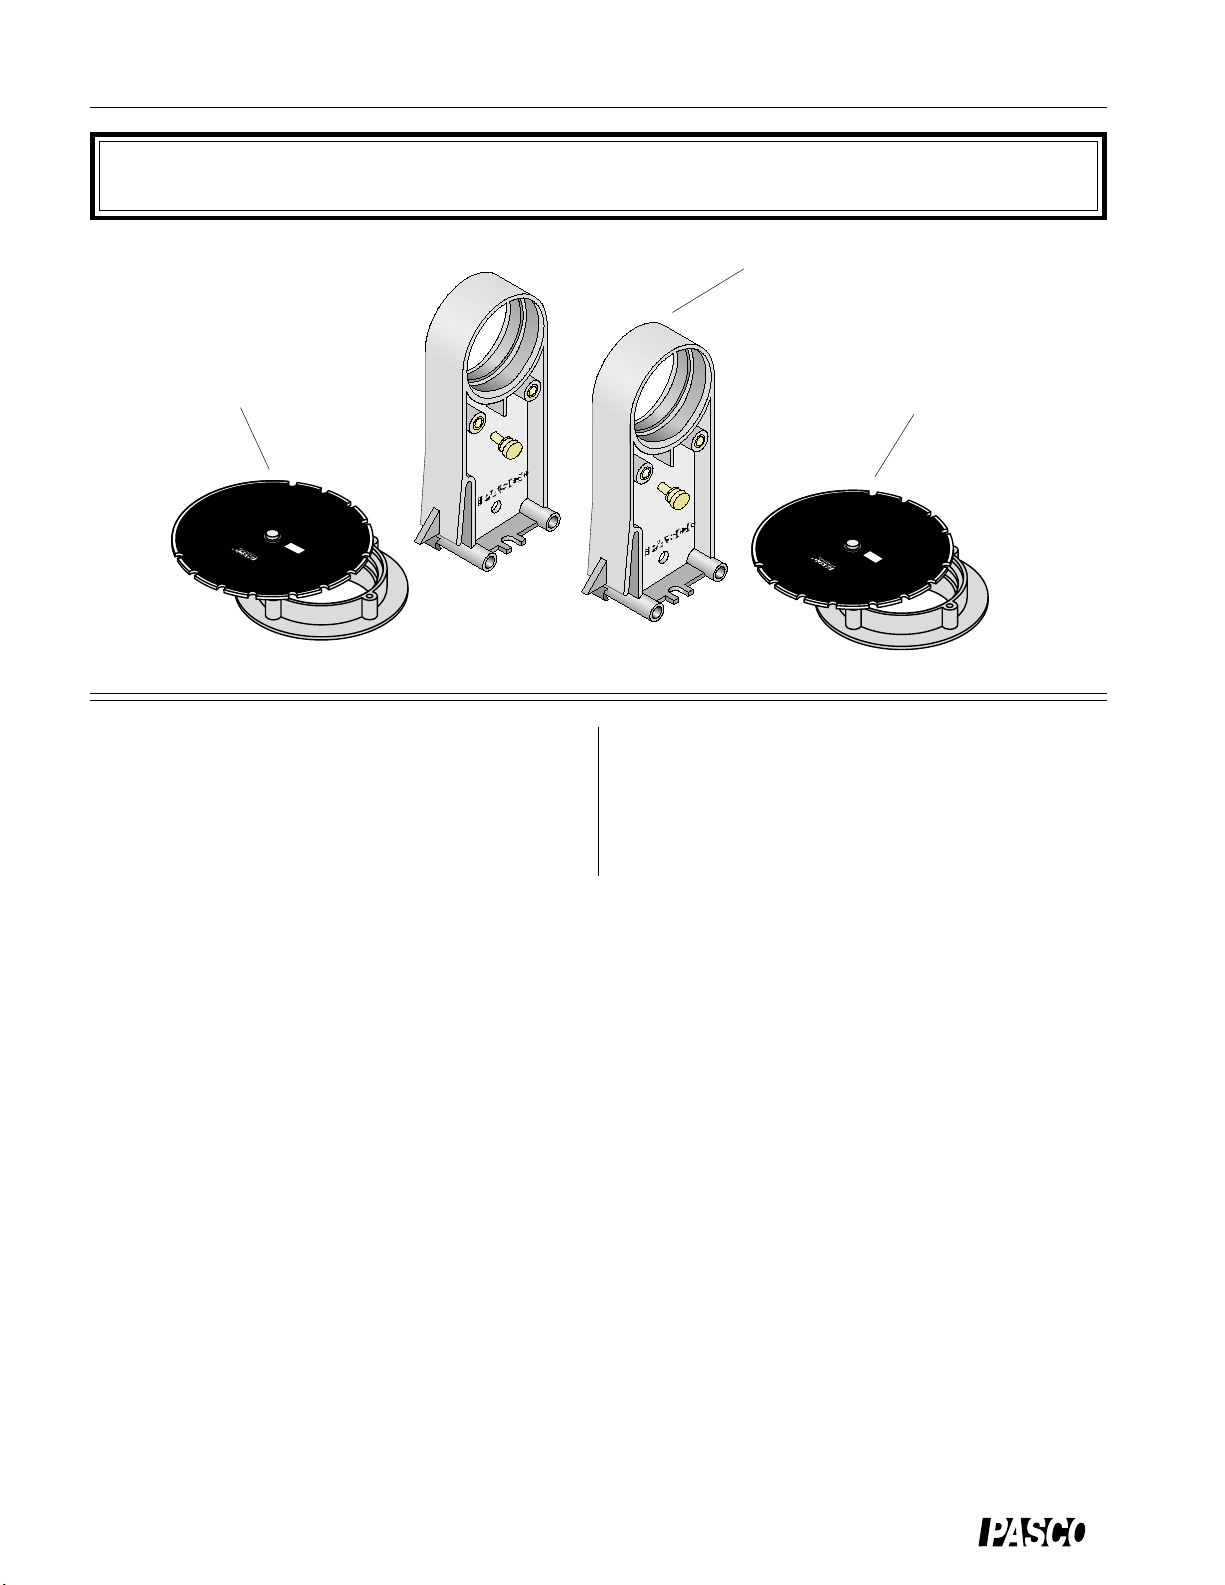
Equipment
lens holder with
thumbscrew (2)
Single Slit Disk
:
=
a
T
I
L
T
S
E
E
S
L
B
IT
A
I
R
A
V
L
S
S
OS-8523
T
I
E
L
G
IN
L
L
E
S
S
G
646-05865-B
S
I
N
SLIT ACCESSORY
BASIC OPTICS
L
I
N
E
/
S
L
I
T
A
P
C
E
I
R
R
C
T
U
U
L
R
A
E
R
S
E
R
T
N
T
S
A
P
m
m
n
i
h
t
d
i
w
t
i
l
s
OS-8523 Slit Accessory Equipment
The OS-8523 Slit Accessory includes the following:
– Single Slit Disk
– Multiple Slit Disk
– lens holder with thumbscrew (2)
Multiple Slit Disk
I
R
S
A
O
P
N
M
S
O
C
T
I
L
S
E
L
B
U
O
D
E
L
B
A
I
R
A
V
Y
R
O
S
IC
T
23
5
B
5
6
-8
S
O
O
S
U
T
I
B
L
L
E
S
M
U
S
S
L
E
T
P
C
I
P
C
O
L
A
IC
E
S
LIT
A
S
S
B
L
I
T
S
8
5
0
6
4
6
d
=
:
MULTIPLE SLIT SET
s
a
l
i
=
t
:
s
s
e
l
p
i
t
a
w
r
a
i
t
d
i
o
t
h
n
i
i
n
n
m
m
m
m
D
2
®
Page 6
012-05880D Slit Accessory
V
A
R
I
A
B
L
E
S
L
I
T
a
=
:
s
l
i
t
w
i
d
t
h
i
n
m
m
O
S
-8
5
2
3
SINGLE SLIT SET
S
I
N
G
L
E
S
L
I
T
S
P
A
T
T
E
R
N
S
L
I
N
E
/
S
L
I
T
C
I
R
C
U
L
A
R
A
P
E
R
T
U
R
E
S
B
A
S
IC
O
P
T
IC
S
S
L
IT
A
C
C
E
S
S
O
R
Y
64
6
-0
5
8
6
5
-B
L
a
s
e
r
L
ig
h
t
A
v
o
id
D
i
r
e
c
t
E
y
e
E
x
p
o
s
u
r
e
L
a
s
e
r
D
io
d
e
D
A
N
G
E
R
Assembly
slit disk
ring
thumbscrew
S
E
R
R
A
U
L
T
U
R
C
R
I
C
E
L
G
N
I
S
2
0
.
0
:
=
a
m
A
I
m
D
4
.
0
m
m
E
P
A
T
I
S
T
I
L
S
6
1
.
0
8
0
.
0
4
0
.
0
OS-8523
SINGLE SLIT SET
6
4
6
0
5
8
6
5
-B
BASIC OPTICS
SLIT ACCESSORY
A
I
D
2
.
0
E
N
I
L
8
0
.
0
=
a
L
S
/
E
N
I
L
I
O
N
S
H
O
L
E
S
V
A
a
=
0
.
0
2
t
o
M
A
N
U
E
A
X
L
E
F
S
O
R
D
I
M
D
E
N
O
S
T
S
N
S
attachment
R
I
A
B
L
E
S
L
I
T
0
.
2
0
a
=
:
s
l
i
t
w
i
d
t
h
S
Q
i
n
U
S
m
A
E
R
m
E
E
S
H
P
A
T
T
E
R
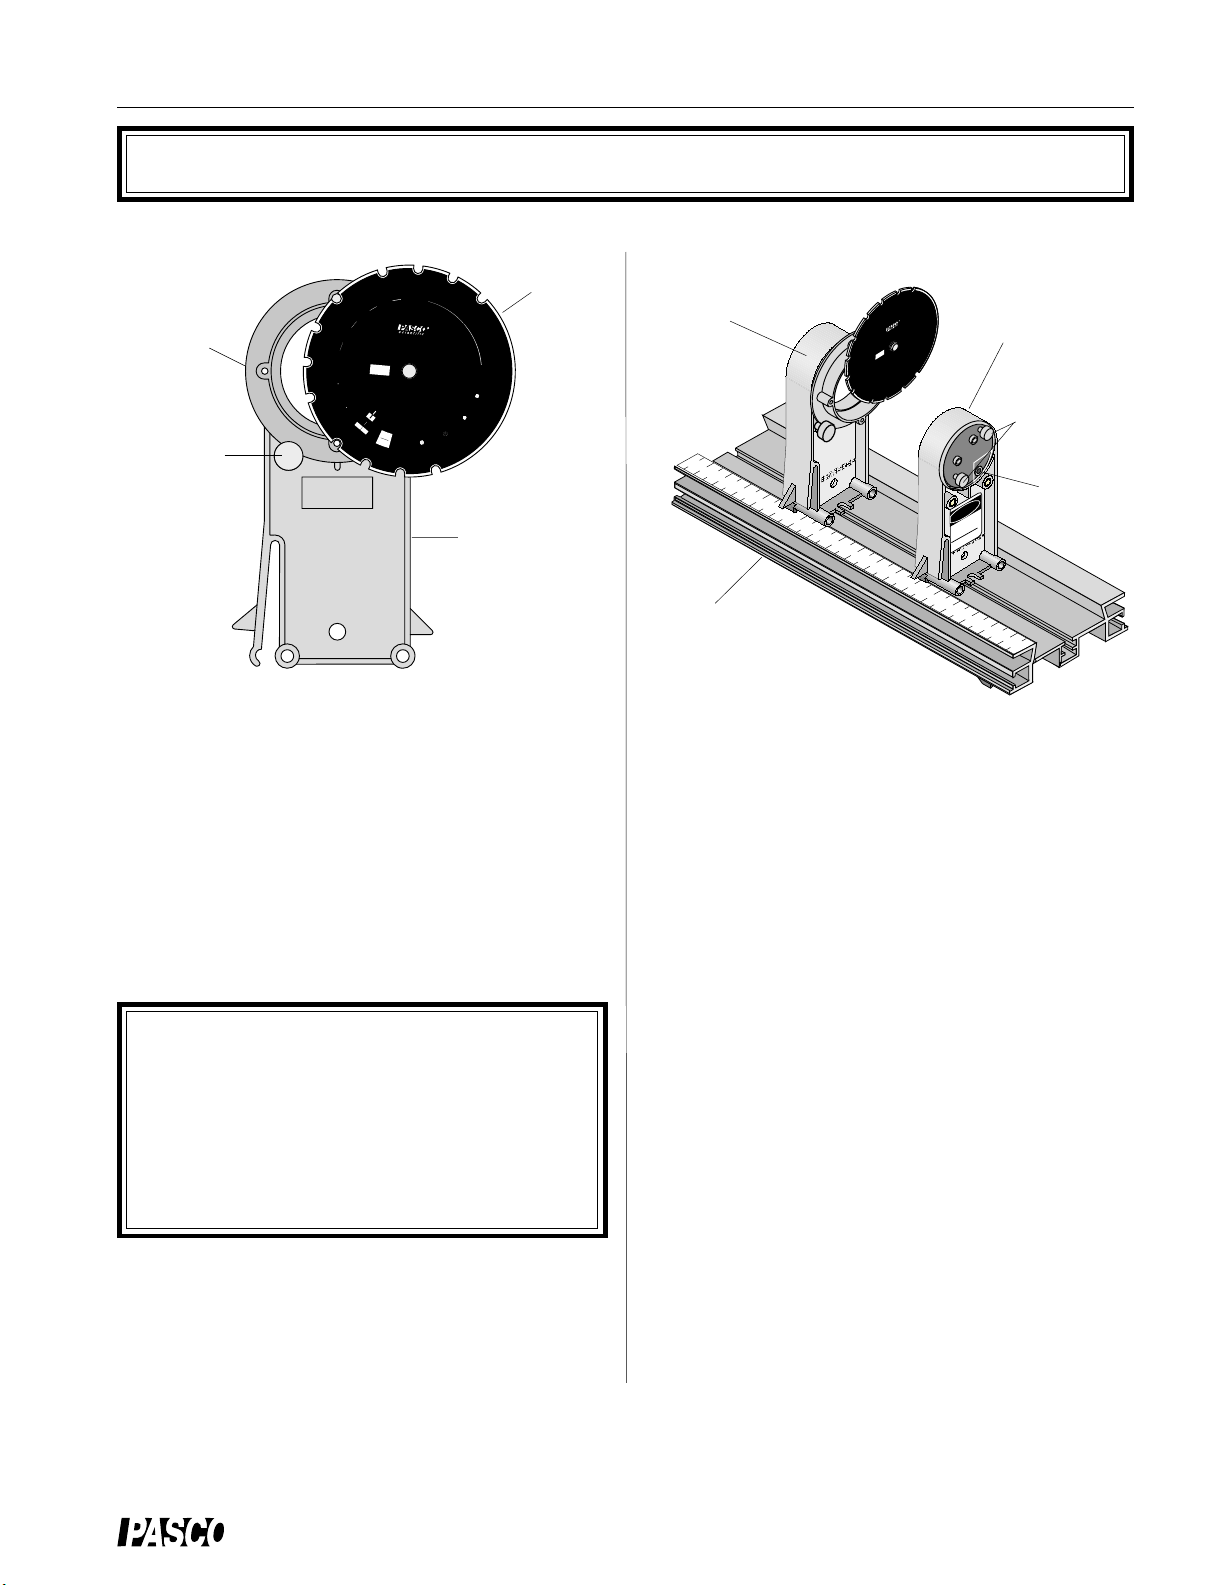
lens holder
mounted slit
accessory
optics bench
OS-8525
Diode Laser
adjusting
screws
input jack
(9VDC)
Figure 3: Slit Accessory and Lens Holder
Mounting the Slit Accessory to the Optics
Bench
Each of the slit disks is mounted on a ring which snaps
into an empty lens holder. The ring should be rotated in
the lens holder so the slits at the center of the ring are
vertical in the holder. See Figure 3. Tighten the thumbscrew on the holder so the ring cannot rotate during use.
To select the desired slits, rotate the disk until it clicks
into place with the desired slits at the center of the holder.
NOTE: All slits are vertical EXCEPT the
comparison slits which are horizontal. The comparison slits are purposely horizontal because
the wide laser diode beam will cover both slits to
be compared. If you try to rotate these slits to the
vertical position, the laser beam may not be
large enough to illuminate both slits at the same
time.
To align the laser beam and the slits, place the Diode
Laser (OS-8525) at one end of the bench. Place the slit
holder on the optics bench a few centimeters from the
laser with the disk-side of the holder closest to the laser. See Figure 3. Plug in the Diode Laser and turn it on.
Adjust the position of the laser beam from left-to-right
Figure 4: Using the Slit Accessory
with the Diode Laser
and up-and-down until the beam is centered on the slit.
Once this position is set, it is not necessary to make any
further adjustments of the laser beam when viewing any
of the slits on the disk. When you rotate the disk to a new
slit, the laser beam will be already aligned. The slits click
into place so you can easily change from one slit to the
next, even in the dark.
®
3
Page 7

Slit Accessory 012-05880D
Notes:
4
®
Page 8

012-05880D Slit Accessory
γ
D
γ
Experiment 1: Diffraction from a Single Slit
EQUIPMENT REQUIRED
– track and screen from the Basic Optics System (OS-8515)
– Diode Laser (OS-8525)
– Single Slit Disk (OS-8523)
– white paper to cover screen
– metric rule
Purpose
The purpose of this experiment is to examine the diffraction pattern formed by laser light
passing through a single slit and verify that the positions of the minima in the diffraction
pattern match the positions predicted by theory.
Theory
When diffraction of light occurs as it passes through a slit, the angle to the minima in the
diffraction pattern is given by
a
sin θ =mλ (m= 1,2,3...)
θ
where a is the slit width,
is the angle from the
center of the pattern to the mth minimum, λ is the
wavelength of the light, and m is the order (1 for
D
the first minimum, 2 for the second minimum, . . .
counting from the center out). See Figure 1.1.
Since the angles are usually small, it can be assumed that
sin θ≈tan θ
a
θ
From trigonometry,
tan θ =
slit
where y is the distance on the screen from the
center of the pattern to the mth minimum and D is
Figure 1.1: Single Slit Diffraction Pattern
the distance from the slit to the screen as shown in Figure 1.1. The diffraction equation can
thus be solved for the slit width:
mλD
a
=
m
=1,2,3,
m = 2
m = 1
m = 1
m = 2
screen
y
®
5
Page 9

Slit Accessory 012-05880D
Setup
Set up the laser at one end of the optics bench and place the Single Slit Disk in its holder
➀
about 3 cm in front of the laser. See Figure 1.2.
➁ Cover the screen with a sheet of paper and attach it to the other end of the bench so that the
paper faces the laser.
➂ Select the 0.04 mm slit by rotating the slit disk until the 0.04 mm slit is centered in the slit
holder. Adjust the position of the laser beam from left-to-right and up-and-down until the
beam is centered on the slit.
laser
slit
screen
Figure 1.2: Optics Bench Setup
Procedure
➀ Determine the distance from the slit to the screen. Note that the slit is actually offset from the
center line of the slit holder. Record the screen position, slit position, and the difference
between these (the slit-to-screen distance) in Table 1.1.
➁ Turn off the room lights and mark the positions of the minima in the diffraction pattern on
the screen.
➂ Turn on the room lights and measure the distance between the first order (m = 1) marks and
record this distance in Table 1.1. Also measure the distance between the second order (m =
2) marks and record in Table 1.1.
Table 1.1: Data and Results for the 0.04 mm Single Slit
Slit-to-screen distance (D) = _____________________________
First Order (m=1) Second Order (m=2)
Distance between
side orders
Distance from center
to side (y)
Calculated slit width
% difference
6
®
Page 10

012-05880D Slit Accessory
➃ Make a sketch of the diffraction pattern to scale.
➄ Change the slit width to 0.02 mm and 0.08 mm and make sketches to scale of each of these dif-
fraction patterns.
Analysis
➀ Divide the distances between side orders by two to get the distances from the center of the pattern
to the first and second order minima. Record these values of y in Table 1.1.
➁ Using the average wavelength of the laser (670 nm for the Diode Laser), calculate the slit width
twice, once using first order and once using second order. Record the results in Table 1.1.
➂ Calculate the percent differences between the experimental slit widths and 0.04 mm. Record in
Table 1.1.
Questions
➀ Does the distance between minima increase or decrease when the slit width is increased?
®
7
Page 11

Slit Accessory 012-05880D
Notes:
8
®
Page 12

012-05880D Slit Accessory
θ
λ
y
Experiment 2: Interference from a Double Slit
EQUIPMENT REQUIRED
– track and screen from the Basic Optics System (OS-8515)
– Diode Laser (OS-8525)
– Multiple Slit Disk (OS-8523)
– white paper to cover screen
– metric rule
Purpose
The purpose of this experiment is to examine the diffraction and interference patterns formed by laser
light passing through two slits and verify that the positions of the maxima in the interference pattern
match the positions predicted by theory.
Theory
When light passes through two slits, the two light
rays emerging from the slits interfere with each
other and produce interference fringes. The angle
to the maxima (bright fringes) in the interference
pattern is given by
d sinθ= mλ(m =0,1,2,3,…)
where d is the slit separation, θ is the angle from
the center of the pattern to the mth maximum, λ is
the wavelength of the light, and m is the order (0
for the central maximum, 1 for the first side maximum, 2 for the second side maximum, . . . counting from the center out). See Figure 2.1.
Since the angles are usually small, it can be assumed that
d
sinθ≈ tan
From trigonometry,
tanθ=
where y is the distance on the screen from the center of the
pattern to the m
slits to the screen as shown in Figure 2.1. The interference
equation can thus be solved for the slit separation:
th
maximum and D is the distance from the
D
D
θ
slit
Figure 2.1: Interference Fringes
diffraction minimum
central envelope
m = 2
m = 1
y
m = 0
m = 1
m = 2
screen
m = 4
m = 3
m = 2
m = 1
m = 0
m
d =
®
D
(m =0,1,2,3,…)
y
dotted line is diffraction envelope
Figure 2.2: Single Slit Diffraction Envelope
9
Page 13

Slit Accessory 012-05880D
While the interference fringes are created by the interference of the light coming from the
two slits, there is also a diffraction effect occurring at each slit due to Single Slit diffraction.
This causes the envelope as seen in Figure 2.2.
Setup
Set up the laser at one end of the optics bench and place the Multiple Slit Disk in its holder
➀
about 3 cm in front of the laser. See Figure 2.3.
laser
slit
screen
Figure 2.3: Optics Bench Setup
➁ Cover the screen with a sheet of paper and attach it to the other end of the bench so that the
paper faces the laser.
➂ Select the double slit with 0.04 mm slit width and 0.25 mm slit separation by rotating the slit
disk until the desired double slit is centered in the slit holder. Adjust the position of the laser
beam from left-to-right and up-and-down until the beam is centered on the double slit.
Procedure
➀ Determine the distance from the slits to the screen.
Note that the slits are actually offset from the center line of the slit holder. Record the screen
position, slit position, and the difference between these (the slit-to-screen distance) in Table
2.1.
➁ Turn off the room lights and mark the positions of the maxima in the interference pattern on
the screen.
Table 2.1: Data and Results for the 0.04 mm/0.25 mm Double Slit
Slit-to-screen distance (D) = _________________
First Order (m=1) Second Order (m=2)
Distance between
side orders
Distance from center
to side (y)
Calculated slit
separation
% difference
10
®
Page 14

012-05880D Slit Accessory
➂ Turn on the room lights and measure the distance between the first order (m = 1) marks
and record this distance in Table 2.1. Also measure the distance between the second order
(m = 2) marks and record in Table 2.1.
➃ Make a sketch of the interference pattern to scale.
➄ Change to a new double slit with the same slit width (0.04 mm) but different slit separation
(0.50 mm) and make a sketch to scale of this new interference pattern.
➅ Change to another double slit with a slit width of 0.08 mm and the original slit separation
(0.25 mm) and make a sketch to scale of this new interference pattern.
Analysis
➀ Divide the distances between side orders by two to get the distances from the center of the
pattern to the first and second order maxima. Record these values of y in Table 2.1.
➁ Using the average wavelength of the laser (670 nm for the Diode Laser), calculate the slit
1separation twice, once using first order and once using second order. Record the results in
Table 2.1.
➂ Calculate the percent differences between the experimental slit separation and 0.25 mm.
Record in Table 2.1.
Questions
➀ Does the distance between maxima increase, decrease, or stay the same when the slit sepa-
ration is increased?
➁ Does the distance between maxima increase, decrease, or stay the same when the slit width
is increased?
®
11
Page 15

Slit Accessory 012-05880D
➂ Does the distance to the first minima in the diffraction envelope increase, decrease, or stay the
same when the slit separation is increased?
➃ Does the distance to the first minima in the diffraction envelope increase, decrease, or stay
the same when the slit width is increased?
12
®
Page 16

012-05880D Slit Accessory
Experiment 3: Comparisons of Diffraction and Interference Patterns
EQUIPMENT REQUIRED
– track and screen from the Basic Optics System (OS-8515)
– Diode Laser (OS-8525)
– Single and Multiple Slit Disks (OS-8523)
– white paper to cover screen
Purpose
The purpose of this experiment is to compare the diffraction and interference patterns
formed by laser light passing through various combinations of slits.
Theory
When diffraction of light occurs as it passes through a slit, the angle to the minima in the
diffraction pattern is given by
a sinθ= mλ(m =1,2,3,…)
where a is the slit width, θ is the angle from the
center of the pattern to the mth minimum, λ is the
wavelength of the light, and m is the order (1 for
the first minimum, 2 for the second minimum, . .
. counting from the center out). See Figure 3.1.
When light passes through two slits, the two light
rays emerging from the slits interfere with each
other and produce interference fringes. The angle
to the maxima (bright fringes) in the interference
pattern is given by
d sinθ= m
λ
(m = 0, 1, 2 , 3,...)
where d is the slit separation, θ is the angle from
the center of the pattern to the mth maximum,
is the wavelength of the light, and m is the order (0 for the central maximum, 1 for the first
side
maximum, 2 for the second side maximum, . . .
counting from the center out). See Figure 3.2.
Setup
➀ Set up the laser at one end of the optics bench
and place the Multiple Slit Disk in its holder
about 3 cm in front of the laser. See Figure 3.3.
m = 2
a
m = 1
θ
m = 1
slit
Figure 3.1: Single Slit Diffraction Pattern
m = 2
screen
λ
m = 5
m = 4
m = 3
θ
d
slit
diffraction envelope
Figure 3.2: Interference Fringes
m = 2
m = 1
m = 0
screen
®
13
Page 17

Slit Accessory 012-05880D
➁ Cover the screen with a sheet of paper and attach it to the other end of the bench so that the
paper faces the laser.
laser
slit
screen
Figure 3.3: Optics Bench Setup
➂ Select the single-double slit comparison by rotating the slit disk until the desired slit set is
centered in the slit holder. Adjust the position of the laser beam from left-to-right and upand-down until the beam is centered on the slit set so that both the single slit and the double
slit are illuminated simultaneously. The patterns from the single and double slits should be
vertical and side-by-side on the screen.
Procedure
➀ Sketch the two side-by-side patterns roughly to scale.
➁ Rotate the slit disk to the next comparison set (2 double slits with the same slit width but
different slit separations). Sketch the two side-by-side patterns roughly to scale.
➂ Rotate the slit disk to the next comparison set (2 double slits with the same slit separation
but different slit widths). Sketch the two side-by-side patterns roughly to scale.
➃ Rotate the slit disk to the next comparison set (double slits/triple slits with the same slit sepa-
ration and same slit widths). Sketch the two side-by-side patterns roughly to scale.
14
®
Page 18

012-05880D Slit Accessory
➄ Replace the Multiple Slit Disk with the Single Slit Disk. Select the line/slit comparison.
Sketch the two side-by-side patterns roughly to scale.
➅ Select the dot pattern on the Single Slit Disk. Sketch the resulting diffraction pattern
roughly to scale.
➆ Select the hole pattern on the Single Slit Disk. Sketch the resulting diffraction pattern
roughly to scale.
Questions
➀ What are the similarities and differences between the single slit and the double slit?
➁ How does the double slit pattern change when the slit separation is increased?
➂ How does the double slit pattern change when the slit width is increased?
➃ What differences are there between a double slit pattern and a triple slit pattern?
®
15
Page 19

Slit Accessory 012-05880D
➄ How does the diffraction pattern from a slit differ from the diffraction pattern from a line?
➅ How does the diffraction pattern from the dot pattern differ from the diffraction pattern from
the hole pattern?
16
®
Page 20

Technical Support
Feedback
If you have any comments about the product or
manual, please let us know. If you have any suggestions on alternate experiments or find a problem in the
manual, please tell us. PASCO appreciates any customer
feedback. Your input helps us evaluate and improve
our product.
To Reach PASCO
For technical support, call us at 1-800-772-8700
(toll-free within the U.S.) or (916) 786-3800.
fax: (916) 786-3292
e-mail: techsupp@pasco.com
web: www.pasco.com
Contacting Technical Support
Before you call the PASCO Technical Support staff, it
would be helpful to prepare the following information:
➤ If your problem is with the PASCO apparatus,
note:
- Title and model number (usually listed on the
label);
- Approximate age of apparatus;
- A detailed description of the problem/sequence
of events (in case you can’t call PASCO right
away, you won’t lose valuable data);
- If possible, have the apparatus within reach when
calling to facilitate description of individual parts.
➤ If your problem relates to the instruction manual,
note:
- Part number and revision (listed by month and
year on the front cover);
- Have the manual at hand to discuss your
questions.
 Loading...