

Page 1
®
Basic Optics Light Source
OS-8470
Instruction Sheet
012-09517B
Included Equipment Part Number
Basic Optics Light Source OS-8470
Universal AC Adapter 540-072
Spare Bulb (stored under access cover) 526-035
Introduction
The OS-8470 Basic Optics Light Source is suitable for a variety of experiments and demonstrations. You can place it in
three different orientations on a tabletop or mount it on a
PASCO Basic Optics Bench or Dynamics Optics Carriage. It
functions as a bright point source, an illuminated
crossed-arrow object, a primary-color source, and a ray box
with up to five parallel rays.
Equipment Setup
Power
Connect the included universal AC adapter to the light
source’s power port. Plug the adapter into a power outlet (100
to 240 VAC).
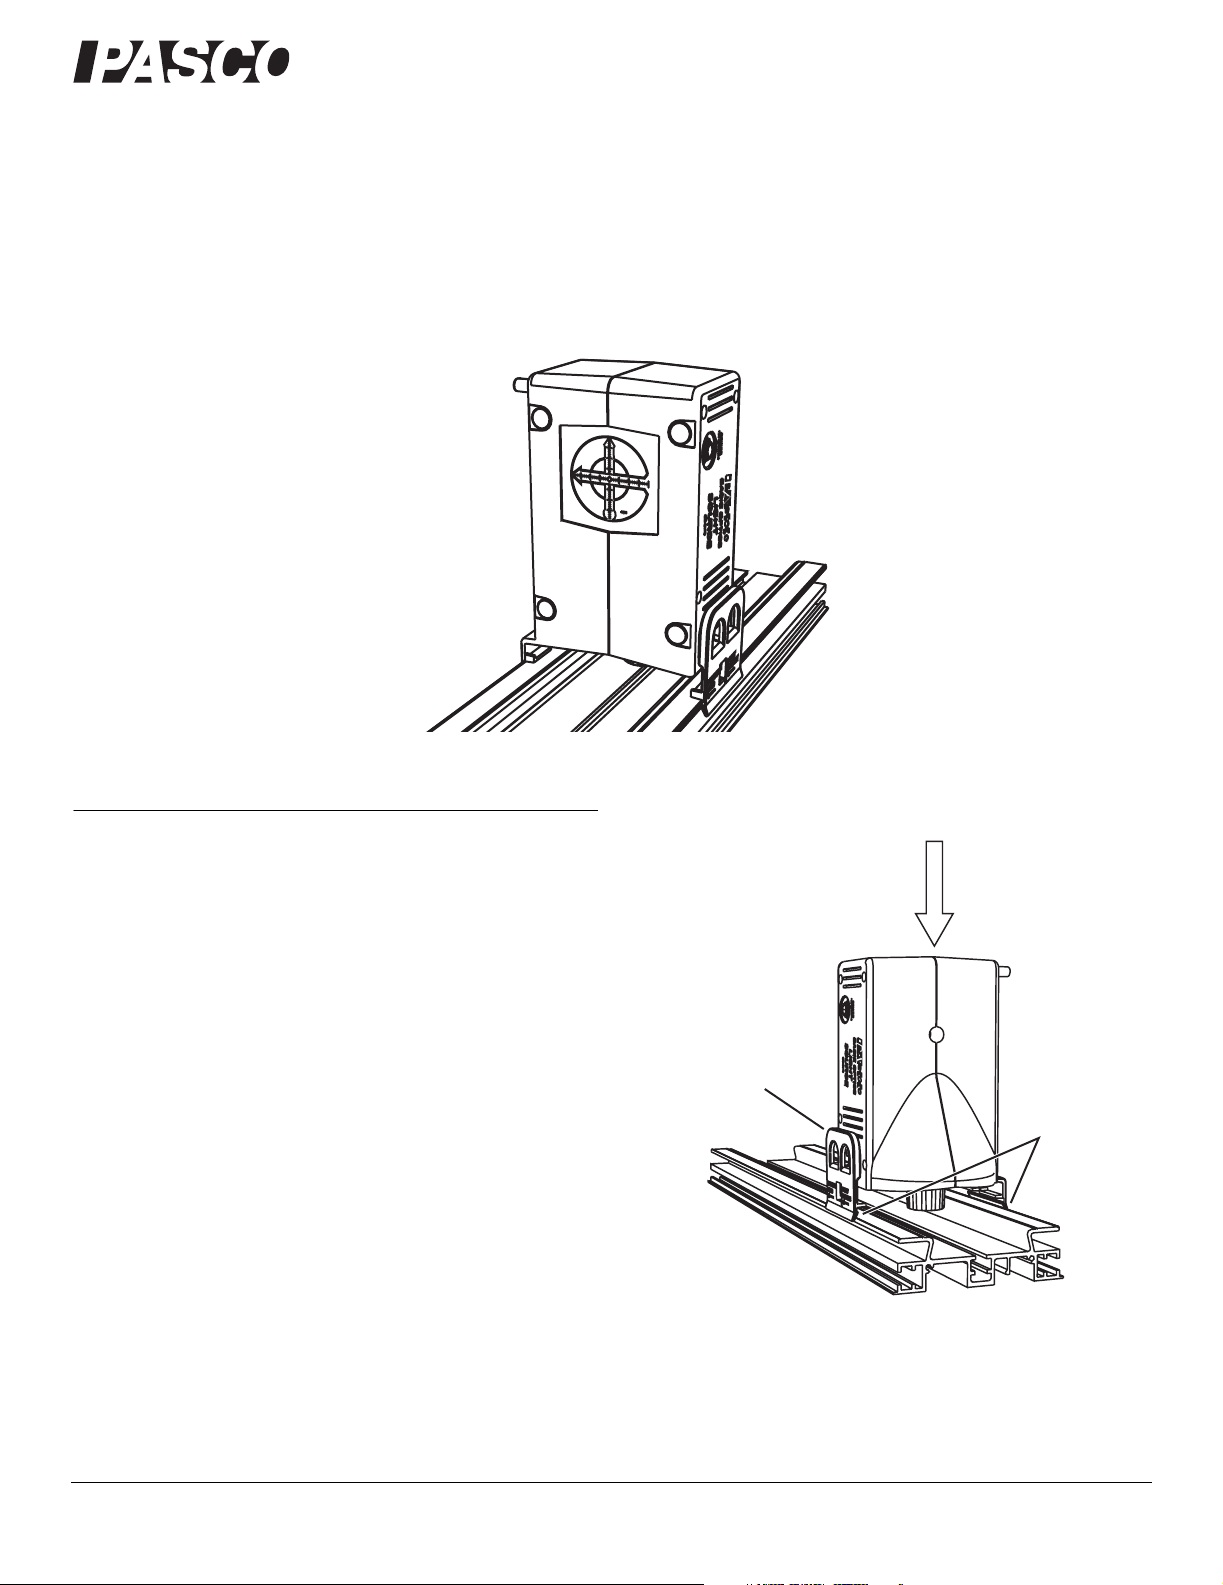
Optics Bench or Carriage Mounting
Press down
Release lever
Tabs
To mount the light source on a Basic Optics Bench, place it
vertically on the bench and press down; the outer tabs of the
light source snap into the side slots of the bench. (Attach the
light source to a Dynamics Optics Carriage in the same way.)
Marks on the tabs indicate the horizontal positions of the point
800-772-8700 www.pasco.com
Page 2
Model No. OS-8470 Equipment Setup
source and object screen. To detach the light source, squeeze
the release lever and pull up.
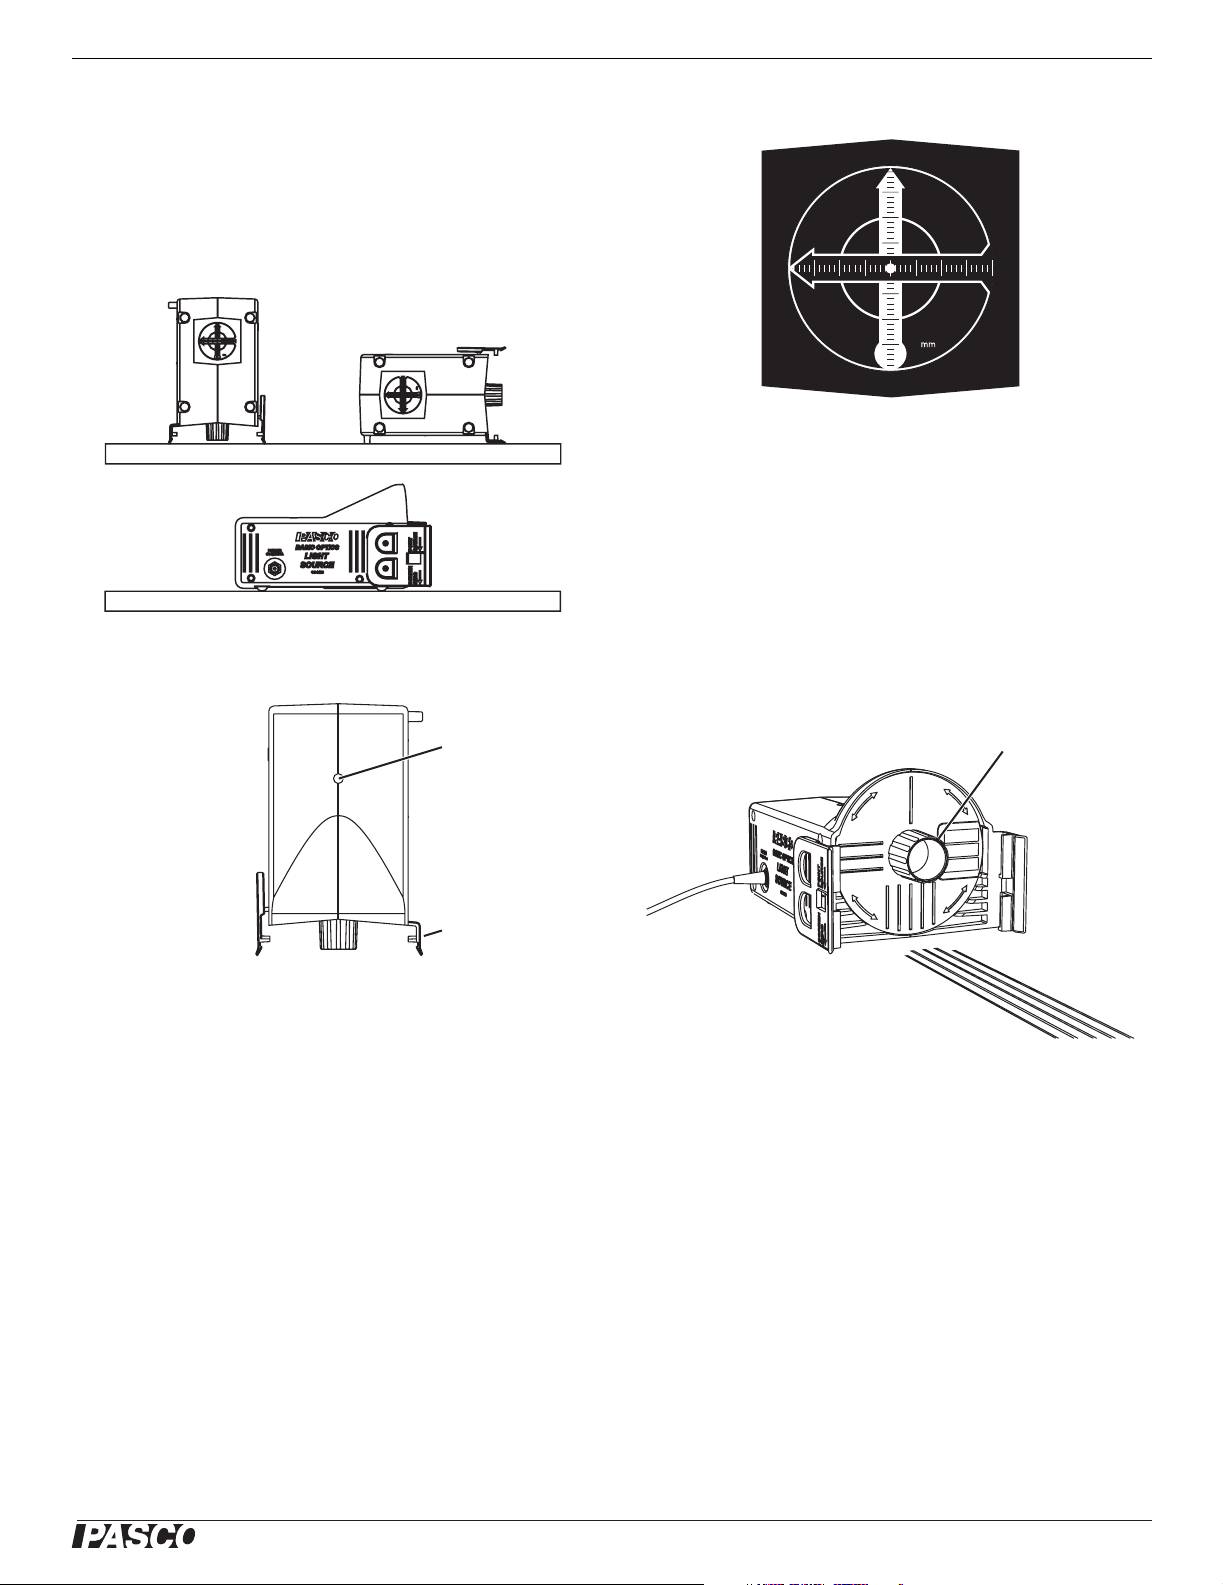
Tabletop Placement
The light source can be placed on a tabletop in three ways:
vertically, horizontally, and flat, as illustrated below.
Horizontal
Vertical
Flat
Tabletop placement
Point Source
Point source
Illuminated Object
The object is a backlit, translucent screen with crossed arrows
printed on it. The pattern is asymmetrical so you can tell if
images formed with lenses and mirror are reversed or
inverted. Millimeter scales on both arrows allow you to measure the magnification of an image even if the entire image is
not visible.
To use the illuminated object, mount the light source on an
optics bench or carriage (see above), or place it vertically or
horizontally on a tabletop.
Ray Box
Turn to select
number of rays
Position mark
on tab
The halogen bulb’s filament viewed “end on” closely approximates a true point source. It projects light through the round
opening in the case, but its actual location is about 3 cm
behind the outer surface of the case, as indicated by marks on
the tabs.
To use the point source, mount the unit on an optics bench or
carriage (see above), or place it vertically or horizontally on a
tabletop.
Ray wheel in 5-ray position
To use the light source as a ray box, place the unit flat on a
table top. Turn the wheel to select one, three, or five parallel
rays projected onto the table. A sheet of white paper placed
flat on the table makes the rays easier to see and allows you to
trace them with a pencil.
Use prisms, mirrors, and cylindrical lenses (such as those
included in the OS-8516A Ray Optics Kit) to study how the
rays are refracted and reflected.
®
2
Page 3

Model No. OS-8470 Bulb Replacement
Primary Colors
Place the light source flat on a sheet of white paper and turn
the wheel so that the colored bars are in the lowest position.
Red, green, and blue parallel beams are projected onto the
paper or a vertical surface placed in front of the light source.
Use a prism or convergent cylindrical lens to combine all three
colors. Block one of the beams with a pencil to see the combination of two colors.
Bulb Alignment
To produce parallel rays, the filament of the bulb must be
located on the imaginary line running through the center of the
round opening and the center of the crossed-arrow object
screen.
To check the alignment, with the light source un-powered,
look into the unit through the round opening. Viewed end-on,
the filament looks like a small loop. Sight through the filament
to the center of the crossed-arrow object (viewed from the
back). If the filament does not appear in the center of the
round opening, then it is out of alignment. It is helpful to tape
a pair of crossed threads over the opening to mark its center.
Back of object screen
Filament
Bulb Replacement
Access cover
Spare bulb
The light source includes a spare bulb, which is stored under
the access cover. Use a #0 Phillips screwdriver to unfasten the
screws securing the access cover and remove the cover.
Remove the old bulb by pulling it straight out. Install the new
bulb by pushing it straight into the socket. Align it approximately with the round opening in the case; then proceed to the
alignment instructions below.
View into round opening showing the properly aligned filament
To adjust the alignment, use a Phillips screwdriver to turn the
screws on the light bulb socket. To move the filament up or
down (as you are looking down through the access hatch) turn
both screws equally in the same direction. To move the filament side-to-side, turn the screws by the same amount in
opposite directions.
Alignment screws
View into access hatch
Caution: If the burned-out bulb has been in use recently, it may
be hot. Allow it to cool before removing it.
Important: Handle the replacement bulb with clean tissue paper and
avoid touching it. Oils transferred from your skin to the bulb may cause
the glass to overheat and break. If the new bulb has been touched,
clean it with alcohol before installing it.
®
3
Page 4

Model No. OS-8470 Specifications
Specifications
Bulb type G4 halogen, 12 V, 10 W
Input Power (to
included AC Adapter)
Dimensions 16 cm × 10 cm × 9 cm
100 to 240 VAC, 50 to 60 Hz
Troubleshooting
Problem Solution
Bulb does not
illuminate when the AC
adapter is connected.
Rays are not parallel or
do not appear as thin,
straight lines of light.
Ensure that the AC adapter is plugged
into an operating power outlet.
Replace bulb with included spare.
Test the output of the adapter; it should
be 12 VDC.
Check and adjust bulb alignment.
Technical Support
For assistance with any PASCO product, contact PASCO at:
Address: PASCO scientific
10101 Foothills Blvd.
Roseville, CA 95747-7100
Phone: 916-786-3800 (worldwide)
800-772-8700 (U.S.)
Fax: (916) 786-7565
Web: www.pasco.com
Email: support@pasco.com
Limited Warranty
For a description of the product warranty, see the PASCO catalog.
Copyright
The PASCO scientific 012-09517B
Sheet
is copyrighted with all rights reserved. Permission is granted to
non-profit educational institutions for reproduction of any part of this manual, providing the reproductions are used only in their laboratories and
classrooms, and are not sold for profit. Reproduction under any other circumstances, without the written consent of PASCO scientific, is prohibited.
Trademarks
PASCO and PASCO scientific are trademarks or registered trademarks of
PASCO scientific, in the United States and/or in other countries. All other
brands, products, or service names are or may be trademarks or service
marks of, and are used to identify, products or services of, their respective
owners. For more information visit www.pasco.com/legal.
Basic Optics Light Source Instruction
®
4
 Loading...