

Page 1
®
Force Accessory Bracket
CI-6545
1
2
3
Instruction Sheet
012-05835B
4
5
6
7
89 10
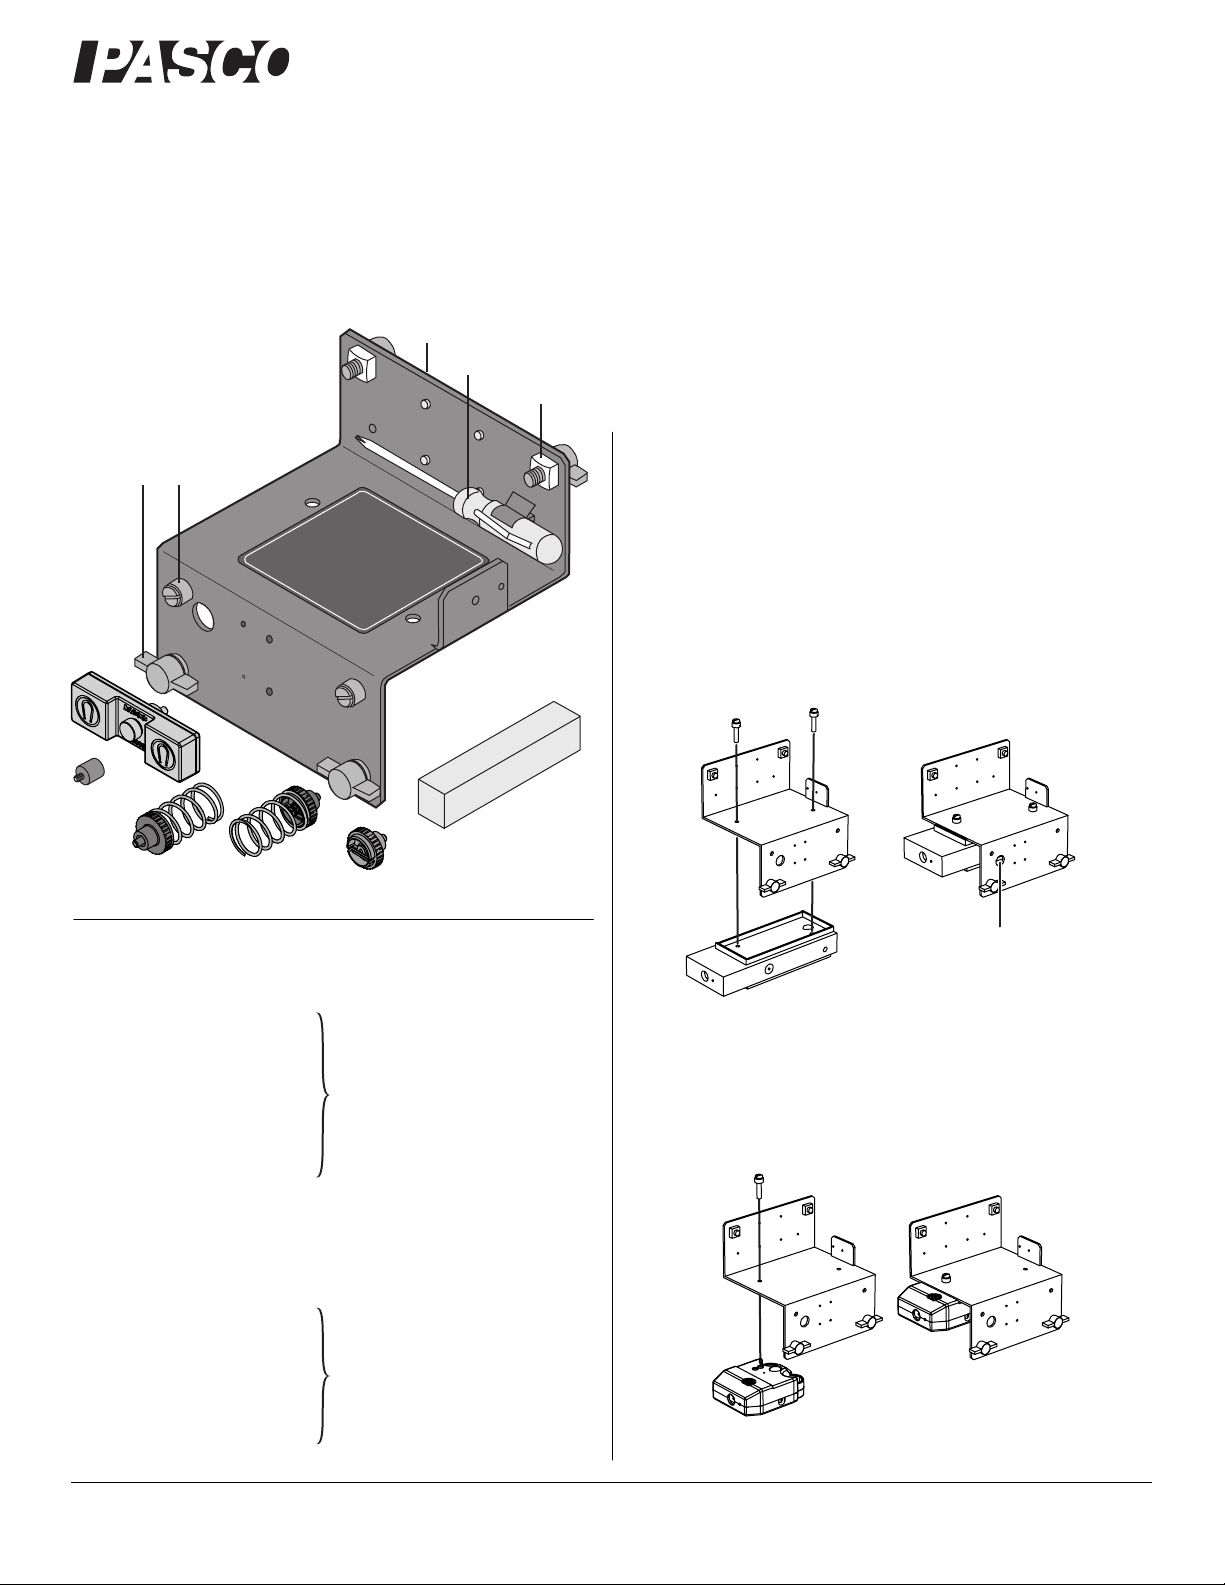
Included Equipment Replacement Parts
1. Bracket CI-6545
2. Screwdriver 855-005
3. Square Nuts (4 pieces)
Introduction
Use the CI-6545 Force Accessory Bracket to mount a force sensor on a PASCO track. The included bumpers can be attached to
the force sensor or directly to the bracket for collisions with a
cart.
Thumbscrews
11
Tare button
access
Force Sensor
Figure 1: Large force sensor attachment
4. T-screws for mounting
on track (4 pieces)
ME-9823 (IDS Spares Kit)
5. Thumb screws for
attaching force sensor
(2 pieces)
Thumbscrew
6. Magnetic Bumper ME-9885A (set of 2)
7. Rubber Bumper CI-6463
(Force Sensor Spares Kit)
8. Light Spring Bumper
9. Heavy Spring Bumper
10. Clay Holder
11. Clay
ME-9884
(Bumper Accessory Set)
Force Sensor
Figure 2: Small force sensor attachment
800-772-8700 www.pasco.com
Page 2
Force Accessory Bracket CI-6545
Recommended Equipment
The Bracket is designed for use with PASCO dynamics tracks
and all types of PASCO carts and force sensors. The table below
is a partial list of compatible equipment.
Force Sensors Part Number
PASPORT Force Sensor PS-2104
ScienceWorkshop
ScienceWorkshop
Dynamics Systems
1.2 m PAScar Dynamics System ME-6955
2.2 m PAScar Dynamics System ME-6956
1.2 m Classic Dynamics System ME-9429B
2.2 m Classic Dynamics System ME-9452A
Carts
PAScars ME-6950
GOcar ME-6951
Force Sensor CI-6537
Economy Force Sensor CI-6746
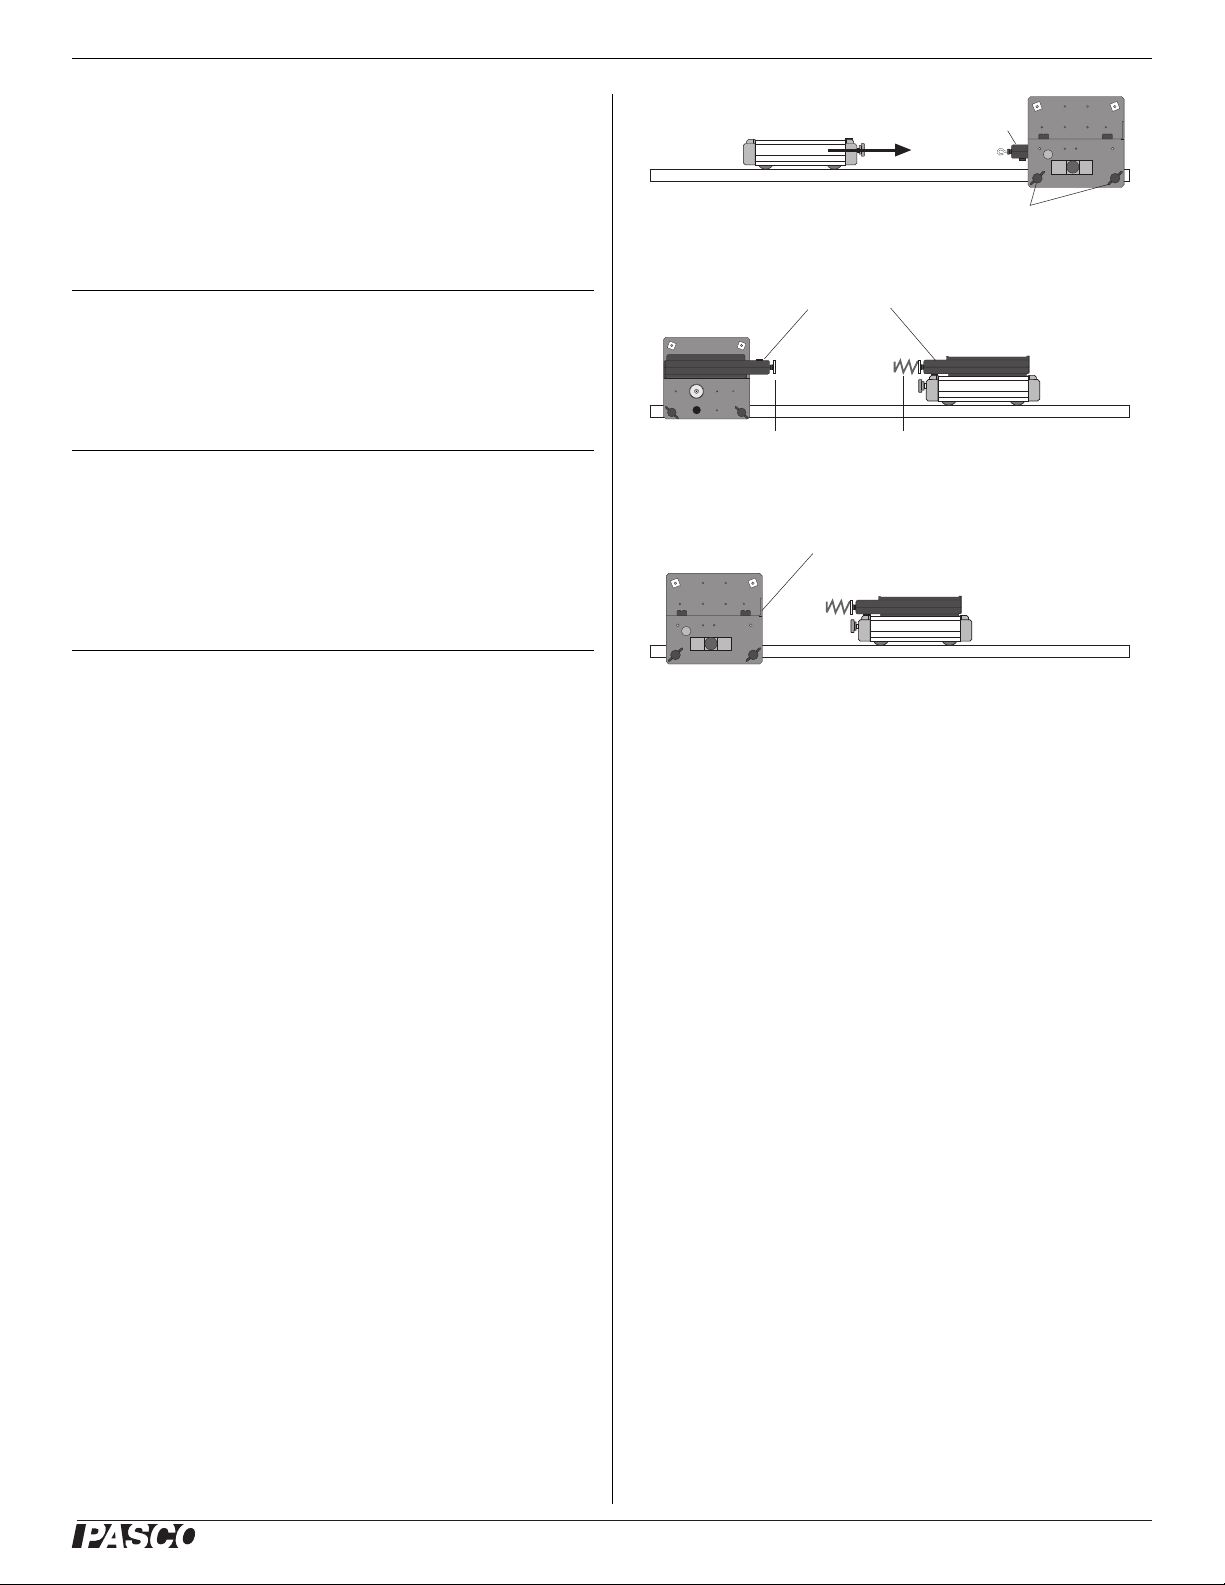
Force Sensor
Bracket
Collision Cup
Cart
Tr ac k
Force Sensors
End Stop
Figure 3: Track attachment options
Force Sensor
Thumbscrews
(a)
Spring Bumper
(b)
Force Sensor
Cart
(c)
R
A
E
T
Plunger Cart ME-9430
Collision Cart ME-9454
Attaching a Force Sensor
Attach a large-format force sensor (such as CI-6537) with two
thumbscrews (included with the bracket) as illustrated in
Figure 1.
To attach a small-format force sensor (such as PS-2104 and
CI-6746), use one thumbscrew as illustrated in Figure 2. On the
sensor, the thumbscrew goes into the hole labeled “IDS Bracket.”
Attaching the Bracket to a
Track
The bracket can be fastened to the T-slot on either side of a
PASCO track. Either side of the bracket can be attached to the
IDS track. When the bracket’s label is faces up (Figure 3a), the
force sensor is level with a cart on the track. When the label faces
down (Figure 3b), the sensor is level with a second force sensor
mounted on a cart.
You can also use the end stop on the bracket (Figure 3c). Depending on how the bracket is mounted, the end stop is either level
with a cart or with a force sensor mounted on a cart.
To mount the bracket on the track, loosen (but do not remove) the
T-screws. Line up the square nuts with the opening of the T-slot
on the end of the track. Slide the square nuts into the T-slot. Position the bracket along the track. Tighten the T-screws.
Using the Collision Bumpers
To use a collision bumper, unscrew it from the storage hole and
attach it to the end of the force sensor in place of the detachable
hook, or attach it to the threaded hole in the bracket’s end stop.
Spring Bumpers The two spring bumpers can be used for
partially elastic collisions.
Rubber Bumper The rubber bumper will dampen a collision.
For example, if the force sensor is mounted on the bracket, and
the rubber bumper is attached to the force sensor, a cart that collides with the rubber bumper will rebound with less speed.
Collision Cup The collision cup can be filled with a small
quantity of clay (included). If the clay is formed into a cone
shape, the hook on the front of the force sensor will stick to the
clay for an inelastic collision.
The collision cup can also be used without the clay to collide
with a spring bumper (Figure 3b).
®
2
Page 3

Force Accessory Bracket CI-6545
Magnetic Bumper The magnetic bumper can be used for
elastic collisions. For example, if the force sensor is mounted on
the bracket in the low position, and the magnetic bumper is
attached to the force sensor, the bumper will repel a dynamics
cart that has magnets in its end cap.
The magnetic bumper has a small pin next to the screw. This pin
fits into the small hole next to the threaded hole on the end stop
of the bracket or on the end of the force sensor. The pin keeps the
bumper from rotating during collisions.
Screwdriver Use the screwdriver to attach a large-format
force sensor (such as CI-6537) to a cart.
Parts Storage
When not in use, the various parts can be attached to the bracket
as illustrated.
Screwdriver
Thumbscrews
Technical Support
For assistance with any PASCO product, contact PASCO at:
Address: PASCO scientific
10101 Foothills Blvd.
Roseville, CA 95747-7100
Phone: 916-786-3800 (worldwide)
800-772-8700 (U.S.)
Fax: (916) 786-7565
Web: www.pasco.com
Email: support@pasco.com
Limited Warranty For a description of the product warranty, see the
PASCO catalog.
Copyright The PASCO scientific 012-05835B
Instruction Sheet
granted to non-profit educational institutions for reproduction of any part of
this manual, providing the reproductions are used only in their laboratories
and classrooms, and are not sold for profit. Reproduction under any other
circumstances, without the written consent of PASCO scientific, is prohibited.
Trademarks PASCO, PASCO scientific, DataStudio, ezSample,
PASPORT, and Xplorer GLX are trademarks or registered trademarks of
PASCO scientific, in the United States and/or in other countries. All other
brands, products, or service names are or may be trademarks or service
marks of, and are used to identify, products or services of, their respective
owners. For more information visit www.pasco.com/legal.
is copyrighted with all rights reserved. Permission is
Force Accessory Bracket
Clay Holder
Spring Bumpers
Magnetic
Bumper
Rubber Bumper
®
3
 Loading...