

Partner SP-2500, SP-2518, SP-2511, SP-2515 Quick Start Manual
USB 2.
0
Safety information
• Before installing and using the machine, take note of the following precautions:
• Do not place the unit on an unstable surface, cart, or stand.
• Do not block the slots and opening on the unit, which are provided for ventilation.
• Only use the power source indicated on the marking label. If you are not sure,
contact your dealer or the Power Company.
• When replacing parts, ensure that your service technician uses parts specified by the
manufacturer.
• Do not place anything on the power cord. Place the power cord where it will not be in
the way of foot traffic.
WARNING
This is Class A Product. In domestic environment this product may cause radio interference
in which case the user may be required to take adequate measures.
警告使用者
這是甲類的資訊產品,在居住的環境中使用時,可能會造成射頻干擾,在這種情況下,使用者會被要求採
取某些適當的對策。
WARNING
The system uses a
3
V CR
2032
battery mounted on the mainboard to keep time. There
is a risk of explosion if the wrong battery type is used when replacing. Dispose of used
batteries according to local ordinance regulations.
Federal Communications Commission (FCC) Statement
This equipment has been tested and found to comply with the limits for a Class A digital
device, pursuant to Part
15
of the FCC Rules. These limits are designed to provide
reasonable protection against harmful interference when the equipment is operated in a
commercial environment. This equipment generates, uses, and can radiate radio frequency
energy and, if not installed and used in accordance with the instruction manual, may cause
harmful interference to radio communications. Operation of this equipment in a residential
area is likely to cause harmful interference in which case users will be required to correct
the interference at their own expense
SP-2500 Series Quick Start Guide
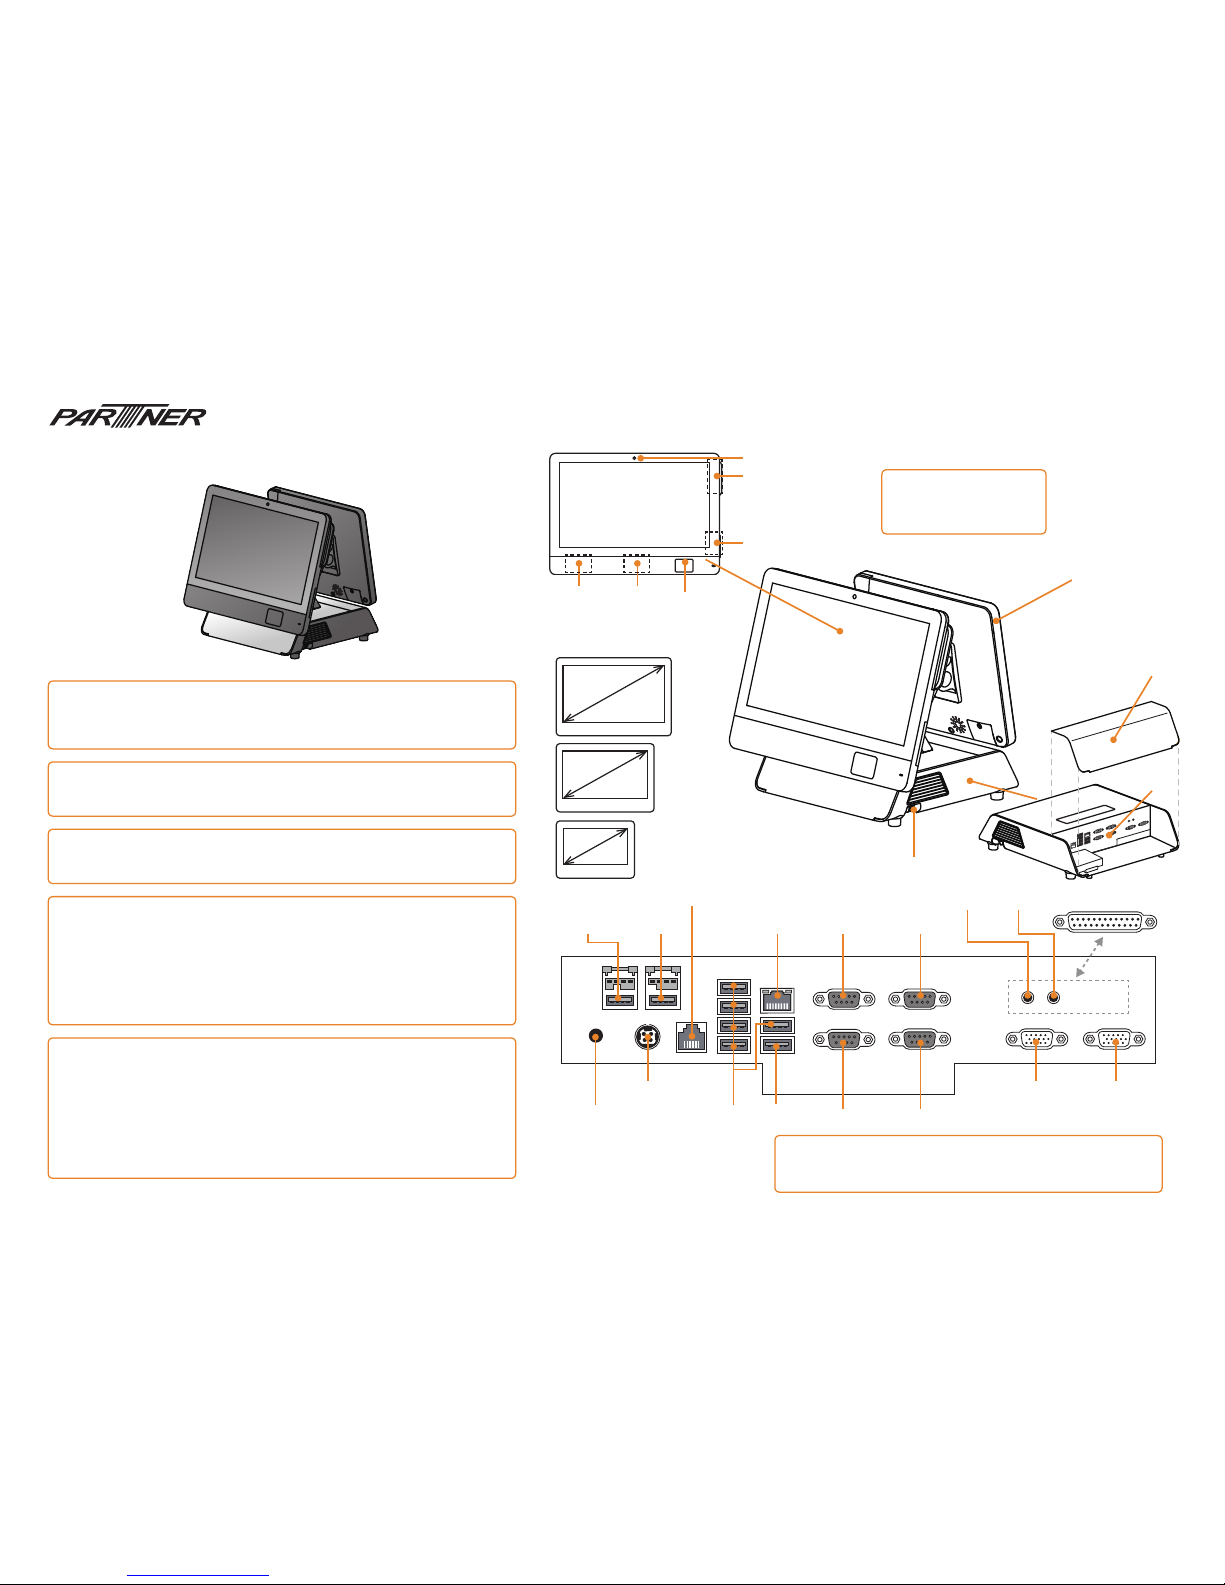
Identifying components
DC12V-In
DC
12
V-Out
COM
2
Secondary
Monitor
I/O Cover
COM
1
COM
4
LPT*
Power Button
I/O Panel
COM
3
MIC*Line-Out*
LAN
MSR
Camera
IC Reader
iButton/
Fingerprint
2
D Scanner RFID
3
optional display sizes
RJ-
11
Cash drawer port
VGA
2
* VGA1*
USB
12
V*USB 24V*
USB
3.0
11
.
6
”
15
.
6
”
18
.
5
”
NOTE
Optional peripherals are sold
separately. (RFID and Camera
are factory options)
* optional connectors.
Audio jacks (Line-out & MIC) and LPT port, can only be chosen either one.
VGA
2
port is unavailable when main monitor is installed.
VGA
1
port is unavailable when secondary monitor is installed.
Specification
Item
SP-
2500
POS PC
SP-
2511
Touch Terminal
SP-
2515
Touch Terminal
SP-
2518
Touch Terminal
Display N/A
11.6” 1366x768 15.6” 1366x768 18.5” 1366x768
Touch N/A Projected capacitive touch (Multi Touch)
Processor Intel
®
Bay Trail-D J
1900 2.0
G up to 2.4G, 2M Cache
Memory
204
pin DDR3L-
1333
SO-DIMM x 2, Max Support 8GB
LAN
10/100/1000
Gb Ethernet x
1
Storage Internal 2.5” type SATA HDD, optional 2nd HDD
I/O Interface
4
* COM ports (powered with DC +5/+12V, COM1~2 by BIOS selection; COM3~4 by
jumper setting)
1
* RJ11 port supports 2 cash drawer (DC+24V)
1
* RJ-45 LAN port with activity and link LEDs
5
* USB 2.
0
1
* USB 3.
0
1
* DC+12V input power-jack
1
* DC+12V 1A output
1
* VGA port
Speaker
1* 3
W
3* 3
W
Optional Peripherals
1* 2
nd VGA Port
1
* Printer port
1
* MIC jack
1
* Audio Line-out
jack
2
* Power USB ports
(+
24V 2.3
A x1/
+
12V 1.5
A x1)
Biometric Reader, Smart Card Reader, I-Button, RFID reader
Camera
2.0
M
3
tracks magnetic reader
Dual Display
11.6”, 15.6”, 18.5”
2
D Barcode Scanner
Operation System Window
7
, POS Ready7, Window 8.1, Industry 8.1 , Linux (Ubuntu), Windows
10
Power Supply AC
100~240
V/DC+12V, 7.5A, 90 watt power adapter
AC
100~240
V/DC+12V, 15A,
180
watt power adapter for integrated power USB module
(optional)
Dimensions
(WxHxD mm)
295x82x299 307x309x299
@ LCD
83°
tilt angle
390x343x299
@ LCD
80°
tilt angle
465x374x307
@ LCD
75°
tilt angle
Operating Temp
0°
C ~ +
40°
C
Storage Temperature -
20°
C ~ +
60°
C
Humidity
15%~80
%
Certification CE, FCC, LVD, VCCI, BSMI, CCC, CB, Class A
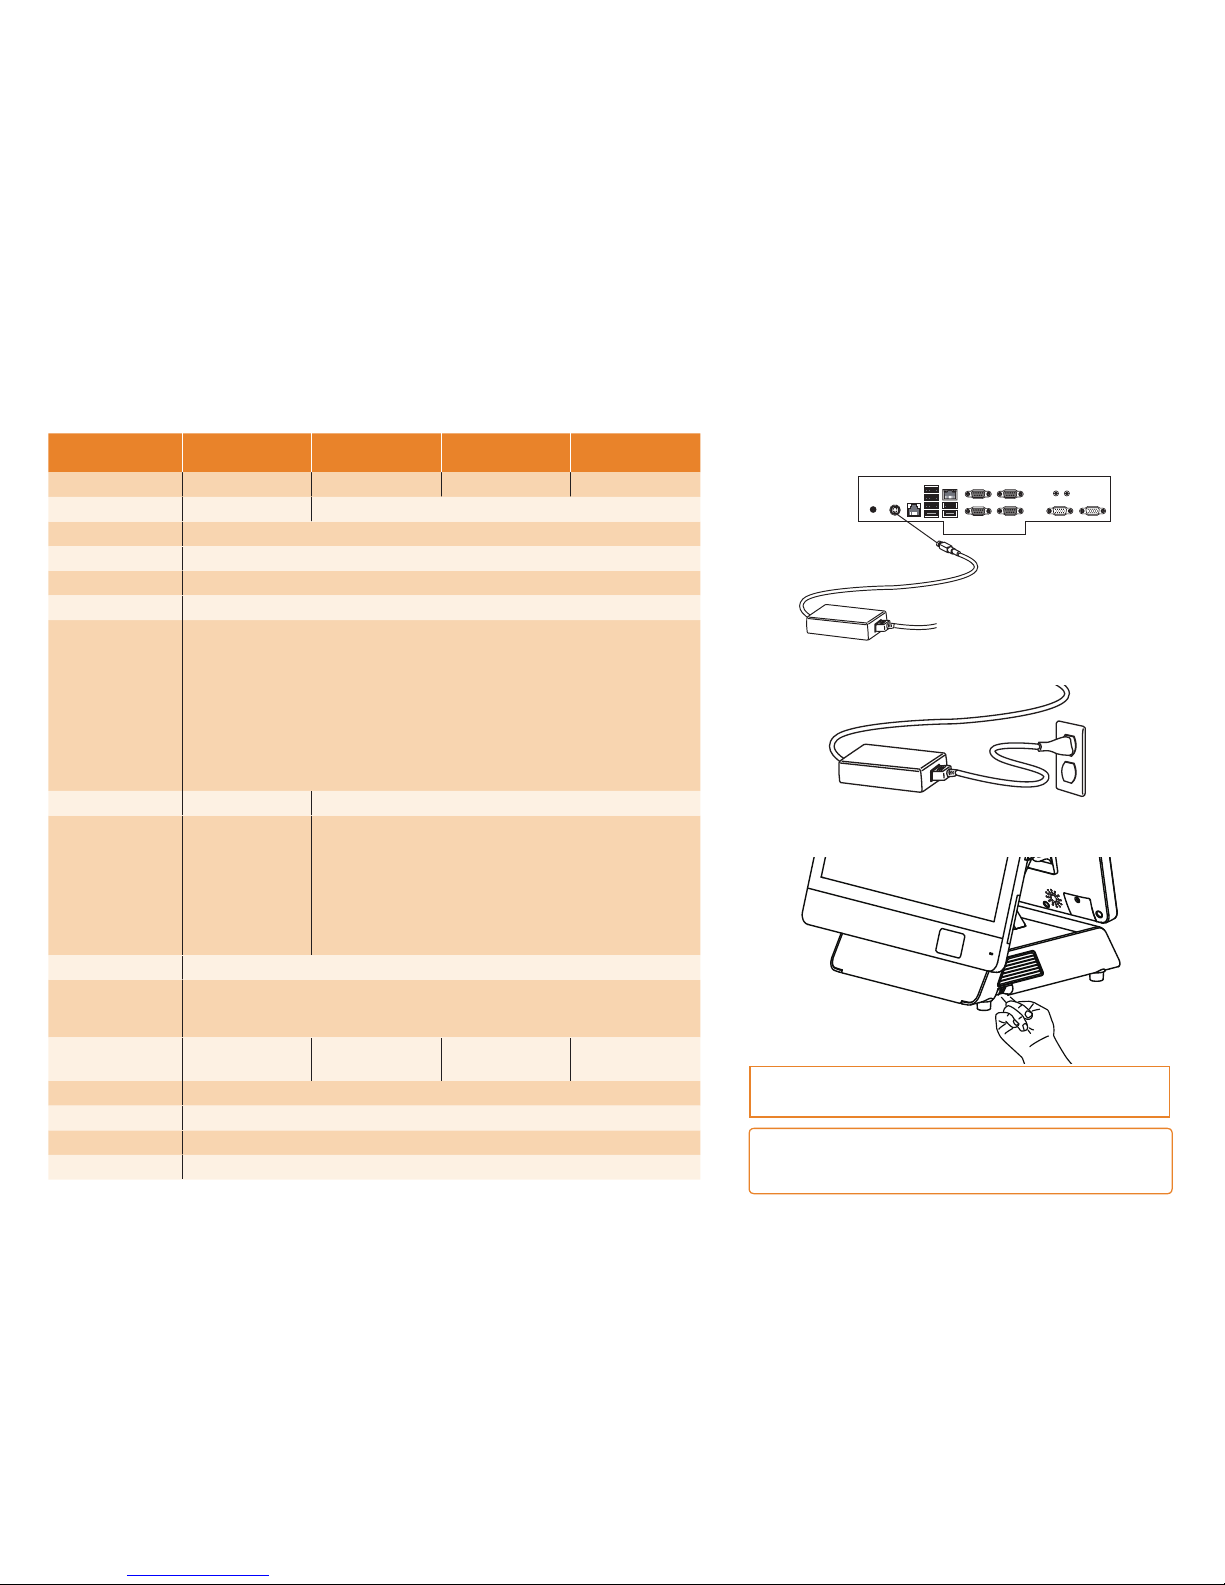
3
. Press the power button on the right underside of the
computer.
Note: Press once to power on the system. Press it for
4~5
seconds to force the system power off.
Quick start
1
. Connect the power cable to the DC-IN connector located on
the I/O panel.
2
. Plug the power cable into an electrical outlet.
Contact Information
Partner Tech Corporation
10
F., No.
233-2
, Baoqiao Rd., Xindian Dist., New Taipei City
231
, Taiwan (R.O.C.)
www.partner.com.tw
 Loading...