

Partex MK10 Quick Start Manual
Quick Start
ENGLISH SVENSKA
MK10
2009-11-27

QUICK START MK10
CONTENT / INNEHÅLL
English
1. Installation
1.1 Unpacking and Setting-up the Printer.
1.2 Install the printer driver.
1.3 Install the WinSign software.
2. Proles and ribbon
2.1 Loading continuous proles.
2.2 Loading ribbon 5
3 Printing example 6
3.1 WinSign: Start 6
3.2 WinSign: Type in text information 7
3.3 Winsign: Print out 8
4 Read this 9
3
3
3
3
ENGLISH SVENSKA
4
4
Svenska
1. Uppstart
1.1 Packa upp och ställa upp skrivaren.
1.2 Installera drivrutinen till skrivaren.
1.3 Installera mjukvaran Winsign.
2. Proler och färgband
2.1 Mata in prol i skrivaren.
2.2 Montera färgband i skrivaren 12
3 Utskriftsexempel 13
3.1 WinSign: Start 13
3.2 WinSign: Mata in textinformation 14
3.3 Winsign: Skriva ut 15
4 Läs detta 16
10
10
10
10
11
11
2PARTEX MARKING SYSTEMS2009-11-27
QUICK START MK10
1. Installation
1.1 Unpacking and Setting-up the Printer
1. Lift the label printer out of the box via the straps..
2. Check printer for damage which may have occurred during transport.
3. Set up printer on a level surface..
4. Remove foam transportation safeguards near the printhead.
5. Check delivery for completeness.
Contents of delivery: (MK10-KIT1)
• Printer
• Power cable
• Cutting unit
• Printer cable USB
• Ribbon
• Drivers on CD
• Software WinSign on CD
ENGLISH
Read the manual for the printer.
1.2 Install the printer driver.
Put the CD with drivers in your computer. Follow the instructions on your computer
screen.
Choose the CAB A4+M/300 printer
1.3 Install the WinSign software.
Put the CD with the WinSign software in your computer. Follow the instructions on
your computer screen.
Read the user manual for WinSign.
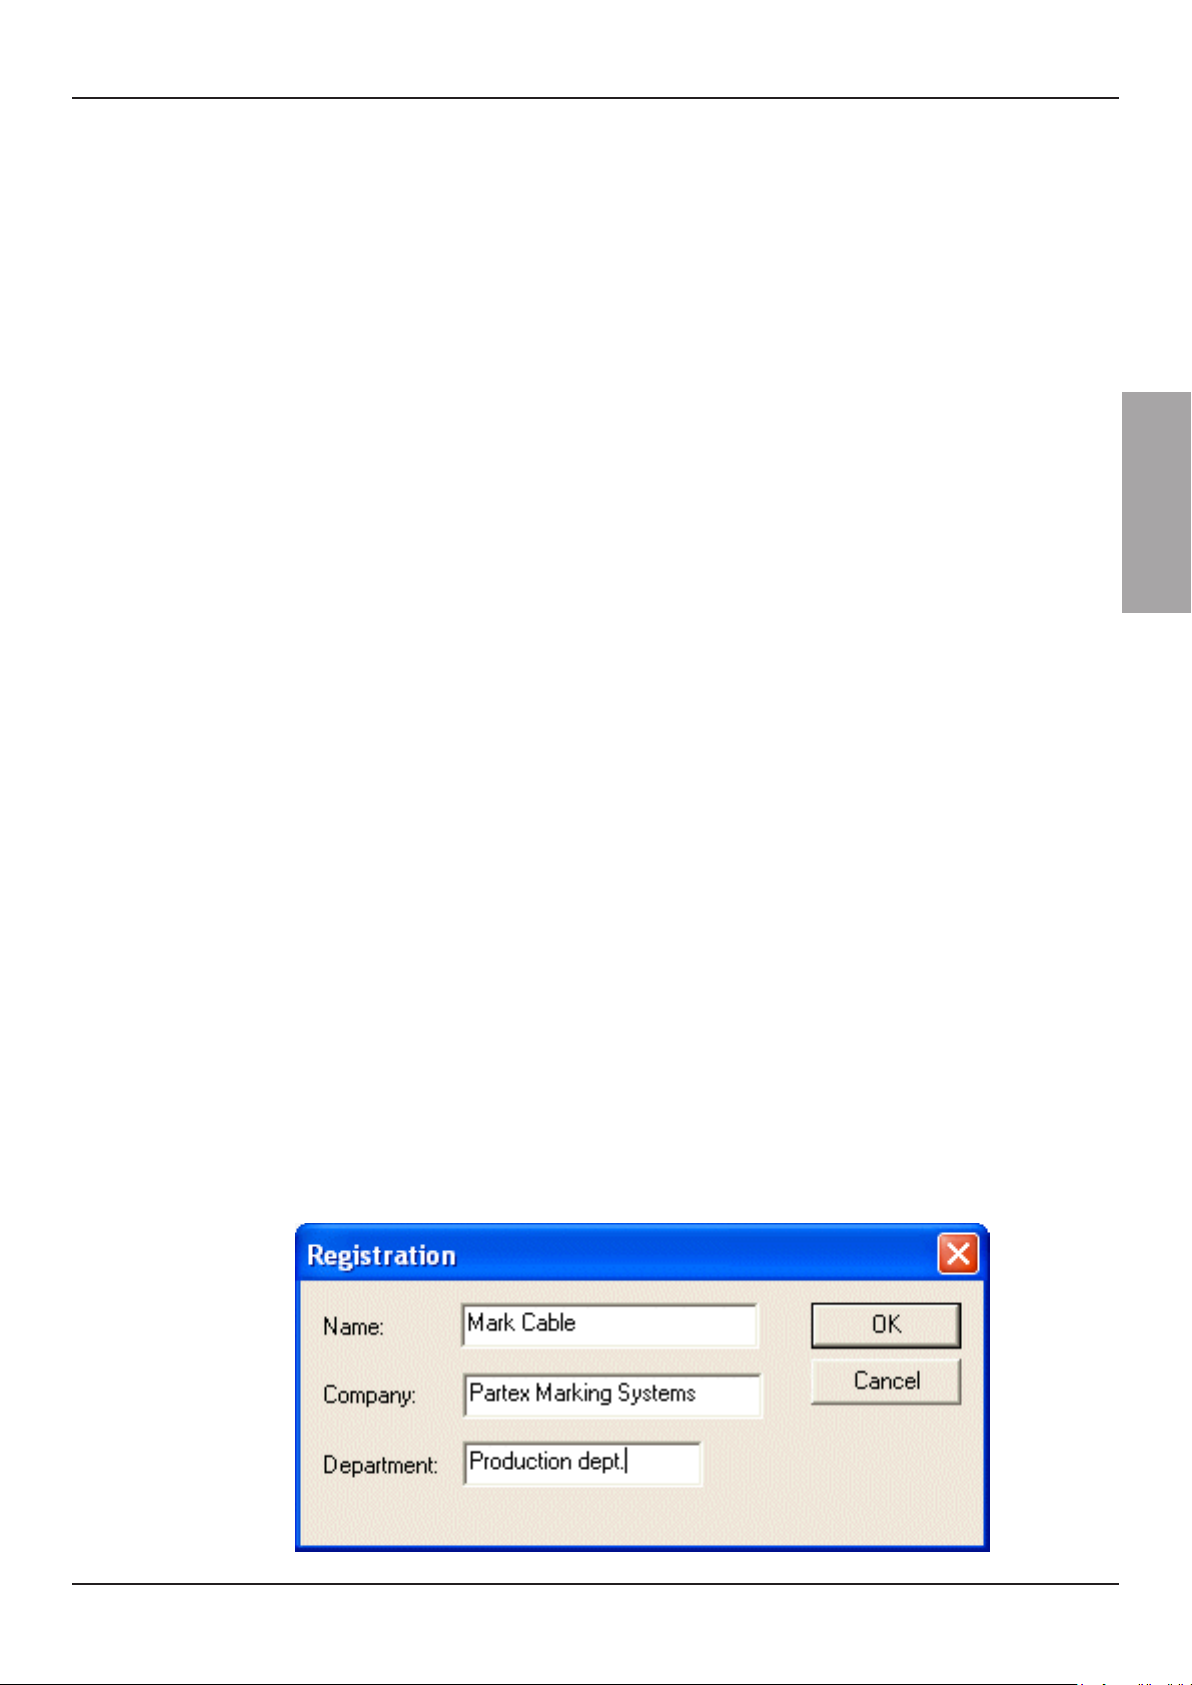
You need to type in some information when you start WinSign for the rst time. This
message box will not appear after that.
3PARTEX MARKING SYSTEMS2009-11-27

QUICK START MK10
2. Proles and ribbons
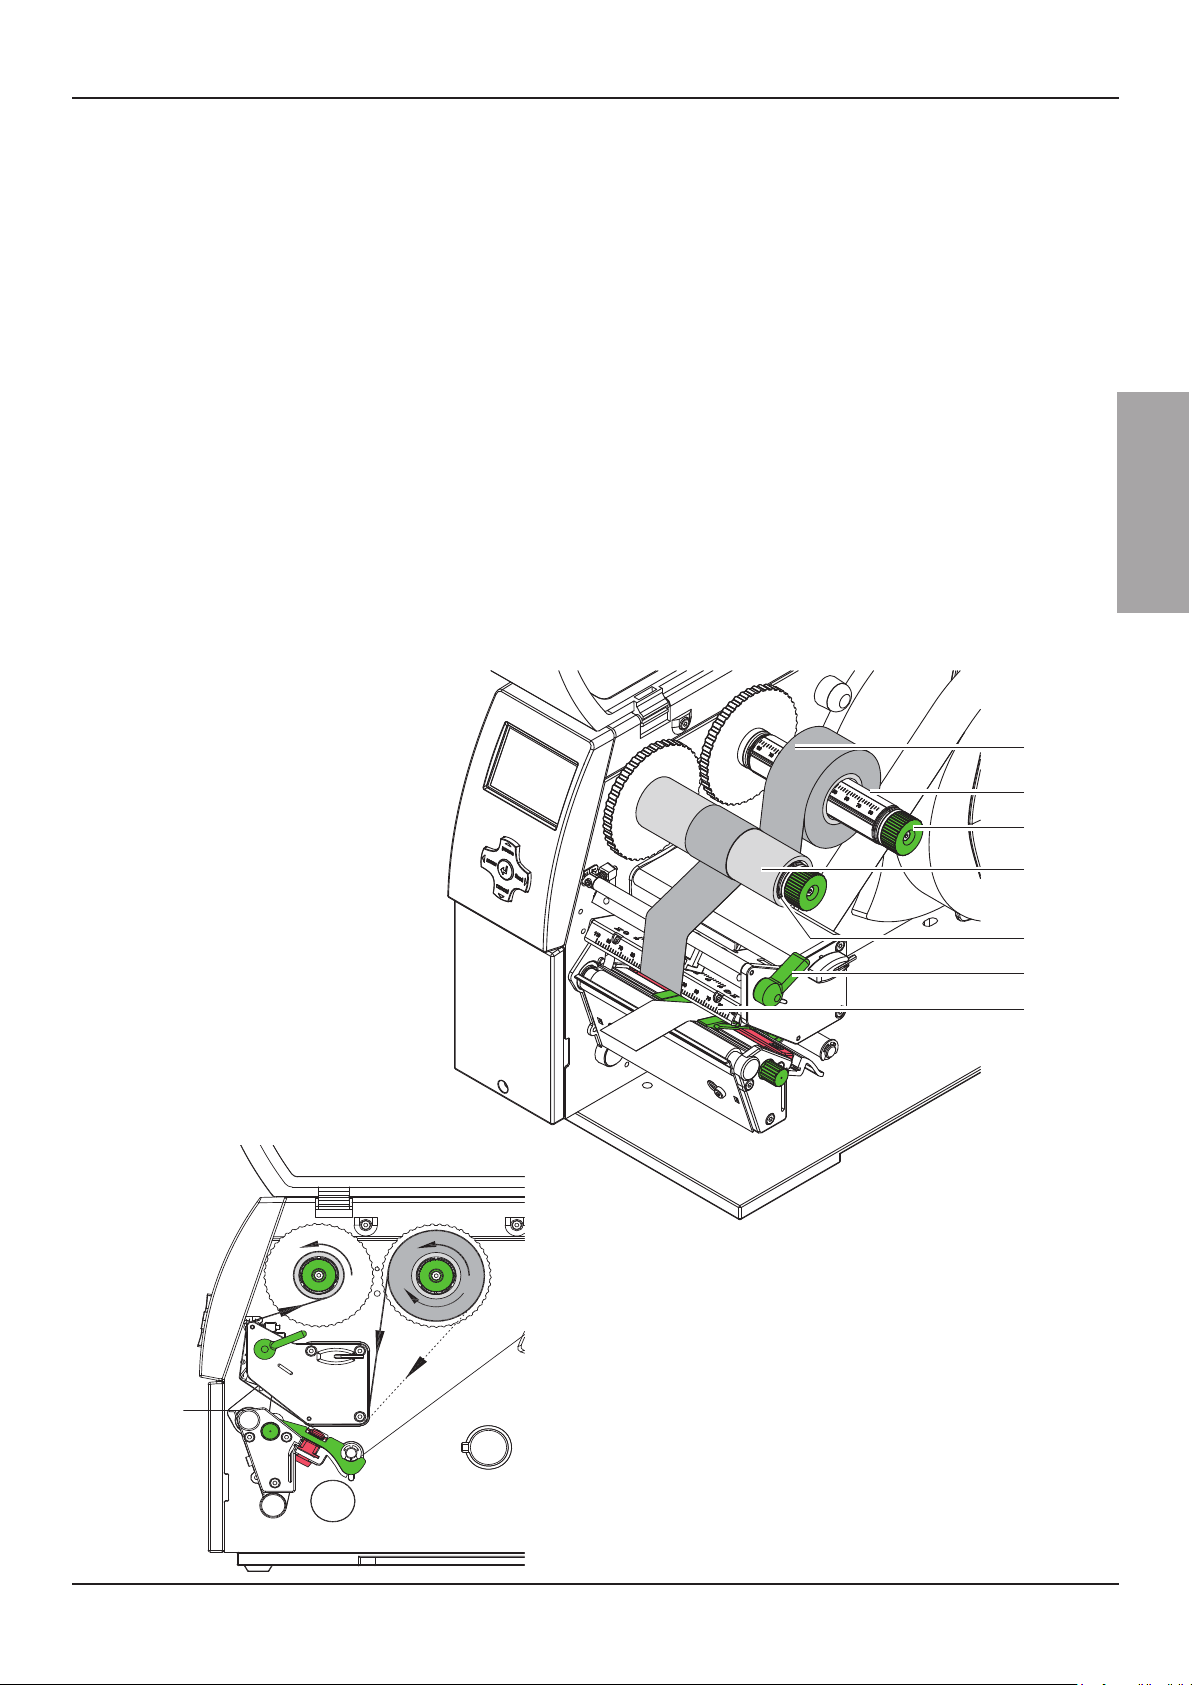
2.1 Loading continuous proles.
• Open cover (13)
• Turn lever (12) counterclockwise to lift the printhead
• Feed the prole into the printer according to the pictures below. Move guides (8)
apart with the green knob (11) until the prole can pass between them..
• You can turn lever (12) clockwise to lower the printinghead if you already have
loaded the printer with a ribbon. If you don’t have any ribbon in the printer, load that
according to section 2.2 (page 5)
13
ENGLISH
12
11
910 78
9 14
8 8 11127
4PARTEX MARKING SYSTEMS2009-11-27
QUICK START MK10
2.2 Loading ribbon.
• Turn lever (6) counterclockwise to lift the printhead
• Slide ribbon roll (1) onto the ribbon supply hub (3) so that the color coating of the
ribbon faces downward when being unwound.
• Position the ribbon roll in such a way that both ends of the roll show identical scale
values.
• Hold ribbon roll (1) rmly and turn knob (3) on ribbon supply hub counterclockwise
until the ribbon roll is secured.
• Slide suitable transfer ribbon core (4) onto the transfer ribbon take-up hub (5).
Position and secure it in the same way as the supply roll.
• Guide transfer ribbon through the printer as shown in the picture at the bottom of
the page.
• Secure starting end of transfer ribbon to middle of the ribbon core (1) with adhesive
tape. Ensure counterclockwise rotation direction of the transfer ribbon take-up hub.
• Turn ribbon take-up hub (5) counterclockwise to smooth out the feed path of the
ribbon.
• Turn lever (6) clockwise to lock the printhead.
ENGLISH
1
2
3
4
5
6
7
5PARTEX MARKING SYSTEMS2009-11-27
 Loading...