

Page 1

INSTRUCTION REF: IN128
ISSUE No. 3
DATE 03.02.09
Page 1 of 9
TELEPHONE: SERVICE (44) 01332 875665
FAX: SERVICE (44) 01332 875536
Parry Group Limited, Town End Road, Draycott, Derby, England DE72 3PT
www.parry.co.uk
INSTRUCTIONS
MODEL: PEO
SAFETY INSTRUCTIONS
TECHNICAL DATA
INSTALLATION INSTRUCTIONS
OPERATION INSTRUCTIONS
MAINTENANCE INSTRUCTIONS
WARRANTY INFORMATION
DISPOSAL INFORMATION
Customer Information
MODEL NUMBER:
______________________
SERIAL NUMBER:
______________________
PURCHASE DATE:
______________________
DISTRIBUTOR:
______________________
Page 2

INSTRUCTION REF: IN128
ISSUE No. 3
DATE 03.02.09
Page 2 of 9
TELEPHONE: SERVICE (44) 01332 875665
FAX: SERVICE (44) 01332 875536
Parry Group Limited, Town End Road, Draycott, Derby, England DE72 3PT
www.parry.co.uk
SAFETY INSTRUCTIONS
IMPORTANT, PLEASE READ INSTRUCTIONS FULLY BEFORE USE
Please be aware that surfaces on this machine may get very hot during, and after
use.
ALL APPLIANCES OTHER THAN THOSE FITTED WITH A SEALED
MOULDED PLUG MUST BE FITTED BY A QUALIFIED ELECTRICIAN, IN
ACCORDANCE WITH CURRENT REGULATIONS.
The unit should be installed in compliance with the INSTALLATION
INSTRUCTIONS and the NATIONAL REGULATIONS in force at the time.
Particular attention should be paid to the Health and Safety at Work Act.
To prevent shocks, all appliances whether gas or electric, must be earthed.
To avoid scratching the highly polished exterior surface of this equipment whilst
in transit, the protective film on the exterior surfaces has NOT been removed.
It is IMPORTANT that this protective film is peeled off before the equipment is
used.
ENSURE THE APPLIANCE IS ISOLATED FROM THE POWER SUPPLY
BEFORE INSTALLING, CLEANING OR MAINTAINING THE APPLIANCE
TECHNICAL DATA
Oven
The oven works both as a fan oven and a conventional oven as it contains two
elements. The rear 1.8KW element works in conjunction with a fan, which blows
heated air from the element around the oven cavity. This gives improved
efficiency and in general, enables the use of lower temperatures for cooking. It
also means that there is less need to be particular about shelf positions and that
you can bake at more that one level simultaneously. Since the distribution of heat
in the oven is very even, most foods will cook satisfactorily on any shelf position,
but the shelves should be spaced evenly if possible.
The oven also contains a conventional 1.1KW base element, which can be used
in addition with the fan and back element, to boost the power of the oven.
Page 3
INSTRUCTION REF: IN128
ISSUE No. 3
DATE 03.02.09
Page 3 of 9
TELEPHONE: SERVICE (44) 01332 875665
FAX: SERVICE (44) 01332 875536
Parry Group Limited, Town End Road, Draycott, Derby, England DE72 3PT
www.parry.co.uk
INSTALLATION INSTRUCTIONS
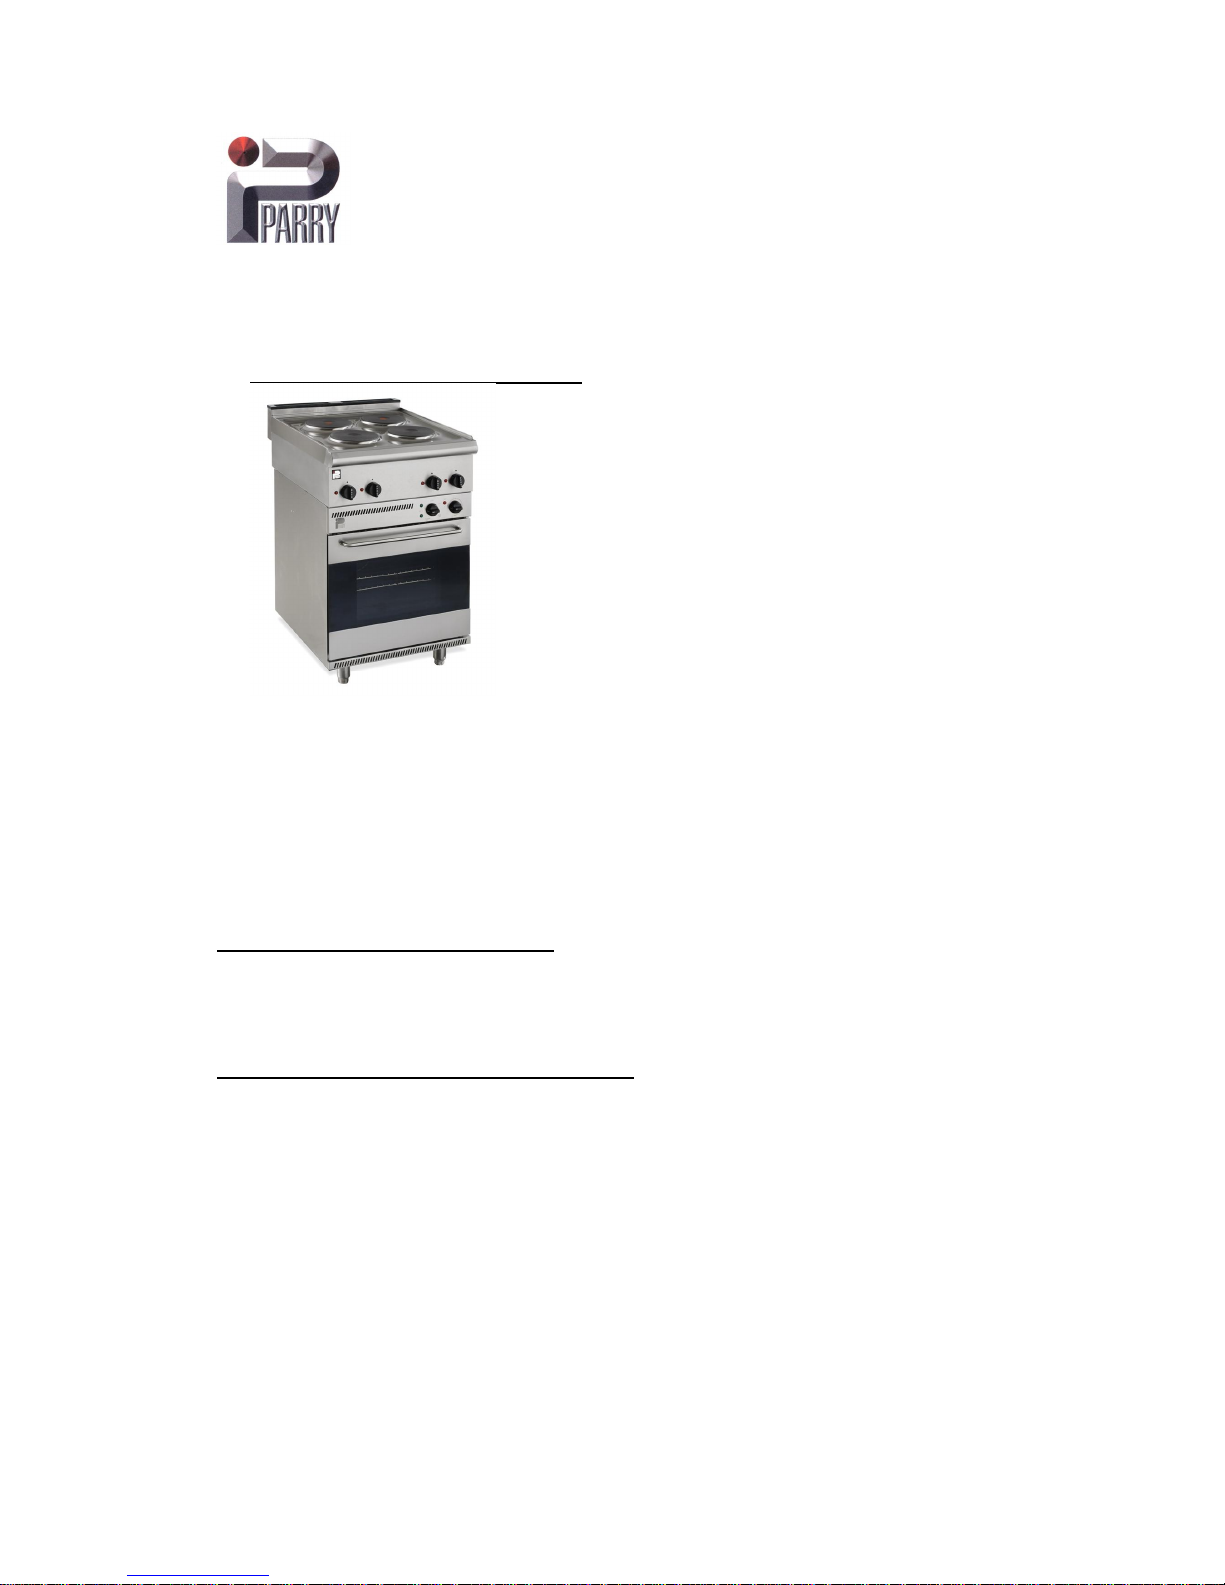
PEO with 1871 fitted (working height 900mm)
The PEO Paragon Electric Oven can be used as a stand alone oven that can sit
on a work surface or on the floor. There is also the option of fitting a 1871 hob
unit to the top of it to turn it into a four burner electric oven.
1871 Hob units are sold separately. Other Parry 600mm products can also be
fitted to the top of the PEO, but the working height may vary depending on the
type of unit fitted.
To install the PEO as an oven only: Take the four small rubber feet provided and
screw them into the riv nuts in the bottom of the unit. These feet will protect the
surface that the unit is being positioned on, as well as providing an air gap, to
allow air to vent through the base of the unit.
To install the PEO with an 1871 unit on top: Screw the four provided stainless
steel 100mm legs into the foot plates on the base of the unit. Remove the top
panel from the PEO by removing four screws from either side. Take the two
locating pins provided and screw them into each of the riv nuts located on the top
fold of the side panels.
The position of the locating pins will correspond with holes in the base of the
1871 allowing the unit to drop on top.
Page 4

INSTRUCTION REF: IN128
ISSUE No. 3
DATE 03.02.09
Page 4 of 9
TELEPHONE: SERVICE (44) 01332 875665
FAX: SERVICE (44) 01332 875536
Parry Group Limited, Town End Road, Draycott, Derby, England DE72 3PT
www.parry.co.uk
OPERATION INSTRUCTIONS
· Ensure that all the packaging is removed and all the shelves are firmly in
place. Ensure that the operation thermostat is switched off.
· Plug in the unit and switch on.
· Located on the front top panel there are two knobs and three neons. The first
knob controls the power to the heating elements, fans and light. Switching the
switch to its first position turns on the interior light and shows that the unit has
power going to it. Power to the machine is also indicated by the illumination of
the red neon on the front of the unit.
· The second switch position turns on the fans
· The third position activates the rear 1.8KW element. This allows the unit to be
used as a fan oven. The top green neon illuminates when this position is
selected.
· The fourth position selects the rear 1.8KW element, plus the bottom 1.1KW
element. These work together to give the oven a combined power rating of
2.9KW. Both of the green neons will be illuminated to signify that both
elements are in use.
· The second knob controls the temperature of the oven, note that the green
indicator neons, will come on when the dial is first turned, but will go out when
the oven has reached the required temperature.
Since the fan assisted oven heats up more quickly and generally cooks food at a
lower temperature than a conventional oven, preheating the oven is often
unnecessary. However food such as bread, scones and Yorkshire puddings, do
prefer to be placed in a pre-heated oven.
Frozen Meat and Poultry
Joints of meat and whole birds should be defrosted slowly, preferably in a
domestic refrigerator (allowing 5-6 hours per 450g ( 1lb)), or at room temperature
(allowing 2-3 hours per 450g (1lb)). If however, it is found necessary to
accelerate this process, frozen food can be defrosted in the fan oven at a
temperature of 70/80 degrees C (150 / 175 degrees F). A 1.5 kg (3 lb) oven-
Page 5

INSTRUCTION REF: IN128
ISSUE No. 3
DATE 03.02.09
Page 5 of 9
TELEPHONE: SERVICE (44) 01332 875665
FAX: SERVICE (44) 01332 875536
Parry Group Limited, Town End Road, Draycott, Derby, England DE72 3PT
www.parry.co.uk
ready chicken, placed in the meat pan, will defrost in approximately 1 ¼ -1 ½
Hours. Food should not be placed directly on the floor of the oven.
Warming Dishes
Take care particularly with delicate tableware. Place the dishes to be warmed in
the oven. Turn the oven control to 90 degrees C
MAINTENANCE INSTRUCTIONS
Care and Cleaning
Turn off the mains switch and unplug the oven. The oven or parts of the oven
should only be cleaned when they are cold. To avoid unnecessary cleaning, rod
shelves that are not in use should be removed from the oven.
How to Replace the Oven Light
WARNING: SWITCH OFF AT MAINS SUPPLY AND UNPLUG THE OVEN
BEFORE REPLACING LAMP.
Open the oven door and remove the rod shelves. Grip the light glass dome,
unscrew anti-clockwise and lift out. Reach into the aperture with fingers, and
unscrew faulty lamp anti-clockwise. Fit replacement lamp, and refit dome. When
unscrewing the faulty lamp use a thick cloth to protect your fingers should the
lamp break.
Door Removal
Turn off mains supply and unplug. The door is removable to facilitate occasional
cleaning of heavy soiling from the oven floor and from the door itself. Please note
that the door is heavy, and care should be taken not to pinch your fingers during
the removal and replacement. To remove open the door fully and lift up the clips
on each of the hinges. Then close the door halfway until the clips lock against the
door and lift the whole door up and out of the slots in the oven casing.
To replace, insert the hinges into the slots in the casing so that the hinge locks
over the recessed slot. Open the door fully and flick the clips towards the oven
casing and push down. The door should now open and close as before. Please
note that the triple glazed door is not meant to be taken apart for cleaning.
Page 6
INSTRUCTION REF: IN128
ISSUE No. 3
DATE 03.02.09
Page 6 of 9
TELEPHONE: SERVICE (44) 01332 875665
FAX: SERVICE (44) 01332 875536
Parry Group Limited, Town End Road, Draycott, Derby, England DE72 3PT
www.parry.co.uk
WARRANTY INFORMATION
PEO/3 (2006 version)
PART NO. PART DESCRIPTION QUANTITY
12570032 1.8 KW ELEMENT 1
12570000 1.1KW BOTTOM RING ELEMENT 1
REAR FAN FOR RING ELEMENT 1
TOP COOLING FAN 1
PEO/3 STAT 250 DEGREE THERMOSTAT 1
4,205,001,003 4 FUNCTION SWITCH 1
SONG GLAZED DOOR 1
105 HANDLE 1
OVEN SHELVES 450 X 360MM 2
RUBBER DOOR SEAL 1
12280000 PROBE CLIPS 4
LIGHT BULB 25KW 1
GLASS COVER FOR LAMP 1
OVEN CARCASS 1
KNOBPHEN KNOB 1
INBK025SG FEET 4
LNGN2211P GREEN NEON 1
LNRE2211P RED NEON 1
1
To place an order please contact our
Sales Office Telephone 01332 875544 or Fax 01332 874455
PAYMENT IS ACCEPTED BY CHEQUE /CREDIT CARD OR DEBIT CARD
CHEQUES SHOULD BE MADE PAYABLE TO THE PARRY GROUP LTD
ALL GOODS REMAIN THE PROPERTY OF THE PARRY GROUP UNTIL PAID
FOR IN FULL
Page 7

INSTRUCTION REF: IN128
ISSUE No. 3
DATE 03.02.09
Page 7 of 9
TELEPHONE: SERVICE (44) 01332 875665
FAX: SERVICE (44) 01332 875536
Parry Group Limited, Town End Road, Draycott, Derby, England DE72 3PT
www.parry.co.uk
WARRENTY INFORMATION
WARRANTY POLICY
· The manufacturers warranty is only valid in the UK mainland & Northern
Ireland, Western Isles, Inner Hebrides and Islands are parts only warranty.
· All service calls will be carried out between the hours of 8.00am – 5.00pm
Monday to Friday only.
· We accept no responsibility for delays in replacing or repairing the
equipment due to circumstances beyond our control.
· Your warranty can be immediately invalid if the installation of the
equipment has not been installed in accordance with the manufactures
instruction. (See installation details). Also the miss-use, alteration or
unauthorised repairs of the equipment will invalidate the warranty.
· During the warranty period it is at Parrys discretion to repair or replace the
equipment.
· Warranty only applies if the equipment has been used in a professional
manor following the manufactures instructions and maintenance guide
lines.
· The warranty covers defects in the material and components failure only
we are not liable for trading loss, loss of perishable items, water damage,
loss due to injury or fire damage.
WARRANTY REQUEST
· Please ensure you have referred to the manufacturers’ instruction before
placing a warranty call. Or contact our warranty department on 01332
875665 for technical assistance. Please ensure you obtain the model
number before calling.
· Please ensure you have read the section not covered under warranty to
avoid any unnecessary warranty charges.
· If the problem with the machine can not be resolved please contact the
company that supplied you the machine.
(SERVICE CALLS CAN NOT BE PLACED DIRECT WITH PARRY)
Page 8

INSTRUCTION REF: IN128
ISSUE No. 3
DATE 03.02.09
Page 8 of 9
TELEPHONE: SERVICE (44) 01332 875665
FAX: SERVICE (44) 01332 875536
Parry Group Limited, Town End Road, Draycott, Derby, England DE72 3PT
www.parry.co.uk
NOT COVERED UNDER WARRANTY
· Fault due to poor maintenance.
· Resetting of equipment or circuit breakers.
· Abuse of the equipment
· Foil should never be used on racks
· Blockages eg, drains, condensers, pumps etc
· Lime scale related issues
· Installed incorrectly
· Access arranged for service call and engineer refused access or customer
not there.
· No faults with the machine.
· Setting up of equipment eg, dishwasher detergents, levelling and setting
up of doors on a 6 burner cooker.
· Excessive carbon build up on griddle plates.
· Over use of lava rock on the chargrills recommended use by Parry 2kg
only.
· Faulty electrics – eg, customers plug socket, plug, wiring, junction box
fault, wrong fuse.
· Any damages caused by the customer.
· Lamps, glass, door gaskets, Perspex, baskets, knobs all perishable items
are not covered.
All of the above are not covered under our warranty policy. Any costs incurred
because of the above will be forwarded to the parties responsible for placing the
call.
Failure to pay any warranty charges will result in the customers warranty been
put on hold until the bill has been settled.
Any issues regarding the raised charges should be put in writing to our warranty
department for further investigation.
Page 9

INSTRUCTION REF: IN128
ISSUE No. 3
DATE 03.02.09
Page 9 of 9
TELEPHONE: SERVICE (44) 01332 875665
FAX: SERVICE (44) 01332 875536
Parry Group Limited, Town End Road, Draycott, Derby, England DE72 3PT
www.parry.co.uk
DISPOSAL INFORMATION
Parry Catering recognises our obligations to the EU DIRECTIVE covering the
waste disposal of electrical and electronic equipment (WEEE), Parry Catering are
committed to this policy in order to help conserve the environment.
At the end of this unit’s life you MUST dispose of it in an approved manner. You
MUST not discard the unit or place it in the refuse bin.
You have several options:
a) Take the unit to an approved WEEE scheme company, there will be
one in your area.
b) Take the unit to an approved waste disposal site; many sites are
managed by your local authority.
c) Contact the unit’s manufacturer, importer or their agent the contact
details will be on the unit.
There will probably be a charge for this service which will depend on the physical
location of the unit and size you will be given a collection price for a curb side
collection based on commercial rates prevailing at the time.
It should be noted that the unit to be collected should be suitably packed and
sealed to prevent dangerous gases and fluids from escaping. The condition of
the unit must also be clean to comply with health and safety regulations.
 Loading...