

Page 1

Page 2

4
Parrot PHOTO VIEWER 7’’
CONTENTS
English............................................................
Français..........................................................
Español...........................................................
Italiano...........................................................
Dutch..............................................................
Deutsch...........................................................
Português........................................................
Norsk.............................................................
Dansk.............................................................
Svenska..........................................................
p 5
p 21
p 37
p 53
p 69
p 87
p 105
p 123
p 139
p 155
Page 3
Parrot PHOTO VIEWER 7’’
English - User Guide
Page 4

6
Parrot PHOTO VIEWER 7’’
CONTENTS
IMPORTANT SAFETY INSTRUCTIONS ..................................................
INTRODUCTION...................................................................................
KIT CONTENTS.....................................................................................
QUICK START GUIDE ..........................................................................
MENU STRUCTURE ..............................................................................
SCROllING ThROUGh ThE MENUS ..................................
MAIN MENU ....................................................................
SETTINGS .........................................................................
USING FOR ThE FIRST TIME ................................................................
PAIRING YOUR PhONE OR COMPUTER .....................................
SENDING PhOTOS ...........................................................
SETTINGS ..........................................................................................
PICTURE DISPlAY ORDER ..................................................
ChOOSING AND CREATING A SlIDEShOw ......................
FRAME ORIENTATION ......................................................
MANAGING ThE FRAME’S SCREEN .................................
UPDATING ThE SOFTwARE ...............................................................
hOTlINE ..........................................................................................
SPECIFICATIONS ...............................................................................
NOTES .............................................................................................
GENERAl INFORMATION
..................................................................
p 7
p 8
p 9
p 9
p 10
p 10
p 11
p 12
p 14
p 14
p 15
p 16
p 16
p 17
p 18
p 18
p 19
p 19
p 20
p 20
p 171
Page 5

7
English
Parrot PHOTO VIEWER 7’’
IMPORTANT SAFETY INSTRUCTIONS
1. This apparatus shall not be exposed to dripping or splashing and no object filled with liquid, such as vases, shall be placed
on the apparatus.
2. The AC/DC adaptor which provides disconnection from mains supply shall remain readily operable. Unplug this apparatus when
unused for long periods of time.
3. Read these instructions
4. Keep these instructions
5. Heed all warnings
6. Follow all instructions
7. Do not use this apparatus near water
8. Clean only with dry cloth
9. Do not block any ventilation openings. Install in accordance with the manufacturer’s instructions.
10. Do not install near any heat as radiators. Heat registers, stoves or other apparatus (including amplifiers ) that produce heat.
11. Do not defeat the safety purpose of the polarized or grounding type plug. A polarized plug has two blades with one wider than
the other. A grounding type plug has two blades and a third grounding prong. The wide blade or the third prong are provided
for your safety. If the provided plug does not fit into your outlet, consult an electrician for replacement of the obsolete outlet.
12. Only use attachments/accessories specified by the manufacturer
13. Unplug this apparatus during lightning storms or when unused for long periods of time.
14. Refer all servicing to qualified service personnel. Servicing is required when the apparatus has been damaged in any way, such
as power supply cord or AC/DC adaptor is damaged, liquid has been spilled or objects have fallen into the apparatus,
the apparatus has been spilled or objects have fallen into the apparatus, the apparatus has been exposed to rain or moisture,
does not operate normally, or has been dropped.
15. WARNING: To reduce the risk of fire or electric shock, do not expose this apparatus to rain or moisture.
This apparatus is designed for indoor use only.
Page 6
8
Parrot PHOTO VIEWER 7’’
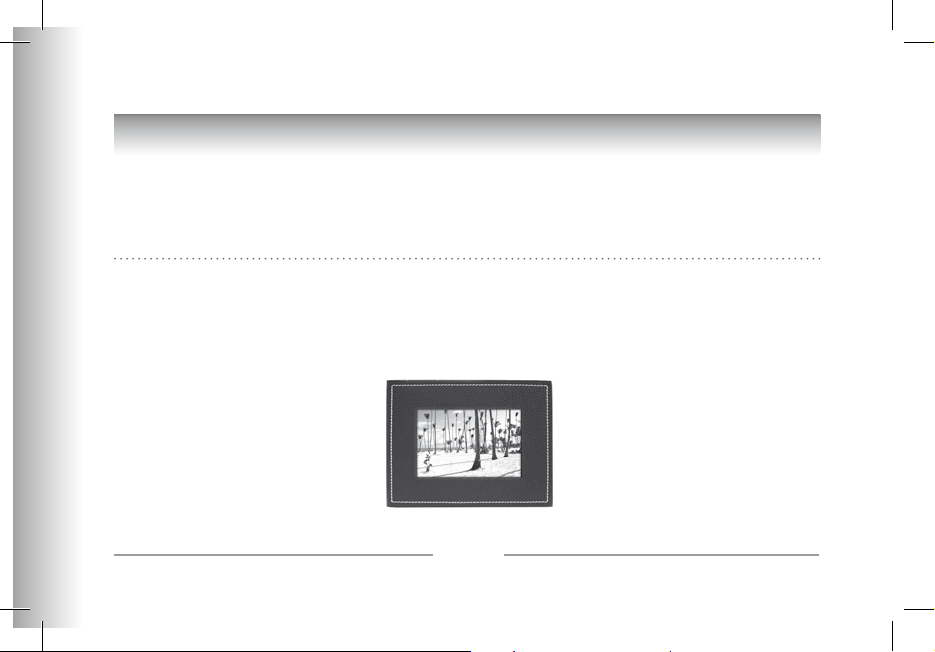
INTRODUCTION
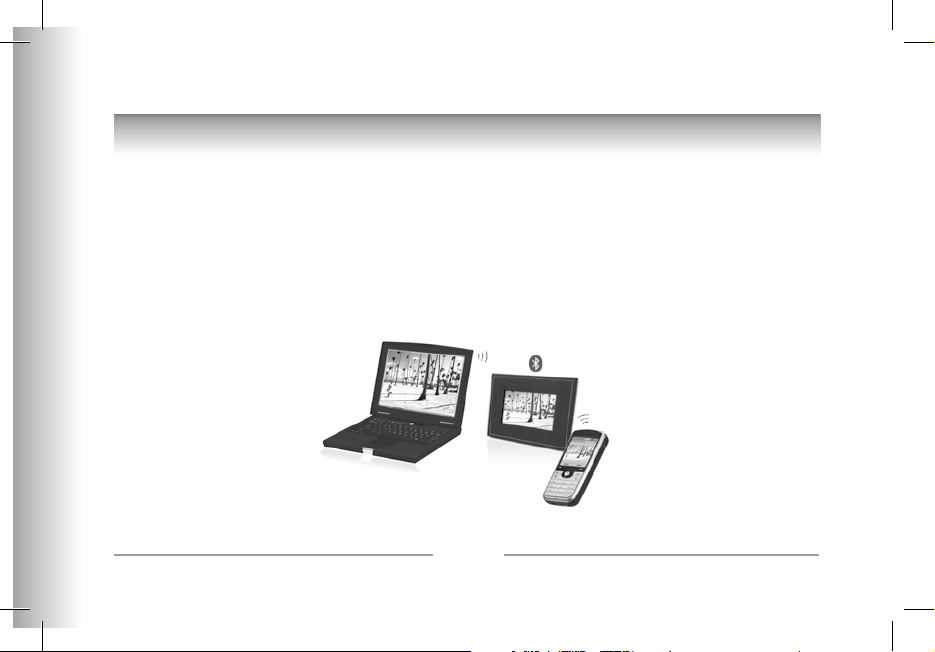
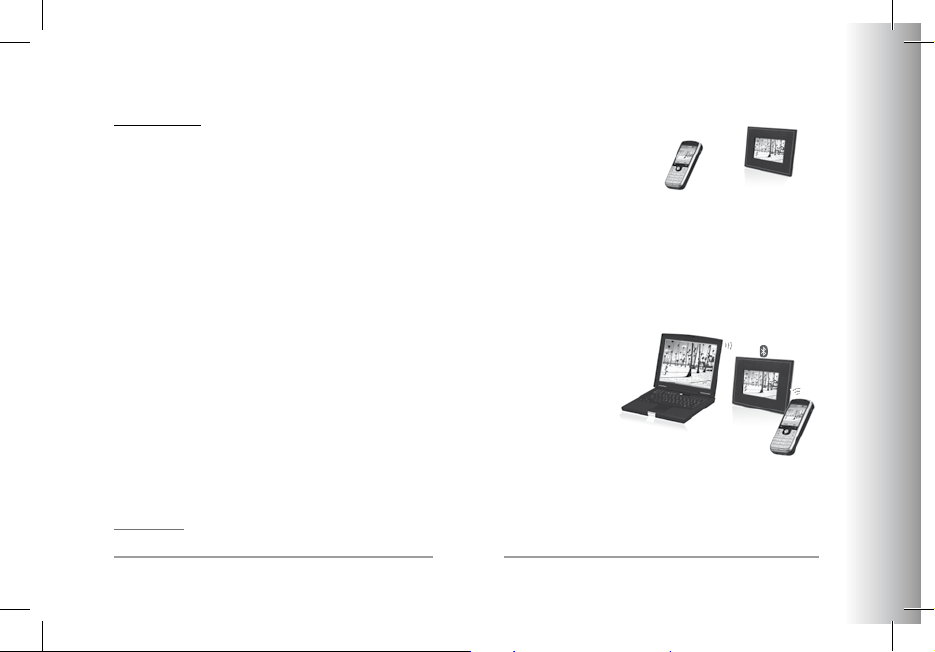
The Bluetooth® technology enables voice and data to be sent via a short-distance radio link. It allows several electronic devices
to communicate with each other.
Parrot draws on its long years of experience in the Bluetooth technology to offer you the Parrot PHOTO VIEWER 7’’, an innovative photo frame. You can send your photos to the Parrot PHOTO VIEWER 7’’ from your mobile phone, PDA or computer
by Bluetooth.
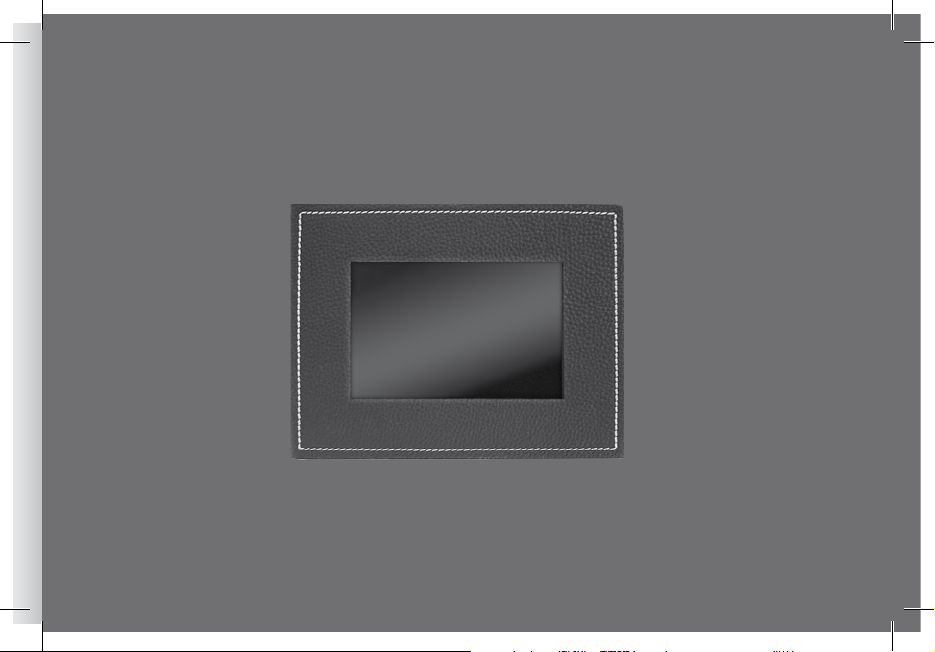
The Parrot PHOTO VIEWER 7’’ is an LCD photo frame (720 x 480 pixels) that can store over 500 photos. You can configure the
display by programming slideshows or by rotating the frame. The Parrot PHOTO VIEWER 7’’ sports a stylish design, blending
in seamlessly inside the home, and also adapts its brightness setting to suit the room. The Parrot PHOTO VIEWER 7’’ can tell
you the time just like a clock.
Page 7
9
English
Parrot PHOTO VIEWER 7’’
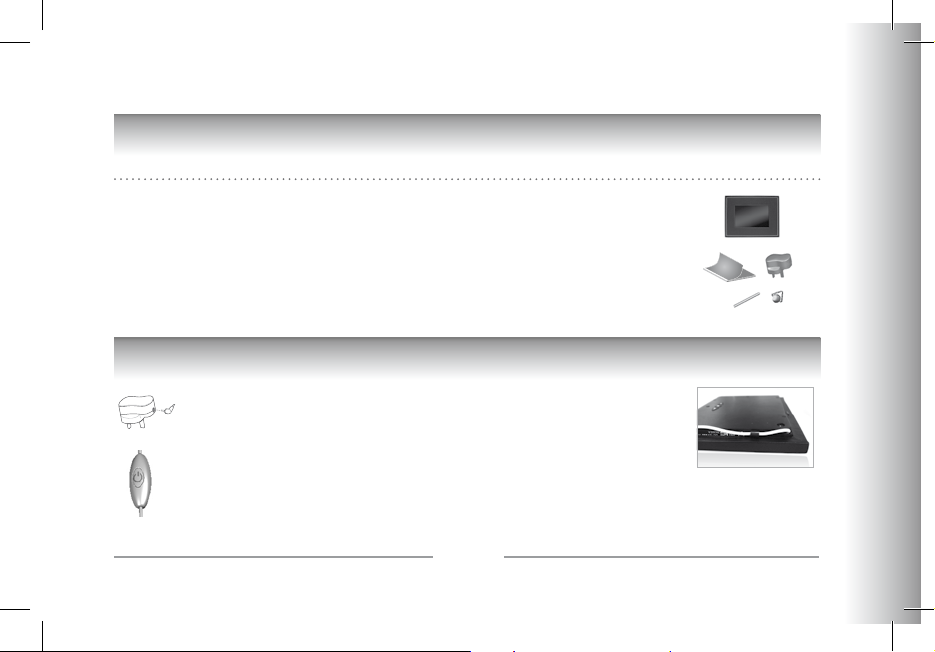
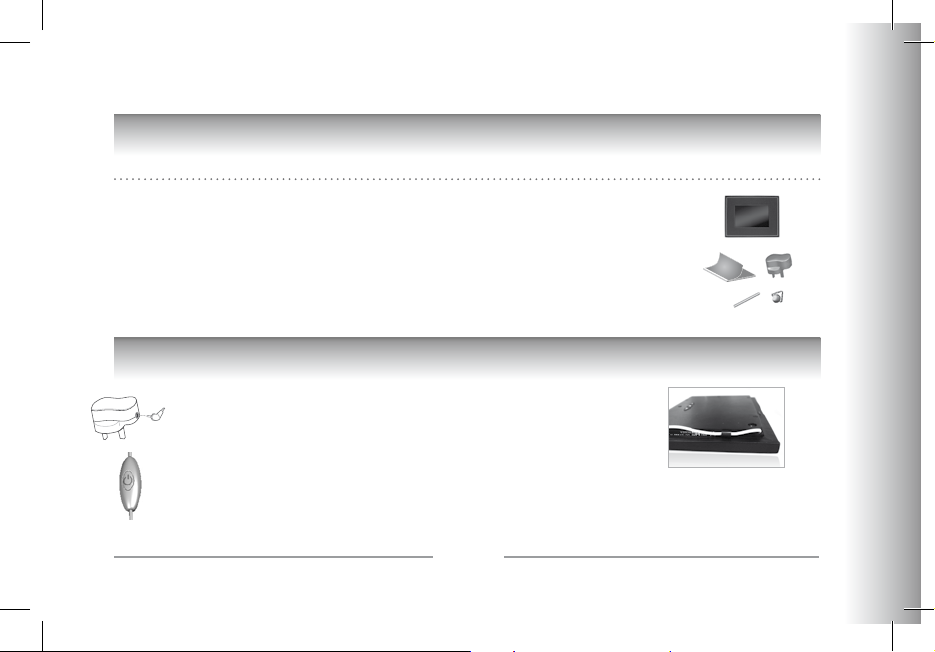
KIT CONTENTS
The kit contains:
• An LCD frame
• A transformer
• A metal rod to be screwed into the frame (the rod helps to support the frame)
• A wall bracket
• A clip system (for fixing the power lead along the side of the frame)
• A user guide
• A Parrot product guide
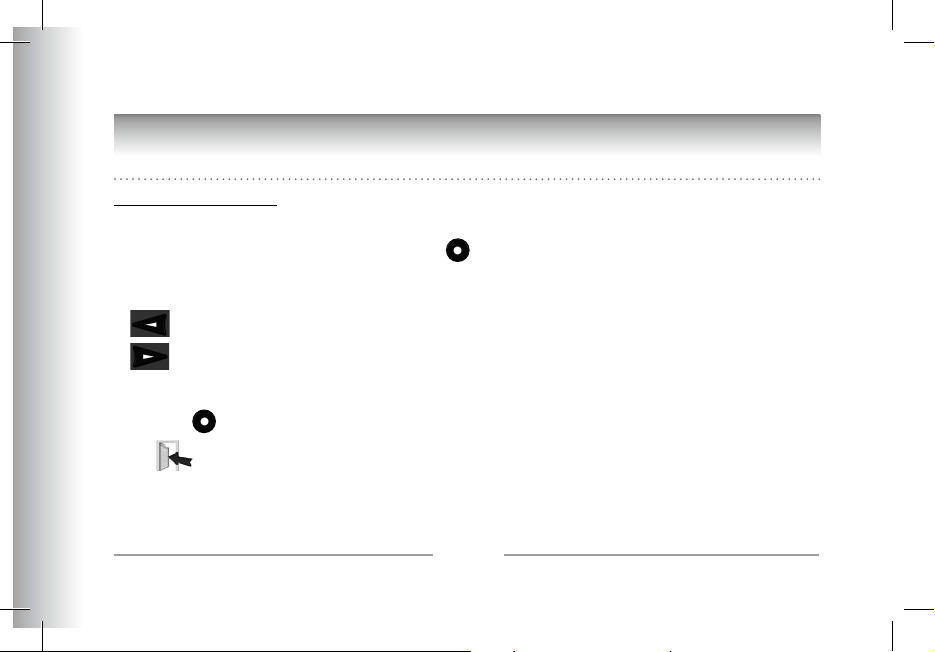
QUICK START GUIDE
• Screw the metal rod into the back of the frame.
• Plug the power lead connector into the transformer.
• The Parrot PHOTO VIEWER 7’’ automatically switches on.
• Choose the language to be used by the Parrot PHOTO VIEWER 7’’ (refer to the section
entitled «Description of the Icons
and Features» in the «Settings» chapter).
NOTE: THE FRAME CAN ALSO BE HUNG ON THE WALL. IN THIS CASE, SCREW THE HOOK INTO THE BACK, INSERT THE CLIPS INTO
THE SLOTS PROVIDED AND RUN THE POWER LEAD THROUGH THE CLIPS. IF YOU ROTATE THE FRAME, THE PHOTO DISPLAYED TURNS
TO MATCH THE NEW POSITION OF THE PARROT PHOTO VIEWER 7’’
Page 8
10
Parrot PHOTO VIEWER 7’’
MENU STRUCTURE
Scrolling Through the Menus
Moving Through the Menus
• You can scroll through the menus using the buttons on the back of the Parrot PHOTO VIEWER 7’’.
To access the main menu, press the button on the back of the frame.
Select buttons:
• : Move left or up, depending on the frame’s orientation. It can also be used to select the previous photo.
• : Move right or down, depending on the frame’s orientation. It can also be used to select the next photo.
Enter button:
• The button : Enters the selected menu or selects a photo.
The icon takes you back to the previous menu or exits the menus.
Page 9
11
English
Parrot PHOTO VIEWER 7’’
Main Menu
Description of the Icons and Features
• : Returns to the previous menu.
• : Turns the photo to the right.
• : Displays the photos as thumbnails.
• : Organises the order in which the photos are displayed.
• : - Delete Current Picture: deletes the picture currently displayed.
- Delete Several Picture: delete the selected pictures.
- Delete All Pictures: deletes all the pictures.
• : For choosing and creating slideshows.
• : For adjusting the display and
Bluetooth settings.
Page 10
12
Parrot PHOTO VIEWER 7’’
• : Provides information on the software built into the Parrot PHOTO VIEWER 7’’, the memory status and
the picture displayed.
Settings
The «Settings» menu can be accessed from the main menu.
Description of the Icons and Features
• : Returns to the main menu.
• : - Visibility: makes the Parrot PHOTO VIEWER 7’’ visible or invisible to other
Bluetooth devices.
- Frame name: for selecting the pre-recorded
Bluetooth name by which the frame will be detected
by other
Bluetooth devices.
- Advanced mode: for selecting a specific or standard pairing mode depending on the model of
your
Bluetooth phone (for further information, visit the Support heading on our website at www.parrot.com).
• : Adjusts the brightness of the display. You can adjust the screen brightness using the «Select»
buttons on the back of the Parrot PHOTO VIEWER 7’’; press the «Enter» button to confirm.
• : - Automatic: the screen’s backlight level is controlled by an algorithm that uses a light sensor built into the frame
This is the default setting.
- Manual: the backlight is always on. Use the ON\OFF button on the power lead to enable the screensaver.
Page 11
13
English
Parrot PHOTO VIEWER 7’’
- Predefined Time: a predefined time range determines when the screen is backlit.
You will be prompted to set the time on the Parrot PHOTO VIEWER 7’’.
NOTE: YOU CAN ACTIVATE THE SCREENSAVER BY QUICKLY PRESSING THE ON/OFF BUTTON ON THE POWER LEAD. IF THE STANDBY MODE IS SET TO
«AUTOMATIC» OR «PREDEFINED TIME» MODE, THEN THE PARROT PHOTO VIEWER 7’’ IS SET TO «MANUAL» MODE UNTIL THE NEXT ILLUMINANCE LEVEL
OR PREDEFINED HOUR IS REACHED.
• : Select the required language.
• : - Adjustment: adjust the time using the «Select» buttons. Press the «Enter» button to confirm.
- Visibility: Enable / Disable the permanent time display. This is the default setting.
- Format: Select the format of the displayed time.(AM/PM)
• : Restores the factory settings (doing so does not delete your photos).
Page 12

14
Parrot PHOTO VIEWER 7’’
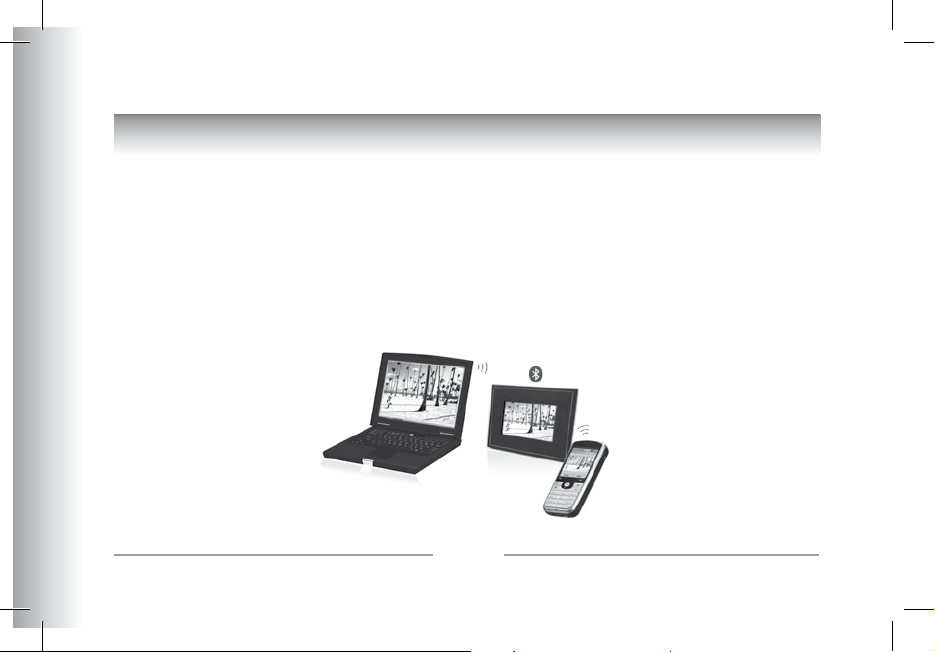
USING FOR THE FIRST TIME
Prior to using your Parrot PHOTO VIEWER 7’’ with your phone / computer for the very first time, you must initially pair the two
devices. This procedure allows both devices to exchange information in order to configure a Bluetooth connection.
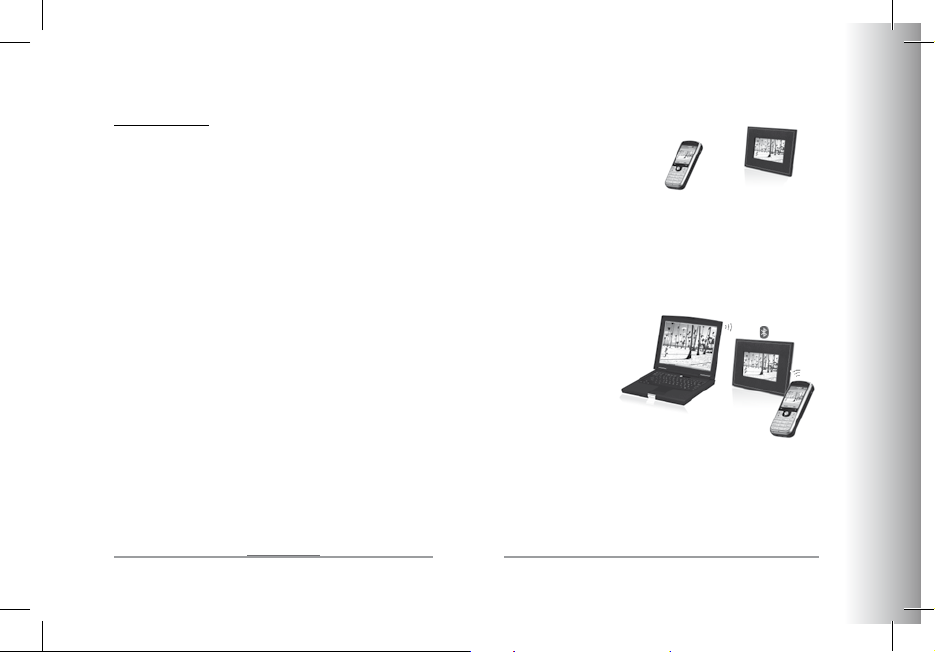
Pairing Your Phone or Computer with the Parrot PHOTO VIEWER 7’’
• Ensure that the Parrot PHOTO VIEWER 7’’ is adjusted so that it is visible to all Bluetooth
devices. Refer to the «Settings» chapter in this guide.
• Activate the Bluetooth feature on your phone/computer (refer to your phone’s or computer’s user guide or visit the Support
heading on our website at www.parrot.com).
• Search for Bluetooth devices on your phone/computer.
• Select the Parrot PHOTO VIEWER 7’’ in the list of Bluetooth devices proposed by your phone / computer.
• On your phone / computer, enter the code «0000».
• Your two devices are now paired.
Note: with some phones, you must enable the «Specific reception mode» option in the «Advanced mode…» menu prior to
pairing your phone with the Parrot PHOTO VIEWER 7’’ (available in the «Settings \ Bluetooth» menu). For further information,
visit our website at www.parrot.com
NOTE: DEPENDING ON THE MODEL OF YOUR PHONE / COMPUTER, THIS PHASE MIGHT BE OPTIONAL. HOWEVER, IT WILL ENABLE YOU TO SEND YOUR
PHOTOS TO THE PARROT PHOTO VIEWER 7’’ MORE QUICKLY.
Page 13
15
English
Parrot PHOTO VIEWER 7’’
Sending Photos
Sending from a Phone or PDA:
• Ensure that the Parrot PHOTO VIEWER 7’’ is adjusted so that it is visible to all
Bluetooth devices. Refer to the «Settings» chapter in this guide.
• Activate the Bluetooth feature on your phone or PDA.
• On your phone/PDA, go to the «Pictures» menu. Select a picture and choose «Send by Bluetooth».
Your device starts searching for Bluetooth peripherals.
• Once the search has finished, select your Parrot PHOTO VIEWER 7’’. If your device prompts you to enter a code,
type «0000». The picture is then sent to the Parrot PHOTO VIEWER 7’’. Several pictures can be sent at the same time,
though this feature will depend on your device.
• During transmission, the Bluetooth icon appears on the screen and the picture is displayed.
Sending from a Computer:
• Ensure that the Parrot PHOTO VIEWER 7’’ is adjusted so that it is visible
to all Bluetooth devices. Refer to the «Settings» chapter in this guide.
• Activate the Bluetooth feature on your computer.
• Right-click on the picture that you wish to send and choose «Send by Bluetooth».
• Your PC will search for any nearby Bluetooth peripherals.
• Select your Parrot PHOTO VIEWER 7’’. Type «0000» if your PC prompts you
to enter a code.
• During transmission, the Bluetooth icon appears on the screen and the picture is displayed.
Note: if you are unable to detect the Parrot PHOTO VIEWER 7’’, you might have inadvertently made the Bluetooth frame invi-
sible to other devices. Refer to the «Settings» chapter in this guide. However, if your Bluetooth device is already paired to the
frame, it can always connect to the Parrot PHOTO VIEWER 7’’.
NOTE: FOR FURTHER INFORMATION ON THE MODE FOR SENDING PHOTOS, REFER TO YOUR PHONE’S USER GUIDE OR VISIT OUR WEBSITE AT
www.parrot.com
Page 14
16
Parrot PHOTO VIEWER 7’’
SETTINGS
The Parrot PHOTO VIEWER 7’’ allows you to adjust several settings. You can fully manage the frame’s display, such as determining the order in which pictures appear, creating slideshows and displaying the time. You can also change the orientation
of the Parrot PHOTO VIEWER 7’’.
Picture Display Order
• Access the main menu of the Parrot PHOTO VIEWER 7’’ and then select the «Arrange the pictures» menu.
• Your pictures are displayed as thumbnails. The display may run over several pages: holding down one of the «Select»
buttons will allow you to scroll through the previous and next pages. Simply release the button to stop scrolling.
• Select the picture with the «Select» buttons and then press the «Enter» button on the back of the frame to confirm your choice.
• The selected photo is placed at the top of the screen on the Parrot PHOTO VIEWER 7’’ and a cursor indicates the photo’s
position in the album.
Page 15

17
English
Parrot PHOTO VIEWER 7’’
Press the «Select» buttons to change the photo’s position. You can change its position in all the pages of your album.
• Once the cursor is in the position where you want to place the image, press the «Enter» button.
Choosing and Creating a Slideshow
The «Slideshow» submenu provides you with the following options:
• None: No slideshows is able.
The Parrot PHOTO VIEWER 7’’ proposes four slideshows, one of which featuring all the photos stored on your frame in their
order of appearance. Once the slideshow has been selected, you can enable / disable or configure it.
The following options are available for creating a slideshow:
• Picture choice: use the «Select» and «Enter» buttons to select the photos for your slideshow.
The selected photos are marked with a tick (not available for the default slideshow).
• Timer: defines the slideshow display time.
• Picture order: used to define the order in which the photos are displayed in the slideshow (not available
for the default slideshow).
• Random: arranges the photos in the slideshow at random.
• Delete slideshow: resets the slideshow (the selected images will no longer be part of the slideshow,
but they will not be deleted from the frame’s memory).
• Transition: defines the transition effect between the photos in your slideshow:
- None
- Fade
- Tile
- Wipe
- Checkerboard
- Random
Page 16
18
Parrot PHOTO VIEWER 7’’
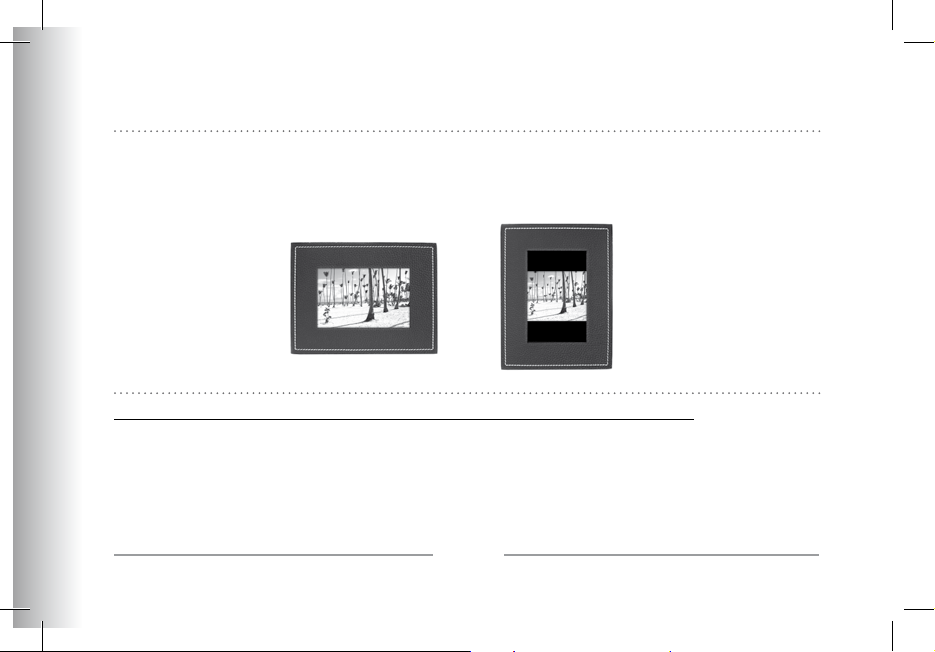
Frame Orientation
• Portrait mode.
• Landscape mode.
NOTE: THE FRAME CAN ALSO BE HUNG ON THE WALL. IN THIS CASE, SCREW THE HOOK INTO THE BACK, INSERT THE CLIPS INTO THE SLOTS PROVIDED
AND RUN THE POWER LEAD THROUGH THE CLIPS. IF YOU ROTATE THE FRAME, THE PHOTO DISPLAYED TURNS TO MATCH THE NEW POSITION OF THE
PARROT PHOTO VIEWER 7’’.
Managing the Frame’s Screen
The Parrot PHOTO VIEWER 7’’ lets you put your device on standby as well as activate the screensaver.
• On / Standby mode: long press of the ON/OFF button on the power lead.
In standby mode, the Bluetooth function of the Parrot PHOTO VIEWER 7’’ is disabled.
• Screensaver mode: the Parrot PHOTO VIEWER 7’’ displays the time during the periods when the backlight is off.
This feature is enabled by quickly pressing the ON/OFF button (refer to the section entitled «Description of the Icons and
Features» in the «Settings» chapter in this guide).
Page 17

19
English
Parrot PHOTO VIEWER 7’’
UPDATING THE SOFTWARE
The Parrot PHOTO VIEWER 7’’ can be updated by Bluetooth. Download the utilities and the update procedure from our website
at www.parrot.com. Doing so will increase the compatibility of the Parrot PHOTO VIEWER 7’’ with other Bluetooth devices.
HOTLINE
• Our hotline is at your disposal. You can contact us by email or telephone.
Europe : [+33] (0)1 48 03 60 69
Italy : [+39] 02 86 39 14 63
Spain : [+34] 902 404 202
UK : [+44] (0)870 112 5872
Germany : 0900 1727768
USA : [+1] (877) 9 PARROT (toll-free)
China : [+86] (0)2164 601 944
Hong Kong : [+852] 2736 1169
Check out our website at www.parrot.com for further information.
Page 18

20
Parrot PHOTO VIEWER 7’’
SPECIFICATIONS
Screen:
• LCD screen size: 6.5’’
• Screen resolution: 720 x 480 pixels (QVGA)
• 262 144 colours
• Internal memory of 64 MB for storing over 500 photos
• Light sensor for the automatic backlight mode
• Weight (frame only): 415 g
• Dimensions: 192 x 146 mm
• Power supply: 100V - 240V ~, 0.2A and 50/60 Hz
Bluetooth:
• Bluetooth 2.0 + EDR qualified
• Bluetooth PIN code: 0000
• Profiles supported:
- FTP (File Transfer Profile)
- OPP (Object Push Profile)
- BIP (Basic Imaging Profile)
• Software updates by Bluetooth
• Photo / Picture files supported: JPEG
• Up to 10 devices paired
NOTES
Page 19
Parrot PHOTO VIEWER 7’’
Français - Guide Utilisateur
Page 20

22
Parrot PHOTO VIEWER 7’’
SOMMAIRE
CONSIGNES DE SéCURITé .................................................................
INTRODUCTION..................................................................................
CONTENU DE l’EMbAllAGE ...............................................................
DéMARRAGE RAPIDE DE l’APPAREIl ...................................................
ARbORESCENCE DES MENUS .............................................................
NAvIGATION DANS lES MENUS ......................................
MENU PRINCIPAl ............................................................
PRéFéRENCES ..................................................................
PREMIèRE UTIlISATION ......................................................................
MISE EN SERvICE DE vOTRE TéléPhONE .................................
ENvOI DES PhOTOS .......................................................
PARAMéTRAGES ...............................................................................
ORDRE D’APPARITION DES IMAGES .................................
ChOIx ET CRéATION DE DIAPORAMA ..............................
POSITION DU CADRE ......................................................
GESTION DE l’éCRAN DE l’APPAREIl ................................
MISE A jOUR DU lOGICIEl ................................................................
hOTlINE ...........................................................................................
SPECIFICATIONS TEChNIQUES ...........................................................
NOTES ..............................................................................................
INFORMATIONS GéNéRAlES
.............................................................
p 23
p 24
p 25
p 25
p 26
p 26
p 27
p 28
p 30
p 30
p 31
p 32
p 32
p 33
p 34
p 34
p 35
p 35
p 36
p 36
p 171
Page 21

23
Parrot PHOTO VIEWER 7’’
CONSIGNES DE SéCURITé
1. Placer cet appareil de sorte qu’il ne soit pas exposé à des suintements ou projections de liquides.
Ne pas placer d’objets remplis de liquide, comme des vases, sur l’appareil.
2. S’assurer que l’adaptateur AC/DC qui assure la déconnexion avec l’alimentation secteur puisse toujours être facilement manipulé.
Débrancher cet appareil lorsqu’il n’est pas utilisé pendant une longue période.
3. Lisez ces instructions
4. Conservez ces instructions.
5. Tenez compte de tous les avertissements.
6. Suivez toutes les instructions.
7. N’utilisez pas cet appareil à proximité de substances liquides.
8. Nettoyez l’appareil uniquement avec un chiffon sec.
9. N’obstruez pas les ouvertures d’aération. Installez l’appareil en respectant les instructions du constructeur.
10. N’installez pas l’appareil à proximité d’une source de chaleur.
Radiateurs, fours ou autres appareils (amplificateurs inclus) qui produisent de la chaleur.
11. Ne modifiez pas les connecteurs polarisés ou de mise à la masse de l’appareil.
Les connecteurs polarisés sont composés de deux fiches métalliques, l’une plus large que l’autre. Les connecteurs de mise à la
masse sont composés de deux fiches métalliques et d’une branche de masse. La plus large des fiches métalliques et la branche
de masse sécurisent l’utilisation de votre appareil. Si les connecteurs fournis ne correspondent pas à votre installation, consultez
un électricien pour le remplacement de votre installation obsolète.
12. Utilisez uniquement les attaches / accessoires spécifiés par le constructeur.
13. Débranchez l’appareil en cas d’orages ou lors d’une longue période d’inutilisation.
14. Pour toute intervention sur l’appareil, veuillez vous adresser aux services qualifiés. Une intervention est requise lorsque l’appareil
présente des détériorations, tel un cordon d’alimentation ou le bloc d’alimentation AC/DC défectueux. Mais également
lorsqu’une substance liquide ait été renversée sur l’appareil ou que des objets étrangers y aient été insérés. Ainsi qu’après toute
chute, renversement, exposition à la pluie ou à l’humidité de l’appareil ou lorsqu’il ne fonctionne pas correctement.
15. AVERTISSEMENT : Afin de réduire les risques d’incendie ou de choc électrique, n’exposez pas l’appareil à la pluie ou à
l’humidité. L’appareil est destiné uniquement à une utilisation intérieure.
Page 22
24
Parrot PHOTO VIEWER 7’’
INTRODUCTION
La technologie Bluetooth® permet d’établir des communications voix et données via une liaison radio courte distance. Elle
permet à de nombreux équipements électroniques de communiquer entre eux.
Parrot tire bénéfice de ses longues années d’expérience dans la technologie Bluetooth pour vous proposer le Parrot PHOTO
VIEWER 7’’ : un cadre photo innovant. Vous pouvez transmettre par Bluetooth vos photos sur le Parrot PHOTO VIEWER 7’’
depuis votre téléphone portable, votre PDA ou votre ordinateur.
Le Parrot PHOTO VIEWER 7’’ est un cadre photos LCD (720x480 pixels) qui peut contenir plus de 500 photos. Vous pourrez
configurer son affichage par des diaporamas programmables ou en changeant l’orientation du cadre. Le Parrot PHOTO
VIEWER 7’’, dont le design raffiné s’adapte à votre intérieur, adapte également sa luminosité en fonction de la pièce. Le Parrot
PHOTO VIEWER 7’’ pourra vous indiquer l’heure telle une horloge de bureau.
Page 23
25
Français
Parrot PHOTO VIEWER 7’’
CONTENU DE L’EMBALLAGE
L’emballage contient :
• Un cadre LCD.
• Un transformateur.
• Une tige métallique à visser sur le cadre (cette tige constituera le support du cadre).
• Un crochet mural.
• Un système de clips (permet de fixer le câble d’alimentation le long du cadre).
• Le manuel d’utilisation.
• Un guide produit Parrot.
DÉMARRAGE RAPIDE DE L’APPAREIL
• Vissez la tige métallique au dos du cadre.
• Branchez le connecteur du câble d’alimentation dans le transformateur.
• Le Parrot PHOTO VIEWER 7’’ s’allume automatiquement.
• Choisissez la langue dans laquelle vous voulez utiliser
le Parrot PHOTO VIEWER 7’’ (veuillez vous référer à la partie « description
des icônes et fonctionnalités » dans le chapitre « Préférences » de ce manuel).
NOTE: VOUS POUVEZ AUSSI ACCROCHER LE CADRE AU MUR. DANS CE CAS, VISSEZ LE CROCHET AU DOS, INSÉREZ LE SYSTÈME
DE CLIPS DANS L’EMPLACEMENT PRÉVU À CET EFFET ET FAITES Y GLISSER LE CÂBLE D’ALIMENTATION. SI VOUS CHANGEZ L’ORIENTATION
DU CADRE, LA PHOTO AFFICHÉE PIVOTE POUR CORRESPONDRE À LA NOUVELLE ORIENTATION DU PARROT PHOTO VIEWER 7’’.
Page 24
26
Parrot PHOTO VIEWER 7’’
ARBORESCENCE DES MENUS
Navigation dans les menus
Déplacement dans les menus
• Le déplacement dans les menus s’effectue à l’aide des boutons situés au dos du Parrot PHOTO VIEWER 7’’.
Pour accéder au menu principal, appuyez sur le bouton situé au dos du cadre.
Boutons sélection :
• : Déplacement à gauche ou en haut selon l’orientation du cadre. Permet également de sélectionner la photo précédente.
• : Déplacement à droite ou en bas selon l’orientation du cadre. Permet également de sélectionner la photo suivante.
Bouton validation :
• Le bouton : Accède au menu sélectionné ou sélectionne une photo.
L’icône vous permet de revenir au menu précédent ou de sortir des menus.
Page 25

27
Français
Parrot PHOTO VIEWER 7’’
Menu principal
Description des icônes et fonctionnalités
• : Retour au menu précédent.
• : Tourne la photo vers la droite.
• : Affiche les photos en vignettes.
• : Organise l’ordre d’apparition des images.
• : - Effacer l’image en cours : Supprime l’image affichée.
- Effacer plusieurs images : Supprime les images sélectionées.
- Effacer toutes les images : Supprime toutes les images.
• : Choix et composition du Diaporama
• : Réglages d’affichage et de paramètres
Bluetooth.
Page 26
28
Parrot PHOTO VIEWER 7’’
• : Affiche les informations concernant le logiciel embarqué du Parrot PHOTO VIEWER 7’’,
l’état de la mémoire et l’image affichée.
Préférences
Le menu « Préférences » est accessible depuis le menu principal.
Description des icônes et fonctionnalités
• : Retour au menu principal.
• : - Visibilité : Rend visible ou invisible le Parrot PHOTO VIEWER 7’’ des autres appareils
Bluetooth.
- Nom du cadre : sélection de nom
Bluetooth préenregistré sous lequel sera découvert
le cadre par les autres appareils
Bluetooth..
- Mode avancé : Sélection d’un mode de jumelage spécifique ou standard selon le modèle de votre téléphone
Bluetooth. (pour plus d’informations, connectez vous sur www.parrot.com, rubrique Support).
• : Règle la luminosité de l’affichage. Vous réglez la luminosité de l’écran par les boutons « sélection »
au dos du Parrot PHOTO VIEWER 7’’, appuyez sur le bouton «validation » pour valider.
• : - Automatique : Le niveau du rétro-éclairage de l’écran est contrôlé par un algorithme qui utilise un capteur de
lumière situé sur le cadre. C’est le mode utilisé par défaut.
- Manuel : Le rétro éclairage est toujours en fonction.
Page 27
29
Français
Parrot PHOTO VIEWER 7’’
Utilisez le bouton ON\OFF sur le câble d’alimentation pour activer l’économiseur d’écran.
- Horaire prédéfini : Une plage horaire prédéfinie contrôle les heures pendant lesquelles l’écran est allumé.
Il vous sera demandé de régler l’horloge du Parrot PHOTO VIEWER 7’’.
NOTE: VOUS POUVEZ DÉCLENCHER L’ÉCONOMISEUR D’ÉCRAN PAR PRESSION COURTE SUR LE BOUTON ON/OFF DU CÂBLE D’ALIMENTATION. SI LE
MODE VEILLE EST RÉGLÉ SUR LE MODE « AUTOMATIQUE » OU « HORAIRE PRÉDÉFINI », LE PARROT PHOTO VIEWER 7’’ EST TEMPORAIREMENT EN MODE
«MANUEL» JUSQU’AU PROCHAIN CHANGEMENT DE SEUIL DE LUMINOSITE OU D’HEURE PREDEFINIE.
• : Choix de la langue.
• : - Réglage: Réglage de l’heure par les boutons «sélection». Appuyez sur le bouton « validation » pour valider.
- Visibilité: Active / Désactive l’affichage permanent de l’heure. C’est le mode utilisé par défaut
- Format : Sélection du format d’affichage de l’heure (AM/PM)
• : Restaure la configuration d’usine. (Ceci ne provoque pas l’effacement des images).
Page 28

30
Parrot PHOTO VIEWER 7’’
PREMIÈRE UTILISATION
Avant d’utiliser votre Parrot PHOTO VIEWER 7’’ avec votre téléphone / ordinateur pour la première fois, vous devez tout
d’abord effectuer un jumelage des deux appareils. Cette phase permet aux deux appareils d’échanger des informations afin
de configurer une connexion Bluetooth.
Mise en service de votre téléphone avec le Parrot PHOTO VIEWER 7’’:
• Assurez vous que le Parrot PHOTO VIEWER 7’’ soit réglé pour être visible par tous les appareils Bluetooth.
Veuillez vous référer à la partie « Préférences » de ce manuel.
• Activez la fonction Bluetooth de votre téléphone/ordinateur. (référez-vous à la notice de votre téléphone
ou connectez vous sur www.parrot.com, rubrique Support).
• Effectuez une recherche Bluetooth de périphérique depuis votre téléphone/ordinateur.
• Sélectionnez le Parrot PHOTO VIEWER 7’’ dans la liste des appareils Bluetooth proposé par votre téléphone /ordinateur.
• Sur votre téléphone / ordinateur entrez le code « 0000 ».
• Vos deux appareils sont désormais jumelés.
Note : Certains téléphones nécessitent l’activation de l’option « Mode réception spécifique » du menu « Mode avancé… »
avant d’effectuer un jumelage avec votre Parrot PHOTO VIEWER 7’’ (disponible dans le menu « Préférences \ Bluetooth »).
Pour plus d’informations connectez-vous à notre site internet : www.parrot.com
NOTE : SELON LE MODÈLE DE VOTRE TÉLÉPHONE / ORDINATEUR CETTE PHASE PEUT ÊTRE OPTIONNEL. CEPENDANT ELLE VOUS PERMETTRA D’ADRESSER
PLUS RAPIDEMENT VOS PHOTOS AU PARROT PHOTO VIEWER 7’’.
Page 29
31
Français
Parrot PHOTO VIEWER 7’’
Envoi des photos
Envoi depuis un téléphone ou un PDA:
• Assurez vous que le Parrot PHOTO VIEWER 7’’ soit réglé pour être visible par tous les
appareils Bluetooth. Veuillez vous référer à la partie « Préférences » de ce manuel.
• Activez la fonction Bluetooth sur votre téléphone.
• Depuis votre téléphone/PDA, allez dans le menu « Images ». Sélectionnez une image et choisissez ‘’envoyez
par Bluetooth’’. Votre appareil lance une recherche des périphériques Bluetooth.
• Une fois cette recherche terminée, sélectionnez votre Parrot PHOTO VIEWER 7’’. Si votre appareil demande un code,
entrez ‘’0000’’. L’image est alors envoyée vers l’écran. Il est possible d’envoyer plusieurs images en une fois,
cette fonctionnalité dépend de votre appareil.
• Lors de la transmission de l’image, l’image apparaît progressivement. L’icône Bluetooth s’affiche sur l’écran.
Envoi depuis un ordinateur:
• Assurez vous que le Parrot PHOTO VIEWER 7’’ soit réglé pour être visible par tous
les appareils Bluetooth. Veuillez vous référez à la partie « Préférences » de ce manuel.
• Activez la fonction Bluetooth sur votre ordinateur.
• Faites un clic droit sur l’image que vous voulez envoyer, et choisissez ‘’
envoyer vers Bluetooth’’.
• Votre PC recherche les périphériques Bluetooth environnants.
• Sélectionnez votre Parrot PHOTO VIEWER 7’’.Entrez ‘’0000’’ si votre PC vous demande un code.
• Lors de la transmission de l’image. L’icône Bluetooth s’affiche sur l’écran. L’image apparaît progressivement.
L’icône Bluetooth s’affiche sur l’écran.
Note : Si vous n’arrivez pas à détecter le Parrot PHOTO VIEWER 7’’, vous avez peut-être rendu le cadre Bluetooth invisible
pour les autres appareils. Référez-vous au chapitre « Préférences » de ce guide. Néanmoins, si votre appareil Bluetooth est
déjà jumelé avec le cadre, il pourra toujours se connecter au Parrot PHOTO VIEWER 7’’.
NOTE : POUR PLUS D’INFORMATIONS CONCERNANT LE MODE D’ENVOI DE PHOTOS, RÉFÉREZ-VOUS AU MANUEL DE VOTRE APPAREIL, OU CONNECTEZVOUS SUR NOTRE SITE WEB www.parrot.com.
Page 30

32
Parrot PHOTO VIEWER 7’’
Paramétrages
Le Parrot PHOTO VIEWER 7’’ vous permet de nombreux paramétrages. Vous pouvez gérer complètement l’affichage de votre
cadre : ordre d’apparition des images, création de diaporama, affichage de l’heure. Vous avez également la possibilité de
changer l’orientation du Parrot PHOTO VIEWER 7’’.
Ordre d’apparition des images
• Accédez au menu principal du Parrot PHOTO VIEWER 7’’ puis sélectionnez le menu «Ordonner les images».
• Vos images sont affichées en miniatures. L’affichage peut se faire sur plusieurs pages : Un appui constant sur un
des boutons « sélection » vous permettra de défiler respectivement sur les pages précédentes et suivantes.
Il vous suffit de relâcher ces boutons pour arrêter le défilement.
• Sélectionnez l’image par les boutons « sélection » puis appuyez
sur le bouton « validation » au dos du cadre pour valider votre choix.
• La photo sélectionnée est placée en haut de l’écran du Parrot PHOTO VIEWER 7’’ et un
curseur vous indique la position de votre photo dans votre album. En appuyant sur les
boutons « sélection» la position de la photo évolue.
Vous pouvez faire évoluer cette position dans toutes les pages de votre album.
• Une fois le curseur positionné à l’emplacement où vous désirez placer l’image, appuyez sur le bouton « validation ».
Page 31

33
Français
Parrot PHOTO VIEWER 7’’
Choix et création de Diaporama
Le sous menu « Diaporama » vous permet les options suivantes :
• Aucun : Aucun diaporama n’est actif
Le Parrot PHOTO VIEWER 7’’ vous propose 4 diaporamas dont un diaporama constitué par toutes les photos de votre cadre
disposées dans leur ordre d’apparition. Une fois un diaporama sélectionné, vous pouvez l’activer / le désactiver ou le configurer. La composition d’un diaporama vous offre les possibilités suivantes :
• Choix des images : sélection par les boutons « sélection » et « validation » des photos qui composeront le diaporama.
Les photos sélectionnées seront marquées d’une coche. (non disponible pour le diaporama proposé par défaut).
• Minutage : Définie la durée d’affichage du diaporama.
• Ordre des images : Permet de définir l’ordre d’apparition des photos qui composeront le diaporama. (non disponible
pour le diaporama proposé par défaut).
• Mode aléatoire: Dispose aléatoirement les photos composant le diaporama.
• Effacer le diaporama : Réinitialise la composition de votre diaporama (les images sélectionnées en feront plus partie
du diaporama mais elles ne seront pas effacées du cadre).
• Transition : Défini l’effet de transition entre les photos de votre diaporama
- Aucune
- Fondu
- Mosaïque
- Balayage
- Damier
- Aléatoire
Page 32

34
Parrot PHOTO VIEWER 7’’
Position du cadre
Choisissez l’orientation :
• Mode portrait.
• Mode paysage.
NOTE: VOUS POUVEZ AUSSI ACCROCHER LE CADRE AU MUR. DANS CE CAS, VISSEZ LE CROCHET AU DOS, INSÉREZ LE SYSTÈME DE CLIPS DANS L’EMPLACEMENT PRÉVU À CET EFFET ET FAITES Y GLISSER LE CÂBLE D’ALIMENTATION. SI VOUS CHANGEZ L’ORIENTATION DU CADRE, LA PHOTO AFFICHÉE PIVOTE
POUR CORRESPONDRE À LA NOUVELLE ORIENTATION DU PARROT PHOTO VIEWER 7’’.
Gestion de l’écran de l’appareil
Le Parrot PHOTO VIEWER 7’’ vous permet de mettre en veille votre appareil ainsi que d’activer un économiseur d’écran.
• Mode Allumé / Veille : Appui long sur le bouton ON/OFF du cordon d’alimentation.
En veille la fonction Bluetooth du Parrot PHOTO VIEWER 7’’ est désactivée.
• Mode économiseur d’écran : Le Parrot PHOTO VIEWER 7’’ affiche l’heure pendant les périodes où la fonction
rétro-éclairage n’est pas active. Cette fonction est activée par appui bref sur le bouton ON/OFF (veuillez vous référer
à la partie « description des icônes et fonctionnalités » dans le chapitre « Préférences » de ce manuel).
Page 33

35
Français
Parrot PHOTO VIEWER 7’’
MISE A JOUR DU LOGICIEL
Il est possible de mettre à jour par Bluetooth le Parrot PHOTO VIEWER. Téléchargez depuis notre site web www.parrot.com les
utilitaires et la procédure de mise à jour. Cela augmente la compatibilité avec les appareils Bluetooth.
HOTLINE
• Notre hotline se tient à votre disposition. Vous pouvez la contacter par mail ou par téléphone.
Europe : [+33] (0)1 48 03 60 69
Italie : [+39] 02 86 39 14 63
Espagne : [+34] 902 404 202
UK : [+44] (0)870 112 5872
Allemagne : 0900 1727768
USA : [+1] (877) 9 PARROT (gratuit)
Chine : [+86] (0)2164 601 944
Hong Kong : [+852] 2736 1169
Connectez-vous sur notre site internet www.parrot.com pour plus d’informations.
Page 34

36
Parrot PHOTO VIEWER 7’’
SPECIFICATIONS TECHNIQUES
Ecran:
• Taille de l’écran LCD: 6,5’’
• Résolution de l’écran 720x480 pixels (QVGA)
• 262144 couleurs
• Mémoire de 64MB permettant de stocker plus de 500 photos
• Capteur de lumière pour le mode automatique du
rétro éclairage
• Poids du cadre seul : 415 g
• Dimension : 192 x 146 mm
• Alimentation : 100V - 240V ~, 0.2A, 50/60 Hz.
Bluetooth:
• Qualifié
Bluetooth 2.0 + EDR
• Bluetooth PIN Code : 0000
• Profiles supportés :
- FTP (File Transfer Profile)
- OPP (Object Push Profile)
- BIP (Basic Imaging Profile)
• Mise à jour du logiciel par
Bluetooth
• Type de fichiers Photos \ Images supportés : JPEG
• Jusqu’à 10 appareils jumelés
NOTES
Page 35

Parrot PHOTO VIEWER 7’’
Español - Guía de uso
Page 36

38
Parrot PHOTO VIEWER 7’’
ÍNDICE
INSTRUCCIONES DE SEGURIDAD .........................................................
INTRODUCCIÓN ................................................................................
CONTENIDO DEl EMbAlAjE
.................................................................
PUESTA EN MARChA RáPIDA DEl DISPOSITIvO ....................
...............
DIAGRAMA ARbÓREO DE lOS MENúS ................................................
NAvEGACIÓN POR lOS MENúS .......................................
MENú PRINCIPAl .............................................................
PREFERENCIAS .................................................................
PRIMER USO ......................................................................................
PUESTA EN SERvICIO.................................................................
ENvÍO DE lAS FOTOS ......................................................
PARáMETROS ....................................................................................
ORDEN DE APARICIÓN DE lAS IMáGENES .........................
ElECCION Y CREACION DEl DIAPORAMA .........................
POSICION DEl MARCO ....................................................
GESTION DE lA PANTAllA DEl DIAPOSITIvO
....................
ACTUAlIzACI
ÓN DEl PROGRAMA INFORMáTICO ...............................
SERvICIO DE ATENCI
ÓN TElEFÓNICA .................................................
ESPECIFICATIONES TECNICAS
.............................................................
NOTAS .............................................................................................
INFORMACIÓN GENERAl ..................................................................
p 39
p 40
p 41
p 41
p 42
p 42
p 43
p 44
p 46
p 46
p 47
p 48
p 48
p 49
p 50
p 50
p 51
p 51
p 52
p 52
p 171
Page 37

39
Español
Parrot PHOTO VIEWER 7’’
INSTRUCCIONES DE SEGURIDAD PARA EL USUARIO
1. Este aparato no debe estar expuesto a goteos ni salpicaduras ni debe colocarse encima de él ningún objeto que contenga
líquido, como por ejemplo jarrones.
2. El adaptador AC/DC que facilita la desconexión del suministro de corriente eléctrica deberá permanecer siempre operativo.
Desenchufe este aparato si no piensa utilizarlo durante un largo período de tiempo.
Page 38

40
Parrot PHOTO VIEWER 7’’
INTRODUCCIÓN
La tecnología Bluetooth® permite establecer comunicaciones de voz y de datos a través de una conexión por radio a corte
distancia. Permite la comunicación entre numerosos dispositivos electrónicos.
Parrot se beneficia de sus largos años de experiencia en la tecnología Bluetooth para proponerle el Parrot PHOTO VIEWER
7’’: un marco de fotos innovador. Puede enviar sus fotos vía Bluetooth al Parrot PHOTO VIEWER 7’’ desde su teléfono móvil,
PDA u ordenador.
El Parrot PHOTO VIEWER 7’’ es un marco de fotos LCD (720x480 píxeles) que tiene capacidad para más de 500 fotos. Podrá
configurar su visualización mediante diaporamas programables o cambiando la orientación del marco. El Parrot PHOTO
VIEWER 7’’, cuyo diseño refinado se adapta a su interior, ajusta también su luminosidad en función de la estancia. El Parrot
PHOTO VIEWER 7’’ podrá indicar la hora como un reloj de sobremesa.
Page 39

41
Español
Parrot PHOTO VIEWER 7’’
CONTENIDO DEL EMBALAJE
El embalaje contiene:
• Un marco LCD.
• Un transformador.
• Una varilla metálica para atornillar en el marco (que constituirá el soporte del marco).
• Un gancho de pared.
• Un sistema de clips (permite fijar el cable de alimentación a lo largo del marco).
• El manual de uso.
• Una guía de productos Parrot.
PUESTA EN MARCHA RÁPIDA DEL DISPOSITIVO
• Atornille la varilla metálica en la parte posterior del marco.
• Enchufe el conector del cable de alimentación del transformador.
• El Parrot PHOTO VIEWER 7’’ se enciende automáticamente.
• Seleccione el idioma en que quiere utilizar el Parrot PHOTO VIEWER 7’’
(consulte el apartado «Descripción de los iconos y las funciones» en el capítulo
«Preferencias» de este manual).
NOTA: ASIMISMO, PUEDE COLGAR EL MARCO EN LA PARED. EN ESTE CASO, ATORNILLE EL GANCHO EN LA PARTE POSTERIOR,
INTRODUZCA EL SISTEMA DE CLIPS EN EL LUGAR DESTINADO A TAL EFECTO Y DESLICE EL CABLE DE ALIMENTACIÓN. SI CAMBIA
LA ORIENTACIÓN DEL MARCO, LA FOTO MOSTRADA GIRA SOBRE SU EJE PARA CORRESPONDER A LA NUEVA ORIENTACIÓN.
Page 40

42
Parrot PHOTO VIEWER 7’’
DIAGRAMA ARBÓREO DE LOS MENÚS
Navegación por los menús
Desplazamiento por los menús
• El desplazamiento por los menús se realiza con la ayuda de los botones situados en la parte posterior del Parrot
PHOTO VIEWER 7’’. Para acceder al menú principal, pulse el botón situado en la parte posterior del marco.
Botones de selección:
• : Desplazamiento hacia la izquierda o hacia arriba según la orientación del marco.
Asimismo, permite seleccionar la foto anterior.
• : Desplazamiento hacia la derecha o hacia abajo según la orientación del marco.
Asimismo, permite seleccionar la foto siguiente.
Botón de validación:
• El botón : Proporciona acceso al menú seleccionado o selecciona una foto.
El icono porta le permite volver al menú anterior o salir de los menús.
Page 41

43
Español
Parrot PHOTO VIEWER 7’’
Menú principal
Descripción de los iconos y las funciones
• : Vuelve al menú anterior.
• : Gira la foto hacia la derecha.
• : Muestra las fotos en viñetas.
• : Organiza el orden de aparición de las imágenes.
• : - Borrar la imagen seleccionada: suprime la imagen mostrada.
- Borrar varias imágenes: suprime las imágenes seleccionadas.
- Borrar todas las imágenes: suprime todas las imágenes.
• : Elección y composición del diaporama
• : Ajustes de visualización y de parámetros
Bluetooth.
Page 42

44
Parrot PHOTO VIEWER 7’’
• : Muestra la información relativa al programa informático integrado del Parrot PHOTO VIEWER 7’’,
el estado de la memoria y la imagen mostrada.
Preferencias
Se puede acceder al menú «Preferencias» desde el menú principal.
Descripción de los iconos y las funciones
• : Vuelve al menú principal.
• : - Visibilidad: hace visible o invisible el Parrot PHOTO VIEWER 7’’ para otros dispositivos
Bluetooth.
- Nombre del marco: selección del nombre
Bluetooth pregrabado bajo el cual los demás dispositivos
Bluetooth encontrarán el marco.
- Modo avanzado: Selección de un modo de emparejamiento específico o estándar según el modelo
de su teléfono Bluetooth (para más información, visite www.parrot.com, sección Apoyo al cliente).
• : Ajusta la luminosidad de la pantalla. Ajuste la luminosidad de la pantalla con los botones de «selección»
que se encuentran en la parte posterior del Parrot PHOTO VIEWER 7’’ y pulse el botón de «validación»
para validar.
• : - Automatico: el nivel de retroiluminación de la pantalla se controla mediante un algoritmo
que utiliza un sensor de luz situado en el marco. Este es el modo predeterminado utilizado.
- Manual: la retroiluminación siempre está en funcionamiento. Utilice el botón de encendido /apagado
del cable de alimentación para activar el salvapantallas.
Page 43

45
Español
Parrot PHOTO VIEWER 7’’
- Horario predefinido: un intervalo horario predefinido controla las horas durante las cuales se enciende
la pantalla. Se le solicitará que ajuste el reloj del Parrot PHOTO VIEWER 7’’.
NOTA: SÓLO PUEDE PONER EN MARCHA EL SALVAPANTALLAS MEDIANTE UNA PULSACIÓN CORTA DEL BOTÓN DE ENCENDIDO / APAGADO DEL CABLE DE
ALIMENTACIÓN. SI LA RETROILUMINACIÓN ESTÁ AJUSTADA EN EL MODO «AUTOMÁTICA» O DE «HORARIO PREDEFINIDO », EL PARROT PHOTO VIEWER 7’’
ESTÁ AJUSTADO TEMPORAREMENTE EN EL MODO «MANUAL» HASTA EL PROXIMO CAMBIO DE ILUMINACIÓN O DE HORARIO PREDEFINIDO.
• : Elección del idioma.
• : - Ajuste: ajuste de la hora con los botones de «selección». Pulse el botón de «validación» para validar.
- Visibilidad: Activa / Desactiva la visualizacion de la hora de manera permanente. Este es el modo
predeterminado utilizado.
- Formato: Seleción del formato del hora.(AM/PM)
• : Restaura la configuración de fábrica. (Esto no provoca la eliminación de las imágenes).
Page 44

46
Parrot PHOTO VIEWER 7’’
PRIMER USO
Antes de utilizar su Parrot PHOTO VIEWER 7’’ con su teléfono / ordenador por primera vez, debe realizar en primer lugar
un emparejamiento de ambos dispositivos.
Esta acción permite que los dos dispositivos intercambien información para configurar una conexión Bluetooth.
Puesta en servicio de su teléfono u ordenador con el Parrot PHOTO VIEWER 7’’:
• Asegúrese de que el Parrot PHOTO VIEWER 7’’ está ajustado para ser visible en todos los dispositivos Bluetooth.
Consulte el apartado de «Preferencias» de este manual.
• Active la función Bluetooth de su teléfono / ordenador. (Consulte la información de su teléfono o ordenador o conéctese
a www.parrot.com, sección Apoyo al cliente.)
• Realice una búsqueda Bluetooth de periféricos desde su teléfono / ordenador.
• Seleccione el Parrot PHOTO VIEWER 7’’ de la lista de dispositivos Bluetooth propuesto por su teléfono / ordenador.
• En su teléfono / ordenador, introduzca el código «0000».
• A partir de ahora, sus dos dispositivos están emparejados.
Nota: algunos teléfonos necesitan la activación de la opción «Modo recepción específ.» del menú « Modo avanzado…» antes
de realizar un emparejamiento con su Parrot PHOTO VIEWER 7’’ (disponible en el menú «Preferencias \ Bluetooth»). Para más
información, visite nuestra web: www.parrot.com
NOTA: SEGÚN EL MODELO DE SU TELÉFONO / ORDENADOR, ESTA ACCIÓN PUEDE SER OPCIONAL. SIN EMBARGO, LE PERMITIRÁ ENVIAR SUS FOTOS
CON MAYOR RAPIDEZ AL PARROT PHOTO VIEWER 7’’.
Page 45

47
Español
Parrot PHOTO VIEWER 7’’
Envío de las fotos
Envío desde un teléfono o una PDA:
• Asegúrese de que el Parrot PHOTO VIEWER 7’’ está ajustado para ser visible en todos los
dispositivos Bluetooth. Consulte el apartado de «Preferencias» de este manual.
• Active la función Bluetooth en su teléfono / PDA.
• Desde su teléfono / PDA, entre en el menú «Imágenes». Seleccione una imagen y elija «Enviar vía Bluetooth».
Su dispositivo inicia una búsqueda de periféricos Bluetooth.
• Una vez finalizada la búsqueda, seleccione Parrot PHOTO VIEWER 7’’. Si su dispositivo solicita un código, introduzca
«0000». La imagen se envía hacia la pantalla. Se pueden enviar varias imágenes a la vez; esta función depende de su
dispositivo.
• Durante la transmisión de la imagen, esta aparece progresivamente. El icono Bluetooth aparece en la pantalla.
Envío desde un ordenador:
• Asegúrese de que el Parrot PHOTO VIEWER 7’’ está ajustado para ser visible en todos
los dispositivos Bluetooth. Consulte el apartado de «Preferencias» de este manual.
• Active la función Bluetooth en su ordenador.
• Pulse el botón derecho del ratón sobre la imagen que desea enviar
y seleccione «Enviar vía Bluetooth».
• Su PC busca los periféricos Bluetooth que se encuentran cerca.
• Seleccione Parrot PHOTO VIEWER 7’’. Si su PC solicita un código, introduzca «0000».
• Durante la transmisión de la imagen, el icono Bluetooth aparece en la pantalla. La imagen aparece.
Nota: si no consigue detectar el Parrot PHOTO VIEWER 7’’, el motivo sea quizá que ha hecho invisible el marco Bluetooth
para los demás dispositivos. Consulte el capítulo «Preferencias» de esta guía. No obstante, si su dispositivo Bluetooth ya está
emparejado con el marco, siempre podrá conectarse al Parrot PHOTO VIEWER 7’’.
NOTA: PARA MÁS INFORMACIÓN RELATIVA AL MODO DE ENVÍO DE FOTOS, CONSULTE EL MANUAL DE SU DISPOSITIVO O VISITE NUESTRA PÁGINA
WEB www.parrot.com
Page 46

48
Parrot PHOTO VIEWER 7’’
PARÁMETROS
El Parrot PHOTO VIEWER 7’’ le permite numerosos parámetros. Puede gestionar la visualización completa de su marco:
orden de aparición de las imágenes, creación del diaporama, ajuste de la hora. Asimismo, tiene la posibilidad de cambiar
la orientación del Parrot PHOTO VIEWER 7’’.
Orden de aparición de las imágenes
• Acceda al menú principal del Parrot PHOTO VIEWER 7’’ y seleccione el menú «Ordenar las imágenes».
• Sus imágenes se muestran en miniatura. La visualización puede realizarse en varias páginas: Una pulsación continua en
uno de los botones de «selección» le permitirá desplazarse de las páginas anteriores a las siguientes, respectivamente.
Sólo tiene que soltar estos botones para detener el desplazamiento.
• Seleccione la imagen con los botones de «selección» y pulse el botón de «validación» que se encuentran en la parte
posterior del marco para validar su elección.
• La foto seleccionada se sitúa en la parte superior de la pantalla del Parrot PHOTO VIEWER 7’’ y un cursor le indica la
posición de su foto en su álbum. Pulsando los botones de «selección», cambia la posición de la foto.
Page 47

49
Español
Parrot PHOTO VIEWER 7’’
Puede cambiar esta posición en todas las páginas de su álbum.
• Una vez el cursor se encuentre en el lugar donde desea posicionar la imagen, pulse el botón de «validación».
Elección y creación del diaporama
El submenú «Diaporama» le permite las siguientes opciones:
• Ningún: Ningún diaporamas esta activado.
El Parrot PHOTO VIEWER 7’’ le propone 4 diaporamas, estando constituido cada uno de ellos por todas las fotos de su marco,
dispuestas en orden de aparición. Una vez seleccionado un diaporama, puede activarlo / desactivarlo o configurarlo. La
composición de un diaporama le ofrece las siguientes posibilidades:
• Selección de las imágenes: selección con los botones de «selección» y «validación» de las fotos que compondrán el
diaporama. Las fotos seleccionadas se señalarán con una marca. (No disponible para el diaporama propuesto por
defecto.)
• Minutaje: define la duración de visualización del diaporama.
• Orden de las imágenes: permite definir el orden de aparición de las fotos que compondrán el diaporama. (No disponible
para el diaporama propuesto por defecto.)
• Modo aleatorio: ordena aleatoriamente las fotos que componen el diaporama.
• Borrar el diaporama: reinicia la composición de su diaporama (las imágenes seleccionadas formarán parte
del diaporama, pero no se borrarán del marco).
• Transición: define el efecto de transición entre las fotos de su diaporama.
- Ningúna - Barrido
- Fundido - Damero
- Mosaico - Aleatorio
Page 48

50
Parrot PHOTO VIEWER 7’’
POSICIÓN DEL MARCO
• Modo retrato.
• Modo paisaje.
NOTA: ASIMISMO, PUEDE COLGAR EL MARCO EN LA PARED. EN ESTE CASO, ATORNILLE EL GANCHO EN LA PARTE POSTERIOR, INTRODUZCA EL SISTEMA
DE CLIPS EN EL LUGAR DESTINADO A TAL EFECTO Y DESLICE EL CABLE DE ALIMENTACIÓN. SI CAMBIA LA ORIENTACIÓN DEL MARCO, LA FOTO MOSTRADA
GIRA SOBRE SU EJE PARA CORRESPONDER A LA NUEVA ORIENTACIÓN DEL PARROT PHOTO VIEWER 7’’.
Gestión de la pantalla del dispositivo
El Parrot PHOTO VIEWER 7’’ le permite poner en espera su dispositivo, así como activar un salvapantallas.
• Modo Encendido / Espera: pulsación larga del botón de encendido / pagado del cable de alimentación.
En espera, la función Bluetooth del Parrot PHOTO VIEWER 7’’ está desactivada.
• Modo salvapantallas: el Parrot PHOTO VIEWER 7’’ muestra la hora durante los periodos en que la función de
retroiluminación no está activada. Esta función se activa mediante una pulsación corta del botón de encendido
/ apagado (consulte el apartado «Descripción de los iconos y las funciones» en el capítulo «Preferencias» de este
manual).
Page 49

51
Español
Parrot PHOTO VIEWER 7’’
ACTUALIZACIÓN DEL PROGRAMA INFORMÁTICO
El Parrot PHOTO VIEWER 7’’ puede actualizarse vía Bluetooth. Descargue las utilidades y el procedimiento de actualización
de nuestra página web www.parrot.com. Esta aumenta la compatibilidad con los dispositivos Bluetooth.
SERVICIO DE ATENCIÓN TELEFÓNICA
• Nuestro servicio de atención telefónica está a su disposición. Puede ponerse en contacto con dicho servicio por correo
electrónico o por teléfono.
Europa: [+33] (0)1 48 03 60 69
Italia: [+39] 02 86 39 14 63
España [+34] 902 404 202
Reino Unido: [+44] (0)870 112 5872
Alemania: 0900 1727768
EE.UU.: [+1] (877) 9 PARROT (número gratuito)
China : [+86] (0)2164 601 944
Hong Kong : [+852] 2736 1169
Visite nuestra página web www.parrot.com. para más información.
Page 50

52
Parrot PHOTO VIEWER 7’’
ESPECIFICACIONES TÉCNICAS
Pantalla:
• Tamaño de la pantalla LCD: 6.5’’
• Resolución de la pantalla 720x480 píxeles (QVGA)
• 262144 colores
• Memoria de 64MB que permite almacenar más de 500 fotos
• Sensor de luz para el modo automático de retroiluminación
• Peso del marco solo: 415 g.
• Medidas: 192 X 146 mm
• Alimentación: 100V - 240V ~, 0,2A, 50/60 Hz.
Bluetooth:
• Calificado Bluetooth 2.0 + EDR
• Código PIN del Bluetooth: 0000
• Perfiles compatibles:
- FTP (File Transfer Profile)
- OPP (Object Push Profile)
- BIP (Basic Imaging Profile)
• Actualización vía Bluetooth
• Tipo de ficheros de fotos / imágenes compatibles: JPEG
• Hasta 10 dispositivos emparejados
NOTAS
Page 51

Parrot PHOTO VIEWER 7’’
Italiano - Guida all’uso
Page 52

54
Parrot PHOTO VIEWER 7’’
INDICE
ISTRUzIONI DI SICUREzzA PER l’UTENTE .............................................
INTRODUzIONE ................................................................................
CONTENUTO DEllA CONFEzIONE
.......................................................
GUIDA RAPIDA All’USO DEll’APPARECChIO ....................
...................
STRUTTURA AD AlbERO DEI MENU ......................................................
USO DEI MENU .................................................................
MENU PRINCIPAlE ............................................................
PREFERENzE .................................................................
PRIMO UTIlIzzO .................................................................................
ASSOCIAzIONE DEl TElEFONO/COMPUTER..............................
INvIO DI FOTO .................................................................
PROCEDURE DI IMPOSTAzIONE ...........................................................
ORDINE DI vISUAlIzzAzIONE DEllE IMMAGINI .................
SElEzIONE E CREAzIONE DI DIAPORAMA ..........................
POSIzIONAMENTO DEllA CORNICE ..................................
GESTIONE DEl DISPlAY DEl DISPOSITIvO
..........................
AGGIORNAMENTO DEl SOFTwARE
.....................................................
hOTlINE
.............................................................................................
CARATTERISTIChE TECNIChE
................................................................
NOTE ..................................................................................................
INFORMAzIONI GENERAlI
..................................................................
p 55
p 56
p 57
p 57
p 58
p 58
p 59
p 60
p 62
p 62
p 63
p 64
p 64
p 65
p 66
p 66
p 67
p 67
p 68
p 68
p 171
Page 53

55
Italiano
Parrot PHOTO VIEWER 7’’
ISTRUZIONI DI SICUREZZA PER L’UTENTE
Europa
1. Non esporre il presente apparecchio a gocce o schizzi, né collocarvi sopra oggetti contenenti liquidi, quali ad esempio vasi.
2. . L’adattatore AC/DC, che consente di scollegare l’apparecchio dall’alimentazione di rete, deve essere sempre facilmente
accessibile. Se non si desidera utilizzare l’apparecchio per un periodo prolungato di tempo, scollegarlo dall’alimentazione.
Page 54

56
Parrot PHOTO VIEWER 7’’
INTRODUZIONE
Grazie alla tecnologia Bluetooth®, è possibile stabilire comunicazioni vocali e dati tramite una connessione radio a breve
distanza. Essa consente a svariate apparecchiature elettroniche di comunicare tra loro.
Parrot si avvale della sua grande esperienza nell’ambito della tecnologia Bluetooth per proporre Parrot PHOTO VIEWER 7’’,
un’innovativa cornice digitale. Tramite la tecnologia Bluetooth, è possibile trasmettere le foto su Parrot PHOTO VIEWER 7’’ da
un telefono cellulare, un PDA o un computer.
Parrot PHOTO VIEWER 7’’ è una cornice digitale con display LCD (720 x 480 pixel) in grado di contenere più di 500 foto.
È possibile configurarne la visualizzazione attraverso diaporama programmabili o modificando l’orientamento della cornice.
Parrot PHOTO VIEWER 7’’, grazie al suo design raffinato, si adatta perfettamente a qualsiasi tipo di arredamento e consente
la regolazione della luminosità in base alla stanza in cui viene collocato. Parrot PHOTO VIEWER 7’’ indica l’ora proprio come
un vero orologio.
Page 55

57
Italiano
Parrot PHOTO VIEWER 7’’
CONTENUTO DELLA CONFEZIONE
Nella confezione sono contenuti i seguenti articoli:
• Una cornice LCD
• Un alimentatore
• Un’asta metallica da avvitare sulla cornice come supporto
• Un gancio per il montaggio alla parete
• Un sistema di clip per fissare il cavo di alimentazione alla cornice
• Un manuale delle istruzioni
• Una guida ai prodotti Parrot
GUIDA RAPIDA ALL’USO DELL’APPARECCHIO
• Avvitare l’asta metallica nella parte posteriore della cornice.
• Collegare il connettore del cavo di alimentazione all’alimentatore.
• Parrot PHOTO VIEWER 7’’ si accende automaticamente.
• Selezionare la lingua desiderata per l’uso di Parrot PHOTO VIEWER 7’’ (consultare la
sezione «Descrizione e funzioni delle icone» nel capitolo «Preferenze» del presente
manuale).
NOTA: LA CORNICE PUÒ INOLTRE ESSERE APPESA ALLA PARETE. IN TAL CASO, AVVITARE IL GANCIO NELLA PARTE POSTERIORE,
QUINDI INSERIRE IL SISTEMA DI CLIP NELLE APPOSITE SCANALATURE E FARVI PASSARE IL CAVO DI ALIMENTAZIONE. CAMBIANDO L’ORIEN
TAMENTO DELLA CORNICE, LA FOTO VISUALIZZATA RUOTA PER ADATTARSI AL NUOVO ORIENTAMENTO DI PARROT PHOTO VIEWER 7’’.
Page 56

58
Parrot PHOTO VIEWER 7’’
STRUTTURA AD ALBERO DEI MENU
Uso dei menu
Consultazione dei menu:
Per la consultazione dei menu, utilizzare i tasti situati nella parte posteriore di Parrot PHOTO VIEWER 7’’.
• Per accedere al menu principale, premere il tasto situato nella parte posteriore della cornice.
Tasti di selezione:
• Tasto : Consente di spostarsi a sinistra o verso l’alto, a seconda dell’orientamento della cornice.
Consente inoltre di selezionare la foto precedente.
• Tasto : Consente di spostarsi a destra o verso il basso, a seconda dell’orientamento della cornice.
Consente inoltre di selezionare la foto successiva.
Tasto di conferma:
• Tasto : Consente di accedere al menu selezionato o di selezionare una foto.
L’icona consente di tornare al menu precedente o di uscire dai menu.
Page 57

59
Italiano
Parrot PHOTO VIEWER 7’’
Menu principale
Descrizione e funzioni delle icone
• : Consente di tornare al menu precedente.
• : Consente di ruotare la foto verso destra.
• : Consente di visualizzare le foto in formato ridotto.
• : Consente di organizzare l’ordine di visualizzazione delle immagini.
• : - Elimina immagine corrente : Consente di eliminare l’immagine visualizzata.
- Elimina più immagini : Consente di eliminare l’immagine selezionata.
- Elimina tutte le immagini : Consente di eliminare tutte le immagini.
• : Consente di selezionare e comporre un diaporama.
• : Consente di regolare la visualizzazione e i parametri
Bluetooth.
Page 58

60
Parrot PHOTO VIEWER 7’’
• : Consente di visualizzare le informazioni relative al software installato su Parrot PHOTO VIEWER 7’’,
allo stato della memoria e all’immagine visualizzata.
Preferenze
È possibile accedere al menu «Preferenze» dal menu principale.
Descrizione e funzioni delle icone
• : Consente di tornare al menu principale.
• : - Visibilità: consente di rendere Parrot PHOTO VIEWER 7’’ visibile o invisibile agli altri apparecchi
Bluetooth.
- Nome della cornice: consente di selezionare il nome
Bluetooth preregistrato con il quale la cornice sarà
riconosciuta dagli altri apparecchi
Bluetooth.
- Modalità avanzata: consente di selezionare un modo di associazione specifico o standard in base
al modello di telefono
Bluetooth in uso (per ulteriori informazioni, accedere alla sezione Assistenza del sito
Web
www.parrot.com).
• : Consente di regolare la luminosità di visualizzazione. Per regolare la luminosità del display, utilizzare i tasti di
«selezione» situati nella parte posteriore di Parrot PHOTO VIEWER 7’’, quindi premere il tasto di «conferma» per
confermare.
• : - Automatica: il livello di retroilluminazione del display viene controllato mediante
Page 59

61
Italiano
Parrot PHOTO VIEWER 7’’
un algoritmo che impiega un sensore di luminosità posto sulla cornice. Si tratta della modalità predefinita.
- Manuale: la retroilluminazione è sempre attiva. Per attivare il modo di risparmio energetico del display,
utilizzare il tasto di accensione/spegnimento posto sul cavo di alimentazione.
- Orario predefinito: una fascia oraria predefinita controlla le ore durante le quali il display rimane acceso.
Verrà richiesta la regolazione dell’orologio di Parrot PHOTO VIEWER 7’’.
NOTA: PER DISATTIVARE IL MODO DI RISPARMIO ENERGETICO DEL DISPLAY, PREMERE BREVEMENTE IL TASTO DI ACCENSIONE/SPEGNIMENTO DEL CAVO
DI ALIMENTAZIONE. SE LA RETROILLUMINAZIONE È IMPOSTATA SUL MODO «AUTOMATICA» O «ORARIO PREDEFINITO», IL PARROT PHOTO VIEWER 7’’ STA
TEMPORANEAMENTE IN MODO «MANUAL» FINO AL PROSSIMO CAMBIAMENTO DI SOGLIA DI LUMINOSITÀ O DI ORA PREDEFINITA.
• : Consente di selezionare la lingua desiderata.
• : - Regolazione: consente di regolare l’ora mediante i tasti di «selezione». Premere il tasto di «conferma»
per confermare.
- Visibilità: Attivare / Disattivare la visualizzazione dell’ora. Si tratta della modalità predefinita.
- Formato : Selezionare il formato dell’ora visualizzata (AM/PM).
• : Consente di ripristinare la configurazione predefinita (tale operazione non comporta l’eliminazione delle immagini).
Page 60

62
Parrot PHOTO VIEWER 7’’
PRIMO UTILIZZO
Prima di utilizzare Parrot PHOTO VIEWER 7’’ con il telefono/computer per la prima volta, è necessario innanzitutto effettuare
l’associazione dei due apparecchi. Questa operazione consente ai due apparecchi di scambiarsi informazioni al fine di
configurare una connessione Bluetooth.
Associazione del telefono/computer con Parrot PHOTO VIEWER 7’’
• Accertarsi che Parrot PHOTO VIEWER 7’’ sia impostato in modo tale da risultare visibile per tutti gli apparecchi Bluetooth.
Consultare il capitolo «Preferenze» del presente manuale.
• Attivare la funzione Bluetooth del telefono/computer (consultare le istruzioni del telefono/computer oppure accedere
alla sezione Assistenza del sito Web www.parrot.com).
• Effettuare una ricerca del dispositivo Bluetooth tramite il telefono/computer.
• Selezionare «Parrot PHOTO VIEWER 7’’» nell’elenco dei dispositivi Bluetooth rilevati dal telefono/computer.
• Sul telefono/computer immettere il codice «0000».
• A questo punto, i due apparecchi sono associati.
Nota: alcuni telefoni richiedono l’attivazione dell’opzione «Modalità ricezione specifica» dal menu «Modalità avanzata…»
prima di eseguire l’associazione con Parrot PHOTO VIEWER 7’’ (disponibile nel menu «Preferenze/Bluetooth»). Per ulteriori
informazioni, accedere al sito Internet all’indirizzo www.parrot.com
NOTA: A SECONDA DEL MODELLO DI TELEFONO/COMPUTER IN USO, È POSSIBILE CHE QUESTA OPERAZIONE SIA OPZIONALE. TUTTAVIA, TALE OPERAZIONE CONSENTE DI INVIARE PIÙ RAPIDAMENTE LE FOTO A PARROT PHOTO VIEWER 7’’
Page 61

63
Italiano
Parrot PHOTO VIEWER 7’’
Invio di foto
Invio da un telefono/PDA:
• Accertarsi che Parrot PHOTO VIEWER 7’’ sia impostato in modo tale da risultare visibile per
tutti gli apparecchi Bluetooth. Consultare il capitolo «Preferenze» del presente manuale.
• Attivare la funzione Bluetooth sul telefono/PDA.
• Nel telefono/PDA, accedere al menu «Immagini». Selezionare un’immagine, quindi l’opzione di invio tramite Bluetooth.
Il dispositivo avvia una ricerca delle periferiche Bluetooth.
• Una volta terminata la ricerca, selezionare «Parrot PHOTO VIEWER 7’’». Se il dispositivo richiede l’immissione di un
codice, inserire «0000». L’immagine viene inviata al display. Se il dispositivo in uso supporta tale funzione, è possibile
inviare più immagini contemporaneamente.
• Durante la trasmissione, l’immagine viene visualizzata gradualmente. L’icona Bluetooth compare sul display.
Invio da un computer:
• Accertarsi che Parrot PHOTO VIEWER 7’’ sia impostato in modo tale da risultare visibile per
tutti gli apparecchi Bluetooth. Consultare il capitolo «Preferenze» del presente manuale.
• Attivare la funzione Bluetooth sul computer.
• Con il pulsante destro del mouse, fare clic sull’immagine che si desidera inviare,
quindi selezionare l’opzione di invio a Bluetooth.
• Il PC avvia la ricerca delle periferiche Bluetooth presenti nelle vicinanze.
• Selezionare «Parrot PHOTO VIEWER 7’’». Se il PC richiede l’immissione di un codice, inserire «0000».
• Durante la trasmissione dell’immagine, l’icona Bluetooth compare sul display e viene visualizzata l’immagine.
Nota: se il dispositivo Parrot PHOTO VIEWER 7’’ non viene rilevato, è possibile che la cornice Bluetooth sia stata impostata
in modo tale da non risultare visibile agli altri dispositivi. Consultare la sezione «Preferenze» nella presente guida. Tuttavia,
se è già associato con la cornice, il dispositivo Bluetooth potrà essere connesso a Parrot PHOTO VIEWER 7’’ in qualsiasi
momento.
NOTA: PER ULTERIORI INFORMAZIONI SULLE MODALITÀ DI INVIO DELLE IMMAGINI, CONSULTARE IL MANUALE DEL DISPOSITIVO IN USO OPPURE COLLEGARSI
AL SITO WEB ALL’INDIRIZZO www.parrot.com
Page 62

64
Parrot PHOTO VIEWER 7’’
PROCEDURE DI IMPOSTAZIONE
Parrot PHOTO VIEWER 7’’ consente di eseguire numerose procedure di impostazione. È possibile gestire tutte le opzioni di
visualizzazione della cornice: ordine di visualizzazione delle immagini, creazione di diaporama, visualizzazione dell’ora. È
inoltre possibile modificare l’orientamento di Parrot PHOTO VIEWER 7’’.
Ordine di visualizzazione delle immagini
• Accedere al menu principale di Parrot PHOTO VIEWER 7’’, quindi selezionare il menu «Ordina immagini».
• Le immagini vengono visualizzate come miniature. È possibile organizzare la visualizzazione su più pagine:
tenendo sempre premuto uno dei tasti di «selezione», è possibile scorrere rispettivamente le pagine precedenti
e successive. È sufficiente rilasciare i tasti per arrestare lo scorrimento delle pagine.
• Selezionare l’immagine mediante i tasti di «selezione», quindi premere il tasto di «conferma» posto sulla parte posteriore
della cornice per confermare la selezione.
• La foto selezionata viene posizionata nella parte superiore del display di Parrot PHOTO VIEWER 7’’ e un cursore ne
indica la posizione all’interno dell’album. Premendo i tasti di «selezione», la posizione della foto cambia.È possibile
modificare la posizione in tutte le pagine dell’album.
Page 63

65
Italiano
Parrot PHOTO VIEWER 7’’
• Una volta posizionato il cursore nel punto in cui si desidera collocare l’immagine, premere il tasto di «conferma».
Selezione e creazione di diaporama
Il sottomenu «Diaporama» comprende le seguenti opzioni:
• Nessuno: consente di disattivare i diaporama.
Parrot PHOTO VIEWER 7’’ propone 4 tipi di diaporama, uno dei quali è costituito da tutte le foto della cornice disposte in
ordine di visualizzazione.Una volta selezionato un tipo di diaporama, è possibile attivarlo/disattivarlo o configurarlo. La
composizione di un diaporama offre le possibilità riportate di seguito:
• Scelta immagini: consente di selezionare mediante i tasti di «selezione» e «conferma» le foto che andranno
a comporre il diaporama. Le foto selezionate verranno contrassegnate da un segno di spunta (non disponibile
per il diaporama predefinito).
• Calcolo minuti: consente di definire la durata di visualizzazione del diaporama.
• Ordine immagini: consente di definire l’ordine di visualizzazione delle foto che andranno a comporre
il diaporama (non disponibile per il diaporama predefinito).
• Modalità random: consente di disporre in ordine casuale le foto che compongono il diaporama.
• Elimina diaporama: consente di reinizializzare la composizione del diaporama (le immagini selezionate non faranno
più parte del diaporama, tuttavia non saranno eliminate dalla cornice).
• Transizione: consente di definire l’effetto di transizione tra le foto del diaporama.
o Nessuna
o Dissolvenza
o Mosaico
o A comparsa
o Scacchiera
o Aleatoria
Page 64

66
Parrot PHOTO VIEWER 7’’
Posizionamento della cornice
Selezionare l’orientamento
• Modo verticale
• Modo orizzontale
NOTA: LA CORNICE PUÒ INOLTRE ESSERE APPESA ALLA PARETE. IN TAL CASO, AVVITARE IL GANCIO NELLA PARTE POSTERIORE, QUINDI INSERIRE IL SISTEMA
DI CLIP NELLE APPOSITE SCANALATURE E FARVI PASSARE IL CAVO DI ALIMENTAZIONE. CAMBIANDO L’ORIENTAMENTO DELLA CORNICE, LA FOTO VISUALIZZATA RUOTA PER ADATTARSI AL NUOVO ORIENTAMENTO DI PARROT PHOTO VIEWER 7’’.
Gestione del display del dispositivo
Parrot PHOTO VIEWER 7’’ consente sia di mettere in standby il dispositivo che di attivare il modo di risparmio energetico del display.
• Modo di accensione/standby: pressione prolungata del tasto di accensione/spegnimento del cavo di alimentazione.
In standby, la funzione Bluetooth di Parrot PHOTO VIEWER 7’’ è disattivata.
• Modo di risparmio energetico del display: Parrot PHOTO VIEWER 7’’ visualizza l’ora durante i periodi in cui
la retroilluminazione non è attiva. Questa funzione si attiva mediante une breve pressione del tasto di accensione/
spegnimento (consultare la sezione «Descrizione e funzioni delle icone» nel capitolo «Preferenze» del presente manuale).
Page 65

67
Italiano
Parrot PHOTO VIEWER 7’’
AGGIORNAMENTO DEL SOFTWARE
È possibile aggiornare Parrot PHOTO VIEWER 7’’ tramite Bluetooth. Scaricare i programmi di utilità e le istruzioni relative
all’aggiornamento presso il sito Web all’indirizzo www.parrot.com. L’aggiornamento del software consente di disporre di una
maggiore compatibilità con i dispositivi Bluetooth.
HOTLINE
• La hotline è a disposizione degli utenti. È possibile contattarla tramite e-mail o telefonicamente.
Europa: [+33] (0)1 48 03 60 69
Italia: [+39] 02 86 39 14 63
Spagna: [+34] 902 404 202
Regno Unito: [+44] (0)870 112 5872
Germania: 0900 1727768
Stati Uniti: [+1] (877) 9 PARROT (numero verde)
Cina : [+86] (0)2164 601 944
Hong Kong : [+852] 2736 1169
Per ulteriori informazioni, accedere al sito Internet all’indirizzo www.parrot.com.
Page 66

68
Parrot PHOTO VIEWER 7’’
CARATTERISTICHE TECNICHE
Display:
• Dimensioni del display LCD: 6,5’’
• Risoluzione del display: 720 x 480 pixel (QVGA)
• 262.144 colori
• Memoria da 64 MB per l’archiviazione di oltre 500 foto
• Sensore di luminosità per la modalità Automatica della
retroilluminazione
• Peso della sola cornice: 415 g
• Dimensioni: 192 * 146 mm
• Alimentazione: 100V -240 V ~, 0,2 A, 50/60 Hz.
Bluetooth:
• Compatibile con Bluetooth 2.0 + EDR
• Codice PIN Bluetooth: 0000
• Profili supportati:
- FTP (File Transfer Profile)
- OPP (Object Push Profile)
- BIP (Basic Imaging Profile)
• Aggiornamento del software mediante Bluetooth
• Tipo di file di foto/immagini supportato: JPEG
• Possibilità di associare fino a 10 dispositivi
NOTE
Page 67

Parrot PHOTO VIEWER 7’’
Dutch - Gebruikershandleiding
Page 68

70
Parrot PHOTO VIEWER 7’’
INHOUDSOPGAVE
vEIlIGhEIDSvOORSChRIFTEN vOOR DE GEbRUIKER ............................
INlEIDING ..........................................................................................
INhOUD vAN DE DOOS
......................................................................
hET APPARAAT GEbRUIKSKlAAR MAKEN ....................
........................
bOOMSTRUCTUUR vAN DE MENU’S ....................................................
NAvIGEREN TUSSEN DE MENU’S ......................................
hOOFDMENU ...................................................................
vOORKEUREN ..................................................................
EERSTE INGEbRUIKNAME ....................................................................
KOPPElING vAN Uw TElEFOON OF COMPUTER ....................
FOTO’S STUREN ................................................................
PARAMETERS INSTEllEN ......................................................................
vOlGORDE vAN vERSChIjNING vAN DE AFbEElDINGEN ..
EEN DIAShOw SElECTEREN EN SAMENSTEllEN .................
PlAATSING vAN DE lIjST ...................................................
bEhEER vAN hET SChERM vAN hET APPARAAT
..................
UPDATEN vAN DE SOFTwARE
.............................................................
hOTlINE
.............................................................................................
TEChNISChE GEGEvENS
.....................................................................
AANTEKENINGEN ...............................................................................
AlGEMENE INFORMATIE
.....................................................................
p 71
p 72
p 73
p 73
p 74
p 74
p 75
p 76
p 78
p 78
p 79
p 81
p 81
p 82
p 83
p 83
p 84
p 84
p 85
p 86
p 171
Page 69

71
Dutch
Parrot PHOTO VIEWER 7’’
Veiligheidsvoorschriften voor de gebruiker
Europa
1. Dit apparaat mag niet aan druipende of spattende vloeistof worden blootgesteld en er mogen geen met vloeistof gevulde
voorwerpen zoals vazen bovenop worden gezet.
2. De AC/DC adapter waarmee het apparaat van het elektriciteitsnet kan worden losgekoppeld moet gemakkelijk toegankelijk
blijven. Trek de stekker van het apparaat uit het stopcontact wanneer het gedurende langere tijd niet wordt gebruikt.
Page 70

72
Parrot PHOTO VIEWER 7’’
INLEIDING
De draadloze Bluetooth® technologie maakt spraak- en datacommunicatie mogelijk via een radioverbinding op korte afstand,
hierdoor kunnen tal van elektronische apparaten met elkaar communiceren.
Parrot benut zijn jarenlange ervaring in de Bluetooth technologie om u de Parrot PHOTO VIEWER 7 ‘’ te presenteren: een
innovatieve fotolijst. U kunt uw foto’s via Bluetooth vanaf uw mobiele telefoon, uw PDA of uw computer naar de Parrot PHOTO
VIEWER 7 ‘’ overbrengen.
De Parrot PHOTO VIEWER 7 ‘’ is een LCD fotolijst (720x480 pixels) die meer dan 500 foto’s kan bevatten. U kunt de weergave configureren door diashows of door de lijst in een andere stand te zetten. De Parrot PHOTO VIEWER 7 ‘’, die door zijn
elegante design perfect in ieder interieur past, past bovendien zijn helderheid aan de omgeving aan. Verder kan de Parrot
PHOTO VIEWER 7 ‘’ net als een bureauklok de tijd aanduiden
Page 71

73
Dutch
Parrot PHOTO VIEWER 7’’
INHOUD VAN DE DOOS
De doos bevat:
• Een LCD-lijst.
• Een transformator.
• Een metalen staaf om op de lijst te schroeven (deze staaf vormt de steun van de lijst).
• Een haak voor wandbevestiging.
• Een clipsysteem (om het snoer langs de lijst te bevestigen).
• De gebruikershandleiding.
• Een Parrot productencatalogus.
HET APPARAAT GEBRUIKSKLAAR MAKEN
• Schroef de metalen staaf op de achterkant van de lijst.
• Sluit de stekker van het snoer aan op de transformator.
• De Parrot PHOTO VIEWER 7 ‘’ gaat automatisch aan.
• Kies de taal waarin u de Parrot PHOTO VIEWER 7 ‘’
wilt gebruiken (zie het gedeelte «Beschrijving van symbolen en functies»
in het hoofdstuk «Voorkeuren» in deze handleiding).
NB: U KUNT DE LIJST OOK AAN DE MUUR HANGEN. IN DIT GEVAL SCHROEFT U DE HAAK OP DE ACHTERZIJDE, SCHUIFT HET
CLIPSYSTEEM OP DE DAARTOE BESTEMDE PLAATS EN BEVESTIG HET SNOER ERIN. ALS U DE LIJST ANDERSOM HANGT,
DRAAIT DE AFGEBEELDE FOTO MEE OM ZICH AAN DE NIEUWE STAND VAN DE PARROT PHOTO VIEWER 7 ‘’ AAN TE PASSEN
Page 72

74
Parrot PHOTO VIEWER 7’’
BOOMSTRUCTUUR VAN DE MENU’S
Navigeren tussen de menu’s
Zich verplaatsen in de menu’s:
Om zich binnen de menu’s te verplaatsen gebruikt u de knoppen op de achterkant van de Parrot PHOTO VIEWER 7 ‘’.
• Om het hoofdmenu te openen, drukt u op de knop op de achterkant van de lijst.
Selectieknoppen:
• De knop : Voor verplaatsing naar links of naar boven,
afhankelijk van de stand van de lijst. Hiermee kunt u ook de vorige foto kiezen.
• De knop : Voor verplaatsing naar rechts of naar beneden, afhankelijk van de stand van de lijst.
Hiermee kunt u ook de volgende foto kiezen
Bevestigingsknop:
• De knop : Opent het geselecteerde menu of selecteert een foto.
Met het symbool kunt u terugkeren naar het vorige menu of de menu’s verlaten.
Page 73

75
Dutch
Parrot PHOTO VIEWER 7’’
Hoofdmenu
Beschrijving van symbolen en functies
• : Terug naar het vorige menu.
• : Draait de foto naar rechts.
• : Toont de foto’s in miniatuur.
• : Organiseert de volgorde van verschijning van de afbeeldingen.
• : - Huidige afbeelding wissen : Verwijdert de getoonde afbeelding.
- Meerdere afbeeldingen wissen : Meerdere afbeeldingen wissen.
- Alle afbeeldingen wissen : Verwijdert alle afbeeldingen.
• : Selectie en samenstelling van een Diashow.
• : Stelt de weergave en de
Bluetooth parameters in.
Page 74

76
Parrot PHOTO VIEWER 7’’
• : Toont de informatie over de in de Parrot PHOTO VIEWER 7 ‘’ geïnstalleerde software,
de staat van het geheugen en de getoonde afbeelding.
VOORKEUREN
Het menu «Voorkeuren» is toegankelijk vanaf het hoofdmenu.
Beschrijving van symbolen en functies
• : Terug naar het hoofdmenu.
• : - Zichtbaarheid: Maakt de Parrot PHOTO VIEWER 7 ‘’ zichtbaar of onzichtbaar voor andere
Bluetooth apparatenh.
- Naam van de fotolijst: Selecteert de van te voren geregistreerde
Bluetooth naam waaronder de lijst door
de andere
Bluetooth apparaten herkend zal worden
- Geavanceerde modus: Kiest een specifieke of standaardkoppelingsmodus afhankelijk van het model van
uw
Bluetooth telefoon. (nadere informatie kunt u vinden op www.parrot.com, rubriek Ondersteuning).
• : Regelt de helderheid van de weergave. U kunt de helderheid van het scherm instellen met
de «selectieknoppen» op de achterkant van de Parrot PHOTO VIEWER 7 ‘’, daarna drukt u op
de «bevestigingsknop» om te bevestigen.
• : - Automatisch: De sterkte van de achtergrondverlichting van het scherm wordt bestuurd door een algoritme
die gebruik maakt van een op de lijst geplaatste lichtsensor. Dit is de modus die standaard wordt gebruikt.
- Handmatig: De achtergrondverlichting blijft altijd aan. Gebruik de AAN/UIT knop op het snoer om
Page 75

77
Dutch
Parrot PHOTO VIEWER 7’’
de screensaver te activeren.
- Vooraf vastgestelde duur: Een van te voren ingestelde tijdspanne bepaalt de tijd gedurende welke
het scherm verlicht is. Er zal u worden gevraagd om de klok van de Parrot PHOTO VIEWER 7 ‘’ in te stellen.
NB: U KUNT DE SCREENSAVER ENKEL ACTIVEREN DOOR EEN KORTE DRUK OP DE AAN/UIT KNOP OP HET SNOER. ALS DE FUNCTIE ACHTERGRONDVERLICHTING IS INGESTELD OP «AUTOMATISCH» OF «VOORAF VASTGESTELDE DUUR», DE PARROT PHOTO VIEWER 7’’ IS TIJDELIJK INGESTELD OP «HANDMATIG» TOT DE VERANDERING VAN DE KLAARHEIDDREMPEL OF VASTGESTELDE DUUR.
• : Voor het kiezen van de taal.
• : - Instellen: Stel de tijd in met behulp van de «selectieknoppen». Druk op de «bevestigingsknop»
om te bevestigen.
- Weergave: Activeert / Deactiveert de permanente tijdweergave. Dit is de modus die standaard wordt
gebruikt.
- Opmaak: Selecteer de opmaak van de tijdweergave (AM/PM)
• : Herstelt de fabrieksinstellingen. (Dit heeft niet tot gevolg dat de afbeeldingen worden verwijderd).
Page 76

78
Parrot PHOTO VIEWER 7’’
EERSTE INGEBRUIKNAME
Voordat u uw Parrot PHOTO VIEWER 7 met uw telefoon / computer kunt gebruiken, moet u de twee apparaten eerst
koppelen.
Deze fase stelt de twee apparaten in staat om informatie uit te wisselen teneinde een Bluetooth verbinding te configureren.
Koppeling van uw telefoon of computer met de Parrot PHOTO VIEWER 7’’
• Zorg dat de Parrot PHOTO VIEWER 7 ‘’ zo is ingesteld dat hij zichtbaar is voor alle Bluetooth apparaten.
Zie het hoofdstuk «Voorkeuren» in deze handleiding.
• Activeer de Bluetooth functie van uw telefoon/ computer. (zie de gebruiksaanwijzing bij uw telefoon of uw computer
of kijk op onze website www.parrot.com, rubriek Ondersteuning).
• Zoek vanaf uw telefoon/computer
Bluetooth randapparaten.
• Selecteer de «Parrot PHOTO VIEWER 7 ‘’» in de door uw telefoon / computer voorgestelde lijst van Bluetooth apparaten.
• Voer op uw telefoon / computer de code «0000» in.
• Uw twee apparaten zijn nu gekoppeld.
NB: Bij sommige telefoons moet de optie «Speciale ontvangst modus» van het menu «Geavanceerde modus …» worden
geactiveerd voordat u de koppeling met uw Parrot PHOTO VIEWER 7 ‘’ kunt uitvoeren (beschikbaar in het menu «Voorkeuren
\ Bluetooth»). Nadere informatie vindt u op onze website: www.parrot.com.
NB: AFHANKELIJK VAN HET MODEL VAN UW TELEFOON / COMPUTER KAN DEZE FASE OPTIONEEL ZIJN. HET ZAL U ECHTER IN STAAT STELLEN UW FOTO’S
SNELLER NAAR DE PARROT PHOTO VIEWER 7 ‘’ TE STUREN.
Page 77

79
Dutch
Parrot PHOTO VIEWER 7’’
Foto’s sturen
Foto’s sturen vanaf een telefoon of een PDA:
• Zorg ervoor dat de Parrot PHOTO VIEWER 7 ‘’ zo is ingesteld dat hij zichtbaar is voor alle
Bluetooth apparaten. Zie het hoofdstuk «Voorkeuren» in deze handleiding.
• Activeer de Bluetooth functie op uw telefoon of PDA.
• Ga vanaf uw telefoon/PDA naar het menu «Afbeeldingen». Selecteer een afbeelding en kies ‘’verzenden via Bluetooth’’.
Uw apparaat gaat nu Bluetooth randapparaten zoeken.
• Zodra deze zoekactie beëindigd is, selecteert u Parrot PHOTO VIEWER 7 ’’. Als uw apparaat een code vraagt,
voert u ‘’0000’’ in. De afbeelding wordt nu naar het scherm gestuurd. U kunt meerdere afbeeldingen in één keer
versturen, deze functie hangt af van uw apparaat.
• Bij de overdracht van de afbeelding, verschijnt de afbeelding geleidelijk. Het
Bluetooth symbool verschijnt op het scherm.
Foto’s sturen vanaf een computer:
• Zorg ervoor dat de Parrot PHOTO VIEWER 7 ‘’ zo is ingesteld dat hij zichtbaar is voor alle
Bluetooth apparaten.
Zie het hoofdstuk «Voorkeuren» in deze handleiding.
• Activeer de Bluetooth functie op uw computer.
• Klik met de rechtermuisknop op de afbeelding die u wilt versturen en kies ‘’verzenden via Bluetooth’’.
Page 78

80
Parrot PHOTO VIEWER 7’’
• Uw computer zoekt de Bluetooth randapparaten in de omgeving.
• Selecteer Parrot PHOTO VIEWER 7 ’’. Voer ‘’0000’’ in, als uw computer u om een code vraagt.
• Tijdens de overdracht van de afbeelding verschijnt het Bluetooth symbool op het scherm,
waarna de afbeelding verschijnt.
NB: ALS HET U NIET LUKT DE PARROT PHOTO VIEWER 7 ‘’ TE DETECTEREN, HEBT U DE BLUETOOTH LIJST MISSCHIEN ONZICHTBAAR GEMAAKT VOOR DE
ANDERE APPARATEN. ZIE HET HOOFDSTUK «VOORKEUREN» IN DEZE HANDLEIDING. ALS UW BLUETOOTH APPARAAT AAN DE LIJST GEKOPPELD IS, ZAL HIJ
NIETTEMIN VERBINDING KUNNEN MAKEN MET DE PARROT PHOTO VIEWER 7 ‘’.
NB: VOOR NADERE INFORMATIE OVER DE MANIER OM DE FOTO’S TE VERZENDEN WORDT VERWEZEN NAAR DE HANDLEIDING BIJ UW APPARAAT OF
NAAR ONZE WEBSITE www.parrot.com.
Page 79

81
Dutch
Parrot PHOTO VIEWER 7’’
PARAMETERS INSTELLEN
Met de Parrot PHOTO VIEWER 7’’ kunt u verschillende parameters instellen. U kunt de manier waarop uw lijst van afbeeldingen worden weergegeven zelf bepalen: volgorde waarin de afbeeldingen verschijnen, samenstelling van een diashow,
tijdsaanduiding. Bovendien kunt u de stand van de Parrot PHOTO VIEWER 7’’ veranderen.
Volgorde van verschijning van de afbeeldingen
• Open het hoofdmenu van de Parrot PHOTO VIEWER 7 ‘’ en selecteer het menu «De afbeeldingen ordenen».
• Uw afbeeldingen worden in miniatuur weergegeven. De weergave kan meerdere pagina’s in beslag nemen:
Door constant op een van de «selectieknoppen» te drukken kunt u respectievelijk door de vorige of volgende pagina’s
scrollen. Zodra u de knop loslaat stopt het scrollen.
• Selecteer de afbeelding met de «selectieknoppen» en druk op de «bevestigingsknop» op de achterkant van de lijst om
uw keuze te bevestigen.
• De geselecteerde foto wordt bovenaan het scherm van de Parrot PHOTO VIEWER 7 ‘’ geplaatst en een cursor duidt u de
positie van uw foto in uw album aan. Door op de «selectieknoppen» te drukken kunt u de positie van uw foto in het album
veranderen. U kunt de foto op alle pagina’s van uw album positioneren.
Page 80

82
Parrot PHOTO VIEWER 7’’
• Wanneer de cursor is gepositioneerd op de plaats waar u de afbeelding wilt zetten, drukt u op de «bevestigingsknop».
Een diashow selecteren en samenstellen
Met het submenu «Diaporama» hebt u de keuze uit de volgende opties:
• Geen: Deactiveert de diashows.
De Parrot PHOTO VIEWER 7 ‘’ stelt u 4 diashows voor, waarvan er één wordt gevormd door alle foto’s in uw lijst, gerangschikt
in volgorde van verschijning. Na een diashow te hebben geselecteerd, kunt u deze activeren / deactiveren of configureren.
Bij het samenstellen van een diashow hebt u de volgende mogelijkheden:
• Selectie van afbeeldingen: met de «selectieknoppen» en de «bevestigingsknop» selecteert u de foto’s die u in de diashow
wilt opnemen. De geselecteerde foto’s worden aangevinkt. (Optie niet beschikbaar voor de standaard geboden diashow.)
• Timer: Bepaalt de tijdsduur gedurende welke de diashow wordt getoond.
• Volgorde van de afbeeldingen: Hiermee kunt u de volgorde bepalen waarin de foto’s, die in de diashow zijn opgenomen,
verschijnen. (Optie niet beschikbaar voor de standaard geboden diashow.)
• Willekeurige modus: De foto’s, die in de diashow zijn opgenomen, verschijnen in willekeurige volgorde.
• De diashow wissen: Annuleert de samenstelling van uw diashow (de geselecteerde beelden maken geen deel meer uit
van de diashow, maar worden niet uit de lijst verwijderd.)
• Overgang: Bepaalt het overgangseffect tussen de foto’s van uw diashow
o Geen o Doorlopend
o Vervloeiend o Schaakbord
o Mozaïek o Toevallig
Page 81

83
Dutch
Parrot PHOTO VIEWER 7’’
PLAATSING VAN DE LIJST
Kies de stand
• Portretmodus.
• Landschapsmodus
NB: U KUNT DE LIJST OOK AAN DE WAND HANGEN. OM DIT TE DOEN, SCHROEFT U HET HAAKJE OP DE ACHTERKANT, SCHUIFT HET CLIPSYSTEEM IN DE
HIERTOE BESTEMDE PLAATS EN BEVESTIGT HET SNOER ERIN. ALS U DE STAND VAN DE LIJST VERANDERT, DRAAIT DE AFGEBEELDE FOTO MEE OM ZICH AAN
DE NIEUWE STAND VAN DE PARROT PHOTO VIEWER 7’’ AAN TE PASSEN.
Beheer van het scherm van het apparaat
U kunt de Parrot PHOTO VIEWER 7’’ in stand-by modus zetten of een screensaver te activeren.
• Aan / Stand-by: Druk lang op de AAN/UIT knop op het snoer.
In stand-by modus is de Bluetooth functie van de Parrot PHOTO VIEWER 7 ‘’ gedeactiveerd.
• Screensaver: De Parrot PHOTO VIEWER 7 ‘’ duidt de tijd aan gedurende de periodes waarin de functie Achtergrondver
lichting niet actief is. Deze functie wordt geactiveerd door een korte druk op de AAN/UIT knop; (zie het gedeelte
«Beschrijving van symbolen en functies» in het hoofdstuk «Voorkeuren» in deze handleiding).
Page 82

84
Parrot PHOTO VIEWER 7’’
UPDATEN VAN DE SOFTWARE
U kunt de software van de Parrot Parrot PHOTO VIEWER 7’’ via Bluetooth updaten. De hulpprogramma’s en de updateprocedure kunt u downloaden van onze website www.parrot.com. Dit vergroot de compatibiliteit met de Bluetooth apparaten.
HOTLINE
• Onze hotline staat tot uw beschikking. U kunt contact opnemen per e-mail of per telefoon.
Europa: [+33] (0)1 48 03 60 69
Italië: [+39] 02 86 39 14 63
Spanja: [+34] 902 404 202
UK: [+44] (0)870 112 5872
Duitsland: 0900 1727768
VS: [+1] (877) 9 PARROT (gratis nummer)
China : [+86] (0)2164 601 944
Hong Kong : [+852] 2736 1169
Bezoek onze website
www.parrot.com voor nadere informatie
Page 83

85
Dutch
Parrot PHOTO VIEWER 7’’
TECHNISCHE GEGEVENS
Scherm:
• Grootte LCD-scherm: 6,5’’
• Schermresolutie 720x480 pixels (QVGA)
• 262144 kleuren
• 64MB geheugen voor opslag van meer dan 500 foto’s
• Lichtsensor voor de automatische modus van de achtergrondverlichting
• Gewicht van de lijst alleen: 415 g
• Afmetingen: 192 * 146 mm
• Netvoeding: 100V - 240V ~, 0.2A, 50/60 Hz.
Bluetooth:
• Bluetooth versie 2.0 + EDR
• Bluetooth PIN Code: 0000
• Ondersteunde profielen:
- FTP (File Transfer Profile)
- OPP (Object Push Profile)
- BIP (Basic Imaging Profile)
• Update van de software via Bluetooth
• Ondersteund type foto-\ beeldbestanden: JPEG
• Koppeling van maximaal 10 apparaten
Page 84

86
Parrot PHOTO VIEWER 7’’
AANTEKENINGEN
Page 85

Parrot PHOTO VIEWER 7’’
Deutsch - Bedienungsanleitung
Page 86

88
Parrot PHOTO VIEWER 7’’
INHALT
SIChERhEITShINwEISE FUR bENUTzER ................................................
EINFÜhRUNG ....................................................................................
vERPACKUNGSINhAlT
..........................................................................
SChNEllSTART DES GERäTS....................
..............................................
AUFbAU DER MENÜS ..........................................................................
NAvIGATION IN DEN MENÜS ...........................................
hAUPTMENÜ ....................................................................
EINSTEllUNGEN ...............................................................
ERSTE vERwENDUNG .........................................................................
INbETRIEbNAhME IhRES TElEFONS/COMPUTERS ....................
SENDEN vON FOTOS .......................................................
PARAMETEREINSTEllUNGEN ...............................................................
ANzEIGEREIhENFOlGE DER bIlDER ....................................
AUSwAhl UND zUSAMMENSTEllUNG EINER DIAShOw ...
AUSRIChTUNG DES RAhMENS .........................................
vERwAlTUNG DES GERäTEDISPlAYS
................................
AKTUAlISIERUNG DER SOFTwARE
......................................................
hOTlINE
............................................................................................
TEChNISChE DATEN
...........................................................................
ANMERKUNGEN ................................................................................
AllGEMEINE INFORMATIONEN
...........................................................
p 89
p 90
p 91
p 91
p 92
p 92
p 93
p 94
p 96
p 96
p 97
p 99
p 99
p 100
p 101
p 101
p 102
p 102
p 103
p 104
p 171
Page 87

89
Deutsch
Parrot PHOTO VIEWER 7’’
SICHERHEITSHINWEISE FÜR BENUTZER
Europa
1. Dieses Gerät darf nicht mit Flüssigkeitstropfen oder -spritzern in Berührung kommen. Stellen Sie keinesfalls mit
Flüssigkeit gefüllte Gegenstände, z. B. eine Vase, in unmittelbarer Nähe des Geräts ab.
2. Der AC/DC-Adapter für den Anschluss an das Stromnetz sollte griff- und einsatzbereit aufbewahrt werden.
Trennen Sie das Gerät von der Stromversorgung, wenn es während eines längeren Zeitraums nicht verwendet wird.
Page 88

90
Parrot PHOTO VIEWER 7’’
EINFÜHRUNG
Die Bluetooth®-Technologie ermöglicht eine Übertragung von Sprache und Daten über kurze Entfernungen per Funkverbindung.
Unter Rückgriff auf Bluetooth können zahlreiche elektronische Geräte miteinander kommunizieren.
Parrot macht sich seine langjährige Erfahrung im Bereich der
Bluetooth-Technologie zu Nutze, um Ihnen heute das Produkt
Parrot PHOTO VIEWER 7’’ anbieten zu können – einen innovativen Fotorahmen. Mit dem Parrot PHOTO VIEWER 7’’ können
Sie Ihre Fotos direkt ausgehend von Ihrem Mobiltelefon, PDA oder Computer per
Bluetooth in einen Fotorahmen übertragen.
Der Parrot PHOTO VIEWER 7’’ ist ein LCD-Fotorahmen (720x480 Pixel), der mehr als 500 Fotos aufnehmen kann. Die Anzeige
der Fotos kann nach Wunsch konfiguriert werden, Sie können Diashows definieren und die Ausrichtung des Rahmens bedarfsgerecht anpassen. Der Parrot PHOTO VIEWER 7’’ zeichnet sich nicht nur durch sein exquisites Design aus, das sich perfekt in
Ihre Räumlichkeiten integriert, sondern stellt darüber hinaus seine Helligkeit selbstständig in Übereinstimmung mit den im Raum
jeweils herrschenden Lichtverhältnissen ein. Und nicht zuletzt kann der Parrot PHOTO VIEWER 7’’ eine Zeitanzeige einblenden
und somit auch als Bürouhr fungieren.
Page 89

91
Deutsch
Parrot PHOTO VIEWER 7’’
VERPACKUNGSINHALT
Das Paket enthält folgende Elemente:
• LCD-Rahmen
• Transfo
• Am Rahmen anzuschraubender Metallstab (dieser Stab fungiert als Rahmenstütze)
• Haken für die Wandmontage
• Klammersystem (ermöglicht die Befestigung des Stromkabels am Rahmen)
• Bedienungsanleitung
• Parrot-Produktführer
SCHNELLSTART DES GERÄTS
• Schrauben Sie den Metallstab auf der Rückseite des Rahmens fest.
• Schließen Sie das Stromkabel an den Transfo an.
• Der Parrot PHOTO VIEWER 7’’ schaltet sich automatisch ein.
• Wählen Sie die Sprache für die Verwendung des Parrot PHOTO VIEWER 7’’ (siehe
hierzu den Abschnitt «Beschreibung der Symbole und deren Funktionen», Kapitel
«Einstellungen», in dieser Anleitung).
HINWEIS: SIE KÖNNEN DEN RAHMEN AUCH AN DER WAND ANBRINGEN. SCHRAUBEN SIE DAZU DEN HAKEN IN DIE RAHMENRÜCK
SEITE, BRINGEN SIE DAS KLAMMERSYSTEM AN DER DAFÜR VORGESEHENEN POSITION AN UND FÜHREN SIE DAS STROMKABEL
HINDURCH. BEI EINER ÄNDERUNG DER AUSRICHTUNG DES RAHMENS DREHT SICH DAS ANGEZEIGTE FOTO AUTOMATISCH,
UM SICH DER NEUEN AUSRICHTUNG DES PARROT PHOTO VIEWER 7’’ ANZUPASSEN.
Page 90

92
Parrot PHOTO VIEWER 7’’
AUFBAU DER MENÜS
Navigation in den Menüs
Fortbewegung in den Menüs
Die Fortbewegung in den Menüs erfolgt mithilfe der Tasten auf der Rückseite des Parrot PHOTO VIEWER 7’’.
Um das Hauptmenü aufzurufen, drücken Sie die Taste auf der Rahmenrückseite
Auswahltasten:
• Taste : Fortbewegung nach links bzw. nach oben, je nach Ausrichtung des Rahmens.
Ermöglicht ebenfalls die Auswahl des jeweils vorhergehenden Fotos.
• Taste : Fortbewegung nach rechts bzw. nach unten, je nach Ausrichtung des Rahmens.
Ermöglicht ebenfalls die Auswahl des jeweils nächsten Fotos.
Bestätigungstaste:
• Taste : Aktivierung des ausgewählten Menüs oder Auswahl eines Fotos.
Das Symbol ermöglicht die Rückkehr zum jeweils vorhergehenden Menü bzw. das Verlassen der Menüs.
Page 91

93
Deutsch
Parrot PHOTO VIEWER 7’’
Hauptmenü
Beschreibung der Symbole und deren Funktionen
• : Rückkehr zum vorhergehenden Menü
• : Drehen des Fotos nach rechts
• : Anzeige der Fotos als Miniaturbilder
• : Vorgabe der Anzeigereihenfolge der Bilder
• :
- Aktuelles Bild löschen : Löschen des angezeigten Bilds
- Mehrere Bilder löschen : Mehrere Bilder löschen
- Alle Bilder löschen : Löschen aller Bilder
• : Auswahl und Zusammenstellung einer Diashow
• : Parametereinstellungen für die Anzeige und die
Bluetooth-Funktion
Page 92

94
Parrot PHOTO VIEWER 7’’
• : Anzeige von Informationen zur integrierten Software des Parrot PHOTO VIEWER 7’’,
zum Status des Speichers und zum angezeigten Bild
Einstellungen
Das Menü «Einstellungen» wird über das Hauptmenü aufgerufen.
Beschreibung der Symbole und deren Funktionen
• : Rückkehr zum Hauptmenü
• : - Identifizierung: Möglichkeit zur Identifizierung des Parrot PHOTO VIEWER 7’’ durch andere
Bluetooth-Geräte (Sichtbar) oder nicht (Verborgen).
- Name des Rahmens: Auswahl des werkseitig gespeicherten
Bluetooth-Namens,
unter dem der Rahmen für andere
Bluetooth-Geräte sichtbar ist.
- Erweiterter Modus: Auswahl eines spezifischen bzw. des Standard-Kopplungsmodus,
je nach dem Modell Ihres
Bluetooth-Telefons (weitere Informationen hierzu finden Sie auf unserer
Website
www.parrot.com, Rubrik «Kundenkontakt»).
• : Einstellung von Helligkeit der Anzeige. Für die Einstellung werden die «Auswahltasten» auf
der Rückseite des Parrot PHOTO VIEWER 7’’ verwendet, anschließend wird die vorgenommene Einstellung
über die «Bestätigungstaste» bestätigt.
• : - Automatisch: Die Stufe der Display-Rückbeleuchtung wird über einen Algorithmus gesteuert,
der auf einen Helligkeitssensor im Rahmen zurückgreift. Dieser Beleuchtungsmodus gilt als Standardeinstellung.
Page 93

95
Deutsch
Parrot PHOTO VIEWER 7’’
- Manuell: Die Rückbeleuchtung ist kontinuierlich eingeschaltet. Über die EIN/AUS-Taste am Stromkabel kann
der Bildschirmschoner aktiviert werden.
- Vordefinierte zeit: Anhand einer vorgegebenen Dauer wird der Zeitraum für die Aktivierung
der Display-Rückbeleuchtung festgelegt. In diesem Fall werden Sie zur Einstellung der Uhr
des Parrot PHOTO VIEWER 7’’ aufgefordert.
HINWEIS: DER BILDSCHIRMSCHONER KANN NUR AKTIVIERT WERDEN DURCH KURZES DRÜCKEN DER EIN/AUS-TASTE AM STROMKABEL. WURDE DIE RÜCKBELEUCHTUNGSFUNKTION AUF DEN MODUS «AUTOMATISCH» ODER «VORDEFINIERTE ZEIT» EINGESTELLT, DER PARROT PHOTO VIEWER 7’’ IST ZEITWEILIG
AKTIVIERT AUF DEN MODUS «MANUELL» BIS ZUR BALDIGEN SCHWELLENÄNDERUNG ODER VORHER BESTIMMTER STUNDE.
• : Auswahl der gewünschten Sprache.
• : - Einstellen: Einstellung der Uhrzeit über die «Auswahltasten». Durch Drücken der «Bestätigungstaste» wird
die Einstellung bestätigt.
- Zeitanzeige : Daueranzeige ein-/ausschalten. Dieser Beleuchtungsmodus gilt als Standardeinstellung.
- Format : Auswahl des angezeigten Zeitformats (AM/PM)
• : Wiederherstellung der werkseitigen Konfiguration (hierbei werden die Bilder nicht gelöscht)
Page 94

96
Parrot PHOTO VIEWER 7’’
ERSTE VERWENDUNG
Vor der ersten Verwendung des Parrot PHOTO VIEWER 7’’ mit Ihrem Mobiltelefon/Computer müssen Sie beide Geräte zunächst
koppeln. Dabei tauschen die Geräte Informationen aus, die die Konfiguration einer Bluetooth-Verbindung ermöglichen.
Inbetriebnahme Ihres Telefons/Computers mit dem Parrot PHOTO VIEWER 7’’:
• Vergewissern Sie sich, dass der Parrot PHOTO VIEWER 7’’ für andere Bluetooth®-Geräte als
sichtbar eingestellt wurde. Informationen hierzu finden Sie im Kapitel «Einstellungen» in dieser Anleitung.
• Aktivieren Sie die Bluetooth-Funktion Ihres Telefons/Computers (siehe hierzu die Bedienungsanleitung
Ihres Telefons/Computers bzw. die Informationen auf der Website www.parrot.com, Rubrik «Kundenkontakt»).
• Führen Sie ausgehend von Ihrem Telefon/Computer eine Suche nach Bluetooth-Peripheriegeräten durch.
• Wählen Sie in der auf dem Telefon/Computer angezeigten Liste der verfügbaren Bluetooth-Geräte den Eintrag «Parrot
PHOTO VIEWER 7’’».
• Geben Sie auf Ihrem Telefon/Computer den Code «0000» ein.
• Die zwei Geräte sind nunmehr gekoppelt.
Hinweis: Für manche Telefone muss die Option «Spezif. Empfangsmodus» im Menü «Erweiterter Modus» aktiviert werden,
bevor eine Kopplung mit dem Parrot PHOTO VIEWER 7’’ durchgeführt werden kann (verfügbar im Menü «Einstellungen \
Bluetooth»). Weitere Informationen finden Sie auf unserer Website: www.parrot.com.
HINWEIS: JE NACH DEM MODELL IHRES TELEFONS/COMPUTERS IST DIE DURCHFÜHRUNG DIESES VORGANGS GGF. NUR FAKULTATIV. ER ERMÖGLICHT
IHNEN JEDOCH EINE WESENTLICH SCHNELLERE ÜBERTRAGUNG IHRER FOTOS AN DEN PARROT PHOTO VIEWER 7’’.
Page 95

97
Deutsch
Parrot PHOTO VIEWER 7’’
Senden von fotos
Senden ausgehend von einem Telefon oder PDA
• Vergewissern Sie sich, dass der Parrot PHOTO VIEWER 7’’ für andere Bluetooth-Geräte als
sichtbar eingestellt wurde. Informationen hierzu finden Sie im Kapitel «Einstellungen» in dieser Anleitung.
• Aktivieren Sie die Bluetooth-Funktion Ihres Telefons/PDA.
• Rufen Sie auf Ihrem Mobiltelefon/PDA das Bildmenü auf. Wählen Sie ein Bild und anschließend
die Option für das Senden per Bluetooth. Ihr Gerät startet daraufhin eine Suche nach Bluetooth-Peripheriegeräten.
• Wählen Sie nach Abschluss des Suchvorgangs das Element «Parrot PHOTO VIEWER 7’’».
Wenn Sie zur Eingabe eines Codes aufgefordert werden, geben Sie den Code «0000» ein. Das Bild wird dann an
das LCD-Display übertragen. Sie können durchaus mehrere Bilder gleichzeitig senden: Diese Funktion ist von Ihrem
Gerät abhängig.
• Mit fortschreitender Übertragung wird das Bild nach und nach angezeigt. Auf dem Display erscheint
das Bluetooth-Symbol.
Senden ausgehend von einem Computer
• Stellen Sie sicher, dass der Parrot PHOTO VIEWER 7’’ für andere Bluetooth-Geräte als sichtbar eingestellt wurde.
Informationen hierzu finden Sie im Kapitel «Einstellungen» in dieser Anleitung.
Page 96

98
Parrot PHOTO VIEWER 7’’
• Aktivieren Sie die Bluetooth-Funktion Ihres Computers.
• Klicken Sie mit der rechten Maustaste auf das Bild, das Sie übertragen möchten,
und wählen Sie dann die Option für das Senden per Bluetooth.
• Ihr PC sucht daraufhin nach Bluetooth-Peripheriegeräten in der nächsten Umgebung.
• Wählen Sie das Element Parrot PHOTO VIEWER 7’’.
Geben Sie den Code «0000» ein, wenn Ihr PC Sie zur Eingabe eines Codes auffordert.
• Während der Bildübertragung: Auf dem Display erscheint das
Bluetooth-Symbol. Das Bild wird nach und nach angezeigt.
Hinweis: Sollte Ihr Gerät den Parrot PHOTO VIEWER 7’’ nicht identifizieren, dann haben Sie die Identifizierung durch andere
Geräte auf dem Bluetooth-Rahmen ggf. deaktiviert. Informationen hierzu finden Sie im Kapitel «Einstellungen» in dieser Anleitung. Wurde Ihr Bluetooth-Gerät jedoch bereits mit dem Rahmen gekoppelt, dann kann es jederzeit eine Verbindung zum
Parrot PHOTO VIEWER 7’’ herstellen.
HINWEIS: DETAILLIERTE INFORMATIONEN ZUR RICHTIGEN VORGEHENSWEISE BEIM SENDEN VON BILDERN KÖNNEN SIE DER BEDIENUNGSANLEITUNG
IHRES GERÄTS ENTNEHMEN. ODER SIE BESUCHEN UNSERE WEBSITE: www.parrot.com
Page 97

99
Deutsch
Parrot PHOTO VIEWER 7’’
PARAMETEREINSTELLUNGEN
Der Parrot PHOTO VIEWER 7’’ ermöglicht Ihnen die bedarfsgerechte Einstellung zahlreicher Parameter. So können Sie die
Anzeige auf Ihrem Rahmen vollständig selbst verwalten: Anzeigereihenfolge der Bilder, Erstellung einer Diashow, Zeitanzeige.
Darüber hinaus kann die Ausrichtung des Parrot PHOTO VIEWER 7’’ ganz nach Wunsch angepasst werden.
Anzeigereihenfolge der Bilder
• Öffnen Sie das Hauptmenü des Parrot PHOTO VIEWER 7’’ und wählen Sie das Menü «Bilder anordnen».
• Die verfügbaren Bilder werden im Miniaturformat angezeigt. Die Anzeige kann sich dabei über mehrere Seiten erstrecken:
Halten Sie in diesem Fall jeweils eine der «Auswahltasten» gedrückt, um die Seiten vor- bzw. rückwärts zu durchlaufen.
Sobald Sie die Taste loslassen, wird der Abrollvorgang angehalten.
• Wählen Sie ein Bild mithilfe der «Auswahltasten» und drücken Sie anschließend die «Bestätigungstaste» auf der Rückseite
des Rahmens, um Ihre Auswahl zu bestätigen.
• Das ausgewählte Foto wird am oberen Display-Rand des Parrot PHOTO VIEWER 7’’ abgelegt und ein Cursor verweist auf
die Position des Fotos in Ihrem Album. Durch Drücken der «Auswahltasten» kann die Position des Fotos geändert werden.
Eine Positionsverschiebung ist dabei in allen Seiten des Fotoalbums möglich.
Page 98

100
Parrot PHOTO VIEWER 7’’
• Sobald der Cursor auf die Position zeigt, an der Sie das Bild einfügen möchten, drücken Sie die «Bestätigungstaste».
Auswahl und Zusammenstellung einer Diashow
Das Menü «Diashow» stellt Ihnen folgende Optionen zur Auswahl:
• Keine: Deaktivierung der Diashows
Der Parrot PHOTO VIEWER 7’’ stellt 4 verschiedene Diashows bereit, wobei jede Diashow sämtliche Fotos auf Ihrem Rahmen
in der vorgegebenen Reihenfolge umfasst. Nach der Auswahl einer Diashow können Sie diese aktivieren bzw. deaktivieren
und konfigurieren. Für die Zusammenstellung einer Diashow sind folgende Möglichkeiten gegeben:
• Bildauswahl: Auswahl der Fotos für die Diashow mithilfe der «Auswahltasten» und der «Bestätigungstaste».
Die ausgewählten Fotos werden mit einem Häkchen gekennzeichnet (nicht verfügbar für die Standard-Diashow).
• Anzeigedauer pro Bild: Definition der Anzeigedauer der Diashow
• Reihenfolge der Bilder: Definition der Anzeigereihenfolge der Fotos in der Diashow (nicht verfügbar für die Standard-
Diashow)
• Willkürlicher Modus: Anzeige der Fotos in der Diashow nach dem Zufallsprinzip
• Diashow löschen: Reinitialisierung des Inhalts Ihrer Diashow (die ausgewählten Bilder sind nicht mehr Teil der Diashow,
sie sind jedoch nach wie vor auf dem Rahmen vorhanden)
• Übergang: Definition des Effekts beim Übergang von einem Foto zum anderen im Rahmen der Diashow
o Keinen
o Überblendung
o Mosaik
o Verwischung
o Schachbrett
o Willkürlich
Page 99

101
Deutsch
Parrot PHOTO VIEWER 7’’
Ausrichtung des rahmens
Wählen Sie die gewünschte Ausrichtung
• Hochformat
• Querformat
HINWEIS: SIE KÖNNEN DEN RAHMEN AUCH AN DER WAND ANBRINGEN. SCHRAUBEN SIE DAZU DEN HAKEN IN DIE RAHMENRÜCKSEITE, BRINGEN SIE DAS
KLAMMERSYSTEM AN DER DAFÜR VORGESEHENEN POSITION AN UND FÜHREN SIE DAS STROMKABEL HINDURCH. BEI EINER ÄNDERUNG DER AUSRICHTUNG
DES RAHMENS DREHT SICH DAS ANGEZEIGTE FOTO AUTOMATISCH, UM SICH DER NEUEN AUSRICHTUNG DES PARROT PHOTO VIEWER 7’’ ANZUPASSEN.
Verwaltung des Gerätedisplays
Der Parrot PHOTO VIEWER 7’’ kann in den Standby-Modus gesetzt werden. Darüber hinaus können Sie einen Bildschirmschoner aktivieren.
• Betrieb / Standby: Langes Drücken der EIN/AUS-Taste am Stromkabel.
Im Standby-Modus ist die
Bluetooth-Funktion des Parrot PHOTO VIEWER 7’’ deaktiviert.
• Bildschirmschoner: Während der Inaktivität der Rückbeleuchtung blendet der Parrot PHOTO VIEWER 7’’ eine Zeitanzeige ein.
Diese Funktion kann durch kurzes Drücken der EIN/AUS-Taste aktiviert werden (Informationen hierzu finden Sie im Absch
nitt «Beschreibung der Symbole und deren Funktionen», Kapitel «Einstellungen», in dieser Anleitung).
Page 100

102
Parrot PHOTO VIEWER 7’’
AKTUALISIERUNG DER SOFTWARE
Es besteht die Möglichkeit, den Parrot PHOTO VIEWER 7’’ per Bluetooth zu aktualisieren. Laden Sie dazu von unserer Website
www.parrot.com die entsprechenden Dienstprogramme und Aktualisierungsanweisungen herunter. Durch eine Aktualisierung
lässt sich die Kompatibilität mit anderen Bluetooth-Geräten steigern.
HOTLINE
• Unsere Hotline steht Ihnen jederzeit zur Verfügung. Sie können sich per Mail oder per Telefon an die Hotline wenden:
Europa: [+33] (0)1 48 03 60 69
Italien: [+39] 02 86 39 14 63
Spanien: [+34] 902 404 202
Großbritannien: [+44] (0)870 112 5872
Deutschland: 0900 1727768
USA: [+1] (877) 9 PARROT (gebührenfrei)
China : [+86] (0)2164 601 944
Hong Kong : [+852] 2736 1169
Weitere Informationen finden Sie auf unserer Website www.parrot.com.
 Loading...