

Page 1
User guide
Page 2

Table of Contents
Before you begin
Preflight check
Updating the Bebop 2
Flying
.....................................................................................................................................................4
........................................................................................................................................................4
Package contents
........................................................................................................................................................4
Downloading the application
........................................................................................................................................................4
Charging the battery
........................................................................................................................................................5
Installing the battery
........................................................................................................................................................5
Switching on/off the Bebop 2
........................................................................................................................................................5
Connecting a smartphone
........................................................................................................................................................6
Changing the propellers
.....................................................................................................................................................8
.....................................................................................................................................................9
.....................................................................................................................................................10
........................................................................................................................................................10
Piloting screen
........................................................................................................................................................12
Calibrating the Bebop 2
........................................................................................................................................................12
Map mode
........................................................................................................................................................13
Flat trim
........................................................................................................................................................14
GPS signal
........................................................................................................................................................14
Taking off
........................................................................................................................................................14
Movements
........................................................................................................................................................18
Pre-programmed acrobatics
........................................................................................................................................................18
Photos and videos
........................................................................................................................................................19
Retrieving photos and videos
........................................................................................................................................................20
Landing
........................................................................................................................................................20
Return home
........................................................................................................................................................21
Battery
Settings
.....................................................................................................................................................23
........................................................................................................................................................23
Piloting settings
........................................................................................................................................................24
Flight settings
........................................................................................................................................................24
Recording settings
........................................................................................................................................................26
Image settings
........................................................................................................................................................27
Network settings
........................................................................................................................................................28
Motor information
Page 3
........................................................................................................................................................29
Information
Drone Academy
Troubleshooting
General information
.....................................................................................................................................................30
........................................................................................................................................................30
Creating a user account
........................................................................................................................................................30
Main screen
........................................................................................................................................................31
Managing your profile
........................................................................................................................................................31
Registering a drone
........................................................................................................................................................31
Consulting shared flights
........................................................................................................................................................31
Consulting and sharing your flights
.....................................................................................................................................................33
........................................................................................................................................................33
LED behaviour
.....................................................................................................................................................34
........................................................................................................................................................34
Safety precautions and maintenance
........................................................................................................................................................35
Warning on invasi on of privacy
........................................................................................................................................................35
Warranty
........................................................................................................................................................35
Wi-Fi
........................................................................................................................................................35
Modifications
........................................................................................................................................................36
Disposal of this product at the end of its life
........................................................................................................................................................36
Declaration of conformity
........................................................................................................................................................36
Regis tered trademarks
Page 4
Before you begin
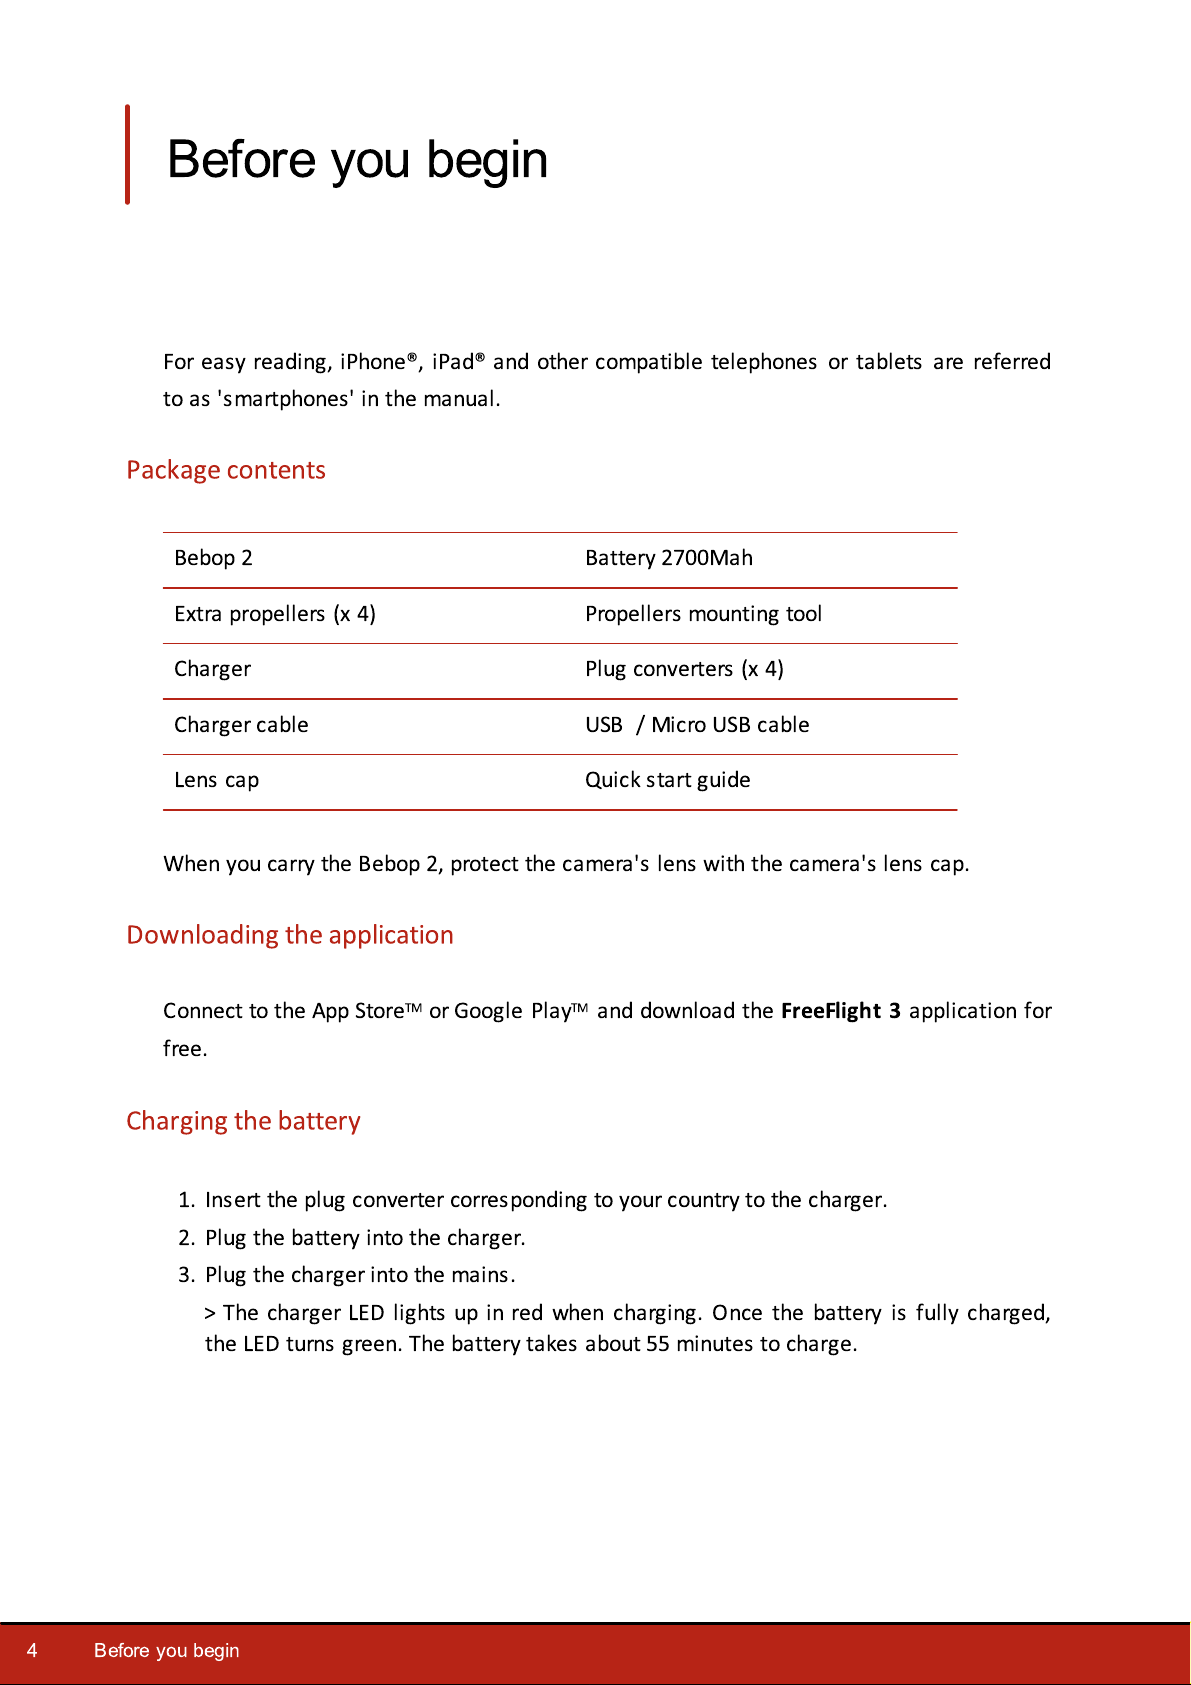
Bebop 2
Battery 2700Mah
Extra propellers (x 4)
Propellers mounting tool
Charger
Plug converters (x 4)
Charger cable
USB / Micro USB cable
Lens cap
Quick start guide
For easy reading, iPhone®, iPad® and other compatible telephones or tablets are referred
to as 'smartphones' in the manual.
Package contents
When you carry the Bebop 2, protect the camera's lens with the camera's lens cap.
Downloading the application
Connect to the App StoreTM or Google PlayTM and download the
free.
FreeFlight 3
Charging the battery
1. Insert the plug converter corresponding to your country to the charger.
2. Plug the battery into the charger.
3. Plug the charger into the mains.
> The charger LED lights up in red when charging. Once the battery is fully charged,
the LED turns green. The battery takes about 55 minutes to charge.
application for
4
Before you begin
Page 5

Installing the battery
Slide the battery into its compartment until hearing a "Click". The latch at the rear of the
battery must be locked in the lower position (A diagram).
To remove the battery, hold the latch up, and slide the battery backward (B diagram).
Switching on/off the Bebop 2
Press the on/off button located on the back of the Bebop 2 to switch it on or off.
> The LED located on the on/off button flickers in red. The Bebop 2 omits a sound. Once it
is fully booted and ready for use, the button stays red.
Connecting a smartphone
1. Switch the Bebop 2 on.
2. On your smartphone, launch a search of the Wi-Fi® networks available:
·
if you are using an iPhone or an iPad, select Settings > Wi-Fi;
Before you begin
5
Page 6
·
if you are using an Android™ smartphone, select Settings > Wireless and networks >
Wi-Fi.
3. Select the network: Bebop2_xxxxx.
4. Wait for your smartphone to connect to the Wi-Fi network of the Bebop 2. This
connection is generally represented by the Wi-Fi logo appearing on the smartphone
screen.
5. Start the FreeFlight 3 application.
> The connection between your smartphone and the Bebop 2 is established
automatically.
See the Network settings section for further information.
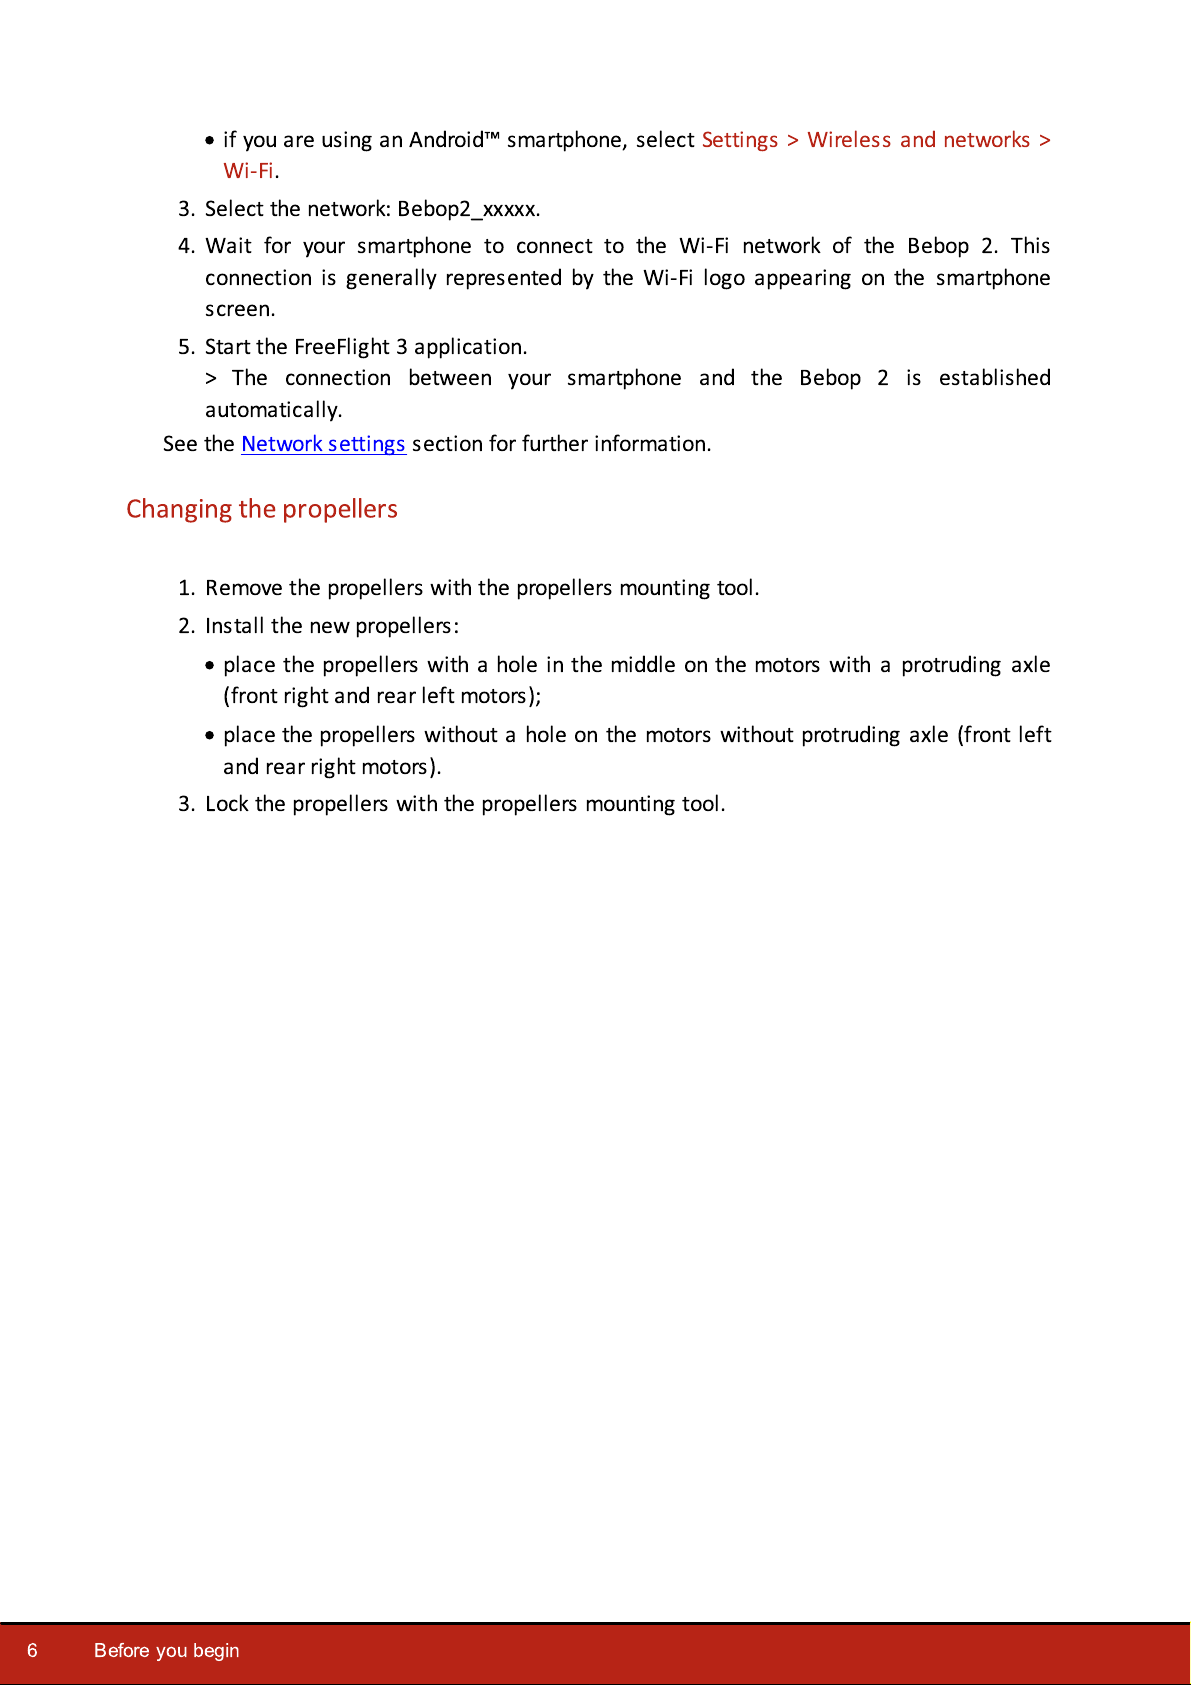
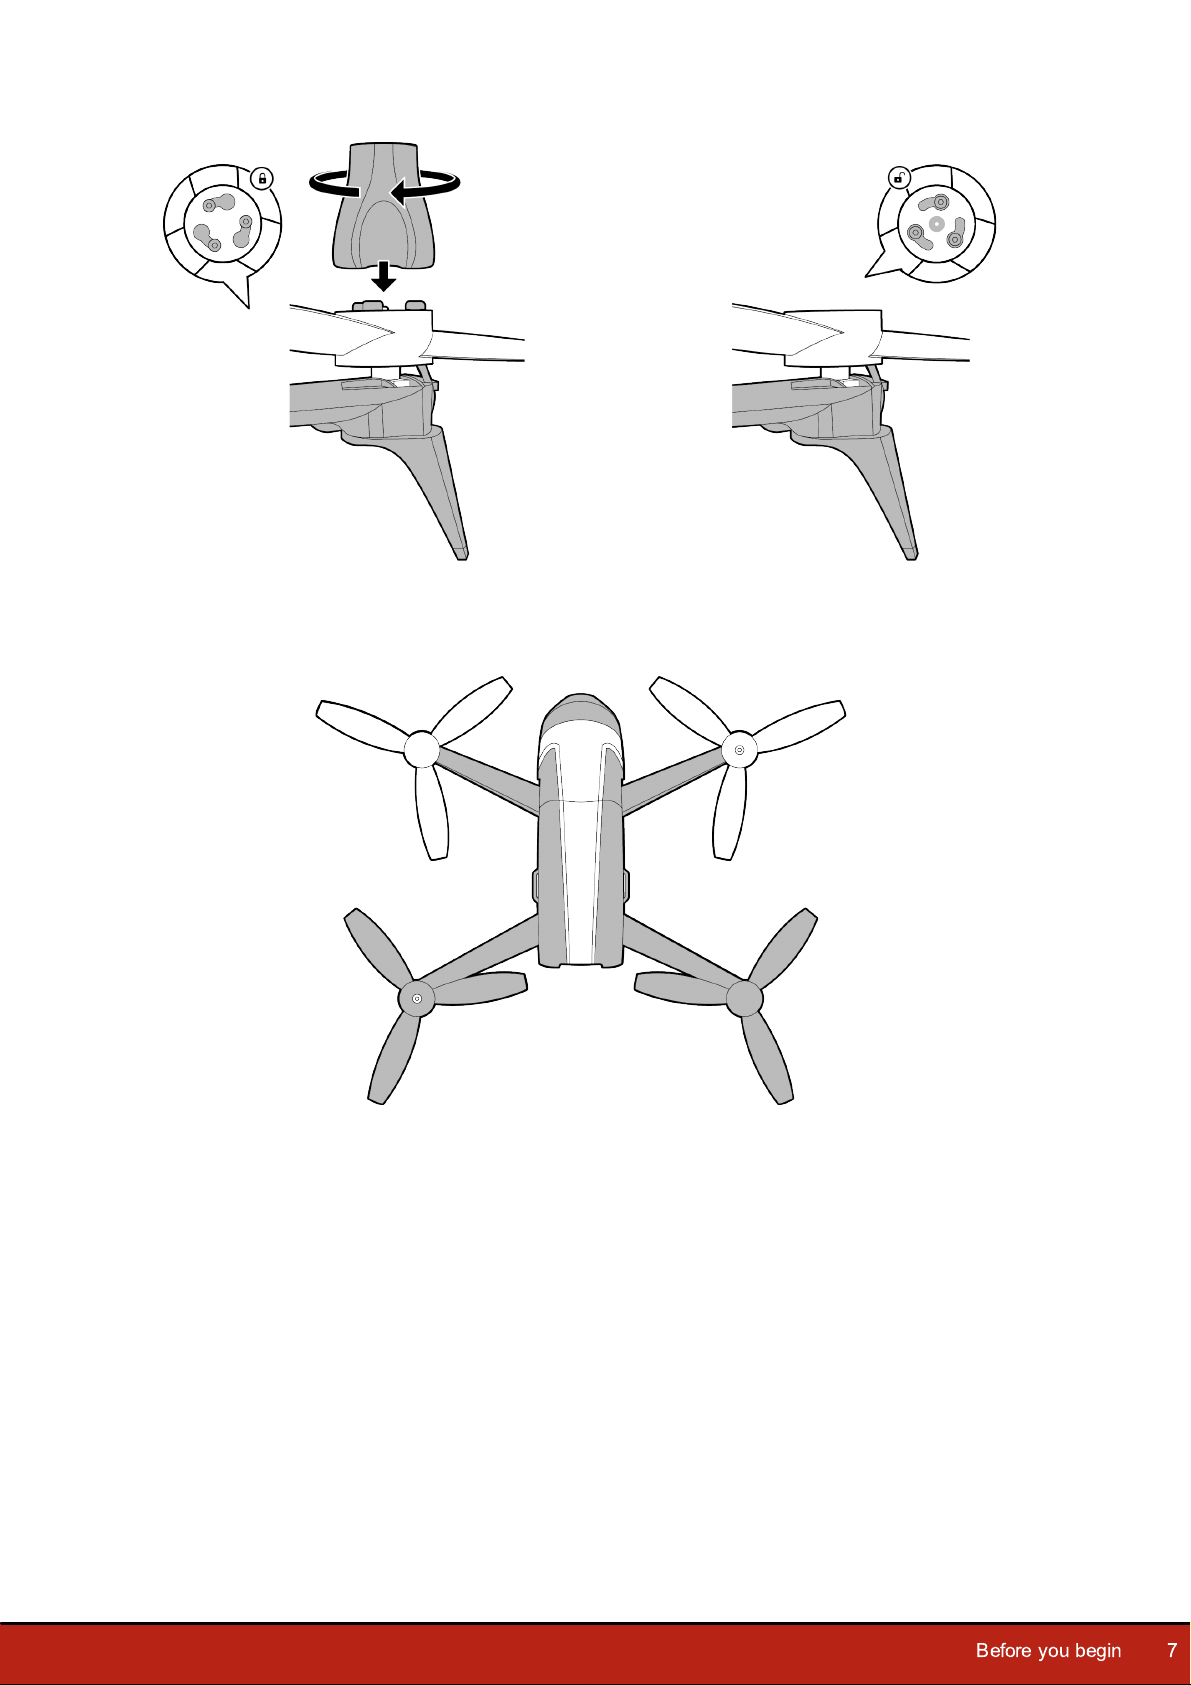
Changing the propellers
1. Remove the propellers with the propellers mounting tool.
2. Install the new propellers:
·
place the propellers with a hole in the middle on the motors with a protruding axle
(front right and rear left motors);
·
place the propellers without a hole on the motors without protruding axle (front left
and rear right motors).
3. Lock the propellers with the propellers mounting tool.
6
Before you begin
Page 7
Before you begin
7
Page 8
Preflight check
Before each flight session, check the following points:
·
Do not fly the Bebop 2 at night.
·
Check the weather conditions. Do not fly the Bebop 2 when the weather is rainy,
snowy, or foggy. Do not fly the Bebop 2 if the wind speed exceeds 24 mph (40 km/h).
·
Ensure there is no obstacle in your flight area that could disturb piloting or visual flight.
·
Ensure the use of the Bebop 2 is allowed in your flight area.
·
Check the Wi-Fi use restrictions in your flight area.
·
Ensure the propellers are correctly installed and locked. For further information, see
Changing the propellers.
·
Ensure the battery is correctly attached to the Bebop 2. For further information, see
Installing the battery.
·
Ensure the Bebop 2 and your smartphone batteries are charged.
·
Check the quality of the Wi-Fi range. For further information, see Network settings.
·
Calibrate the Bebop 2. For further information see Calibrating the Bebop 2.
8
Preflight check
Page 9
Updating the Bebop 2
1. Launch the FreeFlight 3 application.
2. Press Check for updates to check if any updates are available for the Bebop 2.
There are 2 ways to update the Bebop 2:
·
via the FreeFlight 3 application (recommended)
·
via USB, by downloading the update file from our website. A computer is necessary for
this method.
Note:
via USB.
For further information, see the Bebop 2 update procedures.
Ensure that the battery of the Bebop 2 is in place and fully charged before updating
Updating the Bebop 2
9
Page 10
Flying
#
Description
#
Description
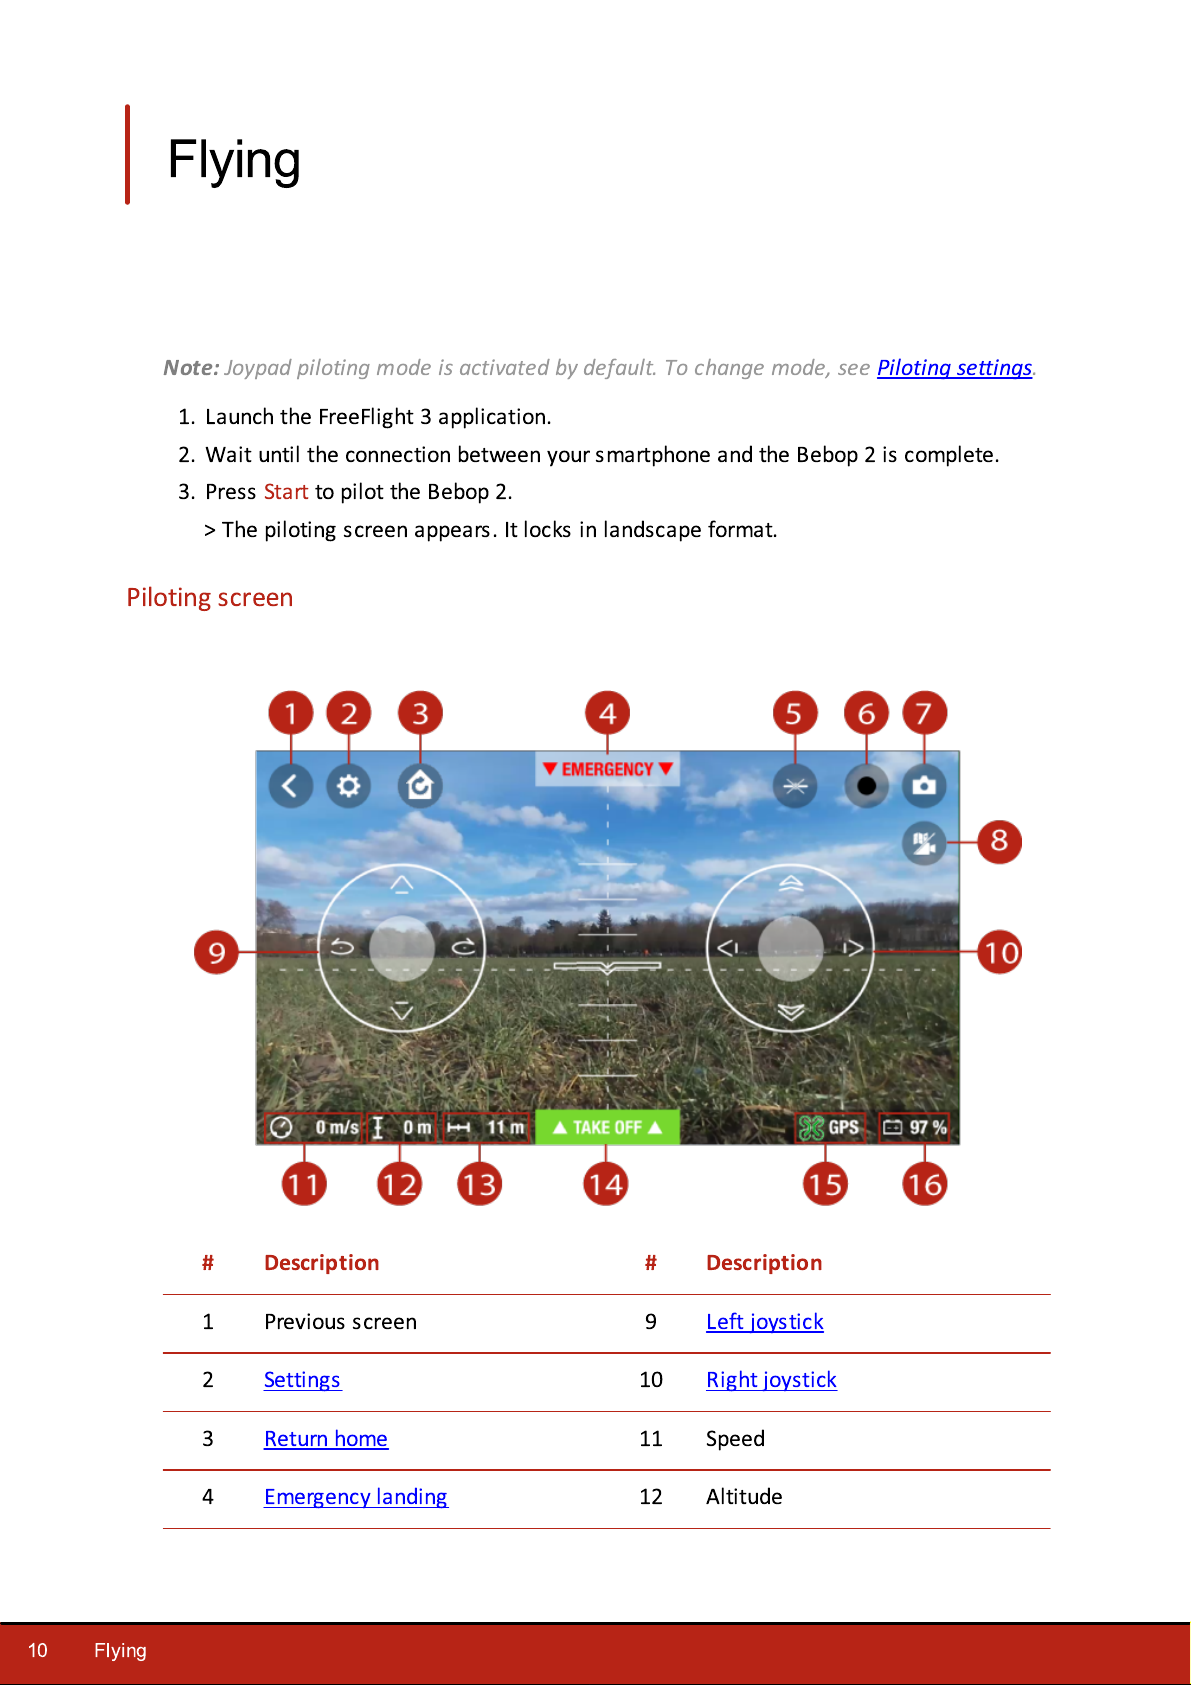
1
Previous screen
9
Left joystick
2
Settings
10
Right joystick
3
Return home
11
Speed
4
Emergency landing
12
Altitude
Note:
Joypad piloting mode is activated by default. To change mode, see Piloting settings.
1. Launch the FreeFlight 3 application.
2. Wait until the connection between your smartphone and the Bebop 2 is complete.
3. Press Start to pilot the Bebop 2.
> The piloting screen appears. It locks in landscape format.
Piloting screen
10
Flying
Page 11
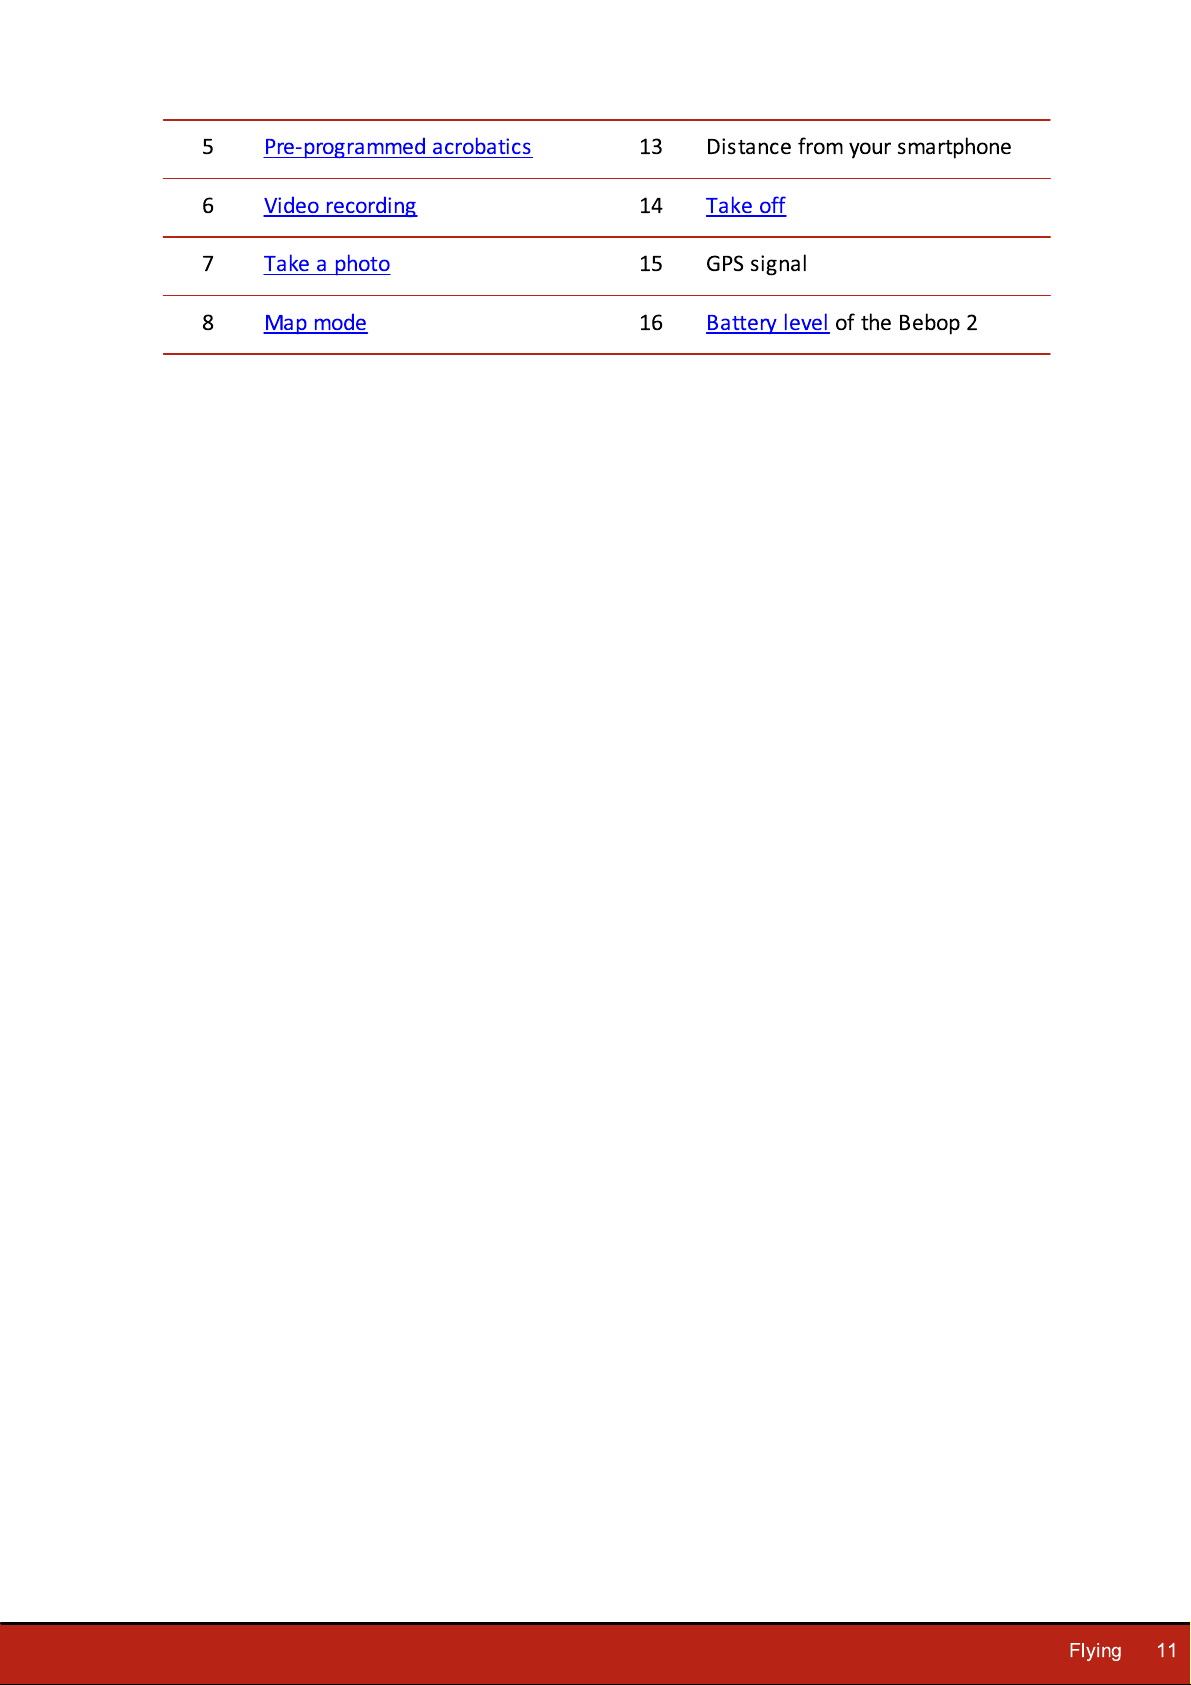
5
Pre-programmed acrobatics
13
Distance from your smartphone
6Video recording
14
Take off
7
Take a photo
15
GPS signal
8
Map mode
16Battery level of the Bebop 2
Flying
11
Page 12
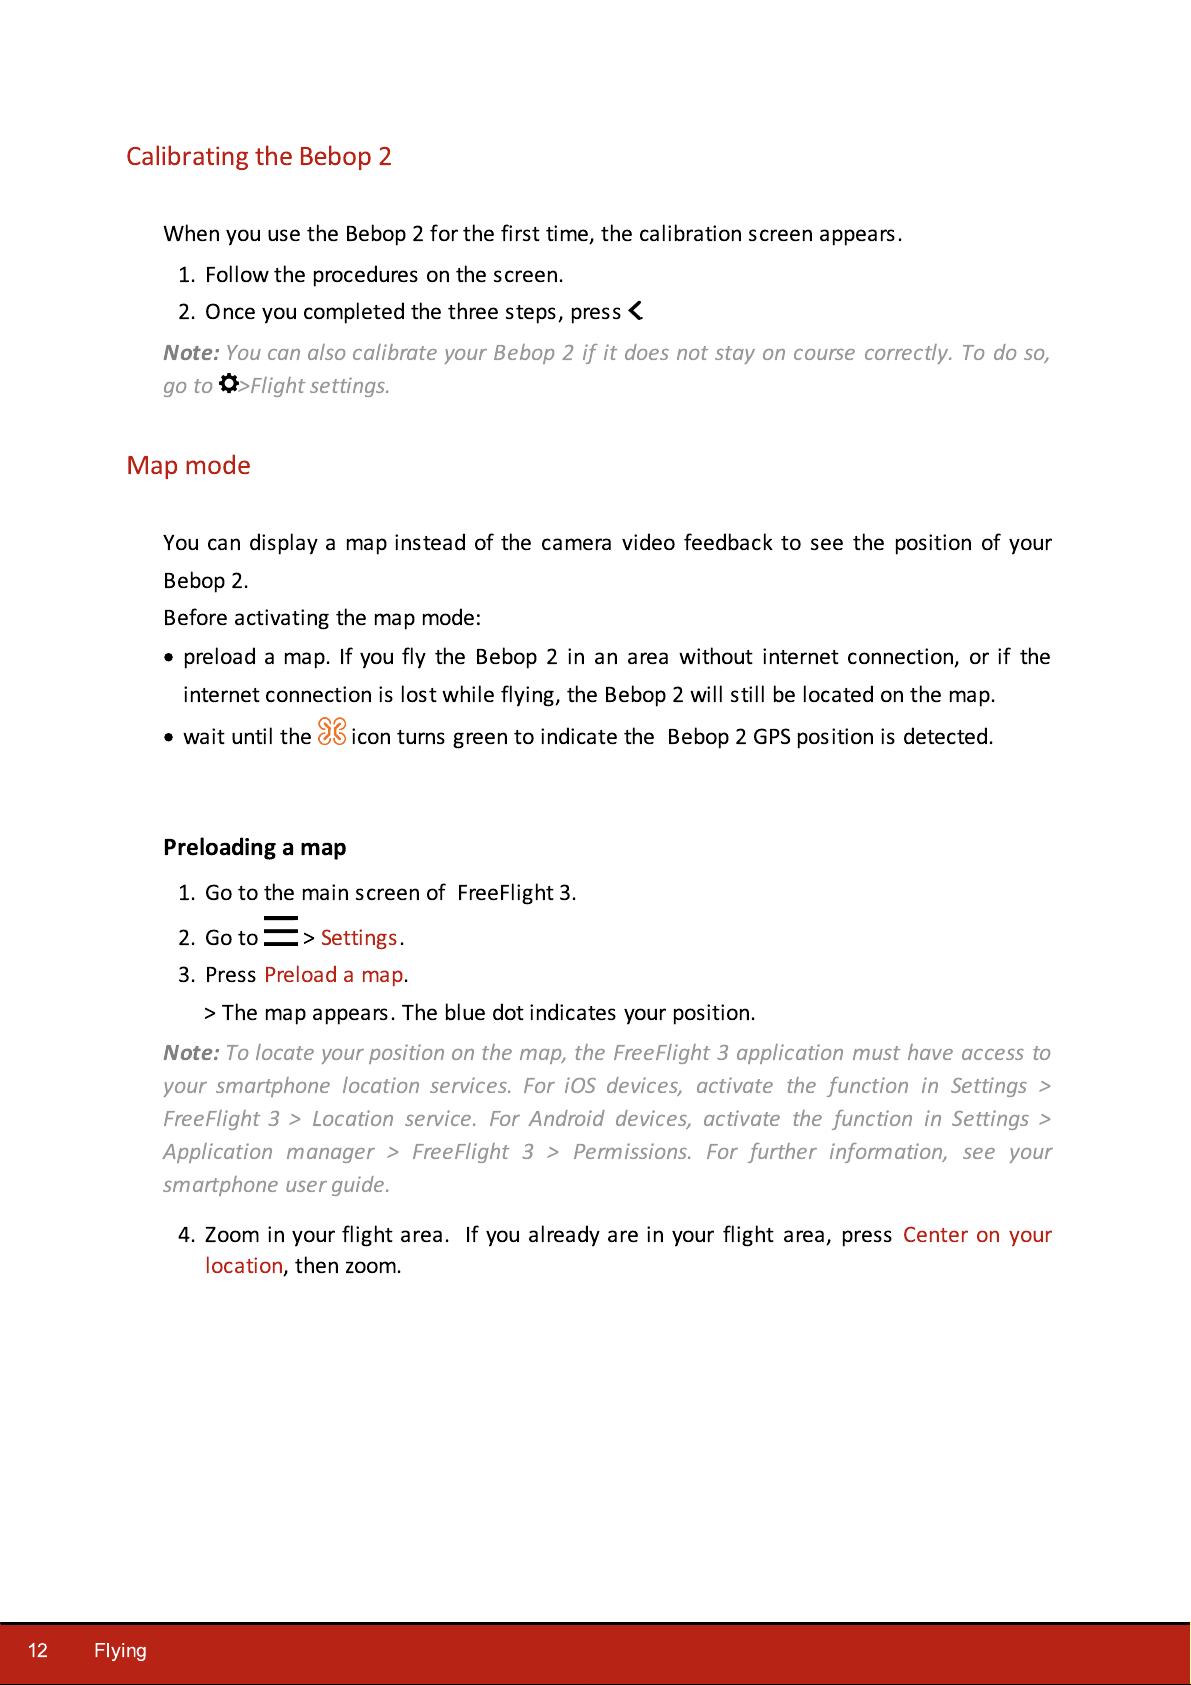
Calibrating the Bebop 2
When you use the Bebop 2 for the first time, the calibration screen appears.
1. Follow the procedures on the screen.
2. Once you completed the three steps, press
Note:
You can also calibrate your Bebop 2 if it does not stay on course correctly. To do so,
.
go to >Flight settings.
Map mode
Y
ou can display a map instead of the camera video feedback to see the position of your
Bebop 2.
Before activating the map mode:
·
preload a map. If you fly the Bebop 2 in an area without internet connection, or if the
internet connection is lost while flying, the Bebop 2 will still be located on the map.
·
wait until the icon turns green to indicate the Bebop 2 GPS position is detected.
Preloading a map
1. Go to the main screen of FreeFlight 3.
2. Go to > Settings.
3. Press Preload a map.
> The map appears. The blue dot indicates your position.
Note:
To locate your position on the map, the FreeFlight 3 application must have access to
your smartphone location services. For iOS devices, activate the function in Settings >
FreeFlight 3 > Location service. For Android devices, activate the function in Settings >
Application manager > FreeFlight 3 > Permissions. For further information, see your
smartphone user guide.
4.Zoom in your flight area. If you already are in your flight area, press Center on your
location, then zoom.
12
Flying
Page 13

5. Press Preload.
6
. Wait until the preloading is completed.
Activating map mode
Press .
The icon indicates your smartphone's position.
The icon indicates the Bebop 2 position.
To switch back to the video mode, press again.
Flat trim
The flat trim feature is used to calibrate the internal sensors for level flight. It is
recommended that you complete a flat trim after each battery change or if the Bebop 2 will
not hover in place correctly.
1. Place the Bebop 2 on a flat, dry, unobstructed surface.
2. In the FreeFlight 3 application, go to > Flight settings.
Flying
13
Page 14

3. Press Flat Trim.
GPS signal
Note:
detected.
The icon indicates that the Bebop 2 position is not detected.
The icon indicates that the Bebop 2 position is detected.
Make sure the Bebop 2 position is detected before taking off to register the starting point
correctly.
To display the last GPS position of the Bebop 2:
If you are in an area with no GPS reception, the Bebop 2 position will not be
1. Launch FreeFlight 3.
2. On the main screen, go to > Settings.
3. Press See details.
> The latitude and longitude of the Bebop 2 position appears in the list.
Taking off
1. Place the Bebop 2 on a flat and dry surface and in a unobstructed and lit area.
2. Press Take Off.
> The Bebop 2 takes off and hovers at approximately 1 meter above the ground.
Note:
Make sure the take-off location of the Bebop 2 is saved. To do so wait for the
icon to turn green.
Movements
Movements depend on the flight and piloting settings. See the Settings section for further
information. By default, the Joypad option is activated and inverted option is deactivated.
14
Flying
Page 15

Joypad mode
Left joypad
Right joypad
rotate to the left
fly forwards
rotate to the right
fly backwards
fly upwards
fly right
fly downwards
fly left
Left joypad
Right joypad
rotate to the left
H
old the central button and tilt your
smartphone to fly the Bebop 2.
rotate to the right
fly upwards
fly downwards
Normal mode
Flying
15
Page 16

16
Hold the central button and tilt your smartphone forwards or backwards to pilot the Bebop 2 forwards or backwards.
Flying
Page 17

Hold the central button and tilt your smartphone to the left or right to fly the Bebop 2 to the left or right.
Left joypad
Right joypad
rotate to the left
Slide to orientate the camera regardless
of the position of the Bebop 2.
rotate to the right
fly upwards
fly downwards
H
old the central button and tilt your
smartphone to fly the Bebop 2.
Ace mode
Flying
17
Page 18

Pre-programmed acrobatics
back flip
front flip
left flip
right flip
no flip
Orienting the
camera
Control the angle of the camera regardless of the Bebop 2 position.
·
in Normal and Joypad modes: slide two fingers on the screen.
Note :
The vertical orientation commands are reversed. If you slide your
finger upwards, the camera angle will move downwards. If you slide your
finger downwards, the camera angle will move upwards.
·
in Ace mode : slide .
Taking a photo
Press to take a photo.
The internal memory of the Bebop 2 is 8GB. The maximum number of
photos stored in the internal memory depends on the selected format. To
choose a photo format, see Recording settings. Once the memory is full, it
is no longer possible to take a photo.
The Bebop 2 can perform acrobatics while flying, whether it is stationary or moving.
1. Press the flip icon to change the flip. is selected by default.
2. Tap on your smartphone screen twice to perform a flip.
Photos and videos
Note:
Bebop 2 is for stabilization only.
Y
For further information, see Recording settings.
The camera is located at the front on the Bebop 2. The camera located under the
ou can set the Bebop 2 in video or photo mode. The video mode is activated by default.
18
Flying
Page 19

Note:
To obtain high quality photos, make sure that the Bebop 2 is set in
photo mode. To do so, see Recording settings.
Recording a
video
The video recording starts automatically when you press Take off. The
button blinks during recording.
To stop the video record, press . To start a new video, press again.
The video recording stops after 25 minutes of recording.
Note:
It is not possible to record a video when the Bebop 2 is set in
timelapse mode. To deactivate timelapse mode, see Recording settings.
Retrieving photos and videos
Y
ou can retrieve photos and/or videos taken with the Bebop 2:
·
on your smartphone, using the FreeFlight 3 application,
·
on your computer, using a USB/micro USB cable (supplied).
Retrieving photos and videos on your smartphone
To retrieve photos and videos from the FreeFlight 3 application:
1. On your smartphone, launch the FreeFlight 3 application.
2. Go to > Internal memory.
> The list of photos and videos stored in the Bebop 2 internal memory appears.
3. Select one or several photos and/or videos.
4. Press Transfer to retrieve the photos and/or videos on your smartphone.
5. Press Delete if you want to delete the photos and/or videos from the internal memory
of the Bebop 2.
Retrieving photos and videos on your computer
·
Windows :
1. Connect the Bebop 2 to your computer with the USB/micro USB cable (supplied).
2. Switch the Bebop 2 on.
> Your computer detects the Bebop 2 automatically. Wait until the driver installation
is complete. A pop-up appears like the one shown below.
Flying
19
Page 20

The appearance, content and location of this message depends on your operating
system.
3.Open the file, as though it were a USB flash drive.
> You can copy the photos and/or videos on your computer.
·
Mac :
3. Connect the Bebop 2 to your computer with the USB/micro USB cable (supplied).
4. Switch the Bebop 2 on.
> Your computer detects the Bebop 2 automatically and the Photos application opens.
Y
ou can copy the photos and/or videos on your computer.
Landing
Ensure that the Bebop 2 is over a flat, dry and unobstructed surface, then press Landing to
make the Bebop 2 land.
Press Emergency in an emergency case only. The motors will cut out and the Bebop 2 will
immediately drop from the height at which it is flying. Using the landing button is sufficient
in most instances.
Return home
Note:
feature cannot be activated.
The Return home feature enables you to make the Bebop 2 fly back to:
If neither your smartphone nor the Bebop 2 receives a GPS signal, the
·
the last take off location,
·
your smartphone location if the Bebop 2 has received no GPS signal.
Return home
20
Flying
Note:
your smartphone location services. For iOS devices, activate the function in Settings >
To locate your position on the map, the FreeFlight 3 application must have access to
Page 21

FreeFlight 3 > Location service. For Android devices, activate the function in Settings >
Application manager > FreeFlight 3 > Permissions. For further information, see your
smartphone user guide.
Press for the Bebop 2 to return to its starting point.
> The button turns green and the Bebop 2 returns to its starting point. Once the
Bebop 2 reaches its starting point, it remains at 2 meters above the ground.
Warning: The Bebop 2 returns to its starting point in a straight line. The Bebop 2 can
collide with any obstacle that is in its trajectory.
Y
ou can take control over the Bebop 2 when it is returning to its starting point.
If the Bebop 2 altitude is below 20 meters, it will reach an altitude of 20 meters before
returning to its starting point in order to avoid any obstacle.
If the connection between your smartphone and the Bebop 2 is lost, the Bebop 2 returns to
its starting point automatically after a certain period of time. To set this period of time, in
the FreeFlight 3 application, go to Settings > Navigation and set the period of time needed.
Battery
The button indicates the Bebop 2's battery level. The Bebop 2 has a battery life of
approximately 25 minutes.
When the battery level is low, an alert appears on your smartphone screen. The Bebop 2's
on/off button lights up twice and shuts off.
Flying
21
Page 22

Note:
The number of acrobatics can have an impact on the Bebop 2's battery life.
22
Flying
Page 23

Settings
Max inclination
Define a maximum angle pitch when you fly the Bebop 2
forwards and backwards. The lower the maximum inclination
value, the smaller the angle of pitch.The higher the maximum
inclination value, the greater the angle of pitch.
Note
: This setting affects the acceleration. With a greater
angle of pitch, the Bebop 2 accelerates faster.
J
oypad inverted
Reverse the controls on your smartphone.
Within the FreeFlight 3 application, press to access the Bebop 2 settings menu.
Slide the screen right or left to access the different settings screens.
Press to reset the Bebop 2 to factory settings. This action deletes your settings and
preferences, photos and videos stored in the Bebop 2's internal memory.
Note:
Bebop 2 on and press the on/off button for 10 seconds.
You can also reset the Bebop 2 without the Bebop 2 application. To do so, switch the
Piloting settings
Settings
23
Page 24

Three piloting modes are available: Normal, Joypad (activated by default) and Ace. For
Calibrate
Calibrate the Bebop 2. Use this feature when the Bebop 2
does not stay on course correctly.
Flat Trim
The flat trim feature is used to calibrate the internal sensors
for level flight. It is recommended that you complete a flat
trim after each battery change or if the Bebop 2 will not hover
in place correctly. For more information, see the Flat Trim
section.
Max vertical speed
Define a maximum speed when you fly the Bebop 2 upwards.
Max rotation speed
Define a maximum speed when you make the Bebop 2 rotate.
When you fly the Bebop 2 horizontally, its speed depends on
the angle of inclination.
more information about these modes, see the Movement section.
Flight settings
Recording settings
The Bebop 2 is equipped with a fisheye (wide-angle) camera.
Note:
the
24
Settings
The camera lens is situated at the front of the
Bebop 2
is for stabilization only.
Bebop 2
. The camera situated under
Page 25

Photo mode
Activate the photo feature.
V
ideo mode
Activate the video feature. This mode is activated by default.
DNG
Select this format to take high resolution photos.
J
PEG
Select this format to take medium resolution photos.
J
PEG 180
°
Select this format to keep the Fisheye effect on your photos.
Note :
This format does not save the picture's metadata.
Timelapse mode
Activate Timelapse mode:
1. Press Timelapse mode.
2. Slide your finger on the circle to select the interval
between each photo. If you select 10'', the Bebop 2 will
take a picture every 10 seconds.
Note :
When the Bebop 2 is set in timelapse mode, it is not
possible to record a video.
Note :
When the DNG option is activated, the timelapse mode
enables the Bebop 2 to take a picture every 10 seconds
minimum. When the JPEG option is activated, the timelapse
mode enables the Bebop 2 to take a picture every 8 seconds
minimum.
Antiflickering mode
Delete the flickering effect on the video. Select the frequency
corresponding to the electric frequency of your country. Select
Auto to adapt the frequency to the country selected on the
Network settings screen.
Settings
25
Page 26

Image settings
Set the image contrast.
Set the image exposure.
automatic
daylight
cloudy
white fluorescent light
tungusten bulb
Select one of the following buttons to adapt the white balance according to your
environment:
26
Settings
Page 27

Network settings
Product name
Change the network name of your Bebop 2:
1. Change the Bebop 2 name in the Product name field.
2. Reboot the Bebop 2.
Note:
The network name of the Bebop 2 can only contain
letters, numerals and underscores ("_"). It must not exceed 32
characters in length.
Select country
Select your country.
Wi-Fi type
Connect the Bebop 2 to the 2.4 or 5 GHz Wi-Fi bands.
·
The 2.4 GHz Wi-Fi band enables you to fly the Bebop 2 from
a greater distance. It is generally more congested than the 5
GHz Wi-Fi band in urban areas.
·
The 5 GHz Wi-Fi band enables you to obtain a better
connection between the Bebop 2 and your smartphone.
Check your smartphone user guide (or the technical
specifications) to see whether it supports connection to the
5 GHz Wi-Fi band. If it does not, use the 2.4 GHz Wi-Fi band
only.
To switch the Wi-Fi band (2.4 GHz or 5 Ghz) manually without
using the application, hold down the on/off button of the
Bebop 2 for 5 seconds .
Note :
The diagram at the bottom of the screen shows the
state of the Wi-Fi channels. Red curves represent congested
channels. Green curves represent less congested channels. The
channel without curves are free.
Settings
27
Page 28

Before flying the Bebop 2, ensure that you comply with the Wi-Fi frequencies restrictions
Motor information
·
The motor state
·
The software version
·
The last flight date
·
The total flight time
·
The last error date
of your place of flight. Certain frequencies may be restricted or forbidden. Selecting the
country and activating the outdoor option enable FreeFlight 3 to adapt the available
channels according to the legislation of the selected country. For example, in certain
countries using the 5 GHz Wi-Fi band may be prohibited in outdoor mode.
In automatic mode, FreeFlight 3 automatically selects a channel according to the country,
the mode (outdoor/indoor), and the Wi-Fi band selected and the congestion of the
channels.
If you encounter a problem with the quality level of the Wi-Fi connection:
1. Select Manual mode.
2. Select a non-overloaded channel using the information displayed on the diagram. Give
preference to channel without curves or with green curves.
Motor information
28
Settings
Page 29

Information
Information
·
FreeFlight 3 version
·
Bebop 2 firmware version
·
Bebop 2 hardware version
·
GPS hardware version
Settings
29
Page 30

Drone Academy
#
Description
1
Access the FreeFlight 3 application home screen
Note:
An internet connection is necessary to use the Drone Academy.
To launch Drone Academy:
1. Launch the FreeFlight 3 application.
2. Press Drone Academy.
Creating a user account
Y
ou need a user account to use Drone Academy.
1. Press Sign up now.
2. Type a user name, a password and an e-mail address.
3. Press Register your profile.
Main screen
30
Drone Academy
Page 31

2
V
isualize the map of the flights
3
Access the list of your drones
4
Access the list of your flights
5
Modify and disconnect your profile
6
Send a Drone Academy invitation
Managing your profile
To modify or delete your profile:
1. Press the Profile tab.
2. Press .
3. Press Logout or Edit.
4. If you edit your profile, slide the screens towards left to complete your profile.
Registering a drone
To register a drone, press My drones.
Note:
register your Bebop 2 in the Drone Academy.
The first time you connect the Bebop 2 to your smartphone, a pop-up asks you to
Consulting shared flights
1. Press Map.
2. Press to search flights amongst:
·
your flights or other user's flights
·
the type of media.
Press to search flights by user or place.
Consulting and sharing your flights
1. Press My pilotings.
>The list of your flights appears. You can sort them by date, rank or type.
2. Press the flight you want to share.
3. Press Public to share the flight. You can also:
Drone Academy
31
Page 32

·
press the stars to rate the flight.
·
press the tabs at the bottom of the screen to consult the flight information.
32
Drone Academy
Page 33

Troubleshooting
Behavior
Signification
Steady red
Normal state.
Slowly blinking
red
The Bebop 2 is booting up.
Quickly blinking
red
A motor error is detected. To locate the
defective motor:
1. In FreeFlight 3, press Start.
2. Press > Motor information.
>The screen indicates the defective
motor.
3. Ensure the propeller is not blocked or
damaged.
LED behaviour
Troubleshooting
33
Page 34

General information
The pilot must operate his/her Bebop 2 in his/her line-of–sight at all times in order to
avoid any obstacles, and must take care only to use it in suitable locations chosen to
ensure that people, animals and property remain safe at all times.
The internal memory for video recording is limited to 29 minutes.
Before flying your Bebop 2, check your local civil aerial regulation and read the guidelines
on www.parrot.com.
Safety precautions and maintenance
The Bebop 2 is not suitable for children under 14 years of age.
The Bebop 2 is a model aircraft designed for recreational and leisure purposes. The pilot
must always maintain direct visual contact with the Bebop 2 and monitor its trajectory. The
Bebop 2 must be used in accordance with the civil aviation regulations in your country. You
should only use the Bebop 2 in open spaces so that you can ensure the safety of people,
animals and property at all times. There are
some public places such as train stations, airports, etc., and roads where you may not be
permitted to use your Bebop 2.
During flight, the propellers of the Bebop 2 can cause injury to people and damage
property.
Do not touch the Bebop 2 while it is in flight! Wait until the propellers have completely
stopped before handling the Bebop 2.
Only use accessories specified by the manufacturer.
Irreversible damage may be caused if sand or dust get into the Bebop 2. Should this occur,
your drone may not function as intended.
Do not use the Bebop 2 in adverse weather conditions such as rain, strong winds, and
snow, or in poor visibility conditions, for example, at night.
K
eep the Bebop 2 away from high voltage power lines, buildings or any other potentially
34
dangerous areas.
Do not use this device near liquids. Do not land the Bebop 2 on water or any wet surface
as this may cause irreversible damage.
Avoid subjecting theBebop 2 to any sudden significant changes in altitude. Do not leave
the Bebop 2 in sunlight.
General information
Page 35

Risk of ingestion of small parts. The packaging is not part of the product and should be
disposed of for safety reasons.
Warning on invasion of privacy
Recording and circulating an image or the voice of a person without their consent could
constitute an infringement of their image and privacy rights and incur your liability. Ask for
consent before filming people and recording their voices, particularly if you want to keep
your recordings and/or share them on the Internet.
Do not share any degrading images or sounds which could undermine the reputation or
dignity of an individual.
Warranty
For warranty conditions please refer to the retailer’s General Conditions of Sale where you
purchased your Bebop 2.
Wi-Fi
Before flying the Bebop 2, please ensure that you comply with the Wi-Fi frequencies
restrictions of your place of flight. Certain frequencies may be restricted or forbidden. For
example, in certain countries using the 5 GHz Wi-Fi band may be prohibited in outdoor
mode.
Modifications
The explanations and specifications in this guide are given for information purposes only
and may be modified without prior notice. They are deemed to be correct at time of going
to press. The utmost care has been taken when writing this guide,as part of the aim to
provide you with accurate information. However, Parrot shall not be held responsible for
any consequences arising from any errors or omissions in the guide, nor for any damage or
accidental loss of data resulting directly or indirectly from the use of the information
herein. Parrot reserves the right to amend or improve the product design or user guide
without any restrictions and without any obligation to notify users. As part of our ongoing
concern to upgrade and improve our products, the product that you have purchased may
differ slightly from the model described in this guide. If so, a later version of this guide
might be available in electronic format at Parrot’s website at www.parrot.com.
General information
35
Page 36

Disposal of this product at the end of its life
At the end of this product’s life, please do not dispose of this product in your
general household waste. Instead, in order to prevent possible harm to the environment or
human health from uncontrolled waste disposal, please dispose of this product separately
in accordance with your local laws and regulation. For more information on the separate
collection systems for waste electrical and electronic equipment that are available for
consumers, near your home, free of charge, please contact your local municipality
authority. You can also contact the retailer from which you purchased your Bebop 2 he
might have put in place recycling services or he may be part of a specific recycling scheme.
Declaration of conformity
This equipment may be operated in: DE, AT, BE, BG, CY, HR, DK, ES, EE, FI,
FR, GR, HU, IE, IT, LV, LT, LU, MT, NL, PL, PT, CZ, RO, GB, SK, SI, SE.
The restriction concerns only the first sub-band of the 5 GHz band (5150-5250 MHz) for an
outdoor use within the member states of the European Union.
Parrot Drones SAS, 174 quai de Jemmapes, 75010 Paris, France, declare under their sole
responsibility that the product described in this user guide complies with technical
standards EN 301489-1, EN 301489-3, EN 301489-17, EN 62311, EN300328, EN301893,
EN300 440-2, EN71-1, EN71-2, EN62115, EN50581 following the provision of the Radio
Equipment, Telecommunication Equipment directive (1
General Safety directive (2001/95/EC) and of ROHS directive 2011/65/EC.
http://www.parrot.com/uk/ce/?bebop-2
999
/5/EC R&TTE), and of the
Regis tered trademarks
Parrot, Bebop Drone and the Parrot logo are registered brands of Parrot Drones SAS.
36
iPhone and iPad are Apple Inc. brands registered in the USA and in other countries. App
Store is an Apple Inc. service mark.
Google Play and Android are Google Inc. brands.
Wi-Fi® is a Wi-Fi Alliance registered brand.
All other brands mentioned in this guide are protected and the property of their respective
General information
Page 37

owners.
General information
37
 Loading...