

Page 1
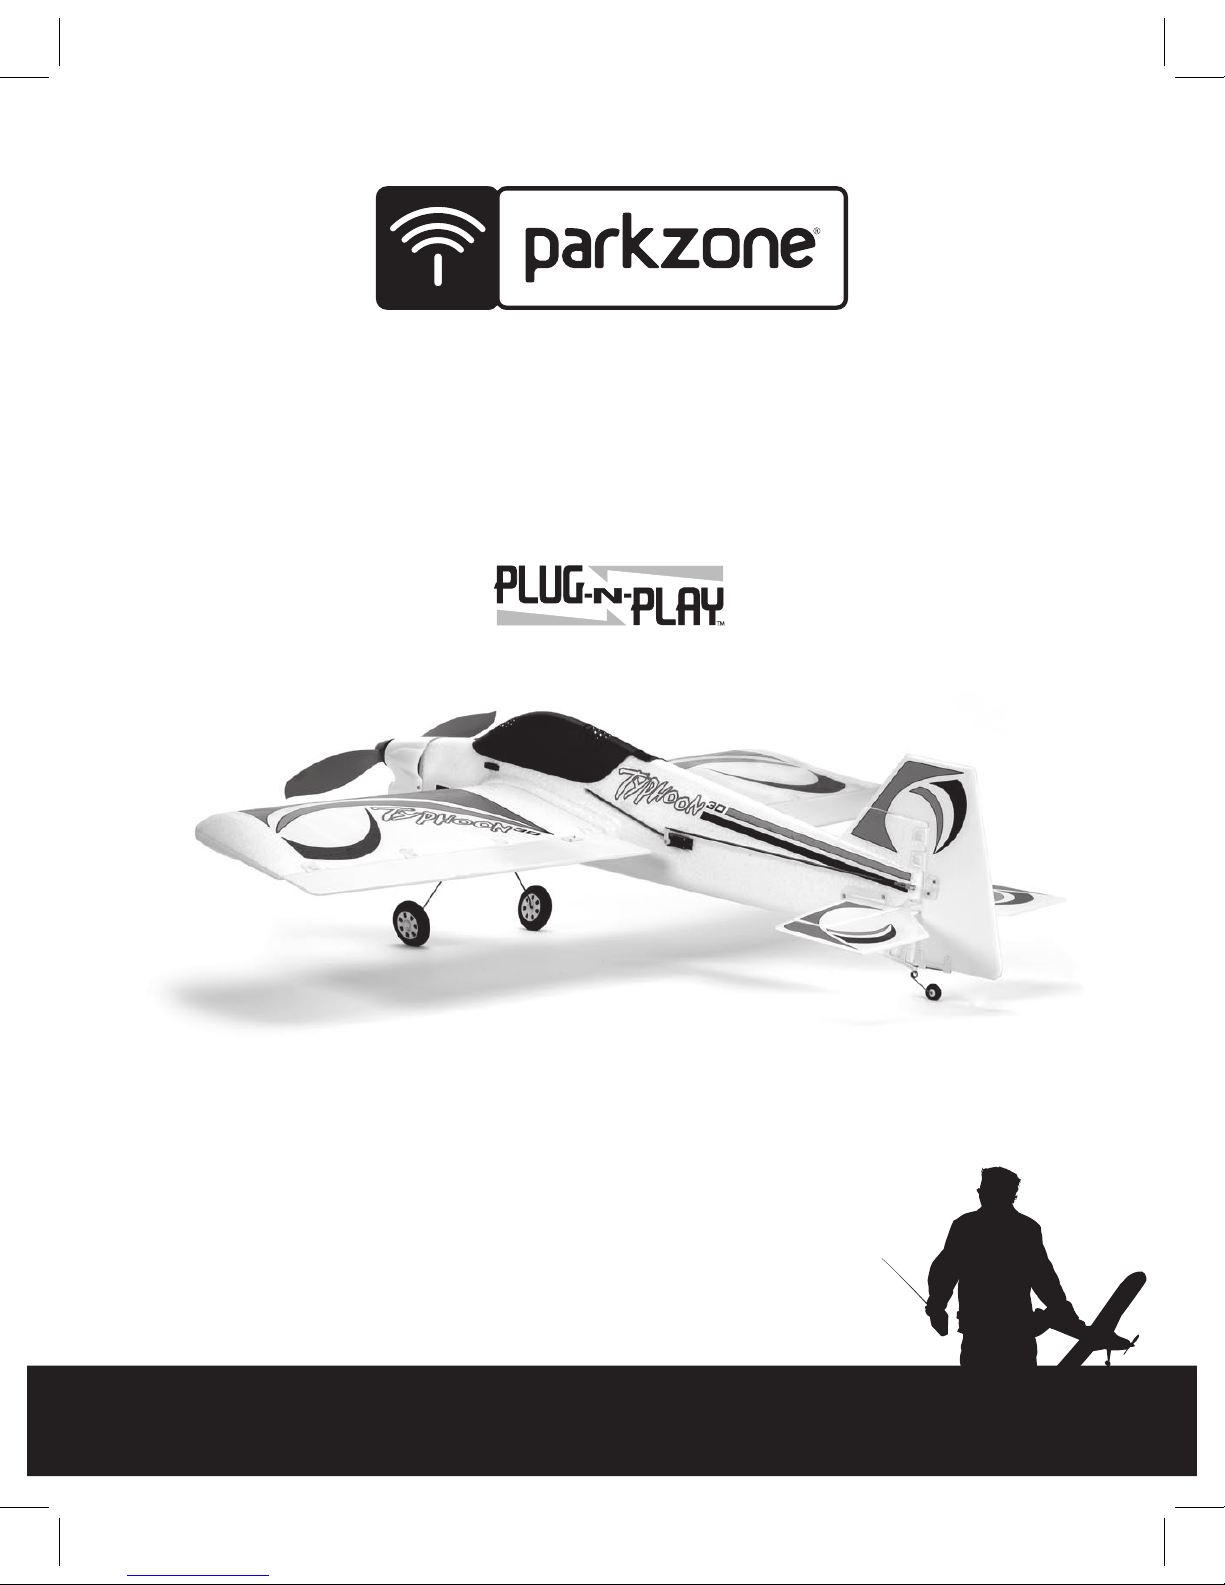
Typhoon 3D
Instruction Manual
Charge-and-Fly™ Park Flyer
Wingspan: 39.5 in (1000mm) Required: 4-channel transmitter (minimum)
4-channel receiver (minimum)
3S 2100mAh Li-Po battery or
9-cell 1000mAh Ni-MH battery
Overall
Length: 34 in (862mm)
Flying Weight:
26 oz (740 g)
Motor:
ParkZone BL400-15T
brushless with gearbox
Page 2
Congratulations on your purchase of the ParkZone
Typhoon™3D Plug-N-Play airplane (PKZ4175). We at
ParkZone are committed to giving you the most enjoy
able flight experience possible. In order to have a safe
and successful flight, we ask that you do not fly until
you have read these instructions thoroughly.
This airplane comes almost fully assembled in order to
allow you to get in the air quickly. Your Typhoon 3D
Plug-N-Play (PNP) already has the 3-wire servos, a
ParkZone (BL400-15T) brushless motor, and a brushless
ESC installed. The decals have already been applied, as
well. You will only need to add your own battery (a 3S
2100mAh Li-Po or 9-cell 1000mAh Ni-MH are recom
-
mended), as well as a receiver and transmitter.
Note: Although the airplane can function with a 4-channel radio system, we
suggest that you use a computer radio system with at least 6 channels so you
can use dual rates and make end-point adjustments. These features will
greatly add to the flying capabilities of the aircraft.
In as little as a few hours, you can be ready for your first
flight with the Typhoon 3D PNP. This means you can
spend your time refining your 3D flying skills, not your
building skills. Your ParkZone Typhoon 3D PNP will allow
you to do such maneuvers as harriers, blenders, hover
-
ing, knife edges, and more.
Warning
Although your ParkZone Typhoon 3D PNP comes almost
ready to fly, this aircraft is for experienced RC pilots only
and is not a toy! Misuse of the plane can cause serious
bodily harm and damage to property. Therefore, only an
experienced RC pilot should fly it.
2
Advancing your Flying Skills
Once you have begun to fly your Typhoon and are looking for more ideas on maneuvers, visit:
http://ww
w.horizonhobby.com/Explore/Article.aspx?ArticleID=1022
http://ww
w.horizonhobby.com/Explore/Article.aspx?ArticleID=1033
http://ww
w.horizonhobby.com/Explore/Article.aspx?ArticleID=1044
Step 1
Typhoon 3D Plug-N-Play Instruction Manual
Charging Your Flight Battery
We recommend that you choose either the 9-cell
10.8V Ni-MH battery pack (PKZ1027), or the Thunder
Power 2100mAh 3S Li-Po (THP21003SPL) to power
your Typhoon 3D PNP. If you choose to use a Li-Po
battery, it must be charged with a charger that is
specifically designed to handle Li-Po batteries, such
as the E-flite
™
Celectra™ 1- to 3-Cell Li-Po Charger
(EFLC3005). Regardless of the battery you choose,
always follow the charger and battery instructions in
order to avoid any damage to the battery, charger,
property or yourself.
Warning
Failure to use the proper charger for a Li-Po battery can
result in serious damage, and if left charging long
enough, will cause a fire. Please use caution when
charging Li-Po batteries.
Page 3
3
TTAB •
ORHT •
VE
L
E
•
)R(
E
LIA •
)L
(
ELIA •
DDUR •
1XUA
•
T
T
AB •
ORHT •
VE
LE
•
)
R
( E
L
IA •
)L( ELIA •
DD
U
R •
1XUA •
Wing TabWing Tab
Step 2
Step 3
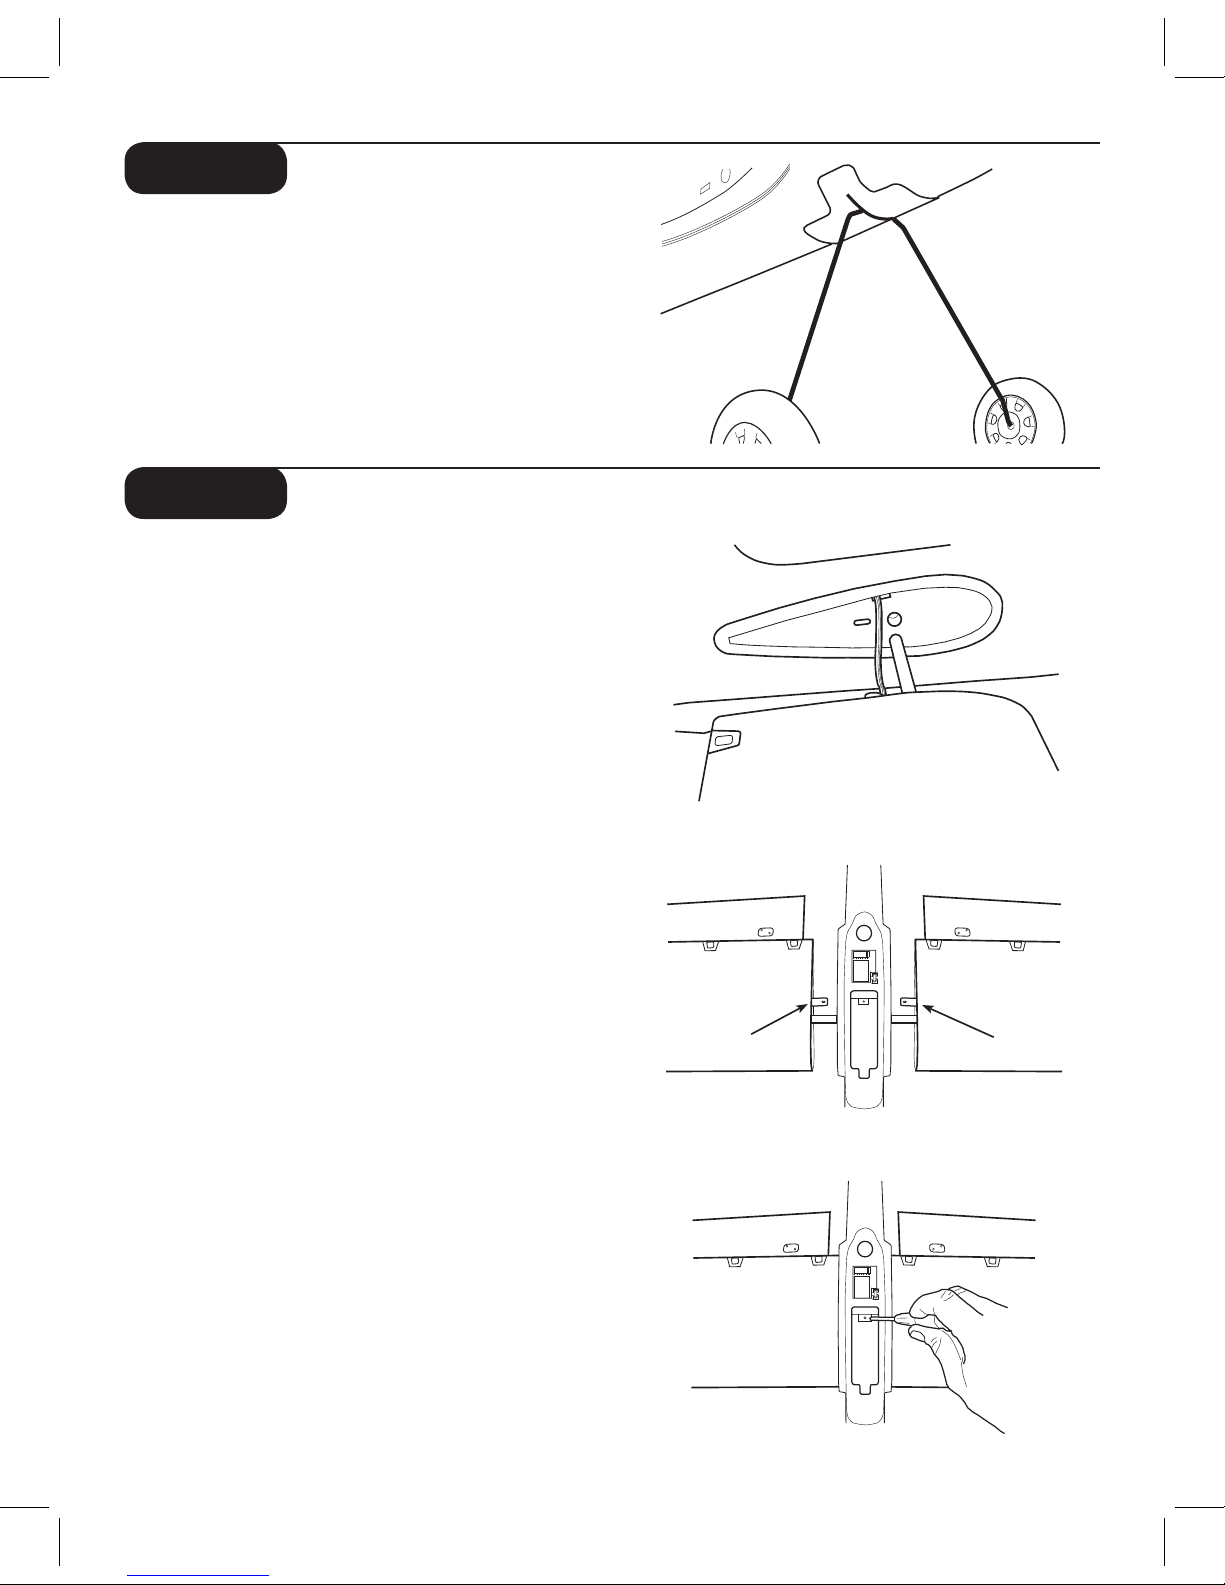
Installing Landing Gear
1. Slightly squeeze together the legs of the landing
gear while sliding it into the allotted space on the
fuselage undercarriage.
2. The fit should be snug, so it will not easily pull out.
3. Gently tug on the landing gear to ensure that it is
inserted all the way into the fuselage and will not
come out when the plane is in use.
Attaching the Wing
1. Locate the wing set. Note that the servos are
located in the bottom of the wing.
2. Select a wing half and slide in fuse, making sure
that you slide aileron servo lead in first (in allotted
hole in side of fuse). Pull aileron lead carefully through
fuse in order to allow wing tab and spar to go into
their allotted holes. Do the same with the other
wing half.
3. Carefully slide wing halves toward each other until
the wing tabs overlap.
4. Match up the holes on each tab and secure with
included screw.
5. Plug in the aileron connectors into receiver. Left
aileron should plug into allotted space of receiver
(directly below elevator). Right aileron lead should
plug into second space of Rx allotted for aileron.
6. Attach the clevis of the aileron linkage to the
bottom (outermost) hole of the aileron horn.
Once you gain more experience, you can insert the
clevis into holes on the aileron horn that are higher
in order to do more extreme maneuvers with
your Typhoon 3D PNP.
Always check ailerons prior to flight to make sure they
are not reversed! Trim adjustments to the ailerons
may be necessary prior to flight.
Page 4

4
Attaching the Horizontal Stabilizer and
Rudder
1. Locate horizontal stab.
2.
Carefully slide horizontal stab into fuselage, making
su
re control surface horn is on top.
3.
Use included strips (4 pieces) of clear tape to
secu
re stab to tail fillet. You should use 1 strip for
top
and bottom of each side.
4.
Locate rudder. Carefully snap tail wheel wire into
the
clip on bottom of fuse, as shown.
5.
Use the three pins that are supplied to connect
rudder
to stab, as shown. Do this by pushing pins
in
carefully.
6.
Install keepers on backside to secure pins,
as shown.
7.
Attach rudder and elevator pushrods to
respective control horns (outer holes of control
horns
for both).
Note: It may be necessary to re-trim control
su
rfaces prior to flight.
Apply Tape
Step 2
Step 4
Step 5
Step 6
Step 7
Step 4
Step 3
Page 5

prop are visible from front of airplane.
and tighten securely.
1. Slide propeller on. Make sure pitch numbers on
2.
Slide washer on first. Next, screw the nut on
3.
Attach spinner.
Installing the Propeller and Spinner
Your Typhoon 3D PNP has two props that are included.
You can select the prop that best works with your
flying
style.
A.
13.5 x 7 (PKZ1006): This prop is recommended for
the first several flights on your plane. This prop
will
allow your plane to fly a bit slower, but is also
the setup for maximum vertical power (especially
with
the 9-cell Ni-MH pack).
B.
12 x 8.75 (PKZ1007): This prop will allow you
to
fly at faster speeds and help with certain
aerobatic maneuvers. This propeller is ideal for the
Thunder Power
3S 2100mAh Li-Po battery pack.
When
you have selected the propeller that best works
for
you, install and secure it making sure not to forget
any
of the necessary hardware.
Step 5
Step 6
5
Installing the Receiver
Carefully plug in the servo leads into the
corresponding channels of the receiver you have
chosen. The servo plugs may have to be trimmed
carefully with a hobby knife if you are using a JR
®
or HiTec radio system in order to fit correctly into
the receiver.
Confirm that the servo leads/plugs are in the
correct channel of the receiver. Do this by:
1. Turning on the transmitter
2. Installing a charged flight battery
3. Turning on receiver switch.
4. Check all functions to ensure proper setup.
Keep all body parts away from the propeller.
You can also make any trim adjustments to the
control surfaces at this time. Once you are
satisfied that the channels are functioning
correctly, you can turn off the radio system.
Install the receiver into the allotted space within the
fuselage. Make sure it is secure.
Carefully route the antenna so it exits the fuselage
just behind the canopy. It should then simply fall
along the fuselage and can be secured through the
vertical stab. When the antenna is routed correctly,
it should hang several inches (5”–7”) below the
fuselage.
Center of Gravity Information
Your ParkZone Typhoon™ 3D Plug-N-Play™ aircraft can be
powered by either a 9-cell Ni-MH 1000mAh battery pack
(PKZ1027), or by the Thunder Power 3S 2100mAh
battery pack (THP21003S).
The center of gravity (CG) for your Typhoon 3D PNP, with
the 9-cell Ni-MH pack, is approximately 3.50 inches
(90mm) back from the leading edge of the wing. The CG
with the 3S 2100mAh Li-Po is approximately 3.70 inches
(95mm) back from the leading edge of the wing.
Additionally, you may choose to make the first several
flights with the included spanner (prop wrench) taped to
the inside or bottom of the cowl. This will add .3 ounces
(8.5 g) and may help you to get used to the flight
characteristics of this 3D airplane.
Aileron, Elevator, and Rudder Throws
The recommended throws in low rate are:
Ailerons: +/- .75 inches (20mm)
Elevator: +/- 1.40 inches (35mm)
Rudder: +/- 1.00 inch (25mm)
The recommended throws in high rate are:
Ailerons: +/- 1.25 inches (30mm)
Elevator: +/- 2.00 inches (50mm)
Rudder: +/- 2.00 inches (50mm)
Your Typhoon
™
3D PNP should fly great between these ranges.
Page 6

6
20 Amp ESC:
Reminder: All Li-Po battery packs must be
cha
rged by Li-Po specific chargers only!
Failu
re to follow these instructions may result
in
a fire!
Programming Your ESC:
1. To enter the programming mode, the controller
must
be powered up with the throttle in full position
and
held there for 5 seconds.
2.
When this is done, the ESC will be in the setup
mode
and will beep three times indicating this.
3.
Once in this programming mode, return the throttle
to
mid-stick within 3 seconds, and the ESC will
sc
roll through the menu.
When
in the programming mode, select yes (up) or no
(down)
as follows:
Yes: Move throttle stick to full for approximately 1
second
(controller will beep once), then return to
mid
-stick.
No:
Move throttle stick to low throttle for 1 second
(cont
roller will beep once), and then return to
mid-stick.
A. Menu Item 1: Voltage Auto Cutoff
1 beep – auto cutoff
* Need to act within 5 seconds:
Li-Po – up (see above)
Ni-MH – down (stock setting)
After the setting of this parameter, the controller will
wait
approximately 3 seconds before moving to next
menu
item.
B. Menu Item 2: Brake Setting
2 beeps – brake setting
* Need to act within 5 seconds:
Brake off – up (stock setting)
Brake on – down
C. Menu Item 3: Motor Timing
3 beeps – motor timing
* Need to act within 5 seconds:
Outrunner (and 4-pole or greater motors) – up
Inrunner (2-pole motors) – down (stock setting)
After
setting the desired parameters, simply power
down
the ESC and then rearm the controller.
Motor Arming:
The ESC will not arm the motor until the throttle stick
is
moved to low throttle and held there for 1 second or
mo
re. Three consecutive beeps will indicate this.
Step 7
The Typhoon™3D PNP™ can be powered by either a
9-cell 10.8V 1000mAh Ni-MH or a 3S 11.1V 2100mAh
Li-Po battery pack. Using the Thunder Power 3S battery
will greatly increase the power, performance, and flight
time of your Typhoon 3D PNP.
The ESC comes with the auto-cut voltage set for the
9-cell Ni-MH battery pack. You must reprogram the
voltage automatic cutoff if you are planning to fly with
the 3S Li-Po battery. Failure to do this will result in
permanent damage to your battery pack.
Page 7

7
Fly in this area
(upwind of pilot)
Stand
here
t
e
e
f
0
0
6
D
N
I
W
Range Checking Your Radio System
After you have finished the assembly, it is time to range
check
the radio system within the Typhoon™3D PNP™.
Prior to each flying session:
• Make sure that no one around may be flying, or
is
getting prepared to fly, on the same channel
that
you are on. After this is confirmed, turn on
transmitter with antenna down. Next, turn on
receiver (switch on the plane). With airplane on the
ground and motor running, you should walk away
app
roximately 100 feet and still have full control of
all
functions. If this is not the case, do not fly! Call
Product Support at 1-877-504-0233.
• Always make sure that all controls are functioning
per
the transmitter input that you are giving. This
includes aile
rons, rudder, elevator, and throttle.
• Always make sure that you have fully-charged
Tx
batteries.
Always
remove the flight battery from the airplane
when
you are done flying, or when you are on the
way
to the flying field. The switch on the fuselage
is
for short-term use only (when you are at the field).
Leaving
the battery plugged in the airplane for an
extended
time could cause permanent damage to your
battery
(especially if you are using a Li-Po battery).
Flying
approved site, always avoid flying near houses, trees,
wi
res, and buildings. You should also be careful to
avoid
flying in areas where there are many people,
such
as busy parks or school yards. Always follow
local
ordinances. We recommend only flying your
Typhoon in light winds.
Prior to each flight:
• Always make sure that your Typhoon 3D PNP is properly
trimmed.
From time to time, it may be necessary to
re-trim your airplane. Simply turn on the radio system,
with the flight battery plugged into the battery port
and
check all control surfaces. Most trim changes
should be able to be made using the trim levers on
the transmitter. Greater changes will need to be made
by removing the clevis from the control horn and
turning in on the pushrod in the appropriate direction.
• Always make sure the receiver, ESC, and battery
are properly secured.
• Always verify the propeller is on securely.
• Always ensure the servo reversing switches on the
Tx
are set correctly.
• Always verify the dual rates switch is set at the level
whe
re you plan on flying. We recommend LOW
rates
for your initial flights. The Typhoon 3D PNP is
VE
RY maneuverable on high rates and requires a lot
of experience to handle properly.
Step 8
Step 9
Always choose a wide-open space to fly your ParkZone
Typhoon 3D PNP. It is ideal for you to fly at an AMA
sanctioned
flying field. If you are not flying at an AMA
Page 8

8
Horizon Hobby, Inc. guarantees this merchandise to be
free from defects in material and workmanship at the
date
of purchase. This warranty does not cover any
component
parts, or damage by use or modification.
In
no case shall Horizon Hobby’s liability exceed the
original
purchase cost of this item. Further, Horizon
Hobby
reserves the right to change or modify this
warranty
without notice.
This
warranty covers only those products purchased
from an authorized Horizon Hobby dealer. Third party
transactions
are not covered by this warranty. Proof of
pu
rchase is required for warranty claims. Due to the
natu
re and operation of your Typhoon™3D PNP™,
the
warranty does not extend beyond the initial
pre-use testing. Carefully check the parts and operation
BEFORE
your first use. If you discover defects during
pre-use testing, please call our Product Support Team
toll-f
ree at 1-877-504-0233 for technical support.
In
that Horizon Hobby has no control over the final
assembl
y, or material used for final assembly, no
liability
shall be assumed nor accepted for any
damage
resulting from use by the user of the final
user-assembled product. By the act of using the userassembled
product, the user accepts all resulting
liabilit
y. Please note that once assembly has been
sta
rted, you must contact Horizon Hobby, Inc. directly
regarding any warranty questions. Please do not
contact
your local hobby shop regarding warranty
issues.
This will enable Horizon to better answer
your
questions and service you in the event you need
warranty
assistance.
Horizon
Hobby, Inc. reserves the right to inspect any
and
all equipment involved in a warranty claim. Repair
or
replacement decisions are at the sole discretion of
Horizon
Hobby, Inc. Collateral damage is not covered
under
this warranty. If you, as the buyer or owner,
are not prepared to accept the liability associated
with
the use of this product, you are advised to return
it
immediately in new and unused condition to the
place
of purchase.
Typhoon 3D PNP, please contact our Product Support
sta
ff toll-free at 1-877-504-0233.
If
your plane requires inspection, please follow
these
steps in order to return it to us:
1.
Call our Product Support team for
return authorization.
Warranty and Follow-Up Procedures
2. Use the “Service and Repair Checklist” from
www.horizonhobb
y.com under the support tab or
write
a detailed letter that includes:
•
Your name, address, home phone number,
and daytime
phone number;
•
A list of the products being shipped for
inspection or
repair;
•
A detailed account of the type of problems
you
are incurring; and
•
The payment method you wish to use for
any pu
rchases or charges, including credit
ca
rd type, number, expiration date and your name
as
it appears on the card.
3.
Submit proof of purchase, including purchase date
and
retailer information.
4.
Make sure that the batteries are unplugged and
removed. Please use packing material to separate
them
from your Typhoon 3D PNP.
5.
Pack all components and accessories in the original
box, and then pack it in a sturdy box with packing
materials
for safe shipping.
6.
For inspection and/or repair, please ship your
product to:
Horizon
Service Center
Attn:
ParkZone Department
4105
Fieldstone Road
Champaign,
IL 61822
We suggest you ship your Typhoon 3D PNP via a carrier
that p
rovides package tracking and/or signature required.
Horizon
Hobby, Inc. is only responsible for product
once
it arrives and is accepted at our facility. Most
carriers
require optional insurance to cover damage or
loss
in transit, so please consider this when shipping
me
rchandise.
Warranty Service
Providing all warranty conditions have been met,
defective
parts will be repaired or replaced without
cha
rge and shipped to you via ground freight prepaid.
Again,
crash or other collateral damage or expense is
not
covered under warranty. Proof of purchase date and
location
is required for all warranty service.
Non-Warranty Service
If our inspection finds the repair cost exceeds $50 or
mo
re than 50% of the value of your product, we will
contact
you with a repair estimate and advise you of
the
available options.
If
you have any warranty questions that have not been
answe
red by the information listed above, please call
our
Product Support staff at 1-877-504-0233.
If
you have any questions concerning your ParkZone
Page 9

9
Replacement Parts
Make sure that you keep your Typhoon™3D PNP™ flying! Replacement parts are available at your local hobby shop or
from Horizon Hobby (www.horizonhobby.com). Please try your local hobby shop first. By supporting them, they will be
the
re when you need them.
Item #: Description: Retail:
PKZ1006 13.5 x 7 Propeller: Typhoon 3D $3.49
PKZ1007
12 x 8.75 Propeller: Typhoon 3D (Aerobatic) $3.49
PKZ4102
Decal Set: Typhoon 3D $4.99
PKZ4104
Prop Shaft with Hardware: Typhoon 3D $2.29
PKZ4107
Spinner: Typhoon 3D $2.29
PKZ4113
Canopy: Typhoon 3D $3.29
PKZ4114
Firewall with Screws: Typhoon 3D $2.19
PKZ4116
Brushless Motor with Pinion: Typhoon 3D $46.99
PKZ4117
Brushless Controller (20 Amp): Typhoon 3D $49.99
PKZ4120
Wing Set: Typhoon 3D $21.99
PKZ4121
Control Horns with Hardware: Typhoon 3D $4.99
PKZ4122
Pushrod and Clevis Set: Typhoon 3D $2.59
PKZ4123
Ailerons (2) with Parts: Typhoon 3D $9.99
PKZ4124
Vertical Tail with Parts: Typhoon 3D $9.99
PKZ4125
Horizontal Tail with Parts: Typhoon 3D $9.99
PKZ4126
Cowl: Typhoon 3D $2.49
PKZ4128
Gearbox with Pinion: Typhoon 3D $8.99
PKZ4130
Mini Servo (3W) with Arms: Typhoon 3D $12.99
PKZ1131
Servo Gear with Accessories $2.49
PKZ1519
1.8A Variable Rate DC Peak Charger $29.99
PKZ1027
10.8V 9-Cell Battery: P-51D, Typhoon 3D $32.99
Optional Parts
THP21003SPL Thunder Power 3S 2100mAh Li-Po Battery Pack $84.95
EFLC3005
Celectra™ 1- to 3-Cell Li-Po Charger $53.99
HBZ1083
Large Battery Connector $.79
HBZ1081
Charger Connector with Wire $1.00
PKZ4176
Instruction Manual: Typhoon 3D PNP $.99
PKZ4141
4-Channel Tx: CH 17, 72.130: Typhoon 3D $32.99
PKZ4142
4-Channel Tx: CH 19, 72.170: Typhoon 3D $32.99
PKZ4143
4-Channel Tx: CH 21, 72.210: Typhoon 3D $32.99
PKZ4144
4-Channel Tx: CH 50, 72.790: Typhoon 3D $32.99
PKZ4145
4-Channel Tx: CH 52, 72.830: Typhoon 3D $32.99
PKZ4146
4-Channel Tx: CH 54, 72.870: Typhoon 3D $32.99
PKZ4151
Rx: CH 17, 72.130: Typhoon 3D $28.99
PKZ4152
Rx: CH 19, 72.170: Typhoon 3D $28.99
PKZ4153
Rx: CH 21, 72.210: Typhoon 3D $28.99
PKZ4154
Rx: CH 50, 72.790: Typhoon 3D $28.99
PKZ4155
Rx: CH 52, 72.830: Typhoon 3D $28.99
PKZ4156
Rx: CH 54, 72.870: Typhoon 3D $28.99
PKZ4167
Bare Fuselage with Tube and Parts: Typhoon 3D $28.99
Page 10

PKZ4176
ParkZone products are distributed exclusively by
Horizon
Hobby, Inc.
4105 Fieldstone Road
Champaign,
IL 61822
©2005 Horizon Hobby, Inc.
www.parkzone.com
7899.1
6
0 5 4 8 2 14 5 5 3
1
 Loading...