

Page 1
ParkZone™products are distributed exclusively by
Horizon Hobby, Inc.
4105 Fieldstone Road
Champaign, IL 61822
© 2004 Horizon Hobby, Inc.
www.parkzone.com
6733
6733
PKZ1315
Charge-and-Fly™Park Flyer
FM Radio: 3 proportional channels
Battery: 7.2V 600mAh Ni-MH
Charger: DC peak detect
Wing Span: 46 in (1170mm)
Length: 36 in (930mm)
Weight: 15 oz (425 g)
Motor: 370 w/gearbox
6
05482 14180 9
Instruction Manual
Page 2
3
Slo-V Instruction Manual
Congratulations on your purchase of the ParkZone
™
Slo-V.™Your Slo-V has come with everything needed to
get you in the air –all in one box! You will only need to
attach the wing and tail, as well as charge the flight battery prior to taking flight.
We at ParkZone are committed to giving you the most
enjoyable flight experience you can have. In order to
have a safe and successful flight, we ask that you do
not fly until you have read these instructions thoroughly.
Your Slo-V comes with a fully proportional 3-channel
FM radio system with full control of throttle, steering,
and pitch. If you have not successfully flown one of
HobbyZone’s Zone 1 or 2 aircraft, or any other radio
controlled aircraft, we recommend that you seek the
help of an experienced radio control pilot during your
beginning flights.
Crash damage is not covered under the warranty!
Step 1
Step 2
Step 3
Step 4
2
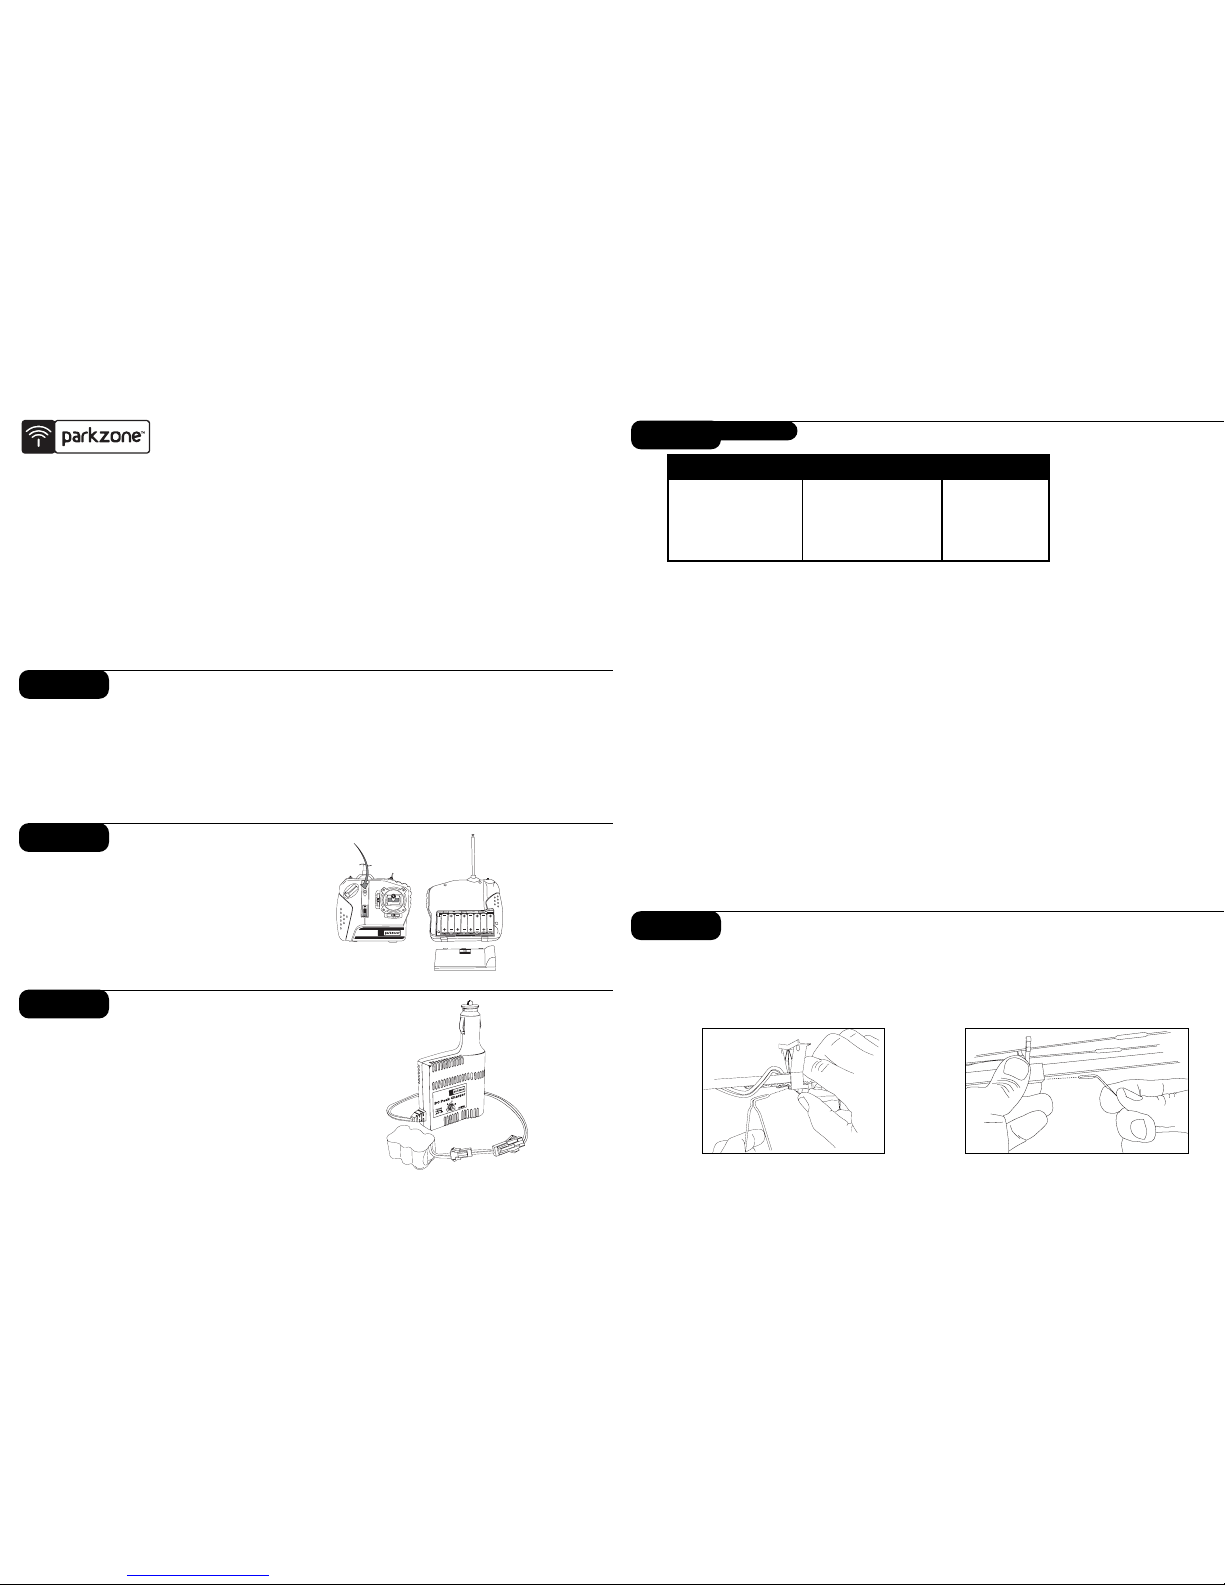
Charging the Aircraft Battery
Your ParkZone charger uses unique peak detection
circuitry that ensures an accurate charge every time and
protects your Ni-Cd and Ni-MH batteries from the dangers
of over-charging. During the charge cycle, it continuously
monitors the charge curve and automatically switches to
trickle charge when the peak is detected.
6V 300mAh Ni-MH .4 amps 40 minutes
4.8V—8.4V 600mAh Ni-MH
.8 amps 40 minutes
7.2V—8.4V 900mAh Ni-MH 1.2 amps 40 minutes
BATTERY CAPACITY
MAX. CHARGE RATE
CHARGE TIME
Note: Charge times are
estimates only for fully
discharged battery
pack. Actual charge
times may vary.
continued
DC Peak Detection Charger Features:
• Variable charge rate from 0.3–1.2 amps
• Trickle charge
• Uses automobile 12V power outlet
• Charges 4- to 7-cell Ni-Cd and Ni-MH
battery packs
• LED charge indicator
Charging the Aircraft Battery:
1. Using the dial on the side of the charger, select
the charge rate .8 amps
Battery Capacity: 7.2V 600mAh Ni-MH
Typical Charge Time: 40 minutes
2. Connect the battery pack to the charger using the
included adapter.
3. Connect the charger to the 12V power outlet in
your automobile. The LED will continually blink
while the battery charges.
4. Charging is finished when the LED indicator
glows steadily. You should also notice at this time
that the battery is warm to the touch.
Note: Although both the stock 6-cell 600mAh Ni-MH
(PKZ1021) and the high performance 7-cell 600mAh
Ni-MH (PKZ1025) battery packs perform well for indoor
and outdoor flying, please consider the following: When
flying in a small- to medium-sized gymnasium, use the
6-cell stock-pack. It is lighter in weight and also allows
your Slo-V
™
to fly slower. When flying outdoors the
7-cell pack offers more power for better loops and other
maneuvers, as well as adds nose weight to help in
light winds.
Note: Do not leave the charger and battery unattended
during the charge process. While charging, place the
battery on a heat resistant surface and constantly monitor the temperature of the battery pack. If the battery
becomes hot at any time during the charge process,
discontinue the charging immediately. Do not allow
children to charge battery packs without adult supervision.
Important: The Slo-V flight battery should be charged
shortly before flying. If you charge the battery 12 to
24 hours prior to flying, you should “re-peak” the
battery before you fly by repeating the charging steps.
Attaching Landing Gear
1. Locate the main landing gear and install it onto
fuselage where shown.
2. Install tail landing gear where shown. Your Slo-V
can now stand in order to attach the wing and tail.
Inspection of Contents
Carefully remove all contents, including the fuselage, tail, wing, radio, landing gear, and small parts bag.
Ensure no damage had been done to any of the contents. If you notice some damage that may have
occurred from shipping, immediately return it to the
place of purchase.
Transmitter
1. Insert 8 new “AA” batteries (supplied) into the
transmitter, observing proper polarity.
2. Turn switch on to ensure the batteries
have been installed correctly. Once this is confirmed, turn radio off.
Step 3
Page 3
Motor Test
1. Make sure the throttle slider is in the
“off” position.
2. Attach charged battery to fuselage with included
rubber band.
3. Turn on transmitter.
4. Plug in the flight battery.
5. Your Slo-V has a built-in throttle-arming feature
which needs to “see” the throttle slider in the off
position before it will spin the propeller.
(CAUTION: Make sure that you, as well as loose
clothing and hair, are away from propeller at all
times!) Advance the throttle forward and the
propeller will spin. The throttle-arming feature
will need to be activated each time the battery is
plugged into the airplane.
6. When finished with the motor test, continue to
the next step.
54
Step 7
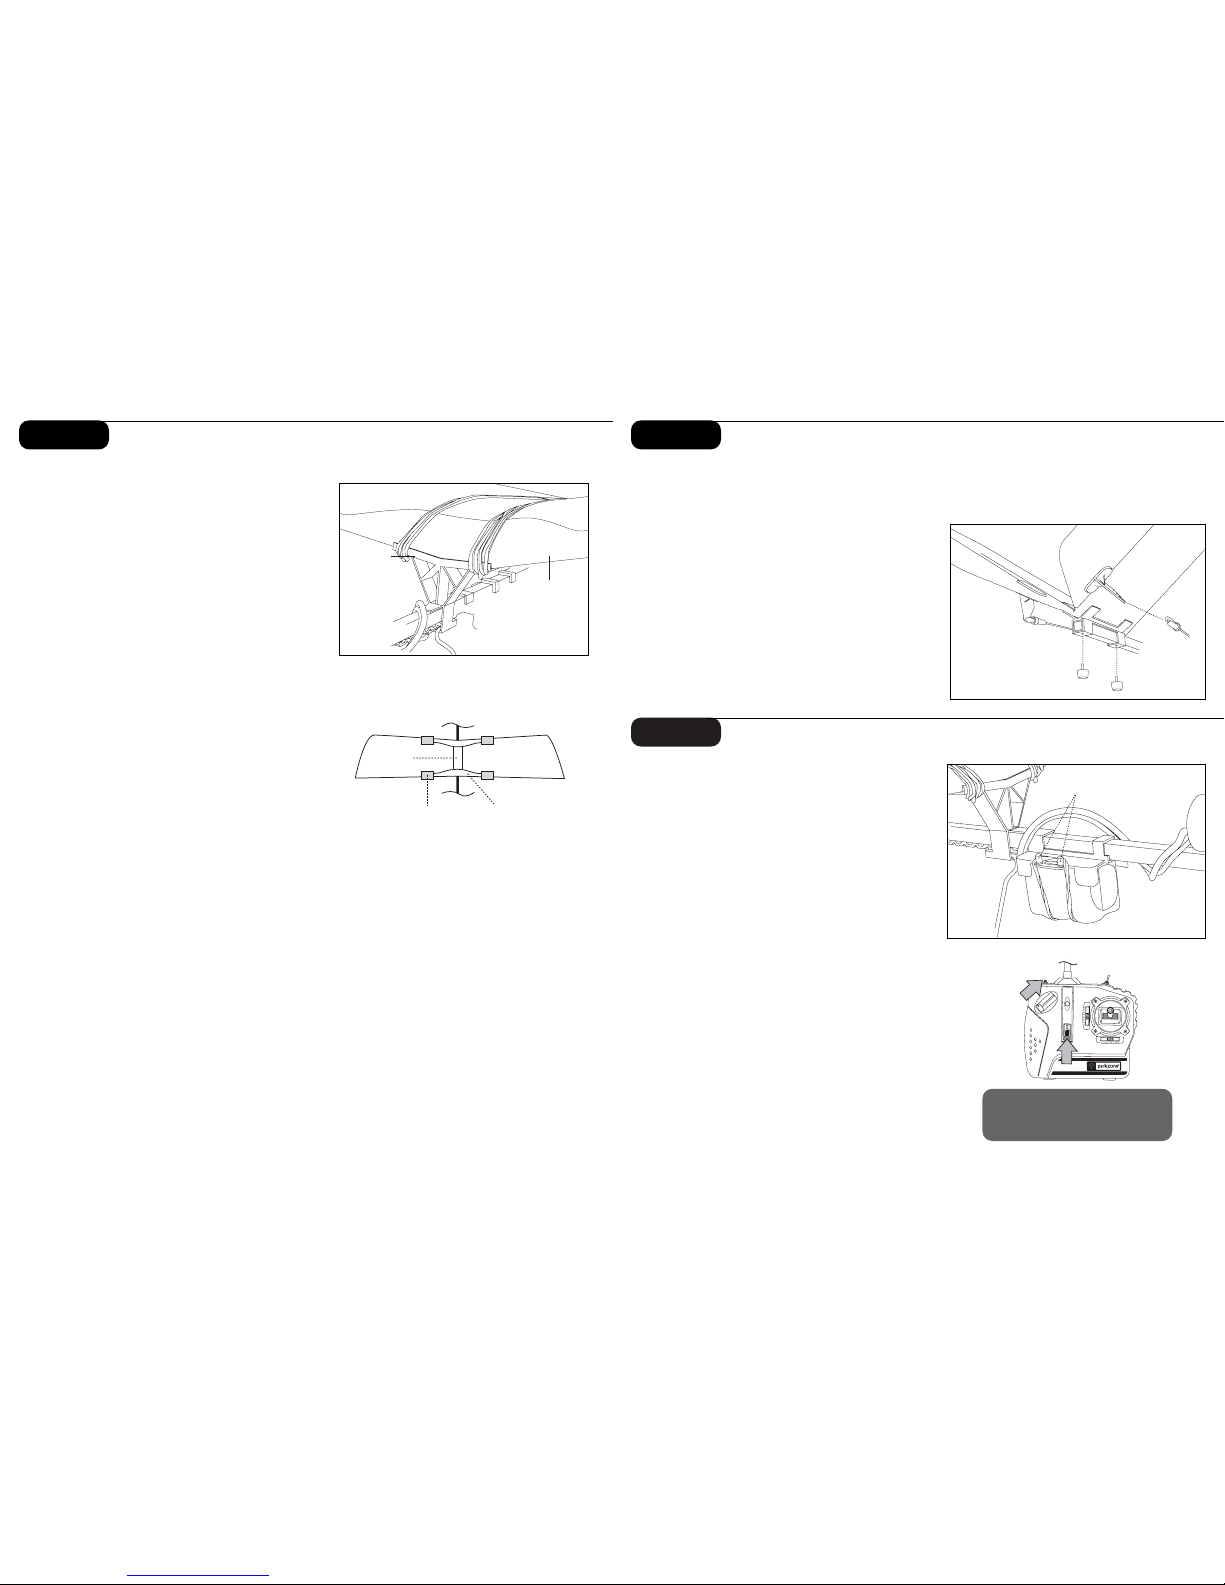
Attaching and Adjusting the Wing
1. Open wing bag carefully. Locate the included
braces that will secure the wing’s correct dihedral. One brace will be applied to the leading
edge and one to the trailing edge of the wing.
2. Unfold wing to see what the fixed dihedral will
look like. Trial fit both braces without removing
the paper from the tape on the braces.
Note: The brace for the leading edge will wrap
around the top and bottom of the leading edge.
3. Once you are pleased with what the fit will be,
peel the paper off of the tape from the leading
edge dihedral brace and carefully attach it to
the wing. Next, do the same with the trailing
edge brace.
4. Locate the four strips (100mm x 40 mm) of
transparent tape that have been supplied to help
secure the braces to the wing. Secure these on
the outer edges of both braces on the leading
edge, starting at the top of the wing and wrapping around the leading edge to the bottom of
wing. Do the same for the brace on the trailing
edge of the wing.
5. Use the supplied white tape (305mm x 30mm)
to re-enforce the center of the wing section.
Simply start at the leading edge of the middle of
the wing and attach all the way until you have
come to the trailing edge of the wing.
6. Place wing on top of fuse, resting it on the two
braces on the fuselage. One brace will hold the
leading edge, one will hold the trailing edge. You
can move the trailing edge brace in small increments as needed to allow the rear of the wing to
rest properly on the brace prior to securing it.
7. Secure the wing by using 4 rubber bands. Stretch
one rubber band from trailing edge brace post to
leading edge post of one side. Do the same for
the other side. Continue with the other two rubber bands so that a total of two rubber bands
secure each side of the wing.
Note: Your Slo-V comes equipped with an exclusive
adjustable wing position to allow you to optimize
your flying, whether indoors or outdoors. If you are
flying indoors, you may want to slide the wing a
little further to the front, allowing your Slo-V
™
to fly
just a bit more tail-heavy and slower. When flying
outdoors, you may want to slide the wing slightly
back toward the tail, allowing the plane to be a little
nose-heavy, faster, and more stable and predictable
in light wind.
Adult Supervision Required
WARNING: Keep everything clear of the propeller and
hold the plane securely. A moving propeller can cause
severe injury.
ON
OFF
Step 5 Step 6
Attaching the Tail
1. Remove 2 thumb screws from plastic parts bag.
2. Locate the tail of Slo-V.
™
3. Making certain the black V-shaped bracket is on
the top of the tail, and the control horns are on
the bottom of the tail, rest it on the fuse where it
will be set. This will allow you to visually see
where the holes of the fuse and the holes of the
tail and bracket will match in order to secure the
tail with the thumb screws.
4. Enter thumb screws from the bottom and tighten
until tail is secured.
5. Taking notice that the pushrods cross each other,
open up the clevis on one side of the pushrod
and attach to tail at the bottom hole of control
horn. Snap clevis shut and secure after this is
done. Repeat for other side.
6. You may have to trim the tail prior to flight.
Wing Bracket
(front)
Wing Brace
Top of Wing
Transparent Tape
White Tape
Wing Brace
Rubber Band Posts
Page 4

76
Step 9
Mode Change Flight Control™ System
Your Slo-V comes with the ability to change flight
modes as you gain more experience and become more
familiar with it. There are two modes that are selectable
from the transmitter that you can choose for flying.
Mode A (Low Rate): Mode A is recommended for
beginning your flight. The tail control travel will be limited in this mode, allowing you to become more familiar
with your Slo-V. The switch on the top of your transmitter is at the “back” position when you are in Mode A.
Mode B (High Rate): Mode B no longer limits your
travel. This mode is ideal for flying indoors (where you
have limited space), as well as for all combat and other
outrageous flying maneuvers. However, your Slo-V may
be much easier to crash as well in this mode. The transmitter switch will be in the “front” position when you
are in Mode B.
Step 12
Range Test
You will need two people to perform the range test:
one to hold the plane and the other to give input to
the transmitter.
Warning: The person holding the plane should be sure
the propeller does not come into contact with any part
of their clothing or body.
1. One person holds the transmitter, while the other
person walks 100 paces away with the airplane.
2. Be sure the throttle slider is in the “off” position.
3. Extend the transmitter antenna completely and
turn the transmitter on.
4. Plug the airplane battery into the fuselage.
5. As soon as the throttle slider is advanced, the
propeller should spin quickly.
6. As the first person moves the transmitter controls
at the same time, the other person watches to be
sure the airplane’s motor and tail controls operate
smoothly.
Step 10
Choose a Location
•A large, open grass field is ideal for flying your Slo-V.
™
• Make certain that you do not fly near trees, buildings,
or other areas that can restrict your view or interfere
with your flying.
• An accomplished pilot can also fly the Slo-V in a large
gymnasium or similar building.
Note: Flying indoors is recommended only for advanced
pilots, as the smaller area obviously makes piloting the
Slo-V more difficult.
Step 11
Choose a Calm Day
You want to fly! However, you need to make sure
that you fly in the conditions that will allow you to have
the best success. This is when there is little to no wind
(less than 5 mph).
To Check Wind Conditions:
1. Tie the included red ribbon to the transmitter
antenna
2. Hold the transmitter antenna so that it is parallel
to the ground and note how much the ribbon
moves in the wind. If the ribbon hangs down,
conditions are right to fly. However, if the angle
between the antenna and the ribbon is less than
30 degrees, it is too windy to fly.
300 feet
Fly in this area
(upwind of pilot)
stand here
30º
100 paces
Mode Switch
Step 8
Tail Control Test
Warning: Keep everything clear of the propeller before
starting the control test in the event that the motor is
accidentally engaged.
Your Slo-V
™
uses a V-tail to provide directional control. The V-tail functions as both rudder and elevator.
To test the tail to ensure it functions correctly, simply
follow these steps:
1. With the transmitter stick at neutral and both trim
levers centered, the control surfaces of the tail
should be at neutral. If this is not the case, you
can make small adjustments to the trim levers. If
these changes are not sufficient (with the stick
and trim levers at neutral), you can remove
the clevis from the control surface on bottom of
tail and turn clevis in or out as needed to move
the control surface back to neutral.
2. Give the transmitter full right on the stick. The left
tail control surface should deflect upward while
the right one deflects downward.
3. Give the transmitter full left on the stick. The right
tail control surface should deflect upward while
the left one deflects downward.
4. Pull back on the stick and both control surfaces
should deflect upward.
5. Push up on the stick and both control surfaces
should deflect downward.
If you encounter any problems with your Slo-V
responding properly to the transmitter, do not fly. Call
Horizon Hobby Product Support at 1-877-504-0233.
Page 5

Flying
1. After launching, your Slo-V™should climb at full
throttle. Keep the throttle full on until you have
reached an altitude of about 30 ft. At this same
time, make sure that you are continuing to keep
the airplane directed into the wind.
2. Make right and left adjustments as necessary to
keep the plane headed directly into the wind.
3. After you have reached approximately 30 ft. of
altitude, you can begin to make directional
changes that you desire.
4. Remember: Control range is 2,500 ft.
Do not allow the plane to get too far away from
you. When the plane is further in the air it is
harder to see and the winds are stronger.
5. Always keep the plane upwind from you. This
way, the airplane will not be carried away from
you by the wind.
6. Flying in too much wind is by far the number
one reason for those who are inexperienced to
crash or have fly-aways.
Do not fly if the wind is more than 5 mph.
Sharp Turns
In order to make a sharper turn, move the stick
in the desired direction and add some up elevator
(pull back on stick). The plane will make a sharper
banking turn.
7. Avoid holding the stick full right or left for more
than two seconds, as this will cause the plane to
enter a spiral and could threaten your Slo-V.
8. Do not try to climb too fast by pulling all the
way back on the stick (up elevon), or your plane
may enter into a stall.
9. Damage/bends to the wings or tail can greatly
affect flight control. Replace the damaged parts
immediately.
Note: With the throttle slider set at low or off
(gliding), the plane will not turn as fast as when
you are flying at or near full throttle.
98
Step 16
Sharp Turn
Throttle
Lever
Off
Full
On
Elevator Trim
Rudder Trim
Step 14
Hand Launching Your Slo-V
1. Turn on transmitter.
2. Install and plug in aircraft battery.
3. Place your fingers of your launching hand just
behind the servos on the fuselage.
4. With the power full on, firmly throw your Slo-V
level and directly into the wind
(if flying outdoors).
5. Keep steering into the wind and hold at full
throttle until you have reached an altitude of at
least 30 feet.
7. When you have reached this safe altitude, it is
safe to steer in the desired direction as well as
adjust the throttle input to help control altitude
and speed.
wind
Step 15
Runway Takeoffs
1. Make certain aircraft battery is fully charged.
2. Select a smooth wide area from which to take to
the sky. New asphalt or concrete is ideal.
3. Turn on transmitter.
4. Install and plug in flight battery.
5. Stand behind your Slo-V.
6. Making certain that nothing will be in your path,
give the airplane full throttle. As you feel the tail
wanting to rise, slowly pull back on the stick
to allow the elevator to help give you the lift
necessary. You should be able to leave the runway within 20 feet.
Do not pull back too far on the stick, as it can
cause your Slo-V to stall and crash.
7. Keep steering into the wind and hold at full
throttle until you have reached an altitude of at
least 30–40 feet.
8. When you have reached this altitude, it is safe to
steer in the desired direction, as well as adjust
the throttle input to help control altitude, and
speed input to help control altitude and speed.
Step 13
Seek Assistance from an Experienced
Radio Control Pilot
VERY IMPORTANT: The 3-channel control system is
designed for the experienced radio control pilot and is
not intended for the first time flyer. If you have successfully flown the Zone 2 or 3 HobbyZone airplanes, then
you should be ready for the ParkZone™ Slo-V. However,
first-time pilots of the Slo V should seek the assistance
of an experienced RC flyer.
Crash damage is not covered under the warranty.
Page 6

Landing Your Slo-V
When you begin to notice that your Slo-V™no longer
climbs well under full power (normally after approximately 12–15 minutes), the battery is getting low and it
is time to land. Bring in your Slo-V, directly into the
wind and toward the desired landing spot. Gradually
reduce throttle to reach an altitude of approximately 5
feet).
At this point, reduce thottle even more and your Slo-V
should glide in softly for a landing.
Expert Tip: As you get better and more experienced at
flying, try adding a bit of “up” elevator just prior to
landing to “flare” the plane. With some practice, your
landings should become smooth and on target.
WARNING: Do not attempt to catch the airplane or
injury may occur. Remember, there is a spinning propeller on the plane that can cause injury! Also, be sure
to cut power to the motor right before you land to
prevent damage to the propeller.
1110
Reduce power at 5 feet.
Step 18
Using Elevator
Your Slo-V™is equipped with a third channel for elevator (pitch control). Pulling back on the stick provides
up elevator. This allows for shorter takeoffs, better
flares for landing, better climb rates, and more effective
turns. However, pulling too far back on the elevator to
climb too quickly could cause the airplane to enter a
stall (make the nose of the plane come down). To avoid
crashing from a stall, always maintain enough altitude
to recover.
Just after a stall has occurred, the nose of the airplane will fall and the plane will look like it is diving. To
pull out of a stall, simply pull back slowly on the stick
(partial up elevator) once your Slo-V has built up airspeed. Remember, pulling back too quickly or for too
long will once again cause the airplane to enter a stall.
Effectively avoiding and recovering from stalls requires
experience. Always seek the help of an experienced
radio control pilot if you are not familiar with pitch control. Failure to do so, could result in a crash and significant damage to your airplane.
Step 19
Full
Throttle
Full
Throttle
Approx. 50% Throttle
Reduced
Throttle
Step 17
Throttle Adjustment
1. Climb to an altitude of 50 feet or more with
full throttle.
2. To achieve and maintain a level “cruising” altitude, reduce the power by moving the throttle
slide down to approximately 50% of full-on. The
thottle slide is proportional, so you can add or
reduce throttle in small increments as needed to
maintain the altitude that you desire.
3. To reduce altitude, reduce throttle
4. To increase altitude, increase throttle.
Step 21
Step 20
Auto Cut-Off
When your flight battery gets low enough, this feature will automatically shut off the motor and save
enough battery for the radio and tail control so you can
land safely. If you are high enough and have some time
to rest the battery, you may re-arm the motor by moving the throttle slider to off and then advancing it again.
This may give you an extra bit of power to adjust your
landing. Do not re-arm more than once or twice, or you
may lose your control power.
Aerobatic Flight
Your Slo-V comes out of the box with the controls
set for softer responses and at the outer holes of the
control surfaces. However, once you get used to the
flight characteristics and want to perform more aerobatic maneuvers you can change the amount of throw
that is permitted by moving to the inner holes of the
control horns.
After making any adjustments, always turn on the transmitter and center the transmitter trim levers, making
sure the control surfaces are adjusted evenly.
Note: By making these changes, you will make the controls much more responsive. This makes the airplane
much less forgiving and easier to stall. Remember,
crash damage is not covered under the warranty.
Page 7

1312
Warnings and Safety
Success Tips
1. Read and follow this manual completely, observing all
instructions and safety directions. Otherwise, serious
injury and damage can occur.
Think safety first.
2. Keep propeller away from body parts, even when it
isn’t spinning, as it could be turned on accidentally.
Beware of hair becoming entangled in the propeller,
especially while launching the Slo-V.
™
3. Do not fly when it’s too windy or you may lose control
and crash, causing injury or damage. Never fly near
people, vehicles, train tracks, buildings, power lines,
water, hard surfaces or trees. Never allow any one to
attempt to catch the airplane while it’s in flight or
serious injury can result.
4. Adult supervision is recommended for ages 14
and under.
5. Battery charging: Only use a battery charger intended
for use with the flight battery. Never leave charger
unattended while charging, to help prevent overcharging. Place the battery on a heat resistant surface;
do not lay it on carpet or upholstery while charging.
6. Never cut into the battery charger or airplane wires or
serious injury can occur. Causing the battery to “short
out” (crossing negative and positive bare wires) can
cause fire, serious injury and damage.
7. Hold the plane securely, and keep all body parts away
from the propeller when the flight battery is plugged
in. When you finish flying the Slo-V, always unplug
the battery before you turn off the transmitter.
8. Never fly on the same frequency as another RC
vehicle in your area. The frequency of the Slo-V is
shown on stickers on the back of the transmitter.
1. Don’t fly in winds over 5 mph! First-time pilots
should get help from an experienced radio control
pilot during first flights.
2. Choose your flying field carefully–grass and soft
ground with 300-foot diameter is optimal to fly the
Slo-V. Make sure there are no obstacles that will get
in your way when flying, such as trees or buildings.
Make sure you do not fly where there are pedestrians
who could be hurt by the airplane.
3. Remember that holding the right stick full over for
too long can cause the airplane to spiral dive and
crash. At the very first sign of the Slo-V beginning
to spiral down, immediately release the stick, and
give the opposite turn to pull out of the spiral. After
this is done and you once again have control of the
Slo-V, pull back on the elevator to level flight and
level the wings.
4. Don’t attempt to fly or do maneuvers beyond your
flying abilities without seeking the assistance of an
experienced pilot.
5. If you’re gliding with the motor off, allow the Slo-V
more area for turns.
6. Position yourself at your flying field to keep the sun
at your back and out of your eyes. Wear sunglasses
on bright days.
7. Keep the Slo-V upwind, especially on windy days, to
prevent it from “flying away.” The wind is normally
stronger at higher altitudes than it is on the ground.
8. Keep your plane in front of you so you don’t have
to turn in circles as you fly. Try to avoid flying
directly overhead.
9. Do not attempt to fly indoors until you have become
very accomplished at flying your Slo-V outdoors.
Step 23
Repairing Minor Damage
If you happen to crash and part of the tail or wing
breaks, it can be repaired by using packing tape to
cover the missing pieces. See this manual for a complete list of replacement parts for your Slo-V.
X-Port
Your Slo-V
™
comes equipped with HobbyZone’s
exclusive X-Port
™
feature. This allows you to add the
Sonic Combat Module™(HBZ4020) to your Slo-V for
incredible aerial combat. With the SCM, you can engage
in aerial combat with other X-port equipped aircraft.
When you successfully “hit” another person’s SCM
equipped aircraft, a high pitched sound is emitted. This
signals their motor is disabled for approximately 10
seconds, while they maintain the ability to steer. This
will allow them the opportunity to make a safe landing
or position themselves to counter-attack.
Simply attach the SCM on the designated space on the
bottom of the fuselage. The firing button is at the top
of the transmitter. When the button is pushed, a highpitched sound will be heard signaling the SCM has
been activated.
The Aerial Drop Module
™
(HBZ6023) attaches to the
exclusive X-port tray that has been included with your
Slo-V. Simply plug-in the ADM and then attach it to the
clip on the bottom of the X-port snap-on tray. The ADM
will allow you to drop either streamer bombs or a parachute jumper, all of which are included in the ADM.
Step 22
Page 8

1514
Item Description Retail
PKZ1302 Decal Sheet: Slo-V 4.99
PKZ1304 Prop Shaft w/gear: Slo-V 2.29
PKZ1306 Landing Gear Set: Slo-V 5.49
PKZ1310 Rubber Bands (6): Slo-V 0.99
PKZ1314 Carbon Fuselage w/tray: Slo-V 10.99
PKZ1316 Motor w/pinion: Slo-V 9.99
PKZ1318 Wing & Pushrod Bracket (3): Slo-V 4.99
PKZ1320 Wing Kit: Slo-V 14.99
PKZ1322 Pushrods w/clevis (2): Slo-V 2.59
PKZ1324 Tail Set: Slo-V 8.99
PKZ1326 Tail Mount Set: Slo-V 1.49
PKZ1328 Complete Gear Box: Slo-V 6.99
PKZ1251 ESC/RX: CH 1: F-27, Slo-V 29.99
PKZ1252 ESC/RX: CH 2: F-27, Slo-V 29.99
PKZ1253 ESC/RX: CH 3: F-27, Slo-V 29.99
PKZ1254 ESC/RX: CH 4: F-27, Slo-V 29.99
PKZ1255 ESC/RX: CH 5: F-27, Slo-V 29.99
PKZ1256 ESC/RX: CH 6: F-27, Slo-V 29.99
PKZ1003 Propeller w/spinner: Slo-V 4.29
PKZ1025 7.2V 600mAh Ni-MH Battery: Slo-V 23.99
HBZ1026 DC Peak Charger (1.2 Amp) 19.99
HBZ1027 Peak Detect Plug Adapter 1.79
PKZ1130 Mini Servo (5W)w/arms: F-27,J-3, Slo-V 9.99
PKZ1241 TX: CH 1, 26.995: F-27, Slo-V 32.99
PKZ1242 TX: CH 2, 27.045: F-27, Slo-V 32.99
PKZ1243 TX: CH 3, 27.095: F-27, Slo-V 32.99
PKZ1244 TX: CH 4, 27.145: F-27, Slo-V 32.99
PKZ1245 TX: CH 5, 27.195: F-27, Slo-V 32.99
PKZ1246 TX: CH 6, 27.255: F-27, Slo-V 32.99
HBZ1058 TX Antenna 4.99
HBZ6057 TX Battery Cover 2.50
Optional Parts:
ParkZone
™
offers some optional parts to give you the best performance possible.
See your retailer for the following parts:
HBZ4020 Sonic Combat Module 23.99
HBZ4025 Stealth Target w/sensor 23.99
HBZ6023 Aerial Drop Module 19.99
HBZ6513 Alligator Clip: 12V Lighter Adapter 3.99
PKZ1021 8.4V 600mAH Ni-MH Battery: J-3, Slo-V 24.99
Due to the nature and operation of this product, the
warranty does not extend beyond the initial preflight
testing. Carefully check the parts and operation BEFORE
your first flight.
Damage incurred during flying, landing, crashing or
modification is not covered under the warranty.
Warranty: Horizon Hobby, Inc. guarantees this product
to be free of defects in material and workmanship. If you
discover defects during the very first preflight testing,
please call our Product Support staff toll-free at 1-877504-0233. If you are directed by them to return the
product to our Service Center, you will be provided with
a RA (Return Authorization) number. If, in our opinion,
after inspecting the product, we determine it to be defective, we will repair or replace it at our discretion.
If you are directed by our Product Support staff to return
the airplane, please follow these instructions:
1. Unplug the battery from the airplane.
2. Pack the complete Slo-V
™
(all components in the
original box) and put into a sturdy shipping carton
for protection.
3. Include your complete name and address information inside the carton, as well as clearly writing
it on the outer label/return address area. Include
detailed information explaining the nature of the
problem(s) encountered.
4. Please date your correspondence and be sure
your complete name, address and daytime phone
number appear on this enclosure. Please include
your original dated sales receipt.
Mail to the address below.
Horizon Service Center
Attn: ParkZone Dept.
4105 Fieldstone Rd.
Champaign, IL 61822
Warranty and Follow-Up Procedures
Unit does not operate
1. Transmitter “AA” batteries are depleted
or installed incorrectly,
indicated by a dim or unlit LED on
transmitter or the low battery alarm.
2. No electrical connection.
3. Flight battery not charged.
1. Check polarity installation or replace
with fresh “AA” batteries.
2. Push connectors together until they
“click.”
3. Charge battery fully.
Aircraft keeps turning in
one direction
1. Tail control surfaces not set up correctly.
2. Wing is not centered.
1. Review control surfaces.
2. Center wing prior to each flight.
Aircraft will not climb 1. Battery is not fully charged.
2. Tail needs adjusting.
1. Charge battery fully shortly before flying.
2. Adjust tail screws or trim levers.
Aircraft keeps
pitching up steeply
1. Wind is too gusty or strong. 1. Postpone flying until the wind calms
down.
PROBLEM
POSSIBLE CAUSE
SOLUTION
Troubleshooting
Replacement Parts
Make sure that you keep your Slo-V™in the air. Replacement parts are available at your local hobby
shop or from Horizon Hobby (www.horizonhobby.com). Please try your local retailer first.
By supporting your local hobby store, they will be there when you need them!
Aircraft is difficult
to control
1. Wing or tail may be creased or damaged. 1. Replace or repair.
 Loading...