

Page 1

SciLog® SciPres
®
Pressure Monitor & Sensor
Installation, Operating & Maintenance Instructions
Page 2

SciLog® and SciPres® are registered trademarks of Parker Hannifin Corporation.
Parker domnick hunter has a continuous policy of product development and although the Company reserves the right to change
specification, it attempts to keep customers informed of any alterations. This publication is for general information only and
customers are requested to contact our Process Filtration Sales Department for detailed information and advice on a product’s
suitability for specific applications. All products are sold subject to the company’s Standard conditions of sale.
2
Page 3

Contents
Maintenance & Cleaning .............................................................................................................. 7
SciPres® Specifications - Monitor ............................................................................................... 8
SciPres® Specifications - Sensors .............................................................................................. 9
SciDoc Documentation Software for PC ................................................................................... 10
Part A: SciPres® Pressure Sensor Hardware............................................................................ 11
1.0 Overview ................................................................................................................................ 11
2.0 Front Panel: Data Entry & Display ....................................................................................... 12
3.0 Back Panel: Interface Options ............................................................................................. 13
4.0 Pin Out of the DB25 Female ‘Output’ Connector ................................................................. 14
5.0 Single-Use Pressure Sensors .............................................................................................. 16
Part B: SciPres® Pressure Sensor Monitor Software ............................................................... 17
1.0 Software Overview ................................................................................................................ 17
2.0 Main Menu ........................................................................................................................... 18
3.0 Custom Calibration ............................................................................................................. 20
4.0 Reduced Pump Pulsation: Improved Sensor Precision .................................................... 22
5.0 SciPres® Pressure Sensor Printout Format ...................................................................... 23
Part C: SciPres® Data ................................................................................................................. 24
1.0 Data Collection .................................................................................................................... 24
1.1 SciPres® SciDoc Data Collection Software ......................................................................... 24
1.2 PC Terminal Program Settings ........................................................................................... 28
3
Page 4

Precautions
READ this manual BEFORE operating or servicing this equipment.
FOLLOW these instructions carefully.
SAVE this manual for future reference.
DO NOT allow untrained personnel to operate, clean, inspect, service or tamper with
this equipment.
ALWAYS DISCONNECT this equipment from the power source before cleaning or
performing maintenance.
Contact Parker domnick hunter for parts, information and service.
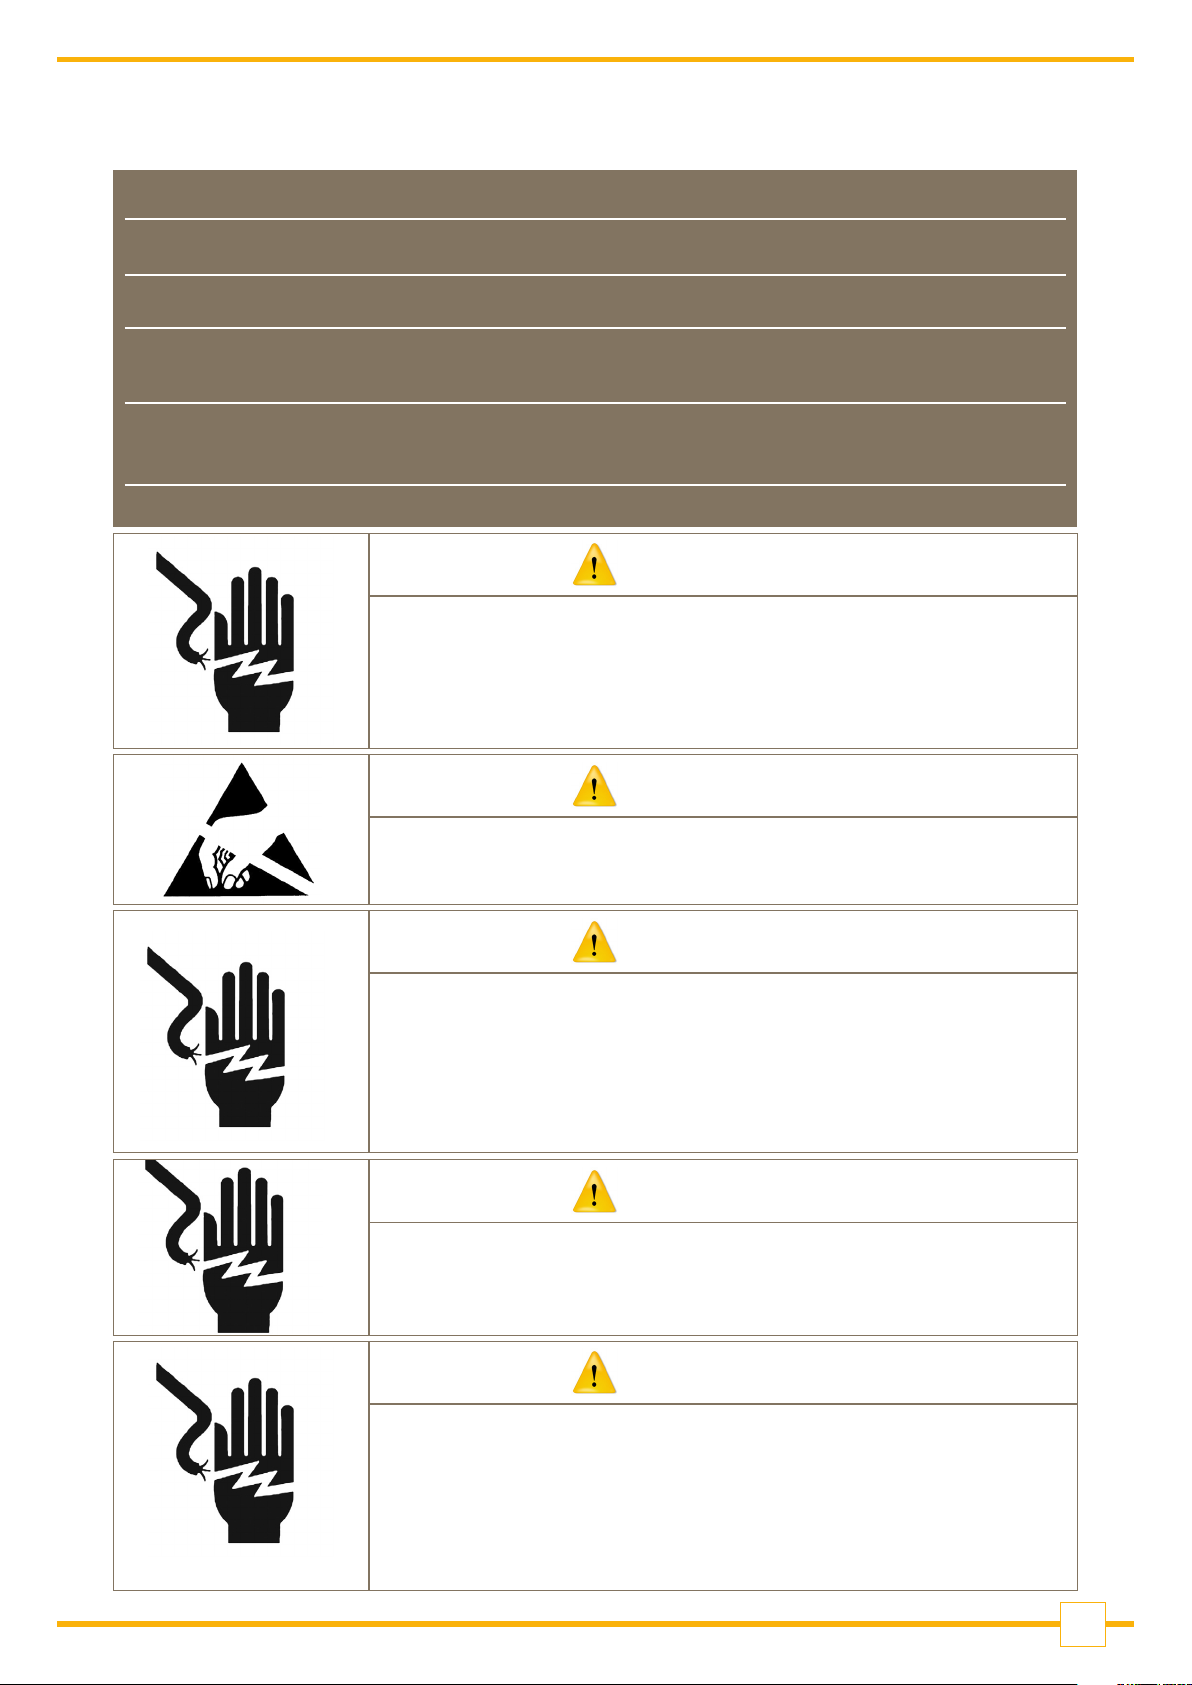
WARNING
DISCONNECT ALL POWER TO THIS UNIT BEFORE
INSTALLING, SERVICING, CLEANING OR REMOVING
THE FUSE. FAILURE TO DO SO COULD RESULT IN
BODILY HARM AND/OR PROPERTY DAMAGE.
CAUTION
OBSERVE PRECAUTIONS FOR HANDLING
ELECTROSTATIC SENSITIVE DEVICES.
WARNING
ONLY PERMIT QUALIFIED PERSONNEL TO SERVICE
THIS EQUIPMENT. EXERCISE CARE WHEN MAKING
CHECKS, TEST AND ADJUSTMENTS THAT MUST BE
MADE WITH POWER ON. FAILING TO OBSERVE THESE
PRECAUTIONS CAN RESULT IN BODILY HARM.
WARNING
FOR CONTINUED PROTECTION AGAINST SHOCK
HAZARD, CONNECT TO PROPERLY GROUNDED
OUTLET ONLY. DO NOT REMOVE THE GROUND PRONG.
CAUTION
USE ONLY CLASS 2 LISTED AC/DC POWER SUPPLIES
WITH THIS DEVICE.
Parker domnick hunter # 070017TOR, OR ITS
EQUIVALENT IS RECOMMENDED.
4
Page 5
Précautions
LISEZ ce manual AVANT de faire fonctionner ou d’entretenir cet équipment.
SUIVEZ attentivement ces instructions.
CONSERVEZ ce manuel pour future référence.
NE LAISSEZ PAS du personnel non qualifié utiliser, nettoyer, inspecter, entretenir, réparer
ou manipuler cet équipement.
DÉBRANCHEZ TOUJOURS cet équipement de la source de courant avant de nettoyer ou
d’exécuter l’entretien.
APPELEZ PARKER pour pièces détachées, renseignements et entretien.
ATTENTION
DÉBRANCHEZ TOUT COURANT DE CETTE UNITÉ AVANT DE FAIRE
L’INSTALLATION, D’EFFECTUER L’ENTRETIEN, LE NETTOYAGE OU
AVANT DE RETIRER LE FUSIBLE. NE PAS OBSERVER CES
PRÉCAUTIONS RISQUERAIT DE CAUSER DES BLESSURES
CORPORELLES OU/ET D’ENDOMMAGER L’ÉQUIPEMENT.
PRUDENCE
SOYEZ PRUDENT LORSQUE VOUS MANIPULEZ DES
APPAREILS SENSIBLES À L’ÉLECTROSTATIQUE.
ATTENTION
AUTORISEZ SEULEMENT LE PERSONNEL QUALIFIÉ À ENTRETENIR
CET ÉQUIPEMENT. SOYEZ PRUDENT LORSQUE DES VÉRIFICATIONS,
TESTS ET AJUSTEMENTS DOIVENT ÊTRE EFFECTUÉS SOUS TENSION.
NE PAS OBSERVER CES PRÉCAUTIONS RISQUERAIT DE CAUSER DES
BLESSURES CORPORELEES.
ATTENTION
POUR ASSURER UNE PROTECTION CONTINUE CONTRE UNE DÉCHARGE
ÉLECTRIQUE, BRANCHEZ UNIQUEMENT SUR UNE PRISE CORRECTEMENT RELIÉE Á LA TERRE. NE RETIREZ PAS LA FICHE DE TERRE.
PRUDENCE
UTILISEZ UNIQUEMENT LA CLASSE 2 CI ALIMENTATIONS AC /
DC AVEC CET APPAREIL .
Parker domnick hunter # 070017TOR, OU SON ÉQUIVALENT
EST RECOMMANDÉ.
5
Page 6

Introduction
You will find the SciPres® pressure sensors easy to use. The state-of-the-art hardware and
software design of the SciPres® pressure sensor and monitor combination allows you to measure
and document the pressure of many filtration / separation processes. With proper maintenance,
the SciPres® pressure monitor will provide many years of excellent service and performance.
Please read the following instructions carefully!
Inspections: Remove the products carefully from the shipping container. Check the contents against
the purchase order to verify that all parts are included and undamaged.
Please do the inspection now, even if the products are not used immediately. Many carriers must
receive damage claims within seven days of delivery. Please retain all packing material so unit may
be shipped safely, if necessary.
Customer Service: Parker domnick hunter customer service: If assistance is required, please contact
us at:
Parker Hannifin Manufacturing Ltd Parker Hannifin Corporation
Parker domnick hunter Parker domnick hunter
Process Filtration - Europe Process Filtration - North America
Durham Road 2340 Eastman Avenue
Birtley, Co. Durham Oxnard, California, USA 93030
DH3 2SF, England toll free: 877 784 2234
phone +44 (0)191 4105121 phone: +1 805 604 3400
fax +44 (0)191 4105312 fax: +1 805 604 3401
email: dhprocess@parker.com email: dhpsales.na@parker.com
www.parker.com/dhpharma www.parker.com/dhsingleuse
Parker domnick hunter customer service personnel will be able to serve you more efficiently if you
have the following information:
• Serial number and model name of the equipment
• Installation procedure being used
• Concise list of symptoms
• List of operating procedures and conditions in use when problem arose
Calibration
The SciPres® monitor is a calibrated device, and is calibrated with test equipment that is traceable to NIST.
A Calibration Certificate is included with each unit, and has a one year expiration date.
It is highly recommended that the monitor be calibrated on an annual basis or more often if your
Metrology Department deems it necessary.
Parker domnick hunter provides this Calibration Service, complete with a new certificate, showing the
“as found” and “as left” data.
Contact your local Parker domnick hunter representative.
6
Page 7

Warranty
Country specific information can be found at: www.parker.com/termsandconditions
Standards
The SciPres® monitor and sensor conform
to the following standards:
• EN 61326-1:2006, Class B
• EN 6100-3-2:2006
• EN 6100-3-3:1995 +A1:2001 +A2:2006
• EN 61010-1 Issued: 2001/03/01
• UL 61010-1 Issued: 2004/07/12 Ed.2
• And is certified to: CAN/CSA-C22.2 No 61010-1 Ed.2
Caution: The maximum recommended pressure for the sensors is 60 psi.
If this is exceeded, problems with leakage and functionality can occur.
Installation & Start Up
Installation of the SciLog® SciPres® monitor must be carried out only by trained personnel in
accordance with the relevant regulations and this operations manual.
Make sure that the technical specifications and input ratings of the SciPres® pressure sensor are
observed. See “SciPres® Pressure Sensor Specifications”.
The protection provided by this equipment may be impaired if the SciPres® pressure sensor is used in
a manner inconsistent with this manual or for purposes not specified by the manufacturer.
Maintenance & Cleaning
The SciPres® pressure monitor is maintenance free. The single-use SciPres® sensors come
pre-calibrated from the factory and require no maintenance.
To remove dust, dirt and stains, the outer surfaces of the SciPres® pressure monitor may be wiped
using a soft, non-fluffing cloth moistened with water. If required, you may also use a mild detergent
or 2-propanol.
The single-use sensors may be sanitized with 0.1 Molar NaOH, or 2-propanol. They may be
autoclaved up to 2 times, or gamma-irradiated with exposure up to 45 kGy.
7
Page 8

Hardware
Specifications - Monitor
Electrical
Dimensions
Weight
Enclosure
Power
Operational
Range
Sensor
I/O Port - 1
I/O Port - 2
I/O Port - 3
I/O Port - 4
I/O Port - 5
W: 6.0¨ (15.2 cm); Height 2.75¨ (7.0 cm); D: 5.5¨ (14.0 cm)
1.5 lb (0.69 Kg)
Molded Plastic / Stainless Steel
110-120 or 220-240 V , 60/50 Hz AC Adaptor, 12 VDC, 500 ma Output,
Centre positive. Use only Class 2 listed AC/DC power supplies.
6 to 60 ° C, 100% Humidity.
3
/4” Tri-Clover (TC) Sanitary and 1” Tri-Clover (‘Ladish’) Sanitary.
Note: Please use care connecting the monitor end of the sensor cable to
these ports as the male cable end can be damaged if mishandled.
‘Output’ - Female DB25, four TTL outputs for alarms, four 4-20 ma Analog
‘Printer / PC’ - Female DB9, RS-232 output for serial printer or PC.
Choice of five sizes: Luer, 3/8" Barb, 1/2” Barb,
‘P1, P2 and P3’ Female Switchcraft 9 pin twist-lock,
connectors for sensor cables.
output signals, 18 bit resolution.
‘Serial I/O’ - Female DB9 (disabled).
‘RS-485’ - 3 wire terminal block. RS-485 output (disabled).
Software
Two
Operational
Modes
I/O Port - 6
Pressure
Mode
Custom
Calibration
Mode
‘12VDC 500ma’ - DC Input for AC Adaptor.
Captures stored calibration data from the sensors, digital display of up to
three pressure sensor values and either Differential or Trans Membrane
pressure, with four user-definable alarms.
Used to perform custom calibrations, selecting User-Defined Zero
and Calibration Pressure.
8
Page 9

Specifications - Sensors
Power
Fluid Connections
Wetted Materials
Sensor Type
Sensor Isolation
Pressure Range
Accuracy
Resolution
Temperature Range
Sensor Microchip
Sensor Connector & Cables
5 VDC provided by SciPres® Pressure Monitor.
3
/4” Tri-Clover (TC) Sanitary and 1” Tri-Clover (‘Ladish’) Sanitary.
Polysulphone meets USP Class VI and FDA 21 CFR 177.1520, all wetted
Insoluble silicone dielectric gel isolates sensing element from process
solution. The gel is a non-toxic, non-allergenic elastomeric system.
+/- 0.30 psi at -5 to 30 psi for 2 point calibrated sensors (can be improved
Choice of five sizes: Luer, 3/8” Barb, 1/2” Barb,
materials made with animal-free compounds.
Medical grade, silicone piezoresistive sensing element
with on-chip temperature compensation.
-5 to 60 psi (-0.34 to 4.14 bar).
to -5 to 60 psi with 3 point calibration, also available)
0.01 psi (0.001 bar).
0 to 60 °C (0 to 140 °F).
EPROM, Stores Sensor ID, and Calibration Factor.
Lockable and Waterproof.
9
Page 10

SciDoc Documentation Software for PC
SciPres® Pressure Sensor System Documentation Software Package - purchased separately.
• Excel spreadsheet with custom macros for data compilation.
Includes WinWedge interface software. Sent ready-to-use.
• Complete process analysis with graphing of data.
• Real-time verification and documentation of process parameters.
• Includes graph of: Pressure versus Time.
Spreadsheet example:
10
Page 11

Part A: SciPres®
Pressure Sensor Hardware
1.0 Overview
The SciLog® SciPres® pressure sensor system consists of two major components, the SciPres®
pressure monitor, with its power supply, and the single-use SciPres® pressure sensor, with its cable.
The monitor is a small desktop package with a backlit display and seven buttons for easy interface and
menu selections. It displays up to three measured pressures and one calculated pressure in real time.
The monitor’s output signals are in both analog and digital forms. It comes with a small wall adapter
as a universal power supply.
The monitor reads and utilizes calibration data from SciPres® sensors that have been calibrated to two
points, 0 and 30 psi, or three points, 0, 54 and 6 psi depending upon the sensor purchased. It has also
been equipped with a Supervisor Password, a Max Pressure Watchdog, and a Noise Filter setting.
The “Max Pressure Watchdog” feature records in the sensor’s memory the maximum pressure seen
by the sensor while it is connected to the SciPres® Monitor. This value is displayed for a few seconds
along with the Sensor ID and calibration information when the Monitor is powered up after a sensor is
connected.
Caution: Disconnection and reconnection of the sensor while in operation may cause
corruption of the sensor’s memorys and consequent loss of calibration. Please turn the
monitor off when connecting / disconnecting the sensors.
Note: The maximum recommended pressure for the sensors is 60 psi (4.14 bar). If this is
exceeded, problems with leakage and functionality can occur.
The Filter setting is used to average the pressure signals when peristaltic pump heads are used. This
makes the display readings easier to interpret, and produces cleaner graphs that are easier to read. At
the lowest setting, the data is “live”, and at the highest, it is averaged over a four second period.
The SciPres® pressure sensors utilize a silicone piezoresisitive sensing element in a polysulphone tube
available in five sizes: Luer, 3/8" or 1/2" Barb, 3/4" and 1" ‘Ladish’ Sanitary TC connections.
All sensors are pre-calibrated at the factory, and retain the calibration data on a small chip embedded
in the sensor body. The following information is retained and is accessed upon connection to the
sensor:
• ID number (Contains Size, Lot number, Mfr Code, and Calibration date)
• Calibration Factors
• Calibration Points
• Pressure Zero Offset
• Max Pressure Value
11
Page 12

2.0 Front Panel: Data Entry & Display
The front panel includes an alphanumeric display and a membrane keypad to select operational
modes and alarm settings. The display is a two line, 20 character, liquid crystal display (LCD). The
display is backlit to allow easy viewing over a wide range of lighting conditions.
The keypad consists of seven keys whose function does not change. These keys are used for basic
control and programming of the SciPres® pressure monitor. The basic key definitions are:
MENU: Allows entry into the parameter settings menu.
ENTER: Accepts the selected parameter setting.
EXIT: Exits the menu, returning to the main operational screen.
SENSOR: Recaptures the factory calibration settings stored on the sensor, and allows entry into the
custom calibration menu. This allows the user to zero and/or custom calibrate the upper span value
using equipment traceable to SI through NIST.
ON/STBY: Turns the monitor on and off.
Up and Down arrows used to change parameters within the menus.
One LED is also on the front panel, on the ON/STBY key. This indicates the monitor is connected to
power.
12
Page 13

3.0 Back Panel: Interface Options
The SciPres® pressure sensor back panel provides interfacing ports for:
• Single-use SciPres® pressure sensor sensors: Female 9 pin twist-lock,
labelled “Sensor P1, P2, and P3”.
• Analog and TTL Output: Female DB25, labelled “Output”.
• RS-232 Data Output: Female DB9, labelled “Printer/PC”.
• 2nd RS-232: Female DB9, labelled “Serial I/O” (Disabled).
• RS-485: 3 wire terminal block, labelled “RS-485”, (Disabled).
• Input Power: Round male connector for AC Adapter, labelled “12 VDC / 500 mA”.
SENSOR PORTS: The single-use pressure sensors are connected to these three using the included
cables.
Note: Please use care connecting the monitor end of the cable to these ports as the male cable
end can be damaged if mishandled.
OUTPUT PORT: Provides four 4-20 mA analog outputs and TTL outputs for the four alarms,
Hi / Low for each pressure channel. TTL outputs provide a 0 / 5 VDC control signal, carry minimal
current. (See Pin out on next page.)
PRINTER / PC PORT: To connect the SciPres® pressure monitor to your PC for data archival.
Alternatively, you may connect to a serial printer via this port.
SERIAL I/O PORT: RS-232 – Disabled.
RS-485 PORT: Disabled.
POWER INPUT JACK: Connect the AC adapter here.
13
Page 14

4.0 Pin Out of the DB25 Female ‘Output’ Connector
3
4
P1
1
14
15
16
17
18
19
20
21
22
10
23
11
24
12
25
13
2
3
4
5
6
7
8
9
27
26
Vpwr
OUT1N
OUT2N
OUT3N
OUT4N
F1
0.1A
R4 1.0K
1 2
R3 1.0K
1 2
R2 1.0K
1 2
R1 1.0K
1 2
Analog1+
Analog1-
Analog2+
Analog2-
Analog3+
Analog3-
Analog4+
Analog4-
OUT1
OUT2
OUT3
OUT4
D Connector 25
Analog Outputs
For 4-20 ma output of Pressure at P1 (Analog 1), use pins 2 (4-20 -) and 14 (4-20 +). If excitation is
needed in the loop, connect pin 1 (Vpwr) to pin 14 (4-20 +), and connect the output cable to pin 2
(4-20 -) and pin 15 (Gnd).
For 4-20 ma output of Pressure at P2 (Analog 2), use pins 4 (4-20 -) and 16 (4-20 +). If excitation is
needed in the loop, connect pin 3 (Vpwr) to pin 16 (4-20 +), and connect the output cable to pin 4
(4-20 -) and pin 17 (Gnd).
For 4-20 ma output of Pressure at P3 (Analog 3), use pins 6 (4-20 -) and 18 (4-20 +). If excitation is
needed in the loop, connect pin 5 (Vpwr) to pin 18 (4-20 +), and connect the output cable to pin 6
(4-20 -) and pin 19 (Gnd).
For 4-20 ma output of Pressure at TM or DP (Analog 4), use pins 8 (4-20 -) and 20 (4-20 +).
If excitation is needed in the loop, connect pin 7 (Vpwr) to pin 20 (4-20 +), and connect the output
cable to pin 8 (4-20 -) and pin 21 (Gnd).
14
Page 15

The use of an end-user supplied analog loop power source is presented below:
TTL Alarm Outputs
P1 Hi / Lo Alarm: TTL 1 Pins 11 (Out0) and 13 (Gnd)
P2 Hi / Lo Alarm: TTL 2 Pins 24 (Out1) and 13 (Gnd)
P3 Hi / Lo Alarm: TTL 3 Pins 12 (Out2) and 13 (Gnd)
TM or DP Hi / Lo Alarm: TTL 4 Pins 25 (Out3) and 13 (Gnd)
TTL outputs are either 0 or 5 VDC, and carry minimal current. They are for TTL inputs on a PLC, or
control of a 5 VDC solid state relay, with an enable voltage of 3 VDC.
15
Page 16

5.0 Single-Use Pressure Sensors
Luer
Connector Type
Luer 080-699PSX-5 080-699PSX-3P-5 ID 0.03¨ to 0.31¨ 1.0 0.26 0.23 60 psi
3
/8¨ Barb 080-694PSX-5 080-694PSX-3P-5 ID 0.31¨ to 0.38¨ 8.0 2.11 1.81 60 psi
1
/2¨ Barb 080-695PSX-5 080-695PSX-3P-5 ID 0.50¨ 17.0 4.49 3.86 60 psi
3
/4¨ Tri-Clover (TC) 080-696PSX-5 080-696PSX-3P-5 Tubing with 3/4¨ TC 31.0 8.19 7.03 60 psi
1¨ Tri-Clover ‘Ladish’ 080-697PSX-5 080-697PSX-3P-5 Tubing with 1¨ TC Ladish 60.0 15.9 13.6 60 psi
* Maximum flow rate at 1 psi
2-pt. Calibration 3-pt. Calibration
3
/8¨ Barb
Part Code (Packs of 5)
1
/2¨ Barb
Compatible
Tubing Sizes
3
/4¨ Tri-Clover 1¨ Tri-Clover ‘Ladish’
Max. Flow Rate*
(L / min) (gpm / psi) (m3 / h / bar)
Max. Operating
Pressure
16
Page 17

Part B: SciPres® Pressure Sensor Monitor Software
1.0 Software Overview
The SciPres® pressure monitor digitally displays inputs from up to three SciPres® pressure sensors
simultaneously, while also calculating and displaying either trans-membrane or differential pressure.
It has also been equipped with a “Supervisor Password”, a “Max Pressure Watchdog”, and a
“Filter” setting.
The “Max Pressure Watchdog” feature records in the sensor’s memory the maximum pressure seen
by the sensor while it is connected to the SciPres® monitor. The maximum recommended pressure
for the sensors is 60 psi (4.14 bar). If this is exceeded, problems with leakage and functionality can
occur. This value is displayed for a few seconds along with the Sensor ID and Cal information when
the monitor is powered up and a sensor connected.
The “Filter” setting is used to average the pressure signals when peristaltic pump heads are used.
This increases the sensor precision as well as accuracy and makes the display readings easier to
interpret when compared to ever changing values caused by pulsation. Thus it produces cleaner
graphs that are easier to read. At the lowest setting, the data is ‘live’, and at the highest, it is
averaged over a 4 second period. Please refer to the graph in section 4.0.
The “Supervisor Password” is a number between 1 and 9999 that must be entered to access the
Menu and its settings. Setting the password to 0 disables it.
The “Main Menu” allows you to change the pressure units, (psi, kPa, bar, mmHg are available) the
high and low analog range settings, adjust the baud rate and print time, change the mode between
trans-membrane, differential and none, adjust the “Filter” setting, as well as configure user-defined
hi / low pressure alarms for all four displayed values.
The SciPres® pressure monitor will also allow custom zero and single point full span calibration of
the sensors through the use of the “Sensor” button on the front panel. This is a modification of the
existing factory two or three point calibration. This can be reset or cleared if desired.
17
Page 18

2.0 Main Menu
Main Screen
P1: 0.00 P2: 0.00
P3: 0.00 TM: 0.00
Menu
psi, kPa, bar, mmHg
PRES UNITS: psi
689.4 kPa, 6.80 bar
Menu
5171 mmHg
RANGE HI: 100 psi
Analog out at 100%
Menu
Min 0.00
RANGE LO: 0.0 psi
Analog out at 0%
1200, 2400, 4800,
9600, 19200, 28800,
Menu
38400, 57600
SERIAL: BR: 9600
WL: 8 SB: 2 PT: N
See 3.1
See 3.2
See 3.3
See 3.4
See 3.5
Menu
See HI Range above
HI-ALARM P1: 0.0 psi
Menu
Min: 0.00
LO-ALARM P1: 0.0 psi
Press Menu to
Enter
bypass to Password
SET TIME / DATE...
Enter
24 Hour Time
TIME: 16:10
Enter
MONTH: DECEMBER
See 3.11
See 3.12
See 3.13
See 3.14
See 3.15
Menu
1 to 60 seconds
PRINT TIME: 5 Seconds
Transmembrane,
Menu
Differential, None
MODE: TRANSMEMBRANE
Menu
SciPres®, OEM
TYPE: SCIPRES
Menu
Off, P1, P2, P3, TM, DP
CONSTANT PRESSURE:
OFF
Menu
1 min, 12 max
FILTER: 9
See 3.6
See 3.7
See 3.8
See 3.9
See 3.10
Enter
DAY OF MONTH: 28
Enter
YEAR: 2006
Menu
Yes, No
FACTORY RESET: NO
YES & ENTER TO RESET
Enter
Yes, No
ARE YOU SURE: NO
Enter
PASSWORD: 0
See 3.16
See 3.17
See 3.18
See 3.19
18
Page 19

2.0 Main Menu, Continued:
SUMMARY: This menu allows the setting of various parameters as they relate to your process.
Use “Menu” to scroll through the menu, the up/down arrow keys to scroll through choices, and
“Enter” to select the choice.
2.1 MAIN SCREEN: Displays all three pressures, P1, P2, P3 and the calculated Trans-Membrane
pressure, TM, or Differential pressure DP.
2.2 PRESSURE UNITS: Use the up / down arrows to select between psi (pounds/square inch),
kPa (kilo Pascal), bar, or mmHg (millimeters of Mercury). Default = psi.
2.3 RANGE HI: Use to set the upper range limit of the Analog output signal (100% full scale).
Allowable maximums are 100 psi, 689.4 kPa, 6.80 bar, 5171 mmHg. Default = 100.0 psi.
Do Not pressurize beyond 60 psi. (This setting is to make replacing a 0-100 psi transmitter
easy to replace without having to re-scale the interface.)
2.4 RANGE LO: Use to set lower range limit of the Analog output signal (0.0% of full scale).
Default minimum is 0.0 regardless of scale.
2.5 SERIAL: Displays the RS-232 serial output parameters. Only baud rate can be changed.
Available rates are 1200, 2400, 4800, 9600, 19200, 28800, 38400 and 57600. Default = 9600.
2.6 PRINT TIME: Used to set the data output interval, 1 to 60 sec. Default = 5 sec.
2.7 MODE: Use to set display and output mode. Trans-membrane will display and output TM,
Differential will display and output DP, None will only display and output P1, P2 and P3.
Default = TM.
2.8 TYPE: Sets type of pressure sensor in use, Default is Calibrated. OEM is under development.
2.9 CONSTANT PRESSURE: Controls 4-20 ma Analog Output 4 inversely as the pressure source
changes between the Hi and Lo Alarm settings. Default = OFF.
2.10 FILTER: Used to filter out (average) pulsations from peristaltic pumps. Pressure changes are
delayed slightly based on setting. Range is 1-12, with 1 = No filter, 12 = Max filter. Default = 9.
2.11 HI-ALARM P1: Used to set High Pressure Alarm, Max value of 60.0 psi. Hi-Alarms exist for all
four pressure outputs. Default = 0.0 psi.
2.12 LO-ALARM P1: Used to set Low Pressure Alarm. Lo-Alarms exist for all four pressure
outputs. Default = 0.0 psi.
2.13 SET TIME / DATE: Press “Enter” to enter this submenu, press Menu to bypass to Password.
2.14 TIME: Use up / down arrows to set current time in 24 hour format, HH:mm, and press “Enter”.
2.15 MONTH: Use up / down arrows to set current Month, and press “Enter”.
2.16 DAY OF MONTH: Use up / down arrows to set current Date, and press “Enter”.
2.17 YEAR: Use up / down arrows to set current Year, and press “Enter”.
2.18 FACTORY RESET: Used to restore the SciPres® pressure sensor pressure monitor to the
factory default values. Change No to Yes using the arrow keys and press “Enter” to reset,
change No to Yes on the “Are You Sure?” screen and press “Enter” again to finish the process.
2.19 PASSWORD: Used to set a Supervisor password. Requires entry of the password to enter the
Menus. Choose a number from 1-9999, setting of 0 disables the password feature.
19
Page 20

3.0 Custom Calibration Menu
Press “Sensor” button. The
following will be displayed:
SENSOR PORT: P1
Use up / down arrows to
choose port, press “Enter”, and
calibration data will reload.
CUSTOM CAL....
Press Enter
SENSOR PORT: P1
Enter
SENSOR ZERO: NO
YES & ENTER TO ZERO
Enter
CAL PRESS: 60.00 psi
Enter
CUSTOM CAL SENSOR
PRESS ENTER TO CAL
Enter
CALL IN PROGRESS
Please Wait: 1...2...
See 3.1
See 3.2
See 3.3
See 3.4
See 3.5
Enter
CUSTOM CAL FACTORS:
CF: 0.511 PZ: 0.0
CALIBRATION ERROR!
OUT OF RANGE
SENSOR RESET: NO
YES & ENTER TO RESET
20
See 3.6
See 3.7
Page 21

3.0 Custom Calibration Menu, Continued:
SUMMARY: This menu shows the settings used for performing a custom calibration of a given
SciPres® pressure sensor. This allows you to calibrate zero the unit for existing pressure offsets,
and re-span the unit with a NIST traceable pressure source if you wish. This procedure adds a
modification to the existing Factory Calibration, it does not modify it, and it can be reset if needed.
After connecting the sensor, press the “Sensor” button, you will be prompted for the sensor to
re-load, choose the sensor and press “Enter”. After reloading the data from the sensor, the
“Custom Cal…” screen appears. Press the “Enter” key to enter the Custom Cal menu, use the
“Exit” key to bypass it.
3.1 SENSOR PORT: Use the up/down arrows to select from P1, P2 or P3 and press “Enter”.
Default = 0.0 °C (0.0 °F).
3.2 SENSOR ZERO: To zero the sensor, use the up/down arrows to change “NO” to “YES” and
press “Enter”. To bypass, leave the setting at NO and press “Enter”. Default = NO.
3.3 CAL PRESS: To Re-span the sensor at the upper limit, use the up/down arrows to select the
pressure being used for the custom calibration and press enter. To bypass, press “Exit”.
3.4 CUSTOM CAL PRESS: When you reach this screen, and are ready to perform the custom
calibration at the upper limit. Be sure you have pressurized the sensor using a NIST traceable
pressure source (gauge). Press the “Enter” key to do the calibration. You may press “Exit” to
cancel the process.
3.5 CAL IN PROGRESS: This screen is displayed during the calibration, and will count up to 10
to complete the custom calibration.
3.6 CUSTOM CAL FACTORS: This screen displays the custom calibration data, the Custom Cal
Factor, (CCF) can the Custom Zero Offset (PZ).
3.7 CALIBRATION ERROR! / OUT OF RANGE: This message will be displayed if the pressure is out
of range, i.e. you’ve tried to perform a custom calibration at an elevated pressure with the
sensor un-pressurized.
3.8 SENSOR RESET: Used to reset / remove the custom calibration. Press the “Sensor” key to
reload the sensor data, and while the custom cal factors are displayed, press the “Enter” key.
The Sensor Reset screen will be displayed, and you can change the No to Yes with the
Up/Down Arrows, and press the “Enter” key to reset / remove the custom calibration.
There is an “Are you sure?” screen that will also need a Yes answer to complete this task.
21
Page 22

4.0 Reduced Pump Pulsation: Improved Sensor Precision
Pressure versus Time
7.00
FILTER-1 FILTER-2
6.00
FILTER-3
5.00
PRESSURE
4.00
3.00
15:27:22 15:28:48 13:30:14 15:31:41 15:33:07 15:34:34 15:36:00 15:37:26
TIME
FILTER-4
FILTER-6
FILTER-5
This graph shows the effects of the Filter setting on the SciPres® monitor and the incoming signal
from the SciPres® sensors.
This provides the added benefit of improving the precision and accuracy of the sensor reading
by eliminating the need to interpret between ever changing high and low values caused by
pump-generated pulsation. It makes the processes easier to control and the cleaner graphs
are easier to read.
Data was collected at 1 second intervals. A peristaltic pump running at 100 mL / min was
connected to the SciPres® sensors and back pressure was applied.
The Filter setting was changed from 1 through 6 over the course of the run. Data was stable at that
point, and it was not increased further due to lack of noticeable effect at these flows and pressures.
As the Filter setting is increased, a small delay occurs in the response of the filtered data when the
pressure is changing. The maximum delay at a setting of 12 is 4 seconds. A setting of 1 yields “live”
data with no delay and no filtering.
22
Page 23

5.0 SciPres® Pressure Sensor Printout Format
RS-232 Output as sent to Serial Printer or Windows HyperTerminal:
03/16/09 0.51
07/07/15; Pressure v0.51; UNITS=psi ; ALARMS: HP1= 0.00; LP1= 0.00; HP2= 0.00; LP2= 0.00;
HP3= 0.00; LP3= 0.00; HTM= 0.00; LTM= 0.00;
Sensor 1 ID=S5-210246-0314; MAXP=15.90; 10/07/14; PZ=-0015; CF1= 1.035; CCF= 1.000;
CPZ=00000
Sensor 2 ID=S5-210248-0314; MAXP=17.97; 08/21/14; PZ=-0014; CF1= 1.030; CCF= 1.000;
CPZ=00000
Sensor 3 Disconnected;
RT, P1, P2, P3, TM
11:24:44, 0.04, 0.05, -.--, 0.05,
11:24:50, 0.04, 0.05, -.--, 0.05,
11:24:55, 0.04, 0.05, -.--, 0.05,
11:25:00, 0.30, 0.05, -.--, 0.17,
11:25:05, 0.28, 0.05, -.--, 0.17,
11:25:10, 0.04, 0.05, -.--, 0.04,
11:25:15, 0.29, 0.28, -.--, 0.29,
11:25:20, 0.37, 0.36, -.--, 0.36,
11:25:25, 0.32, 0.31, -.--, 0.32,
11:25:30, 0.04, 0.05, -.--, 0.05,
Abbreviations
RT = Real Time P1 = Pressure at Sensor P1
P2 = Pressure at Sensor P2 P3 = Pressure at Sensor P3
TM = Trans-Membrane Pressure DP = Differential Pressure (P1 - P2)
CF1 = Calibration Factor 1
CF2 = Calibration Factor 2 Alarm: HP1 / LP1 = Hi / Low Pressure @ P1
PZ = Zero Offset Alarm: HP2 / LP2 = Hi / Low Pressure @ P2
CP1 = Calibration Point 1 (High point) Alarm: HP3 / LP3 = Hi / Low Pressure @ P3
CP2 = Calibration Point 2 (Low Point) Alarm: HTM/ LTM = Hi / Low Pressure @ TM or DP
CCF = Custom Calibration Factor
CPZ = Custom Zero Offset -.— Indicates a disconnected sensor
Note: SciPres® SciDoc Software is available to collect this data automatically into an Excel
spreadsheet. See Part C.
23
Page 24

Part C: SciPres® Data
1.0 Data Collection
SUMMARY: The SciPres® pressure monitor has two serial ports. The serial port which is labelled
“Printer / PC,” is used for RS-232 serial communication with a PC or serial printer. The second
serial port is disabled.
SciDoc software is available and includes an Excel spreadsheet with custom macros that is
automatically populated when data is received. It also automatically populates a graph in real-time
as the data is generated. Discussion of this package begins on the next page.
Alternatively, when a PC is connected to this serial port, all data generated can be sent to a
“HyperTerminal” program. HyperTerminal is OK for viewing the data in real time, but can be a
challenge for actually capturing and retrieving the data. The HyperTerminal settings are provided
for you in section 1.2 entitled “PC HyperTerminal Settings”.
1.1 SciPres® SciDoc Data Collection Software:
SciPres® offers SciDoc software to capture the data output of the SciPres® pressure monitor and
place it in an Excel spreadsheet in real-time. This spreadsheet also populates a graph to aid you in
the analysis of your process. It consists of a copy of WinWedge and a customized spreadsheet with
built in macros. It requires the use of a SciPres® RS-232 cable to connect your SciPres
pressure sensor to an available Com Port on your PC.
Minimum system requirements are Windows 98, Excel 2000 and WinWedge v3.4, which is
included in the package.
Once installed, click on the shortcut for the spreadsheet, and Excel will launch.
Press “Enable Macros” or “Enable Content”to begin the process for data collection. One may
choose to have the computer recognize this as a trusted document, if desired.
Note: If you are opening a previously saved data set, choose “Disable Macros” or “Disable
Content” instead.
®
24
Page 25

The following screen will be displayed:
Choose the Com Port you have the SciPres® pressure monitor connected to. Click on the “OK”
button and WinWedge will start, showing itself as an icon in your system tray.
You are then presented with the next screen:
WinWedge Icon
Enter all of the approprite Operator information in this dialog box and click on “OK”.
Note: The “Clear Data” button on the spreadsheet does not affect the information in these
fields. You may click on the “Operator Info” button and update these fields as needed.
Clicking on “OK” leaves the next screen, ready to get started collecting data from the SciPres®
pressure sensors.
25
Page 26

When ready, turn on the SciPres® pressure monitor, pressing the “On / Stby” button. The monitor
will load the calibration data from the sensors, and place that information in the spreadsheet. All
remaining data generated will automatically be placed in the cells of the spreadsheet, and the
charts populated with the same data. The text box in the upper left of the spreadsheet contains the
header information that is generated by the SciPres® pressure sensors and monitor. This will list
the version, the calibration data, all operating parameters, alarm settings and alarm limits.
Note: If you have clicked on “Cancel” on either of the two previous screens, you may click on
the “Com Port Setup” or “Operator Info” buttons to complete these tasks.
A chart of Pressure versus Time has been included for your use, and you may view it by clicking on
the appropriate tab at the bottom of the worksheet.
You may, of course, create your own charts or modify those included by adding trend lines,
changing titles, etc.
26
Page 27

When you are finished with a run, the screen will look similar to this one:
Click on “File”, “Save As” and choose an appropriate file name based on your needs and store it in
a different folder. When ready for another run, simple press the “Clear Data” button, or close and
re-open the original file.
27
Page 28

1.2 PC Terminal Program Settings
SciPres® pressure monitor to PC: PC communications via the Serial Port labeled “Printer / PC”
requires a SciPres® RS-232 Cable.
NOTE: When you are not using the SciPres® with a printer, this allows process data to be “dumped”
into your PC for archiving. The list of settings below must match those in serial section of the
SciPres® pressure sensor main menu.
The following terminal setting procedure is intended for PCs with a Windows 95/98/XP software
installation (for any other operating system, download and use a terminal or Telenet program and set
it up in a similar manner). Press the “START” button in the lower left corner of your screen, select
“All Programs” then select and open “Accessories”, select “HyperTerminal”, double-click at the
HyperTerminal icon.
1. From the “Connection Description” screen, select an icon and enter a file name, i.e. SciPres®
pressure sensor. Press “OK”.
2. From the “Phone Number” screen, select “Direct to Com 1” in the box labelled Connect Using: or
select any other available Com port. Press “OK”.
3. From the “Com 1 Property” screen, select the following parameters
Bits per Second: 9600
Data Bits: 8
Parity: None
Stop Bits: 1
Flow Control: None
Press “Ok”
4. Go to “File” and open “Properties”, from the “SciPres® Pressure Sensor Property” screen, select
the “Setting” screen, enter the following:
Terminal Keys: Select
Emulation: TTY
Backscroll Buffer: 500
While still in the “Setting” screen, press “ASCII Setup” key & select the following from the “ASCII
Setup” screen:
Send Line Ends with Line Feed: Select
Echo Typed Characters Locally: Select
Line Delay 10 msec
Character Delay: 10 msec
Append Line Feeds….....: No Selection
Force Incoming…............: No Selection
Wrap Lines That Exceed …..: Select
Press “OK” at the bottom of the “SciPres® Pressure Sensor Setup” screen.
Press “OK” at the bottom of the “SciPres® Pressure Sensor Property – Setting” screen.
28
Page 29

Notes:
........................................................................................................................................................................................................................
........................................................................................................................................................................................................................
........................................................................................................................................................................................................................
........................................................................................................................................................................................................................
........................................................................................................................................................................................................................
........................................................................................................................................................................................................................
........................................................................................................................................................................................................................
........................................................................................................................................................................................................................
........................................................................................................................................................................................................................
........................................................................................................................................................................................................................
........................................................................................................................................................................................................................
........................................................................................................................................................................................................................
........................................................................................................................................................................................................................
........................................................................................................................................................................................................................
........................................................................................................................................................................................................................
........................................................................................................................................................................................................................
........................................................................................................................................................................................................................
........................................................................................................................................................................................................................
........................................................................................................................................................................................................................
........................................................................................................................................................................................................................
........................................................................................................................................................................................................................
........................................................................................................................................................................................................................
........................................................................................................................................................................................................................
........................................................................................................................................................................................................................
........................................................................................................................................................................................................................
........................................................................................................................................................................................................................
........................................................................................................................................................................................................................
........................................................................................................................................................................................................................
........................................................................................................................................................................................................................
........................................................................................................................................................................................................................
29
Page 30

Notes:
........................................................................................................................................................................................................................
........................................................................................................................................................................................................................
........................................................................................................................................................................................................................
........................................................................................................................................................................................................................
........................................................................................................................................................................................................................
........................................................................................................................................................................................................................
........................................................................................................................................................................................................................
........................................................................................................................................................................................................................
........................................................................................................................................................................................................................
........................................................................................................................................................................................................................
........................................................................................................................................................................................................................
........................................................................................................................................................................................................................
........................................................................................................................................................................................................................
........................................................................................................................................................................................................................
........................................................................................................................................................................................................................
........................................................................................................................................................................................................................
........................................................................................................................................................................................................................
........................................................................................................................................................................................................................
........................................................................................................................................................................................................................
........................................................................................................................................................................................................................
........................................................................................................................................................................................................................
........................................................................................................................................................................................................................
........................................................................................................................................................................................................................
........................................................................................................................................................................................................................
........................................................................................................................................................................................................................
........................................................................................................................................................................................................................
........................................................................................................................................................................................................................
........................................................................................................................................................................................................................
........................................................................................................................................................................................................................
........................................................................................................................................................................................................................
30
Page 31

Notes:
........................................................................................................................................................................................................................
........................................................................................................................................................................................................................
........................................................................................................................................................................................................................
........................................................................................................................................................................................................................
........................................................................................................................................................................................................................
........................................................................................................................................................................................................................
........................................................................................................................................................................................................................
........................................................................................................................................................................................................................
........................................................................................................................................................................................................................
........................................................................................................................................................................................................................
........................................................................................................................................................................................................................
........................................................................................................................................................................................................................
........................................................................................................................................................................................................................
........................................................................................................................................................................................................................
........................................................................................................................................................................................................................
........................................................................................................................................................................................................................
........................................................................................................................................................................................................................
........................................................................................................................................................................................................................
........................................................................................................................................................................................................................
........................................................................................................................................................................................................................
........................................................................................................................................................................................................................
........................................................................................................................................................................................................................
........................................................................................................................................................................................................................
........................................................................................................................................................................................................................
........................................................................................................................................................................................................................
........................................................................................................................................................................................................................
........................................................................................................................................................................................................................
........................................................................................................................................................................................................................
........................................................................................................................................................................................................................
........................................................................................................................................................................................................................
31
Page 32

© 2015 Parker Hannifin Corporation. All rights reserved.
IOMI-AK1-001_RevA
Parker Hannifin Manufacturing Ltd
domnick hunter
Process Filtration - Europe
Durham Road
Birtley, Co. Durham
DH3 2SF, England
phone +44 (0)191 4105121
fax +44 (0)191 4105312
email: dhprocess@parker.com
www.parker.com/dhsingleuse
Parker Hannifin Corporation
domnick hunter
Process Filtration - North America
2340 Eastman Avenue
Oxnard, California, USA 93030
toll free: 877 784 2234
phone: +1 805 604 3400
fax: +1 805 604 3401
email: dhpsales.na@parker.com
www.parker.com/dhsingleuse
 Loading...