

Parish Supply 8070 Instruction Manual
Instructions for
8070 Mytee-Lite
Please read before use.
™
Model #
Serial #
Form # ADM-8070
3-09

ENGLISH
1
2
3
4
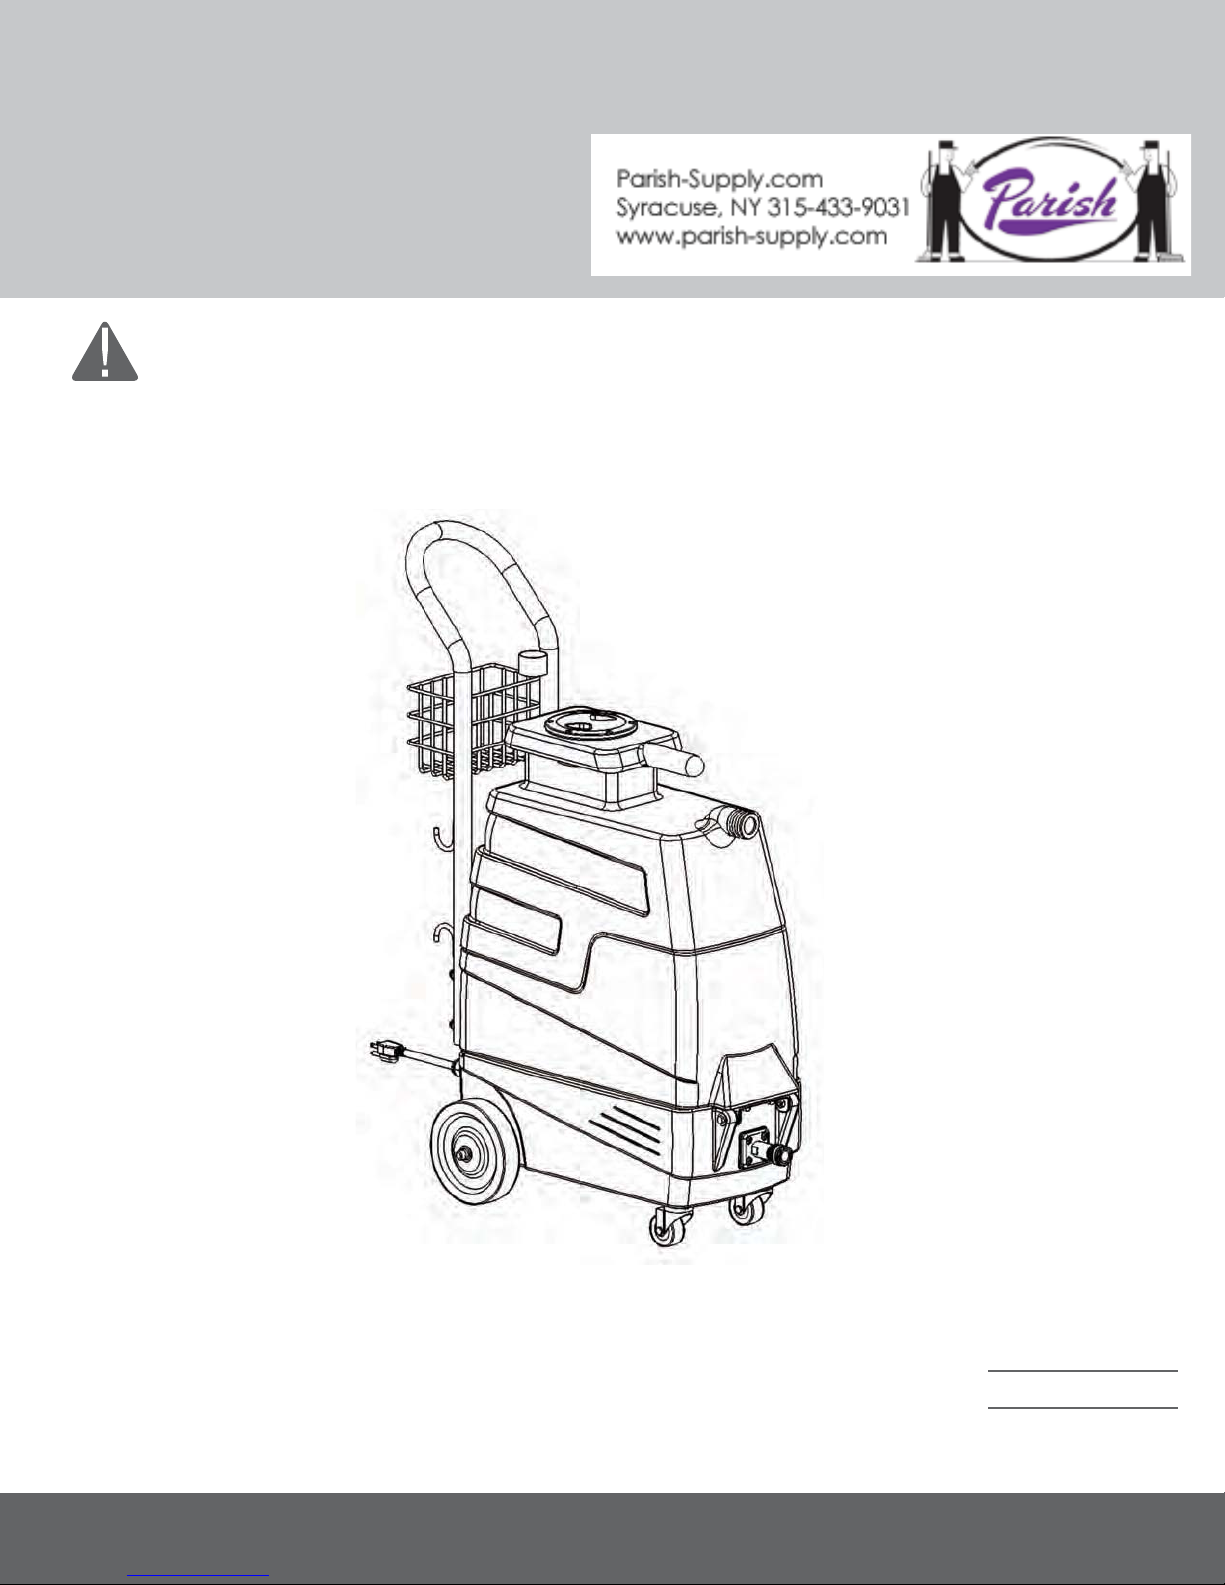
1. Vacuum Lid
2. Vacuum hose connector
3. Solution tank
4. Solution Hose Connector
FRONT
BACK
5
6
7
8
9
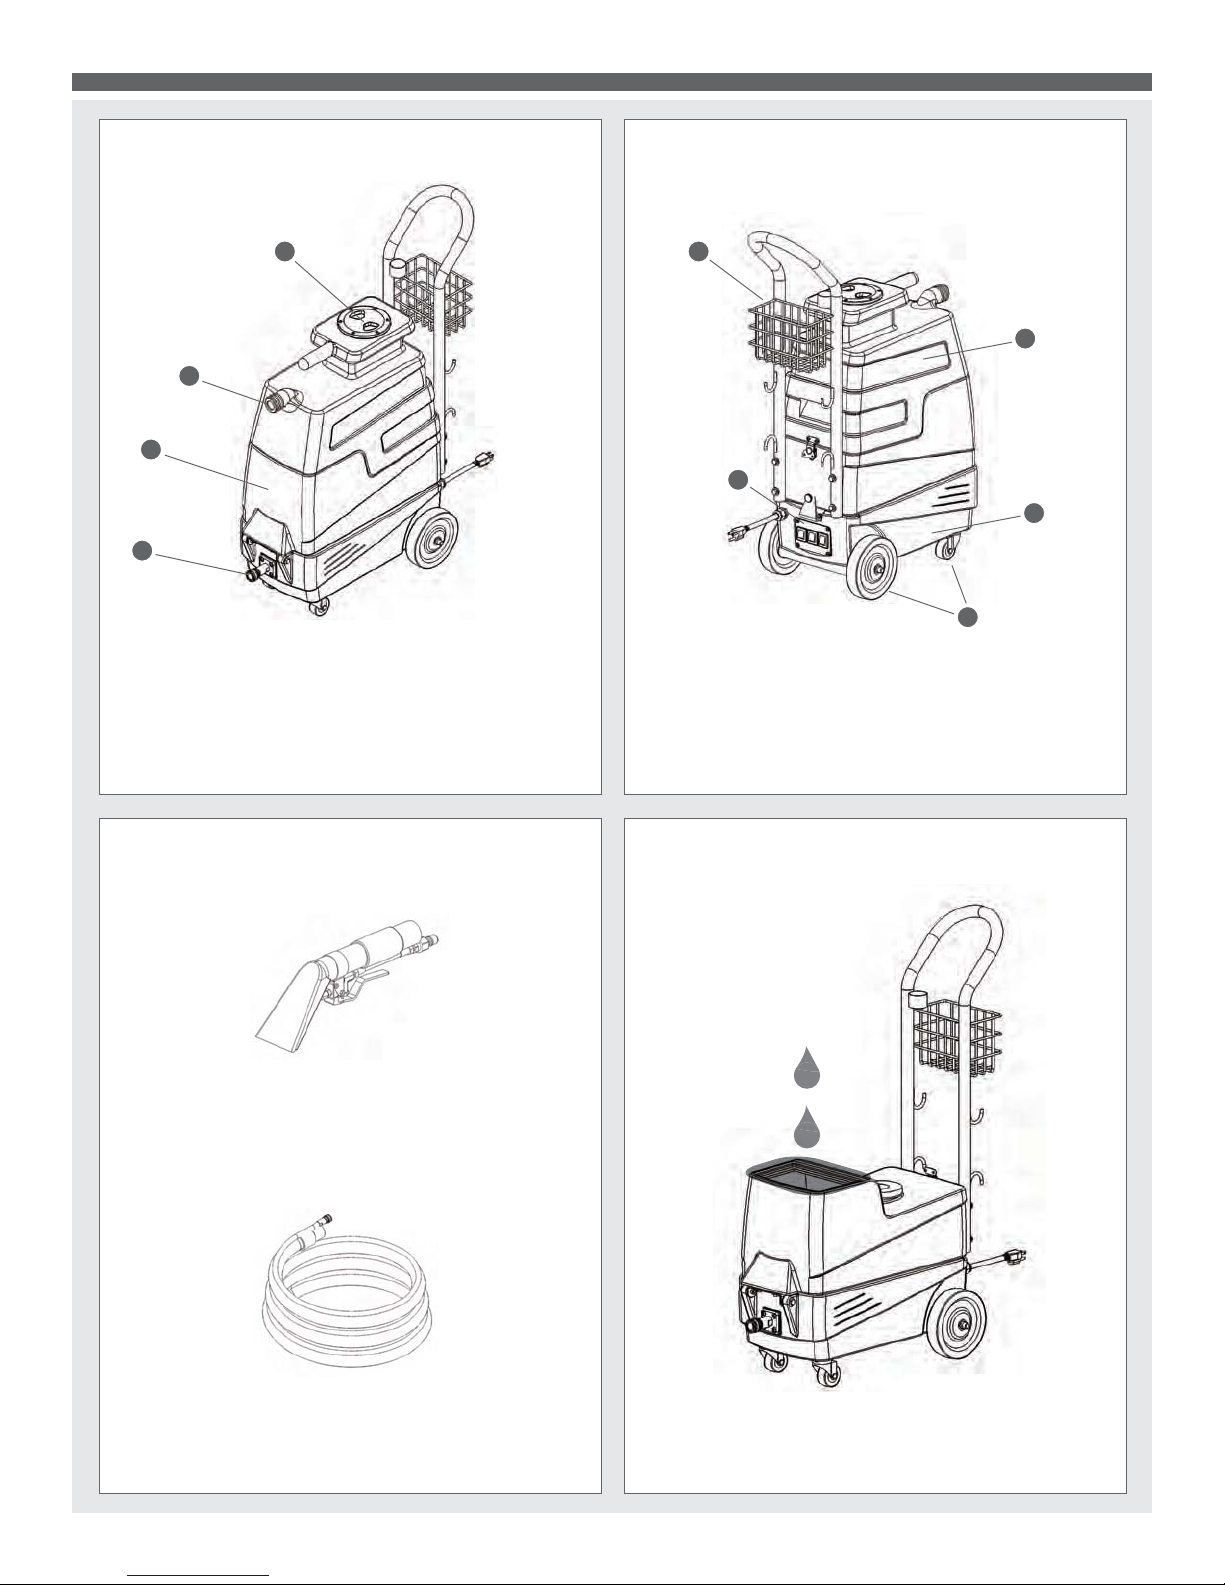
5. Handle with Storage Basket and Cord Wrap
6. Removable Vacuum Tank
7. Switch plate
8. Motor base housing
9. Quality wheels and casters
ACCESSORIES
8400- 3” Stainless Steel
Upholstery Tool
8501- 15’ 1-1/4” Vac/Sol Hose
FILL SOLUTION TANK
Remove vacuum tank to fill solution tank (See release latch
portion). For best results, fill with warm water (140o F).
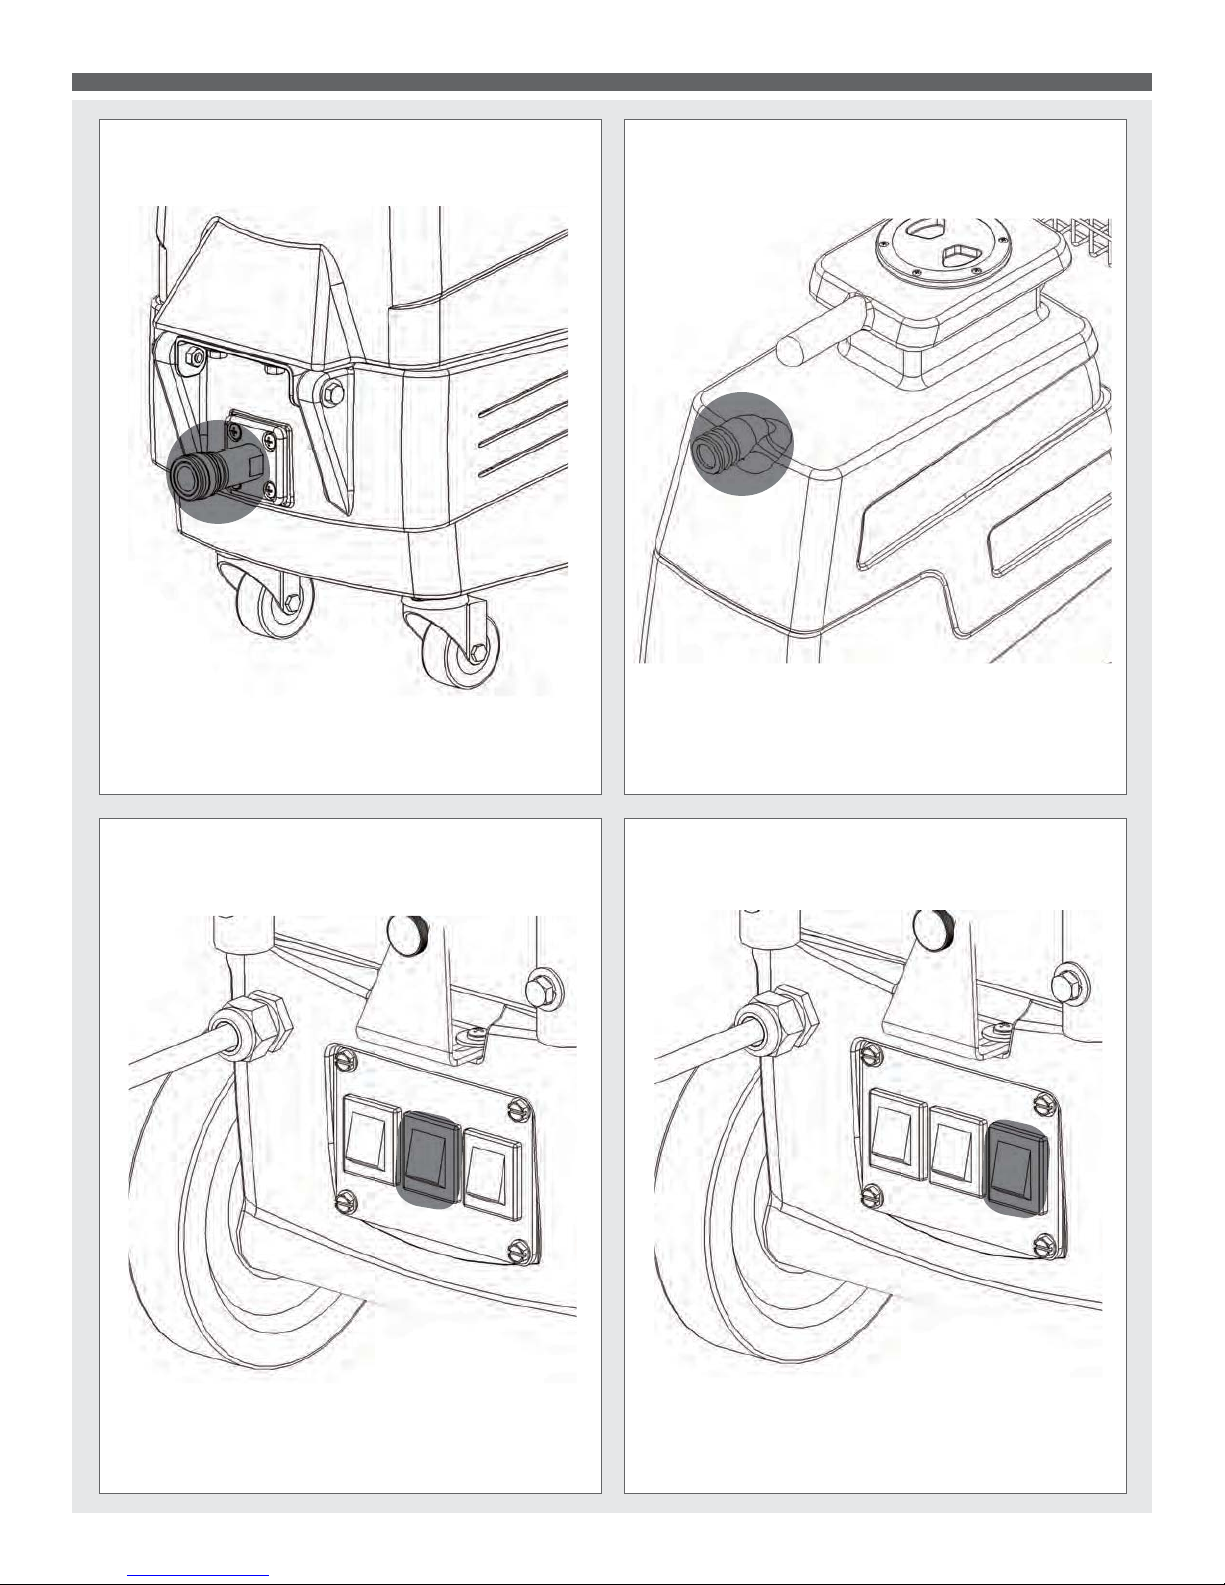
ATTACH VACUUM HOSE TO VACUUM INLET ATTACH HOSE
Firmly attach hose and quick disconnect. Make sure quick disconnects snap together firmly. Once attached to unit connect Q.D. to
upholstery tool. Always inspect hoses for cracks or fraying.
PUMP
VACUUM PUMP HEATER
Connect hose attachment for vacuuming.
HEATER
VACUUM PUMP HEATER
After the machine has been plugged into a 20 amp grounded
outlet, turn on pump. Key tool until upholstery tool releases a
steady flow.
Release tool trigger. Turn on heater. Wait 8 – 10 minutes for unit
to pre-heat. Once heated, re-key upholstery tool until hot water
begins flowing. Once hot water is flowing, release trigger and preheat an additional 4 – 5 minutes.
 Loading...