

Page 1
Beadmaking, Glassblowing,
Fusing and Glass Kiln
Manual
Sundance
Glass
1
Page 2
Introduction
Contents
Thank you for choosing this kiln! We have designed it to
give you many years of reliable service.
Please read this manual. It will help you gain the maximum
enjoyment from your kiln. It will show you how to avoid damag
ing the kiln and will answer many questions. Your instruction
packet also includes a separate digital controller manual. Please
save both manuals.
Inspect the kiln. When you receive your kiln, check the carton
for damage (crushed, holes, etc.). Check the kiln for both inte
rior and exterior damage. If the kiln is damaged, you can refuse
the shipment and have it returned, or accept the shipment after
having the driver note the damage on the Bill of Lading.
Check the Bill of Lading to insure that you received the correct
number of packages. Note any shortages on the Bill of Lading,
and have the driver sign the copy.
If there were no signs of visible kiln damage and you discover it
after the driver has left, notify the shipper immediately.
Save the shipping carton. It was carefully designed to provide maximum protection during shipping. Use the carton to
take the kiln to seminars or on vacation, or to return the kiln to
the factory for repairs.
Needless worries. Tremendous stresses are generated
within the kiln. The ceramic fiber firing chamber actually expands and contracts with each firing. Do not be concerned if
small cracks appear in the fiber. This is normal. These are sur
face cracks that close tightly when the heated fiber expands. You
may find a small pin hole in the center of the firing chamber. It
is from the manufacturing process and will not affect the kiln’s
performance.
The paint around the door will eventually discolor from heat.
This, again, will not affect the kiln’s performance.
Safety 3
Setting Up the Kiln 4
Electrical Installation. . . . . . . . . . . . . . . . . . 4
Where to Locate the Kiln . . . . . . . . . . . . . . 4
Transporting the Kiln . . . . . . . . . . . . . . . . . 4
Basic Operation 5
Accessories . . . . . . . . . . . . . . . . . . . . . . . . 5
Important Guidelines . . . . . . . . . . . . . . . . . 5
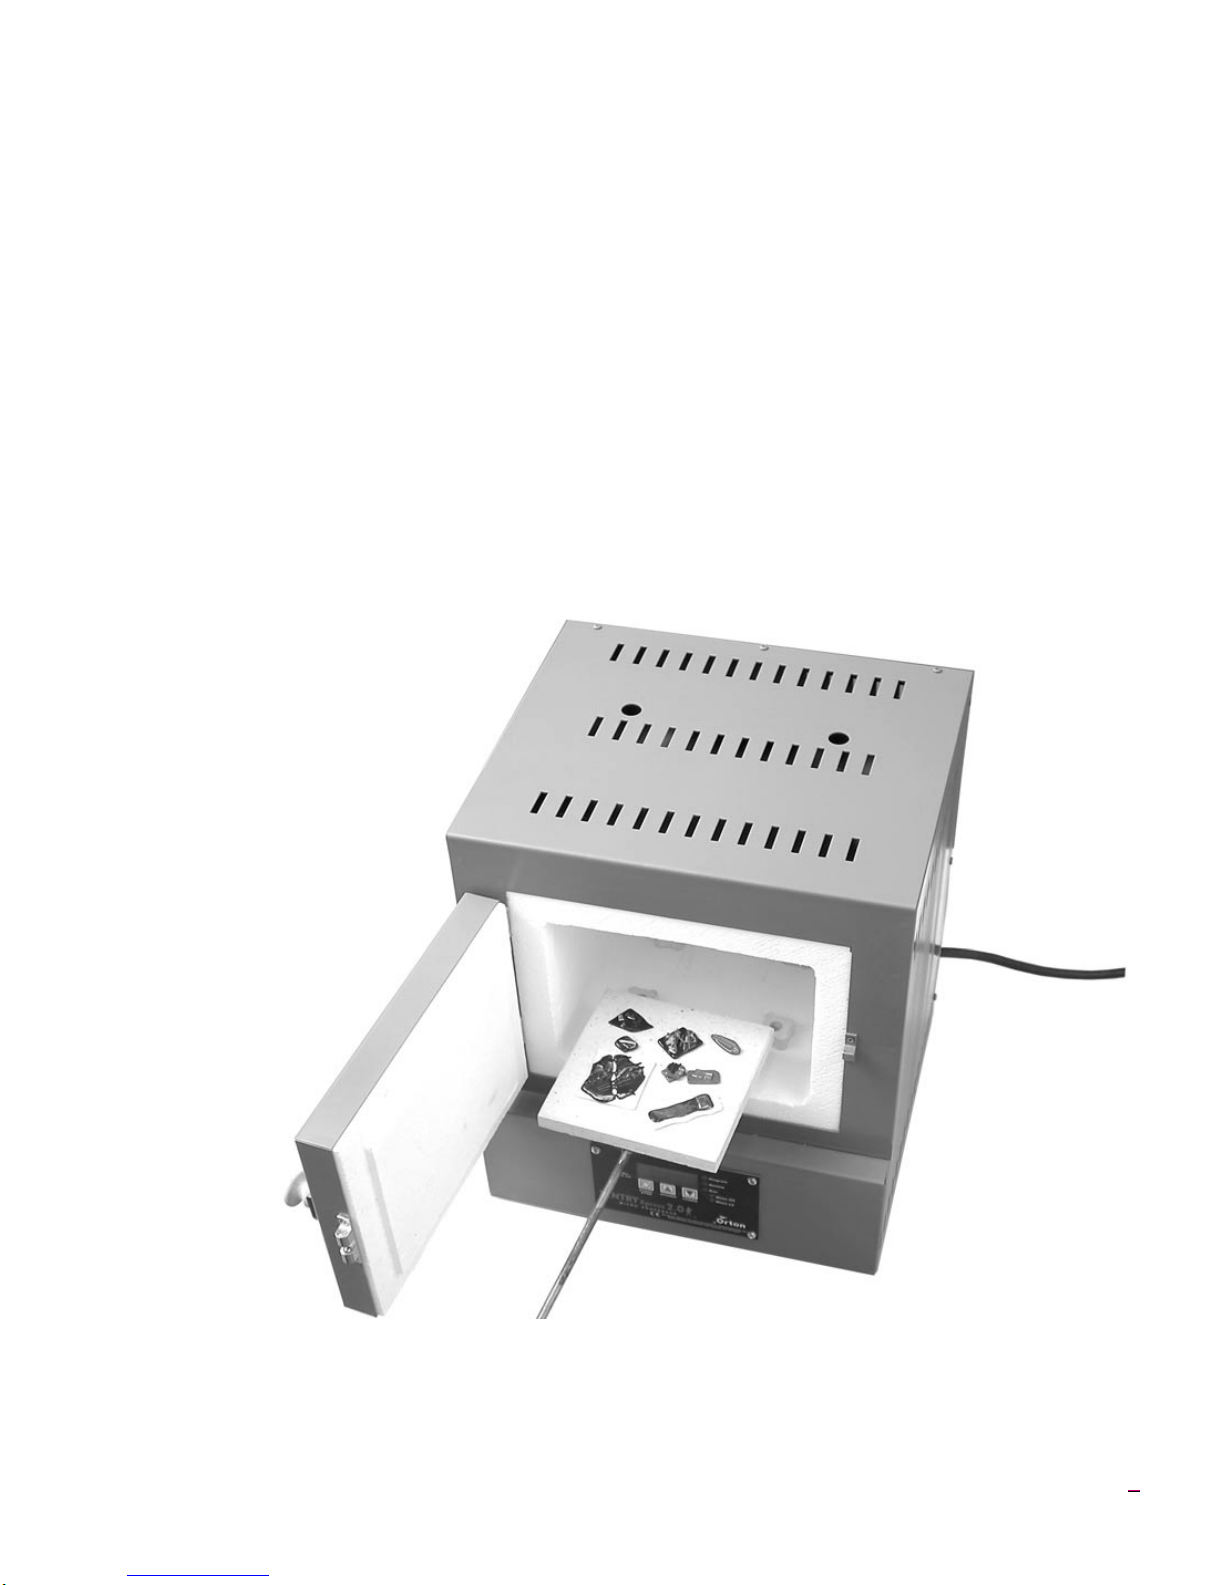
Loading the Kiln . . . . . . . . . . . . . . . . . . . . . 7
Venting the Kiln . . . . . . . . . . . . . . . . . . . . . 8
Silver & Gold Clay 8
Drying Time . . . . . . . . . . . . . . . . . . . . . . . . 8
Loading the Kiln . . . . . . . . . . . . . . . . . . . . . 8
Venting the Kiln . . . . . . . . . . . . . . . . . . . . . 9
Rate, Temperature and Hold . . . . . . . . . . . 9
Cooling Time . . . . . . . . . . . . . . . . . . . . . . . 9
Combining Silver Clay
With Other Materials. . . . . . . . . . . . . . . . . . 9
Glass Fusing & Slumping 10
How to Cut Glass . . . . . . . . . . . . . . . . . . . 10
Fusing Compatibility of Glass . . . . . . . . . . 10
The Annealing Range . . . . . . . . . . . . . . . . 10
Cleaning and Gluing the Glass . . . . . . . . . 11
Loading the Kiln . . . . . . . . . . . . . . . . . . . . 11
Firing the Glass . . . . . . . . . . . . . . . . . . . . . 11
Enameling on Metal 12
Preparing the Copper . . . . . . . . . . . . . . . . 12
Decorating the Copper . . . . . . . . . . . . . . . 12
Firing Enamel . . . . . . . . . . . . . . . . . . . . . . 13
Ceramic Overglaze 13
Pyrometric Cones . . . . . . . . . . . . . . . . . . . 13
Loading and Firing Overglaze. . . . . . . . . . 13
Lost Wax Burnout 14
Overview . . . . . . . . . . . . . . . . . . . . . . . . . . 14
A Sample Program . . . . . . . . . . . . . . . . . . 14
Burnout Instructions . . . . . . . . . . . . . . . . . 15
Firing Mistakes 15
Silver Clay . . . . . . . . . . . . . . . . . . . . . . . . . 15
Glass . . . . . . . . . . . . . . . . . . . . . . . . . . . . . 15
Ceramic Overglaze . . . . . . . . . . . . . . . . . . 16
During firing, you will hear an intermittent, distinct clicking.
This is the sound of the relay(s) sending power to the heating
elements. Do not be concerned with this sound.
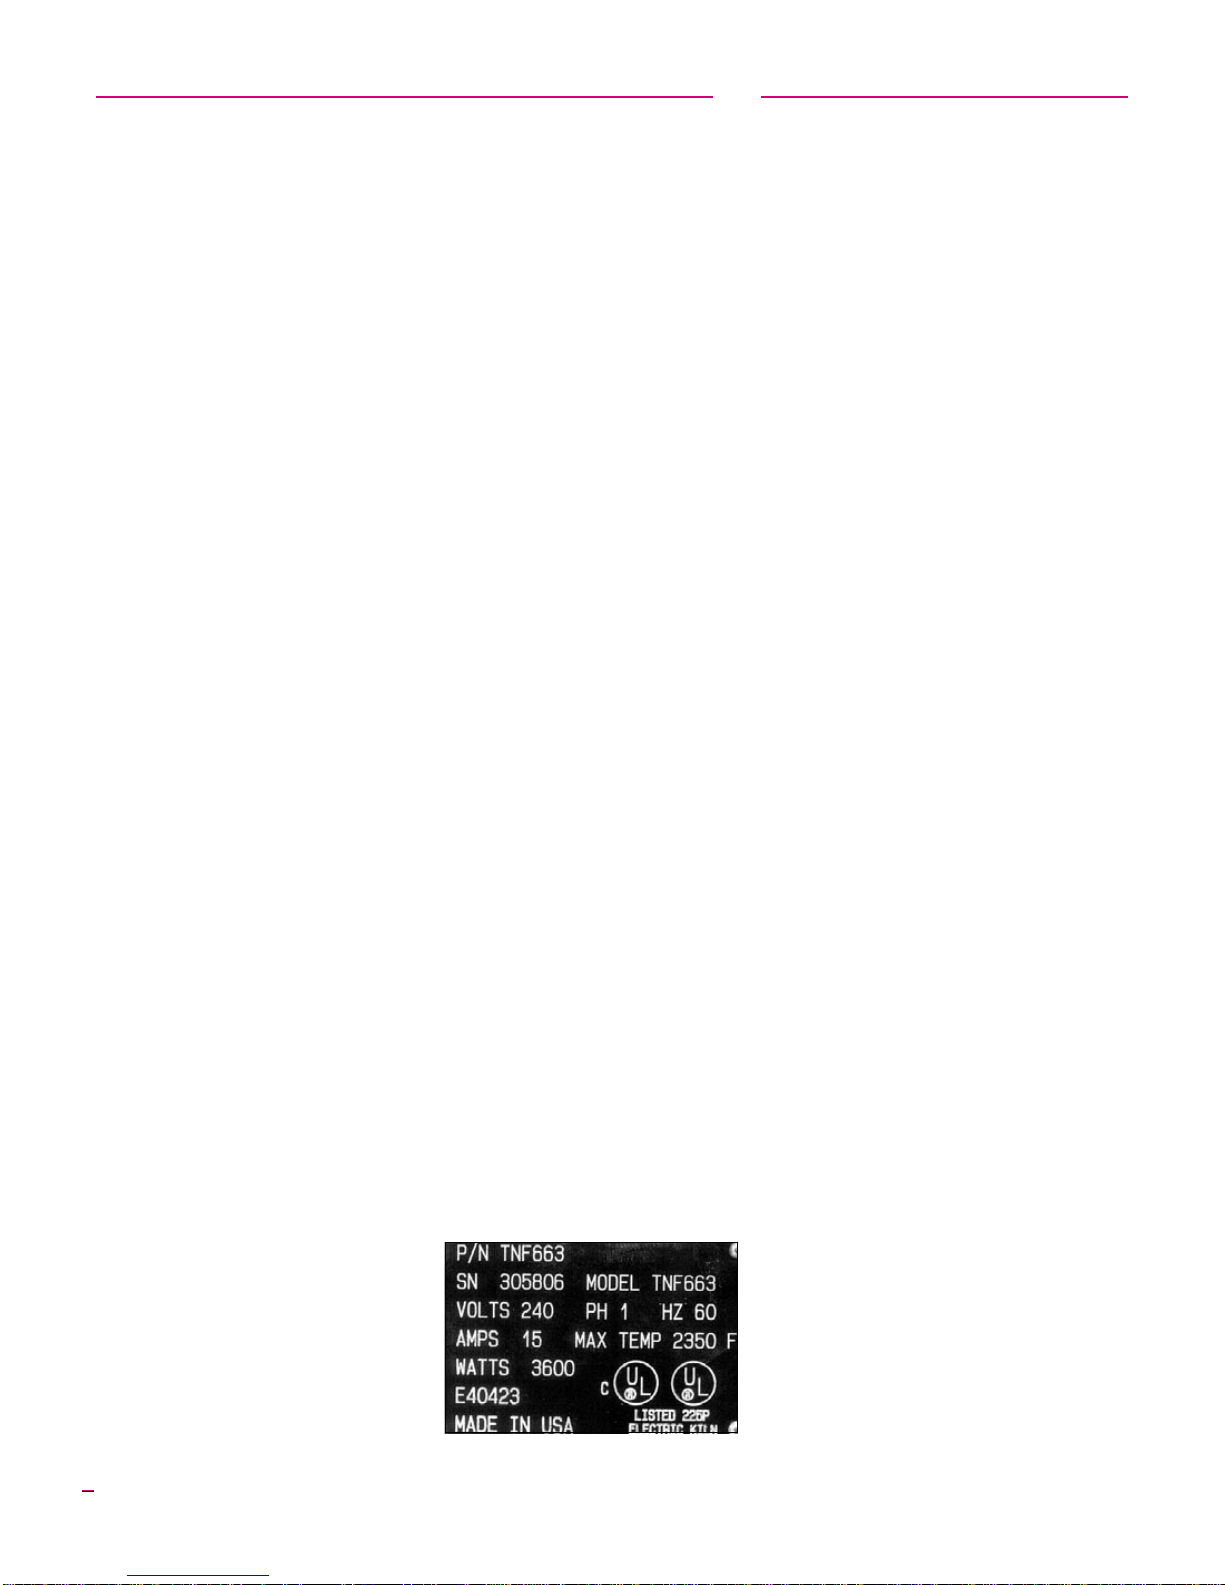
The Electrical data plate. Im
portant information about your
kiln is recorded on its electrical
data plate. Please include this in
formation when ordering parts or
calling your dealer or the factory
about your kiln.
©2001, IM-164/1-02
2
Kiln Maintenance 17
Trouble-Shooter . . . . . . . . . . . . . . . . . . . . 17
Door Latch Adjustment . . . . . . . . . . . . . . . 17
Ceramic Fiber Repair . . . . . . . . . . . . . . . . 17
Cleaning or Replacing Glass View Port . . 17
-
Replacing the Thermocouple . . . . . . . . . . 18
Replacing a Relay or Transformer . . . . . . 18
Replacing the Temperature Controller . . . 19
Replacing the Firing Chamber
(testing the element) . . . . . . . . . . . . . . . . . 19
Page 3
Safety
Overfiring
The warranty on your kiln does
not cover damage from overfiring,
regardlessofthecircumstances.Itisthe
operator’s responsibility to make sure
the kiln turns off at the proper time.
The Ceramic Fiber
Avoid touching the firing chamber
surface with sharp or pointed objects.
They can damage the fiber surface.
Touching the embedded heating
element with sharp or pointed objects is
a shock hazard.
Read the Manual!
Read each page of this manual in detail
before operating your kiln. Warranty
does not cover damage caused by
failure to follow instructions.
Food or Drink Surfaces
Some decorative materials may be
unsafe and toxic when used for surfaces
that will be in contact with food or drink.
When you make food or drink
containers, select a glaze or glass that
has been formulated, tested and labeled
as approved for surfaces that will be in
contact with food or drink. Follow the
glaze or glass manufacturer’s
instructions exactly, without any
variations.
Important Safety Rules
An electric kiln is extremely safe to operate provided you
follow these basic safety rules:
G
Unplug kiln when not in use.
G
Do not touch hot sides.
G
Keep unsupervised children away.
G
Place kiln on a non-combustible surface.
G
Do not installcloser than 12” from any wall
or combustible surface.
G
Fire only in a well ventilated, covered and
protected area.
G
Keep cordset away from hot sides of kiln.
G
DANGEROUS VOLTAGE: Do not touch
heating elements with anything.
G
Disconnect kiln before servicing.
G
Do not leave kiln unattended while firing.
G
Wear safety glasses when cutting glass.
G
Wearfiringsafety glasses when looking into
a hot kiln.
G
Keep food away from your work area.
G
Never fire tempered glass inside a kiln. It
could explode.
G
Avoid firing toxic materials inside the kiln,
suchas styrofoam (used as a coreforhollow
beads).
G
Kilnswiththeglassviewport:do notfirethe
kilnhotterthan1700°F/926°C.Firinghotter
will damage the glass.
3
Page 4
Setting Up the Kiln
Electrical Installation
Youmustplugyourkilnintoacircuitthatnootherappli
anceuses whilethekiln isfiring.Turnoffthecircuitbreaker
or unscrew the fuse for the circuit that your kiln will be
pluggedinto.Checktosee
ifotherappliancesshutoff
too. If that circuit powers
appliances that must re
main on while the kiln is
firing,plugyour kiln intoa
different circuit.
Note: 120 volt kilns:
avoidextensioncords
if possible. If you
must use one, never
use one smaller than
12 gauge and longer
than 20 feet. Never
plug it into a ceiling
outlet!
-
2 Remove gasoline, paint, and other flammable
materials from the kiln room.
3 Providea minimum of 12 inchesclearancebetween
kiln and the closest wall.
4 Never allow the room temperature of your firing
-
roomtoexceed100-110°F.Measurethe tempera
tureabout3feet fromthekiln.Ifnecessary,usefans
to lower room temperature.
-
Voltage fluctuation can vary firing time from as little as
halftomore than twice the average time. If the voltage is too
low, the kiln may never reach full temperature.
The receptacle must have a separate safety grounding
wire. This protects you from serious electrical shock.
Changing the cord plug will void your warranty!
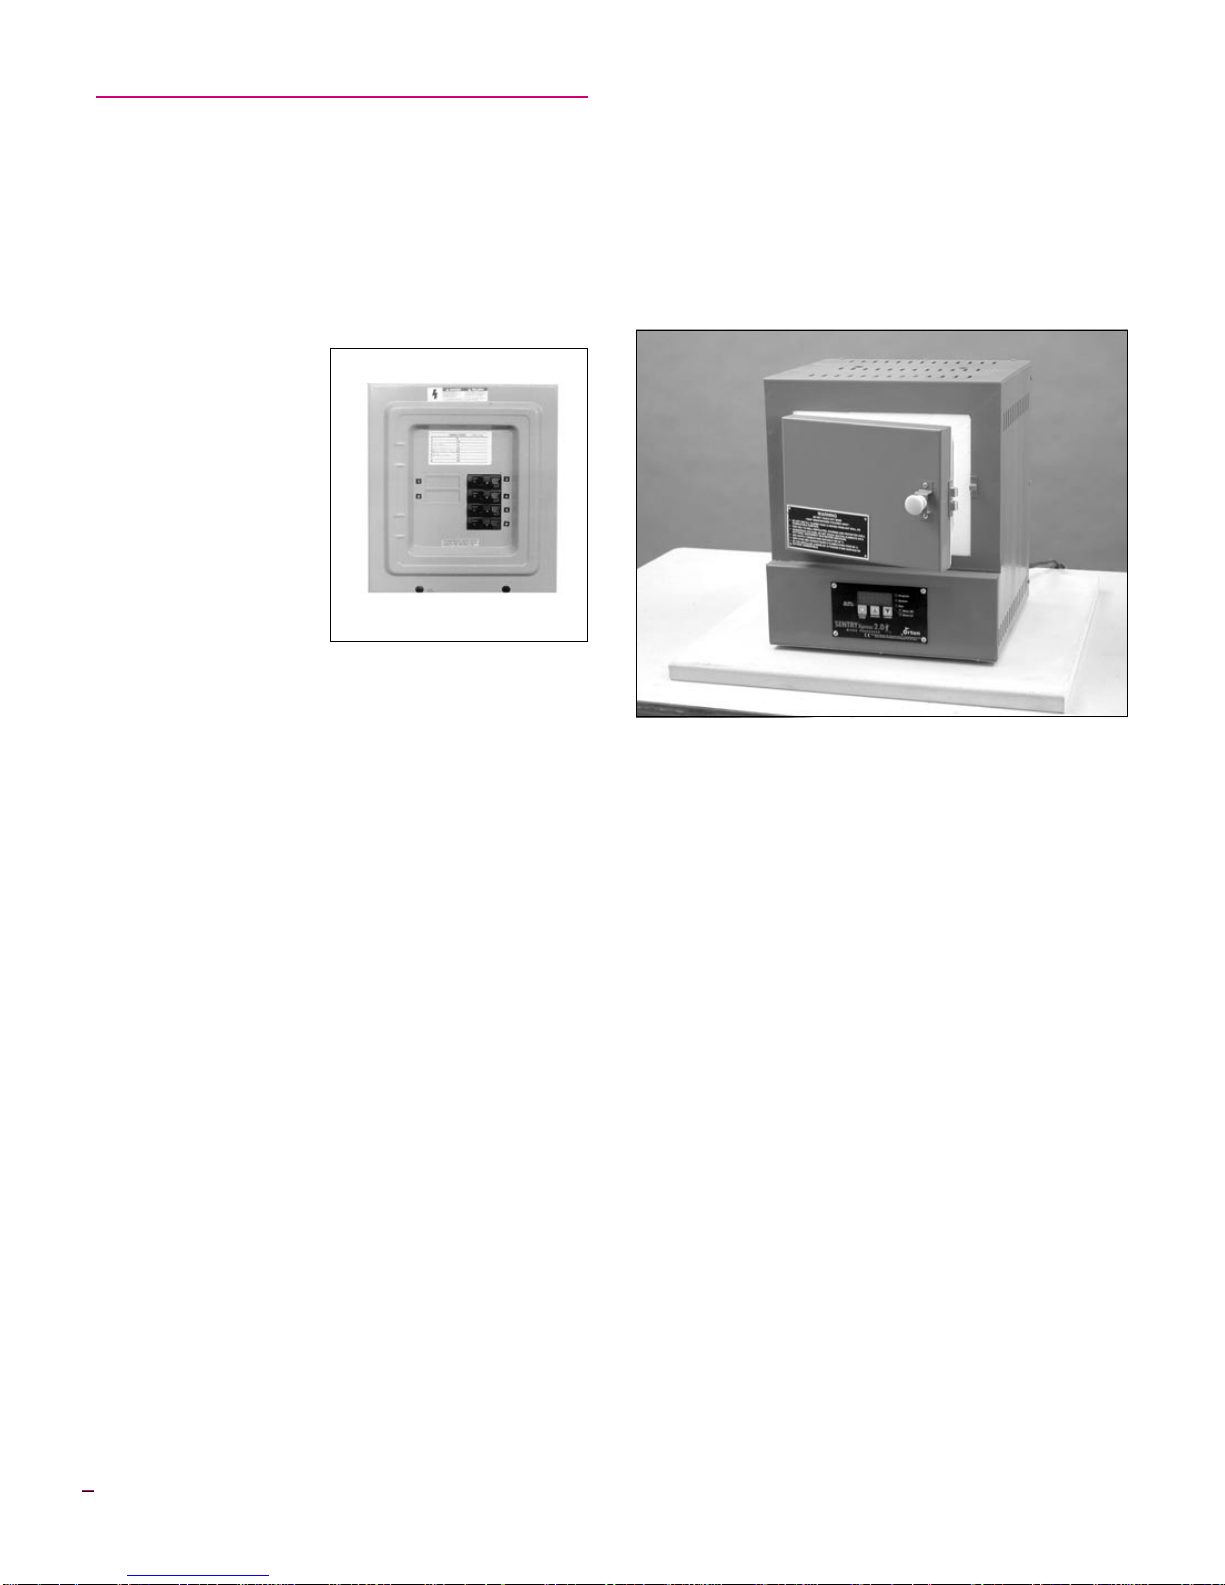
Where to Locate the Kiln
1 Place your kilninawellventilated, covered andpro
tected area such as the garage, basement, utility or
hobby room.
Note: Somepeople keeptheir kilnoutsideon acov
eredpatio. Thisisokaysolongasthekiln isnotsub
jected to excessive humidity. We recommend good
ventilation.However,somematerials,suchas silver
clay, may not need special ventilation.
-
-
-
Place the kiln on a fire-proof surface, such as a large ceramic kiln shelf.
5 Keepthekilnawayfromcurtainsorothercombusti-
ble materials.
6 Position kiln on a level, fire-proof surface. We rec-
ommendan18” x 18”pieceofsheet metaloralarge
ceramic kiln shelf.
Note: Ifyou are with the kiln at all times during fir
ing, you can place it directly onto a workbench or
kitchen table. A fire-proof surface is ideal, though,
becauseitprovidesa safe placetolayhotshelves re
moved from the kiln.
7 Keep unsupervised children away.
8 Keepthepowersupplycordawayfromthekilncase.
There is little danger of serious burn from accidental
contact if you exercise the same caution you would use with
an electric iron.
-
-
Transporting the Kiln
Some people take their kilns to seminars or on vacation.
The easiest way to transport the kiln is to use the original
packing materials.
Ifyounolongerhavethepackingmaterials,transportthe
kilnonits back with the door facing up. Place a thin sheetof
foamcushioning betweenthedoor andthefiringchamberto
prevent rubbing. Avoid subjecting the kiln to excessive vi
bration during travel.
-
4
Page 5
Basic Operation
Accessories
Ceramic Fiber Shelves
The soft ceramic fi
ber shelf, which comes
standard with the kiln,
cradles gold and silver
clay pieces. These
shelves are not suitable
for firing glass or ce
ramics.
Ceramic Fireclay Shelves & Posts
Ceramic fireclay
shelves, available from
Sundance are hard ce
ramic surfaces on
which to fire ceramics
and glass. Firing glass,
enameling,and ceramic
glazes directly on the
firing chamber bottom
would ruin the bottom.
Shelves can be stacked
using posts.
Glass Separator & Kiln Wash
Glass separator and
kilnwash are mixtures of
finely ground minerals
that will not melt and
fuse together at high
temperatures. They pre
vent glass and ceramic
glaze from sticking to
fireclay shelves. The
main difference between
glass separator and kiln
wash is that the separator is ground more finely to leave a
smooth back to glass pieces laid on the shelf.
Aspowders,glass separatorandkilnwash haveanunlim
ited shelf life. Do not breathe the powder when mixing.
Caution: If glass separator or kiln wash contact a
heating element, that element will burn out in the
next firing. NEVER apply glass separator or kiln
wash to the ceramic fiber firing chamber.
Haik Brush
The haik brush is used to apply
glass separator to the kiln shelf in a
smooth, thin layer. The smoother
the glass separator, the smoother
the underside of the glass.
-
-
-
-
Alumina Hydrate
Delicatesilveror goldclayshapesmay needextrasupport
duringfiringtopreventwarping.Placetheseshapesinathin
layerofaluminahydrateinsideasmallceramicbisquebowl.
Do not breathe alumina hydrate.
Stilts
Stiltsarepoints embedded in a ceramic base. The points
separate enameling and glazed ceramics from the shelf.
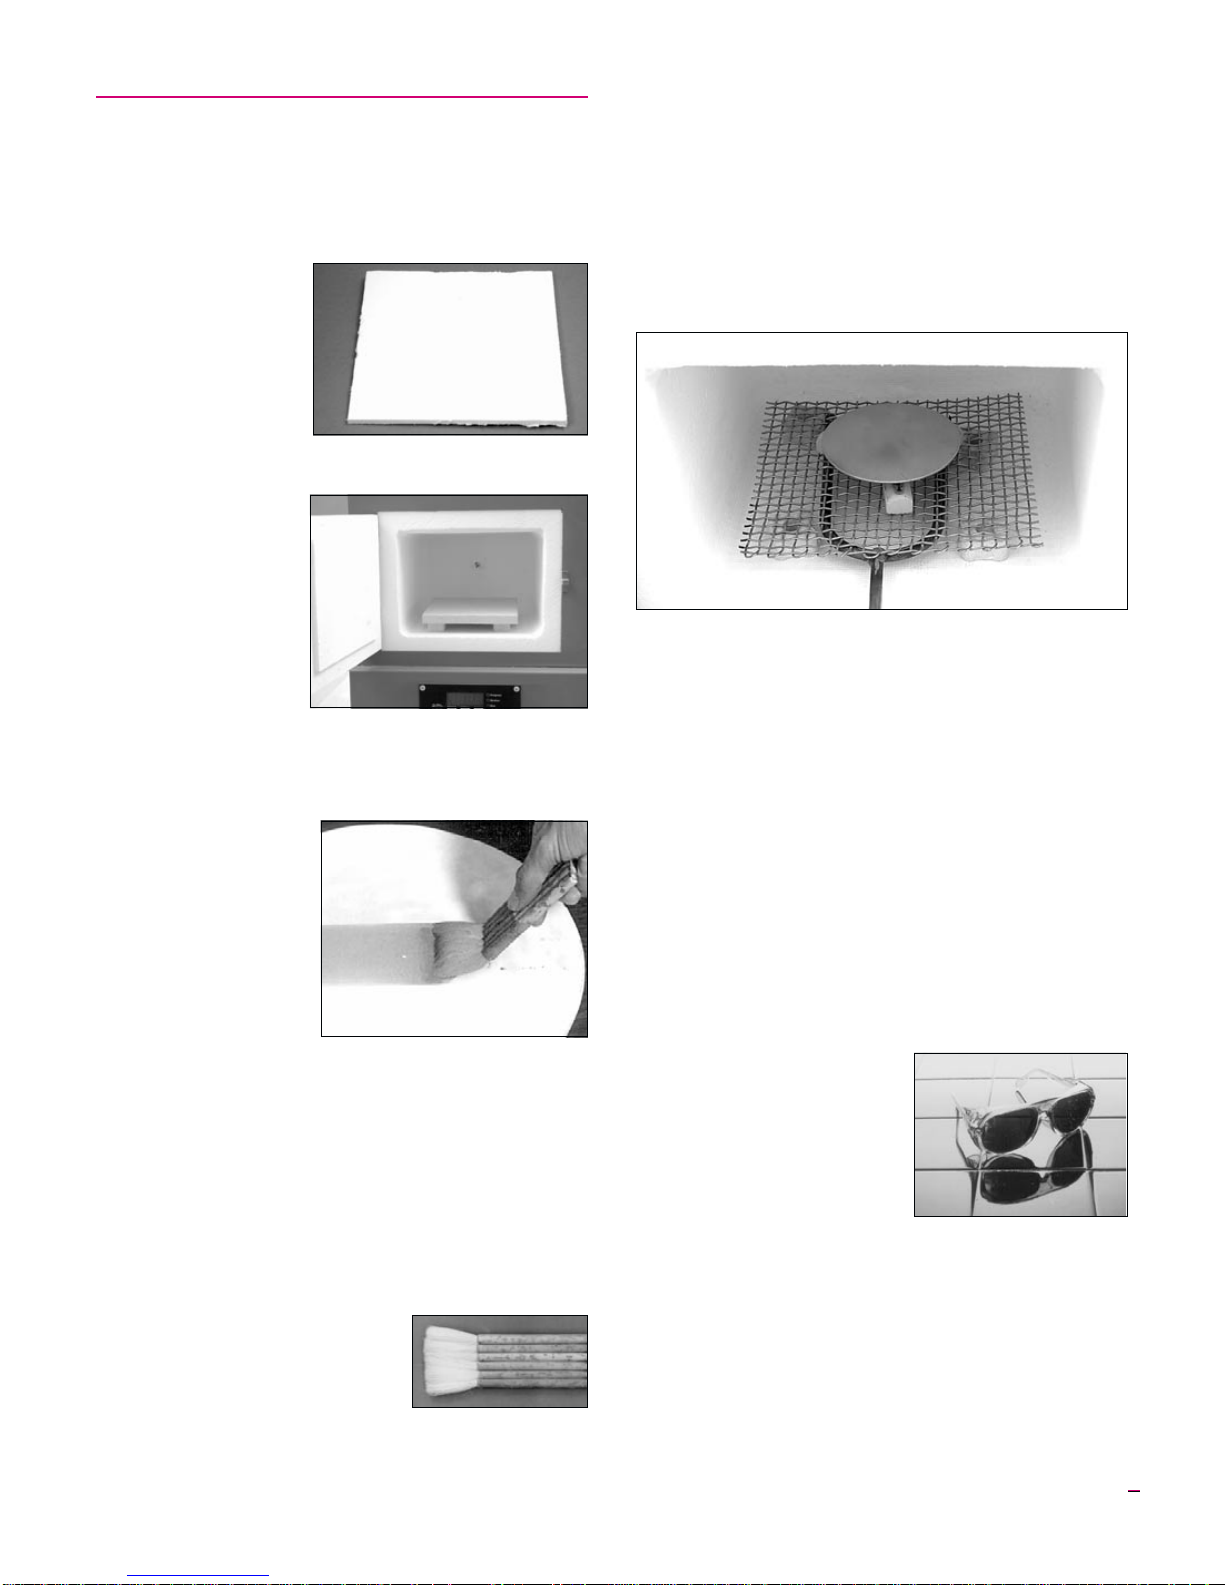
The wire mesh above is referred to as an enameling rack. An enameling
fork lifts therack out of thekiln. A stiltseparates the piece fromthe rack.
Enameling Racks
Enamelingistheartoffiringglassontometal.The metal
shapes are loaded onto a high temperature wire rack. The
enameled pieces and wire rack are loaded into a hot kiln,
fired for just a few minutes, and removed red hot. To load
and unload the racks safely, use an enameling fork.
The heating element under power is dangerous. Do not
touch the element with anything! Turn the kiln switch off
beforeinsertinganenamelingforkintothefiringchamber.
Fiber Repair Filler
Thisisa permanent,hightemperature refractorycement
used to repair holes or cracks in the ceramic fiber firing
chamber.
Safety Glasses
Wear clear safety glasses
when cutting or chipping glass.
Wear firing safety glasses when
-
looking into a hot kiln, such as
when checking the progress of
glass.
Caution: Always wear fir
ing glasses when viewing
the interior through the optional glass view port.
-
5
Page 6
Important Guidelines
The Embedded Heating Element
Theheatingelementsofyourkilnareembeddedintothe
ceramicfiberfiringchamber.Thefiringchambersurface is
hardenedtoadepthof¼”.Thismakesthefibermoredura
ble. It is important that you do not touch the firing chamber
with sharp objects. These can penetrate the fiber surface
and contact the heating element, which is a shock hazard.
Note: Theheatingelementunderpoweris danger
ous.Do not touch the element with anything! Turn
the kiln switch off before inserting an enameling
fork into the firing chamber to remove a shelf.
The Clicking Noise
Do not be concerned if your kiln makes a clicking sound
during firing. Your kiln contains a relay, which sends power
to the element. The relay clicks as it cycles on and off to
maintain the correct temperature.
Check Thermocouple
You will find a small rod, called the thermocouple, ex
tending into the firing chamber. The digital controller
senses temperature by reading a voltage from the thermocouple. If this rod is pushed out of the firing chamber, the
kilnwillassumethat the firingchamberiscold.This will result in an over-fire. Be sure the rod extends into the firing
chamber by ½” - ¾” before firing the kiln.
Vacuum the Kiln
Clean the kiln before firing glass, enameling, or ceramic
glaze. (Cleaning is not necessary when firing silver or gold
clay).Usea softbrushnozzleon avacuumcleanerto remove
dust from inside the kiln.
Removing Hot Ware
To remove hot ware
from the kiln, turn off
the kiln. Carefully slide
an enameling fork un
der the shelf. Place the
hot shelf on a large ce
ramickilnshelfin front
of the kiln. Wear thick
work gloves.
-
-
Firing Log Book
Record the following information in a firing log book:
I
Date
I
Firing temperature, speed and hold; or Ramp/Hold pro
gram
I
Starting time
I
Total firing time
I
Type of pieces
I
Firing results
-
Asyou gain experience, you will finda wealth of informa
tion in your firing logs.
Low Temperature Holds
A low temperature hold (i.e. 200° - 300°F) is more diffi
cult to maintain than higher temperature holds (1400° -
-
1700°F). At low temperatures, turning on the heating ele
ment affects firing temperature to a larger degree than at
high temperatures.
When holding at a low temperature, heat the kiln slowly.
Otherwisethetemperaturemayovershoottheholdtemper
ature before the element turns off.
Avoid Contaminating the Heating Element
Contact with silica or
silica bearing com
pounds, such as kiln
wash, glass separator,
alumina hydrate, glass,
enameling powder, and
ceramic glaze, will ruin
the heating element.
-
Neverfireglazed ceramic
ware, glass, or enameling
directly on the firing chamber bottom. Use a ceramic shelf
on short posts to protect the bottom from glaze drips, glass
and enameling powder.
Caution: Some kilns contain a heating element
embeddedinthe bottomofthefiring chamber.Materials such as glass and glaze, if absorbed into the
fiber firing chamber, can ruin the element. This
type of damage is not covered by warranty. Prevent
glass separator, kiln wash, and alumina hydrate
from falling from a shelf onto the firing chamber.
These materials can destroy the element.
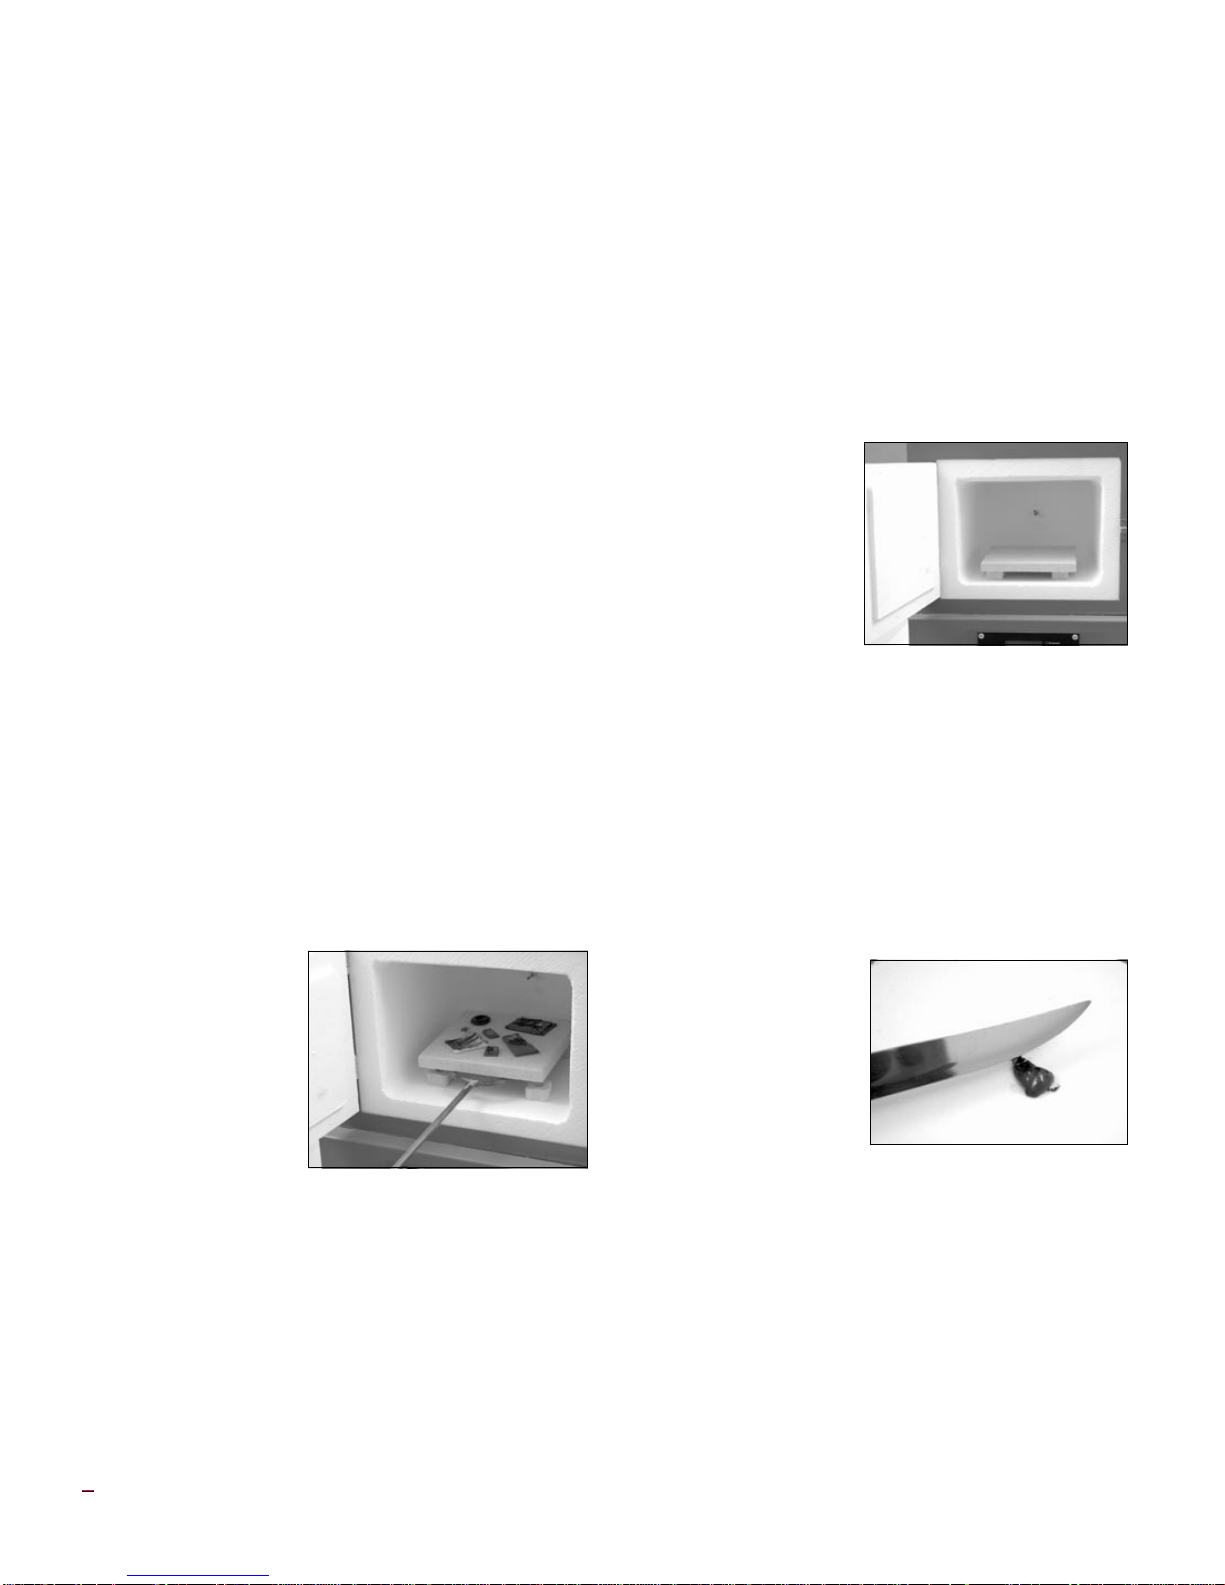
Note: If a contami
nantsuchasdripping
glassorglaze embeds
into the firing cham
ber, unplug the kiln.
Gently scrape off the
contaminant with a
knife, being careful
not to damage the
heatingelement.Vac
uum the kiln.
-
-
-
-
The Effect of Silver Residue on Glass
Firing silver clay leaves traces of silver in the poresof the
firingchamber.Sometimesthere is enough silverresiduein
the kiln to affect colors of glass. For instance, green might
turn yellow.
Note: Before firing an important glass piece in a
kiln used for silver clay, perform color tests. Fire
small samples of each glass color on a base sheet of
clearglass.Placethe glassonafireclayshelf(notthe
soft fiber shelf).
-
-
-
-
6
Page 7

The Optional
Glass View Port
Caution: Wear fir
ing safety glasses
whenever looking
into the optional
view port.
Maximum tempera
ture for a kiln with view
port is 1700°F/926°C.
Firinghotterwilldamagetheglass.Seepage17forglassport
maintenance instructions.
-
-
Loading the Kiln
Place Ware on a Protective Shelf
Alwaysprotectthefiringchamberby firingyourpieceson
a shelf or in a bowl. Do not place the pieces directly on the
bottom of the firing chamber.
Types of shelves and containers:
Fiber Shelf
Place the standard fi
ber shelf directly onto the
kiln bottom. This shelf is
used to support silver and
gold clay.
Note: Fireonlysilver
or gold clay on the fiber shelf—never ceramics, enameling or glass. Do not coat the fiber
shelf with glass separator or kiln wash.
Fireclay Shelf
Ceramic fireclay
shelves, available from
Sundance protect the fir
ing chamber bottom and
provide a smooth surface.
Use a ceramic shelf in
yourjewelry kilntofirece
ramics, glass, and enameling.
Insulating Firebrick
Piece
Insulating firebricks
are porous, light-weight,
and canbe shapedtosup
port delicate silver clay
designs. Carve the fire
brickwithaknifeorhack
saw.
Ceramic Bowl
You can purchase an unglazed, small ceramic bisque
bowlfroma ceramic supplystore.Thebowl willlastthrough
many firings. Use it to hold alumina hydrate. You can also
shape hot glass by slumping it into the bowl.
-
-
-
-
-
-
Note: Ceramic shelves and bowls and insulating
firebricks may slow the firing. They absorb more
heat than the ceramic fiber shelf. They also cool
more slowly than the fiber shelf.
Applying Glass Separator or Kiln Wash
Glass and ceramics are fired on a fireclay kiln shelf and
notdirectly onthekilnbottom.Youcanalsoslumpglassover
amold, suchasabowl.The kilnshelfandsaggingmold must
becoatedwithglassseparatortokeepglass or ceramic glaze
from sticking to them.
A coat of glass separator or
kiln wash will usually last
through several firings. When
the shelf coating begins to
crack or chip, apply a fresh
coat.
Whenrecoatingashelf,re
move most of the old coating
with grit cloth (available from
sundance). This is an abra
sive-coated mesh that allows
residueto pass through. Removing the old coatinggivesyou
a smooth surface to start with. Then recoat the shelf using
thefollowingdirections. (Both glassseparatorandkilnwash
will be referred to as “separator.”)
Caution: Donotapply glass separator or kiln wash
totheceramic fiber firingchamberorto the bottom
of the shelf! Contact with glass separator or kiln
wash can ruin the embedded heating element.
Note: Do not coat the soft ceramic fiber shelf with
separator. If you are firing only silver or gold clay,
you do not need separator. When firing silver clay
withglass, however, fire the piece on ahard fireclay
shelf coated with separator.
1 Mix the separator with water followingthedirections
on the bag. Stir.
2 Useahaik brush or a soft
paint brush to apply the
separator to the shelf.
(The haik brush is easier
to use because it lays
down a more even coat
ing.) Each time you dip
your brush into the sepa
rator mixture, swirl the
brush around the bottom
of the container. This is
because the separator settles quickly. Use two or
three thin coats changing the direction of the brush
stroke 90° with each coat.
3 Drytheshelf beforefiring.Tospeeddrying,placethe
shelf on three ½” posts inside the kiln. Heat at full
rate to 300°F/148°C and hold for five minutes. Then
turn off the kiln and leave the shelf inside.
-
Separator lasts through several
glass firings. Apply new separator
when the oldcoat begins to flake.
-
-
-
7
Page 8
4 Afterthe separator has dried and your shelf is cool,
youcansmoothen the separator further by rubbing
your hand lightly over the shelf. The smoother the
separator,thesmootherthe backsideoftheglass.
A coat of glass separator will usually last several firings.
The lower the fusing temperature, the more firings you can
get from one application of separator.
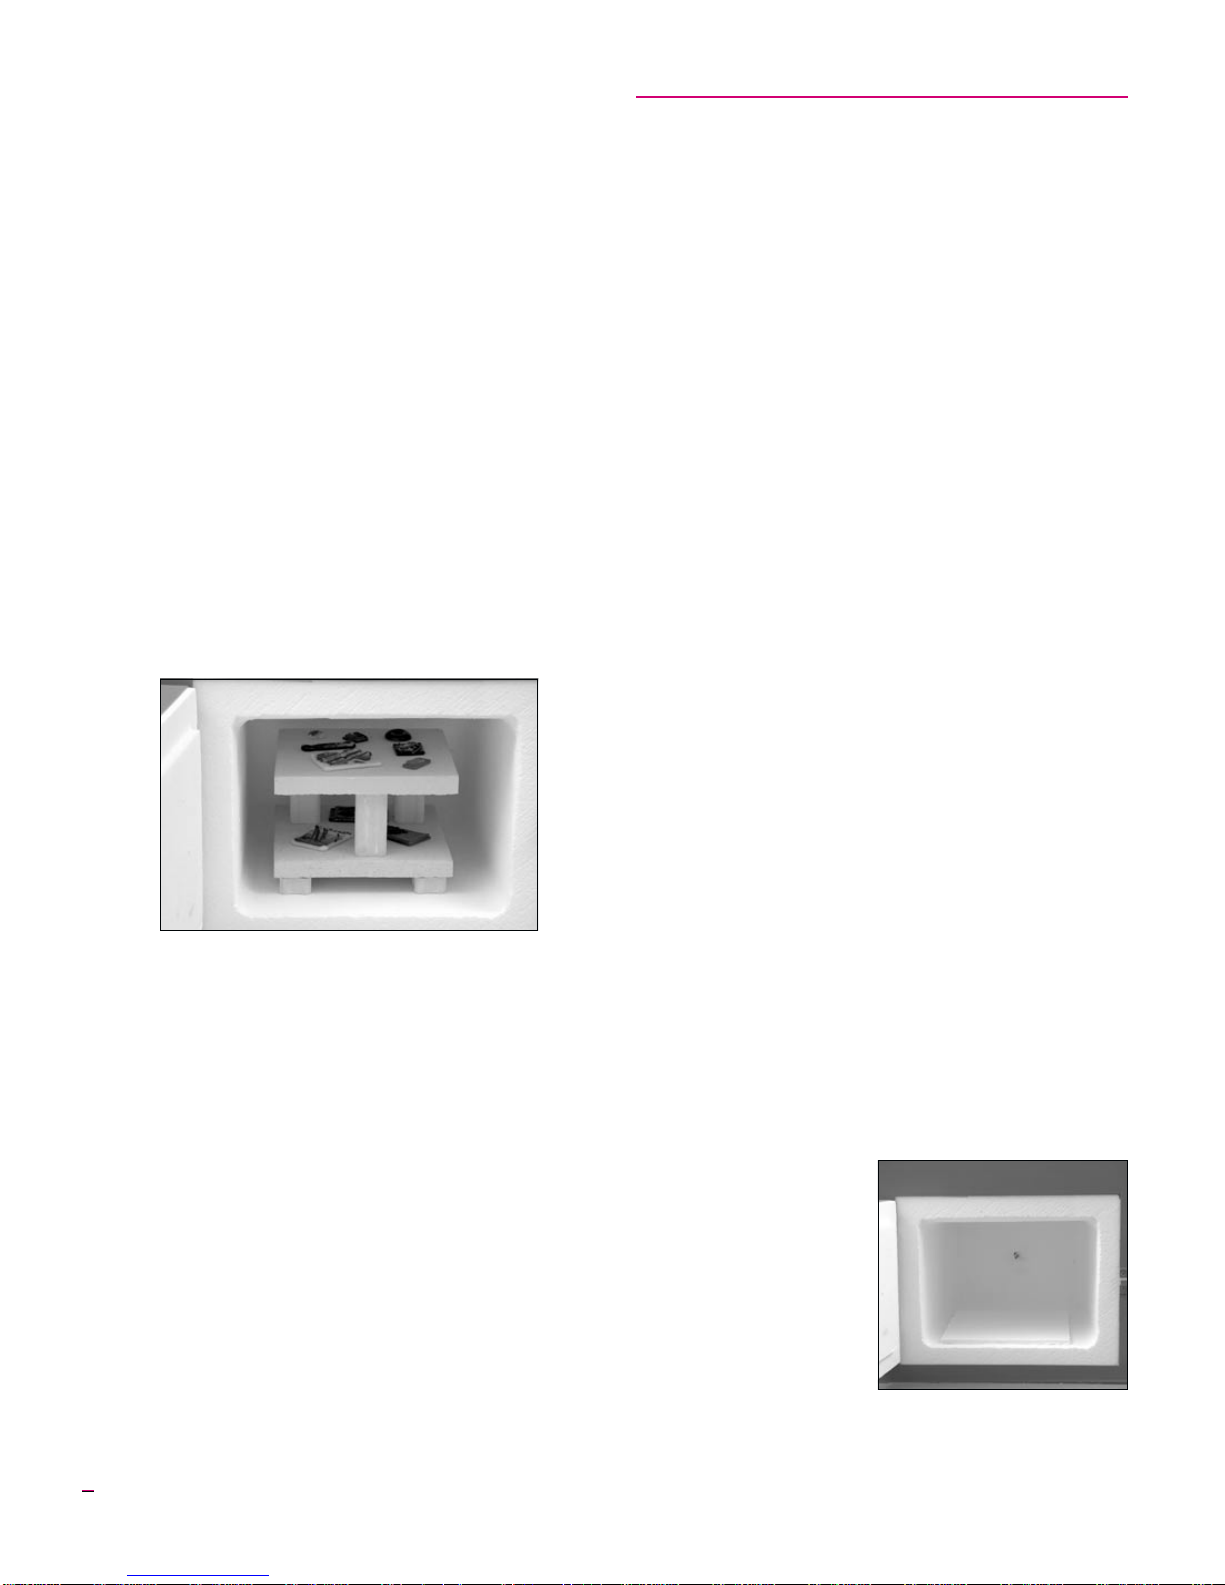
Using Ceramic Fireclay Posts
Ceramic posts support ceramic fireclay shelves inside a
kiln.
I
Donotuse postsundertheceramic fibersoftshelf.Place
the fiber shelf directly onto the bottom of the firing
chamber.
I
Place three ½” posts under the ceramic hard fireclay
shelf. This aids air circulation, preventing heat built-up
under the shelf.
I
Youcan firetwoormoreceramicfireclayshelvesinaPar
agon jewelry kiln. Support the bottom shelf on three ½”
posts. Separate the shelves with taller posts. The length
of the posts and the number of shelves you can fire de
pends on the size of the kiln. When you load multiple
shelves,fireataslowerrate.Thisaidsheatdistribution.
Silver & Gold Clay
Withsilverclay, it ispossibletoshape intricate,free-form
silver jewelry in minutes—even as a beginner. (The clay is
alsoavailablein gold;forsimplicitywe willrefertoboth met
als as “silver clay.”) At the time of printing, the silver clay
brands available were Art Clay Silver and Precious Metals
Clay.
Silver clay looks and feels like modeling clay. It is formed
withsimpletoolssuchas a tooth pick, small knife, and razor
blade. Its surface is pliable and accepts impressions from
objectssuchasleaves,coins,andcoarsefabrics.Afterthesil
ver clay is formed, it is fired in a kiln. The recommended
temperature and hold time is included with the silver clay.
Formingandfiringsilverclayissimple.Thereisnothing
mysterious about making silver clay jewelry. The silver clay
is made of micron-size silver (or gold) particles held in an
organic binder. During firing, the binder burns away. The
silver particles then fuse together forming real silver. Since
thebinder disappears,thereisacertainamountofshrinkage
duringfiring. Shrinkage varies depending onthe type of sil
ver clay you use.
-
-
-
Venting the Kiln
Some types of ware, such as glass and ceramics, contain
impurities that burn off during firing. These impurities
mustbe releasedfromthekiln.Otherwise theycanaffectthe
quality of the ware.
Silver and gold clay need no venting unless you are firing
themwith amaterialthatburnsout forahollowshape,or you
are combining them with another material such as glass.
Ifthekiln hasavent hole,openthevent. Ifitdoes nothave
a vent hole, open the door about ½”. Venting will be ex
plained in greater detail in sections on glass and ceramics.
Drying Time
Small, thin silver clay pieces can be placed into the kiln
whilestill moist, and fired. Thicker pieces need time to dry.
Otherwise they may warp during firing.
Tobeon thesafeside,givethe silverclayplentyof time to
dry. As you gain experience, you will know just how much
drying time each type of piece needs. You can speed drying
with a hair dryer.
Loading the Kiln
Silverclaypiecesthathaveaflatsidecanbeplaced inside
the kiln directly onto a shelf. Use the soft ceramicfiber type
shelf. It cushions the clay silver.
I
Silverclaypiecescanbeclose together,butthey mustnot
touch.
I
The soft ceramic fiber shelf can be placed directly onto
thefiringchamberbottom. It is not necessary to support
the fiber shelf with posts, since the heat transfers easily
through the fiber shelf.
I
-
Donotcoatthe ceramic
fiber shelf with kiln
washorglassseparator.
I
You can also place the
silver clay on a piece of
ceramic fiber batting.
Alumina Hydrate
Rounded, hollow, or
other delicate shapes may
needsupport to prevent collapsing. You can lay these pieces
onto a mound of alumina hydrate.
8
Page 9

If the piece needs only shallow support of ¼” depth or
less, pour the alumina hydrate onto a ceramic fireclay shelf.
Support the fireclay shelf on three ½” posts to aid heat flow
under the shelf.
If the silver clay shape needs deeper support, pour the
alumina hydrate into an unglazed ceramic bisque bowl.
These are available at ceramic supply stores.
I
Place the ceramic bowl directly onto the kiln bottom.
I
NEVERusea glazed bowl to hold the alumina hydrate. If
the glaze runs, it can embed into the firing chamber.
Caution: Avoid breathing alumina hydrate dust.
Caution: Alumina hydrate can destroy the heating
elementoncontact.Ifitspillsontothefiringcham
ber, remove with a vacuum cleaner.
-
combination, eliminating the need to visually check the
glass.
Venting the Kiln
Silver clay by itself needs no venting. Load the kiln, close
thedoor,andleaveitclosed untiltheclay silverisready tore
move.
The kiln needs venting if you fire ceramics or glass with
the clay silver, or if you make hollow objects that contain a
core of organic materials.
Paper maché and paper clay are good core materials. Do
not use wax or styrofoam as a core. They emit harmful
fumes.
Rate, Temperature, Hold
Each brand of silver clay fires to a specific temperature
andholdtime.Thisinformationisavailablefromyoursilver
clay supplier.
Note: Hold time is the length of time that the rec
ommended temperature is maintained in the kiln.
Do not fire longer than the recommended hold, or
the silver will begin to overfire.
Besides selecting a temperature and hold time on your
kiln’s digital controller, you will also need a firing rate. (See
the separate digital controller instruction booklet.) Select a
Full Power rate if you are firing silver clay alone. If you fire
glassorceramics withthesilverclay, selectaratebest suited
for the glass or ceramics.
Note: Do not place silver clay into a kiln that is al
readyhotunlesstheclayiscompletely dry. The kiln
should be no hotter than 500°F/260°C when insert
ing the silver clay.
After the kiln begins firing, leave the door closed. Do not
open the door until it is time to remove the clay. Visual in
spection of the clay is unnecessary.
If you are firing glass with the silver clay, on the other
hand,youmayneedto check the fusing progress oftheglass
by opening the door ½” and looking inside. Look for just a
second or two. As you gain experience, you will be able to
programthecorrect temperature forthesilverclay andglass
-
-
-
Cooling Time
-
Aftertheclaysilver has fired to completion,youcancrack
the door an inch to speed cooling. If you are firing stones,
glass,orothermaterialswiththesilverclay,itissafertoallow
the kiln to cool slowly with door closed. Remove the piece
when the kiln reaches room temperature.
Silver clay pieces that contain no other materials can be
removed from the kiln at 1100°F/593°C. You can remove
them with tongs and drop them into water.
Caution: Turn the kiln off before inserting tongs
into the firing chamber. Wear protective gloves.
Combining Silver Clay
With Other Materials
Thereare two ways to fire silver claywith other materials
such as glass:
I
Fire the silver clay first by itself. After you have cleaned
andpolished the silver clay, fire it a secondtimewith the
other material.
I
Fire the silver clay and other materials, such as a stone,
together in a single firing.
Enamelingpowderiseasiertofirewiththe silver clay in a
secondfiring.See page12.Glassis oftenfiredwiththesilver
clay in a single firing. Many types of glass will melt to the
point of overfire at silver clay temperatures. So before
combiningglassandsilverclay in a single firing, test a small
sample of the glass. To do this, fire the glass during a silver
clay firing, keeping the glass separate from the silver clay
piece. (This way you won’t ruin the silver clay piece.) Place
theglasspiecesonaceramicfireclayshelf. Youmustcoatthe
shelfwith glassseparator,orotherwisetheglasssamplewith
embed into the shelf.
If the glass sample survives the firing, you can fire that
typeofglasswithsilverclayin a single firing. Note, however,
that different types of glass fire to different temperatures.
Every time you fire a different type of glass, be sure to test.
9
Page 10

Glass Fusing &
2 Hold the straight edge firmly and score the glass
withtheglass cutter.Pressjusthard enoughsothat
the scoring noise sounds steady and unbroken.
Slumping
You will probably fire mostly stained glass, but you can
also fire standard float (window) glass. Some types of float
glass devitrify (form a dull, frosty surface) when fired.
Caution: Never fire tempered glass. It could ex
plode if heated inside a kiln.
Basic Glass Tools
Reservoir Glass Cutter uses a reservoir of oil to lu
bricate the cutter wheel.
Running Pliers are for cutting large pieces of glass.
Breaking Pliers are for cutting small strips.
Grozing Pliers shape the glass by chipping away the
edges.They areoftenusedwhenthescoreline doesn’tbreak
cleanly. Note that rough edges will become smooth when
fired to fusing temperature.
How to Cut Glass
Note: IMPORTANT! Wear safety glasses when
cutting or chipping glass.
1 Lay the glass on a clean surface. Mark off the cut
withagreasepencilor felt-tip pen. A smallmarkon
each end of the glass will do. Lay a wooden straight
edgeoverthe glassandlineit upwiththemarks you
just made.
-
3 Place the straight edge under the glass so that an
edge is lined up with the score line you just made.
Press down on the glass. It will break cleanly.
Fusing Compatibility
of Glass
When glass changes temperature, it expands and con
tracts.Therateatwhich glasschangessize iscalledthecoef
-
ficient of thermal expansion. If you fuse two glass pieces to
gether and one changes size faster or slower than the other,
the fused piece may crack—even several months after fus
ing.
Whendifferentglasses have a close enough coefficient of
expansiontofusesuccessfully,they’recalled fusing compati
ble. Buy glass labeled fusing compatible. Or fuse glass that
has been cut from the same sheet, which guarantees com
patibility.
Fusing Compatibility Test
1 Totestglassforcompatibility,fusesmall½”square
samplepiecesof differentglassesontoa largerbase
piece of clear transparent. It should extend beyond
thesmall samplepiecesbyhalfaninchon eachside.
One of the sample pieces should be cut from the
base piece.
2 Heat the glass to a temperature that completely
rounds the edges of the small sample pieces.
-
-
-
-
-
-
3 After the glass cools, place a polarizing filter under
the glass and another filter over the glass. Look at
theglasswith lightshiningthroughit (hold itovera
lamp).Turn one of the filters until the filters areat
their darkest.
Results of the Test
Ifyou see a halo around the edges ofthe small glass sam
ples,thisusuallymeanstheglassisnot compatible.Ifyousee
no halo, the glass is fusing compatible.
Why did we include a sample square cut from the base
transparent glass? It tests for annealing. A halo around that
piece means the glass was not annealed properly. Perform
thetestagain,thistimecoolingmoreslowlythroughthean
nealing range.
The Annealing Range
Each type of glass has a temperature range that it must
passthroughslowlywhenitcools.Thisiscalledtheanneal
ing range. This slow cooling gives hot glass time to release
thestressofcooling.Ifyoucooltheglass toofastthrough the
annealing range, it will break.
The larger and thicker the glass, the slower it must pass
through its annealing range. You cannot over-anneal, so err
-
-
-
10
Page 11

on the side of caution if you aren’t sure how long to anneal.
Smallprojectssuchasearringsrarelyneedannealingtimeas
they cool.
Cleaning and
Gluing the Glass
Grease, dirt, and
fingerprints etch per
manently into the
glass during firing.
Clean the glass with
glasscleaner(thetype
without silicones),
rubbing alcohol, or
even plain water just
before assembling
the pieces on the kiln
shelf.
Use white glue,
such as Elmer’s
diluted1:1with water,
to hold the glass
pieces together after
you place them on the
kiln shelf. Use the
gluesparingly.Glueis
especially important
whenfusing wire into the glass. The glue prevents the glass
or wire from moving out of place before they fuse. The glue
disappears during firing.
Avoid using glue on the coated side of dichroic glass. If
youlaydichroicglasscarefully onto the piece, glueisunnecessary,soavoiditaltogether if you do notknowwhichsideof
the dichroic is coated.
-
Loading the Kiln
Air should circulate
between the shelf and
the bottom of the kiln,
so place three or four
1/2” posts in the kiln.
Lay the shelf over the
posts.
Firing the Glass
1 Vent kiln by openingthedoor½”and leaving thevent
hole (if your kiln has one) open. Venting allows the
gasesreleasedto escape. Whenthekilnreaches500 800° F / 260 - 426°C, close the door.
2 The first time you fire a particular brand or type of
glass, program the controller for a higher tempera
-
Looking at the glass during firing. Open the door about ½”. Always
wear firing safety glasses when looking at the hot glass.
ture than the estimated fusing temperature. Watch
the glass by opening the door ½” for several seconds
at a time. Shut the kiln off when the glass fuses the
way you want. Make a note of the shut-off tempera
ture. For future firings, program the kiln for that
temperature and rate.
Note: With everyfiring,besureyou arenearthekiln
before the expected shut-off time.
3 After you shut the kiln off, vent the kiln for five min-
utes by opening the door 1”. Then close the door.
Note: Someglass artists flash cool the glass after it
fuses. They vent the kiln until the temperature
drops to 1000° F. Then they close the door again.
This speeds up cooling.
4 The annealing range for most glasses is between
950°/510°C and 700°F/371°C. Cool slowly through
this annealing range. Leaving the door closed will
slow the cooling enough for most projects. If you
need even slower cooling, program a separate seg
ment for cooling. See the kiln’s digital controller
manual.
Note: For safest cooling, leave the ware inside the
kilnuntilthe kiln reaches room temperature. If you
remove the ware too soon, the sudden temperature
change can crack the piece.
To remove small
pieces, such as glass
jewelry, before they
have cooled com
pletely, remove the
shelf also. Leave the
pieces on the shelf
untilthey reachroom
temperature. The
heat in the shelf will
help prevent them
from cooling too quickly.
Caution: Beforeremoving a shelf,turnoffpowerto
the kiln.
-
-
-
11
Page 12

Enameling
on Metal
Preparing the Copper
Enamels come in transparent or opaque. They can be
purchased directly from Thompson Enamel, P.O. Box 310,
Newport, Kentucky 41072. Their Lead Free Enamels come
readytouse. Noenamelwashingisrequiredforthese enam
els.
Startwithoneof themanypre-shapedcopperformsavail
able, or shape and trim the copper to your own design.
1 Heat the copper on an enameling rack to about
1400°F/760°C to burn off oil or grease. Heat the
copper to just until smoke from oil or grease stops
coming off the metal and its color has changed to a
purple-red-pale green iridescence that moves
across the copper. This indicates that the grease
hasvaporized.Do not fire the copper any longer than
this point. Otherwise excess fire scale will form,
making the next cleaning step difficult.
2 After the copper cools, brush any loose scale from
the copper. Use a brush or paper towel, being sure
thatyoudonotput anygreaseor oilontothe copper,
Decorating the Copper
Counter Enameling
Most enameled pieces should be counter enameled on
the back side. This gives the piece a much more finished
look, it eliminates a great deal of fire-scale cleaning, and it
controls the chipping and cracking that can result from the
different rates of expansion and contraction in copper and
enamel after the enamel has been fired.
-
-
Counter or backing enamel, a mixture that gives a mot
tled effect, can be used for counter enameling. Or you can
useregularenamel.Counter enamelisappliedbythe sifting
method described below.
When firing counter enamel, underfire it so that the fire
scale on the front of the piece isn’t too difficult to remove.
Youcanpurchaseamaskingpreparationfromyoursupplier
tohelp prevent fire scale. You must place thepiece on a stilt
whenfiringtheother(front)sideofthepiece.Thestiltprevents the back of the counter enameled piece from sticking
to the enameling rack.
-
such as fingerprints. Clean the copper with a 3M
Scotch-Brite® pad. This pad does such a good job
that in most cases no further cleaning will be re
quired. Additional copper cleaning products are
availableintheThompsonEnamel Catalog,includ
ing Sparex No. 2.
Itisbesttocleanthe copper just before you decorate it.If
youwaittoo longtodecorateafter cleaning,thecoppercould
get dirty again.
-
-
Applying Enamels
Apply enamel over a clean sheet of paper so you can pour
theexcessbackintothebottle forreuse.Transparentenam
els should be applied in several thin coats. Transparent
enamels can be mixed with fairly good results. If opaque
enamelsaremixed,however, agrainyeffectresults.The two
basic methods of applying enamels are sifting and spatula.
Sifting Enamel
SprayorbrushThompsonholdingagentontothecopper.
Thensifta1/32”layerof enamel onto the copper. Usea#60
meshsifter.Ifthecoatis too thin, you can easily addanother
coat after firing. But a coat that is too thick will bubble and
crack. The enamel must dry completely before firing.
Spatula or Inlaid Method
You can use this method to decorate a small area with
manydifferentcolors.UsingadilutedsolutionofThompson
holding agent, dampen the enamels just to the saturation
point, and maintain this moisture while working with the
enamels. Apply the enamels onto the copper with a small
spatula, and spread them out with a spreader to a coat of
about 1/32” thick. Lines of contact can be formed by the
spatula blade. Then spray the enamels with the holding
-
12
Page 13

agenttokeepthegrainsof enamelinplace. Allowtheenamel
to dry completely before firing.
Ceramic Overglaze
Firing Enamel
1 Heat the kiln to 1450°F/787°C for most enameling.
Use a Single Segment. (Please see your digital con
troller instruction manual.)
Rate Temp.
Segment °F/°C °F/°C Hold
1 1799/999 1450/787 01.00
Note: Hold time should be the length of time you
will be inserting enameling into the kiln. In the
above example, hold time is for a one hour.
2 Lay the copper shape on an enameling rack. If the
part that touches the rack is enameled, place a stilt
under the copper. Some bowls or other shapes have
enameled sides that might run during firing. These
shouldbefiredwitha stiltevenif thepiecehas aplain
bottom.Use anenamelingforkor,iftherackis small,
a 6” putty knife, to place the rack into the kiln on top
of ½” ceramic posts.
Note: Firing the piece at enameling temperature
shouldtakeabout threeminutesandrequires undivided attention!
3 Look at your pieceevery15secondsbycrackingopen
thedoor.Removethe rack whenthecopperpieceap
pears a rosy red and the enamel is smooth. Place the
rackonasteelpadorlargeceramickilnshelfandletit
cool completely.
4 After counter enameling, you will need to clean the
fire scale off the front of the piece. A 3M Scotch
Brite® pad works well for this. Then clean it with
Thompson Sparex No. 2.
Pyrometric Cones
-
-
Pyrometric cones are small pyramids of clay and mineral
oxide that soften and bend
whenexposedtoheat.They
indicatewhenceramic ware
has fired to maturity.
Pyrometric cones come
in 1 1/8" and 2 ½" lengths.
Use the 2½” cones. Cones
mounted on the kiln shelf
mustbeslanted8° fromver
tical.Theywillnotbendac
curately if they are slanted
to the wrong angle.
Self-supporting large
coneshave thecorrectslant
built into the base. Stan
dard cones must be
mounted in a clay or wire
plaque.
The chart on page 14
shows the temperatures of
pyrometriccones.Program
your controller to the cone
recommended for the ceramic ware that you are
firing.
For small ceramic
pieces, such as figurines,
program a rate of
400°F/222°C. Fire to the
temperature shown in the
108°F column of the Tem
perature Equivalents chart
for the cone number you
are firing.
Before deciding on the
firingspeedofimportantpieces,testfiresampleclaypieces.
Note: Do not fire beyond your kiln’s maximum
temperature. Firing hotter will void your warranty.
Kilns with glass view port: do not fire hotter than
1700°F/926°C.
-
-
A self-supporting cone fired to matu
rity. Do not be concerned if the tip is
slightly higher or lower than shown.
-
A “puddled” over-fired cone.
-
Under-fired cone.
-
Loading and Firing
Overglaze
Overglaze is decoration applied over fired glaze or pol
ished porcelain bisque. Overglazes include china paints,
gold, and luster, which fire from cone 022 to 014.
Load overglazed ware the same way you would load ce
ramic glaze. Use stilts and make sure ware is not touching
other ware. Ware must be completely dry before firing.
13
-
-
Page 14

China paints will
crack or peel if ap
plied heavily. Apply
several light coats in
stead, firing between
each,untilyougetthe
shade you want. Not
all china paint colors
reach maximum
colorsaturation atthe
same temperature
even when fired on
thesameware.Soyou
mustknowwhichcol
ors you should fire
first at higher tem
peratures to prevent burning out the original colors in later
firings. For example, reds mature at a lower temperature
than other colors and are fired after the other colors have
beenfired.Reds and yellowsshouldnotbe fired sidebyside.
Colorsalsomatureatalower temperatureonceramic pieces
thanonporcelainorhardchina.Checktheoverglazemanu
facturer’s literature for information on which cone to use
with each color and type of ware.
Vent the door during the first hour of firing. If your kiln
has a vent hole, leave it open during the entire firing. Allow
kiln to cool to room temperature before opening the door.
-
-
Open the door ½” to vent the kiln if your kiln
-
does not have vent holes.
-
Temperature Equivalents For Orton
Self-Supporting Pyrometric Cones
Cone
Cone Self-Supporting Cones Pre-Fire
Number Color
Heated at: 27° F 108° F 270° F
Per Hour* Per Hour* Per Hour*
022 — 1087 1094 Green
021 — 1112 1143 Fuschia
020 — 1159 1180 Orange
019 1213 1252 1283 Yellow
018 1267 1319 1353 White
017 1301 1360 1405 Pink
016 1368 1422 1465 Light Blue
015 1382 1456 1504 Violet
014 1395 1485 1540 Gray
013 1485 1539 1582 Green
012 1549 1582 1620 Fuschia
*Rate of temperature increase during last 90 - 120
minutes of firing. Tables by courtesy of the Edward
Orton, Jr. Ceramic Foundation.
Lost Wax Burnout
Caution: Only kilns with vent holes are designed
for lost wax burnout. However, you can use a kiln
without the vent hole provided that you open the
door ½” during venting.
Caution: Always use a wax tray.
Caution: If your kiln’s heating element is embed
ded in the floor of the firing chamber, place the
metal wax tray on 3 or4-½”posts inside the kiln.
This prevents the element from possibly shorting
out against the tray.
Note: Theseinstructionsapply toinjectionwaxthat
melts at 200°F, not pattern waxes and plastics that
meltathighertemperatures.Ifsmokeappearsdur
ing wax elimination, turn off the kiln. Smoking wax
means the kiln fired hotter than 300°/148°C.
-
Overview
Lostwaxcastingistheprocessofcarvingashapeinwax,
andthencasting that shape in metal. After the wax has been
carved,amold is madeofthewax shape. Themoldisa negativeimageofthewax.Thewaxislatermeltedoutofthemold
through hollow channels called sprues.
Lost wax burnout is the process of preparing a casting
mold for the melted metal that will be poured into it. The
steps in lost wax burnout:
1 Melt the wax from the mold.
2 Remove wax from the kiln before raising the tem-
perature higher than 300°F/148°C.
3 Harden the mold at high temperature.
4 Maintain the mold at the casting temperature rec
ommendedforthetypeofmetalthatwillbepoured
into the mold.
Caution: Prevent wax or carbon from contacting
the kiln’s walls and elements. Carbon build-up in
sideakilnruins the interior.Carbonconductselec
tricityand causeselementstoshortcircuit. Damage
to elements from contact with foreign materials is
not covered by warranty.
A Sample Program
See your digital controller instruction manual to enter
this program:
Rate Temp.
Segment °F/°C °F/°C Hold
1 500/277 300/148 01.00
2 500/277 1350/732 01.00
3 450/250 800/426 02.00
-
-
-
-
-
14
Page 15

Segment 1 heats the wax to 300°F/148°C and holds it for
one hour, allowing it to drip from the mold.
Segment 2 hardens the mold.
Segment 3 lowers temperature to 800°F/426°C, the typi
calcastingtemperatureforsilver.(Most types of gold cast at
900°F/482°C.)
Note: Casting temperature depends on the size of
themold.Thetemperaturesaboveareonlyaguide.
See your jewelry supply dealer for temperature
recommendations.
Burnout Instructions
1 Place a metal tray inside the kiln on three ½” posts.
Place the mold on a wire mesh screen on top of the
tray.Themold’ssprueholeshouldbedown.Thetray
willcatchmeltingwaxasitdripsfromthespruehole.
2 Keep the kiln’s vent hole(s), if any, open during wax
elimination. If the kiln has no vent hole, leave the
door open ½”. This allows fumes to escape from the
kiln. Heat the kiln to 300°F/148°C and hold it at that
temperature for at least one hour.
Note: Do NOT heat the wax above 300°F/148°C.
Hold at 300°F/148°C for at least one hour. During
this hour, the wax will melt from the mold and drip
into the tray. If the kiln gets hotter than
300°F/148°C, the wax may smoke and deposit carbon inside your kiln, causing expensive damage.
3 Afteronehourat300°F/148°C,openthe kiln.Remove
themoldandwaxtray.Pourthewaxfromthetray and
leavethetrayoutofthe kilnuntilyour nextwaxelimination. (Do not leave the tray in the kiln!)
4 Heat the mold to the temperature recommended by
yourjewelers’supplyhousewhereyoupurchasedthe
moldmaterial.Thisisusuallyaround1350°F/732°C.
5 Lower the temperature tothecastingtemperatureof
the metal. Hold at that temperature until you are
ready to begin casting. Remove the mold with tongs.
Wear protective gloves and safety glasses.
Saving a Carbon-Damaged Kiln
Ifyoufollow theabovedirections,yourkiln shouldbesafe
from wax damage. In some cases, a small amount of carbon
mayformonthewallsoveraperiodoftime.Thisisduetothe
burningof waxresiduethatwasleft inthemold.Forthis rea
son we recommend that you periodically fire the kiln to
1500°F/815°C as follows:
1 Open the vent cover(s) or leave the door ajar ½”.
2 Fire the kiln empty to 1500°F/815°C at a rate of
300°F/166°C with a one hour hold (01.00).
Firing Mistakes
-
Silver Clay
Cracks
Cracks that appear in fired silver clay may be due to too
much water in the silver clay before it was fired. Another
cause is careless handling of a dried, unfired piece. To re
pair, fill the crack with silver clay and fire again.
Brittle
Silver clay will not reach full strength if underfired. You
may be able to save the piece by firing again to the correct
temperature and hold.
Too Much Shrinkage
When silver clay is overfired, it shrinks too much and
loses detail. If the kiln is firing hotter than the temperature
programmed, check the position of the thermocouple (see
page17,bottom left column).Replacethethermocouple if it
is old.
Glass
Glass Cracking
Probable Causes:
I
Heating the Kiln Too Fast
I
Cooling the Kiln Too Fast
I
Fusing Incompatible Glass
I
Not Enough Glass Separator on Shelf
Mostproblemsin fusing arecausedbyrushing the firing.
Theglass must change temperature slowly during the criti
cal temperature range of 100° - 500° F / 37° - 260°C. This
critical range applies to both heating and cooling.
The second critical temperature range is annealing,
whichis thecoolingrangeof950°-700°F/510°-371°Caver
age. Cool the glass slowly during this range so the stress in
the glass will have time to dissipate.
If you become im
patient after the glass
has fused and you
crack open the door of
the kiln for a few sec
onds to peek inside,
-
you may hear a “ping,”
which is the sound of
glass cracking. Avoid
the temptation to open
thedoor.Waituntilthe
kilnhascooled toroom
temperature. Some
artists schedule their
fusingsothatitiscom
pletedbefore theygoto
bed. That way they will
-
-
Flaking glass separator can cause the
-
glass to crack. This is because the glass
sticks to the shelf.
-
-
-
15
Page 16

beasleep while the glass cools andthey won’t be tempted to
open the door.
After each firing, examine the shelf. Recoat if the kiln
washischipped.Whenglassstickstoabaresectionofshelf,
the glass cracks.
Glass Bubbles
Probable Causes:
I
Heating the Kiln Too Fast
I
Air Trapped Between Layers of Glass
I
Grease or Dirt Between Layers of Glass
I
Uneven Glass Volume
I
Moisture or trapped Air Between the Glass and Shelf
Makesuretheshelfiscompletelydrybeforefiring.If you
have applied fresh glass separator, leave the shelf in the kiln
at 300°F/148°C for 20 minutes before placing glass on it.
One way to eliminate bubbles is to hold the temperature
at 100°F/55°C below fusing temperature for 15 minutes.
This gives the shelf time to heat up to match the tempera
ture of the glass.
Glass Devitrification (Frosty Surface)
Probable Causes:
I
Impurities in Glass
I
Kiln Not Vented Long Enough During Initial Heating
Devitrification is a frosty surface on the glass caused by
impurities. With some glasses, it is unavoidable. To lessen
devitrification, some artists vent the door of the kiln slightly
afterfusingiscompleted.Theyclosethedoorwhentheglass
reaches 1000°F/537°C.
Glass Separator Sticks To Glass
Probable Causes:
I
Firing Too Hot
I
Overglaze On the Back of the Piece
Instead of firing to a full fuse temperature, try firing
50°F/28°Ccoolerand holding atthattemperatureforseveral
minutes.
Ceramic Overglaze
Breaking in Overglaze Firing
Canbecaused bypoorlyfired bisque.Aslowbisque fireis
always better for ware that is to be china painted. The
greenware should be completely dry before being placed in
the kiln.
Purple Spots in Gold
Usuallydueto athinapplicationof goldortoo muchthin
ner.Ifgoldis applied accidentally to anareaitwillshowpur
ple after being fired unless cleaned with a good gold re
mover.
Broken Lines in Gold
Can be caused by overfiring or too heavy an application.
However, this can be very attractive when gold is crackled
over a dark color of fired glaze.
Peeling China Paint
-
Can be caused by the paint being applied too heavily.
Loss of Color in China Paints
Usually a result of overfiring or thinning your paint with
too much medium when applying.
Faded Colors in Overglaze Decals
This is the result of either underfiring or overfiring. If
pinks and reds are drab, refire to a hotter cone. When used
withachinapaintbackground,apply andfirethe decalsfirst,
thenchina paintandfireagain.Checktherecommendations
ofdecal supplier.Ifdecalwasunderfired,refiretoproperfiringcone.Ifdecalwasoverfired,the design may be repainted
in china paints and refired.
Weakening of Luster Colors
This can be caused by overfiring.
White Spots in Lusters or Metals
Can be caused by moisture on the ware before it was
placedinthekilnorfrom having been fired at the sametime
as other overglazes.
Note: Apply lusters only on a dry day.
-
-
-
16
Powdering of Luster Colors
This can be caused by too heavy an application.
Page 17

Kiln Maintenance
Trouble-Shooter
Kiln Does Not Turn On, Display is Blank
I
Make sure the circuit
breaker is in the “on” po
sition.
I
Ifthecircuitbreakerison,
check the kiln’s fuse. Re
move by pressing on the
fuse holder and turning
counter-clockwise half a
turn. Check the fuse by
placing the probes of an
ohmmeter on the ends of
the fuse. If the ohmeter
reads less than one ohm
(digital meter) or reads 0
ohms (analog meter), the
fuse is bad. Replacement
fuse:
AGC ½ A 250V AC
Note: If you do not have an ohmmeter, visually inspect the fuse. You will see a thin strand of unbroken wire in a good fuse. The wire usually appears
broken in a burned fuse.
-
-
Kiln Repairs
Door Latch
Adjustment
Adjustthetwoscrews
on the door latch to
change the spring ten
sion.
Note: Do not
loosen the screws
too far, or they
could fall out.
Ceramic Fiber Repair
If glass, ceramic glaze, or other materials drip onto the
firing chamber, repair before the next firing. Otherwise the
glaze will remelt and embed deeper into the fiber.
1 Unplug the kiln.
2 Cutorscrape the ceramic
fiber to remove the con
taminant.Removeaslittle
fiberaspossible. If aheating element is located
where you are scraping,
avoid touching the element.
-
-
Circuit Breaker Trips
I
If the circuit breaker trips after the kiln has fired for
awhile, make sure no other appliances are operating on
the same circuit as the kiln.
I
If the circuit
breaker trips im
mediately after the
kiln is turned on,
the kiln may have a
short circuit. Un
plug the kiln. Re
move the bottom
cover and look for a
loosewiretouching
the case.
-
-
-
Temperature is
Inaccurate
I
Make sure the ther
mocouple is pushed
½”- ¾” intothefiring
chamber.
I
Ifthe thermocouple is
pushed into the firing
chamber, and the
temperature is inac
curate, replace the thermocouple.
-
Thermocouple
-
Cleaning or Replacing the
Glass Viewing Port
Never fire a kiln equipped with the glass view port hotter
than 1700°F/926°C. Firing hotter will damage the glass.
To remove the window:
1 Remove the four
screws holding the
glass cover.
2 Remove the glass.
Clean with glass
cleaner. To remove
scratches, take the
glassto an eye glass
polisher.
17
Page 18

Replacing the Thermocouple
1 Unplug the kiln.
2 Remove the four screws holding the controller to
the front of the kiln. Carefully remove the control
ler.
5 The thermocouple is located in the back of the fir
ingchamber,held inplacebya metalband.Remove
the thermocouple from the kiln.
-
6 Bend the new thermocouple between porcelain in
sulators. The thermocouple end should be two in
-
sulators long after bending.
3 Removethe two thermocouple wires from the back
ofthe controller.Theyareheldinplacebybutton or
lever type connectors. To remove the wires, lift the
levers (or press down on the connector buttons)
and pull the wires out.
7 Push the newther
mocouple into the
hole in the firing
chamber. The
twisted end must
extendintothefir
ingchamberby ½”
- ¾”. Make sure
the band holds the
thermocouple.
Otherwise, the
thermocouple can
be pushed out, re
The band must secure the thermocou
ple. Otherwise the kiln could overfire.
sulting in an overfire.
8 Thread the thermocouple wires down to the con
troller opening at the front of the kiln. Keep the
thermocouple wires away from electrical components and other wires.
9 Strip½” of insulation from theendsofthethermo-
couple wires.
10 Attach the wires to the back of the controller. One
wire is yellow, the other red. Make sure the wires
connect to the correct terminals, which are color
coded.
-
-
4 Remove the back cover of the kiln.
Removing the thermocouple.
11 Install the controller and back cover of the kiln.
Replacing a Relay or Transformer
1 Unplug the kiln.
2 Place the kiln on its back.
3 Removethescrewsholdingthesheet metal bottom
tothekiln. Tiltthebottomforward togainaccessto
the transformer and relay.
18
Page 19

Replacing the Temperature Controller
1 Unplug kiln.
2 Remove the 4 corner screws holding the control
ler faceplateto the switchbox.Carefullylift outface
plate.
3 Disconnect the wires
from the back of the
board. You will find
twoplugsandtwosin
-
gle wires.
4 Connect the wires to
the new board. Reinstall faceplate.
-
-
Place the new part next to the old one, aligned in the same direction. Remove and replace one wire at a time. In the photo, the relay is being replaced. The transformer is the part in the foreground.
4 Hold the new part next to the one you are replacing,
aligned in the same direction. Remove and transfer
one wire at a time from the old part to the new one.
Make sure each connection is tight.
5 Replace push-on
connectors and
wires damaged by
heat from a burned
terminal. If wire
connectorsdo not fit
snugly on terminals,
gently squeeze the
end of the terminal
with pliers.
6 Asyou move the sheet metal bottom back into place,
make sure the thermocouple wire attached to the
back of the board is away from the other wires.
7 Install the screws holding the bottom to the kiln.
Replacing the Firing Chamber
When the element burns out, the ceramic fiber firing
chamber must be replaced.
To test for a burned out element, you will need an ohm-
meter:
1 Unplug the kiln.
2 Remove the back of the kiln (page 18, left column).
3 Place ohmmeter leads against the element connec
tors. A no-needle-movement reading on an analog
meter, or OPEN on a digital meter, indicates a
burned out element.
-
Replacing the firing chamber is a factory repair.
19
 Loading...