

Paradyne 1740 SHDSL, 1740 Quick Installation Instructions
1740 SHDSL 2/4-Wire Router
Quick Installation Instructions
Document Number 1740-A2-GZ10-00
May 2005
Installation
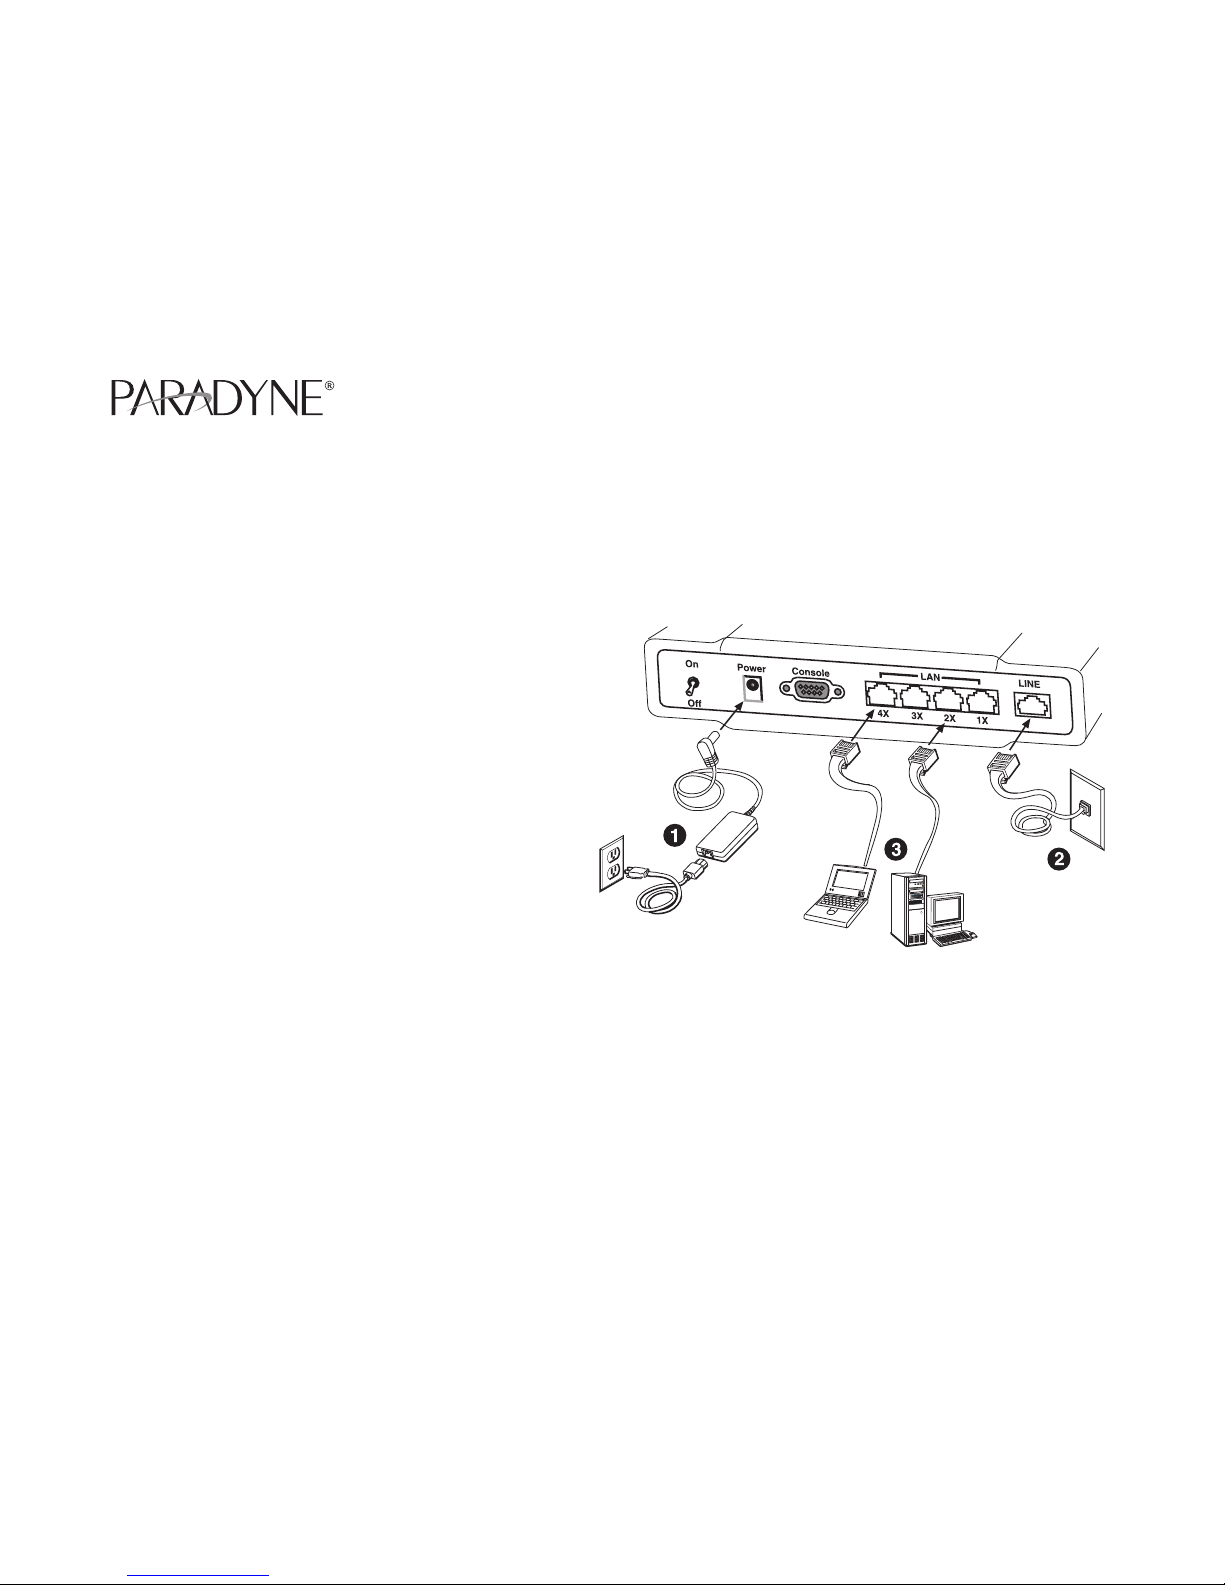
➊ Connect the supplied external AC adapter into the DC power
outlet on the back of the router. Connect the power supply into
your wall outlet or surge protector. Turn on the power switch. After
a self-test runs, the POWER indicator on the front of the router
will illuminate green to indicate that power is being supplied to the
router.
➋ Connect the supplied RJ45 cable to the port marked LINE at the
back of the SHDSL router. Connect the other end of the cable to
your SHDSL wall outlet. A green LED on the front of the device
labeled LINK will illuminate steadily.
➌ Insert one end of the RJ45 Ethernet cable into one of the LAN
ports marked LAN on the back of the SHDSL router. Connect the
other end of the cable into the Ethernet Network Interface Card
(NIC) installed in your computer. Connect up to four Ethernet
devices to the router.
➍ The router’s default IP address is 192.168.1.1. To configure the
router, set up your PC to be on the same network segment and
open 192.168.1.1 with your web browser.
See the user’s guide on the CD for more information.
*1740-A2-GZ10-00*
*1740-A2-GZ10-00*
05-17663
Copyright 2005 Paradyne Corporation. Printed in U.S.A.
 Loading...