

Page 1
EverServ
® 7700/7200 POS Terminal Setup Guide
[©Copyright 2012 ParTech, Inc. All rights reserved.] page 1 772230804
Thank You!
Thank you for purchasing a PAR point-of-sale
system. We are confident that our technology
solutions will contribute to your business
success.
Examine the Shipment:
Use the invoice to ensure all equipment is
present.
Report any missing or damaged equipment to
your PAR salesperson.
Inventory Components:
Ensure you have the following items in your
POS order:
POS terminal
AC power cord
2 Serial adapter cables
Note: The EverServ 7700/7200 POS terminals
have RJ-45 serial connections. In order to
connect serial peripherals with DB9 connectors
you must use a RJ-45 to DB9 adapter cable with
the terminal. Two C4823-02 cables are shipped
with each terminal and additional cables can be
purchased from PAR, by ordering part number
C4823-02. Contact PAR Parts at 1-800-PARPART.
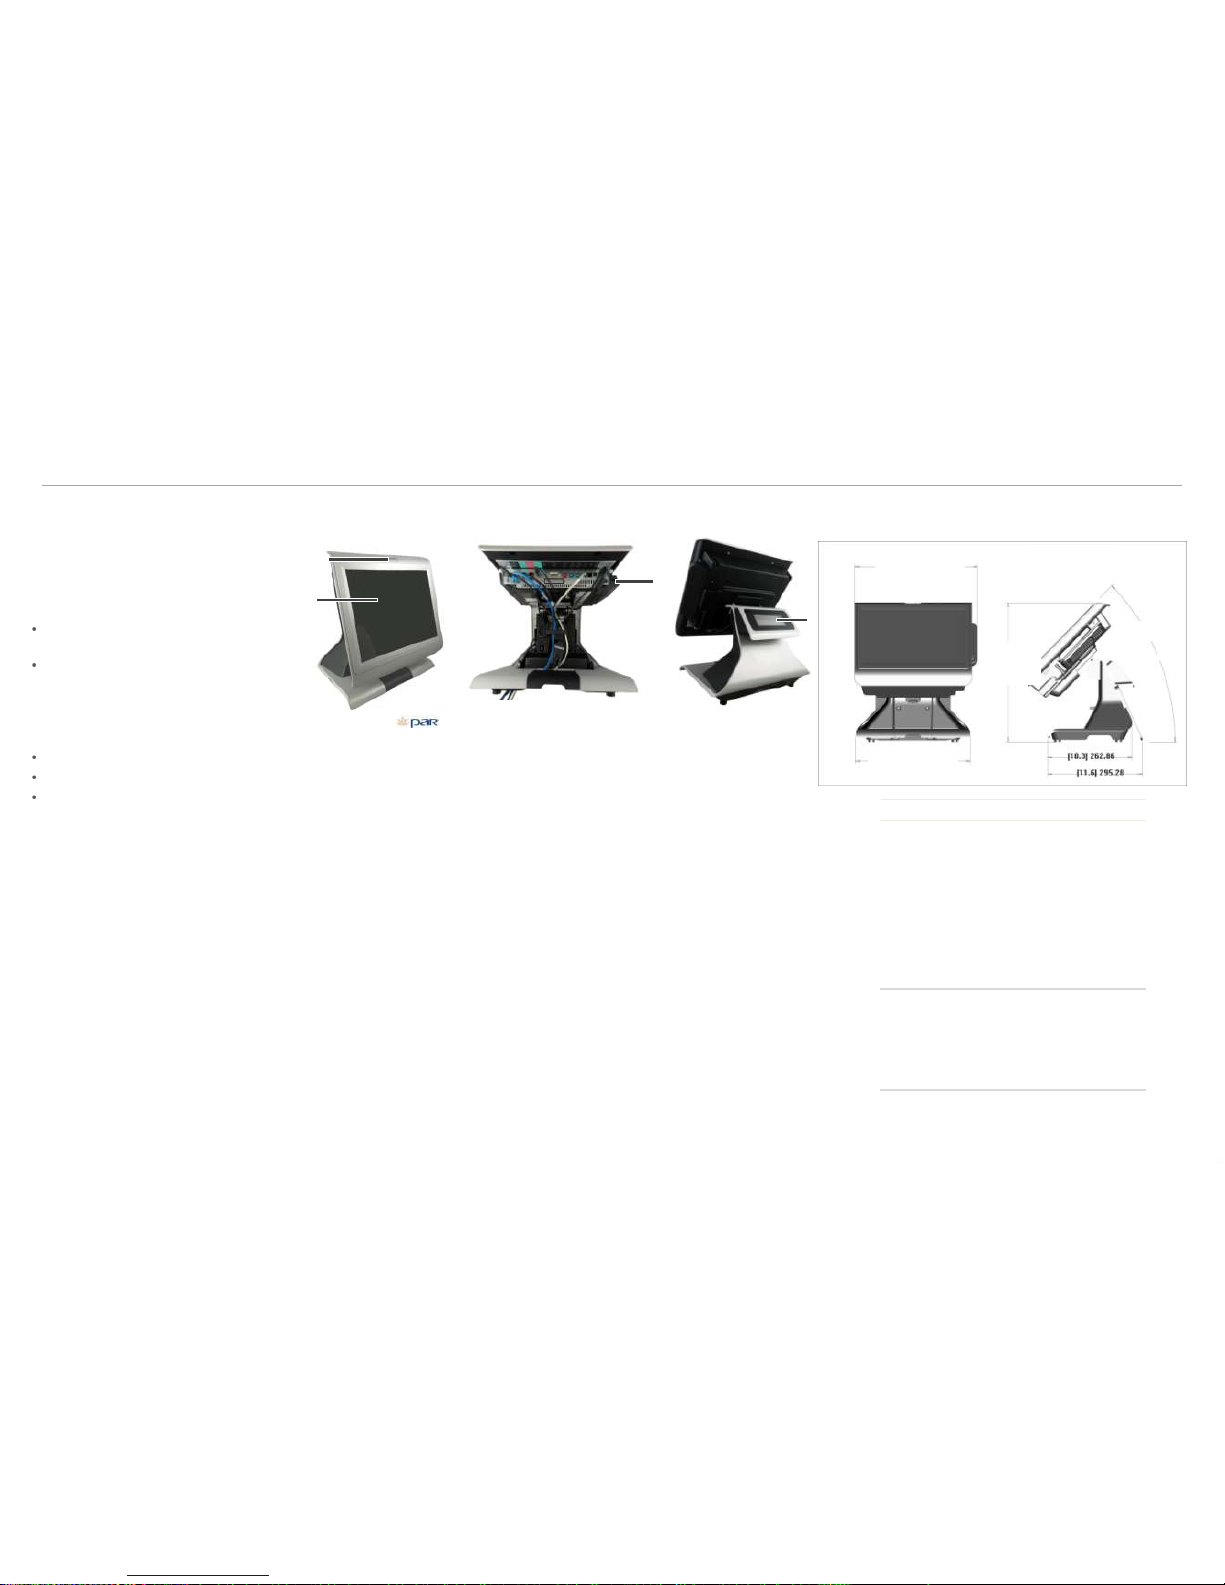
1. Power LED 3. Power Switch 4. Customer Display
2. Touch Screen and LCD
32
POS Dimensions
Service and Support
For service and support during or after installation,
contact the PAR Phone Center at 1-800-382-6200.
1
2
3
4
EverServ 7700/ 7200 POS Terminal Overview
Product Overview
EverServ 7700/7200 POS Models
M7700-00 – EverServ 7700 Counter Top POS with Projective Capacitive touch
screen
M7700-10-- EverServ 7700 Counter Top POS with Flat Resistive touch screen
M7700-20— EverServ 7700 Counter Top POS with Surface Capacitive touch screen
M7200-30 – EverServ 7200 counter with Resistive touch screen
Cleaning the POS Terminal
1. Power down the equipment that you will be
cleaning.
2. Dampen a clean towel with carbonated
water or glass cleaner. Avoid cleaners that
contain ammonia. Ensure the towel is
damp, but not saturated.
3. Wipe down the unit with the damp towel.
Never pour or spray cleaner directly in the
terminal or touch screen.
WARNING: Never use abrasive materials to
clean the touch screen on a POS terminal. Do
not use sharp objects to clean the edges of the
touch screen. A scratch on the surface could
disable the terminal and result in added repair
expense.
4. When finished cleaning, power the unit on.
[15.1] 383.08
[14.1] 357.73
[16.7]
423.2
45°
[inches] mm
Page 2
EverServ
® 7700/7200 POS Terminal Setup Guide
[©Copyright 2012 ParTech, Inc. All rights reserved.] page 2 772230804
Power on the POS Equipment
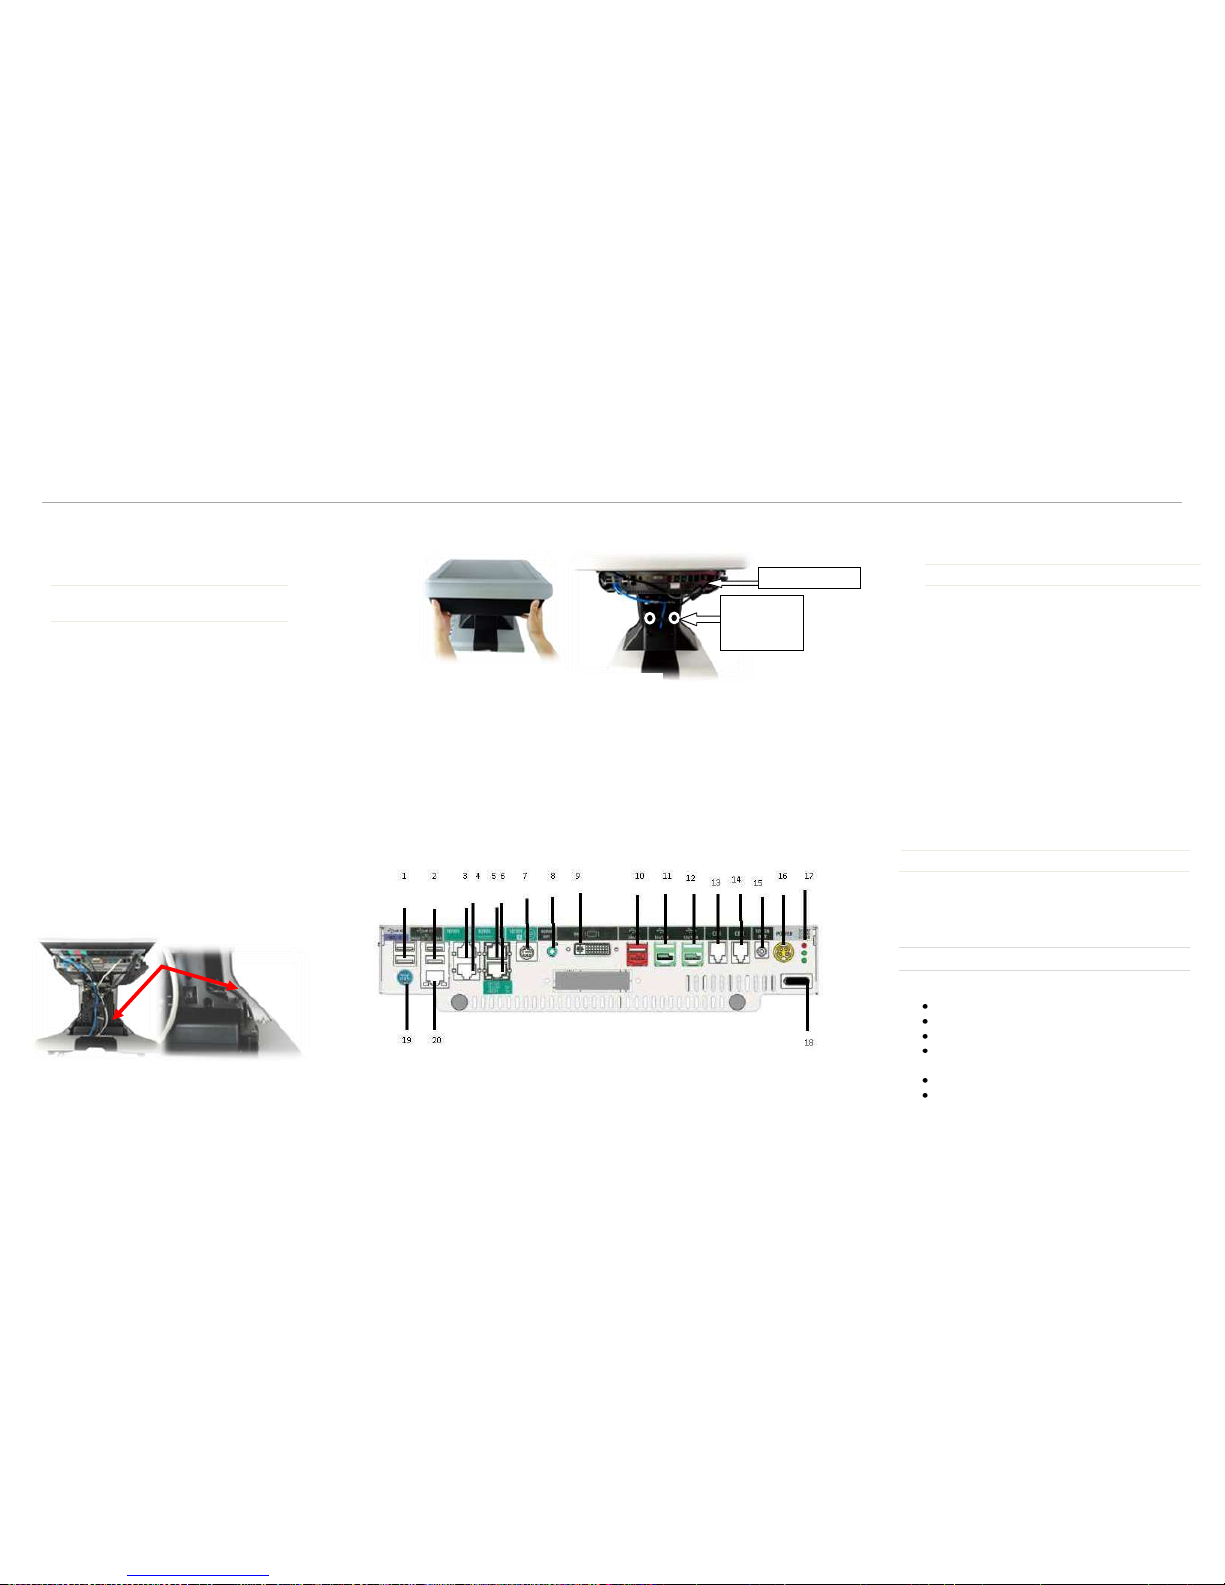
Ensure that the unit powers on by switching on the
black power button that is indicated on the “Main
Cable Well” diagram located in the middle of the
page.
Connecting USB Devices
M7700:
Two USB 2.0’s ports
Two 12V powered USB 2.0 ports
One 24V powered USB port
Two 3.0 USB ports
M7200
Four USB 2.0 ports
One 24V powered USB 2.0 port
Connecting Your
Peripherals
Remove Covers to Access Connection
Panels
1. Set the terminal on a flat, clean surface
and tilt the display head horizontally to the
table to access cable well covers.
2. Remove the cable well cover by pressing
the two side tabs, and pulling it away from
the register
3. Loosen the two thumb screws on the
pedestal cover and slide out toward the
front of the register.
4. Unclip the retaining clamp to access the
cables.
5. Lift the cut out at the base and pull
forward.
6. Route the AC power cord to the power
supply by going through the pedestal of
the terminal and connect it to the power
supply (reference picture below).
Now you have complete access to the connection
ports on the POS terminal.
Connect Peripherals to POS Terminal
All peripheral connections will be made in the
cable well on the underside of the top cover.
1. Connect the DC Power cable.
2. Next, connect the cash drawer cable, network
cable, and printer cable. Customer display cable
and MSR cable should be pre-connected from the
factory.
Refer to the “Cable Well” diagram located in the
middle of the page.
3. Gather the cables in one hand and replace the
cable wall cover by clipping the retaining clamps
back into place.
4. Next, tighten the two thumb screws on the
pedestal cover.
Loosen thumb
screws and pull
panel forward
Cable Well
1. Two USB 2.0 Ports 7. COM Port 5 Customer Display 14. CD 2 (Cash Drawer Port 2)
2. Two USB 3.0 Ports (M7700 only) 8. Audio Line Out (M7700 only) 15. 12V Power Out
Two additional USB 9. DVI-I Video Port 16. 19V Power Input
2.0 Ports (M7200 only) 10. 24V Power USB 2.0 Port 17. Diagnostic LED
3. COM Port 1 11. 12V Power USB (M7700 only) 18. Power Switch
4. COM Port 2 12. 12V Power USB (M7700 only) 19. PS/2 Port
5. COM Port 3 (powered) 13. CD 1(Cash Drawer Port 1) 20. LAN Port
6. COM Port 4 (powered)
DC Power Cable
 Loading...