

Page 1
One Blue Hill Plaza, 16th Floor, PO Box 1546
Pearl River, NY 10965
1-800-PC-AMERICA, 1-800-722-6374
(Voice) 845-920-0800 (Fax) 845-920-0880
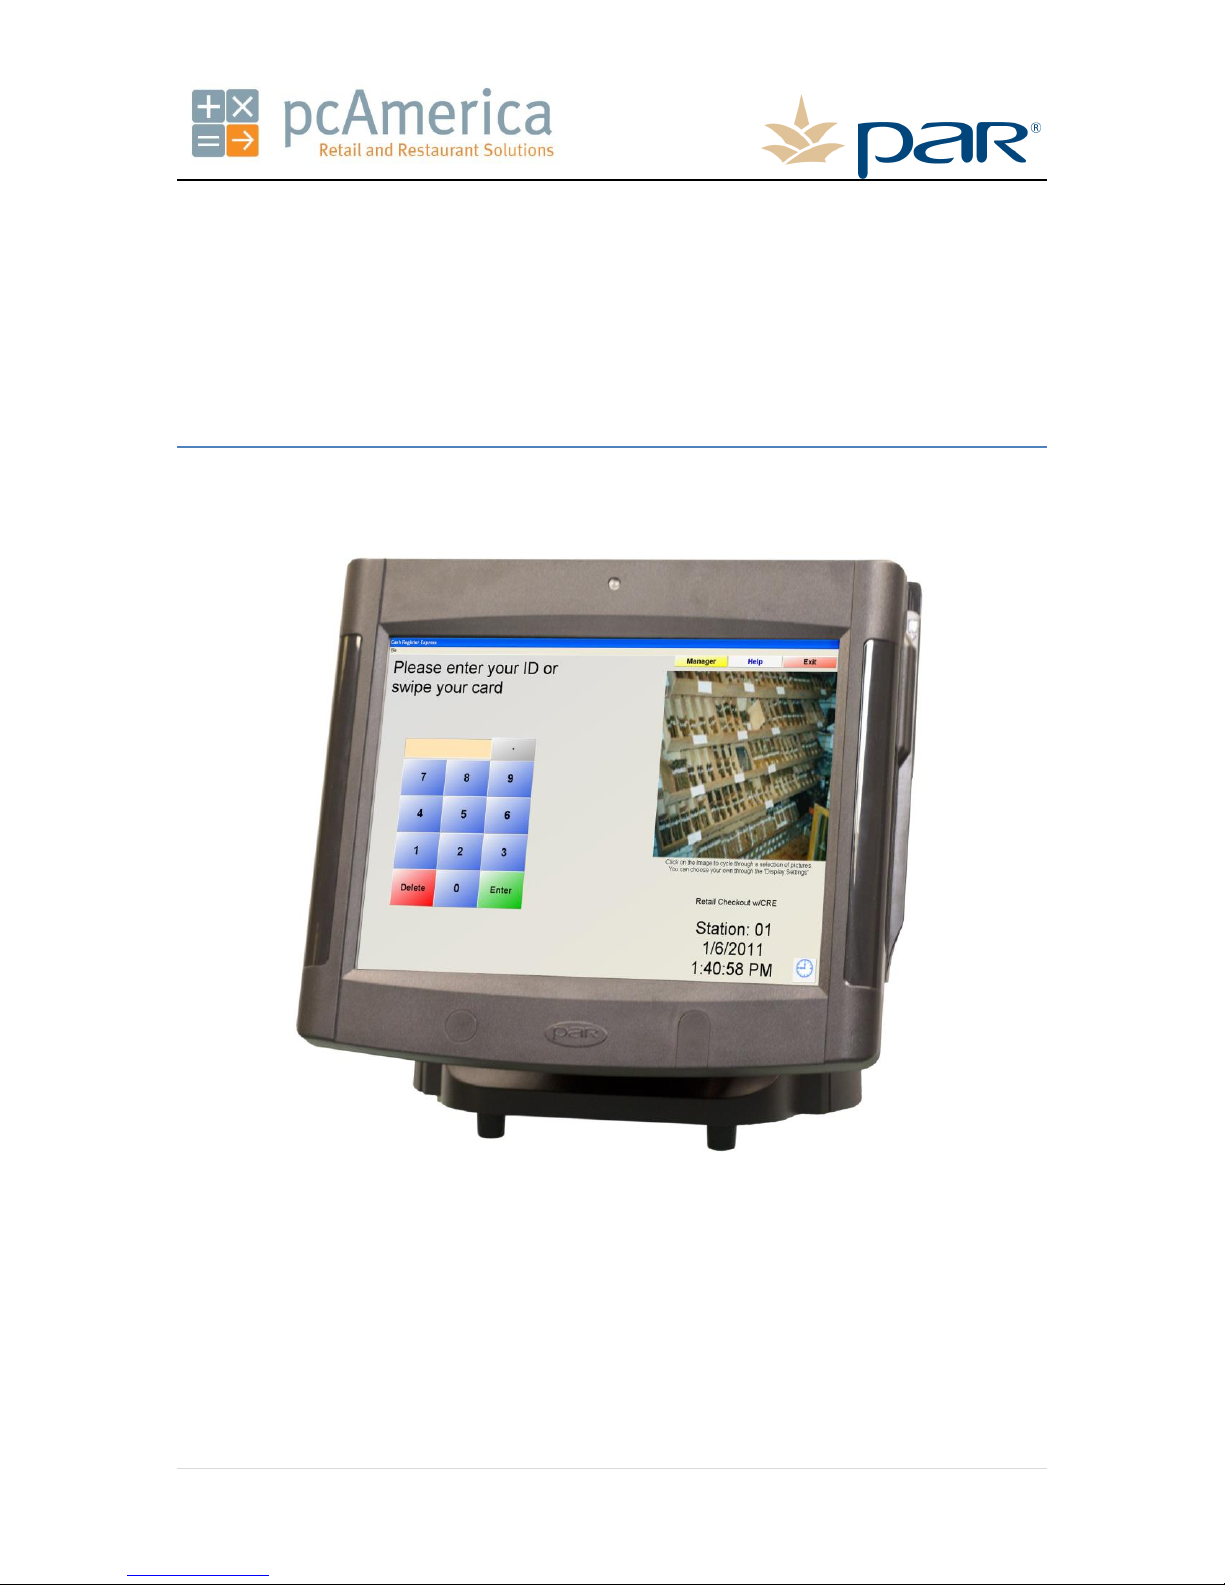
PAR EverServ™ 6000 Installation
Guide
This document provides step-by-step instructions for setting up your PAR system, which contains the
following components: the EverServ™ 6000 Terminal, integrated Pole Display and an integrated MSR.
1 | P a g e
Page 2
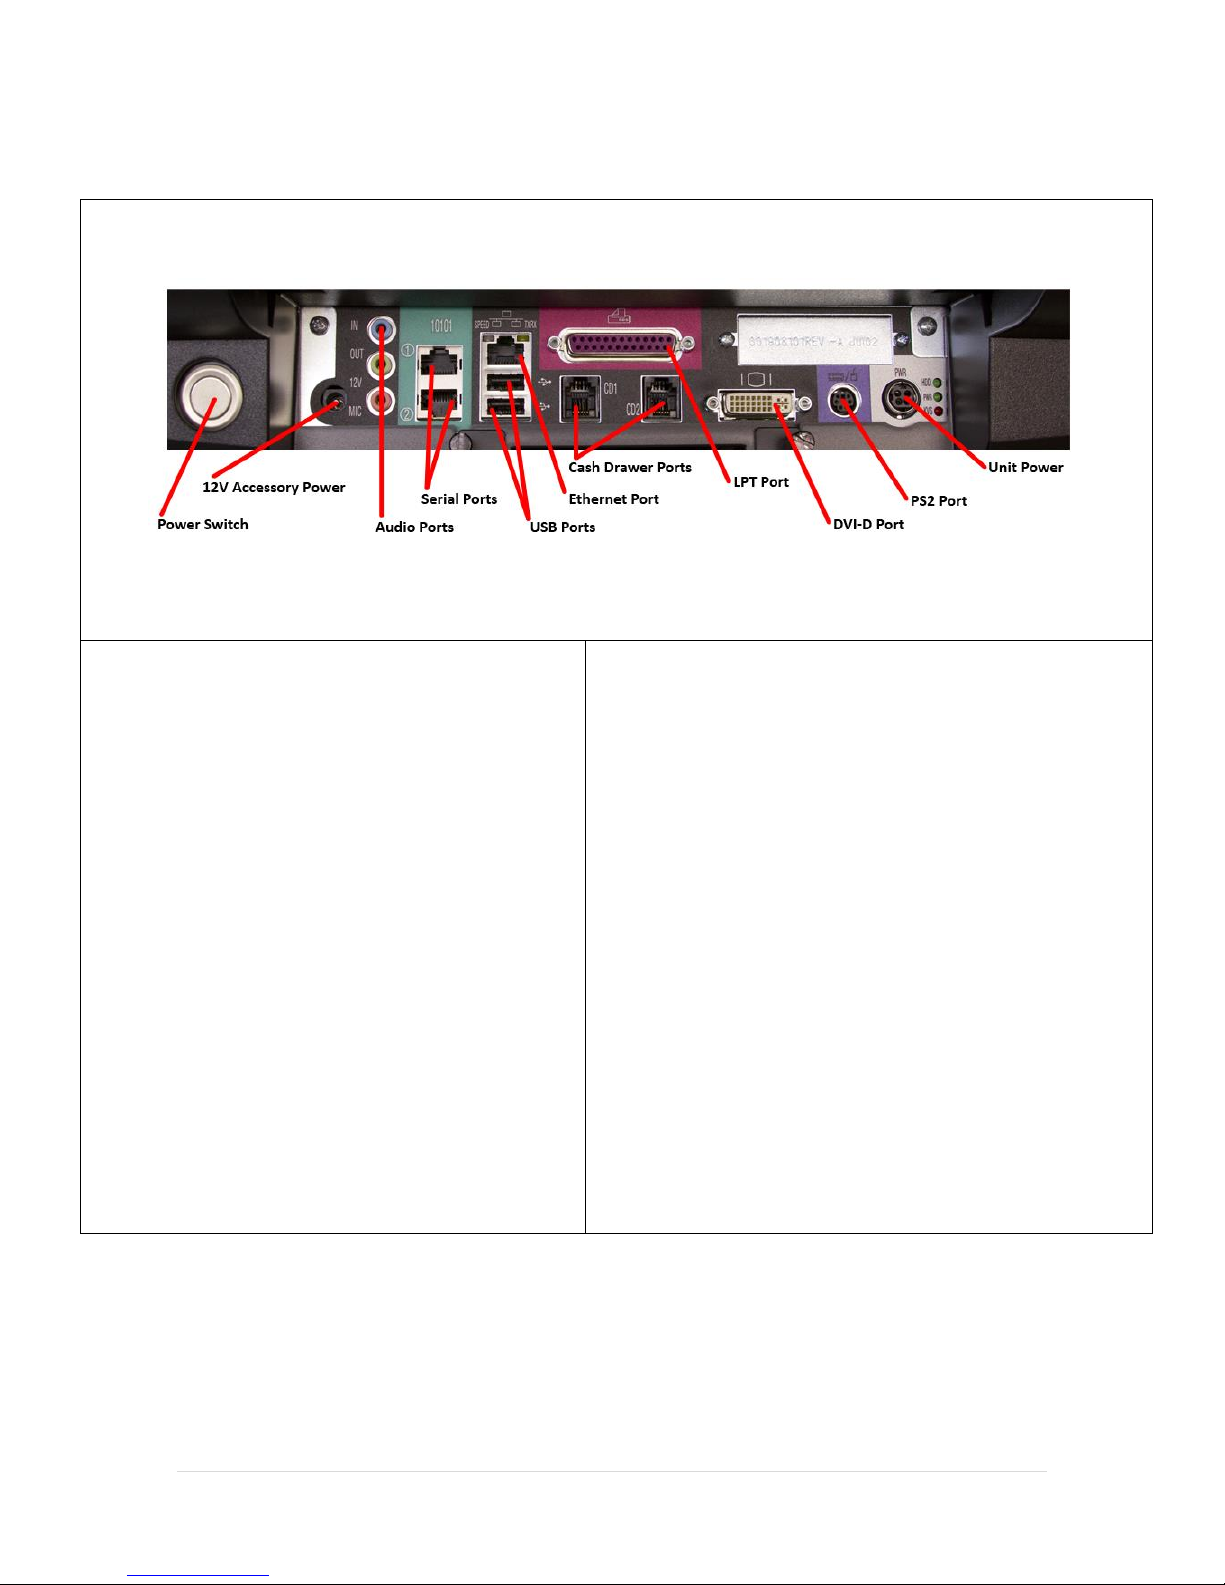
12V Accessory:
Connect optional Virtual Pole Display
power cable here.
USB Ports:
Connect a supported USB device here.
Audio IN:
Connect audio cable from external
device here.
Cash Drawer Ports
(CD1 & CD2):
Open
Audio OUT:
Connect audio cable here to speakers.
LPT Port:
Connect a supported LPT device here.
Audio MIC:
Connect audio cable here from
microphone.
DVI-D Port:
Connect optional Virtual Pole Display video
cable here.
Serial Ports (1
& 2):
Connect DB9 to RJ45 Serial cables, for
connecting supported serial devices.
PS2 Port:
Connect optional PS2 keyboard or mouse
here.
Ethernet Port:
Connect a network cable here from your
modem or router.
Unit Power:
Connect Power cable here.
Hardware Ports
2 | P a g e
Page 3
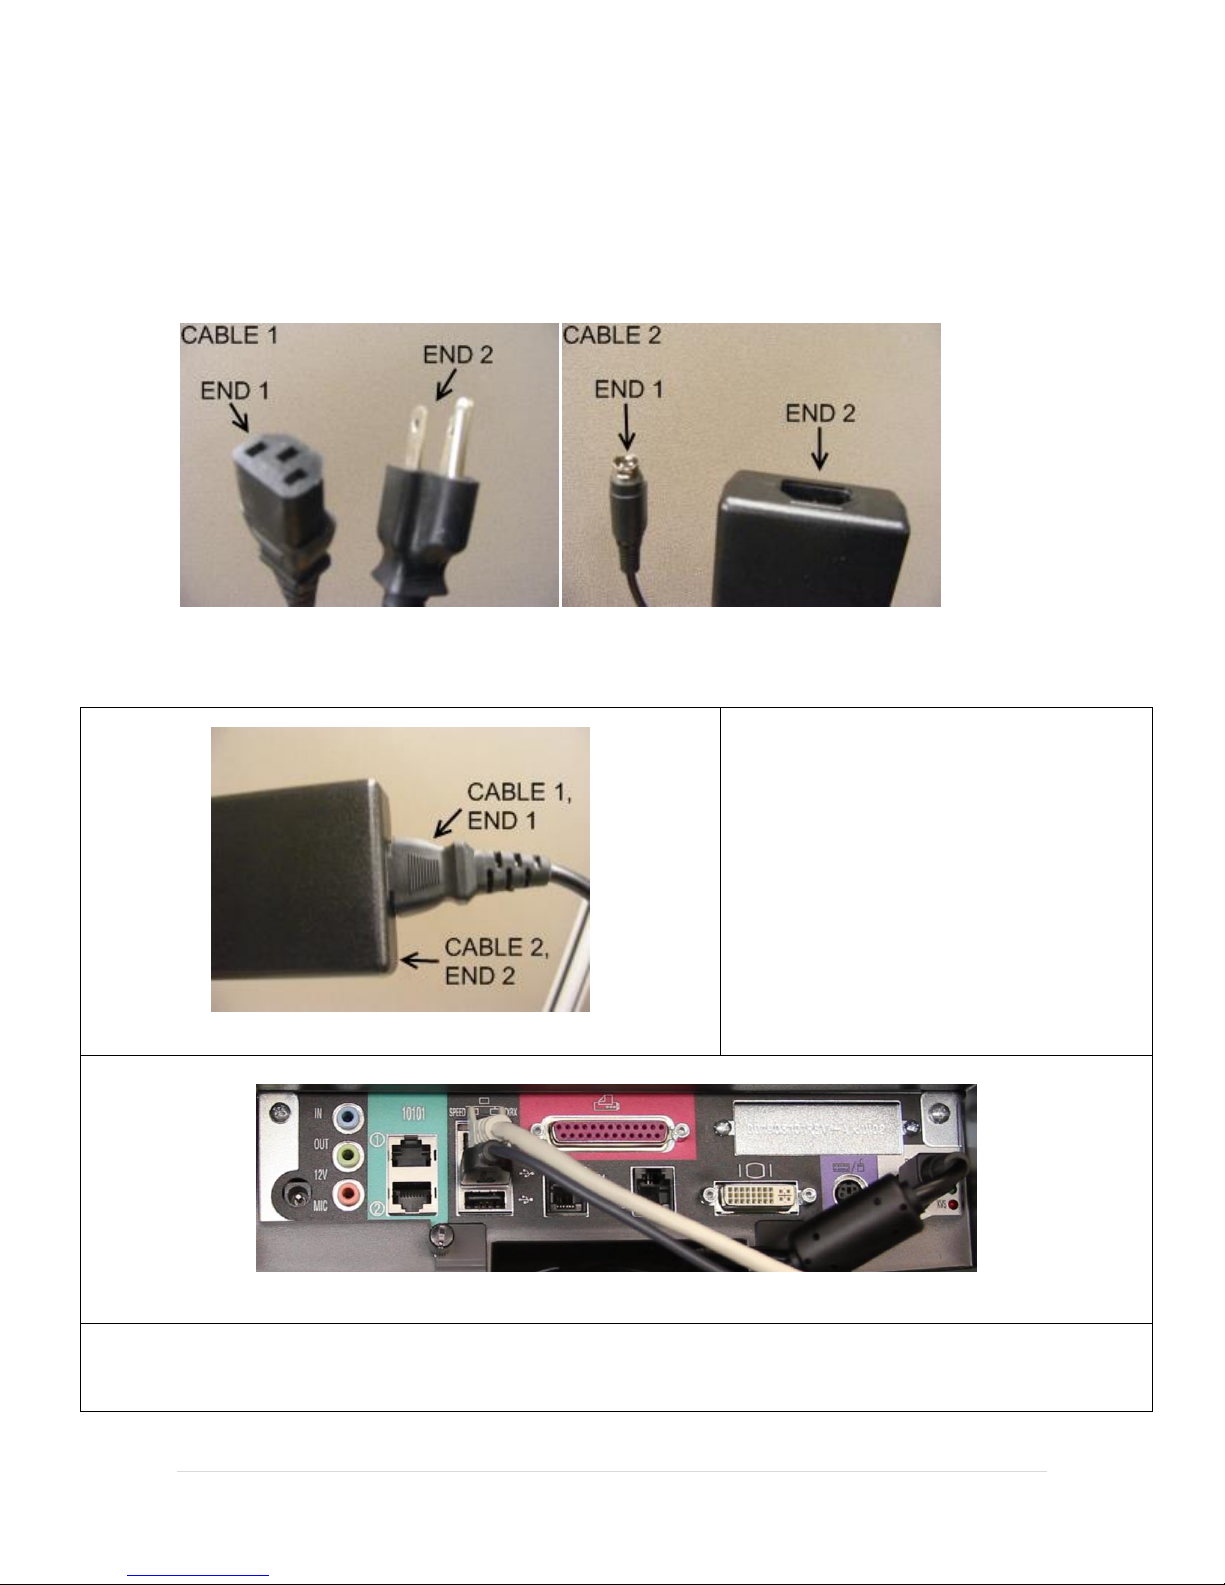
Insert end 1 of cable 1 into end 2 of cable 2.
Insert end 2 of cable 1 into a power outlet.
Insert end 1 of cable 2 into the computer.
Connecting the Power Cable to the PAR EverServ 6000 Terminal
In order to use the PAR EverServ 6000 Terminal, you must first connect the power with the following
cables:
Follow these steps:
3 | P a g e
Page 4
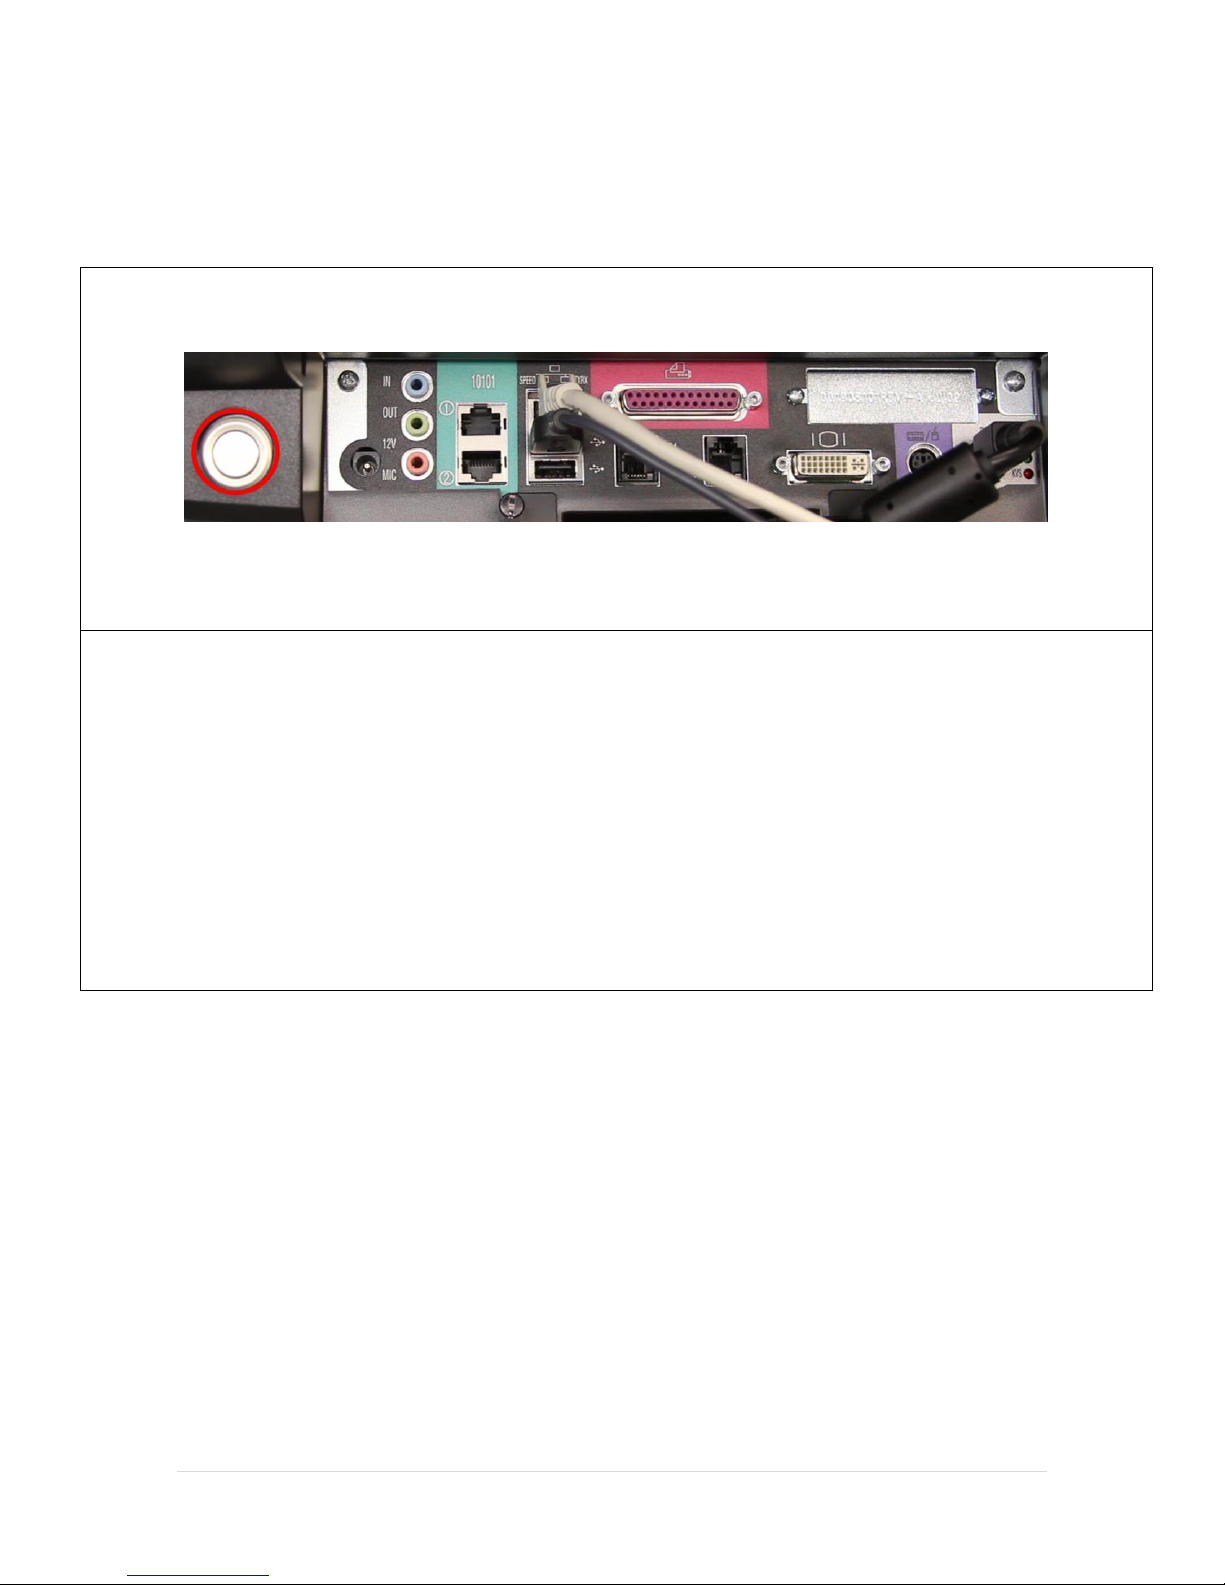
Locate the panel at the bottom of the screen, next to the hardware ports and press the power button.
Turning on the KS6600 Fan Free Terminal
To turn on the KS6600, follow these steps.
4 | P a g e
Page 5
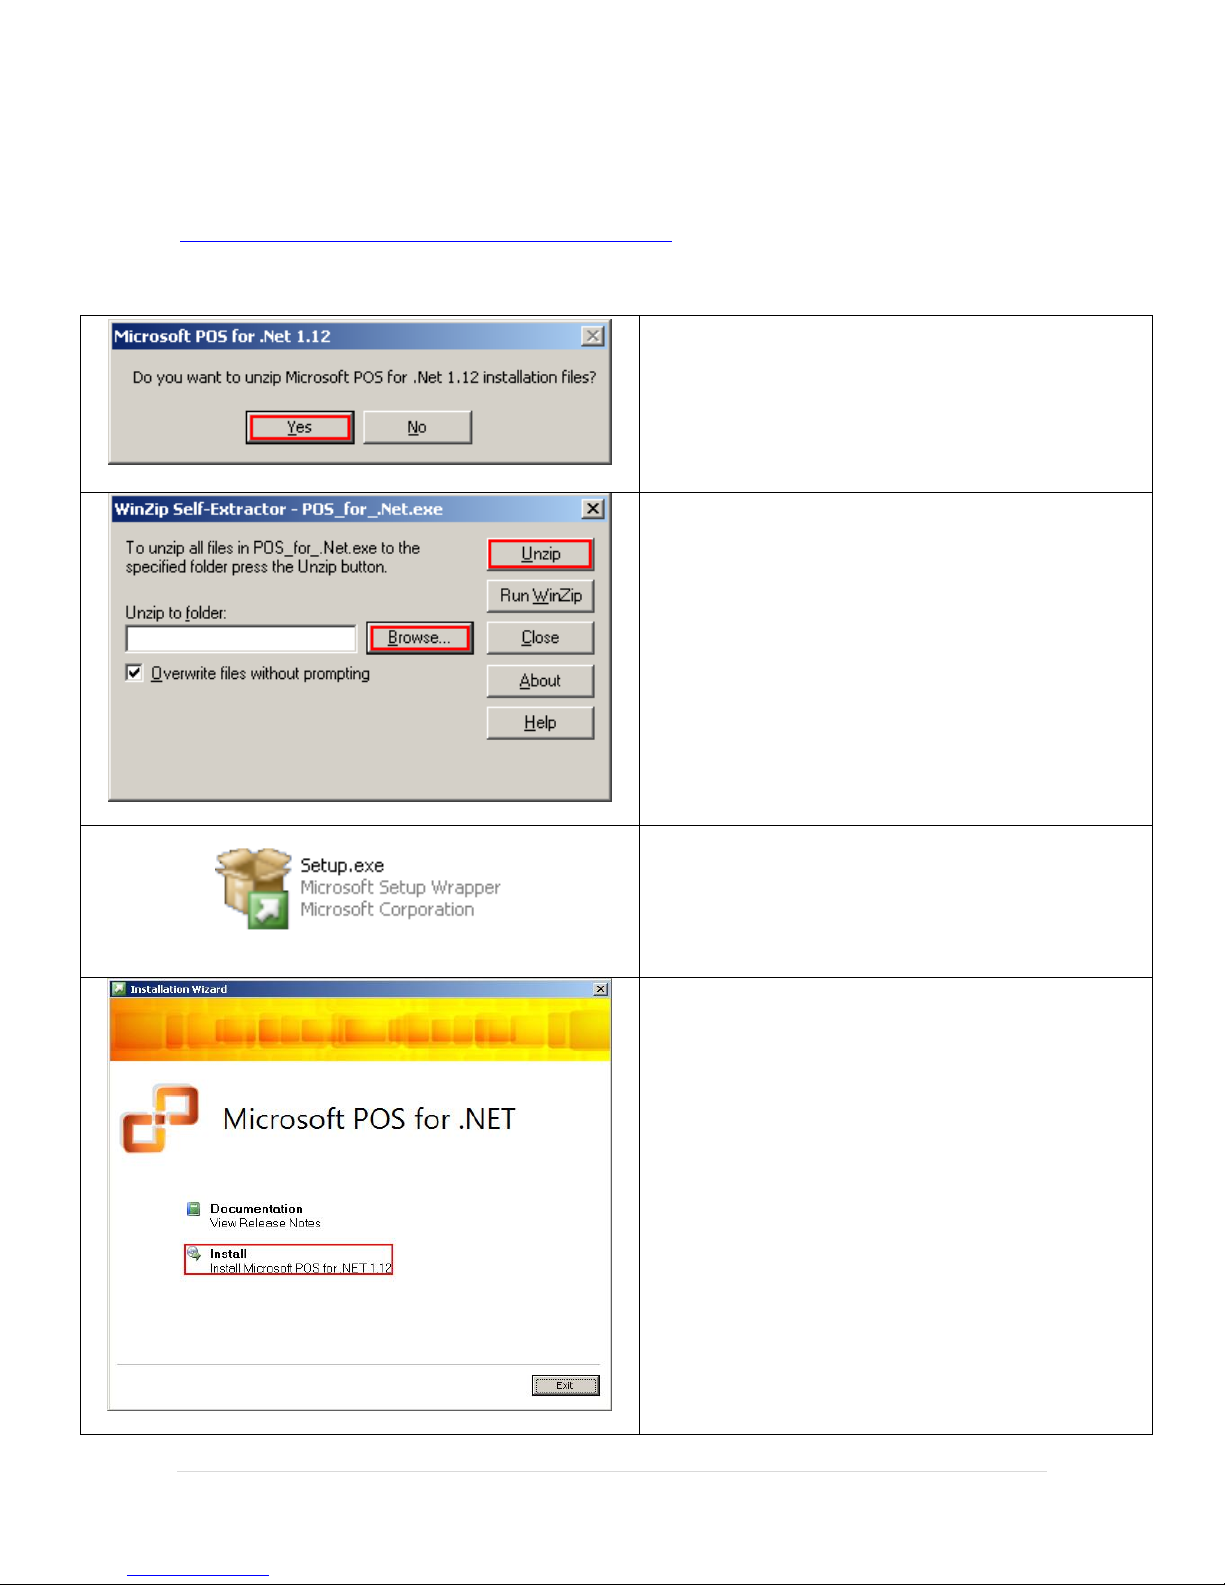
Select Yes.
Select Browse and select a folder to unzip all files to.
Select Unzip.
Navigate to the folder containing the unzipped files.
Double-click on Setup.exe.
Select Install.
Installing Microsoft POS for .NET
The installer for Microsoft POS for .NET can be downloaded at:
http://download2.pcamerica.com/drivers/POS_for_.Net.exe
Double-click the installer and follow these steps:
5 | P a g e
Page 6
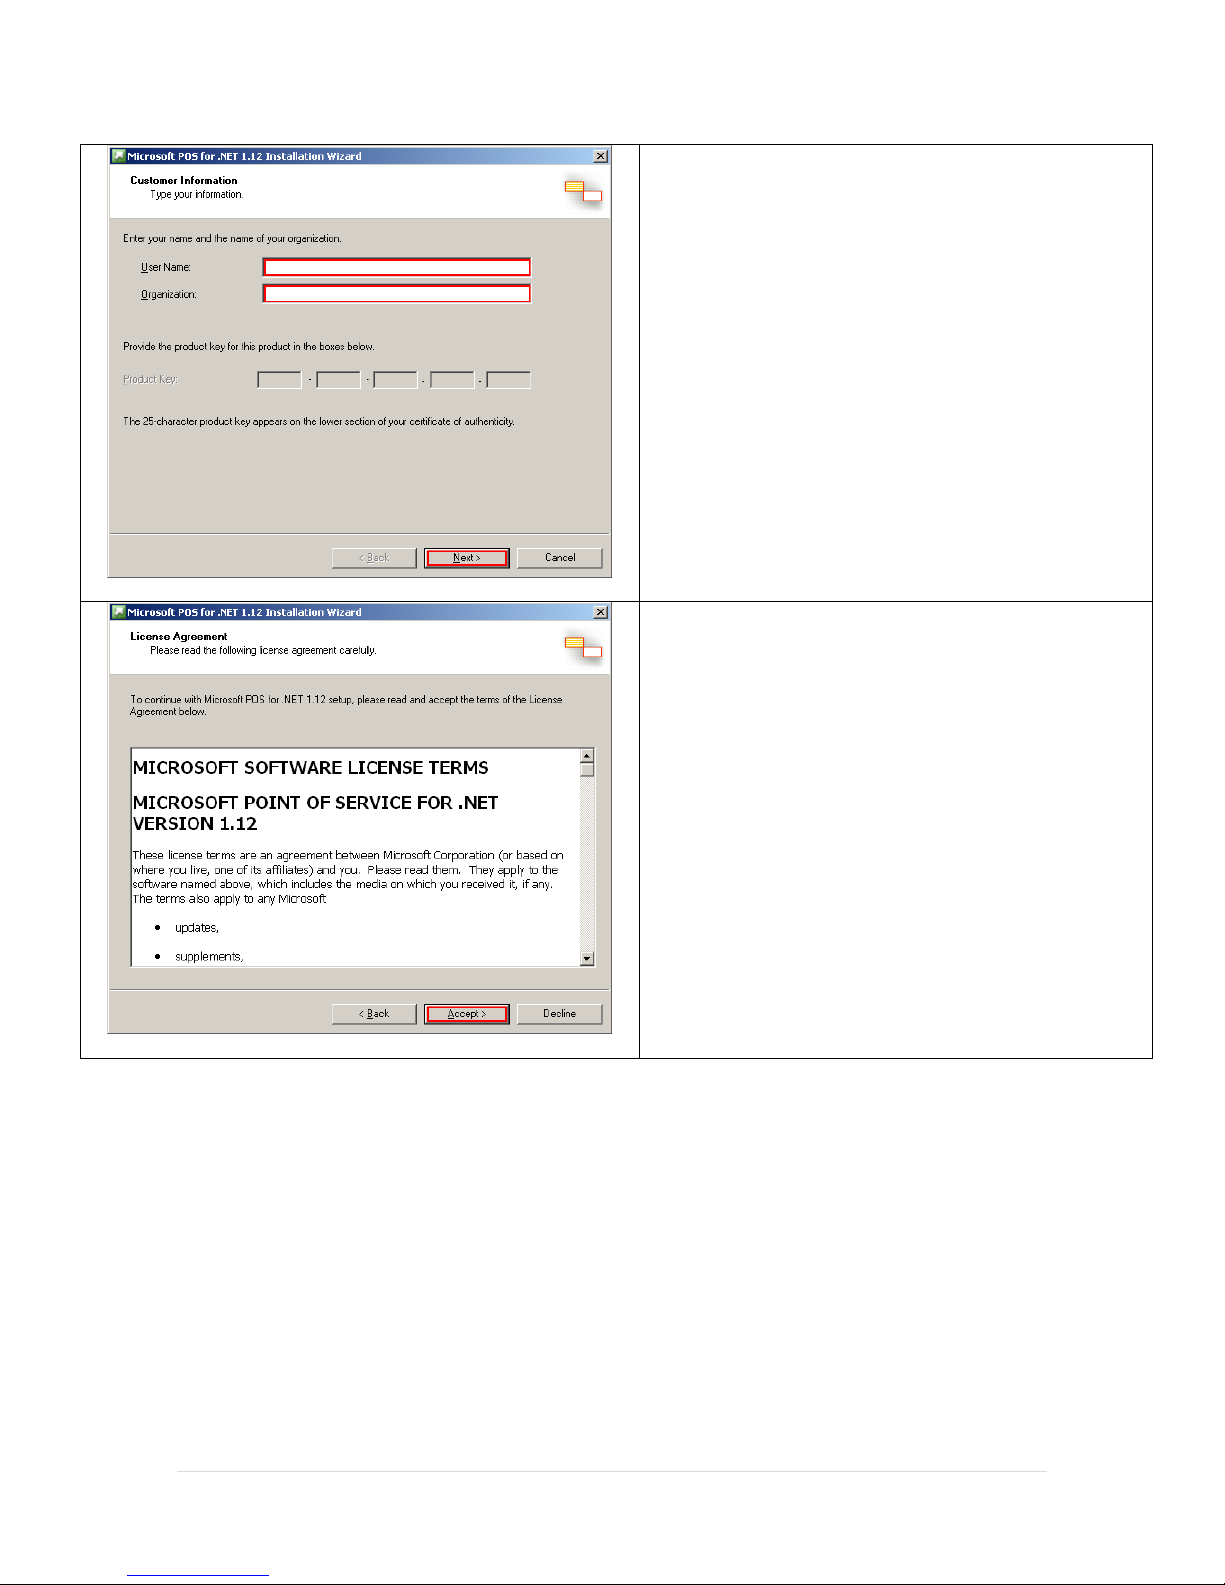
Provide a user name and organization.
Select Next.
Select Accept.
6 | P a g e
Page 7
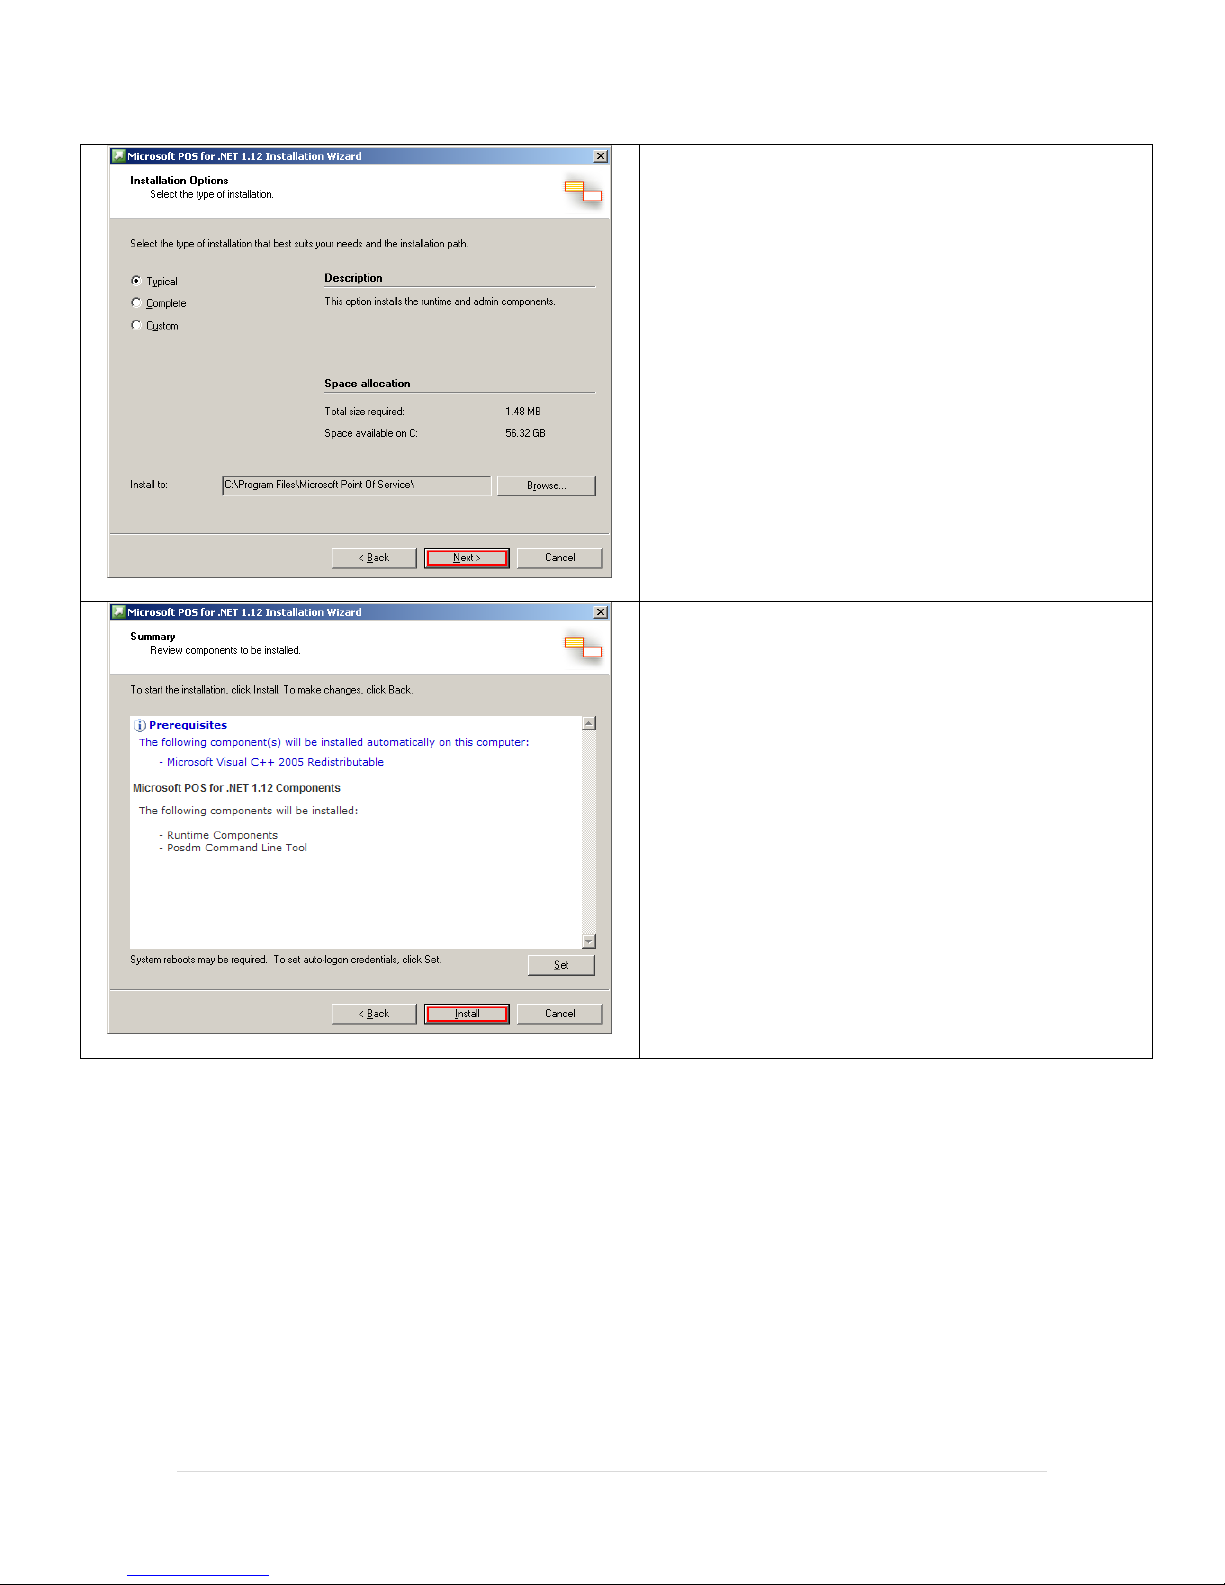
Select Next.
Select Install.
7 | P a g e
Page 8
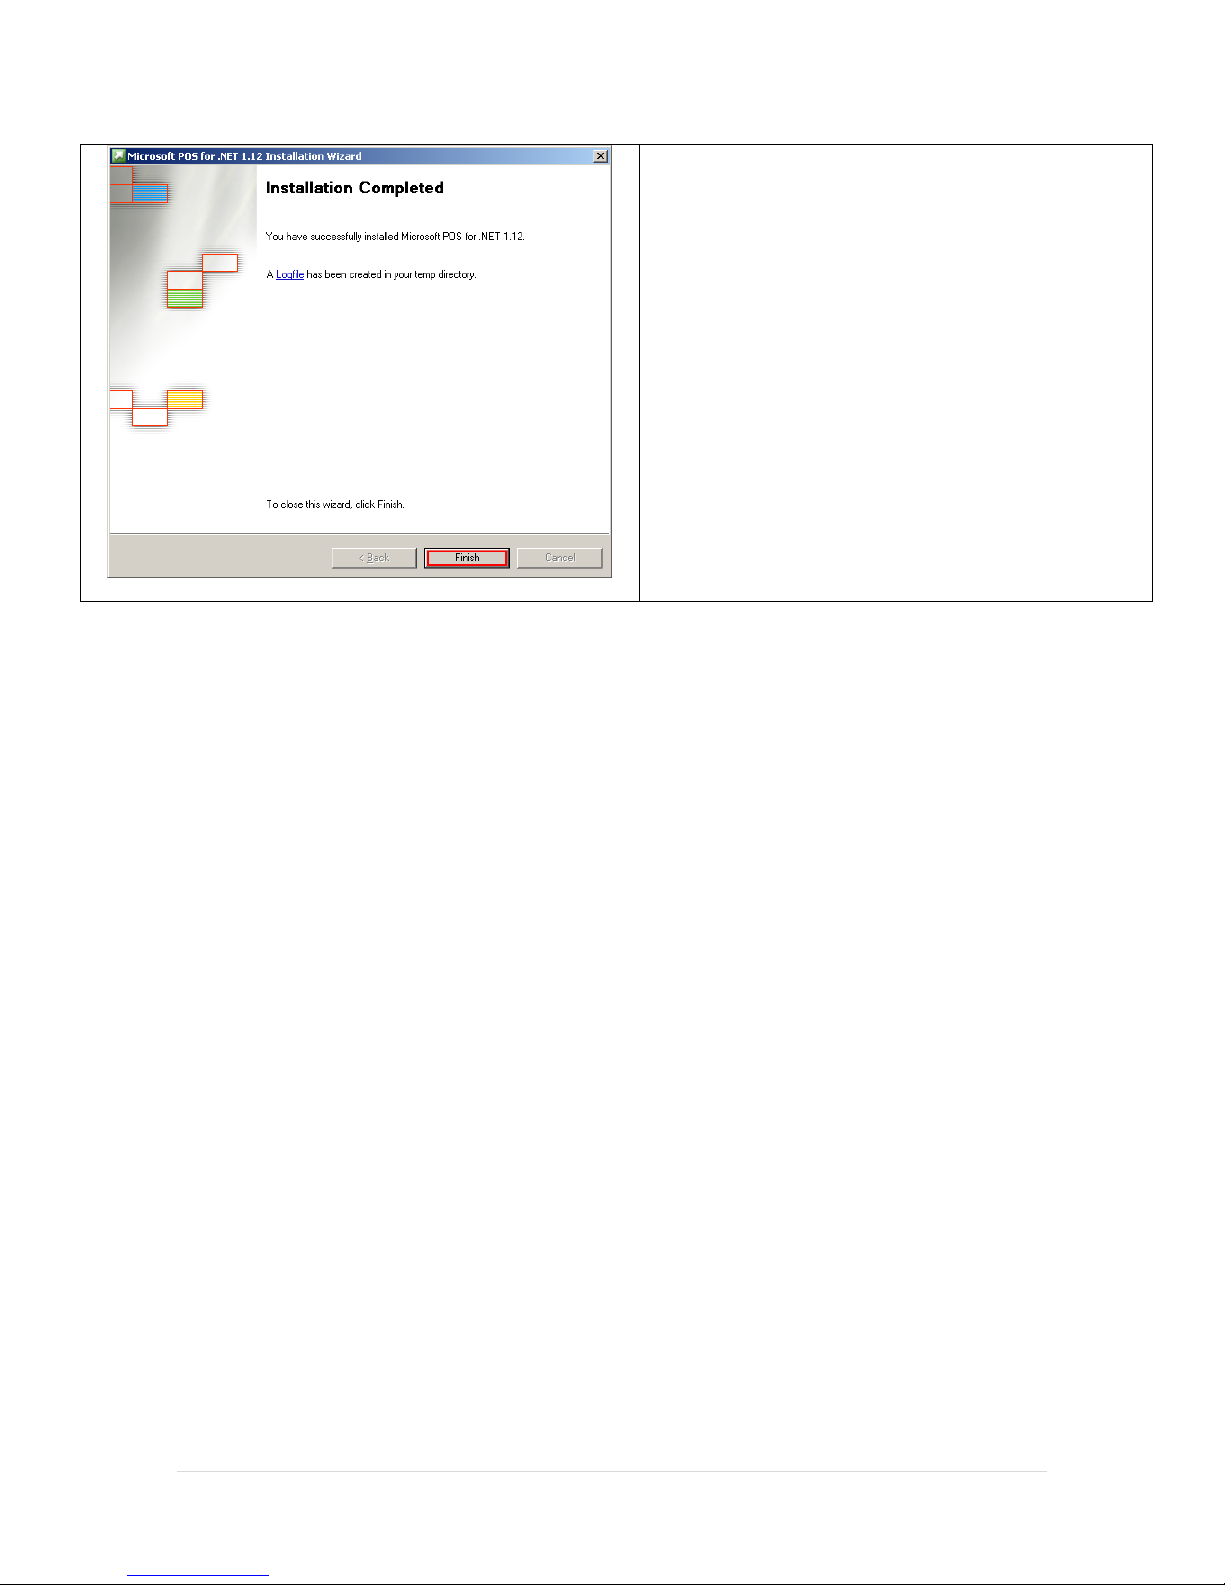
Select Finish.
8 | P a g e
Page 9
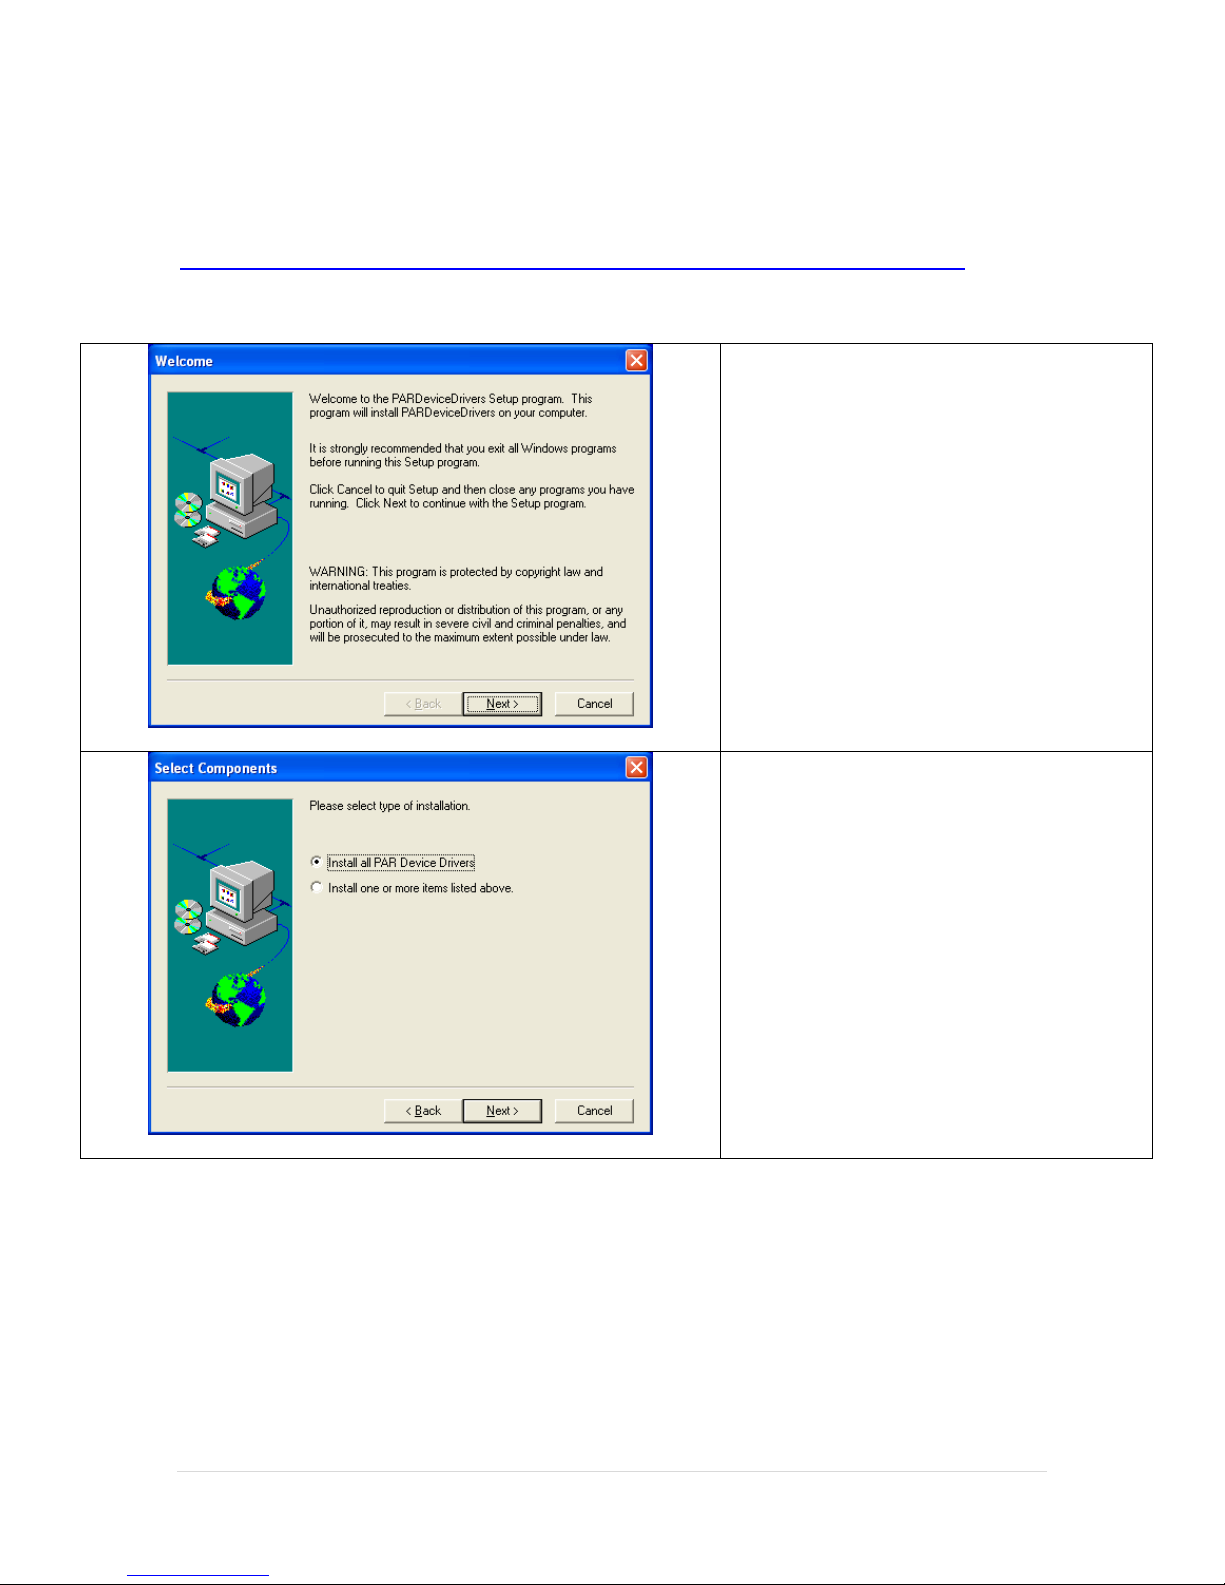
Run Setup.exe.
Select Next.
Select Install all PAR Device Drivers.
Select Next.
Installing the PAR POS Device Drivers V1.0.0.13
The installer for the PAR POS Device Drivers can be downloaded at:
http://download2.pcamerica.com/drivers/Manufacturer/PAR/PAR-Device_Drivers_V1.0.0.13.zip
9 | P a g e
Page 10
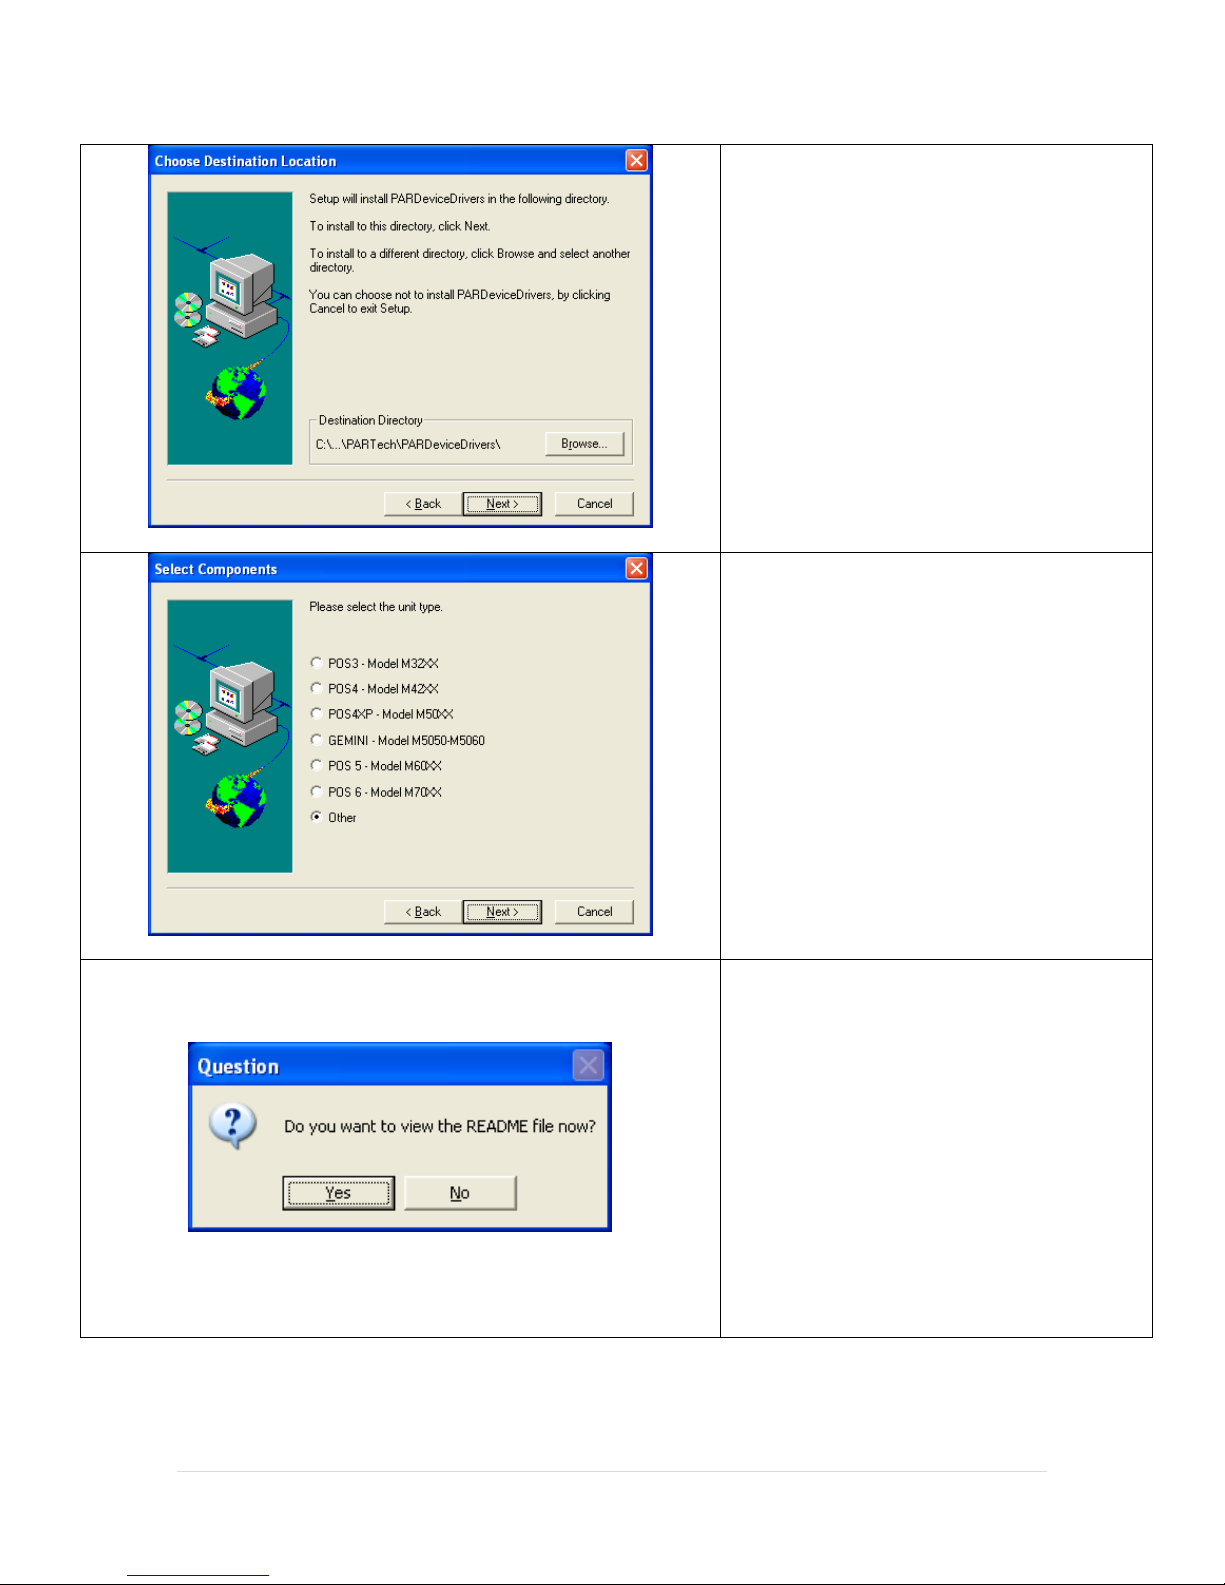
Select Next when asked to select a program
folder.
Select Other then select Next to start copying
files.
Select Yes to view the readme file.
10 | P a g e
Page 11
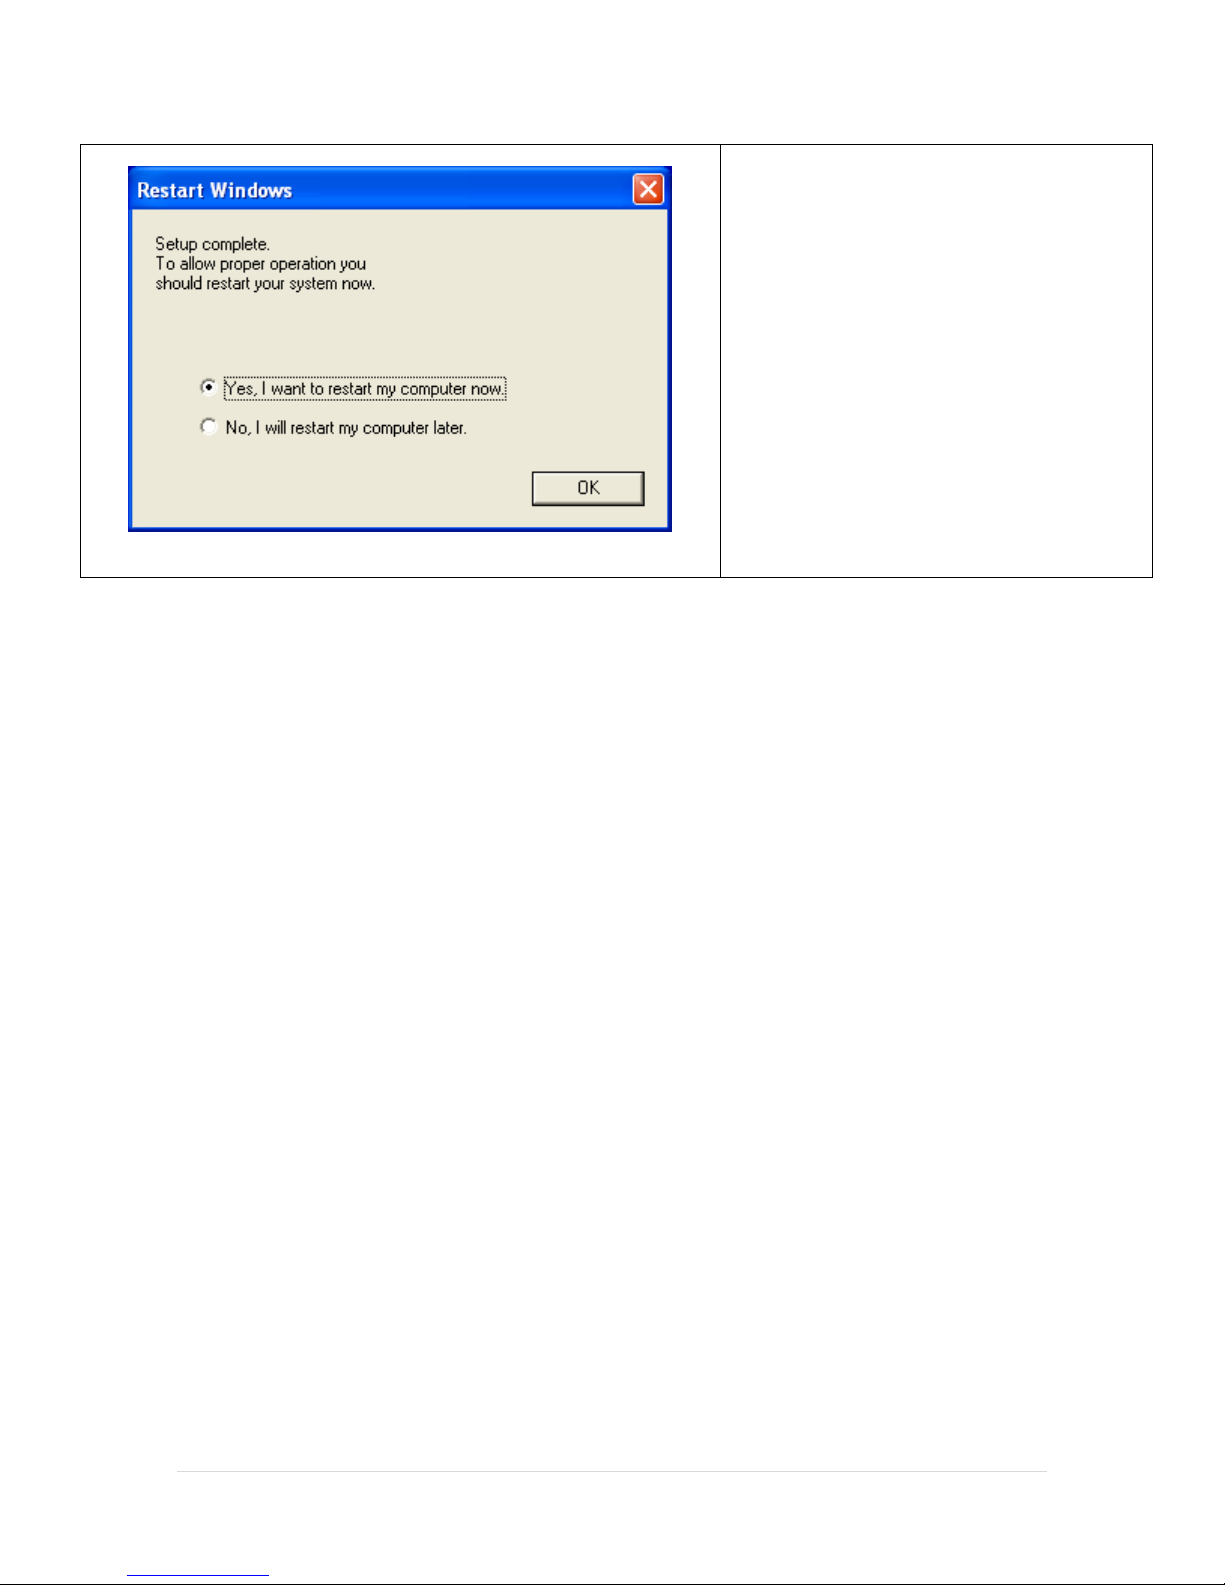
Select Yes, I want to restart my computer now.
Select OK.
11 | P a g e
Page 12
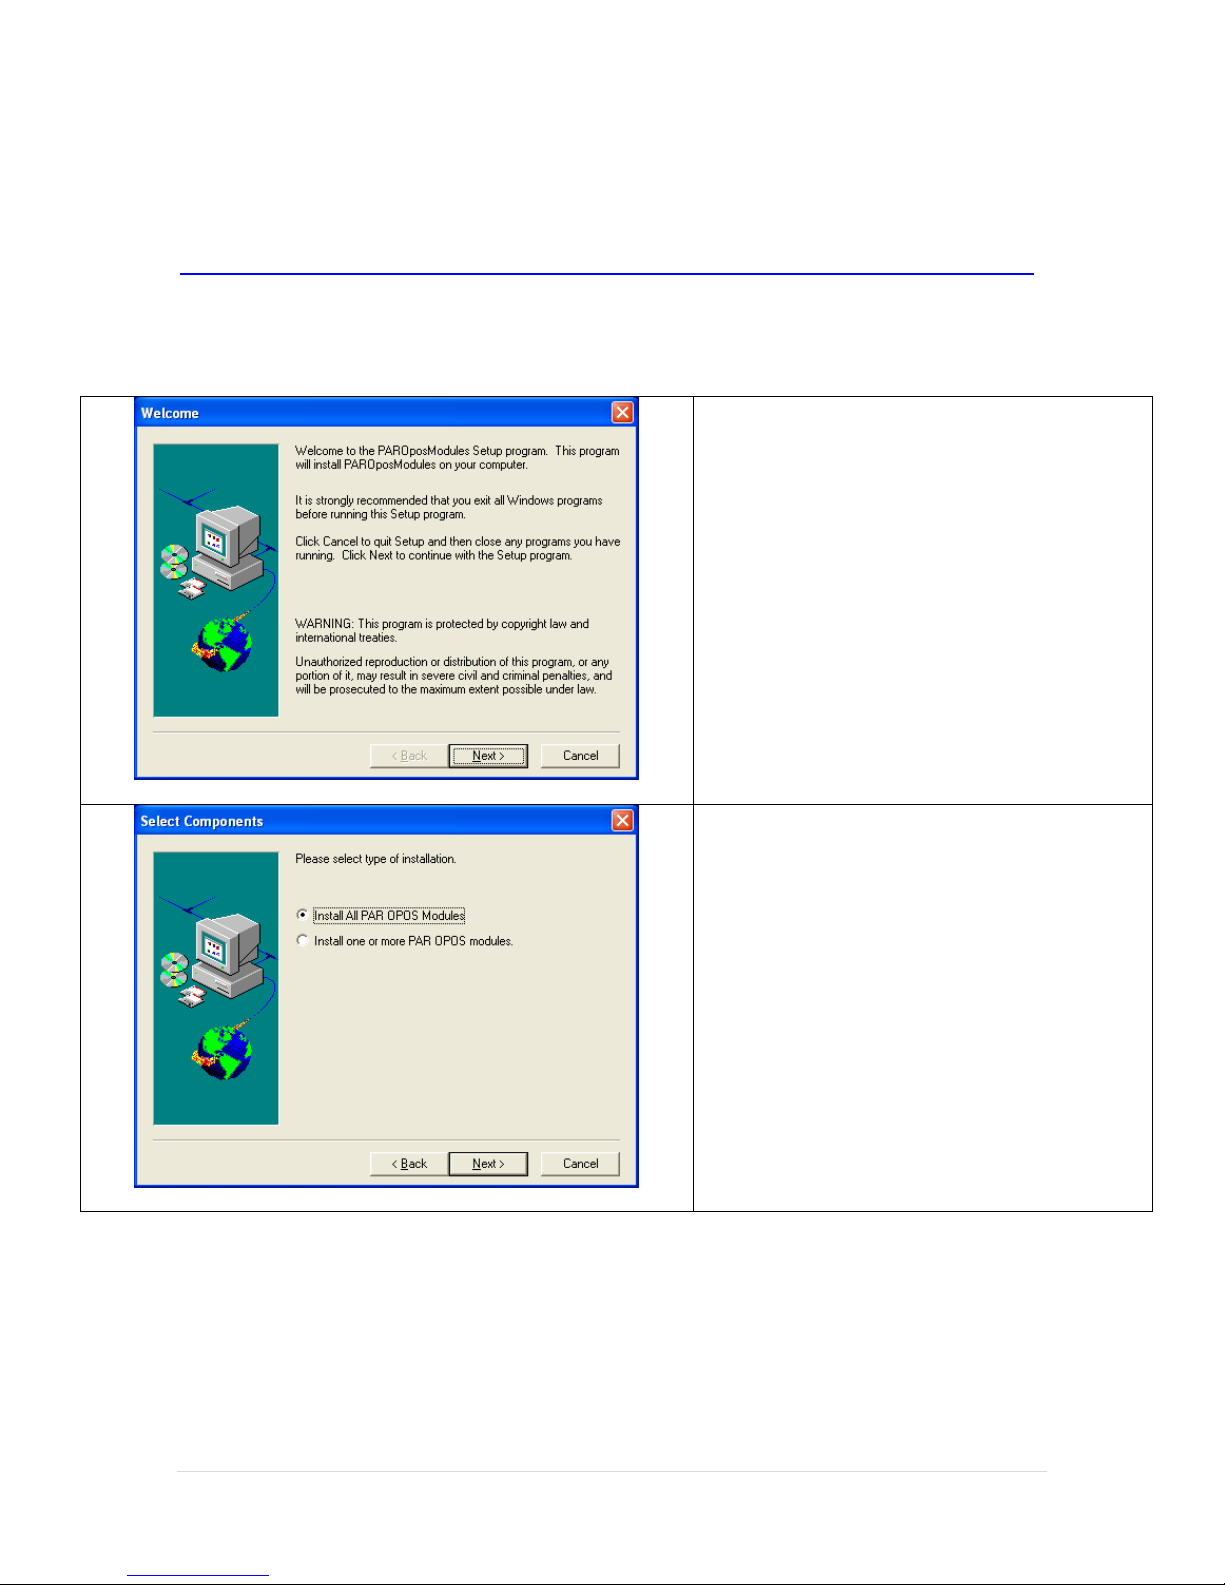
Select Next.
Select Install all PAR OPOS Modules.
Select Next.
Installing the PAR OPOS Device Drivers V1.0.0.12
The installer for the PAR OPOS Device Drivers can be downloaded at:
http://download2.pcamerica.com/drivers/Manufacturer/PAR/PAR-OPOS_Drivers_V1.0.0.12.zip
Open the Disk 1 folder and run Setup.exe, then follow these steps:
12 | P a g e
Page 13
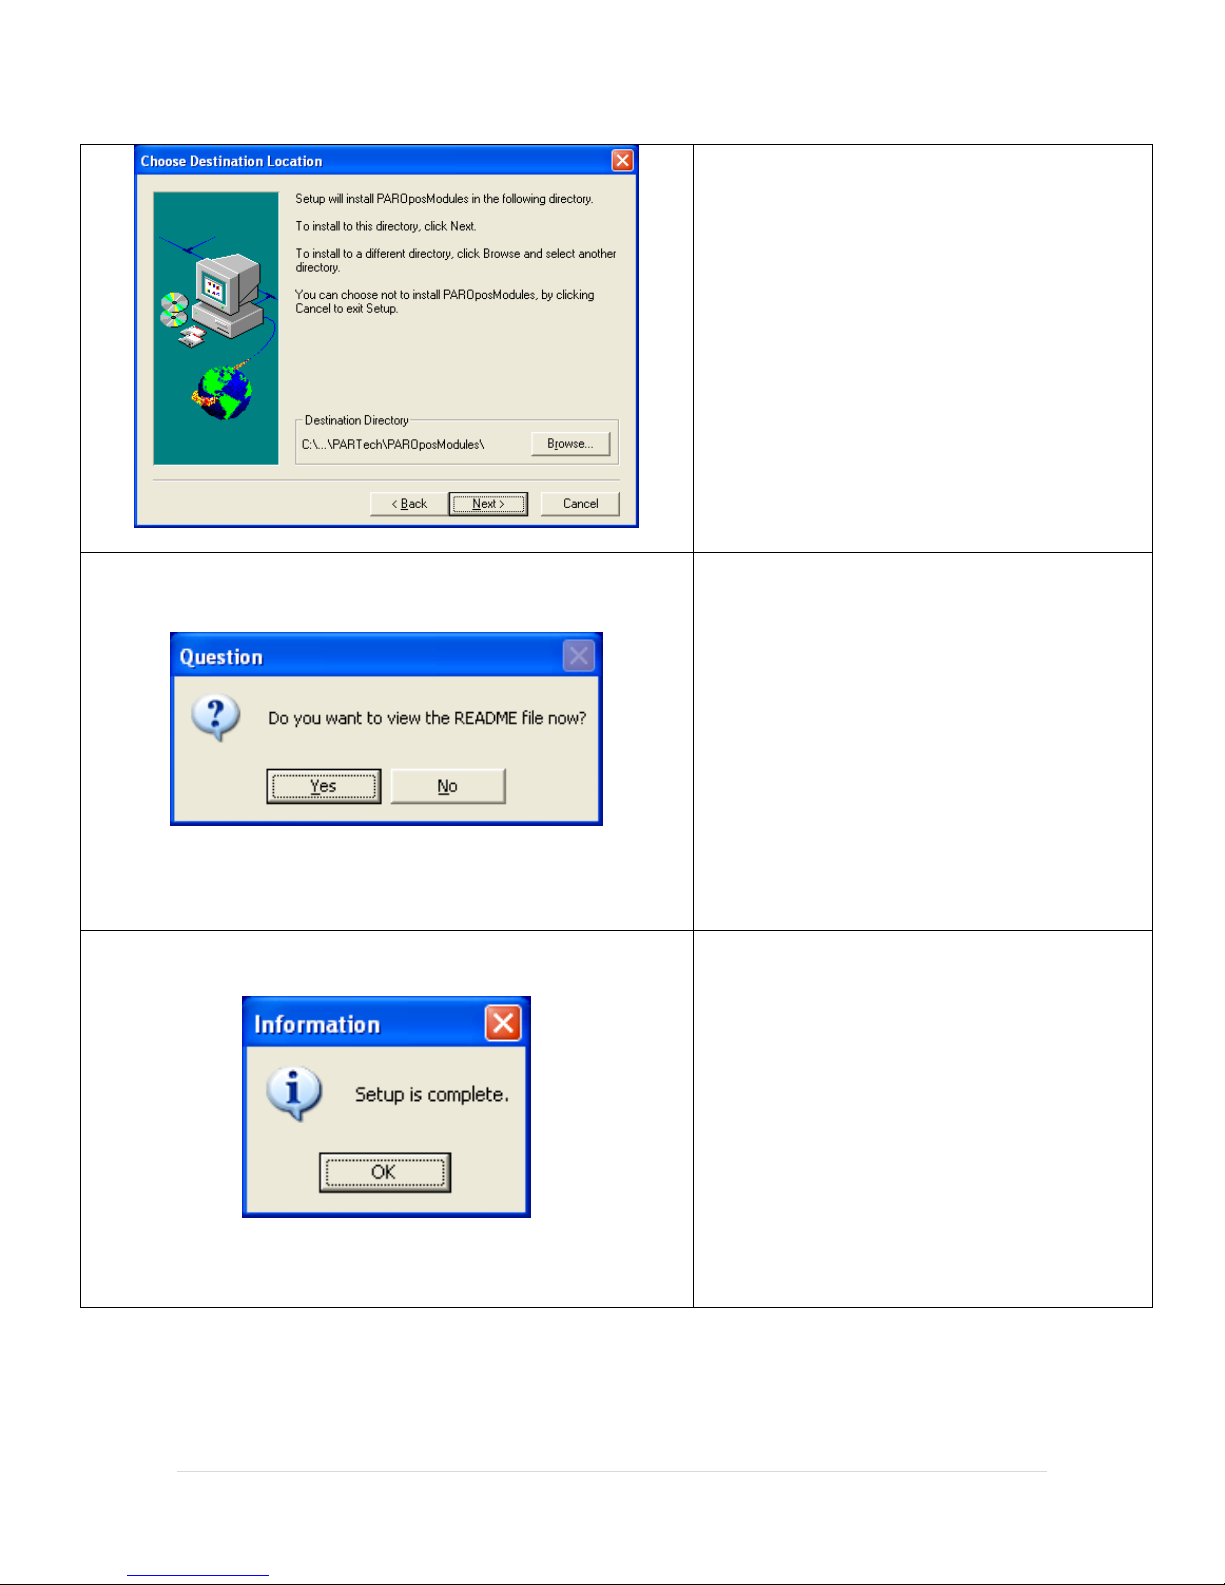
Select Next when asked to select a program folder.
Select Yes to view the readme file.
Select OK.
13 | P a g e
Page 14
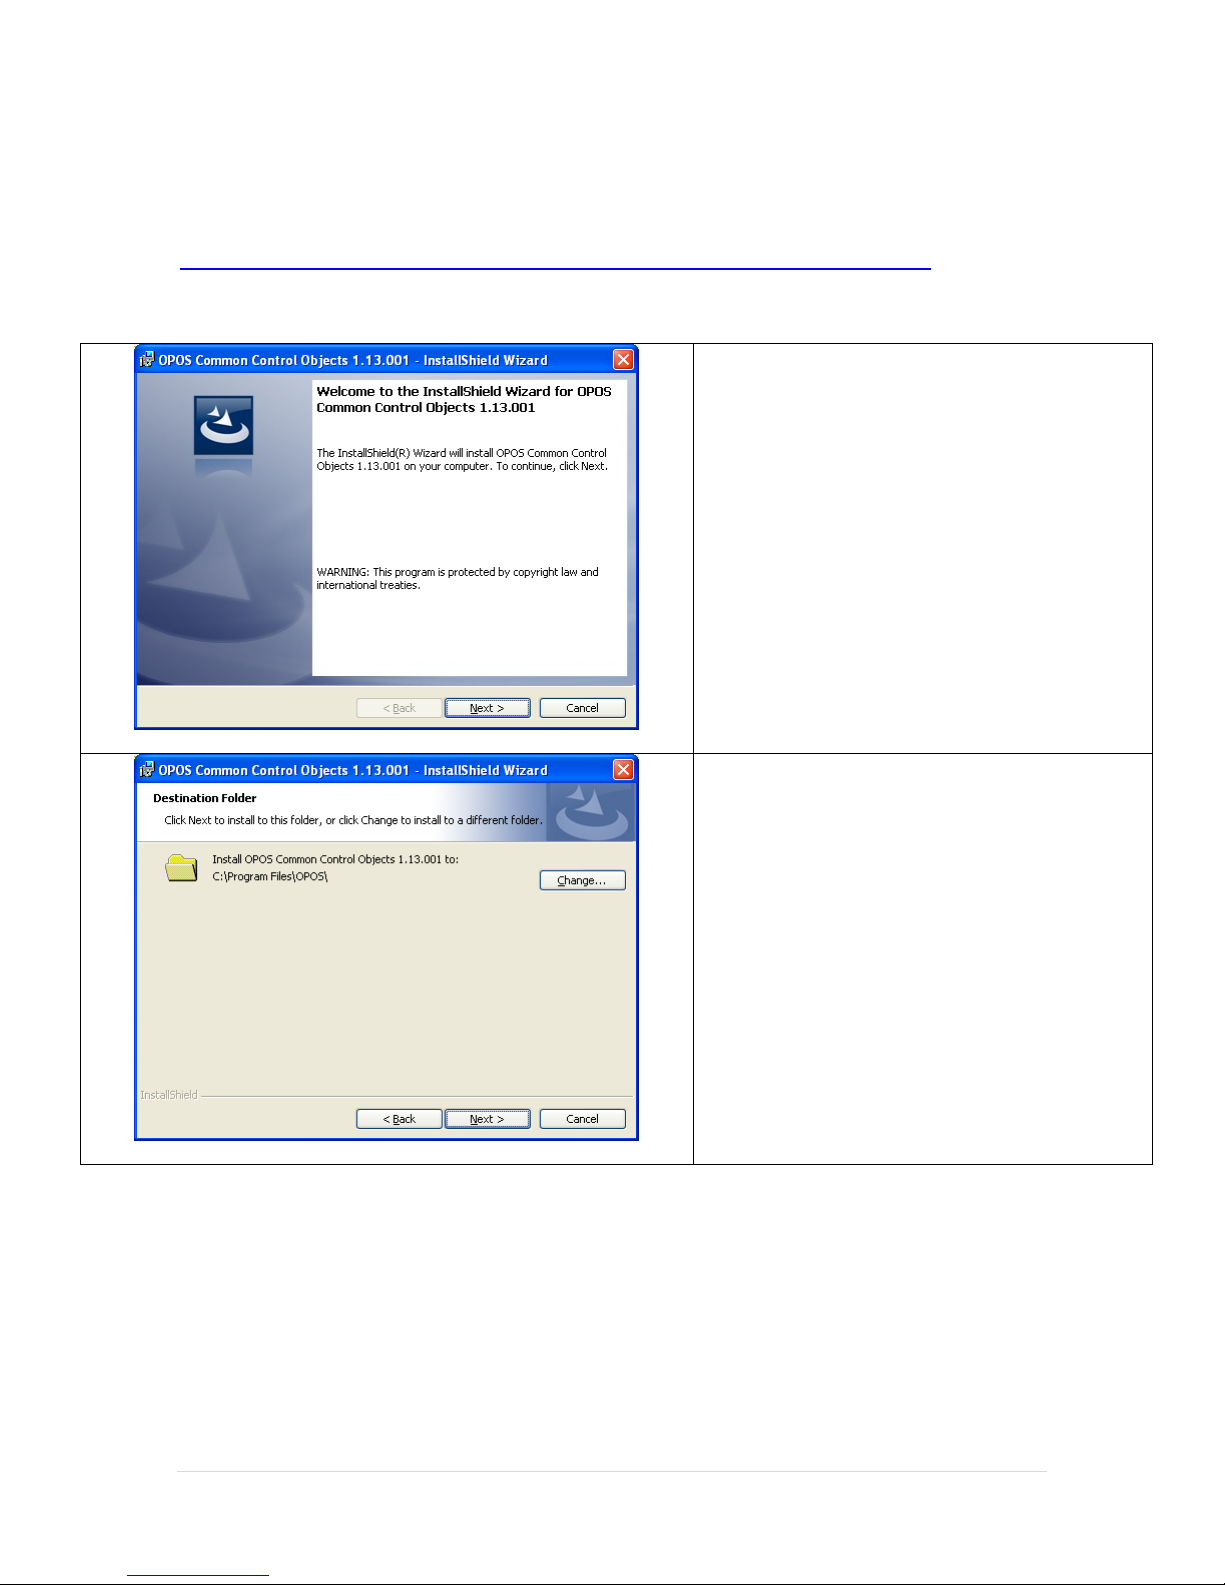
Select Next to begin the installation.
Select Next when asked to select a program folder.
Installing OPOS Common Control Objects 1.13.001
The driver for the OPOS Common Control Objects 1.13.001 can be downloaded from:
http://download2.pcamerica.com/drivers/Manufacturer/PAR/PAR_OPOS_CCO_1.13.001.zip
14 | P a g e
Page 15
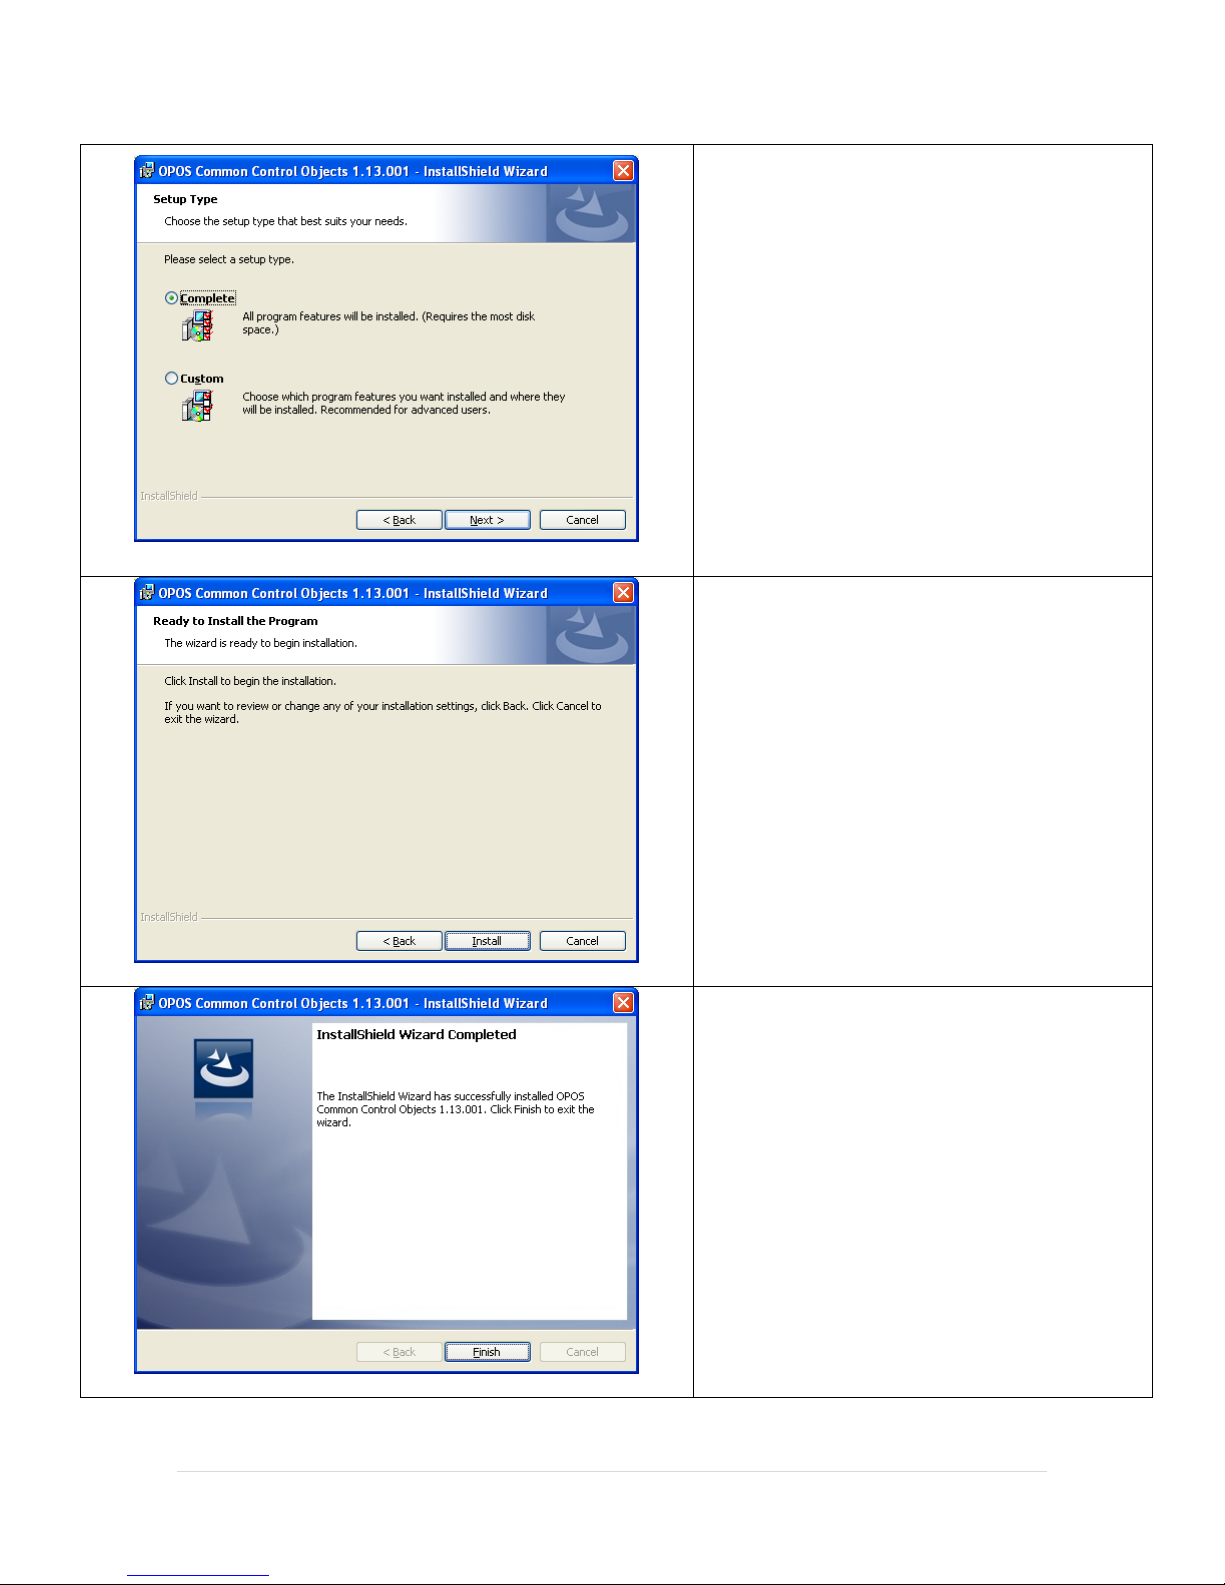
Select Complete then select Next.
Select Install to install the files.
Select Finish to complete the installation.
15 | P a g e
Page 16
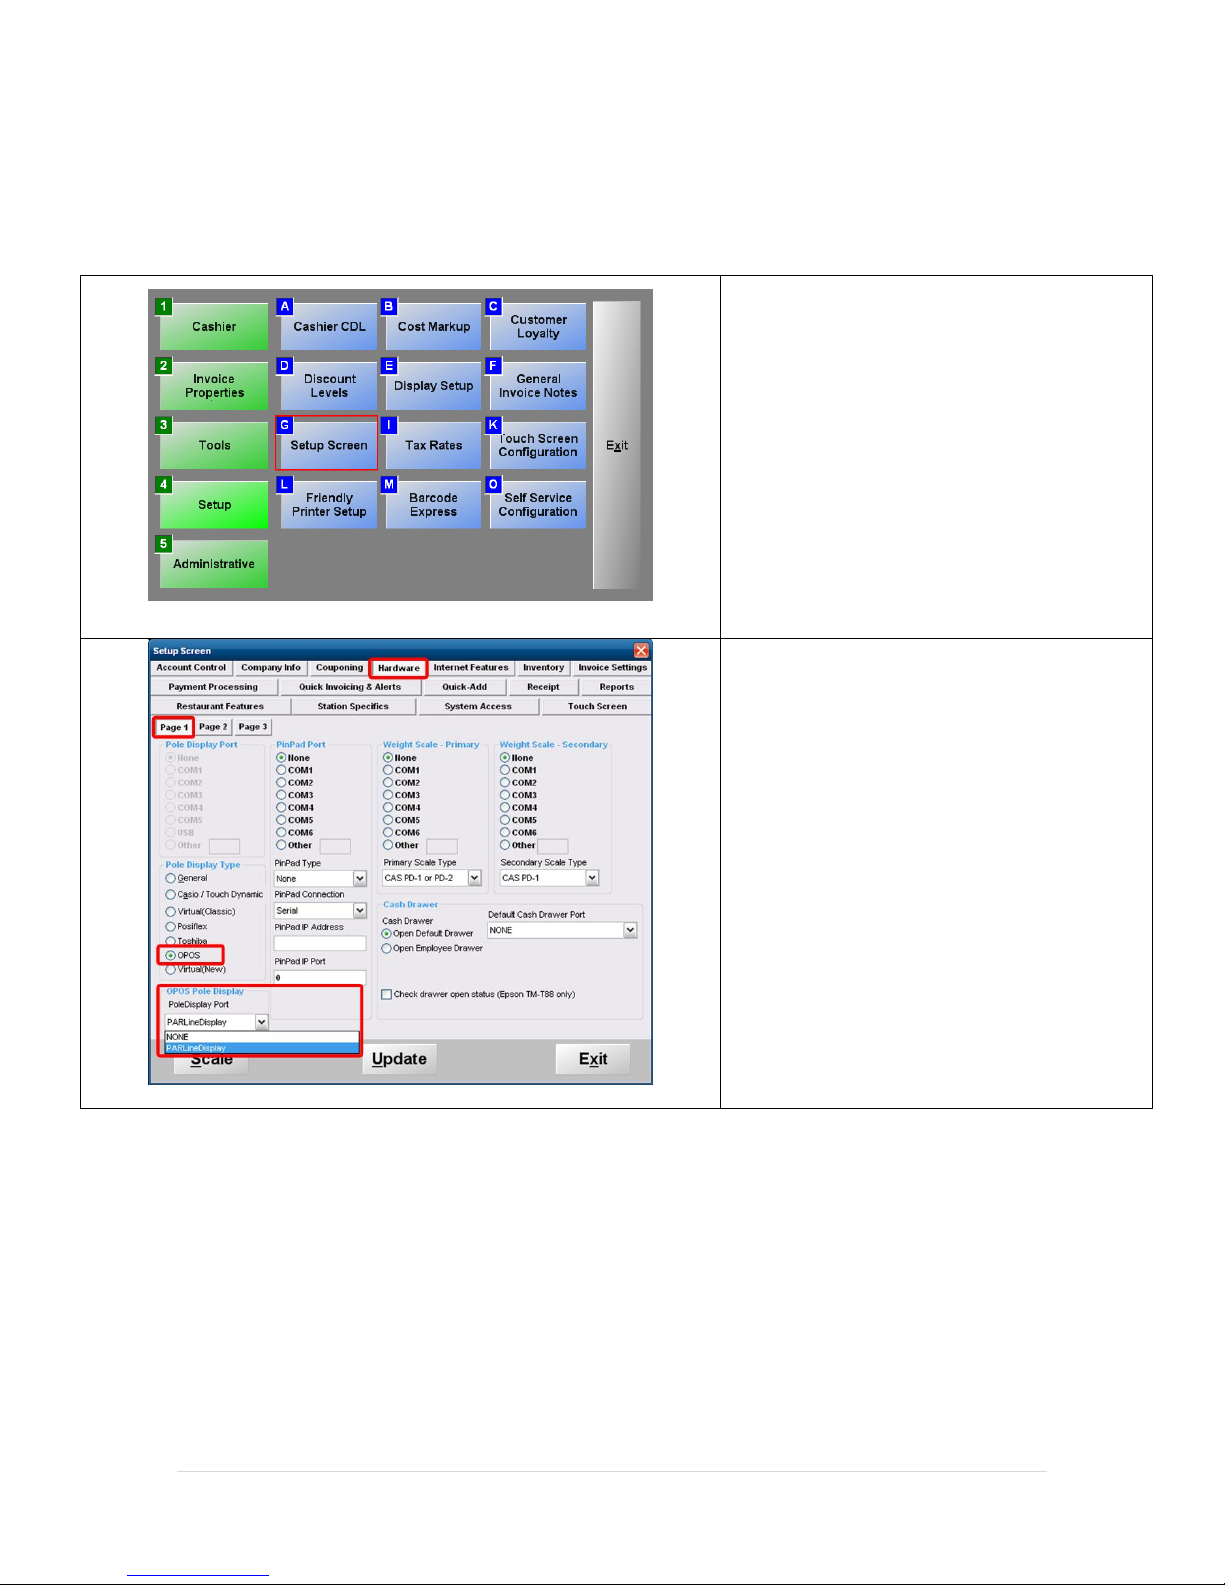
Select Setup then select Setup Screen.
Select the Hardware tab.
Select Page 1.
Under Pole Display Type select OPOS.
Under OPOS Pole Display select PARLineDisplay.
Configuring CRE or RPE to communicate with all devices
To configure CRE or RPE to communicate with all devices, open CRE or RPE, select Manager, provide the
requested credentials, and follow these steps.
16 | P a g e
Page 17
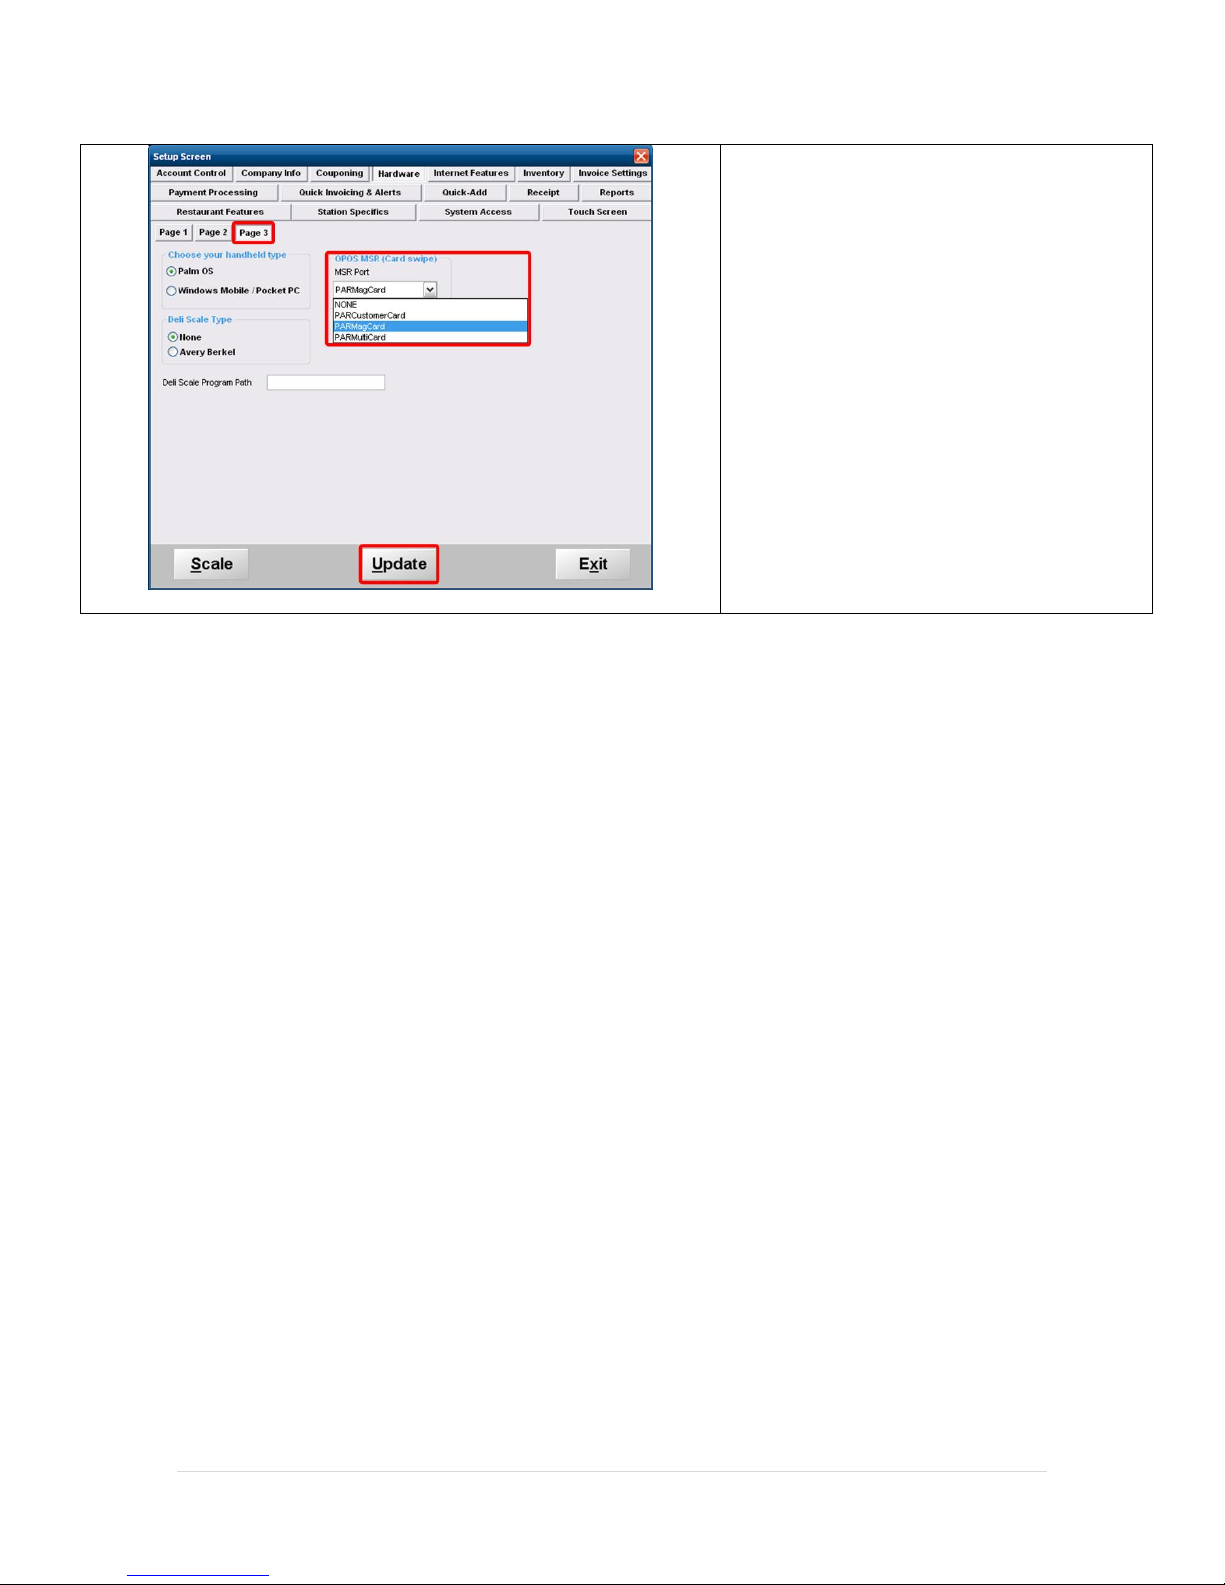
Select Page 3.
Under OPOS MSR (Card swipe) select
PARMagCard.
Select Update to save your changes.
17 | P a g e
 Loading...