

Page 1
Copyright(C)2001-2012, PAPAGO Inc., All right reserved.
User Guide
Page 2
English 1
1. Production Introduction
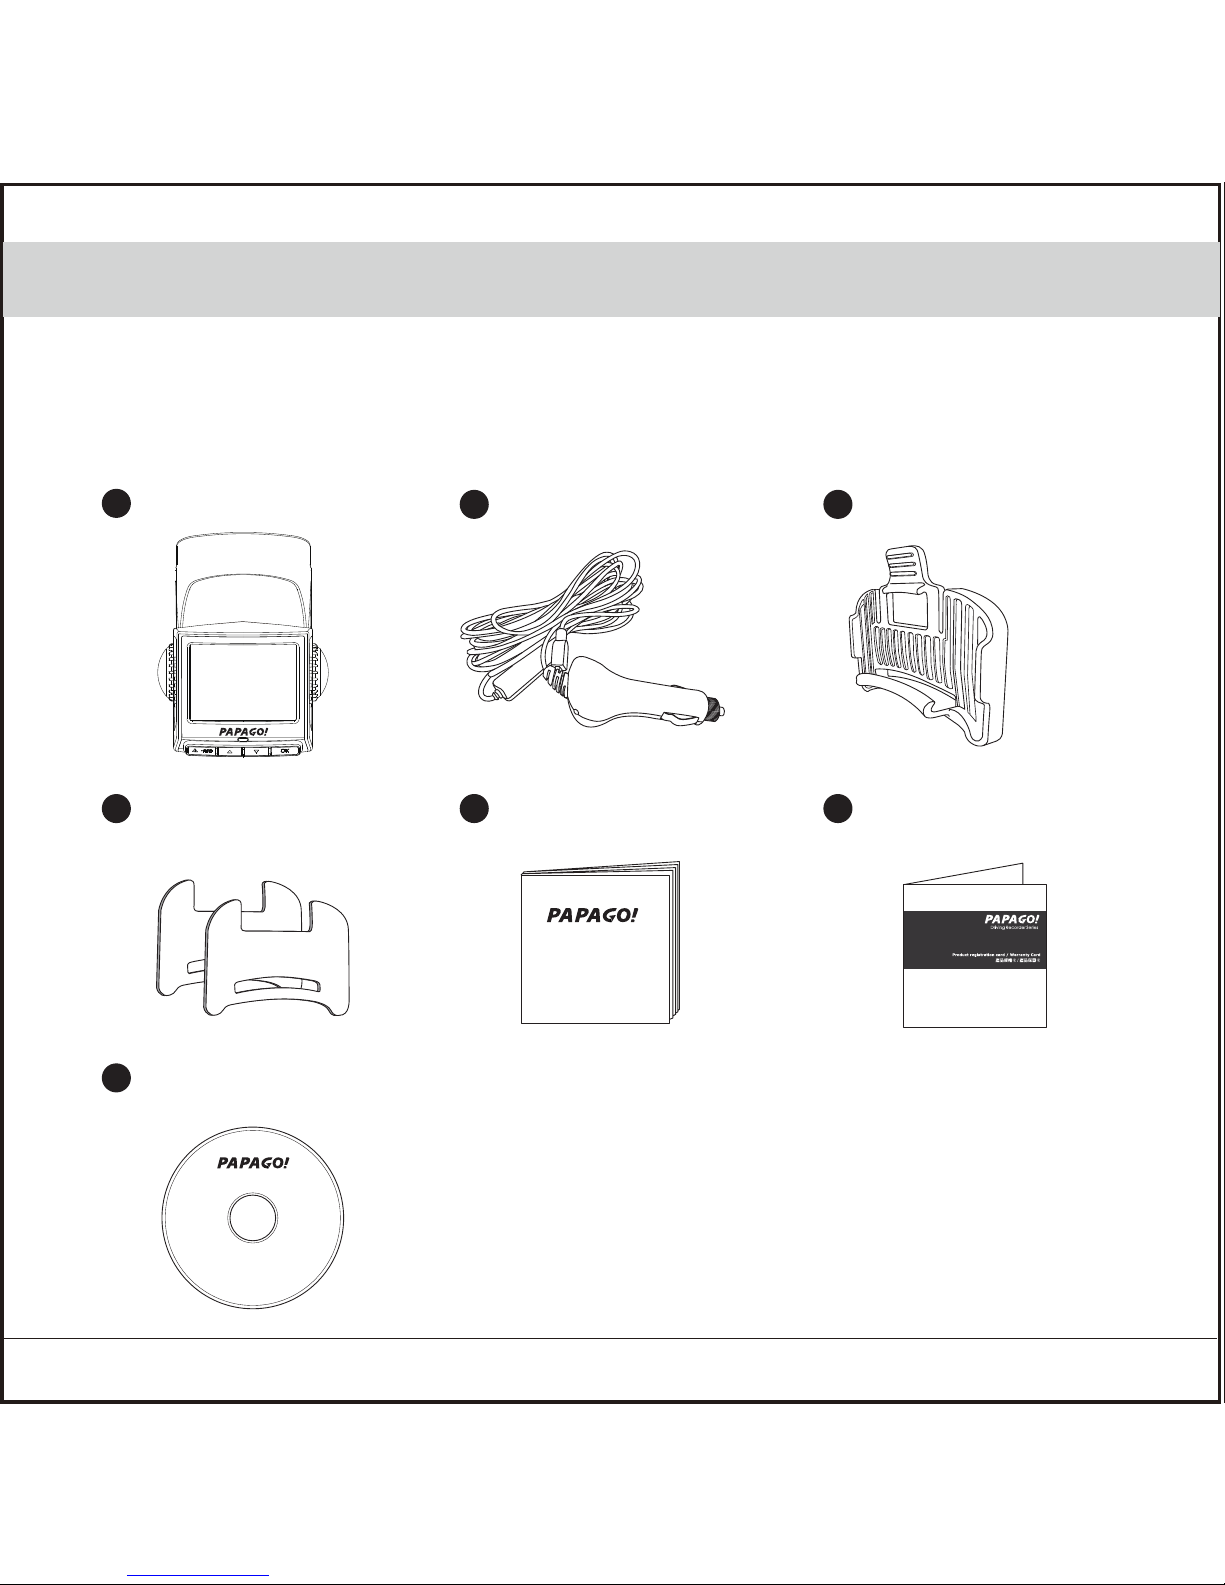
1.1 Package Content
Device
2
3
4
5
6
7
Car Charger
Package should include below items
Removable Buckle
Sticker x 2 pcs Quick Start Guide Warranty Card
CD (PC Software)
1
Install
User Guide
Page 3
English 2
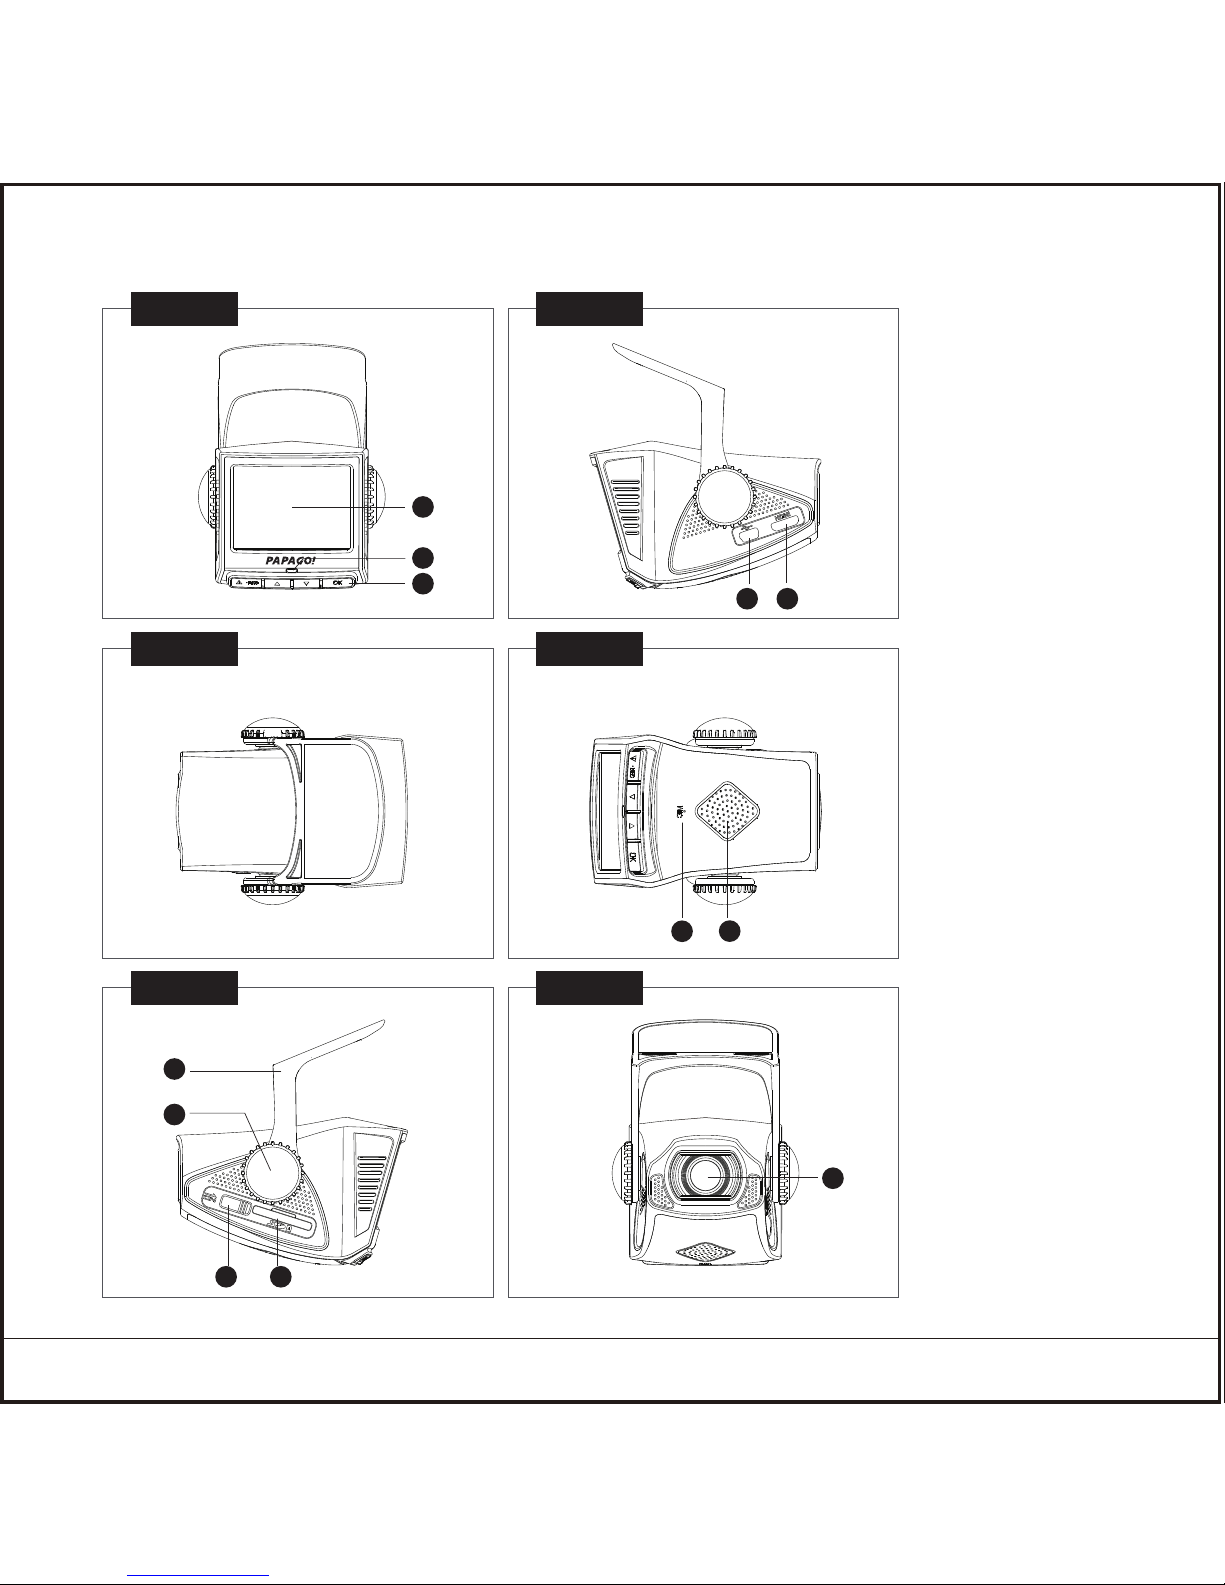
1.2 Device Interface
3
6
2
5
8
9
10
11
12
4
7
1
1. 2.4”Screen
2. LED Light
3. Buttons
4. Mini USB
5. HDMI
6. Microphone
7. Speaker
8. Bracket
9. Knob x 2 pcs
10. Power Switch
11. SD Card Slot
12. Lens
Front View Right View
Top View Bottom View
Left View Rear View
Page 4
English 3
2. Install/Uninstall
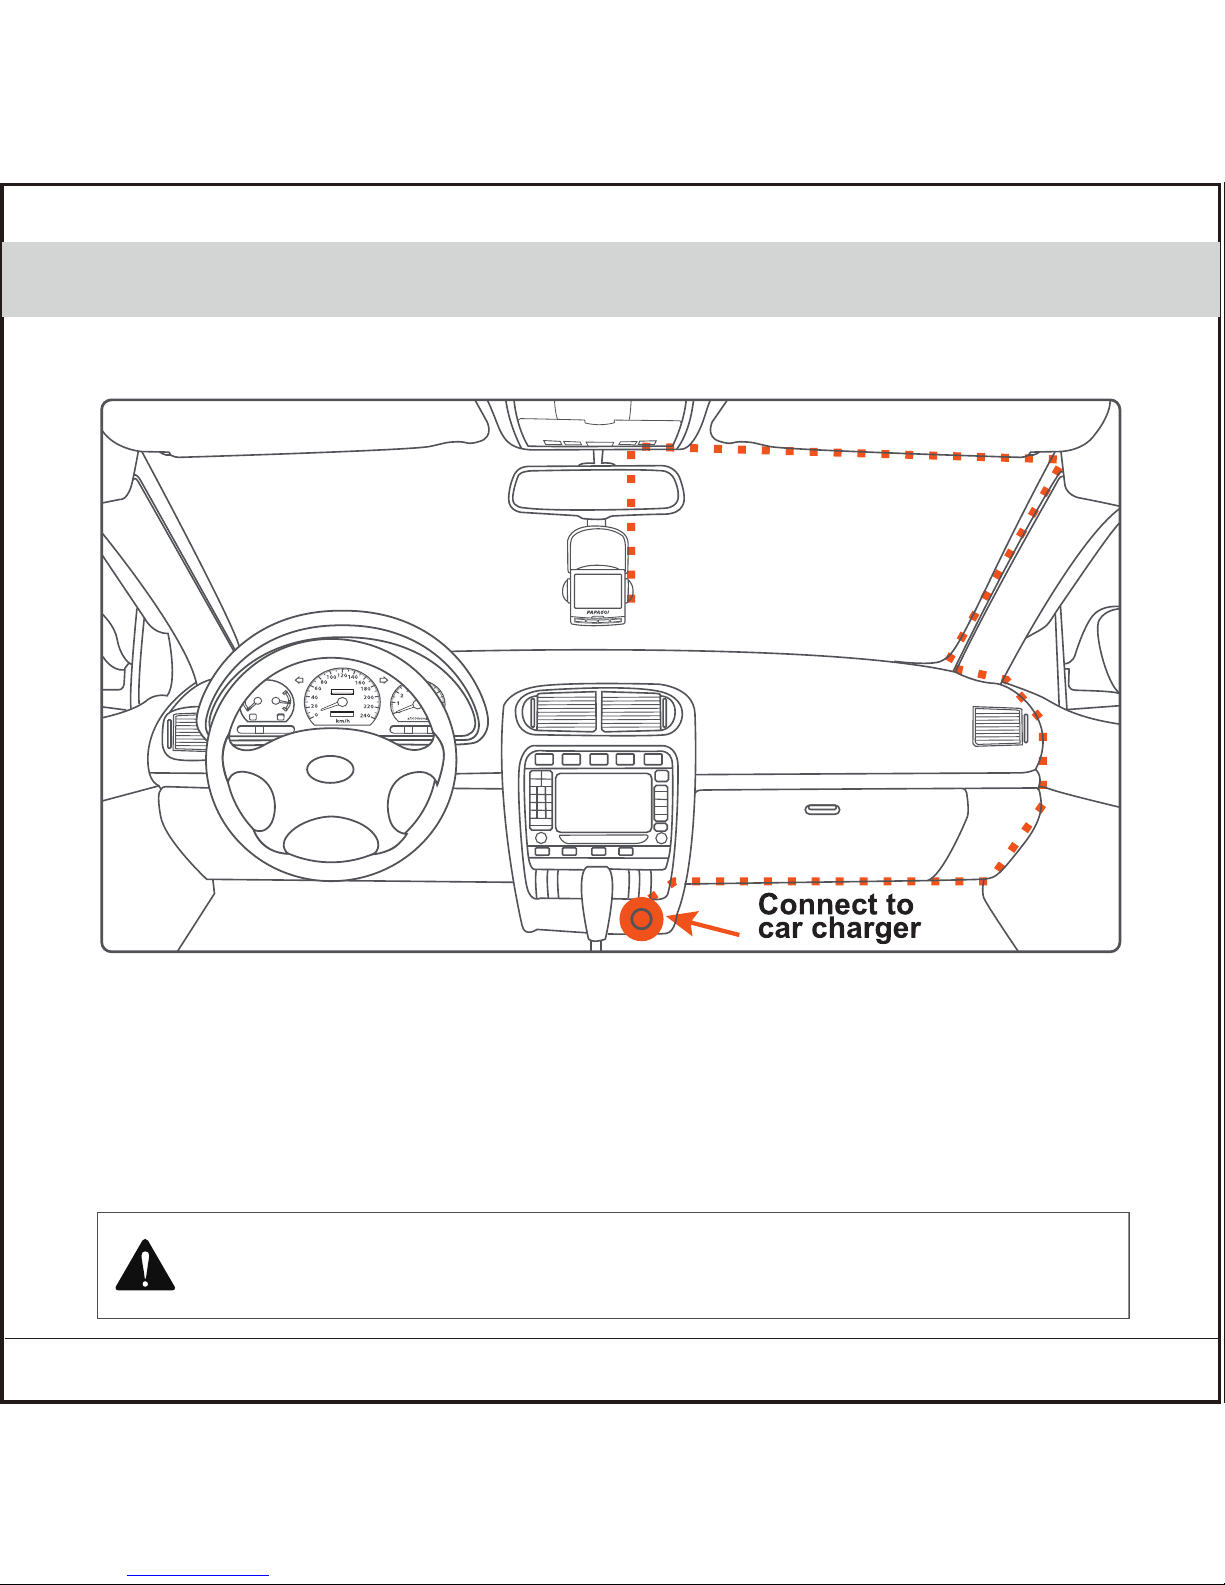
2.1 Install Location
1. Put the device around the area of front rear view mirror, to have better view.
2. Make sure the lens is within windshield wiper area, to have the clear video quality in
the raining day.
3. Don’t install the device within the area of air safety bag.
4. Don’t install on the tented windshield film, to prevent any damage of the film.
5. Don’t install on the area that will affect by the tinted window film or any interference
electronic products.
Do not put the device within the area of air safety bag. Our company is not responsible for
any damage or injure caused by air safety bag.
Air Safty Bag Warning
Best mounting
location
Page 5
English 4
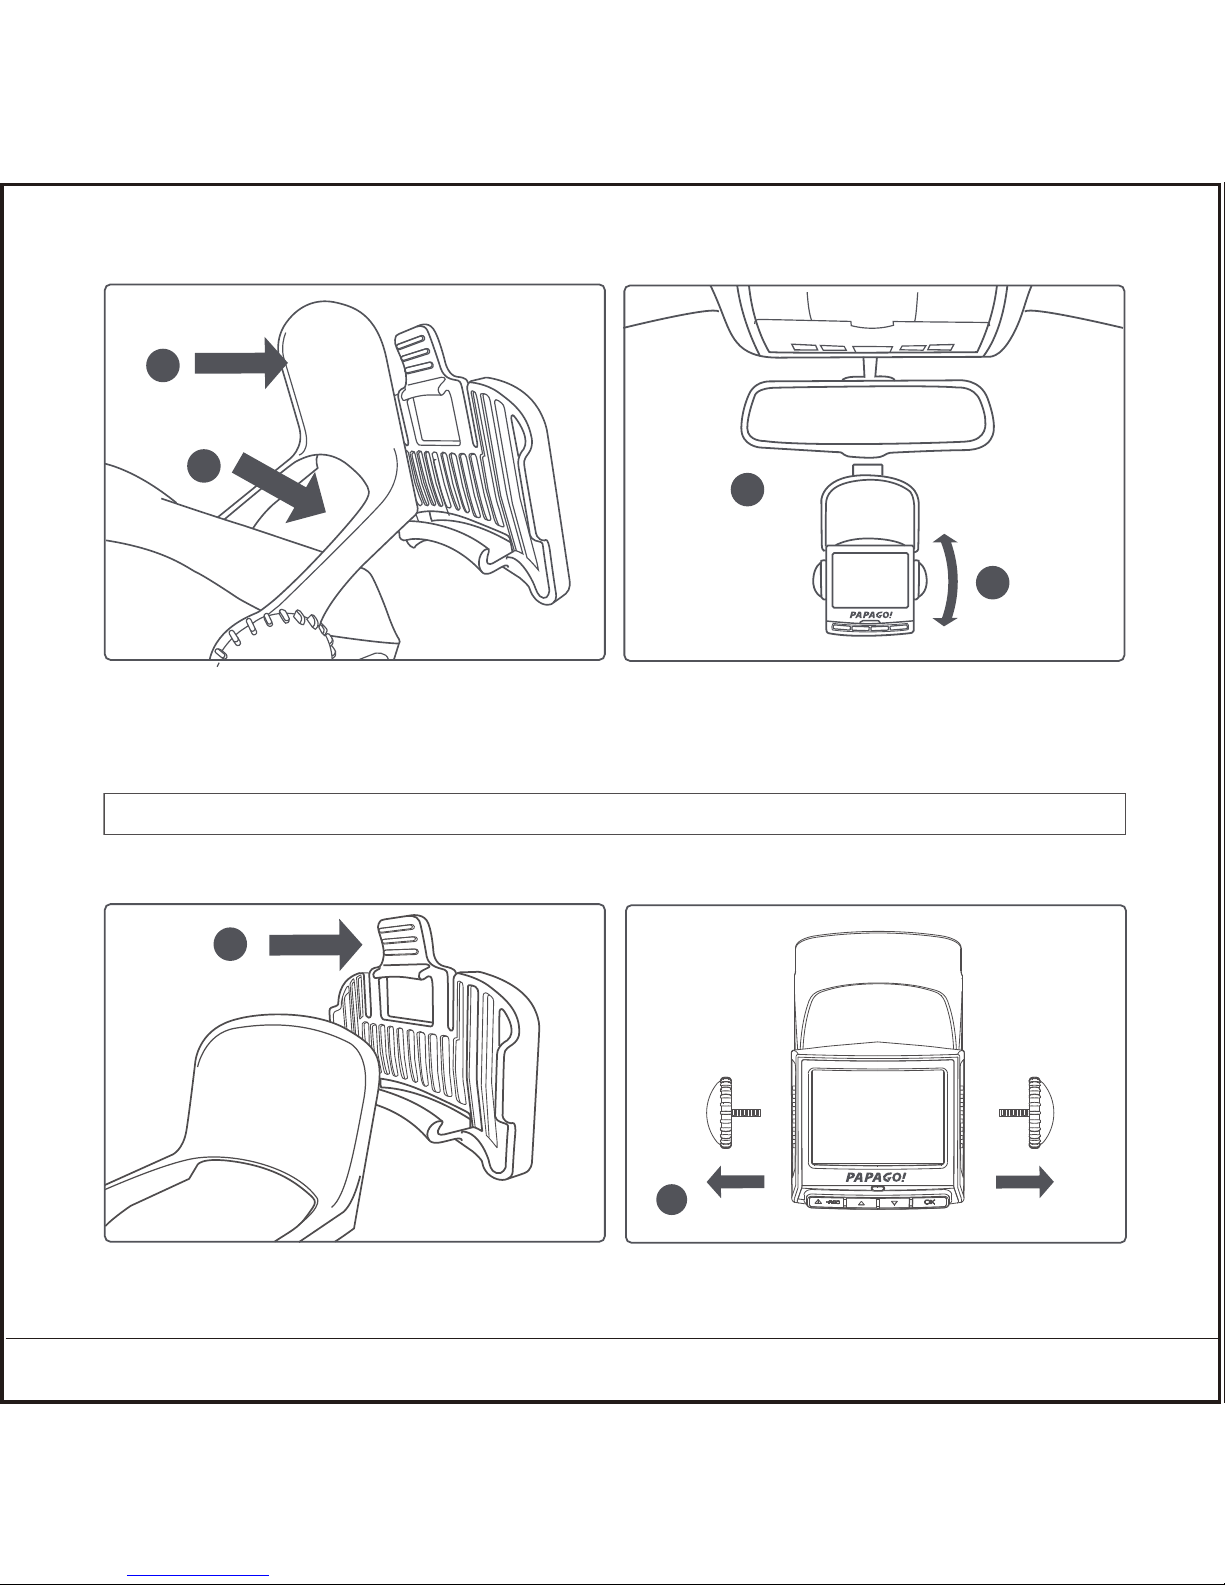
2.2 Install
2.3 Uninstall
1. Put the device on top of the removable buckle.
2. Push to lock.
3. Stick the removable buckle on proper area.
4. Adjust the angle.
1. Push the button to release the device from removable buckle.
2. Or take off the device by release the knobs.
2
1
3
4
2
P.S. Do not move the position of the buckle within 24 hours.
1
Page 6

English 5
3. Start to Use
3.1 Power On
1. Insert the car charger into the car lighter.
2. Insert the USB cable into the USB port.
3. Insert the SD card into the SD card slot, and switch for Power ON.
3.4 Auto Power ON/OFF
1. Switch to Power ON.
2. Auto Power OFF after car power off.
3. After start up the car again, the device will auto Power ON again and start
cycle recording.
3.3 Power Off
1. Switch to Power OFF.
2. Take off the SD card after completely power off.
3.2 First Start On
Setting the language.
P.S. If the car power off but the car lighter still working, then will not
support for this feature.
Page 7

English 6
3.5 Features of Each Button
Introduction Button Feature
Video Saving
Up/Play
Down/Setting
Mode switch/
screen off
On/Off Power ON/OFF
Recording/Time Mode
-Video saving
Play/Setting
-Back to recording
Recording/Time Mode
- Enter play list
- Long press for taking picture
Play/Setting
-Up
Recording/Time Mode
- Enter setting list
- Long press for turn on/off
voice recording
Play/Setting
-Down
Recording/Time Mode
-Enter map mode
Play/Setting
-Confirm
Page 8

English 7
3.7 Video screen
1. video time
2. video reserved space
3. voice record off
4. current time
5. feature list
Recording
ModeSettingPlayBackup
0:15 11:48
2
3
4
5
1
3.9 5 Sets Video Reserved Space
1. Manual Save : Push the video copy button during recording for save the
current video to prevent for auto rewritten.
2. Bump Auto save : When any bump happened, will activate auto save
system, to prevent accident video to be over rewritten.
3.6 LED Light
Not recording
Recording
LED Color Definition
Green
Red
4/5
1. Second
2. Hour
3. Minute
4. Date
3.8 Time Mode
2
3
1
4
Page 9

English 8
4. Record/Play
4.1 Cycle Recording
1. Insert SD card, power switch ON to start record.
2. Each recording file is default 5 minutes, and will overwritten while out of
SD card memory.
2. On the other hand, push longer again for “setting” button, until the
upper right side disappear the microphone off icon to on the voice recording
feature again.
3. Or to set the voice recording on/off from setting menu.
4.2 Voice Recording
1. Under recording mode, push longer for “Mode” button, until the upper
right side shows microphone off icon to off the voice recording feature.
4.3 Screen off
Push longer with mode button during video recording to off the screen.
4.4 Video Play/Delete
1. Under recording mode, push play button to enter play menu.
2. Select play source file(Emergency Record or Last Record)
3. Select video to play/delete.
Page 10

5.1 G-sensor Status
1. G-sensor status: Show current data and could adjust manually.
2. Bump Auto Record : To select off/low/middle/high sensitivity.
1. Date and time setting :
Enter setting menu, manually setting date and time.
2. 24 hours format
On/off 24 hours format.
5.3 Date and Time
5.4 Sound effect
1. Volume : Adjust system volume.
2. Button Sound : On/Off button sound
English 9
5. System Setting(TBD)
1. Resolution : To select resolution and format for video quality.
2. Digital WDR : On/Off digital WDR.
1080p 30fps Full HD quality 30 frames/ per second
720p 60fps
720p 30fps
HD quality 60 frames/ per second
HD quality 30 frames/ per second
5.2 Video Format
Page 11

English 10
6. GoLife Installation
5.5 Display
1. LCD Brightness : Adjust screen brightness.
2. LCD Auto Off : To set screen always on or auto off after 1, 3, 5 minutes.
3. Video with speed/time : On/off video with speed/time info.
4. LED Light : On/off LED light.
5.6 Language
Support multi-languages
6.1 System inquiry
5.7 System
1. Factory Reset : To have all settings reset to default status.
2. Format
3. System info : Showing current system version and map version in the SD card.
O/S
CPU
Memory
Interface
Browser
Pentium 4 2.4GHz above
512MB above
SD card reader
IE8
Windows 7 / Vista / XP operating system
3. Voice recording : On/off voice recording.
Page 12

English 11
6.2 Software package
6.3 Player interface
Please insert the CD disc to your computer, and follow the instruction to
install GoLife for software player. After installation, you may enter GoLife
from your desk top directly.
1. Video file list
2. Video playing
3. Feature list
4. G-sensor/G-sensor value display
5. File name & path/display time
1
2
3
4
5
Page 13

English 12
7. Caution
7.1 Usage Related
1. If car lighter still on after car power off, make sure to pull off the car charger,
in case to run out all the battery or cause any accident.
2. There will be backup battery to record the files after car power off, device
power off or any emergency power off.
3. Do not take off SD card immediately during the device power off, to prevent
file damage.
7.2 SD Card Related
1. Please use at least Class 6, 8GB SD card
2. Before use, please formatting the SD card
3. SD card memory & recording time for reference
(Exclude map data in the SD card)
SD card Memory
8GB
16GB
32GB
120min
240min
480min
240min
480min
960min
720p 30fps
1080p 30fps / 720p 60fps
Page 14

English 13
8. Reference Info
To use car charger connect directly to car power source.
(this installation method is not covered in the warranty.)
1. To cut car charger cable at the front side, make sure to keep the regulator.
2. To connect red cable to ACC. power, and black cable to negative.
Regulator
 Loading...