

Page 1

USER MANUAL
Pantera Command Centre
www.pantera.co.nz
V 2.4
The information contained herein may be changed at any time without prior notification
Updates can be found on www.pantera.co.nz
Page 2

CONTENTS
Preface............................................................................................................................ 4
Personal preference set up ........................................................................................... 6
TURN ON / TURN OFF on button is in middle of front display ............................. 7
1 Pair your bluetooth phone ................................................................................... 8
2 Decide if you want to run Auto Run Navigation ............................................... 11
3 Adjust Volume .................................................................................................... 11
4 Adjust backlighting ............................................................................................ 12
5 Set the FM transmitter (only if you require the audio streaming through the
vehicle’s stereo) .................................................................................................... 12
6 Test Making a call ............................................................................................... 14
7 L
7 L
ocate and remove sd card that is on the right hand side of mirror .............. 15
7 L7 L
9.
8 H
8 H
ear your MP3 files ............................................................................................ 15
8 H8 H
Navigation: .............................................................................................. 18
GPS Positioning ................................................................................. 18
Operating Modes ................................................................................ 18
Speed Camera Warning setting ......................................................... 20
Startup Screen: the Navigation Menu ............................................... 20
Navigating to an Address .................................................................. 21
Navigating to a POI ............................................................................. 22
Map screen .......................................................................................... 24
2
Page 3

11 Photo Album ..................................................................................................... 25
12 GPS Monitor Viewer ......................................................................................... 27
13 Bluetooth Device mManagement .................................................................... 30
14 Touch Panel Calibration ................................................................................... 32
15 Language Setup ................................................................................................ 33
16 Time Setup ........................................................................................................ 34
17 System Information .......................................................................................... 35
18 Interface Style Setup ........................................................................................ 36
19 AV-IN Function ........................................................................................................ 37
8.1 V1 Video input .................................................................................................. 37
8.2 V2 Video input .................................................................................................. 37
8.3 V3(back camera) Video input .......................................................................... 37
20 GPS Packing List .................................................................................................... 37
21 Product Description ............................................................................................... 39
22 Product Specifications ........................................................................................... 40
23 Rearview mirror GPS Appearance and Function Description ............................ 44
24 Cautions .................................................................................................................. 48
Rights of User ....................................................................................... 50
Limitations of use ................................................................................. 51
3
Page 4

1 PREFACE
Thank you for purchasing your Pantera Command Centre
The Pantera Command Centre will soon become your trusted companion as it helps you
travel in the city or adventure into the wild.
Information comes to you with push button ease and you never get lost.
You can answer calls on the go.
And you have your favourite music to keep you company.
The PCC is a formidable GPS Navigator, with an integrated high-performance reception
chip and high-sensitivity antenna to give you high coverage throughout NZ.
Often your selling dealer will have completed the preliminary setup for you such as date
and time, but you may like to set your personal preferences.
Please read through the user’s manual carefully.
Set up your personal preferences
Set up and pair your mobile with the Bluetooth function on the PCC.
Familiarise yourself with adjusting brightness and volume.
Test the initial positioning prior to starting the car.
Copy music and pictures onto card and backup.
We endeavour to provide all the necessary information concerning this product, and have
used caution and prudence in preparing this user’s manual; however mistakes and
omissions may occur therefore your understanding is appreciated.
Comments and corrections are always welcome.
From time to time without prior notification we may update this information. Please update
this manual with our latest user manual from our website on a regular basis.
4
Page 5

• Full GPS User Manual available at www.pantera.co.nz
• We shall not be held responsible for any direct or indirect data loss or damages
due to incorrect operation of software and hardware, product reparation, or other
unexpected situations.
• We shall not take any responsibility for any accidental damage or loss or claim by
third parties.
WARNING
o YOUR SD CARD IS LICENSED TO YOU ONLY AND CONTAINS THE
APPROPRIATE REGISTRATION CODE TO RUN THE SOFTWARE ON
YOUR PANTERA COMMAND CENTRE.
o WE RECOMMEND THAT YOU COPY THE SD CARD’S CONTENTS ONTO
A BACKUP FILE ON YOUR COMPUTER. THIS INFORMATION CAN BE
PUT BACK ON THE ORIGINAL CARD IF THE CONTENTS BECOME
CORRUPTED.
o YOU ARE ONLY ISSUED WITH ONE CARD.
o LOSS OF THE SD CARD MEANS THAT YOU WOULD NEED TO
PURCHASE ANOTHER LICENSE.
o MAP UPGRADES ARE AVAILABLE EVERY YEAR.
o INSTRUCTIONS TO DOWNLOAD NEXT YEAR’S MAPS ARE ONLINE AT
www.pantera.co.nz
5
Page 6

PERSONAL PREFERENCE SET UP
Your Pantera Command Centre is
PRE-PROGRAMMED FOR YOUR CONVENIENCE
You ONLY need to:
Set up and pair your mobile with the Bluetooth function on the PCC (if
required).
Familiarise yourself with adjusting brightness and volume located
under settings.
Decide whether you want Navigation to run automatically when you
start the car.
o If yes, then Enter Settings and click Navigation then tick Auto Run
o If no, then leave and the menu will display
Test the initial GPS positioning prior to starting the car.
Then
• If required, copy music onto the SD card that is inserted on the right
hand side of the mirror and backup SD Card to your computer.
If your PCC malfunctions and the information is not available in this
book, then turn the PCC off and on to initiate a reboot before
contacting support@pantera.co.nz
More information is available online www.pantera.co.nz
6
Page 7
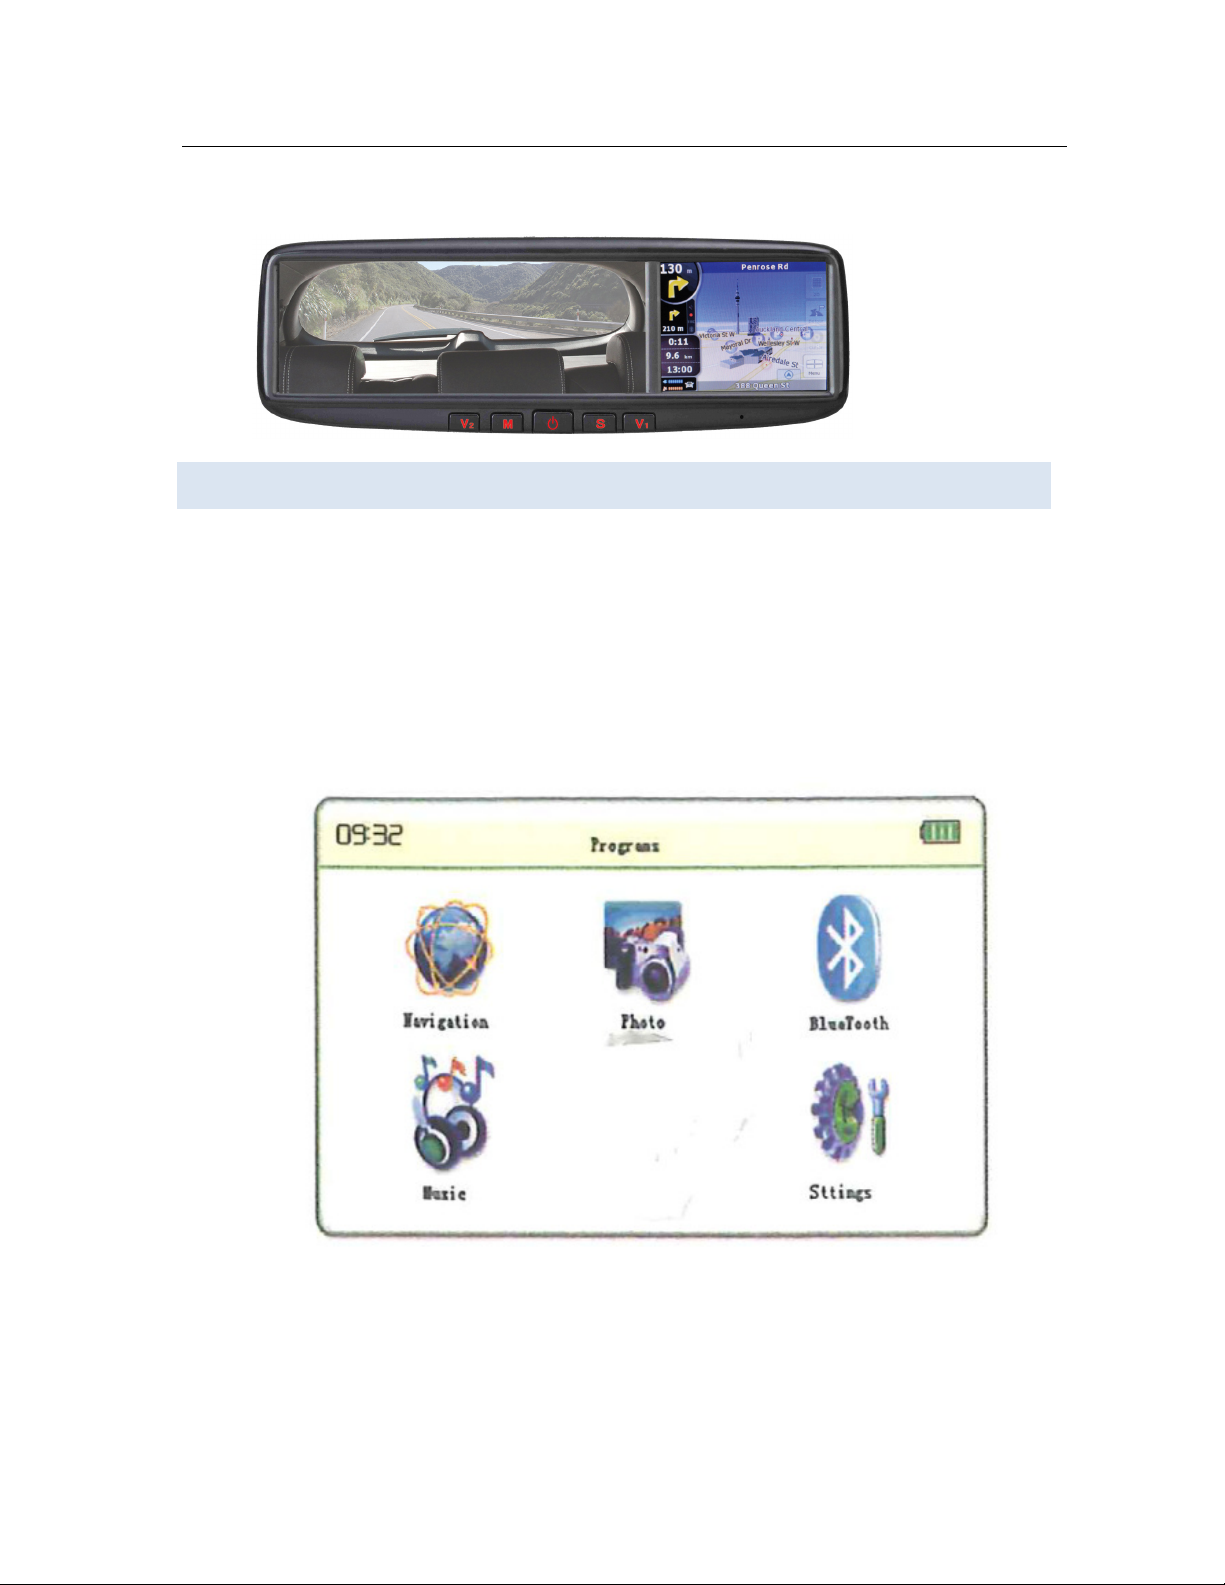
TU RN O N / T URN OFF ON BUTTON IS IN MIDDLE OF FRONT DISPLAY
POWER ON: Press the power button in the middle of the unit for about 3
seconds, the LOGO as well as the startup schematic progress bar will appear on
the LCD screen.
After 10 seconds, the system logs into the programs as shown:
7
Page 8
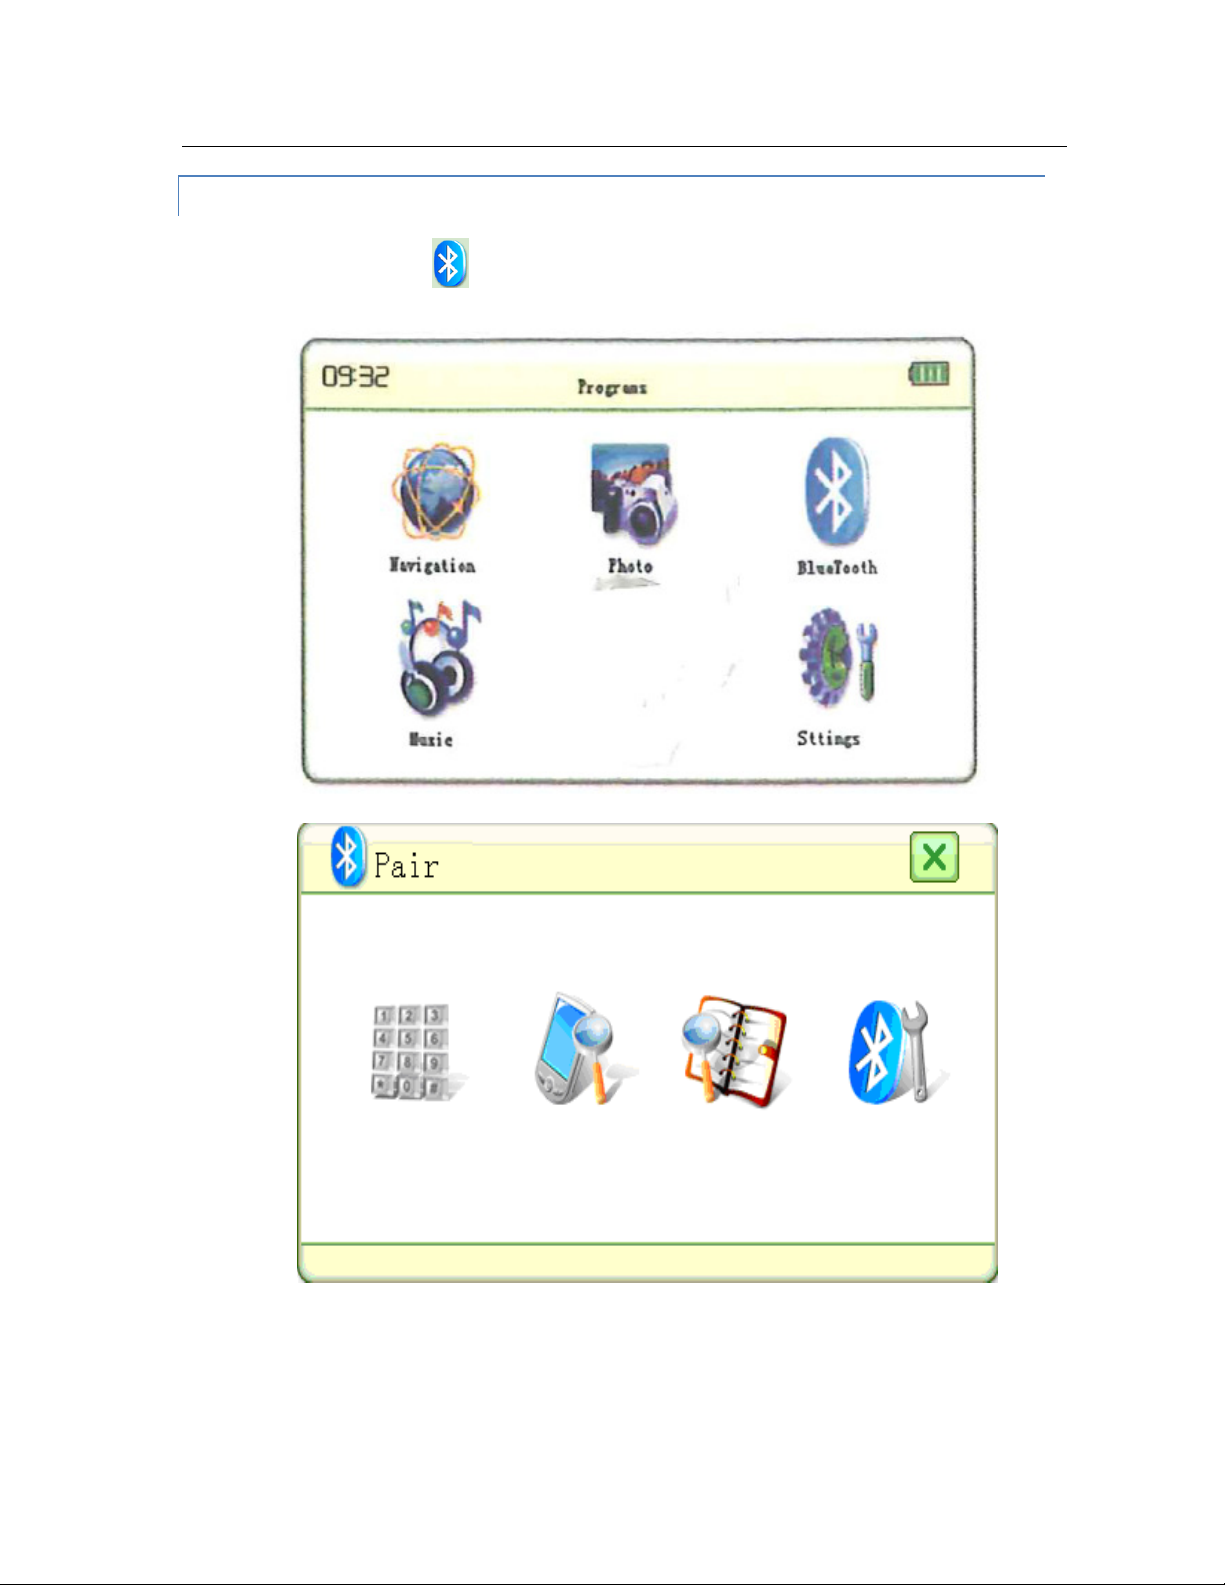
1 PAIR YO UR B LUETOOTH PHONE
• Click the icon ,
8
Page 9
In the Bluetooth main menu, click icon to start pairing mode.
To pair Bluetooth, you need to use a cell phone with bluetooth capability.
Select ‘Search for audio enhancements on phone’.
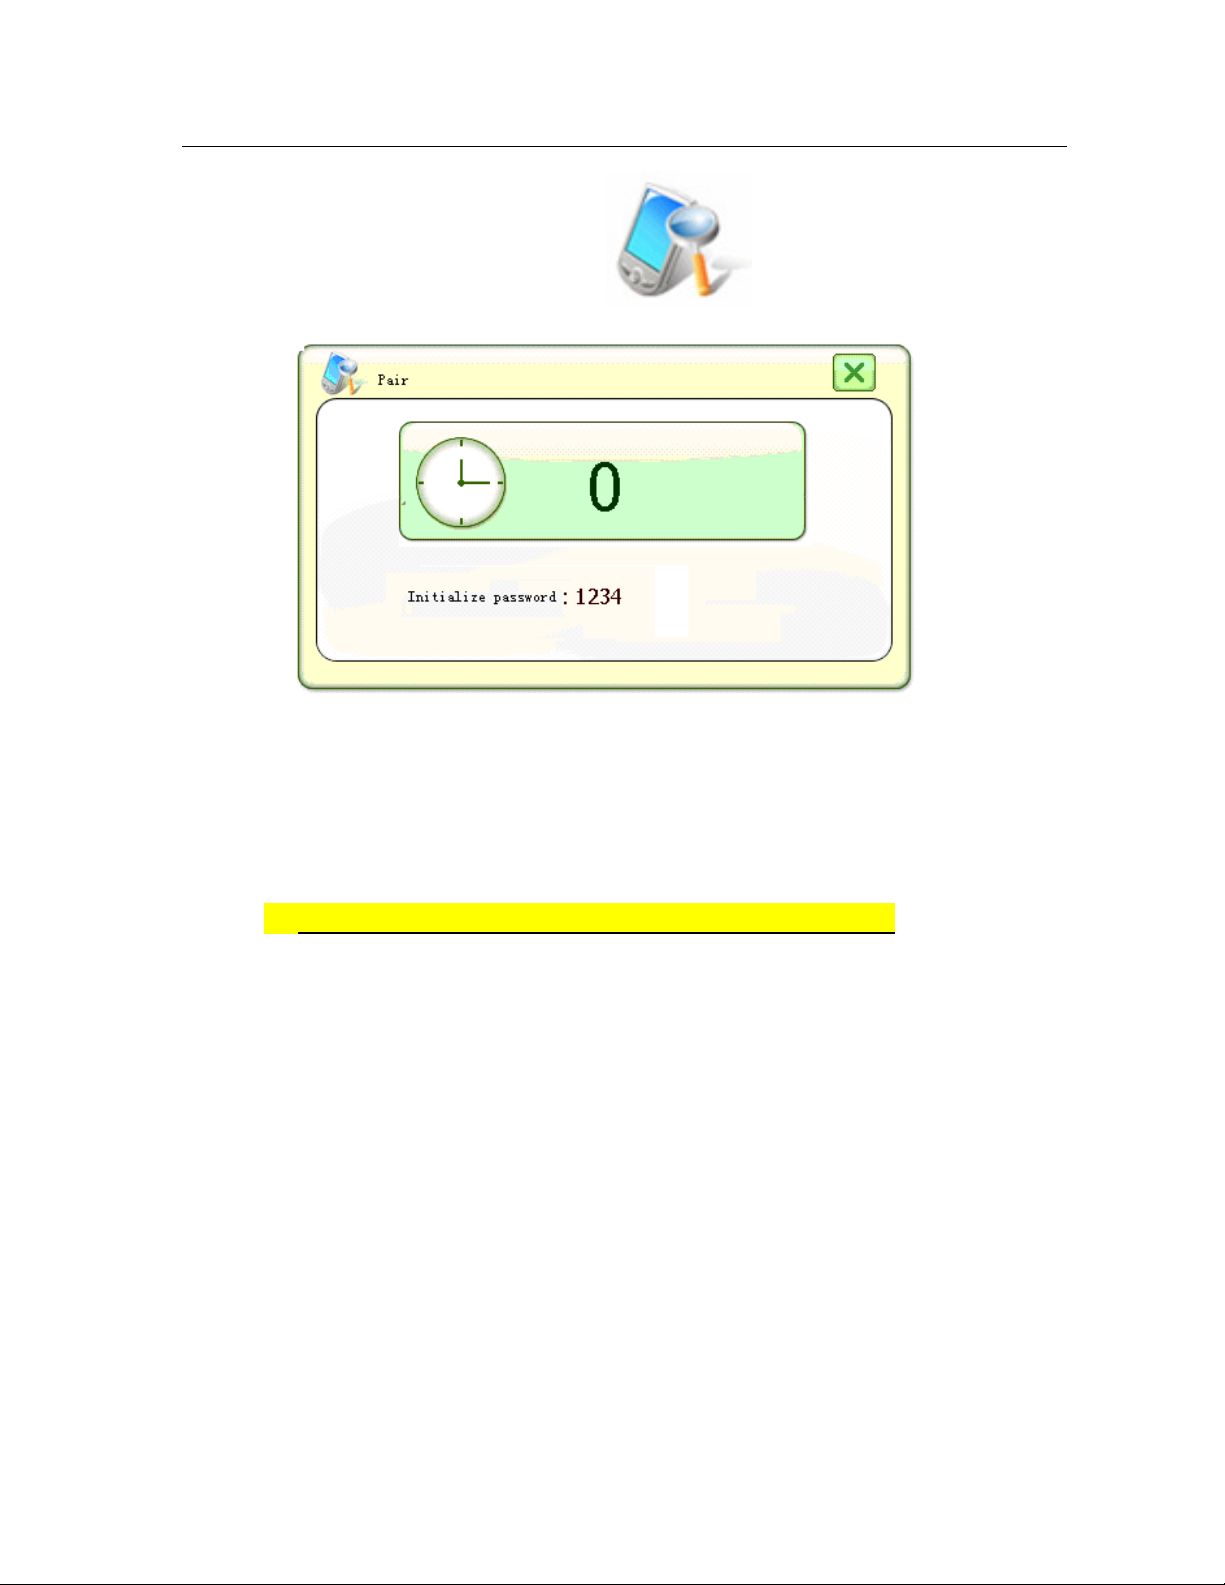
• Once the cell has searched for a GPS Bluetooth device, select GPS device
on phone. It needs the device’s password.
• The default password is 1234 and device name is GPS.
• Once the match is successfully completed, confirm ‘Autoconnect” on phone
when Bluetooth function on both GPS and cell-phone are turned-on, the
PCC’s Bluetooth will connect automatically.
• A time searching icon will display.
• After successful connection, the Phone keyboard on the Monitor will change
from grey to deep-grey:
9
Page 10
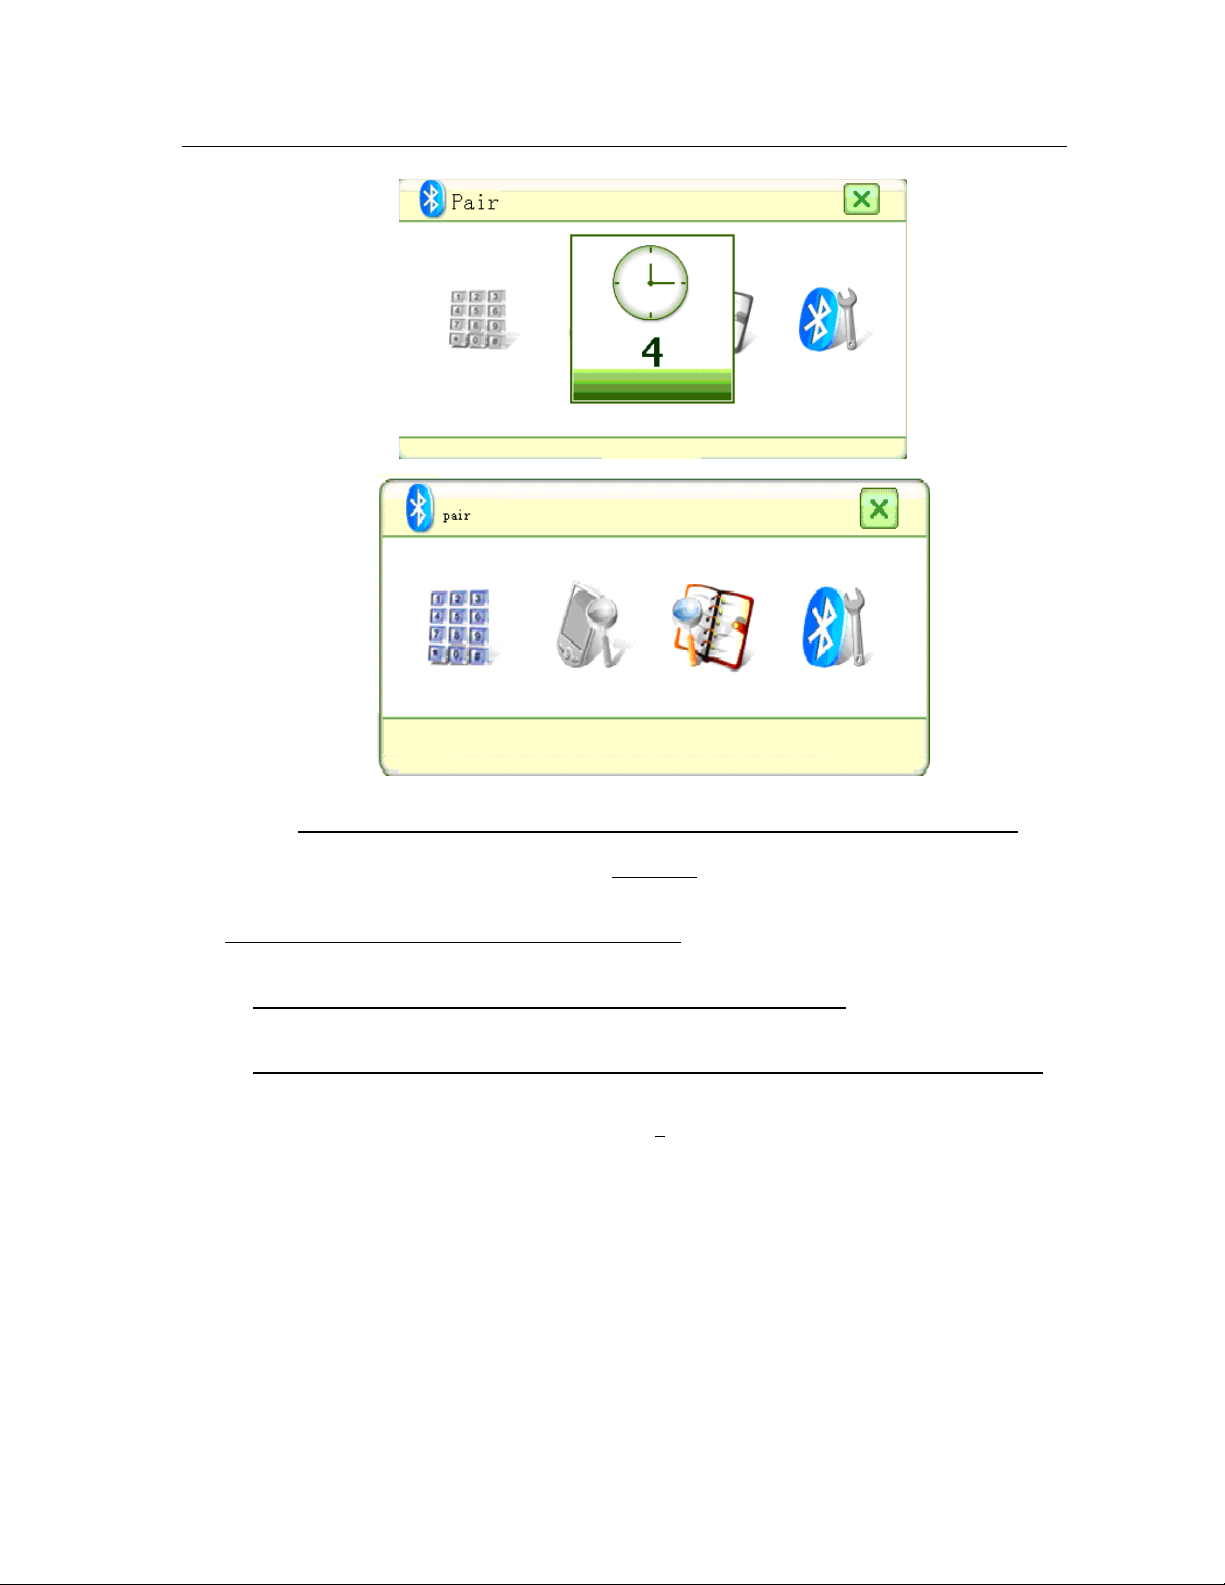
You do not need to do this again unless you want to add another phone
connect.
If your device fails to reconnect the Bluetooth:
• Delete the paired device from the PCC and then the phone.
• Reconnect, taking care to follow the phone’s auto reconnect instructions closely.
10
Page 11

2 DE CI DE I F YOU WANT TO AUTO RUN NAVIGATION
Under Settings – Navigation – It is your choice to have Auto Run on
There is an option “Navigation Auto Run at Power On”. Select it and the Navigation
will auto-run at power on, otherwise, the Programme menu will display on startup and
you will need to manually select the Navigation option.
3 AD JU ST V O LUME
Under Settings - Move to second page – Volume – Adjust to your preferred volume
• Click the icon on the side to move pages.
• Click the icon on the left to return the last icon.
• Click the icon
• Under this interface, you can adjust the volume, enable or disable the
speakers and the tone while pressing any button or the touch panel.
11
Page 12
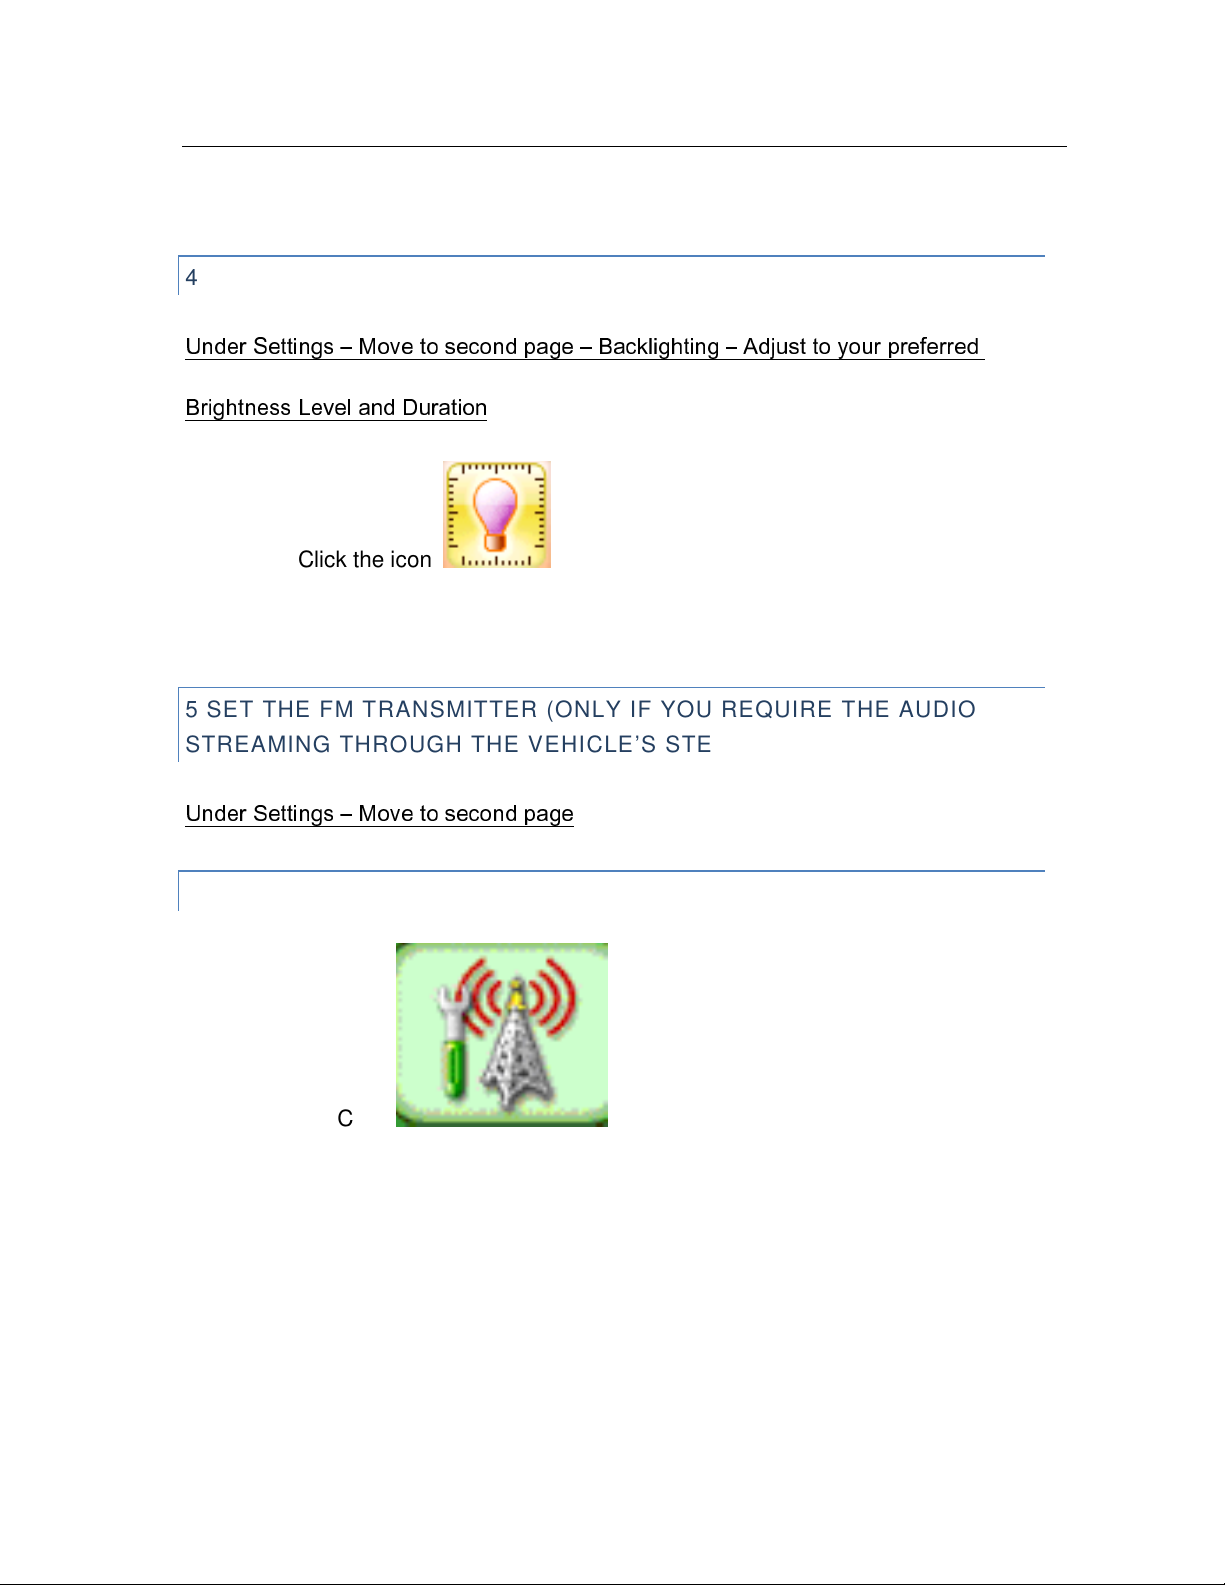
4 AD JU ST B A CKLIGHTING
Under Settings – Move to second page – Backlighting – Adjust to your preferred
Brightness Level and Duration
• Click the icon
5 SET THE FM TRANSMITTER (ONLY IF YOU REQUIRE THE AUDIO
STR EA MI NG THROUGH THE VEHICLE’S STEREO)
Under Settings – Move to second page
FM SEARCH
• Click to log into the FM interface, as shown
below and the following tips pop up:
12
Page 13
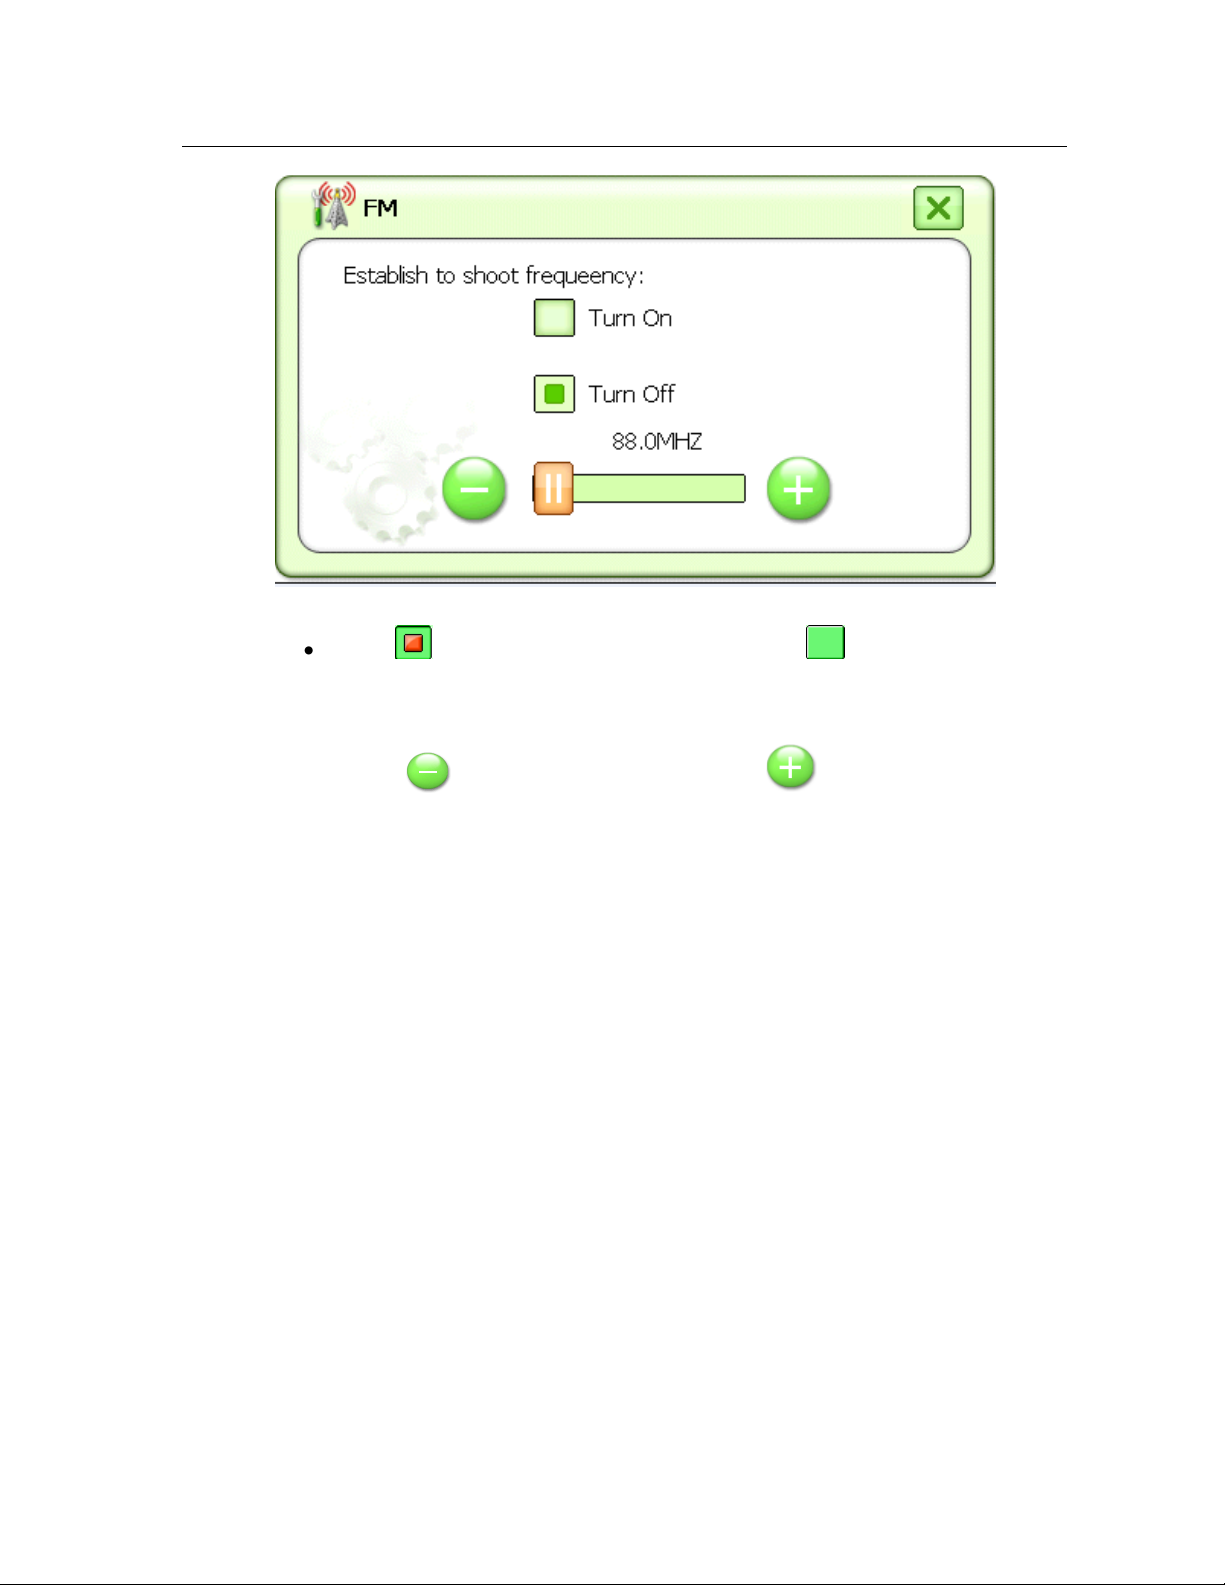
• Press to turn on the FM transmitter, Press to turn off the FM
transmitter
• Press to decrease frequency, Press to increase
frequency, please adjust the frequency to blank frequencies to avoid a
local radio station.
• Turn radio to the same frequency and the PCC will stream the audio
through the vehicle’s audio system.
• (Note: if this feature is selected, the car’s stereo must be on to hear the
PCC).
13
Page 14
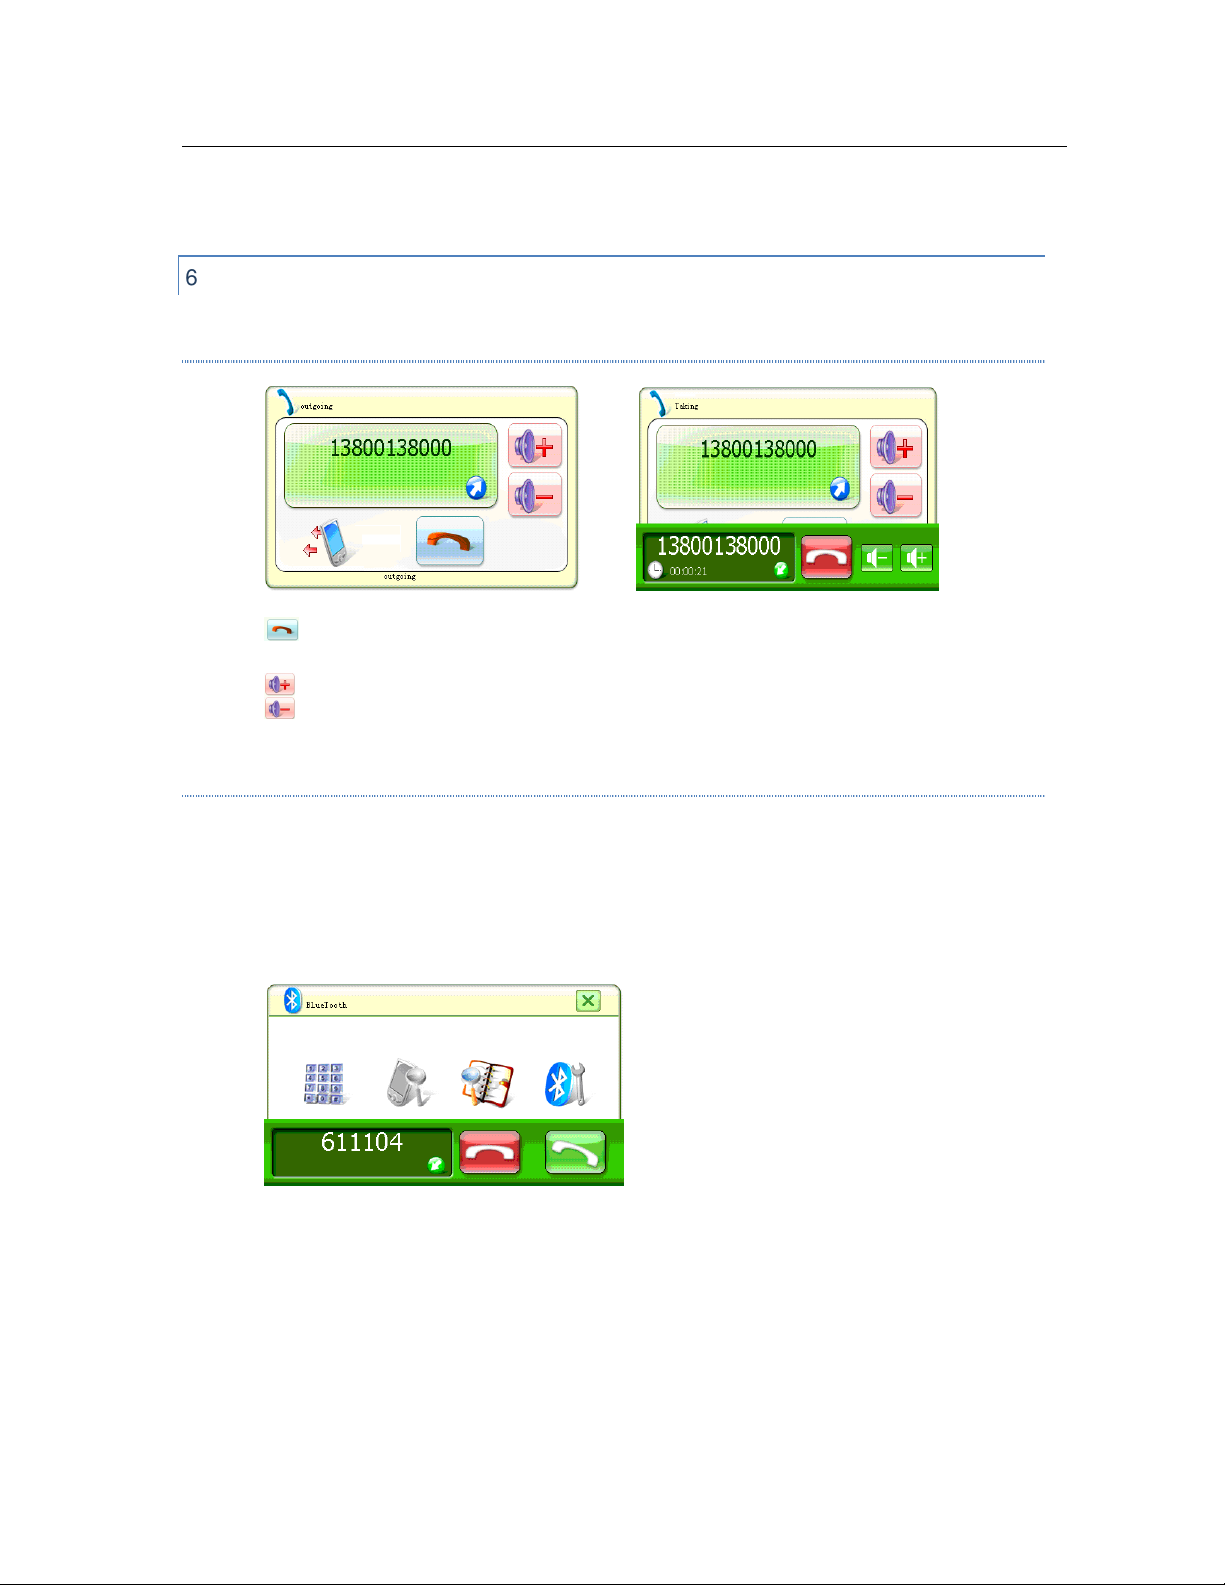
6 TEST MAK ING A PHONE CALL
MAKING CALLS
Hang up
Volume Adjustment
STAT US O F C ALL
• Number Called
• Duration
• Hang-up and Increase & Decrease Volume
• Telephone Number of Incoming Call
• Hang-up Button and Receiving Button
14
Page 15
7
LOCATE AND REMOVE SD CARD THAT IS ON THE RIGHT HAND SIDE
OF MIRR O R
Copy Music onto Card
Copy Images onto Card
Backup Card
8
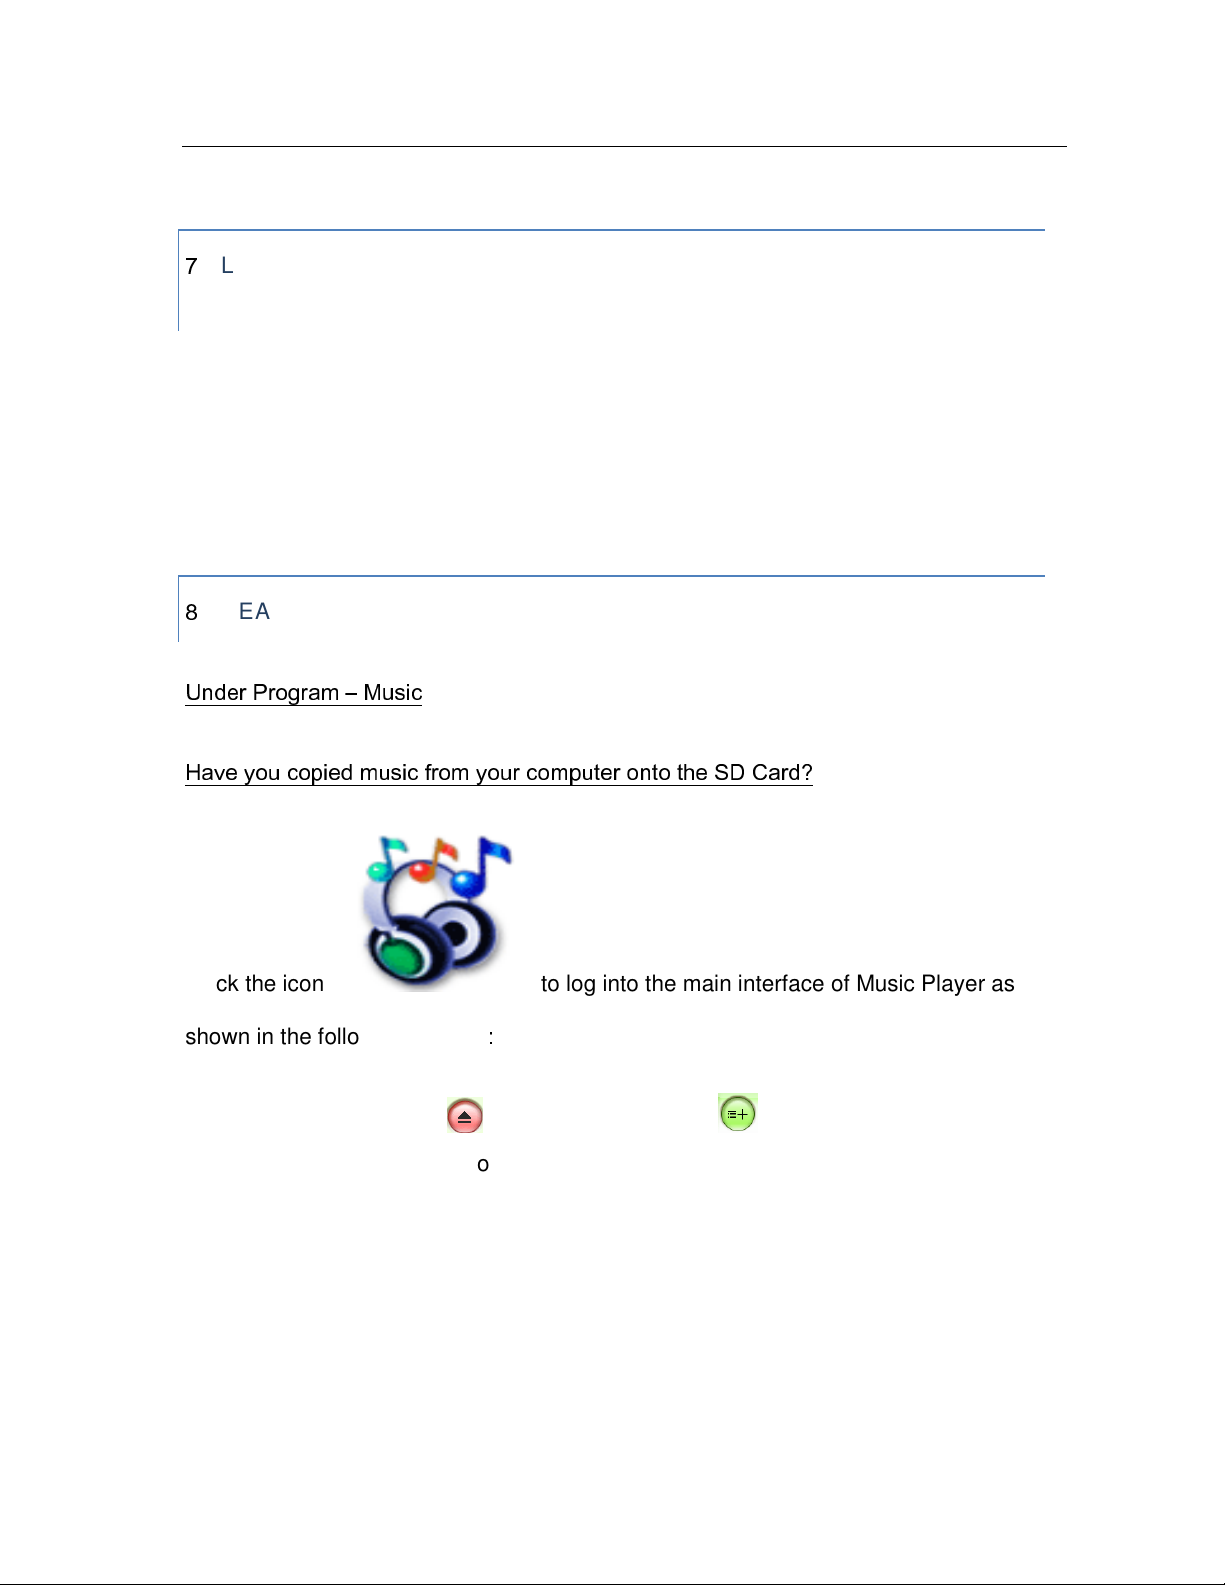
HEAR YOU R MP3 FILES
Under Program – Music
Have you copied music from your computer onto the SD Card?
click the icon to log into the main interface of Music Player as
shown in the following picture:
• Click the icon first and click the icon to select the storage
directory for audio files as shown:
15
Page 16

• Select audio files in “NAND Flash” or “Storage Card”, click to confirm
and return to the Music Player:
Click the icon to add all audio files of the folder.
Click the icon to add more audio files
Click the icon to select the interface of adding audio files.
Click the icon to return to the interface of Music Player.
Click the icon or double-click the file to start playback.
16
Page 17

Function Description for other Icons:
Click the icon to pause;
Click the icon to select next track;
Click the icon to select previous track;
Click the icon to repeat;
Click the icon to play at random;
Click the icon to enable the speaker operate normally;
Click the icon to silence the speaker;
Click the icon to delete selected files;
Click the icon to delete all files;
Click the icon to quit the interface of Music Player.
Click the icon to adjust volume and the icon or the
“Playback Progress Bar” to set up playback speed.
Note: When earphones are inserted, speaker output will be closed
automatically.
17
Page 18

9. NAVIGATION:
GPS POSITIONING
1. Start car in an open space and allow a minute to position itself in relation to
overhead satellites.
2. While the GPS is positioning the car, please ensure that there isn’t any metal, high
buildings or tall trees close by that may block the signal.
3. Different atmospheric conditions may mean that the signal is blocked. Be patient
while it is searching or move into an open space and restart the unit there.
4. The Unit will not work indoors.
5. Hint: the GPS satellites are positioned above the equator. To get the Full GPS
connection, the PCC must have a clear view of the North Sky.
OPE RATING MODES
When the Pantera Command Centre is started for the first time, you need to select
whether to start the program in Simple mode or Advanced mode.
The two operating modes of Pantera Command Centre differ in the menu structure
and the number of available features. The controls and screen layouts are the same.
•
Simple mode: you have easy access to the most important navigation functions
and the basic settings only. The rest of the settings are set to values that are
optimal for typical use.
•
Advanced mode: you have access to the full functionality.
•
This Guide covers actions in Simple mode. See the full User Manual
www.pantera.co.nz for detailed instructions on both modes.
Later you can switch between the two operating modes:
18
Page 19

•
To switch from Simple mode to Advanced mode: on the startup screen
(Navigation Menu), tap , .
•
To switch from Advanced mode to Simple mode: on the startup screen
(Navigation Menu), tap , .
19
Page 20

SP EED CAME RA W ARNING SETTING
(SHOULD BE ALREADY SWITCHED ON)
•
Click settings:
Select Warnings.
Check Speed Camera warning is ticked.
STA RT UP SCRE EN: THE NAVIGATION MENU
After selecting Simple mode, the Navigation menu appears. From here you can reach
all parts of the PCC.
The Navigation menu contains the following options:
•
Tap to specify an address as your destination.
•
Tap for the list of recent destinations.
•
Tap to select one of the stored Points of Interest.
•
Tap for the list of your favourite destinations.
20
Page 21

•
Tap to navigate or to browse the map.
•
Tap to customise the way the Pantera Command Centre works.
NA VI GATING TO AN ADDRESS
In the Navigation menu, tap .
By default, Pantera Command Centre proposes the country/state and city where you
are.
If needed, change the city: (Press “All” located bottom right of screen to search all
cities).
•
To select the city from the list of recently used ones, tap the button.
•
To enter a new city:
1.
Tap the button with the name of the settlement, or if you have changed the
country/state, tap .
2.
Start entering the settlement name on the keyboard.
3.
Get to the list of search results:
•
After entering a couple of characters, the names that match the string
appear in a list.
•
Tap to open the list of results before it appears
automatically.
4.
Pick the city from the list.
21
Page 22

Enter the street name:
1.
Tap .
2.
Start entering the street name on the keyboard.
3.
Get to the list of results:
•
After entering a couple of characters, the names that match the string
appear in a list.
•
Tap to open the list of results before it appears
automatically.
4.
Pick the street from the list.
Enter the street number:
1.
Tap .
2.
Enter the street number on the keyboard.
3.
Tap to finish entering the address.
The map appears with the selected point in the middle. Tap from the
Cursor menu. The route is then automatically calculated, and you can start navigating.
NA VI GATING TO A POI
22
Page 23

On the Map screen, tap to return to the Navigation menu.
In the Navigation menu, tap .
Select the area around which the POI should be searched for:
•
•
•
•
: The POI will be searched around a given address.
: The POI will be searched around the Cursor.
: The POI will be searched around the current GPS position.
: The POI will be searched around the destination of the active
route.
•
: The POI will be searched, not around a given point, but by the size
of the detour it adds to the active route. This can be useful if you search for a
later stopover that causes only a minimal detour, for example upcoming petrol
stations or restaurants.
After this, the list of POI categories appear.
You can narrow the search with the following:
•
Select the POI group (e.g. Accommodation), and after that, if needed, select the
POI subgroup (e.g. Hotel or Motel).
•
To find the POI by its name, tap , and use the keyboard to enter a
part of the name.
23
Page 24

•
To list all POIs in a given POI group, tap .
[optional] When finally the list of results appear, you can change the list order with the
or button.
Tap the desired POI in the list.
The map appears with the selected point in the middle. Tap from the
Cursor menu. The route is then automatically calculated, and you can start navigating.
MA P S CREE N
The most important and most often used screen of Pantera Command Centre is the
Map screen. The map looks similar to a conventional road-map. The blue arrow
represents your current position, and the orange line shows the recommended route.
There are several screen buttons and data fields on the screen to help you navigate.
Their functions are explained in detail in the User Manual.
During navigation, the screen shows route information and trip data, but when you tap
the map, additional buttons and controls appear for a few seconds. Most parts of the
screen behave as buttons.
, or : Cycles through the available map view modes: a North oriented
2D (classic top-down) view, a rotated 2D view and a rotated 3D (perspective) view.
: Opens the Navigation menu.
If you have moved the map, a button appears. Tap this button to move the
map back to the current GPS position.
24
Page 25

11 PHO TO ALB UM
Copy files from your computer onto the SD card
Under Program – Photo
• Click the icon
•
25
Page 26

Click to select the location of file to be saved, enter into interface as
follows:
• Select the desired image file, and click or double click the file name to
return to the “Image Viewer” interface as shown:
Function Description for other Icons:
Click the icon to enlarge the screen to the full size.
Click the icon to move to the previous image.
Click the icon to move to the next image.
Click the icon to enter the Image Slide mode.
Click the icon to zoom out.
Click the icon to zoom in.
Click the icon the rotate the image 900 clockwise.
Click the icon to quit the interface of Image Browser.
26
Page 27

12 GP S MO NITOR VIEWER
Click the Setting Icon
• Click the icon to log into the function of GPS Monitor, click the icon
on the right to log into the interface of Satellite Number & Signal
Reception Status as shown below:
Grey means the GPS is receiving the satellites and not positioned yet, as
shown as below:
Blank means the GPS unable to position and receive the satellites signal.
• Click the icon to interface shown below:
27
Page 28

• Click the icon to reset the GPS satellite test.
• Click the icon on the right to log into the interface of Satellite Data-stream
as shown below:
28
Page 29

• Click the icon on the right to log onto the Altitude,
Longitude & Time interface as shown below.
• Always close the Settings Page and return to the Program Page.
29
Page 30

13 B LUE TOO TH DEVICE MANAGEMENT
From Program page Enter Bluetooth.
Click the icon in the Bluetooth mode to check the history of
the match-up as shown:
Connect with all selected devices
Disconnect with all selected devices.
Delete all Bluetooth devices.
Click the icon in Bluetooth mode to log onto the Dial &
Communication Setup.
These features will not be available if no phones are paired.
30
Page 31

Back Button
Answer Button
Redail Button
Call Recording Button
;
31
Page 32

14 TO UC H PANEL CALIBRATION
From Program Page enter Settings.
Click the icon to log onto Touch Panel Calibration.
• Using a touch pen press the very centre of the cross as shown on the
screen until the Calibration Cursor moves to the upper left corner
automatically and then the lower left corner, lower right corner and
upper right corner in sequence.
• If the calibration is achieved, the screen displays OK and the user can
use a Touch Pen to click any spot on the screen to quit. Calibration
information is then memorized even the power is off. Your screen was
calibrated prior to release from the factory.
32
Page 33

15 LANGUAGE SETUP
From Program, enter Settings:
• Click the icon to log into the interface of Language Setup:
• The GPS supports multiple languages - English, German,French
Spanish,Dutch,Hungarian,Czech,Danish,Norwegian,Swedish
Portuguese,Italian,Japanese,Finnish,Romanian,Hellenic
Russian,Poland etc.
• Select the desired language and then return to the setup interface.
Click to page up the language options.
Click to page down the language options.
Click to return back the system settings interface.
,
,
,
33
Page 34

16 TI ME S ETU P
In the Settings interface:
• Click the icon to log into the interface of Time Setup as shown below:
• Date format: Year-Month-Date=2022-11-04, click and to adjust the
current date.
34
Page 35

• Time format: 24-hour system, Hour: Minute=18:14,click and to adjust
the current time.
• Click to adjust.
• When completed, click the icon to return to the Settings interface.
17 SYSTEM INFORMATION
In the Settings interface:
• Click the icon to log in the following interface
35
Page 36

• ID: GPS body number
• VER: Software Version Number
• RAM: Built-in memory capacity/total capacity=32.89MB/64.00MB
• FLASH: Built-in Flash memory=1010.14MB/2048.00MB
• Initial Setup: Restore the system into the initial status;
18 INTE RFA CE STYLE SETUP
In the Settings interface:
• Click the icon to log into the interface, two styles of “Light green” and
“black” appear.
• Select your desired style and then click the icon
to return to the interface
of Settings.
36
Page 37

19 AV-IN FUNCTION
8.1 V1 VIDEO INPUT
• Press V1 button, the video will change to V1 mode. The video will back to GPS or
Bluetooth mode when a call or event occurs.
8.2 V2 VIDEO INPUT
• Press V2 button short time, the video will change to V2 mode. If you press V2
for long time, the video will cycle between V2 and GPS every 10 second.
8.3 V3(BACK C AM ER A ) V I D E O I N P U T
• V3 is designed for connecting with the back camera,
• When reversing the car, the rearview image appears onto the screen
automatically.
20 GPS PACKING LIST
37
Page 38

Components Quantity
Mirror with GPS
Navigator
1
Cable with a filter 1
Power Cable 1
User’s Manual 1
Bracket(Optional) 1
38
Page 39

21 PRODUCT DESCRIPTION
3.5-Inch 16K color TFT High Brightness Display Screen at 320*240
1.5W Built-in Hi-Fi Speaker
Button + Touch Panel Operation
Built-in High Sensitive GPS Reception Module
Built-in GPS Receiving Antenna
Software and Data Storage SD/MMC Card or Built-in FLASH.
Music Playback in MP3, WAV and MIDI formats etc.
Image Browse in the Format of BMP, JPG, PNG and GIF etc.
Bluetooth Handsfree Function
Reversing Rear Mirror
Supports FM transmit function, Frequency Range from 88MHZ to 92MHZ.
Power supply from 9V to 16V.
39
Page 40

22 PRODUCT SPECIFICATIONS
Environment Parameters
Size 30*8.5*3cm
Working Temperature -10℃ ~ +55℃
Storage Temperature -20℃ ~ +85℃
Working Humidity 45% ~ 80%RH
Storage Humidity 30% ~ 90%RH
System Parameters
Main Frequency 400MHZ/533MHZ(optional)
Main Chip Type SAMSUNG S3C2443
Memory 64MB-4G(option)
Expansion Card 128MB~8GB
Navigation Software
Storage Medium
SD card or FLASH(optional)
Operating System WINCE 5.0 NET
Software Compilation
Method
ARMV4I
Navigation Software Supplied by third party
40
Page 41

GPS Hardware Parameters
Frequency 1.575GHZ
C/A CODE 1.023 MHZ chip rate
Channel Number 20 Channels
Tracking Sensitivity -150dBm
Positioning Sensitivity 10m, 2D RMS 5m, 3D RMS, WAAS enable
Speed Rate 0.1m/s
Data Update Rate 1HZ
Recapture Time 0.1s on Average
Hot Startup Time Less than 3s
Warm Startup Time 40s on Average
Cold Startup Time Less than 100 s
Maximum Positioning
Height
18,000m
Maximum Speed Rate 515m/s
Acceleration < 4g
Build-in Antenna Type Built-in Active Ceramic Antenna
41
Page 42

Build-in Antenna Gain 24dB
Build-in Antenna Voltage 3.3V±5%
Build-in Antenna Current 15mA
Basic Parameters
Video Input Type CVBS
Video Input Power No
Screen Dimensions 4.3
Resolution 320*240
Audio Output(option) Double Channel CD Sound Quality
Audio Power 4Ω/1.5W
Standby Power <20mW
Power supply DC 9V to 16V
FM Transmit
Transmit frequency 88MHZ~92MHZ
Transmit distance 3~5 M
42
Page 43

BluetoothHandfree Parameters( optional)
Maximum Distance 10m
Communication Type V1.2
Handfree Type Full Duplex Transmission
Chip Set CSR BLUECORE3
43
Page 44

23 REARVIEW MIRROR GPS APPEARANCE AND FUNCTION
DESCRIPTION
14
1 2 3 4 7 8
5 6
9
10 11 13
44
Page 45

17 15 16 20 18 19 21
24 23 22 25 26
45
Page 46

27 29 28 30
1 Mirror
Mirror
2 V2
Switch to Video 2 mode
(used for additional optional camera)
3 M
Not used
4 Power On/Off
5 S
Silent Mode
Types of Mount
1 2 4 5 6
3 Adaptor = +
46
Page 47

6 V1
Switch to Video 1 mode
(used for additional optional camera)
7 MIC
Microphone for
Bluetooth
8 TOUCH SCREEN
3.5-inch touch screen
Monit
or
9 SD CARD SLOT
SD Card
Slot
10 CABLE
Connected to Power Supply and Video Input
11 BRACKET CHASSIS
Different windshield mounting brackets optional
13 SPEAKER
Built-in 1.5W Speaker
14 BACK OF
P
CC
Panter
a Command Centre
15 V1 This V1 Input corresponds to Video 1 mode
16 V2
This V2 Input corresponds to Video 2 mode
17 CAR CAMERA
Car Camera Signal Input Port
18 BATTERY(YELLOW)
+12V Connected to Full Time Power
19 ACC (RED)
+12V Connect
ed to Ignition On
20 GND(BLACK)
Connected to Negative (Earth)
21 GRN (GREEN)
Connected to Reverse
Light Wire
22 (RED)
CAMERA
Connected to Reversing Light
12v Positive
24 PLUG
Plug to Camera
25 CAMERA WI
RING
Camera Power Wiring Harness
26 EXTENSION
RCA Extension lead (for running from front to rear of car
)
27 CAMERA
Reversing Camera
28 PLUG
Plug to Power Wiring Harness
29 PLUG
RCA Plug to RCA Extension Lead
30 SCREWS
Mounting Screw for mounting brack
et to Mirror
23 GND (BLACK) Connected to Negative (Earth)
47
Page 48

24 CAUTIONS
• Allow the GPS navigator to read the overhead satellites before starting the
car. The Monitor status will change from blue to grey when completed. This
generally occurs within 60 seconds. Avoid mountains and high buildings that
will block this initial positioning.
• Strong radio waves or radiation can affect this product. Avoid these areas.
• Have this unit professionally installed.
• Humidity and water can damage the unit.
• Never switch on in a dusty environment.
• To avoid overheating or fire disaster; do not bend, place the power cables
under strain or use over-voltage.
• Do not use chemicals or detergents to clean the PCC as they can erode the
surface or paintwork.
• Please do not let children play with this unit as it is not a toy.
• High temperatures can cause over-heating which could trigger a fault or
danger. Park in the shade where possible.
• If this unit becomes faulty, contact qualified maintenance personnel to repair
rather than try to disassemble it yourself.
• Never press the LCD screen violently. Please wipe the screen surface with
clean, dry, soft cloth.
• Never turn the power off when the unit is in navigation, music, or image
browsing modes as this could cause the PCC to lose stored data.
48
Page 49

• When the system is reading or writing data to or from the memory card, never
take out the card. This could corrupt or delete the data on the card. It may also
crash the system. Make sure the system is off before removing the SD card.
• When formatting, uploading or downloading, never disconnect the power
supply abruptly. This could lead to an application error.
• Pay attention to multimedia file compatibility. The product can only playback
files in the stipulated formats.
• All the music and images are under copyright protection. Unauthorized usage
is deemed to be a copyright infringement.
• Please back up the data from the SD/MMC card onto your computer on a
regular basis.
• Audio distortion may occur if the speaker volume is left on maximum for
extended periods of time.
• The pictures shown in this manual are for reference only.
• Power supply cautions: When you install the rearview mirror GPS, never
connect the car battery +12V to the GND line because it will damage the unit
or blow a fuse.
• Some buses, trucks, and some late model cars the battery is +24V. If this is the
case you should never connect the +24V to your PCC or it will be damaged.
You must find a 24V to 12V DC-DC converter and change the +24V to +12V.
• Only allow authorised installers to connect your PCC. Never attempt to install
yourself.
•
We are not responsible for any damages, penalties, or fines that may occur as
a result of illegal installation.
•
We are not responsible for any consequential damage that may be attributed
to the use of this unit.
49
Page 50

RI G H TS OF U S E R
• The User is entitled to install the Software Product into one hardware device (desktop,
handheld, portable computer, navigation device), and to run and use one copy of the
Software Product or a preinstalled copy of the Software Product thereon.
• The User is entitled to make one backup copy of the Software Product. However, if the
Software Product operates after installation without the use of the original media copy,
then the original media copy shall be deemed to be a backup copy. In all other cases, the
User is only entitled to use the backup copy if the original media copy of the Software
Product has been ascertainably and unequivocally rendered unsuitable for its lawful and
intended use.
50
Page 51

7. 1 7 LIMITATIONS OF USE
The User is not entitled
• to duplicate the Software Product (to make a copy thereof);
• to lease, rent or lend or transfer the software to a third person for any reason;
• to translate the Software Product (including translation (compilation) to other
programming languages);
• to decompile the Software Product;
• To evade the protection of the Software Product or to modify, circumvent or obviate such
protection through technological or by any other means;
WARNING
o YOUR SD CARD IS LICENSED TO YOU ONLY AND CONTAINS THE
APPROPRIATE REGISTRATION CODE TO RUN THE SOFTWARE ON
YOUR PANTERA COMMAND CENTRE.
o YOU ARE ONLY ISSUED WITH ONE CARD.
o LOSS OF THE SD CARD MEANS THAT YOU WOULD NEED TO
PURCHASE ANOTHER LICENSE.
o MAP UPGRADES ARE AVAILABLE EVERY YEAR.
FURTHER INFORMATION IS AVAILABLE AT
www.pantera.co.nz
The Standard Warranty for this product is 2 years. Extended warranty deals
are available. For further information please check with your retailer.
51
Page 52

TR OU B L E SH OOTING
52
Page 53

53
Page 54

54
Page 55

55
Page 56

56
Page 57

57
Page 58

This information contained herein may be changed at any time without prior
notification.
Updates can be found on www.pantera.co.nz
Your Agent
58
 Loading...