

Page 1

WELCOME
Thank you for choosing the up-to-date CDM-8300, our new model,
developed by top researchers to support the IS-95C system through
Qualcom-manufactured MSM5100 (Handset based GPS) chips and
CDMA technologies. This product allows for high speed
communication services, such as web browsing, data & fax
services, GUI animation menu, and so on.
Among its many advanced features, the T9 input mode makes it
much easier to enter letters. In addition, the VR (Voice Recognition)
makes it more user friendly, with proven technologies in detail as
follows:
Full graphic display of 5 text input line and 1 icon line with
variable font size.
High capacity batteries allow for long talk time and 330 hours of
standby time.
Easy to dial through the VR feature.
Easy to enter letters through the T9 text input mode.
Multilingual (English and Spanish available)
Enhanced for web browsing & data services (i.e. ; wireless
internet access, wireless fax send/receive, Phone.com, Up
browser)
GUI & Animation display compliant with IS-95C.
4-Gray large LCD.
Navigation key and 23 keys aligned for more convienence.
Sophisticated features of speaker phone, USB, and voice
recognition.
Handset-based GPS feature.
Additional services of SMS and Web browsing on top of
authenication, call forwarding, call transfer, call waiting.
IMPORTANT INFORMATION
This CDM-8300 user guide contains very important information
about how to handle and use the product. So please read this
manual thoroughly, pay attention to the warranty on the back page
and be alert to the exclusions and limitations of your warranty,
which are related with the unauthorized use of components.
Page 2

TABLE OF CONTENTS
1
Chapter 1
Chapter 2
Chapter 3
CHAPTER 1. BEFORE USING YOUR PHONE .................................5
INSIDE THE PACKAGE .....................................................................................6
HANDSET DESCRIPTION.................................................................................7
THE FUNCTION KEYS.............................................................................................8
DISPLAY INDICATORS ...........................................................................................9
BATTERY USAGE...........................................................................................10
BATTERY INSTALLATION....................................................................................10
BATTERY REMOVAL.............................................................................................10
BATTERY CHARGING...........................................................................................11
POWER CONNECTION ......................................................................................11
CHARGING THE BATTERY WITH THE HANDSET .............................................11
CHARGING THE BATTERY ONLY ......................................................................12
BATTERY LIFE (FOR NEW BATTERY)................................................................12
BATTERY HANDLING INFORMATION..........................................................13
DOs.........................................................................................................................13
DON’Ts...................................................................................................................13
CHAPTER 2. BASIC OPERATION ..................................................15
TURNING THE PHONE ON / OFF ..................................................................16
TURNING THE PHONE ON...................................................................................16
TURNING THE PHONE OFF..................................................................................16
ACCESSING THE MENU................................................................................17
MENU SUMMARY .........................................................................................18
BASIC FUNCTIONS ........................................................................................20
MAKING A CALL ...................................................................................................20
SPEAKER PHONE..................................................................................................21
PAUSE FEATURE ..................................................................................................21
ANSWERING A CALL............................................................................................22
CALLER ID FUNCTION..........................................................................................22
CALL WAITING FUNCTION..................................................................................23
ANSWERING MACHINE DISPLAY.......................................................................23
ADJUSTING VOLUME..........................................................................................24
ETIQUETTE............................................................................................................24
LOCK ......................................................................................................................24
DURING A CALL .............................................................................................25
MUTE(UNMUTE)...................................................................................................25
SILENT(QUIT)........................................................................................................25
SEND MY PHONE # ..............................................................................................25
MY PROFILE ..........................................................................................................26
VOICE PRIVACY.....................................................................................................26
LOCATION .............................................................................................................26
MAKING AN EMERGENCY CALL..................................................................27
E911 IN LOCK MODE ............................................................................................27
E911 USING ANY AVAILABLE SYSTEM .............................................................27
CHAPTER 3. MEMORY FUNCTIONS ............................................29
STORING A PHONE NUMBER ......................................................................30
ENTERING LETTERS NUMBERS & CHARACTERS......................................31
STANDARD INPUT MODE....................................................................................32
T9 INPUT MODE....................................................................................................33
NUMERIC MODE...................................................................................................34
SYMBOL MODE ....................................................................................................35
MAKING A CALL THROUGH THE PHONEBOOK .........................................36
SPEED DIALING ....................................................................................................36
Page 3

TABLE OF CONTENTS TABLE OF CONTENTS
3
2
Chapter 4
Chapter 4
Chapter 5
Chapter 6
AUTO RETRY......................................................................................................70
AUTO ANSWER..................................................................................................71
VOICE PRIVACY..................................................................................................71
KEY GUARD........................................................................................................72
LANGUAGE.........................................................................................................72
WEB IDLE TIME .................................................................................................72
S/W VERSION.....................................................................................................73
UP PROXY IP .........................................................................................................73
TOOLS.............................................................................................................74
CALCULATOR........................................................................................................74
WORLD CLOCK .....................................................................................................74
STOPWATCH.........................................................................................................75
DATA SVC.......................................................................................................76
CONNECTION........................................................................................................76
LOCATION ......................................................................................................77
SETTING ................................................................................................................77
CHAPTER 5. VOICE SERVICE....................................................79
VR MODE ........................................................................................................80
NAME.....................................................................................................................80
DIAL....................................................................................................................... 81
REDIAL.................................................................................................................. 82
VOICE MEMO ....................................................................................................... 83
PHONEBOOK........................................................................................................ 84
CANCEL ................................................................................................................ 84
VS MENU ........................................................................................................85
VOICE MEMO ........................................................................................................85
CALL ANSWER......................................................................................................86
CALL ANSWER......................................................................................................86
VOICE COMMAND................................................................................................87
YES/NO.............................................................................................................. 87
WAKE UP........................................................................................................... 88
TOP LEVEL ........................................................................................................ 88
DIGIT DIAL......................................................................................................... 89
VOICE DIAL............................................................................................................90
LIST.................................................................................................................... 90
ADD ................................................................................................................... 91
CLEAR ALL ........................................................................................................ 91
VOICE SETTING ....................................................................................................92
UNTRAIN ALL.....................................................................................................92
PROMPT MODE................................................................................................ 92
DIGIT MODE...................................................................................................... 93
HFK MODE ........................................................................................................ 93
CHAPTER 6. SMS.......................................................................95
WHEN A NEW MESSAGE ARRIVES .............................................................96
VOICE MAIL ....................................................................................................96
SEND NEW............................................................................................................... 97
SEND ..................................................................................................................97
EDIT RECIPIENT .................................................................................................97
EDIT MESSAGE..................................................................................................98
PRIORITY............................................................................................................98
CALL BACK.........................................................................................................98
SAVE...................................................................................................................98
DELIVERY ACK ...................................................................................................98
CHAPTER 4. MENU FUNCTION................................................37
CALL HISTORY ...............................................................................................38
OUTGOING CALLS ...............................................................................................38
INCOMING CALLS ...............................................................................................39
MISSED CALLS .....................................................................................................40
CALL TIMES...........................................................................................................41
LAST CALL..........................................................................................................41
ALL CALLS..........................................................................................................41
HOME CALLS.....................................................................................................42
ROAM CALLS.....................................................................................................42
ACCUMALATED CALLS .....................................................................................42
PHONEBOOK ..................................................................................................43
FIND .......................................................................................................................43
BY GROUP..........................................................................................................43
BY NAME............................................................................................................44
BY NUMBER.......................................................................................................45
EDIT PHONEBOOK ...............................................................................................46
ADD NEW ENTRY...............................................................................................46
EDIT EXISTING ENTRY.......................................................................................46
EDIT GROUP..........................................................................................................47
ADD NEW GROUP .............................................................................................47
CHANGE GROUP NAME....................................................................................47
CHANGE GROUP BELL......................................................................................48
CLEAR GROUP...................................................................................................48
SPEED DIAL...........................................................................................................49
MY PROFILE ..........................................................................................................49
SCHEDULE......................................................................................................50
EVENT....................................................................................................................50
ALARM...................................................................................................................51
ROAMING .......................................................................................................52
SET MODE.............................................................................................................52
FORCE ANALOG ...................................................................................................52
NAM SETTING ......................................................................................................52
AUTO NAM.........................................................................................................52
CHANGE NAM....................................................................................................53
CALL PROMPT.......................................................................................................53
PRL ID.....................................................................................................................53
SETTING .........................................................................................................54
SOUNDS................................................................................................................54
RINGER TYPE .....................................................................................................54
RINGER MODE...................................................................................................54
VOLUME.............................................................................................................55
ALERT.................................................................................................................56
ROAM RINGER...................................................................................................59
TONE LENGTH ...................................................................................................59
DISPLAY.................................................................................................................60
ANIMATION SETTING ........................................................................................60
MAIN DISPLAY SETTING ...................................................................................61
LCD SETTING .....................................................................................................62
SECURITY..............................................................................................................63
RESTRICT ...........................................................................................................63
SPECIAL#’S ........................................................................................................67
CLEAR PHONEBOOK.........................................................................................68
RESET PHONE....................................................................................................68
CHANGE PASSWORD........................................................................................69
OTHERS .................................................................................................................70
ANSWER MODE.................................................................................................70
Page 4

TABLE OF CONTENT
BEFORE USING
YOUR PHONE
C
H
.
1
5
4
This chapter provides important information about using the
the CDM-8300 including:
Chapter 1
Chapter 6
Chapter 7
Chapter 8
INBOX....................................................................................................................... 99
REPLY................................................................................................................ 99
ERASE................................................................................................................ 99
FORWARD....................................................................................................... 100
SAVE................................................................................................................ 100
SAVE ADDRESS .............................................................................................. 100
LOCK................................................................................................................ 100
OUTBOX................................................................................................................. 101
CHECKING SENT TEXT MESSAGE .................................................................. 101
RESEND........................................................................................................... 101
ERASE.............................................................................................................. 101
SEND TO.......................................................................................................... 102
SAVE................................................................................................................ 102
STATE .............................................................................................................. 102
SETTINGS............................................................................................................... 103
SAVE SENT MESSAGE...................................................................................... 103
DEFAULT CALL BACK NUMBER....................................................................... 103
ALERT ................................................................................................................ 103
DISPLAY DELIV.ACK.......................................................................................... 104
AUTO ERASE...................................................................................................... 104
AUTO ERASE INBOX....................................................................................... 104
AUTO ERASE OUTBOX................................................................................... 104
ENTRY MODE..................................................................................................... 105
FILED....................................................................................................................... 106
ERASE ALL ............................................................................................................. 107
CHAPTER 7. WEB BROWSING ...............................................109
START INTERNET BROWSER .....................................................................110
ACCESS THE INTERNET.....................................................................................110
BROWSER MENU.........................................................................................110
RELOAD ...............................................................................................................110
HOME...................................................................................................................110
BOOKMARKS ......................................................................................................111
MARK SITE ..........................................................................................................111
ABOUT PHONE.COM..........................................................................................111
ADVANCED..........................................................................................................112
SHOW URL.......................................................................................................112
HOMEPAGE......................................................................................................112
SET UP.LINK.....................................................................................................112
OFFLINE SERVICES..........................................................................................113
OUTBOX ...........................................................................................................113
RESTART UP. BROWSER.................................................................................114
ENCRYPTION....................................................................................................114
CHAPTER 8. SAFETY AND WARRANTY ....................................115
SAFETY INFORMATION FOR WIRELESS HANDHELD PHONES ..............116
DRIVING SAFETY................................................................................................117
ELECTRONIC DEVICES .......................................................................................118
OTHER SAFETY GUIDELINES............................................................................119
PRECAUTIONS....................................................................................................120
SAFETY INFORMATION FOR FCC RF EXPOSURE ....................................121
CAUTIONS...........................................................................................................121
SAR INFORMATION.....................................................................................122
PROTECT YOUR WARRANTY .....................................................................124
12 MONTH LIMITED WARRANTY...............................................................125
Packing List
Handset Description
Installing, Charging and Removing the Battery
Page 5

HANDSET DESCRIPTION
C
H
1
This package should include all items pictured below.
If any are missing or different, immediately contact the retailer where
you purchased the phone.
7
INSIDE THE PACKAGE
C
H
1
6
Handstrap
User Manual
Desktop Charger
?O2@@@@@@@@@6K
?O2@@@@@@@@@@@@@@@6K
O2@@@@@@@?h@@@@6K
?O2@@@@@e?@@@@@@@@@@@@@?@@@6X
W2@@@@@??@@@@@0Mg?I4@@@W@@1
?O&@@@@?@@@@0Mhf?I'@@Y@@
O2@@@@@@@@@@@@@@@@@@e@@@0M? V'@W@@
O2@@@@@@@@@@@@@@@@@@@@@@@@@@@@?@@@@0M? ?N@@Y@
W2@@@@@@@@@@@@@@@@f@@@?f@@@@0M ?J@@X@
7@@@@@0?'@@@@@@@@@?O2@@@@@@@@@@@X? W&@V@@
?J@@(MfV@@@@@@@@@@@@@@@@@@?@@@@)K ?O&@@X@@
?@@@H?eW2@@@@@0M?g?I4@@@@@?@@@@@6K ?O2@@@V@@5
?N@@e?O&@@@0Mhf?I4@@@@@@?@@@@@@@@@@@@@@@@@@@@@@@@?@@@(Y
@@?O2@@@0M I4@@@@@@@@f@@@@@@@@@@@?e@@@@@0Y?
@@@@@@(M I4@@@@@@@@@@@@@@@@@@@@@@@@@0M?
@@@@@0Y? I4@@@@@@@@@@@@@@@0M?
W2@@6K
?W&@@@@@6K
W&@@(?4@@@@6K?
?W&@@@H??W@@@@@6K?
W&@@V@eW&@T@@@@@@6K
?W&@@@f&0R+R'T@@@@@@6K?
W&@(M??@K?f?V@U?I4@@@@6K?
?W&@(Ye?3@@@6KO2@@,fI4@@@@6K
W&@(Y?e?V@@@@@@@@@UgW@@@@@6K
?W&@@?e?W2@@@@@@@@@>,g.M?I'@@@@6K?
W&@@@1e?7@@@@@@@@@V'UheS@@@@@@6K?
?W&@@X?@W@X@@@@@@@@@@?V/[email protected]@@@6X?hg
W&@@V@@@@@@@?@@@@@(M ?@@@1?hg
?W&@@@@@@@W@@@@@@@@(Y?e@?h?@e?@@?J@@@5?hg
W&@@0Y@??@@Y@@@@@@(Y 7@@(Y?hg
?W&@@?e@??@@@@?@@@@f?@ ?J@@@H
W&@@@@6X@@@@@@@@@@@@@?e?3L??@hfW&@@5?
?W&@@?eB@@@@@@@@@@@g?V/?he?@?W&@@(Y?
W&@@@LeJ@@@@@@@@@V@ ?3T&@@(Y
?W&@(?4@?W&@@@@@@@@@ ?S@@@(Y?
O&@(Y?eW&@?@@@@@@ W&@@(Y
W2@@(Ye?W&@@@@@@@@5 ?W&@@(Y?
7@@(Y?eW&@@@@@@@@(Y W&@@(Y
?J@@0Ye?W&@@@@@@@@(Y? ?W&@@(Y?
W&@?fW&@@@@@@@@(Y W&@@(Y
?O&@@?e?W&@@@@@@@@(Y? ?W&@@(Y?
?W2@(Mf?7@@@@@@@@0Y W&@@(Y
W&@(Y?f?3@@@@@@@X 7@@(Y?
?W&@(Yg?V4@@@@@@@ ?J@@@H
W&@(Y?he@@@0M? W&@@5?
7@@?hf@M ?W&@@(Y?
@@@)K? W&@@(Y
3@@@@6K? ?W&@@(Y?
V4@@@@@6K?f@? O&@@(Y
I4@@@@@6K? @@?@@@@(Y?
I4@@@@@6K? J@@@(Y
I4@@@@@6KO)X ?W&@@(Y?
I4@@@@@@@)X? W&@@@H
I4@@@@@@)K ?W&@@@5?
I4@@@@@@6KhfO&@@@(Y?
?I4@@@@@6Kh?@@@@@(Y
?I4@@@@@6Kg?@@@@(Y?
?I4@@@@@6Ke?@@@@@(Y
?I4@@@@@6K?@@@@(Y?
?I4@@@@@@@@@(Y
?I4@@@@@@(Y?
?I4@@@(Y
?I40Y?
Handset
Standard Battery
Antenna
Earpiece
Ear-jack
LCD Screen
Function Keys
SPK/Clear Key
Digit Key
Send key
END/
Power Key
Microphone
Page 6

C
H
1
DISPLAY INDICATORS
9
C
H
1
THE FUNCTION KEYS
8
Press to Press make or receive a call.
Press and hold to turns to VR mode.
Press to Press access access internet service.
Press to clear a digit from the display
or to enable the speakerphone mode.
Press and hold it to enter Lock Mode.
Press and hold it to enter the Lock mode.
Press to turn the phone on/off, to terminate a call
or to return to the initial page.
Signal Strength
Current signal strength – the more lines the stronger signal.
Service Indicator
Indicates call is in progress, indicates the phone is
in standby mode, and indicates the phone cannot
receive a signal from the system.
Battery
Battery charging level – the more blocks the stronger the charge.
Roaming
Phone is out of home area.
Message
New text or voice message.
Digital mode
Phone operating in digital mode.
Mute
Phone is mute during a call.
Silent
Appears when Silent is selected as the ring mode.
Emergency Call
Blinks when an emergency call is in progress.
Voice Memo
New voice memo.
Answering machine
Phone in answering machine mode.
Etiquette
Phone will vibrate when call is received.
Schedule
Appears when either an event or an alarm is set.
911 Only :
Your location will be hidden from network &
application except 911.
Location On :
Your location is now available to the
network.
In Idle Mode
- Press up to access the Phone book, down
to access the Call History, right for Settings
and left for Schedule.
Inside the menu
- Within a munu, use to scroll through menu
options, or to select a function displayed on
the bottom line of the screen.
(Soft 1) Press to access the menu or function
displayed on bottom line.
(Soft 2) Press to access a voice or text message,
and access return to the previous page.
HANDSET DESCRIPTION HANDSET DESCRIPTION
Icons
Displas various icons.
Soft Key Indications
Show the functions
currently assigned to
each soft key and
display some icons.
Text & Graphic ABEA
Displas instructions and
messages.
SAT. 15. Nov. 2001
Eluie Phord
MENU SMS
Main Menu
SMS
Call History
Setting
Schedule
Phonebook
Ring Mode
Appears when a ringer is set as a ringer mode.
Page 7

C
H
1
1
Plug the desktop charger into a standard outlet.
BATTERY CHARGING
POWER CONNECTION
11
C
H
1
BATTERY INSTALLATION
1
u
Place the battery on the back of the handset
and slide into place.
v
Push the battery down
until it locks into place.
BATTERY REMOVAL
1
u
Pull down the release latch, lift up the
battery and
v
remove the battery from the
handset.
Securely place the battery to avoid slipping off during a call.
Turn off the phone before removing the battery to avoid
losing any unsaved features and messages.
10
u
v
u
v
1
Place the handset (with battery attached) into
the charger.
CHARGING THE BATTERY WITH THE HANDSET
• It is more efficient to charge the battery with the phone
turned off.
• If the red LED does not illuminate when charging, check
the power connection and make sure the handset is
securely in place.
BATTERY USAGE BATTERY USAGE
l The red LED indicates charging is in progress.
l The green LED indicates charging is completed.
Fully charge the battery before using – it is not charged when
purchased.
Page 8

l Only use the battery and charger approved by the
manufacturer.
l Only use the battery for its original purpose.
l Try to keep batteries in a temperature between 41ºF
and 95ºF .
l If the battery is stored in temperatures above or below
the recommended range, give it time to warm up or
cool down before using.
l Completely drain the battery before recharging. It may
take one to four weeks to completely drain.
l Store the discharged battery in a cool, dark, and dry
place.
l Purchase a new battery when its operatin time
gradually gradually decreases after fully charging.
l Properly dispose of the battery according to local laws.
l Don’t attempt to disassemble the battery – it is a
sealed unit with no serviceable parts.
l
Don’t accidentally short circuit the battery by carrying
it in your pocket or purse with other metallic objects
such as coins, clips and pens. This may critically
damage the battery.
l Don’t leave the battery in hot or cold temps. Otherwise,
it could significantly reduce the capacity and lifetime
of the battery.
l Don’t dispose of the battery into a fire.
l The red LED indicates charging is in progress.
l The green LED indicates charging is completed.
C
H
1
13
C
H
1
1
To charge the battery separately, detach it from the
handset.
CHARGING THE BATTERY ONLY
BATTERY LIFE (FOR NEW BATTERY)
12
Status
Type
PCS CDMA AMPS
157
150 103
113 103 25
Talk (min)
Stand by (hrs)
The operating time is subject to your handset usage and configuration.
DOs
BATTERY USAGE BATTERY HANDLING INFORMATION
DON’Ts
Page 9

MEMO
BASIC OPERATION
This chapter addresses and explains the basic features of your phone
including
Chapter 2
C
H
2
15
C
H
1
14
Accessing the Menu and Menu Options
Making and Answering a Call
Placing Emergency Calls
Page 10

ACCESSING THE MENU
C
H
2
Your phone can be customized via the menu. Each function can be
accessed by scrolling with the Navigation key or by pressing the
number that corresponds with the menu item.
1
To access the menu in the idle mode,
press .
2
Use the Navigation key to scroll through the
menu.
3
To return to the previous page, press .
To exit the current menu and return to the idle
mode, press .
4
Press the Navigation key to enter a function
when its main page is displayed or press its
assigned number to have a direct access to the
function.
17
C
H
2
TURNING THE PHONE ON
1
Press and hold , until the “Power On” logo
appears and the tone sounds.
• To select a logo, refer to page 60 for more details.
(Setting>Display>Animation setting) for more detail.
• When “Password” appears on the display enter your 4-
digit password to unlock your phone.
• The default password is the last 4 digits of your phone
number.
16
TURNING THE PHONE OFF
1
Press and hold until “Power Off” appears.
• Immediately change or recharge the battery when “Low
Battery Warning Power Off” appears on the display.
Memory may possibly be damaged if the phone turns off
due to the battery completely draining.
• Turn the phone off before removing or replacing the
battery. If the phone is on, data may be lost.
Hotkey
In the idle mode move the Navigation Key as follows to
access these functions:
• Upward movement – Phonebook
• Downward movement – Call history
• Rightward movement – Schedule
• Leftward movement – Setting.
TURNING THE PHONE ON / OFF
l When the key guard is activated, press 1, 2, 3 to
unlock the key guard. Please refer to page 24 for
more details
l To search through the menu in numerical
order, press down or to the right.
Call History ( 1 / 9 )
Call History ( 1 / 9)
Phone Book ( 2 / 9 )
Schedule ( 3 / 9 )
Roaming ( 4 / 9 )
Setting ( 5 / 9 )
Tools ( 6 / 9 )
Data Svc. ( 7 / 9 )
Location ( 8 / 9 )
Voice Service ( 9 / 9 )
OK CNCL
Page 11

MENU SUMMARY MENU SUMMARY
C
H
2
19
C
H
2
18
1. Call History
2. Phone Book
3. Schedule
4. Roaming
5. Setting
1. Outgoing Calls
2. Incoming Calls
3. Missed Calls
4. Call Times
1. Find
2. Edit Phone Book
3. Edit Group
4. Speed Dial
5. My Profile
1. Event
2. Alarm
1.
Set Mode(System)
2. Force Analog
3. NAM Setting
4. Call Prompt
5. PRL ID
1. Sounds
2. Display
3. Security
1. Last Call
2. All Calls
3. Home Calls
4. Roam Calls
5. Accumulated Calls
1. By Group
2. By Name
3. By Number
1. Add New Entry
2. Edit Existing Entry
1. Add New Group
2.
Change Group Name
3.
Change Group Bell
4. Clear Group
1. New Event
2. View Event List
1. Automatic-B
2. Automatic-A
3. Home Only
1. Auto NAM
2. Change NAM
1. Off
2. On
3. 7 Secs
1. Ringer Type
2. Ringer Mode
3. Volume
4. Alert
5. Roam Ringer
6. Tone Length
1. Animation Setting
2.
Main Display Setting
3. LCD Setting
1. Restrict
1. Family
2. Friends
3. Work
4. Etc.
5. All
Family, Friend, Work Etc, All
Family, Friend, Work, Etc, All
Family, Friend, Work Etc, All
1. Ringer
2. Vibrate
3.
Ringer After Vibration
4. Silent
1. Ringer
2. Key
3. Voice Call
1. Minute Alert
2. Roam Alert
3. Connect Alert
4. Fade Alert
5. Low Signal Alert
1. Idle Display
2. Power On
3. Power Off
1. Greeting Input
2. Idle Clock
1. Backlighting
2. Contrast
1. Automatic Lock
2. Incoming Call
3. Outgoing Call
4. I ncoming Call History
5. Outgoing
Call History
6. Tools
7. Data Svc.
8. Location
9. Voice Svc
4. Others
5. UP Proxy IP
1. Calculator
2. World Clock
3. Stopwatch
1. Connection
1. Setting
1. Voice Memo
2. Call Answer
3. Voice Command
4. Voice Dial
5. Voice Setting
2. Special #’s
3. Clear Phondbook
4. Reset Phone
5. Change Password
1. Answer Mode
2. Auto Retry
3. Auto Answer
4. Voice Privacy
5. Key Guard
6. Language
7. Web Idle Time
8. S/W Version
1. Voice Call
2. Data Only
3. Fax Only
1. 911 Only
2. Location On
1.On/Off
2.Inbox
3.Greeting
4.Call Speaker
5.Wait Time
1.Yes/No
2.Wake-Up
3.Top Level
4.Digit Dial
1.List
2.Add
3.Clear All
1.Untrain All
2.Prompt Mode
3.Digit Mode
4.HFK Mode
6. Menu
7. Phone Book
8. Data Call
9. 900#’s
10. Long Distance
1. Any Key
2. Send Key
1. Retry Time
2. Repeat
Off,5secs,
10Secs,18Secs
1. Standard
2. Enhanced
On,Off
1. English
2. Spanish
Off,On
1.Play
2.Clear All
1.Record
2.Play
3.Clear
Off,On
NoRivfer,5Secs,
10Secs,18Secs
1.List Words
2.Train All
3.Untrain All
1.List Words
2.Train All
3.Untrain All
1.List Words
2.Train All
3.Untrain All
1.List Words1
2.List Words2
3.Train All
4.Untrain All
Family,Friends,
Work,Etc,ALL
No,Yes
Beginner,Expert
Echo,Echo+Beep,
Beep
Off,On
Page 12

BASIC FUNCTIONS BASIC FUNCTIONS
C
H
2
You can dial or save a phone number with pauses for use in the
automated systems where you need to enter a credit card number, a
social security number, and so on. This feature will be convenient
when you are linked to ARS (Advanced Record System)
PAUSE FEATURE
1
Enter a phone number, then
press .
2
Press to dial or to store.
Please refer to page 30 for more details about storing a
phone number.
21
C
H
2
MAKING A CALL
1
Enter a phone number.
SPEAKER PHONE
1
To activate the speaker phone when the phone is
in idle mode, answering mode, and calling mode
Press and hold .
2
The phone returns to normal (speaker phone off)
after ending or call or when the phone is turned
off and back on.
To modify the phone number you have entered :
• To erase one digit at a time press .
• To erase the entire number, press and hold .
20
2
Press .
The indicator, , appears on the display
• If “CALL FAILED” appears on the display or the line is busy,
press
or .
•
If you activate the AUTO RETRY function, the phone will
automatically retry for the number of times you have
selected. (refer to page 70)
•
A phone number will appear with its name, if available in
the phonebook when a call is placed.
•
There is another way to make a call through the VR mode,
which is called VAD(Voice Activated Dialing). Please
REFER to page 80(Voice Service) for more details.
3
To end a call, press .
STO
FIND
PSE
XX
-XXX-XXXX
STO PSE
XX-
XXX-XXXXP
FIND
Please refer to page 84 (Voice Service) for more details on
using Voice Activated Dialing to place a call.
Page 13

BASIC FUNCTIONS BASIC FUNCTIONS
C
H
2
Notifies of another incoming call when you are on the phone by
making a beep sound and displays the caller’s phone number on the
screen.
Displays the number of voice memos recorded in the answering
machine.
CALL WAITING FUNCTION
1
To answer another call while on the phone,
press . This places the first call on hold. To
switch back to the first caller, press again.
first call.
23
C
H
2
ANSWERING A CALL
1
To answer a call, press any key except Clear,
End or the Navigation key.
2
To end the call, press .
In Auto Answer Mode a call is automatically answered after
a preset number of ring tones. See page 71 for more details.
Displays the caller’s name and phone number, if available, in the
phone book.
CALLER ID FUNCTION
The caller ID is stored in the call history.
22
VOICE MEMO DISPLAY
1
To play the recorded voice
memos, press .
l In the Settings menu, you can selet either “Any
Key” or “Send Key” to answer a call. lf “Send
Key” is selected, the phone can only be
answered by pressing . See page 70 for
more information.
PLAY CNCL
Stored 1 Memo
09:00 PM
Page 14

BASIC FUNCTIONS DURING A CALL
C
H
2
The caller can not hear you and any sound from your side, while you
can hear his or her voice.
To display menu options during a call, press .
MUTE (UNMUTE)
1
Press .
Prevents the other end from hearing tones if any key is pressed
during a call.
SILENT(QUIT)
1
Press .
Automatically transmits your phone number to a pager during a call
without manually entering the number.
SEND MY PHONE #
1
To transmit your phone number during a call,
press and .
25
C
H
2
Adjusts the volume of the ringer, key and voice call Navigation key.
ADJUSTING VOLUME
1
Press and select
one of the following.
2
Adjust volume and press to save it.
Mutes key tones and activates the vibration mode to alert you of an
incoming call or message.
Locks phone allowing it to only be used after the password is
entered.
ETIQUETTE
1
To turn etiquette mode
on/off, press and hold .
24
Ringer – Control the ringer volume
Key – Control the keypad tone
Voice call – Control the earpiece
volume
l
l
l
To deactivate, press
The phone will automatically un-mute in
Emergency Call or Callback mode.
l
l
Press to deactivate it.
l
Move the Navigation key upward or downward to adjust
volume of earpiece during a call.
The default password is the last four digits of your phone
number.
LOCK
1
To lock the phone, press
and hold .
2
To unlock the phone,
input the password.
OK CNCL
Call Menu
Silent
Send my phone#
My Profile
Mute
1
2
3
4
Voice Privacy
5
Location
6
STO PSE
note
Etiquette mode
On
STO PSE
note
Enter
Lock State
OK CNCL
Page 15
C
H
2
27
MAKING AN EMERGENCY CALL
C
H
2
Enhances voice privacy during a call.
VOICE PRIVACY
1
Press .
2
Select “Standard” or “Enhanced” with the
Navigation key.
26
DURING A CALL
Enables phone to locate its current position through GPS. Please see
page 49 for more details.
LOCATION
1
Press .
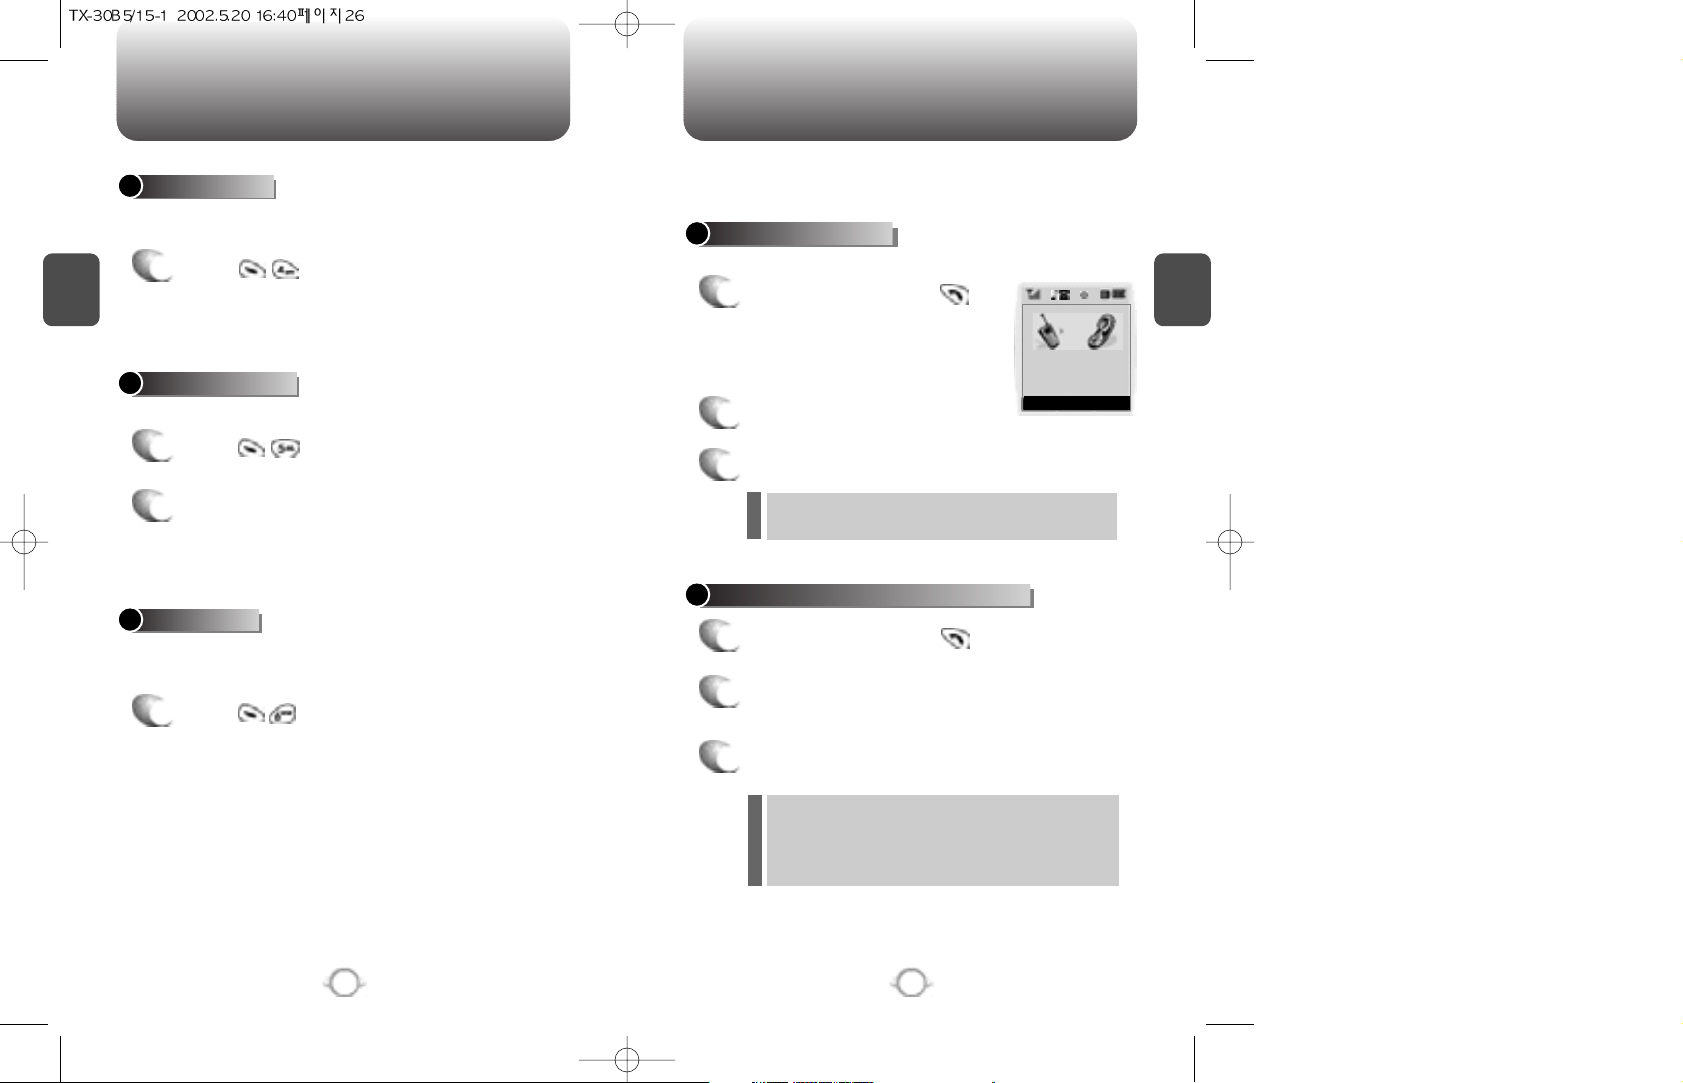
This enhanced 911 feature puts phone in the Emergency Call Mode
when you dial the preprogrammed emergency number, 911. It also
operates in the lock mode and out of the service area.
The 911 call service is available even in the lock mode.
E911 IN LOCK MODE
1
Enter “911” and press .
When the call ends, the phone returns to the
Lock Mode.
2
connects.
3
The phone exits the Lock Mode for 5 minutes.
E911 USING ANY AVAILABLE SYSTEM
1
Enter “911” and press .
When the call ends, the phone returns to the
Lock Mode.
The phone continuously attempts to receive
service from any available system.
2
connects.
3
The phone maintains the Emergenay Mode for 5
minutes.
l
l
Enables you to review and edit your profile that is entered through the
phone book. Please see page 49 for more details.
MY PROFILE
1
Press .
911
Emergency Call
Page 16

MEMORY FUNCTION
This chapter addresses memory functions including:
Chapter 3
C
H
3
29
MEMO
C
H
2
28
Storing Phone Numbers
Entering Letters, Numbers and Characters
Making Calls Through a Phonebook
Page 17

Move the Navigation key
leftward or rightward to view
options of the following fields
when they are highlighted.
Input mode indicator
Abc : Abc mode
123 : Number mode
: T9 mode
Symbol mode
STORING A PHONE NUMBER
ENTERING LETTERS, NUMBERS & SYMBOLS
C
H
3
The input mode(Alpha editor) will be automatically activated when
necessary to enter letters and numbers. As shown below, there are 4
available modes ; Standard input mode (abc), T9 input mode (T9abc),
Numeric mode (123), and Symbol mode.
The following illustrates the function assigned to each key in the
Alpha Editor.
31
C
H
.
3
The phonebook stores up to 300 entriesThe phone book stores up to
300 entries.
1
Enter a phone number and
press .
2
Move to one of the following
fields with the Navigation key
and press it to select a field.
(Home, Mobile, Office, Pager, Fax)
The input mode indicator appears on the upper right
of the display when letters and numbers are entered.
To select the desired input mode among the 4 modes
below, press , then enter letters and numbers.
3
You are now able to fill in other
fields and edit existing fields
through the Navigation key.
4
5
Press when necessary to enter letters in the
following fields, and you will see Alpha Editor popping
up.(E-mail, Wireless address, Name, Memo)
6
Enter letters and symbols, and press Please
refer to page 31 about how to enter letters, numbers
and symbols.
7
To store the entry, press .
30
Case
[ ]
Next
[ ]
Space
[ ]
Shift
Clear
Sto
Press to change mode.
[T9Abc][Abc][123][Symbol mode]
Press to view the next matching word if
the highlighted word is not the word you
intended.
Press to accept a word and add a space.
Press to select a letter case of the
standard text input or T9 text input mode.
[Abc], [ABC], and [abc] indicate the
standard text input.
[T9Abc], [T9ABC], and [T9abc] indicate
the predictive text input.
Press to delete a character to the left of
the cursor.
Store the letters and numbers you enter.
KEY FUNCTION
Group –
Family, Friends, Work, Etc
Voice dial – Home, Mobile, Office, Unassigned
Set Secret – Yes, No
l
The other fields are set to Numeric mode as a default.
l
OK CNCL
No Name
Home
XX-XXX-XXXX
EDIT STO CNCL
No Name
Name
MODE STO CNCL
Editor
Abc
Page 18

ENTERING LETTERS, NUMBERS & SYMBOLS
ENTERING LETTERS, NUMBERS & SYMBOLS
C
H
3
The T9 input mode incorporates a built-in-dictionary to determine a
word based on the entered characters. A word can be entered more
quickly by pressing a key once per character.
T9 INPUT MODE
1
Select the T9Abc mode with .
2
Press a digit key once to enter the character
you want and enter all the characters to input
the word you want.
3
To view the next matching word, press .
To enter a compound word.
l enter the first part of the word and press [ ] to accept it.
l
enter the last part of the word and press [ ] to enter the
word.
Select Abc mode, by pressing [ ].
When you select this mode, the Abc icon
appears as a visual confirmation.
- “Find the key that corresponds to the
letter you want to enter.”
- Press it as many times as needed for the
letter to appear on the screen.
- To enter the name “John”:
Press [ ] J
Press [ ] o
Press [ ] h
Press [ ] n
33
C
H
3
Uses digit keys to enter letters, numbers and characters.
STANDARD INPUT MODE
1
Enter letters using the keypad as follows:
2
To enter a space, press . After two
seconds, the cursor will automatically move to
the next column.
3
Repeat until letters are entered. There is a 16letter limit.
4
To delete one digit, press . To delete the
entire entry, press and hold .
To change the input mode, press .
32
Keypad
1
2ABC
3DEF
4GHI
:
9WXYZ
1
A
D
G
:
W
.
B
E
H
:
X
@
C
F
I
:
Y
-
2
3
4
:
Z
1
A
D
G
:
9
1
Time
Repetitions
2 times
Repetitions
3 times
Repetitions
4 times
Repetitions
5 times
4
To accept matching word and enter a space,
press .
To enter “phone book” in the T9 input mode.
- Press [ ] to select the T9 input mode
and [ ] to choose the small letter case
(T9abc).
- Press [ ] and you will
see “phone” highlighted. Press [ ] to
sea the next matching word and [ ] to
select it.
- Press [ ] and you will see
“book” highlighted. Press [ ] to move to
the next matching word and [ ] to select
the compound word and enter a space.
MODE STO CNCL
Alpha Editor
Abc
John
MODE STO CNCL
Alpha Editor
Abc
phone book
Page 19

ENTERING LETTERS, NUMBERS & SYMBOLS ENTERING LETTERS, NUMBERS & SYMBOLS
C
H
3
NUMERIC MODE
1
Press until the “Symbol mode” appears.
35
C
H
3
34
1
Press until the current input
mode changes to the Numeric
mode.
2
To enter a number, press a digit key.
Press [ ],
Press [ ],
Press [ ],
2
Press the number for the symbol you want to
enter.
l
Use the Navigation key to view a different line of
symbols.
SYMBOL MODE
Enters numbers.
Allows you to enter symbols.
MODE STO CNCL
Alpha Editor
123
12345
MODE STO CNCL
Alpha Editor
1 2 3 4 5 6 7 8 9 0
! @ # % & < > -
*
MODE STO CNCL
Alpha Editor
1 2 3 4 5 6 7 8 9 0
_ + = : ” ’ ( ) / ~
MODE STO CNCL
Alpha Editor
1 2 3 4 5 6 7 8 9 0
\ ? . , { } $ [ ] ^
Page 20

MAKING A CALL THROUGH THE PHONEBOOK
MENU FUNCTION
This chapter addresses accessing the menu and using its functions
and features to customize your phone.
Chapter 4
C
H
4
37
C
H
3
Dials a number by simply pressing its location number in the phone
book. Please refer to page 49 for more information.
SPEED DIALING
• “Unassigned” appears if the location pressed is
available.
• A phone number that is set secret will not be displayed.
• A call can be made by pressing its entry number
and .
36
Call History
Phonebook
Schedule
Roaming
Tools
Data Svc
Location
Page 21
CALL HISTORY CALL HISTORY
C
H
4
Call details include date, time and phone number.
After the tenth incoming call, the oldest call will
automatically be erased from the history.
The detail includes date, time, and phone
number of outgoing calls.
After the tenth outgoing call, the oldest call will automatically
be erased from the history.
39
C
H
4
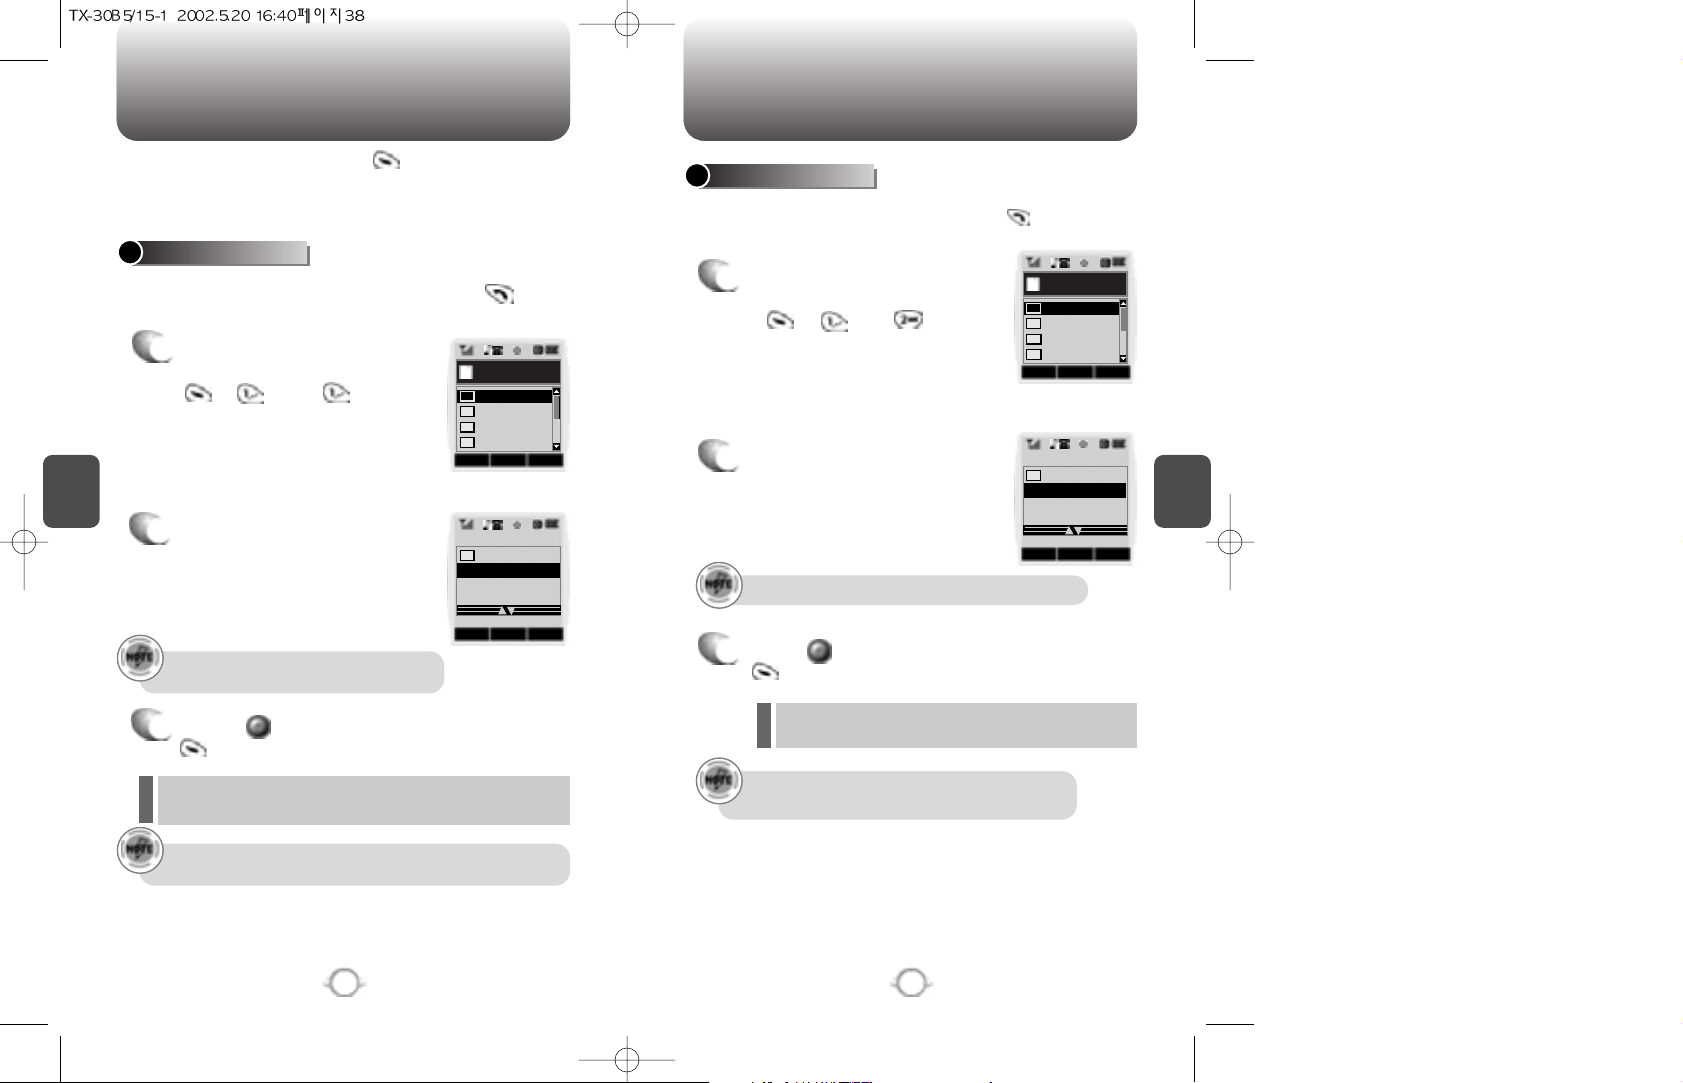
Displays information about the ten most recently dialed numbers.
Saves the numbers and places call by simply pressing .
In the idle mode access through the . Move the
Navigation Key up to access the phone book, down to access Call
History, right to access Schedule and left to access Settings.
OUTGOING CALLS
1
To see a list of the 10 most
recently dialed numbers, press
, and . If the
number is already stored in your
phone book, only the name
appears. If the number is not
stored, only the phone number
appears.
2
To view outgoing call details,
press the Navigation Key.
3
Press again to save it or press
to delete it.
38
Displays information of the 10 most recently answered calls. Saves
the numbers and places calls by simply pressing .
INCOMING CALLS
1
To see a list of the 10 most
recently answered calls, press
, and . If the
number is already stored in
your phone book, only the
name appears. If the number is
not stored, only the
phone number appears.
2
To view incoming call details,
press the Navigation Key.
3
Press again to save it or press
to delete it.
“Phone # is already saved in phone book” or “Move to
phone book save mode?” will appear.
“Phone # is already saved in phone book” or “Move to
phone book save mode?” will appear.
OKDEL CNCL
Outgoing Calls
123
abcdef
ksh
John
01
02
03
04
OPTSDEL CNCL
04/10(Fri) 02:51
01
John
OKDEL CNCL
Incoming Calls
123
abcdef
ksh
ksh
01
02
03
04
OPTSDEL CNCL
04/10(Fri) 02:51
01
ksh
Page 22
CALL HISTORY CALL HISTORY
C
H
4
41
C
H
4
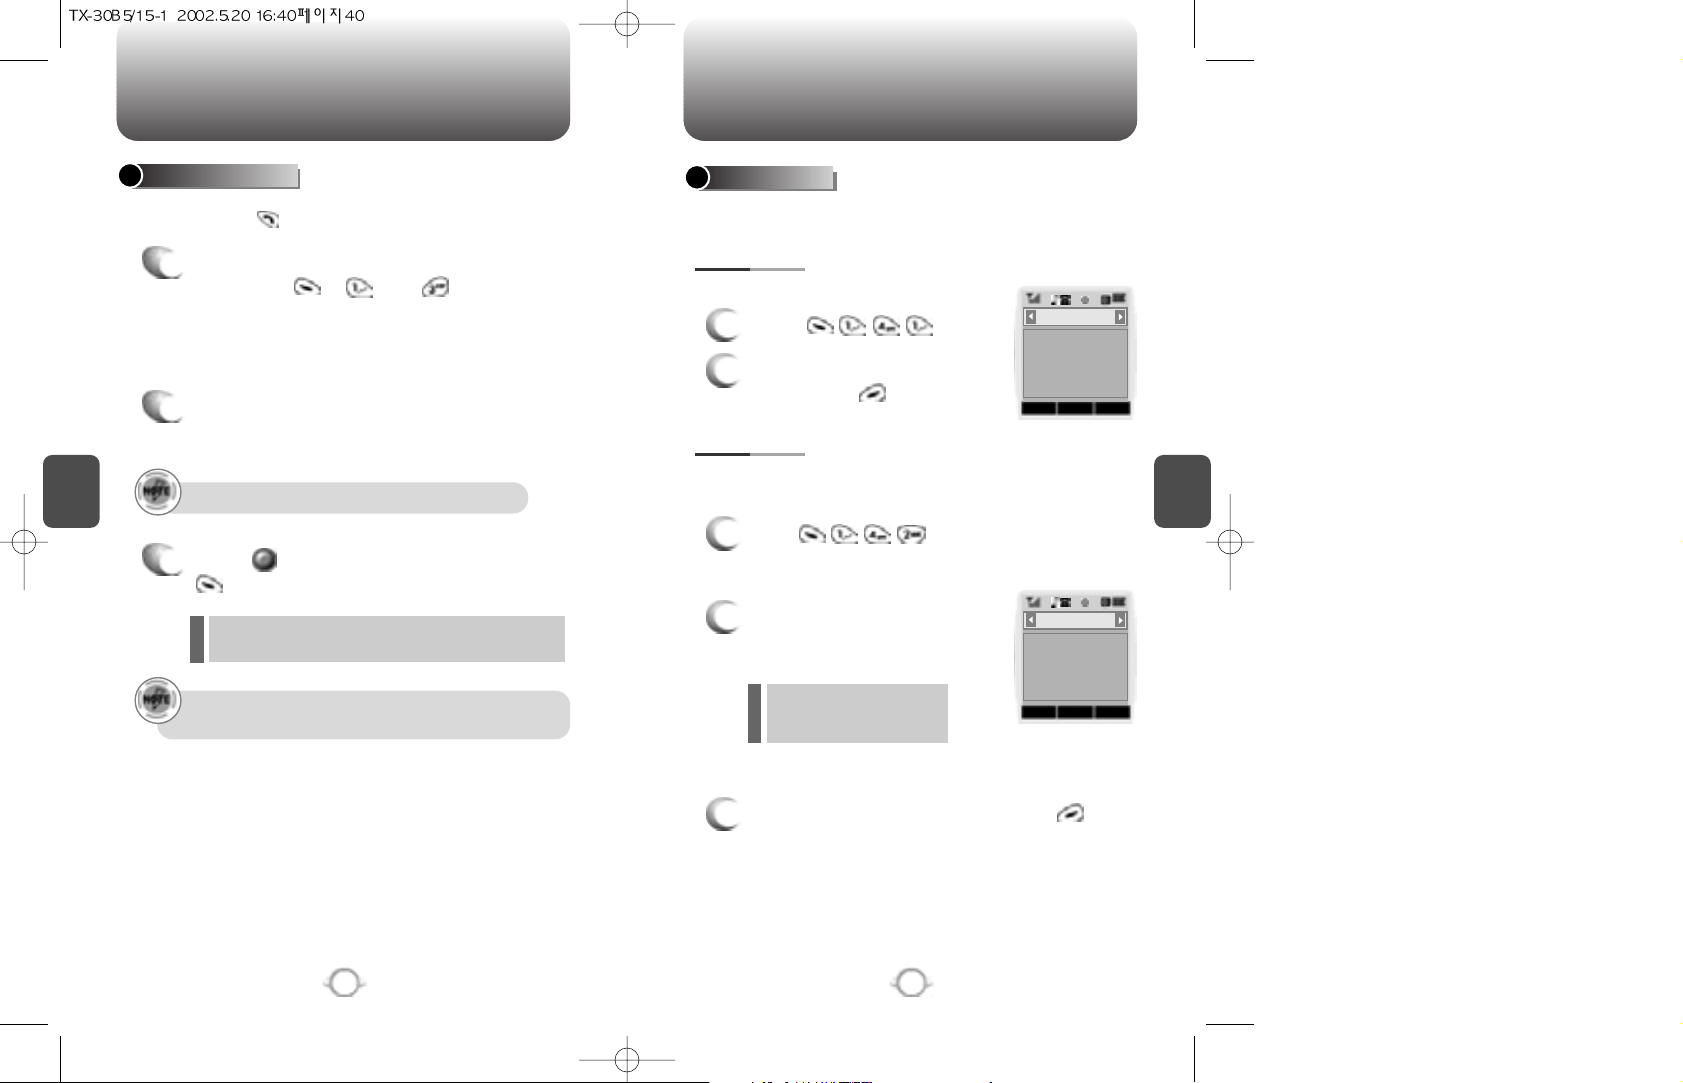
Checks the talk time and manages your calls within the limit you set.
The four timers include:
Displays information of the 10 most recently missed calls. Places calls
by simply pressing .
Displays talk time of all incoming and outgoing calls, excluding web
access calls.
Displays talk time of last call.
CALL TIMES
40
1
Press .
2
To return to the previous
page, press .
LAST CALL
ALL CALLS
1
Press and the message “Not
intended for billing purposes” appears for 5
seconds.
2
Use the Navigation Key to view
the time of the following items:
3
To return to the previous page, press .
To see a list of the 10 most recently missed
calls, press , and . If the number
is already stored in your phone book, only the
name appears. If the number is not stored,
only the phone number appears.
MISSED CALLS
1
2
To view missed call details,
press the Navigation Key.
3
Press again to save it or press
to delete it.
“Phone # is already saved in phone book” or “Move to
phone book save mode?” will appear.
- Voice
- Web
- Data/Fax
Call details include date, time and phone number.
After the tenth missed call, the oldest call will automatically
be erased from the history.
CNCL
003Min/ 16Sec
Last Call
CNCL
XXX Calls
XXX Hours
XX Mins
XX Secs
Voice
Page 23
C
H
4
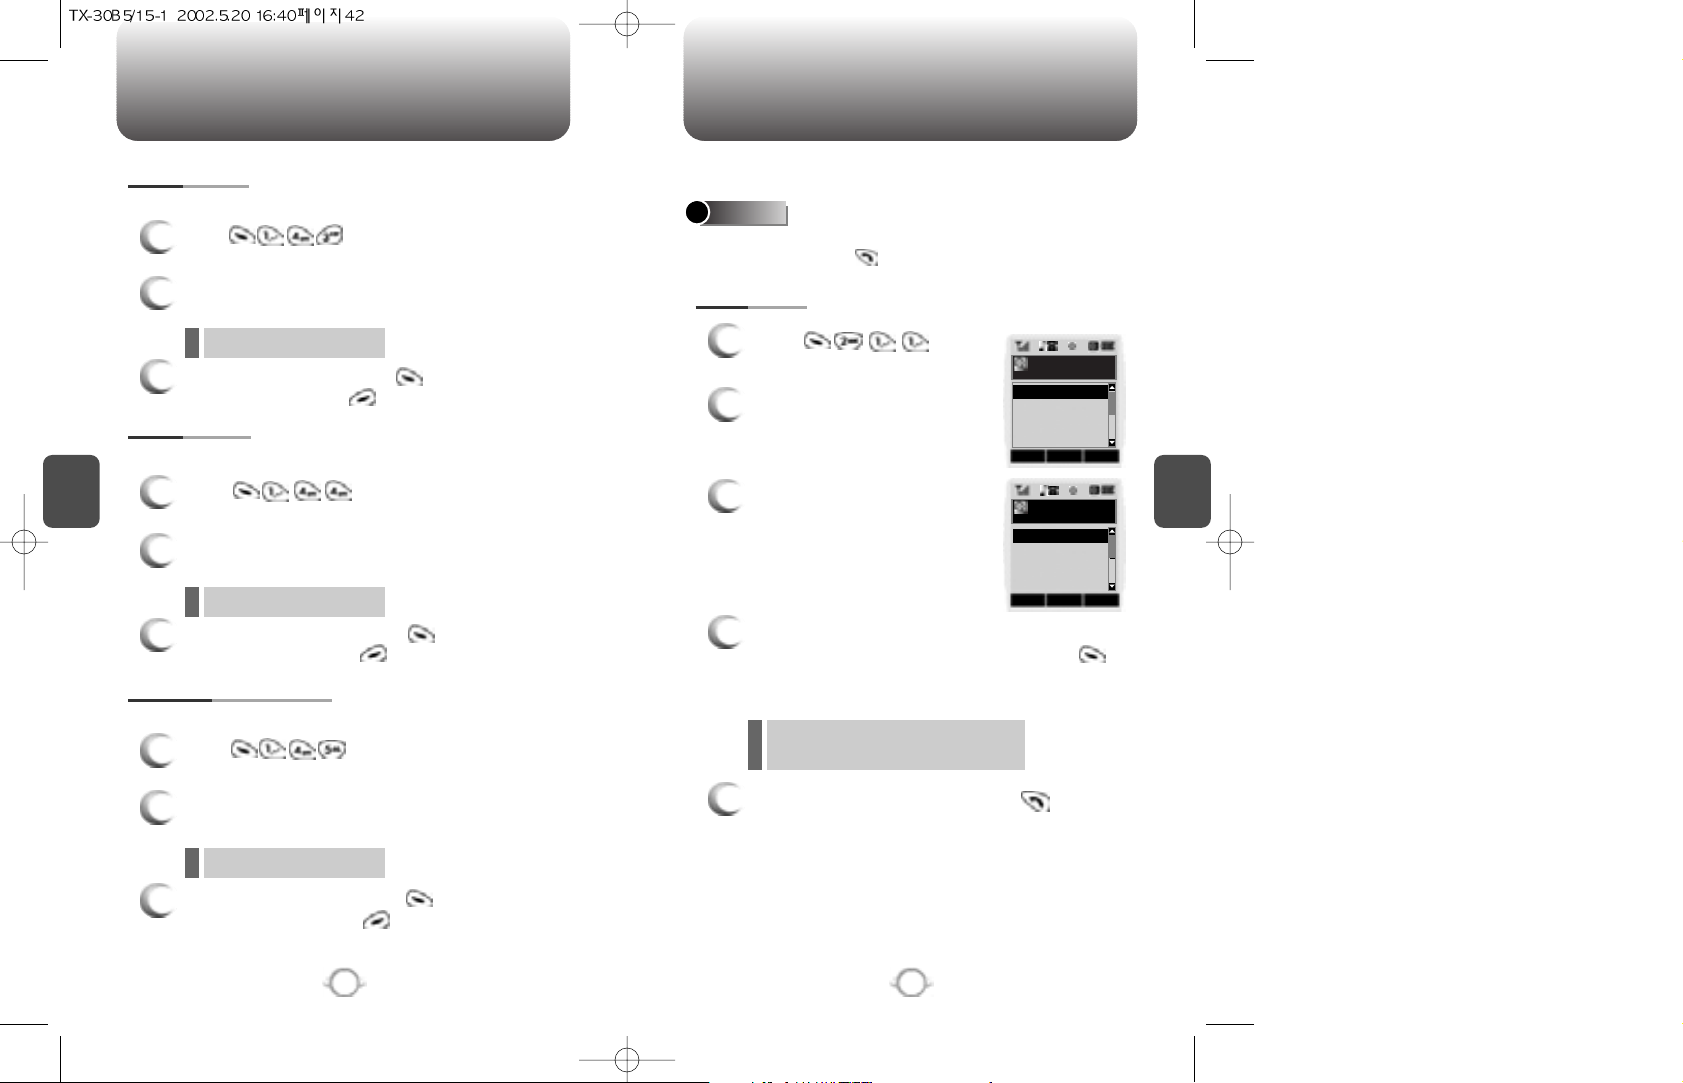
Stores up to 300 entries, each of which can be assigned to a group.
Entries can be retrieved by name, phone number or group.
1
Press .
2
Select one of the following
options(Family, Friend, Work,
Etc, All) with the Navigation
key.
3
To retrieve the phone
book by, group, press the
navigation key.
4
All group entries will be displayed. Select an
entry and either delete it by pressing or
view it by pressing the Navigation Key.
5
To call a selected number, press .
Retrieves an entry by group, voice name, name and number, and
calls by simply pressing .
FIND
BY GROUP
43
You are to be asked about “Password”
when the entry is set secret.
PHONEBOOK
C
H
4
42
CALL HISTORY
Displays talk time of roaming calls.
ROAM CALLS
1
Press and the message
“Not intended for billing purposes” appears for 5
seconds.
2
Use the Navigation Key to view the time of the
following items:
3
To reset the timer, press . To return to the
previous page, press .
Displays talk time of accumulated calls.
ACCUMULATED CALLS
1
Press and the message
“Not intended forbilling purposes” appears for 5
seconds.
2
Use the Navigation Key to view the time of the
following items:
Displays talk time of all calls made within Home area.
HOME CALLS
1
Press and the message
“Not intended for billing purposes” appears for 5
seconds.
2
Use the Navigation Key to view the time of the
following items:
3
To reset the timer, press . To return to the
previous page, press .
- Voice, Web, Data/Fax
- Voice, Web, Data/Fax
3
To reset the timer, press . To return to the
previous page, press .
- Voice, Web, Data/Fax
OK CNCL
By Group
Friends
Work
Etc.
Family
OK CNCL
Family
SES
John
Jane
Gem
Page 24
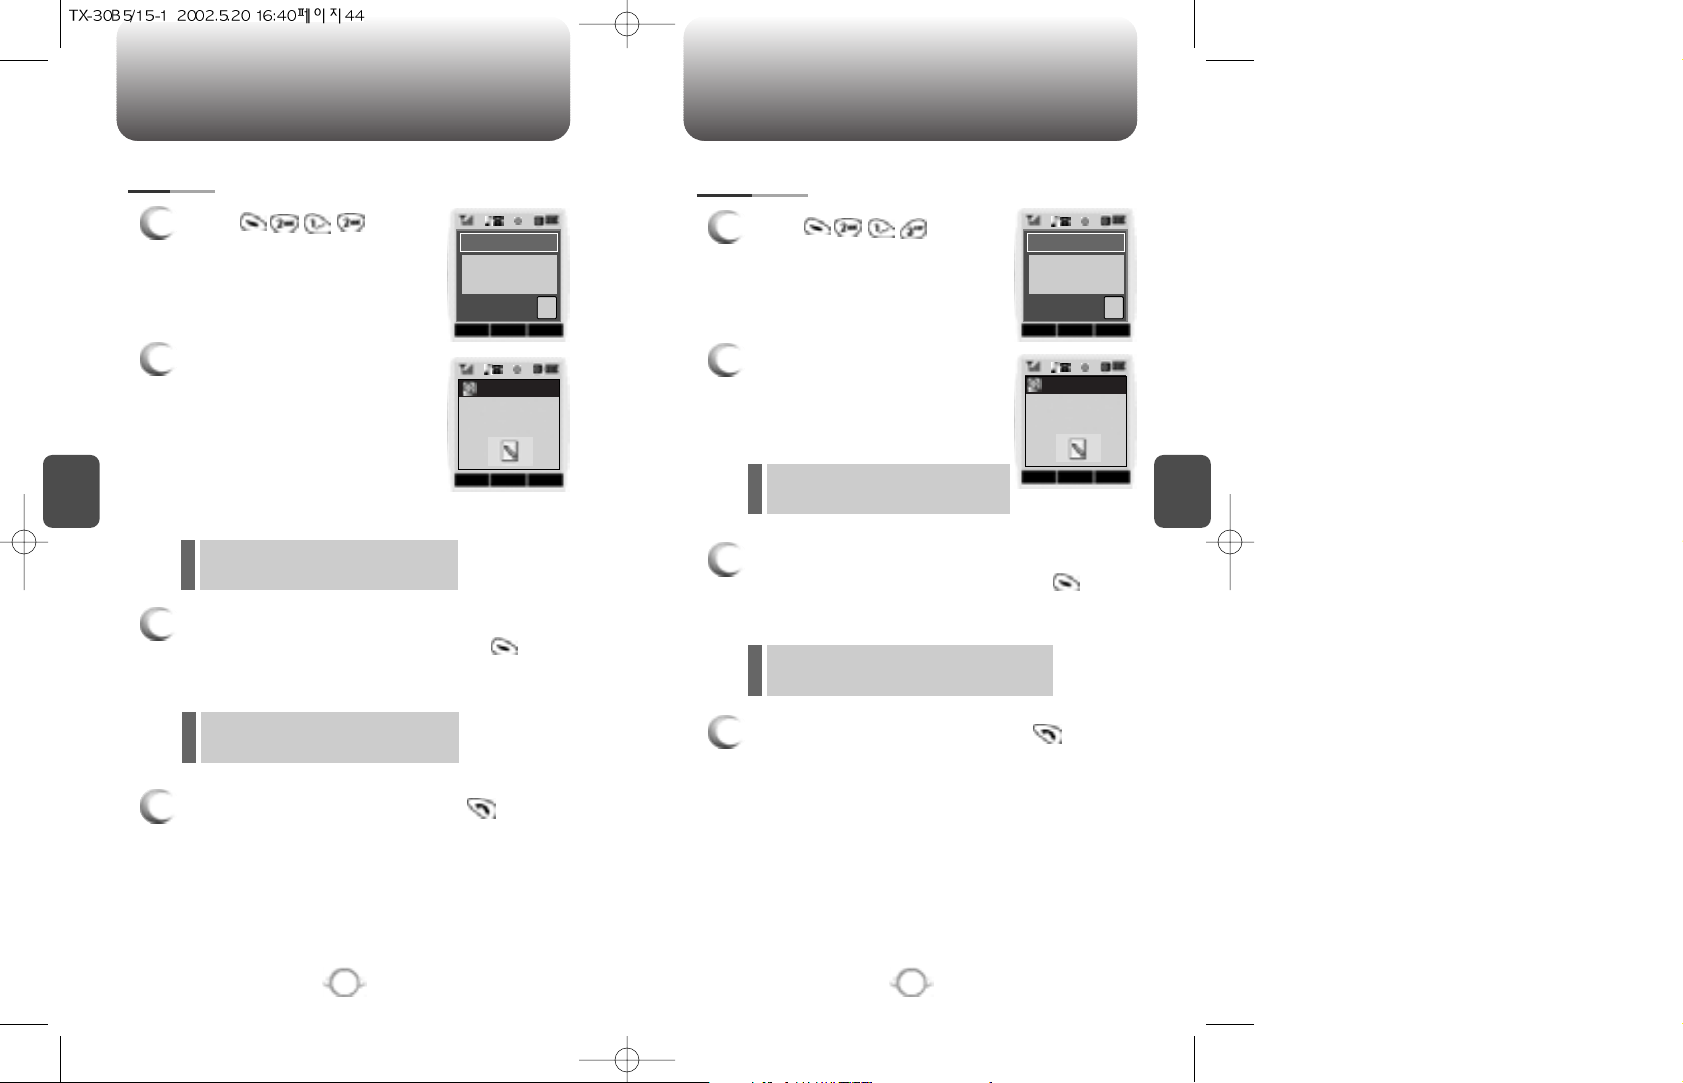
PHONEBOOK
C
H
4
45
PHONEBOOK
C
H
4
44
1
Press .
2
Enter a name or its character
string and press the Navigation
Key to display the names in
alphabetical order. Please refer
to page 31 about using the
Alpha Editor.
3
All matching entries will be displayed. Select an
entry and either delete it by pressing or
view it by pressing the Navigation Key.
4
To call the selected number, press .
BY NAME
1
Press .
2
To search through the menu,
enter a part of the phone
number and press the
Navigation Key.
3
All matching entries will be displayed. Select an
entry and either delete it by pressing or
view it by pressing the Navigation Key.
4
To call the selected number, press .
BY NUMBER
If the entry is set to secret, you will be
asked for your password.
If there is no match, “Cannot Find
Name” will appear.
If the entry is set to secret, you will be
asked for your password.
If there is no match, “Cannot Find Name”
will appear.
MODE STO CNCL
Alpha Editor
Abc
MENU STO CNCL
Editor
123
OKEDIT CNCL
By Number
Search Number
XXXX
OKEDIT CNCL
By Name
Search Name
John
Page 25
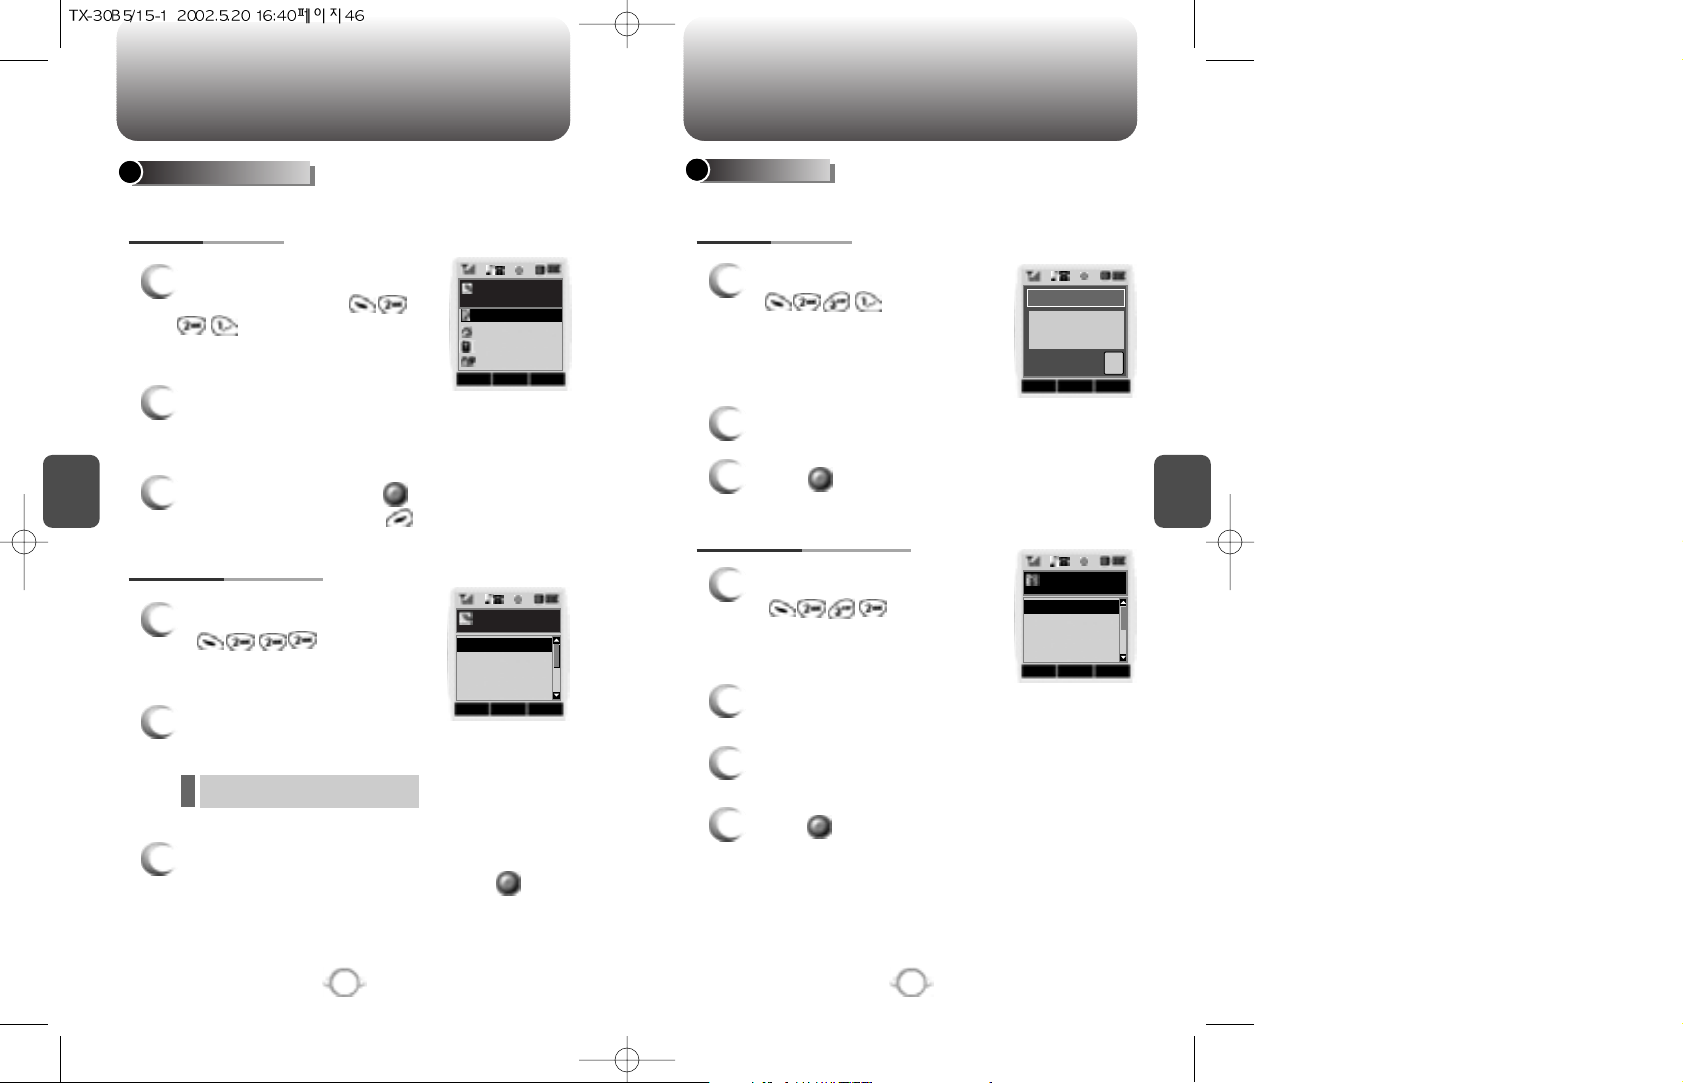
PHONEBOOK PHONEBOOK
C
H
4
EDIT GROUP
1
2
To add a new entry to the
phone book, press
.
ADD NEW ENTRY
EDIT EXISTING ENTRY
47
Adds a new entry or edits an existing one.
EDIT PHONEBOOK
46
To enter a name or number, use the
Navigation Key to select the phone book
field.
3
To save the entry, press . To return to
the previous page, press .
Adds, changes and deletes groups.
1
2
To add a new group, press
. A maximum of
seven groups is allowed.
ADD NEW GROUP
CHANGE GROUP NAME
Input a new group name.
3
Press to save it.
C
H
4
1
To edit an existing entry, press
.
2
Use the Navigation Key to
select a group.
1
2
To change a new group, press
.
Select an existing group name with the joystick
key.
3
Input a new name.
4
Press to save it.
Family, Friends, Work, Etc, All
3
Select an entry with the Navigation Key and
press it to view and edit the entry, or to
delete it.
OK CNCL
Existing Group
Friends
Work
Etc.
Family
OK CNCL
Select Group
Name
Friends
Work
Etc.
Family
MODE STO CNCL
Alpha Editor
Abc
EDIT STO CNCL
No Name
Name
Page 26
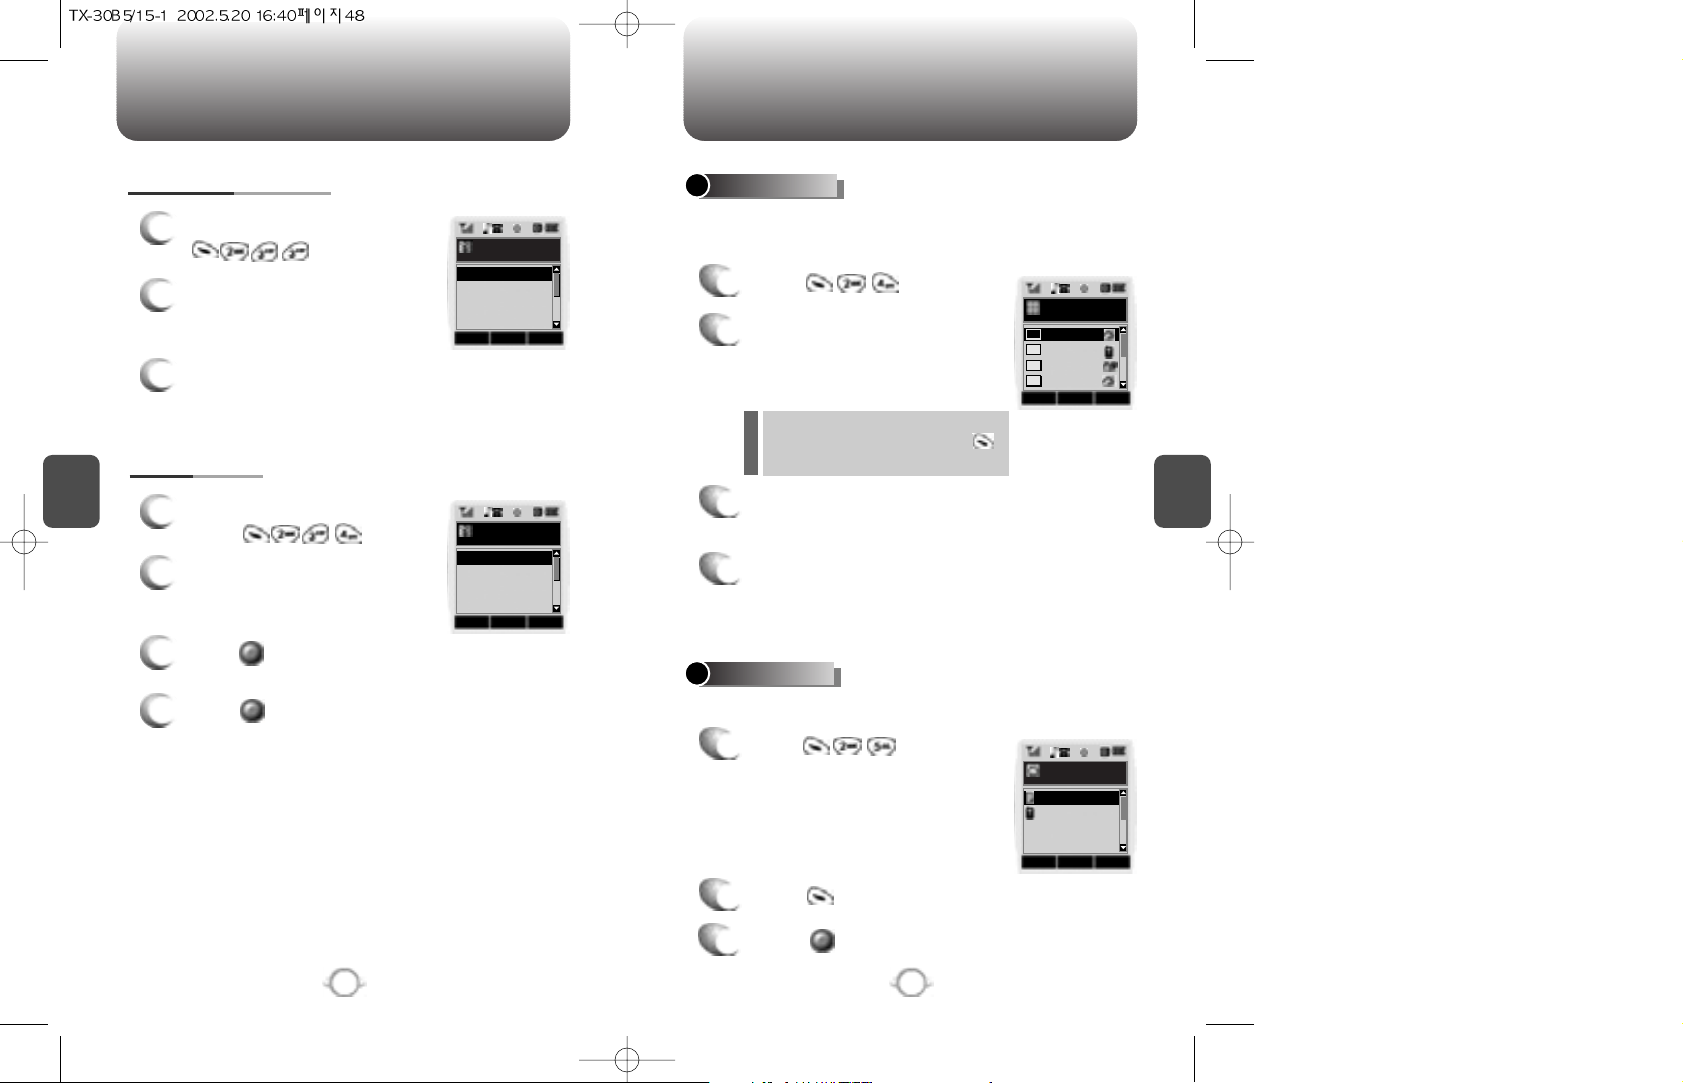
PHONEBOOK PHONEBOOK
C
H
4
49
C
H
4
In idle mode, calls a number stored in speed dial by pressing its
location number on the keypad.
SPEED DIAL
1
Press .
Saves your personal information.
MY PROFILE
1
Press to review and
edit your personal information as
follows. (Name, My Phone
number, Birthday, Blood Type,
Address, Home, E-Mail, Work
Phone #, Memo, Set Secret)
2
3
Press to edit on item when selected.
Press to confirm and save it.
48
CLEAR GROUP
1
To delete an existing group,
press .
2
Use the Navigation Key to
select, then delete the group.
Press again to confirm.
3
Press to delete it.
4
Press again to confirm it.
1
2
To change a group bell, press
.
CHANGE GROUP BELL
Select the group to be changed
and use the Navigation Key to
select one of the bell options.
3
To save, press the Navigation Key.
2
To assign a phone number to a
location, select the location and
press the Navigation Key.
3
Locate the entry in the group where it is saved
and press the Navigation Key.
4
Select the entry and press the Navigation Key;
select the phone number and press the
Navigation Key again.
If a phone number is already
assigned to the location, press
and the navigation key to delete.
OKEDIT CNCL
My Profile
John
XX-XXX-XXXX
XXXX/XX/XX
A type
OK CNCL
Select Group
Friends
Work
Etc.
Family
OK CNCL
Select Group
Friends
Work
Etc.
Family
OKDEL CNCL
Select Number
123
abcdef
ksh
John
01
02
03
04
Page 27
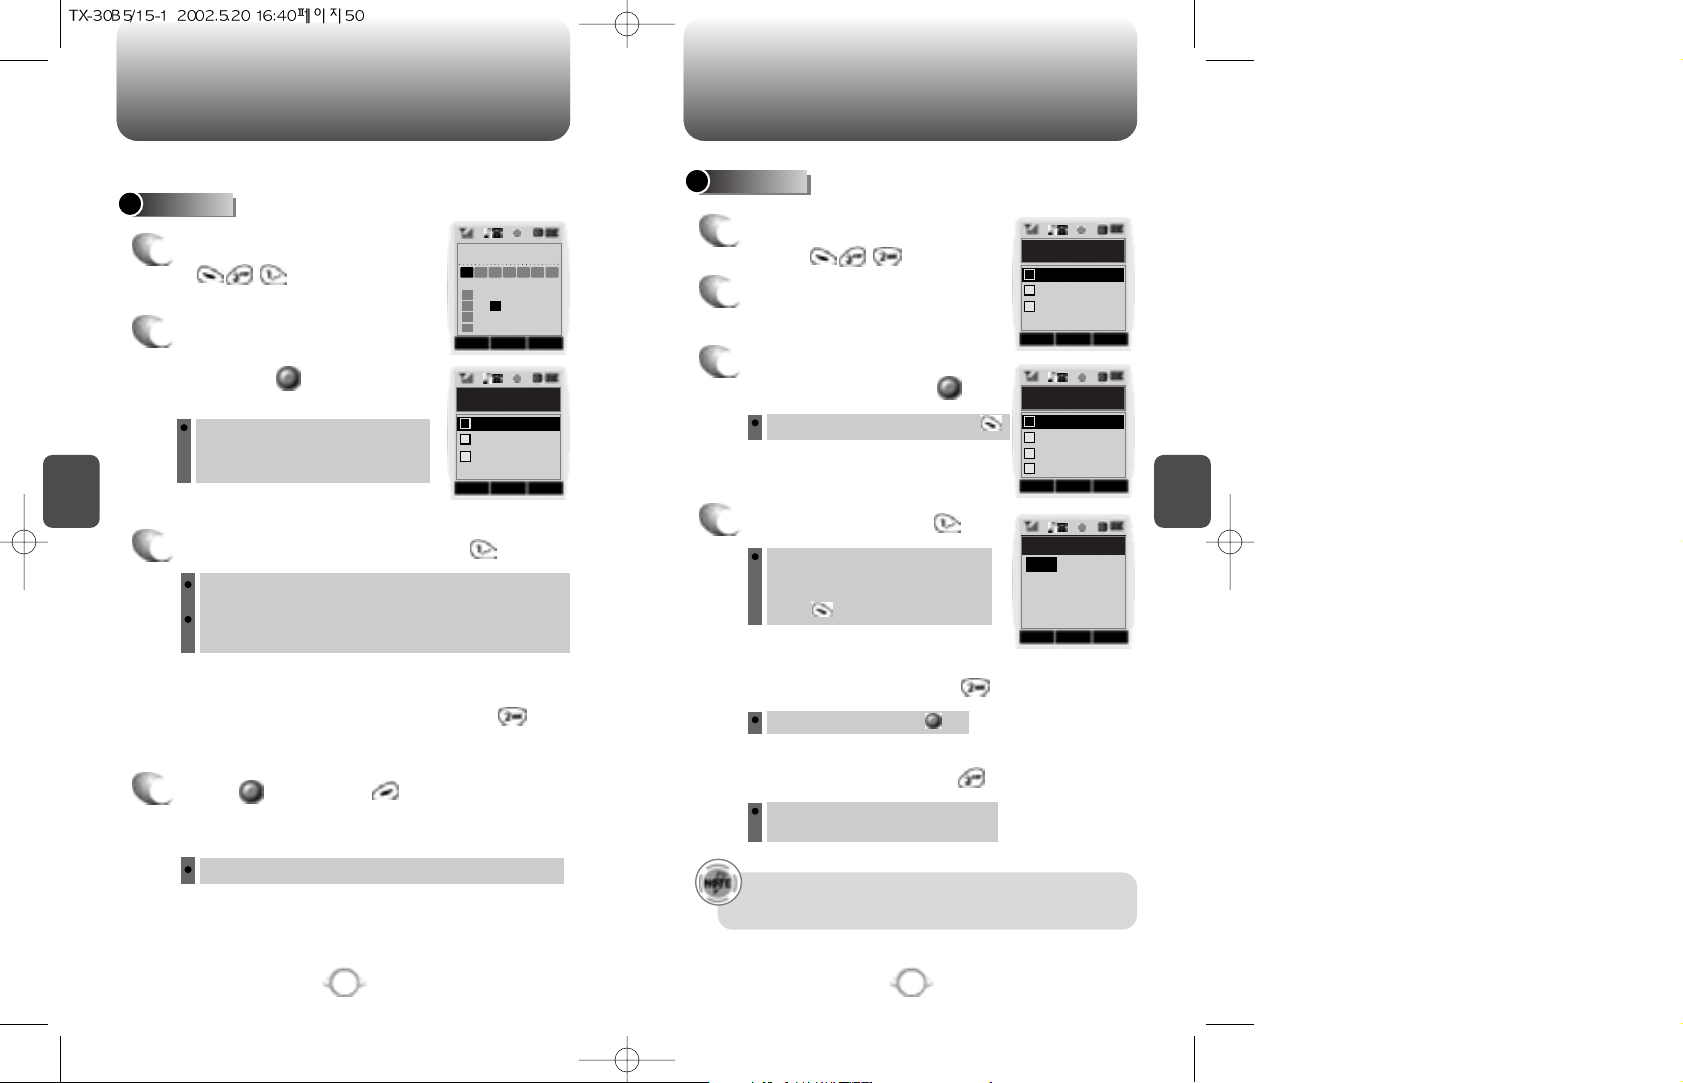
Press to save it or to return to the
calendar.
C
H
4
51
SCHEDULE
C
H
4
50
SCHEDULE
Sets an event and reminds you when it’s time to take place.
EVENT
1
To display a calendar, press
.
2
Move the Navigation key to
choose a date in the calendar
and press .
3
1. To set a time for an event, press .
Use left, right, up and down instead
of leftward, upward, rightward and
leftward.
Choose one of the following on the first line: On time, 10
Min before, 30 Min before, 1 Hour before, No alarm.
Use the Navigation Key to move to year, month, day, time
and input using the digit keys.
To delete the existing one, press .
Use the Navigation Key to choose
an alarm frequency (Once, Daily,
Weekly, Monthly, Yearly). To save,
press .
2. To set a melody for the event, press .
Select a melody with the Navigation Key.
4
The date of the event will be marked on your calendar.
ALARM
1
To display alarm entries,
press .
2
Select one of the entries with
the Navigation key.
3
To edit the existing alarm or
set a new alarm, press .
4
1. To set a time, press .
To set a snooze, press .
2. To set a melody, press .
Select one of the following:
No use, 1 Time, After 3 minutes.
3. To set a snooze, press .
OKNEW CNCL
4 April 2002
Su M
7
14
21
28
1
8
15
22
29
2
9
16
23
30
3
10
17
24
4
11
18
25
5
12
19
26
6
13
20
27
Tu W Th F Sa
OK CNCL
Event Setting
Melody Setting
Pause Setting
Time Setting
1
2
3
OKDEL CNCL
Alarm
[A]Item 2
[A]Item 3
[P]Item 1
1
2
3
OK CNCL
Alarm Setting
Melody Setting
Snooze Setting
Time Setting
1
2
3
Pause Setting
4
STO CNCL
Time Setting
04/16/2002
PM 05:30
meeting
Once
• It doesn’t snooze if an alarm is stopped within a minute,
but it will snooze in a minute an alarm goes off.
Page 28
ROAMING ROAMING
C
H
4
53
C
H
4
52
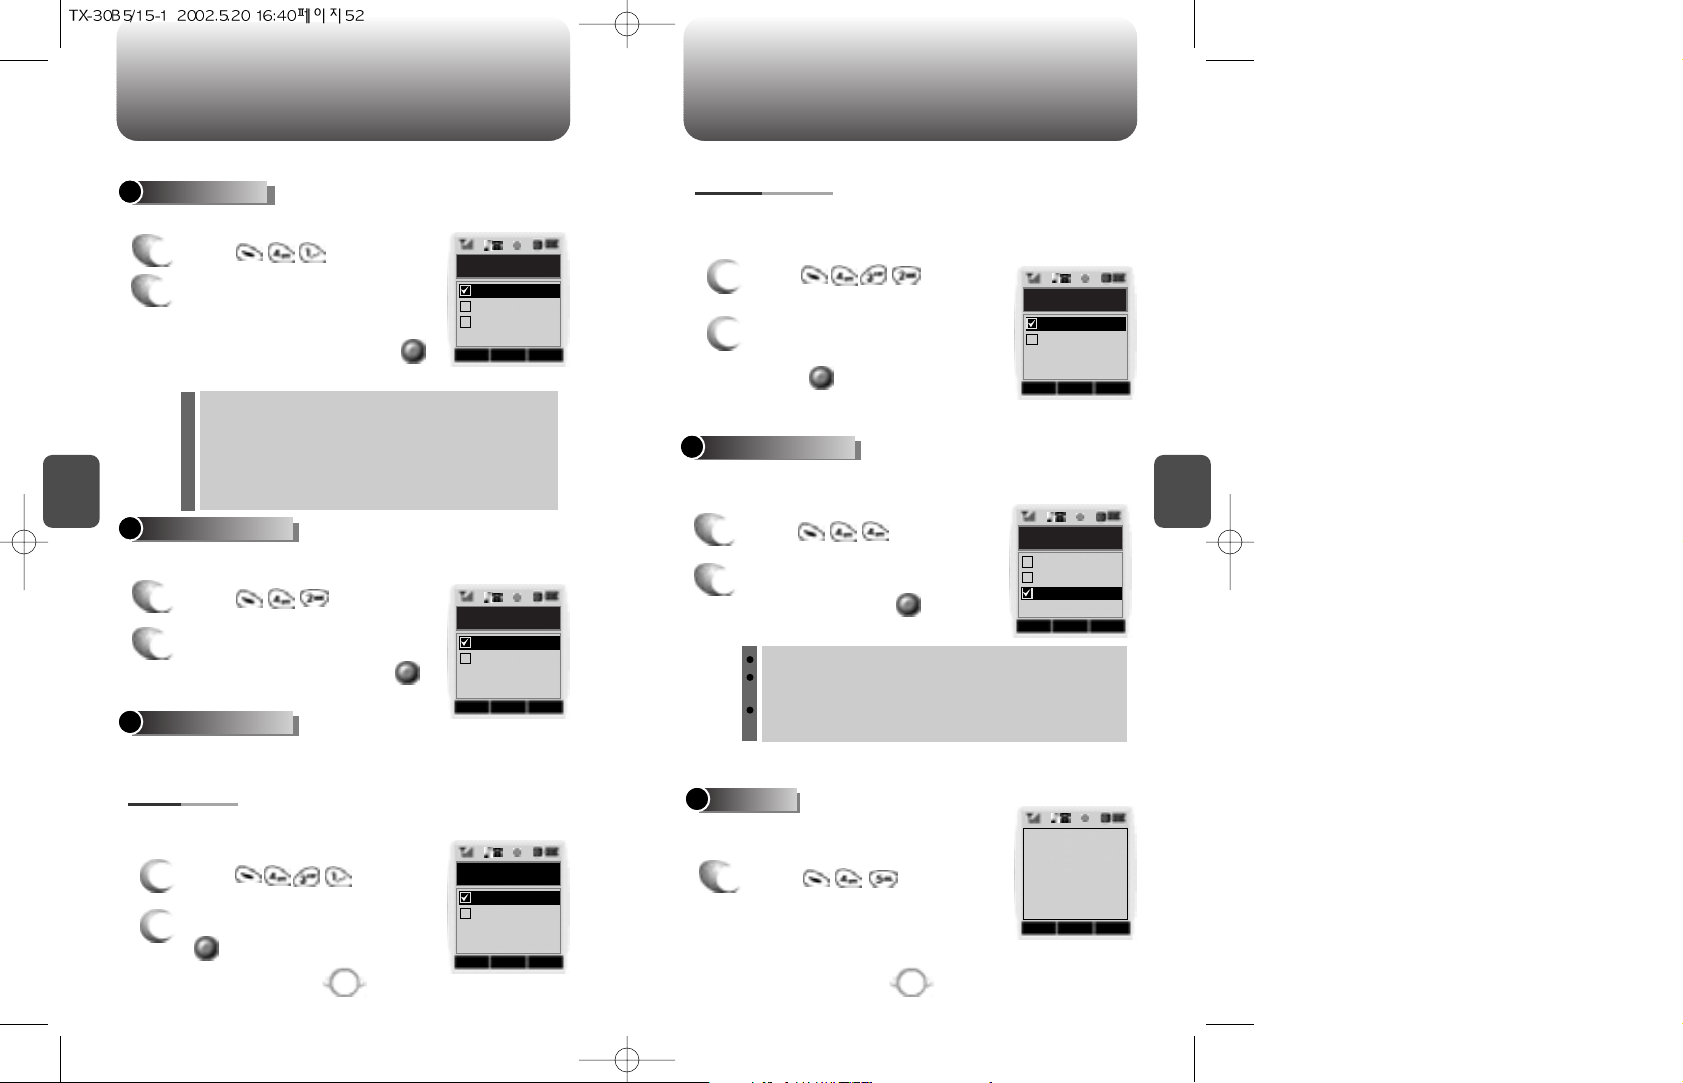
Notifies you when you are in a roaming service area and will be
charged for incoming calls.
CALL PROMPT
1
Press .
2
Select one of the following
options and press to confirm
it.
Displays the phone’s PRL (Preferred Roaming List).
PRL ID
1
Press .
Off : No display [TO BE CHARGED]
On : Display [TO BE CHARGED] until the user answers an
incoming call
7 seconds :
Display [TO BE CHARGED] for only 7 seconds
and return to
normal.
1
2
Press .
Select “Yes” or “No”, then press
to save it.
1
2
Press .
Select a NAM (NAM1,NAM2)
with the Navigation key and
press to save it.
Changes the NAM used by the phone when you have multiple
registrations.
CHANGE NAM
Enables Auto NAM (Number Assignment Modules) or manually selects a
NAM.
Automatically switches phone to proper NAM when you have multiple
NAM registrations.
NAM SETTING
AUTO NAM
OK CNCL
Auto NAM
Yes
No
OK CNCL
Change NAM
NAM2-VERIZ...
NAM1-VERIZ...
OK CNCL
Call Prompt
On
Off
7 Secs
OK CNCL
ERIVERSION
1
PRL ID
00000
Temporarily forces phone to use Analog mode – mode automatically
ends in 10 minutes.
FORCE ANALOG
1
Press .
2
Select “Yes” or “No” with the
Navigation key and press
to activate it.
OK CNCL
Force Analog
Yes
No
Scans the channels to stay connected to any available Verizon
system.
Selects the Preferred System.
SET MODE
1
Press .
2
Select one of the following
options (Automatic A/Automatic
B/Home only) with the
Navogation key and press .
Auto A : Scan the radio channels based on the
Automatic A setting.
Auto B : Scan the radio channels based on the
Automatic B setting.
Home only : Only within your home area or
home affiliated area.
OK CNCL
Set Mode
Automatic A
Home Only
Automatic B
Page 29
SETTING SETTING
C
H
4
55
C
H
4
54
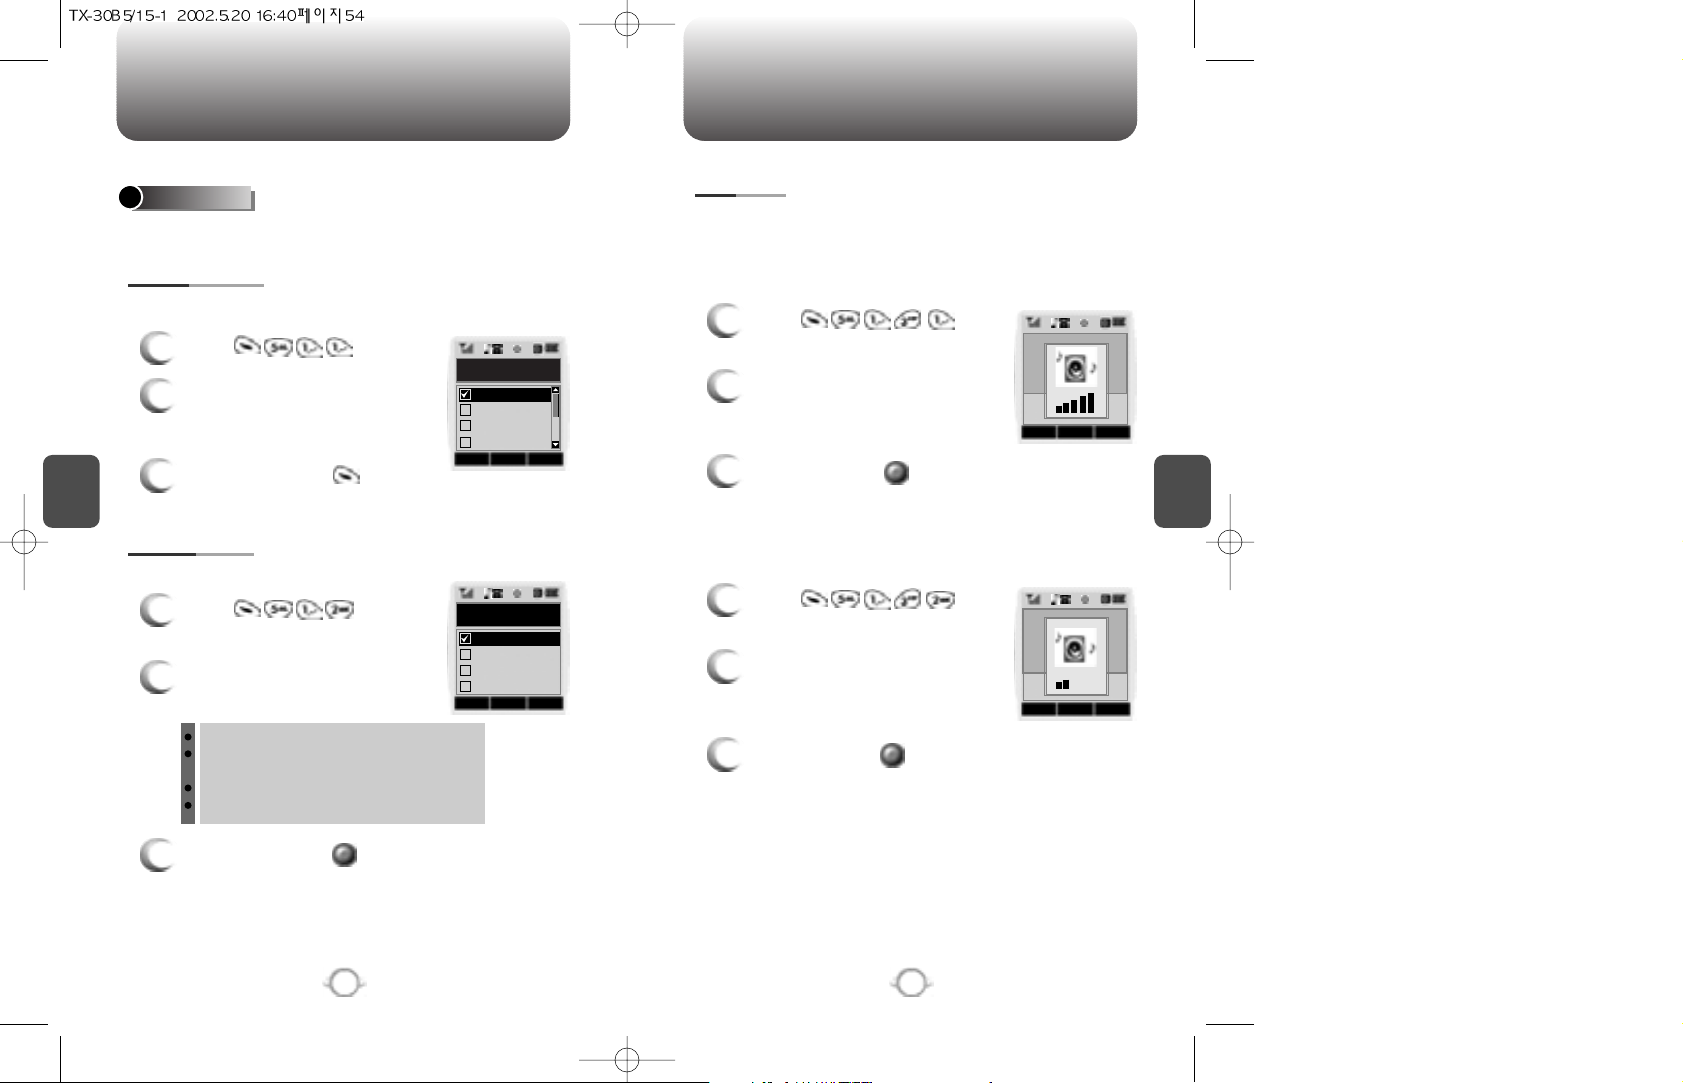
Sets Ringer type, Ringer mode, Volume, Alert, Roam Ringer and Tone
length.
To select a ringer type for incoming calls:
Customizes your phone and optimizes performance through a variety
of settings.
SOUNDS
1
Press .
2
Select one ringer type from
40 melodies and 10 ringer
tones.
3
To confirm, press .
RINGER TYPE
Alerts you to incoming calls in the following modes:
RINGER MODE
3
To confirm, press .
1
Press .
2
Select one of the following
options with the Navigation key.
Ringer
Ringer after Vibrate – The ringer sounds off
after vibration.
Vibrator
Silent – Mute the ringer
OK CNCL
Ringer Type
Air Sul G
Work-up Tru...
Waltz of the...
Wedding March
OK CNCL
Ringer Mode
Vibrate
Ringer After V...
Silent
Ringer
Controls the Ringer, Key and Voice Call volume.
To adjust Ringer volume:
VOLUME
RINGER
1
Press .
2
Adjust the ringer volume with the
Navigation key.
3
To save, press .
To adjust keypad tone:
KEY
1
Press .
2
Adjust the keypad tone with the
Navigation key.
3
To save, press .
OK CNCL
OK CNCL
Page 30
C
H
4
57
SETTING
C
H
4
56
SETTING
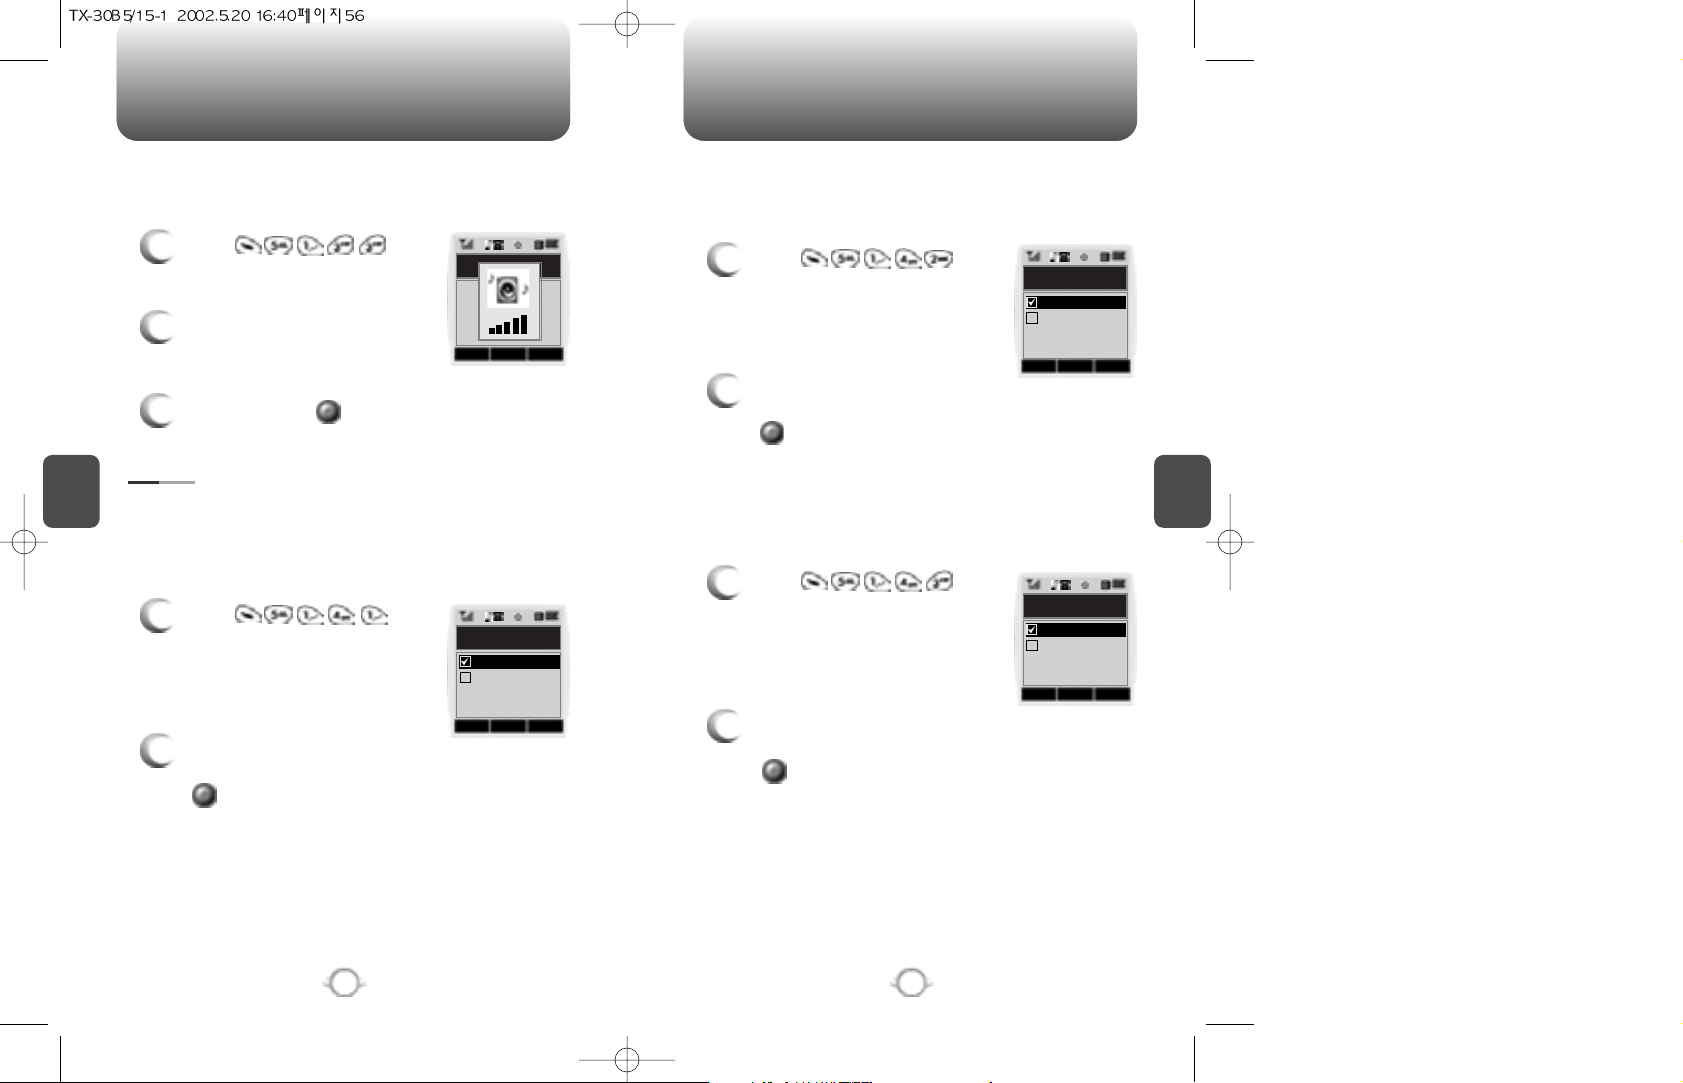
Allows you to set an alert that sounds when any handset changes
occur.
Sounds an alert every minute of a phone call.
ALERT
MINUTE ALERT
1
Press .
2
Select “OFF” or “ON” with the
Navigation key and press
to save it.
Sounds an alert when leaving a service area and entering a roaming
service area.
ROAM ALERT
1
Press .
2
Select “OFF” or “ON” with the
Navigation key and press
to save it.
2
Select “OFF” or “ON” with the
Navigation key and press
to save it.
Notifies you that a call has been successfully placed.
CONNECT ALERT
1
Press .
To adjust earpiece volume:
VOICE CALL
1
Press .
2
Adjust the earpiece volume with
the Navigation key.
3
To save, press .
OK CNCL
Minute Alert
On
Off
OK CNCL
Roam Alert
On
Off
OK CNCL
Connect Alert
On
Off
OK CNCL
Page 31
C
H
4
59
SETTING
C
H
4
58
SETTING
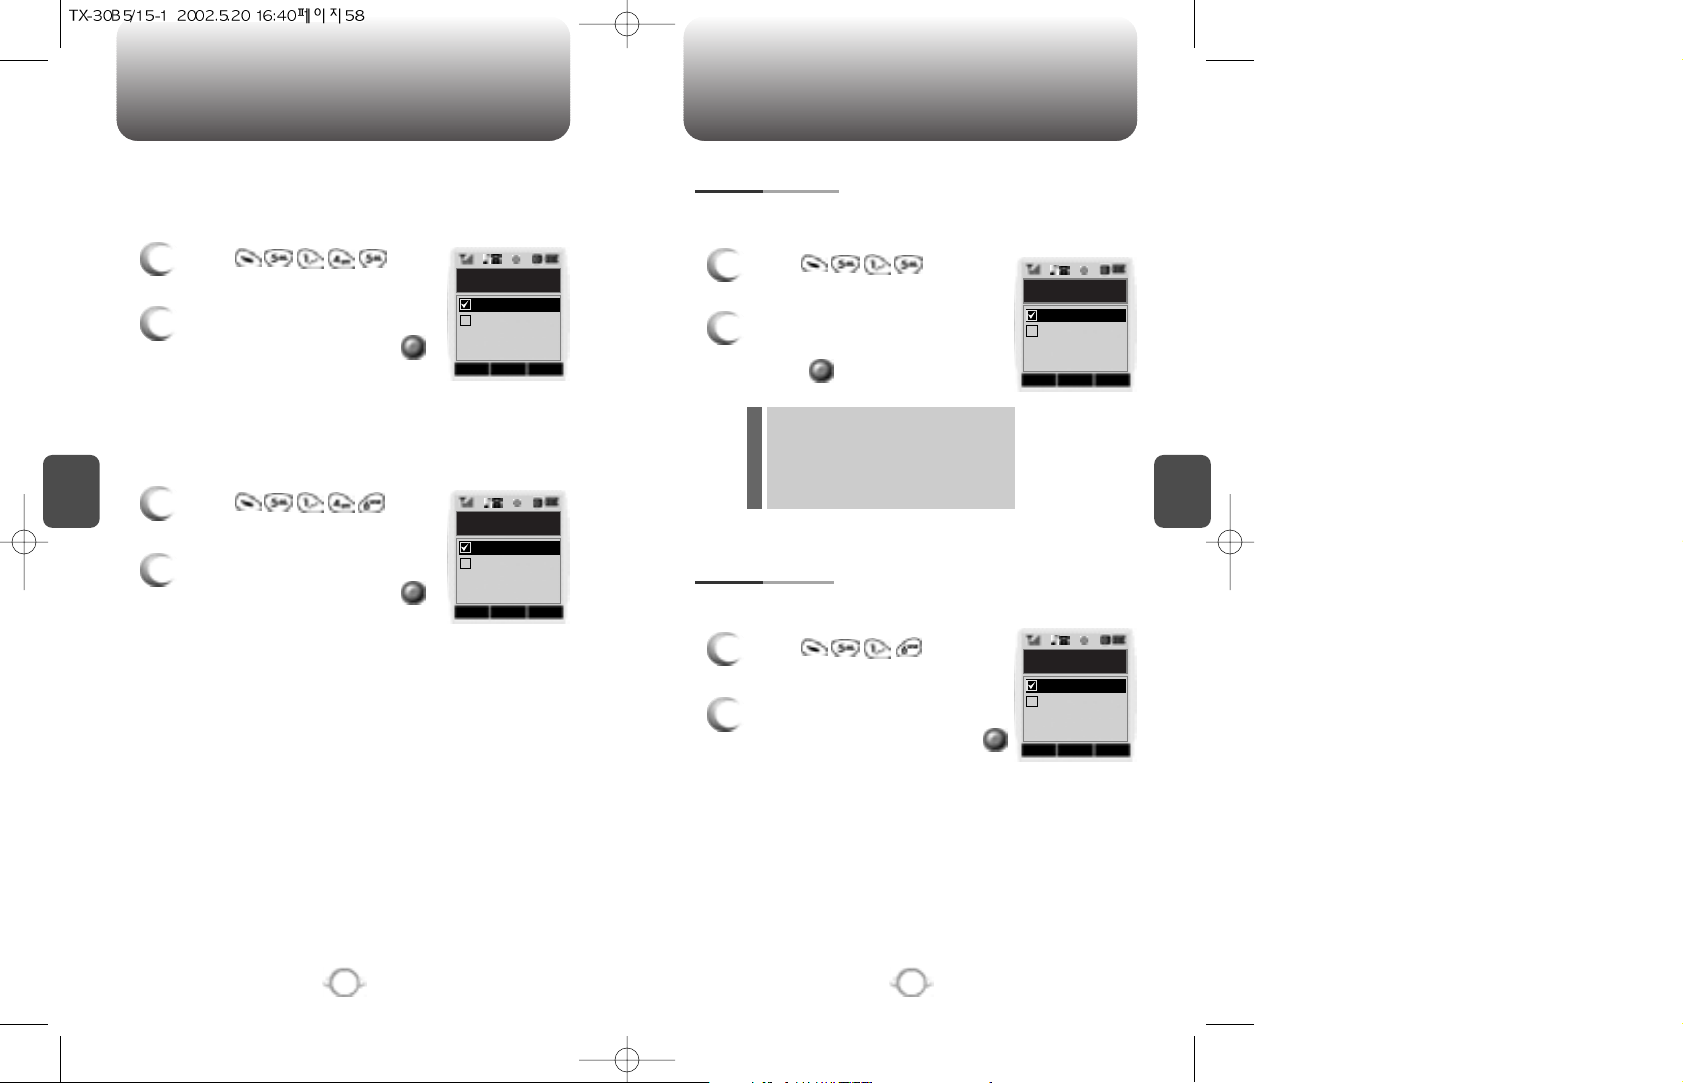
Sounds an alert entering an area where calls cannot be made due to
weak signal strength. The alert sounds in standby mode.
FADE ALERT
1
Press .
2
Select “Off” or “On” with the
Navigation key and press
to save it.
Sounds an alert when you encounter low signal strength during a call.
LOW SIGNAL ALERT
1
Press .
2
Select “Off” or “On” with the
Navigation key and press
to save it.
Sounds a different ringer when you are in a roaming service area.
ROAM RINGER
1
Press .
2
Select “Distinctive” or “Normal”
with the Navigation key and
press to save it.
To adjust tone length:
TONE LENGTH
1
Press .
2
Select “Normal” or “Long” with
the Navigation key and press
to save it.
Distinctive – Sounds a different
ringer type
Normal – Sounds the same ringer
type as used in Home
area.
l
l
OK CNCL
Low Signal Alert
On
Off
OK CNCL
Fade Alert
On
Off
OK CNCL
Roam Ringer
Distinctive
Normal
OK CNCL
Tone Length
Long
Normal
Page 32
C
H
4
61
SETTING
C
H
4
60
SETTING
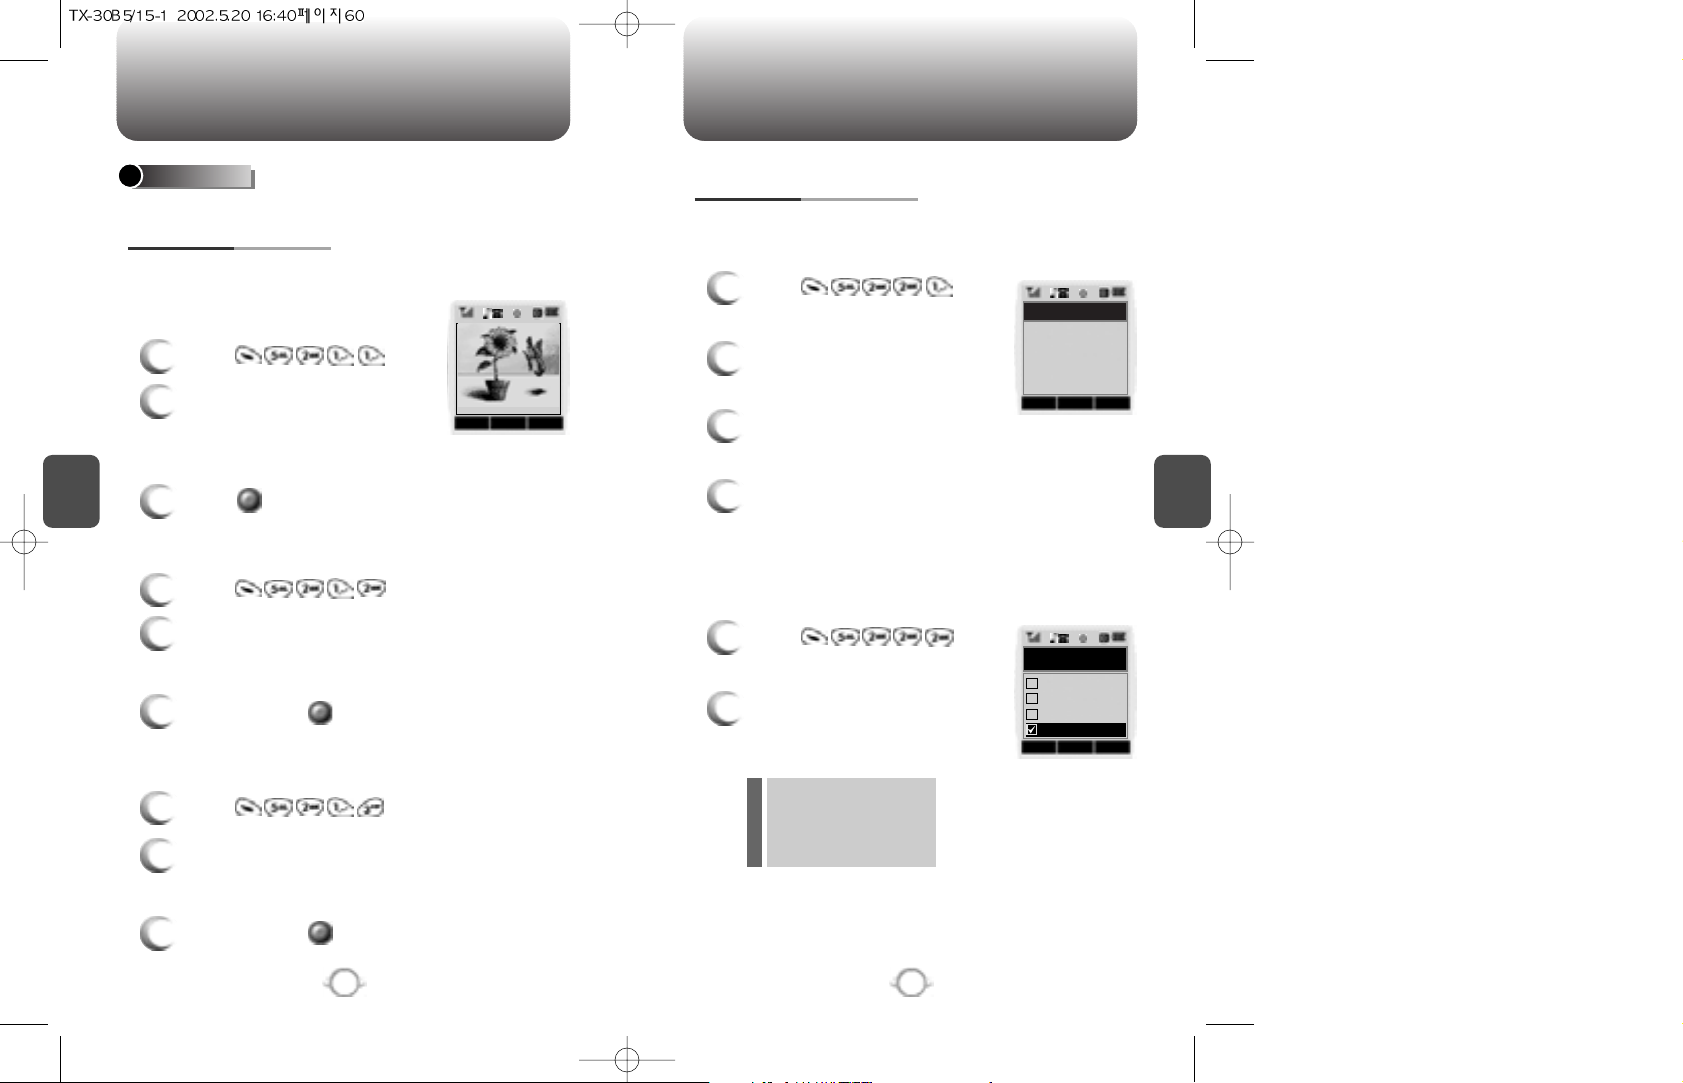
Allows you to customize display.
To select an LCD display:
DISPLAY
1
Press .
2
Select a display from the
Animation list by moving the
Navigation Key up, down, left or
right.
3
Press to save it.
ANIMATION SETTING
IDLE DISPLAY
3
To save, press .
1
Press .
2
Select a display from the Animation list by
moving the Navigation Key up, down, left or
right.
3
To save, press .
2
Select a display from the Animation list by
moving the Navigation Key up, down, left or
right.
POWER ON DISPLAY
1
Press .
POWER OFF DISPLAY
OK CNCL
Sunflower
To input a personal greeting:
1
Press .
2
To edit the greeting, press the
Navigation Key.
3
Input your personal greeting, using the Alpha
Editor.(Refer to page 33)
4
To save, press the Navigation Key.
MAIN DISPLAY SETTING
GREETING INPUT
To display a clock on the LCD:
1
Press .
2
Select one of the following
options and press the
Navigation Key to save it.
IDLE CLOCK
Digital Clock
Analog Clock
Greeting Clcok
Animation Clock
l
l
l
l
EDIT CNCL
Greeting Input
OK CNCL
IdIe Clock
Analog Clock
Greeting Clock
Digital Clock
VERIZON
Animation+Clo...
Page 33
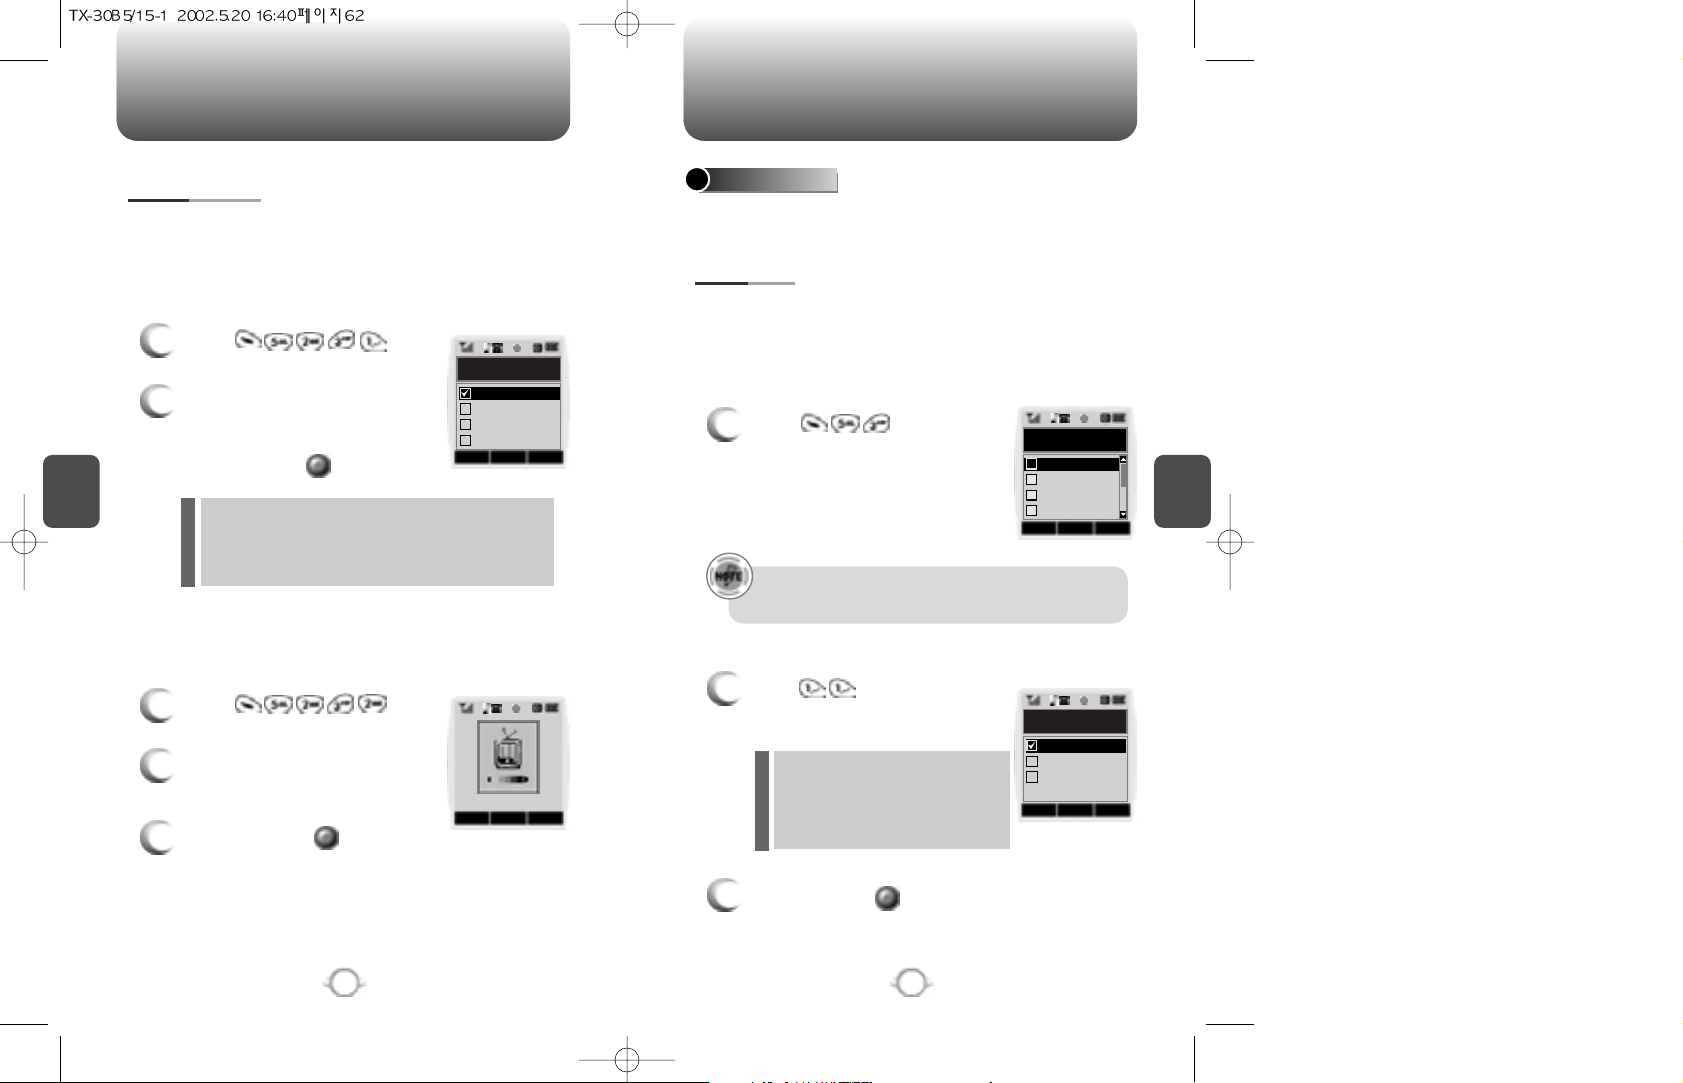
C
H
4
63
SETTING
C
H
4
62
SETTING
Backlights the display and keypad for easy viewing in dark places.
Controls backlight and LCD contrast for a better view and more
efficient use.
1
Press .
2
Select one of the following
options; 5sec, 10 sec, 20 sec,
Off.
To save, press .
LCD SETTING
BACKLIGHTING
To adjust the display contrast:
1
Press .
2
Adjust the LCD contrast for
better view.
3
To save, press .
CONTRAST
Off : Turn the backlight off.
5 sec, 10 sec, 20 sec : Backlight on for 5, 10, or
20seconds respectively after a
touch of the keypad.
l
l
OK CNCL
Backlighting
10 Secs
20 Secs
Off
5 Secs
OK CNCL
Prevents the unauthorized use of the handset and only allows access
to certain features to those who have the password.
When you attempt to make a restricted call, “This phone is restricted”
appears on the screen.
Prevents others from using your phone without permission.
When locked, the menu can not be accessed without password.
SECURITY
1
Press and enter
“Password”.
2
Press and select “Off”,
“Lock Now” or “Power Up”.
3
To save, press .
RESTRICT
AUTOMATIC LOCK
Off – Do not lock the phone
Lock Now – Lock the phone now
Lock On Power Up –
Lock the phone whenever it
is turned on.
l
l
l
OK CNCL
Automatic Lock
Lock Now
Lock On Powe...
Off
OK CNCL
Security
Special #’s
Clear Phoneb
Reset Phone
Restrict
1
2
3
4
The default password is the last 4 digits of your phone
number.
Page 34
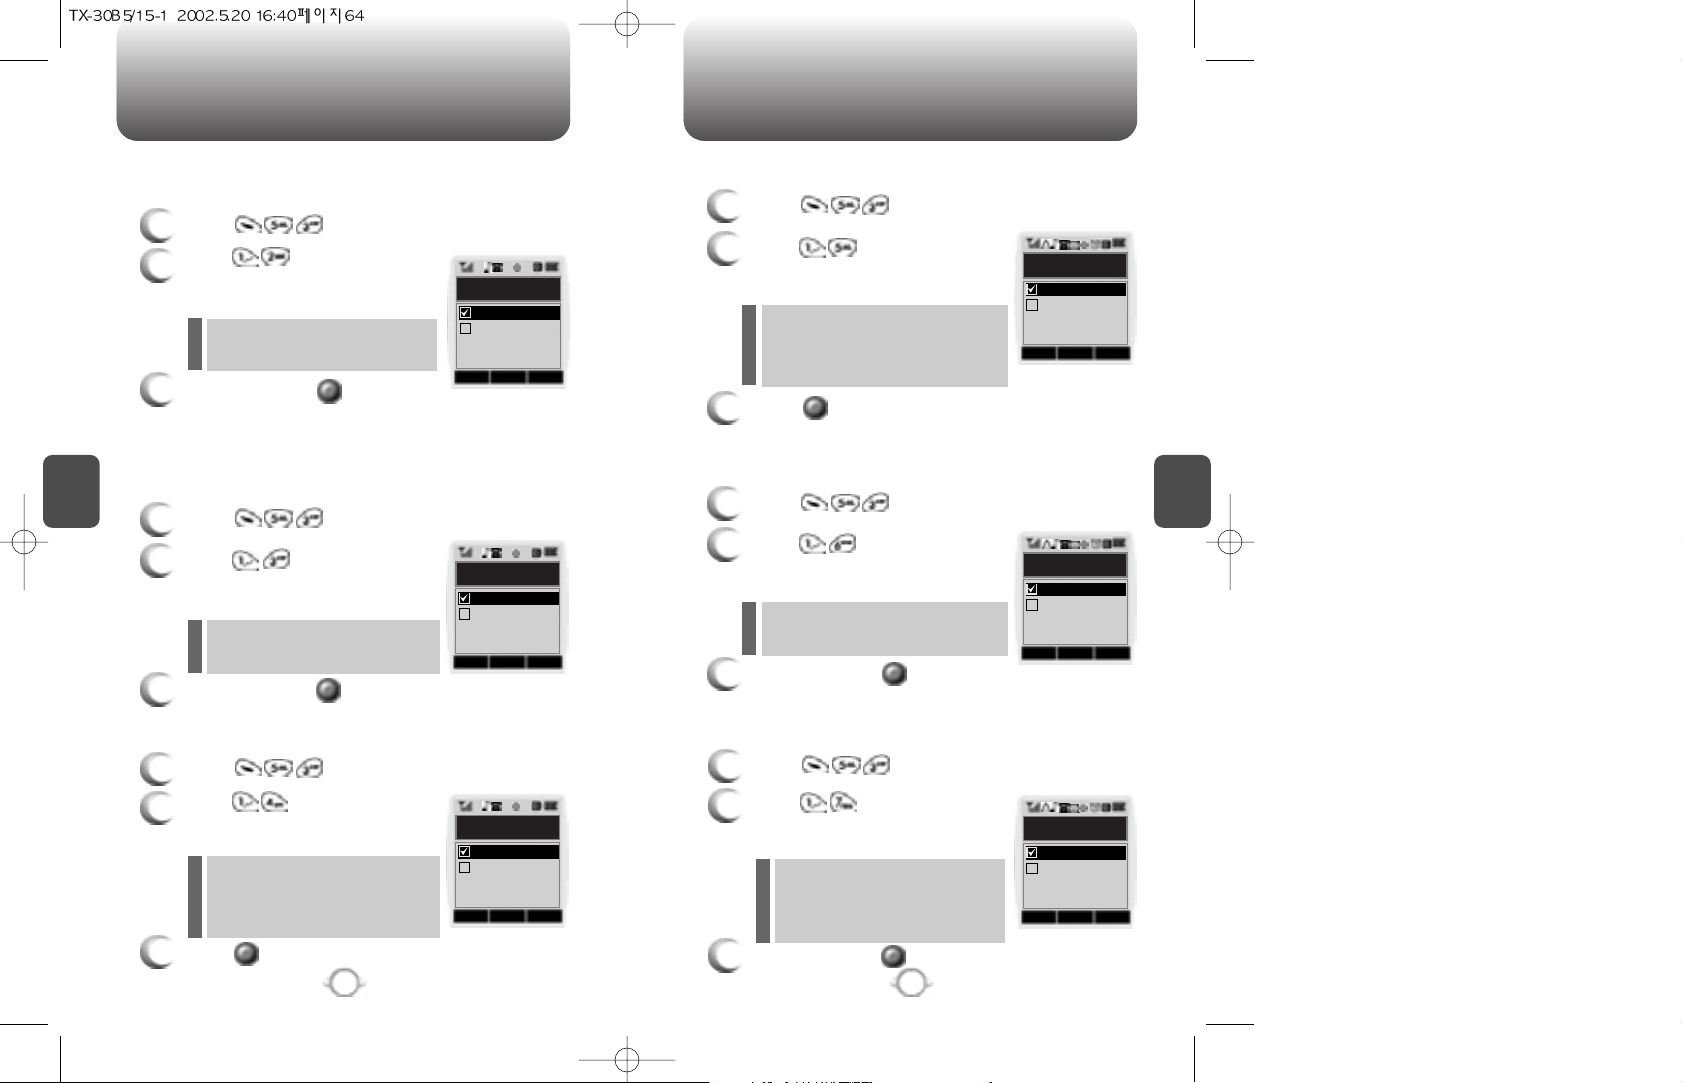
C
H
4
65
SETTING
C
H
4
64
SETTING
Blocks all incoming calls but allows outgoing calls to be placed.
1
Press and enter “Password”.
2
Press and select “Allow”
or “Restrict” with the Navigation
key.
3
To save, press .
INCOMING CALL
Restrict : Restricts incoming calls
Allow : Allows incoming calls
l
l
Blocks all outgoing calls – except emergency calls – but allows
incoming calls to be placed.
1
Press and enter “Password”.
2
Press and select “Allow”
or “Restrict” with the Navigation
key.
3
To save, press .
OUTGOING CALL
Restric t : Restricts outgoing calls
Allow : Allows outgoing calls
l
l
3
Press to save it.
Restrict : Restrict an incoming call
history
Allow : Allow an incoming call
history
l
l
Blocks access to, and protects data in your phonebook.
1
Press and enter “Password”.
2
Press and select “Allow”
or “Restrict” with the Navigation
key.
3
To save, press .
PHONEBOOK
Restrict : Restrict access to the
phonebook
Allow : Allow access to the
phonebook.
l
l
OK CNCL
Incoming Call
Restrict
Allow
OK CNCL
Outgoing Call
Restrict
Allow
1
Press and enter “Password”.
2
Press and select “Allow”
or “Restrict” with the Navigation
key.
INCOMING CALL HISTORY
OK CNCL
Incoming
Call History
Restrict
Allow
OK CNCL
Phone Book
Restrict
Allow
Restricts access to the menu.
1
Press and enter “Password”.
2
Press and select “Allow”
or “Restrict” with the Navigation
key.
3
To save, press .
MENU
Restrict : Restrict access to the menu
Allow : Allow access to the menu
l
l
OK CNCL
Menu
Restrict
Allow
1
Press and enter “Password”.
2
Press and select “Allow”
or “Restrict” with the Navigation
key.
3
Press to save it.
OUTGOING CALL HISTORY
Restrict : Restrict access to the
outgong call history.
Allow : Allow access to the outgong
call history.
l
l
OK CNCL
Outgoing
Call History
Restrict
Allow
Page 35
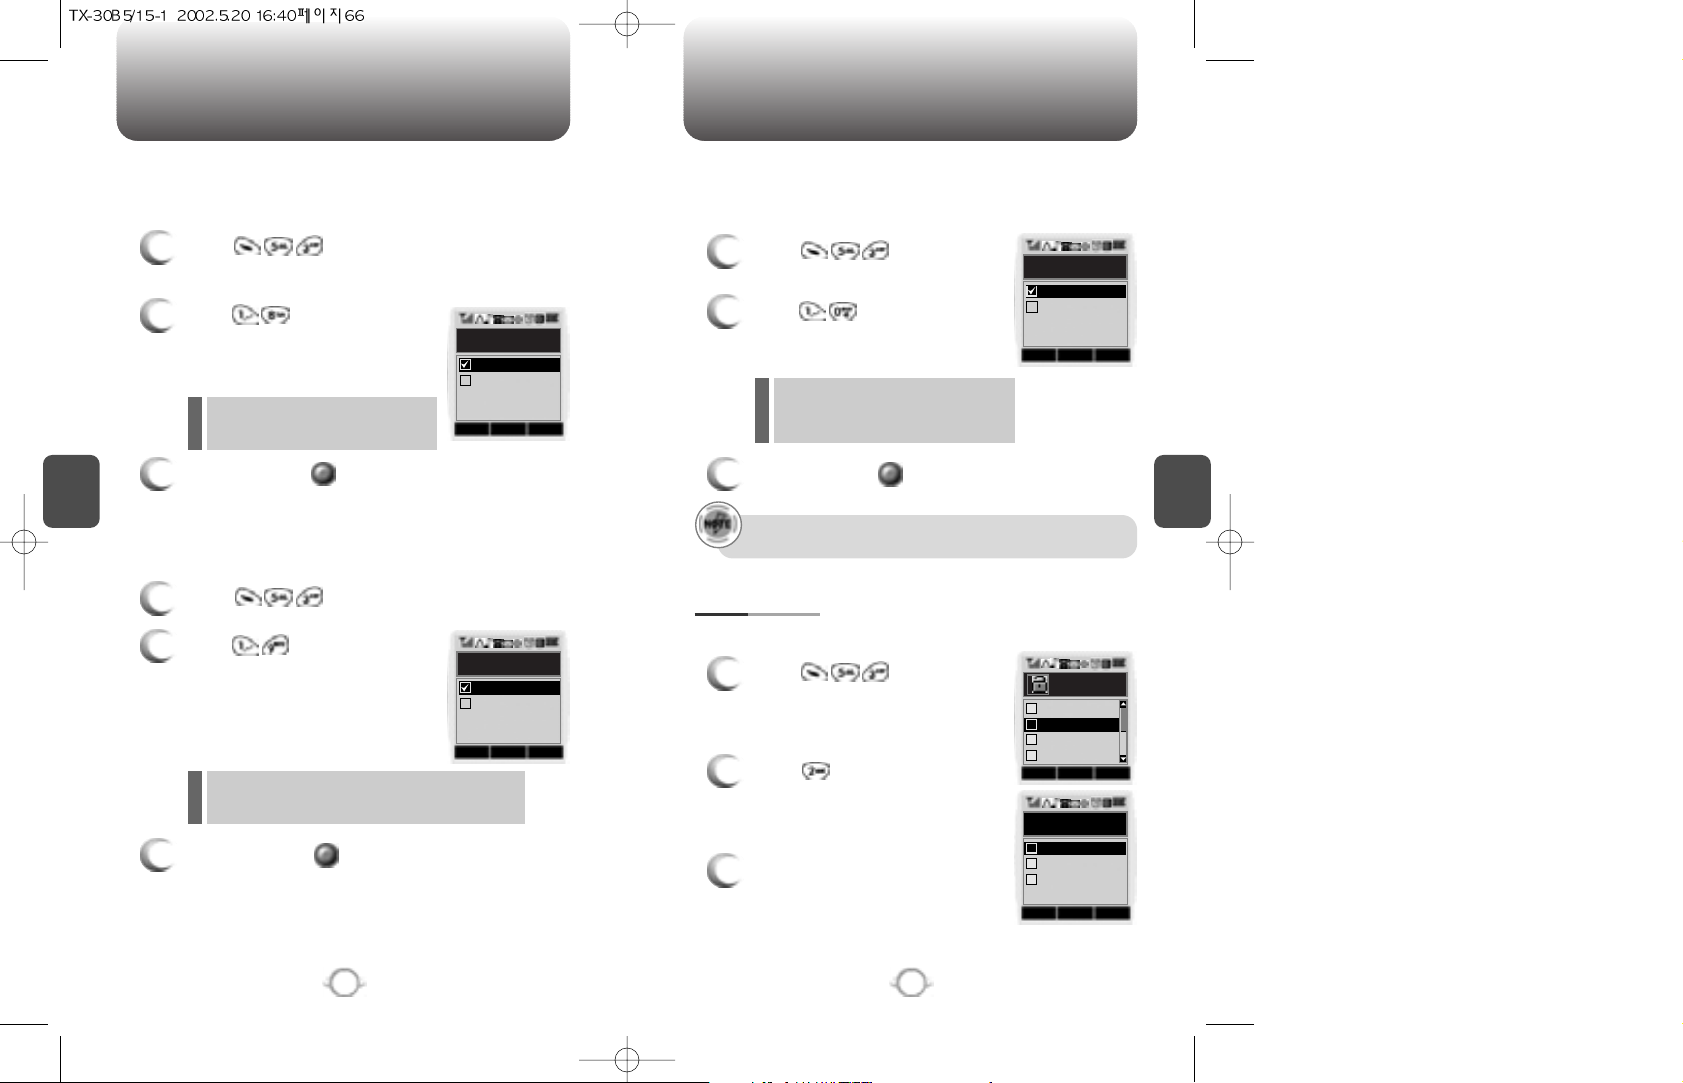
C
H
4
67
SETTING
C
H
4
66
SETTING
Restricts data calls from being placed.
1
Press and enter
“Password”.
2
Press and select “Allow”
or “Restrict” with the Navigation
key.
3
To save, press .
DATA CALL
Restrict : Restricts data calls
Allow : Allows data calls
l
l
Restricts calling 900 dial service numbers.
1
Press and enter “Password”.
2
Press and select “Allow”
or “Restrict” with the Navigation
key.
3
To save, press .
900 #’S
Restrict : Restricts calls 900-dial services
Allow : Allows 900-dial services
l
l
Restricts calling long distance numbers – the phone is limited to
calling numbers within the area.
1
Press and enter
“Password”.
2
Press and select
“Allow” or “Restrict” with the
Navigation key.
3
To save, press .
LONG DISTANCE CALLS
Restrict : Restricts calls 900-dial
services
Allow : Allows 900-dial services
l
l
A phone number over 7 digits is to be restricted.
OK CNCL
Data Call
Restrict
Allow
OK CNCL
900#S
Restrict
Allow
OK CNCL
Long Distance
Restrict
Allow
Stores 3 phone numbers that can be called even in the lock mode.
1
Press and enter
“Password”.
2
Press and select a location
with the Navigation key.
3
Press the Navigation Key and
input a phone number; press
again to save.
SPECIAL #
’
S
OK CNCL
Special #’s
Empty2
Empty3
Empty1
1
2
3
OK CNCL
Security
Clear Phoneb
Reset Phone
Restrict
2
1
3
4
Special #’s
Page 36
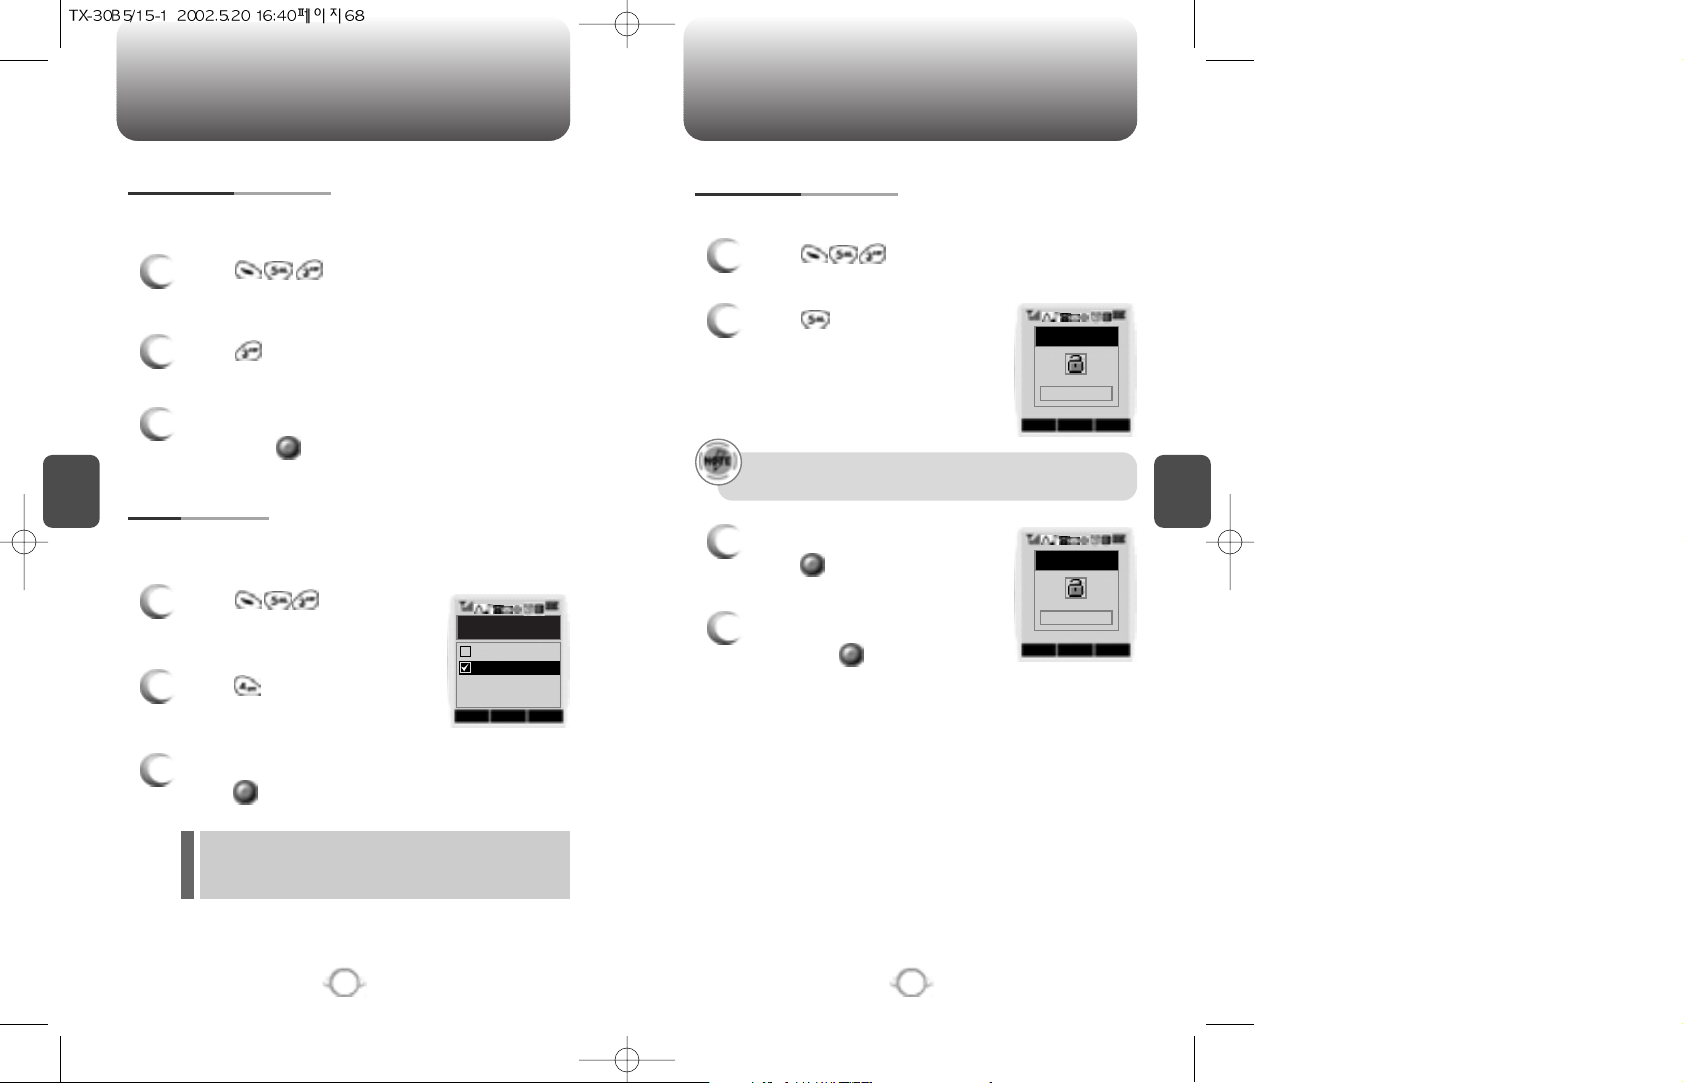
C
H
4
69
SETTING
C
H
4
68
SETTING
Clears all phonebook entries.
1
Press and enter
“Password”.
2
Press .
3
Select “Yes” or “No” with the Navigation
key. Press .
CLEAR PHONEBOOK
Resets phone to default settings.
RESET PHONE
Changes your 4-digit password
1
Press and enter
“Password”.
2
Press .
3
Select “Yes” or “No” with the Navigation key.
Press .
CHANGE PASSWORD
1
Press and enter
“Password”.
2
Press .
3
Enter a new password and
press .
4
Enter the new password again
and press .
The default password is the last 4 digits of your phone
number.
When you select “Yes”, you will see “Wait a
moment” on the display and the phone will return to
idle mode.
OK CNCL
Reset Phone
Yes
No
STO CNCL
New Password
0000
STO CNCL
Enter Again
XXXX
Page 37
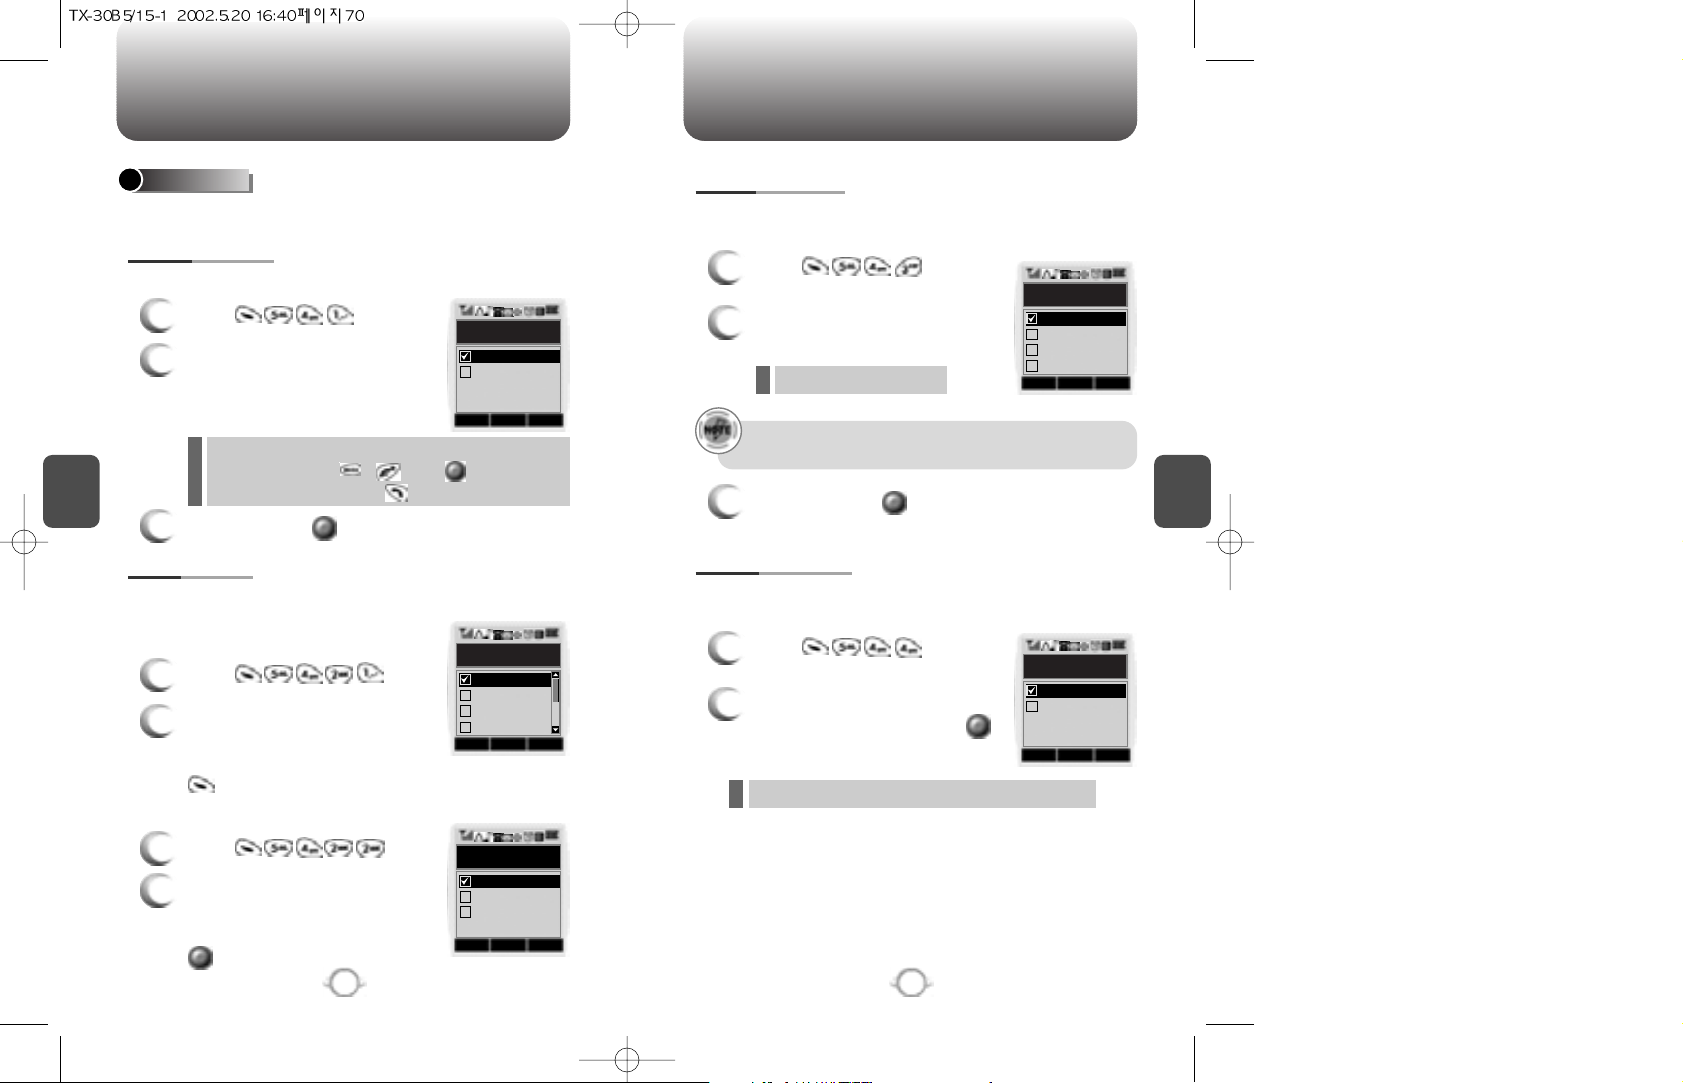
C
H
4
71
SETTING
C
H
4
70
SETTING
To select an answer mode:
OTHERS
1
Press .
2
Select “Any Key” or “Send Key”
with the Navigation key
3
To save, press .
ANSWER MODE
Any Key –
Press any key to answer an incoming call
except , , and .
Send Key – Press only to answer a call.
l
l
Automatically answers a call after a preset number of rings. An ideal
setting for the hands-free car kit.
1
Press .
2
Select one of the following with
the Navigation key:
3
To save, press .
AUTO ANSWER
Off/5/10/18 seconds.
l
“Enhanced” - Makes it more difficult to wire tap.
l
Enhances voice privacy and avoids tapping during a call.
1
Press .
2
Select “Standard” or “Enhanced”,
if available.
To save, press .
VOICE PRIVACY
Automatically retries a call up to 5 times after a set time interval.
1
Press .
2
Select a time interval option
(Off,3,5,7,10 seconds) with the
Navigation key. To save, press
.
AUTO RETRY
RETRY TIME
1
Press .
2
Select one of the options
(1 time,3 times,5 times) with the
Navigation key. To save, press
.
REPEAT
This function will not be active when you select Vibrate,
Silent,or Ringer after vib as a ringer mode.
OK CNCL
Answer Mode
Send Key
Any Key
OK CNCL
Retry Time
3 Secs
5 Secs
7 Secs
Off
OK CNCL
Repeat
3 Times
5 times
1 Times
OK CNCL
Auto Answer
5 Secs
10 Secs
18 Secs
Off
OK CNCL
Voice Privacy
Enhanced
Standard
Page 38
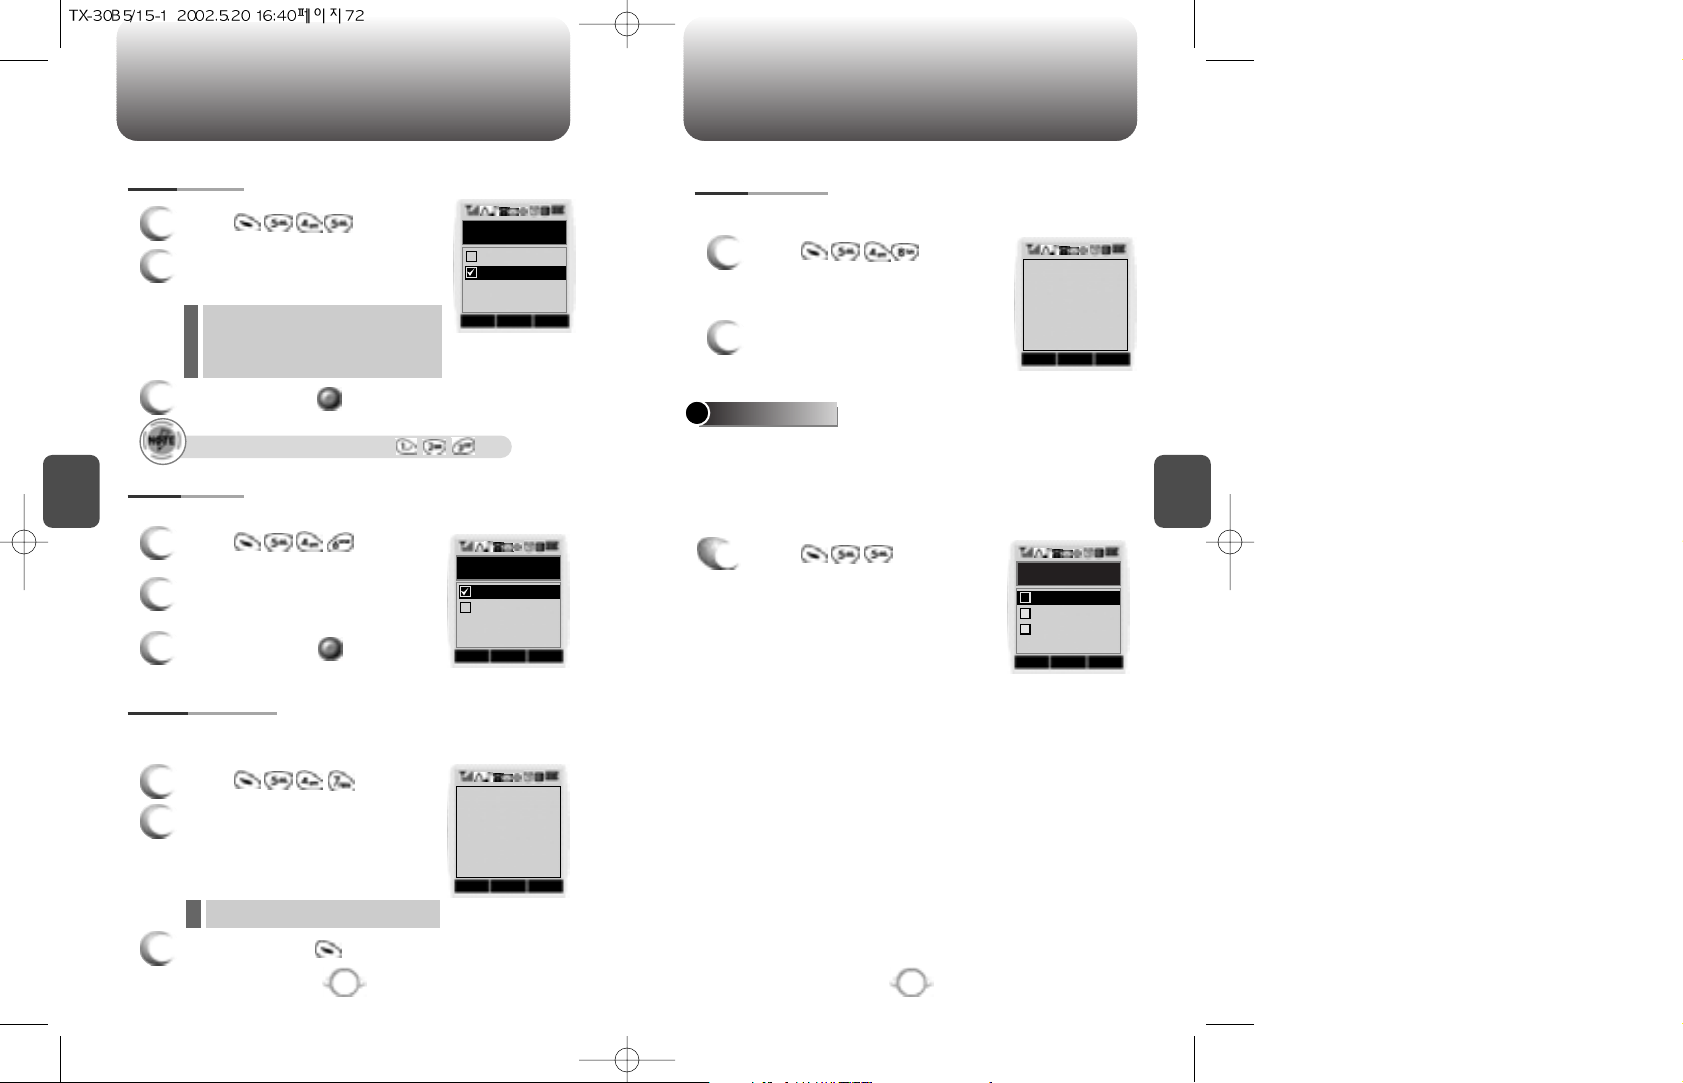
C
H
4
73
SETTING
C
H
4
72
SETTING
On: Prevents accidentally
pressing the keypad
Off: Key guard off
l
l
1
Press .
2
Select “On” or “Off” with the
Navigation key.
3
To save, press .
KEY GUARD
1
Press .
2
Select either “English” or
“Spanish”.
3
To save, press .
LANGUAGE
Selects the language in which letters are displayed on screen.
1
Press .
2
You are to see the version of
software and hardware.
S/W VERSION
1
Press .
To display the version of your phone:
1
Press .
2
Use the Navigation key to set
the web idle timer or press digit
keys one by one to enter the
time.
3
To save, press .
WEB IDLE TIME
Disconnects from a network when there is no key input for a certain
amount of time.
Time cannot exceed 3 digits
l
The phone can have up to 3 sets of server IP (Internet Protocal)
addresses and Port numbers to access your service provider’s
website. These may already be preset or be separately programmed
by your service provider. Please note that any change to these
settings may disable the Web access capability.
UP PROXY IP
OK CNCL
Key Guard
On
Off
OK CNCL
Language
Spanish
English
STO CNCL
Input
Web ldle Time
30 SECONDS
OK CNCL
Software :
Hardware :
Version
[Verizon Wireless]
TO30VEDWO7 1.160
TX - 30B
OK CNCL
UP Proxy IP
UP Link2
UP Link3
UP Link1
1
2
3
To unlock the key guard, press .
Page 39
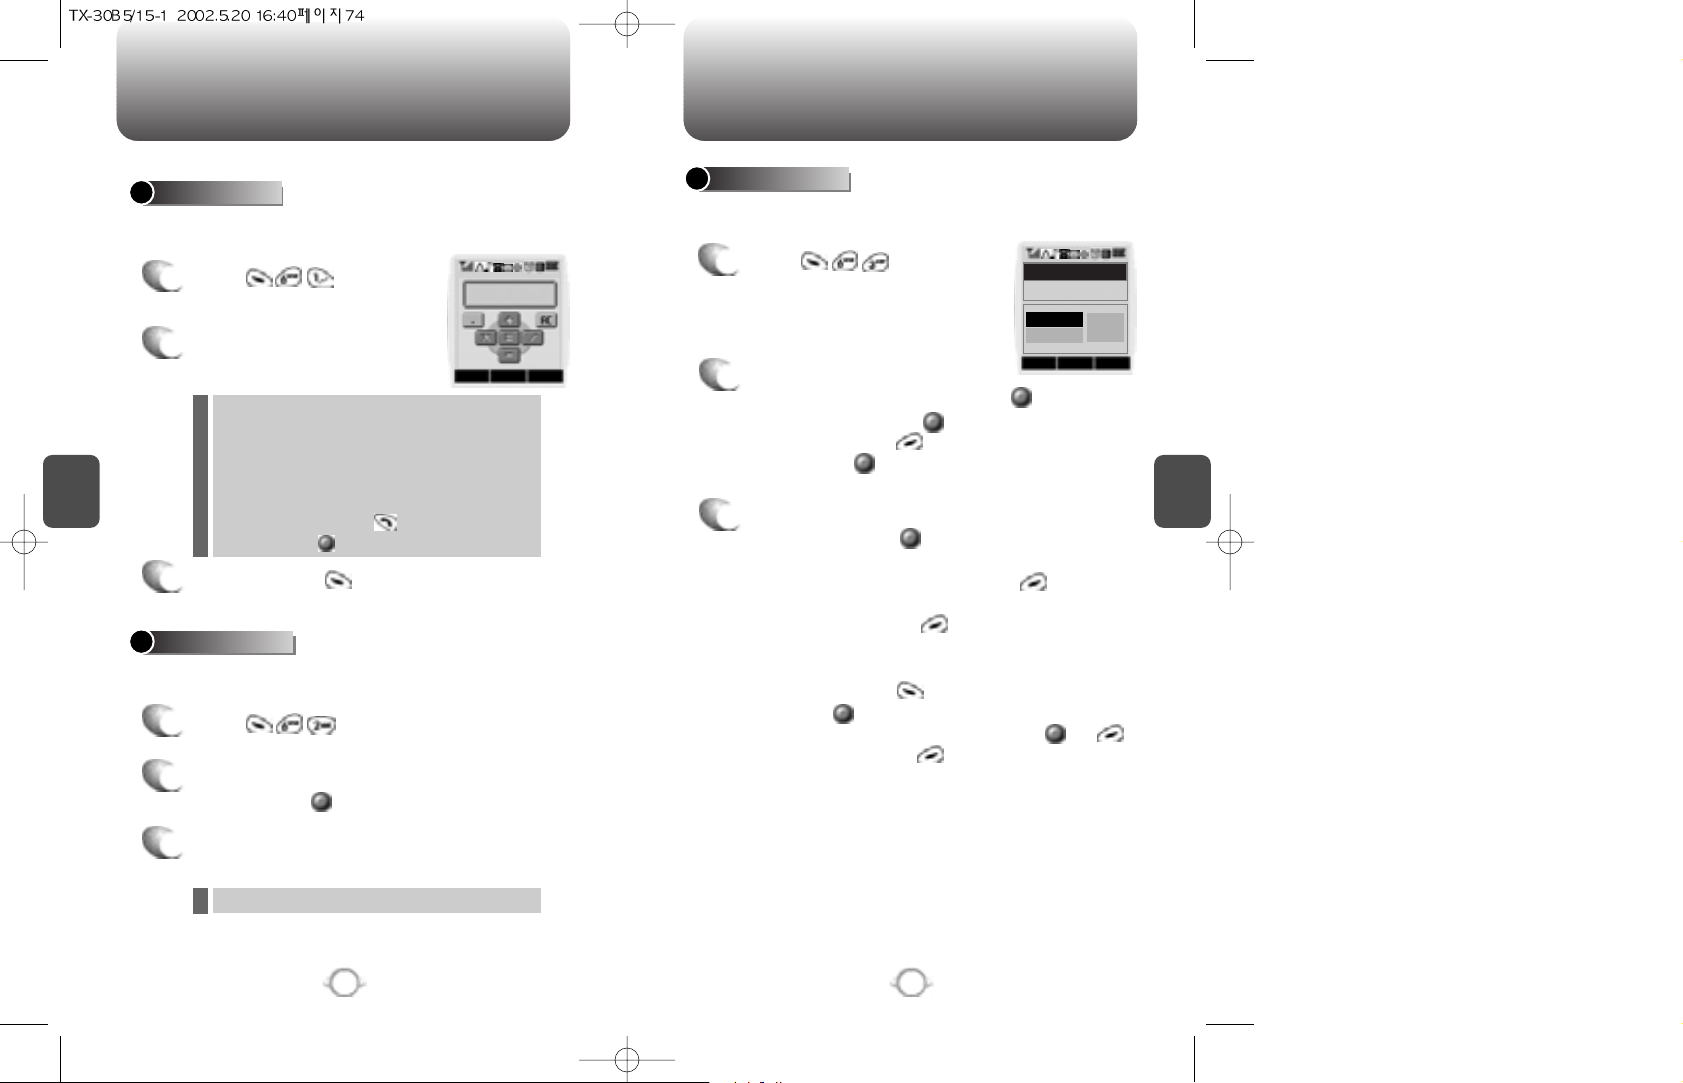
C
H
4
75
TOOLS
C
H
4
74
TOOLS
1
Press .
2
Follow the instructions below
to calculate (8*6)/4-2.5
3
To reset, press .
1
Press .
2
Select a city with the Navigation
key and press .
3
The world map is to be displays with the city,
its date and time.
To access the calculator:
CALCULATOR
Notifies you of the time in a specific preprogrammed city.
WORLD CLOCK
1
Press .
2
To measure a time period.
1. To start the stopwatch, press .
2. To pause it, press .
3. To resume it or to return to the previous
page press, .
3
To time up to six events at once:
1. To start, press .
2. To stop a time period and continue
measuring another one, press .
3. To stop the second and continue measuring
a third one, press .
4. To measure up to six time periods, repeat the
above steps.
5. To stop, press . To review the results,
press .
6. To return to the stopwatch, press or .
7. To reset it, press .
Simultaneously times up to six different events. To operate the
stopwatch:
STOPWATCH
Input 8
Move the Navigation key leftward
Input 6 and press the Navigation key
Move it rightward
Input 4 and press the Navigation key
Move it downward
Input 2 and press the to input (.)
Press 5, then .
Use the Navigation key to select another city.
OKRESET CNCL
0.
STARTVIEW CNCL
Stopwatch
0:00:00:00
RECORD
[0/6]
STOP
Page 40
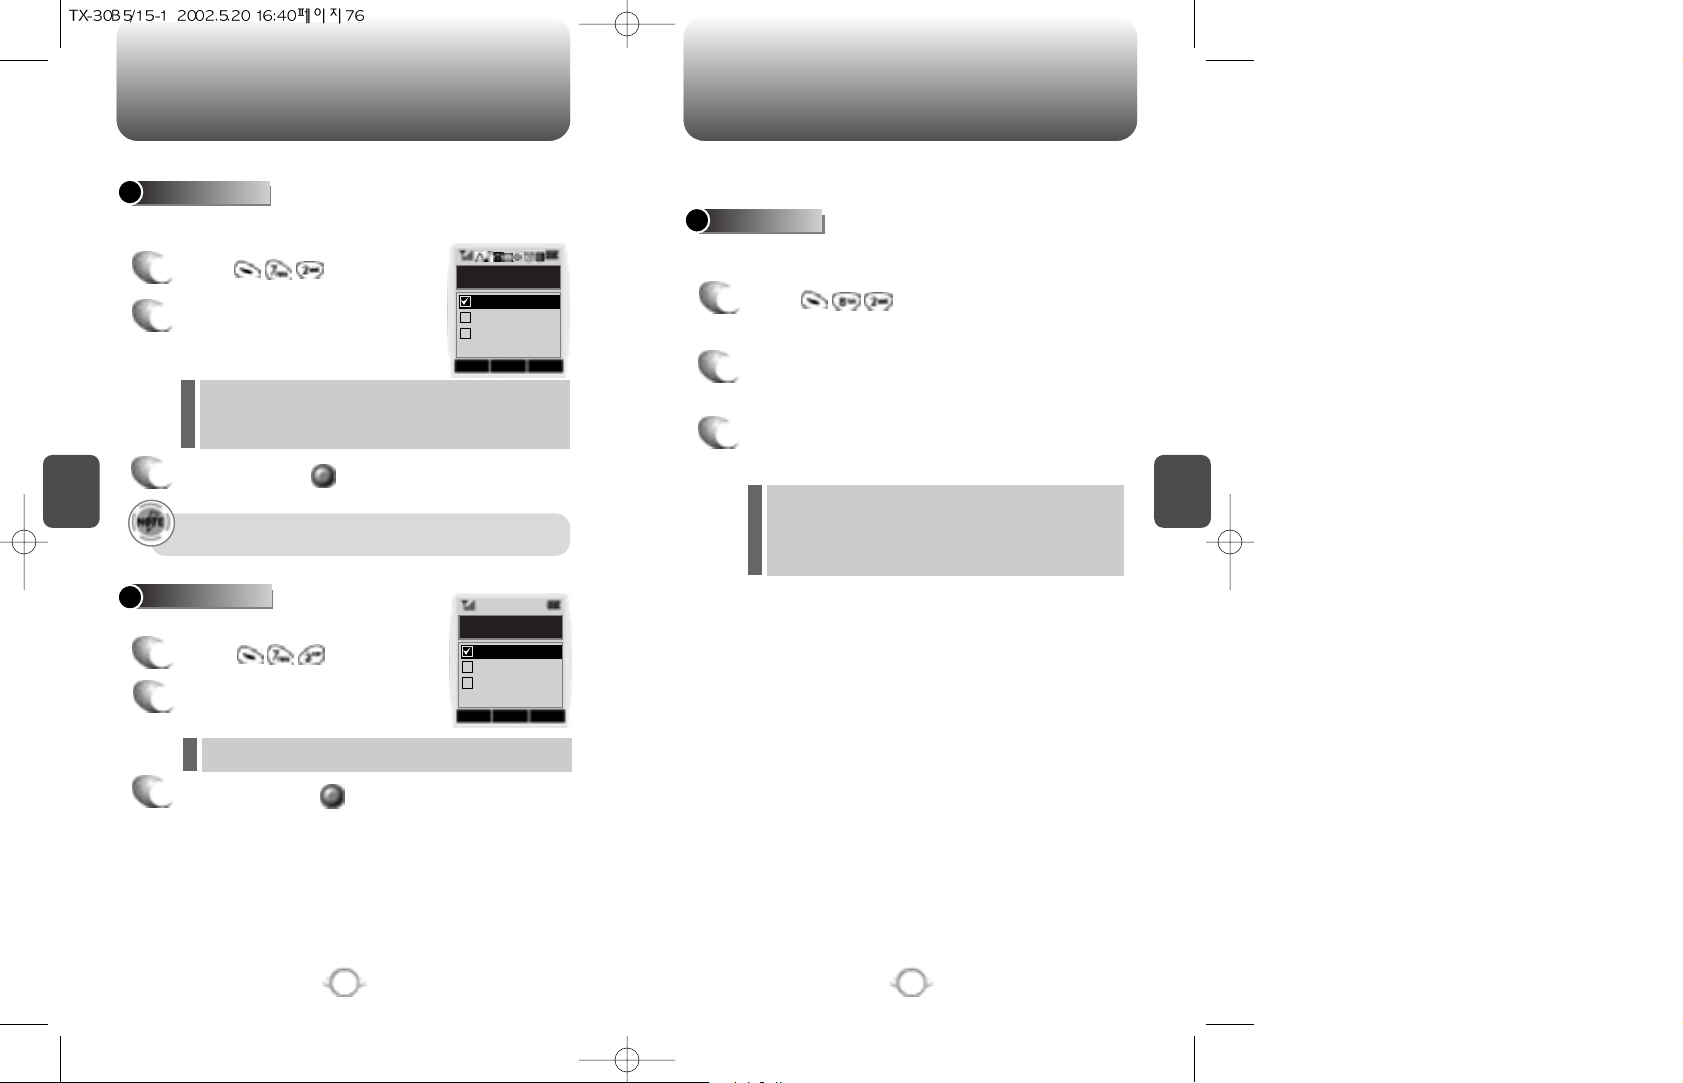
C
H
4
77
LOCATION
C
H
4
76
DATA SVC
Enables Verizon network system to locate your position and allows
the use of some Verizon wireless applications.
Select a connection mode based on how the handset will be used.
To determine whether or not the network system can detect your
position:
1
Press .
2
Press any key when you see a message.
3
Select “Location On” or “911 Only” with the
Navigation key.
SETTING
1
Press .
2
Select one of the following
connection modes with the
Navigation key.
3
To save, press .
CONNECTION
Voice Call : To receive a voice call
Data Only : To receive data when connected to PC.
Fax Only : To function as a fax when connected to PC.
l
l
l
911 Only - Your location will be hidden from
network & application except 911
Location On – Your location is now available to
the network.
l
l
OK CNCL
Connection
Data Only
Fax Only
Voice Call
This function is available only when the phone is connected
to data cable.
Transfers data from to PC.
3
To save, press .
1
Press .
2
Select one of the following data
speed with the Navigation key.
Select a speed that best optimizes data flow.
DATA SPEED
19,200 BPS, 115,200BPS, 230,400BPS
l
OK CNCL
Data Speed
115200 BPS
230400 BPS
19200 BPS
Page 41
C
H
5
79
C
H
4
78
MEMO
VOICE SERVICE
This chapter addresses Voice Service, an advanced feature that allows
you to place calls using your voice. With Voice Memo (VM) you can
record voice messages and set the Answering Machine. Topics
include:
VR Mode
VOICE MEMO (VM)
Call Answer
Voice Command
Voice Dial
Voice Setting
Chapter 5
Page 42
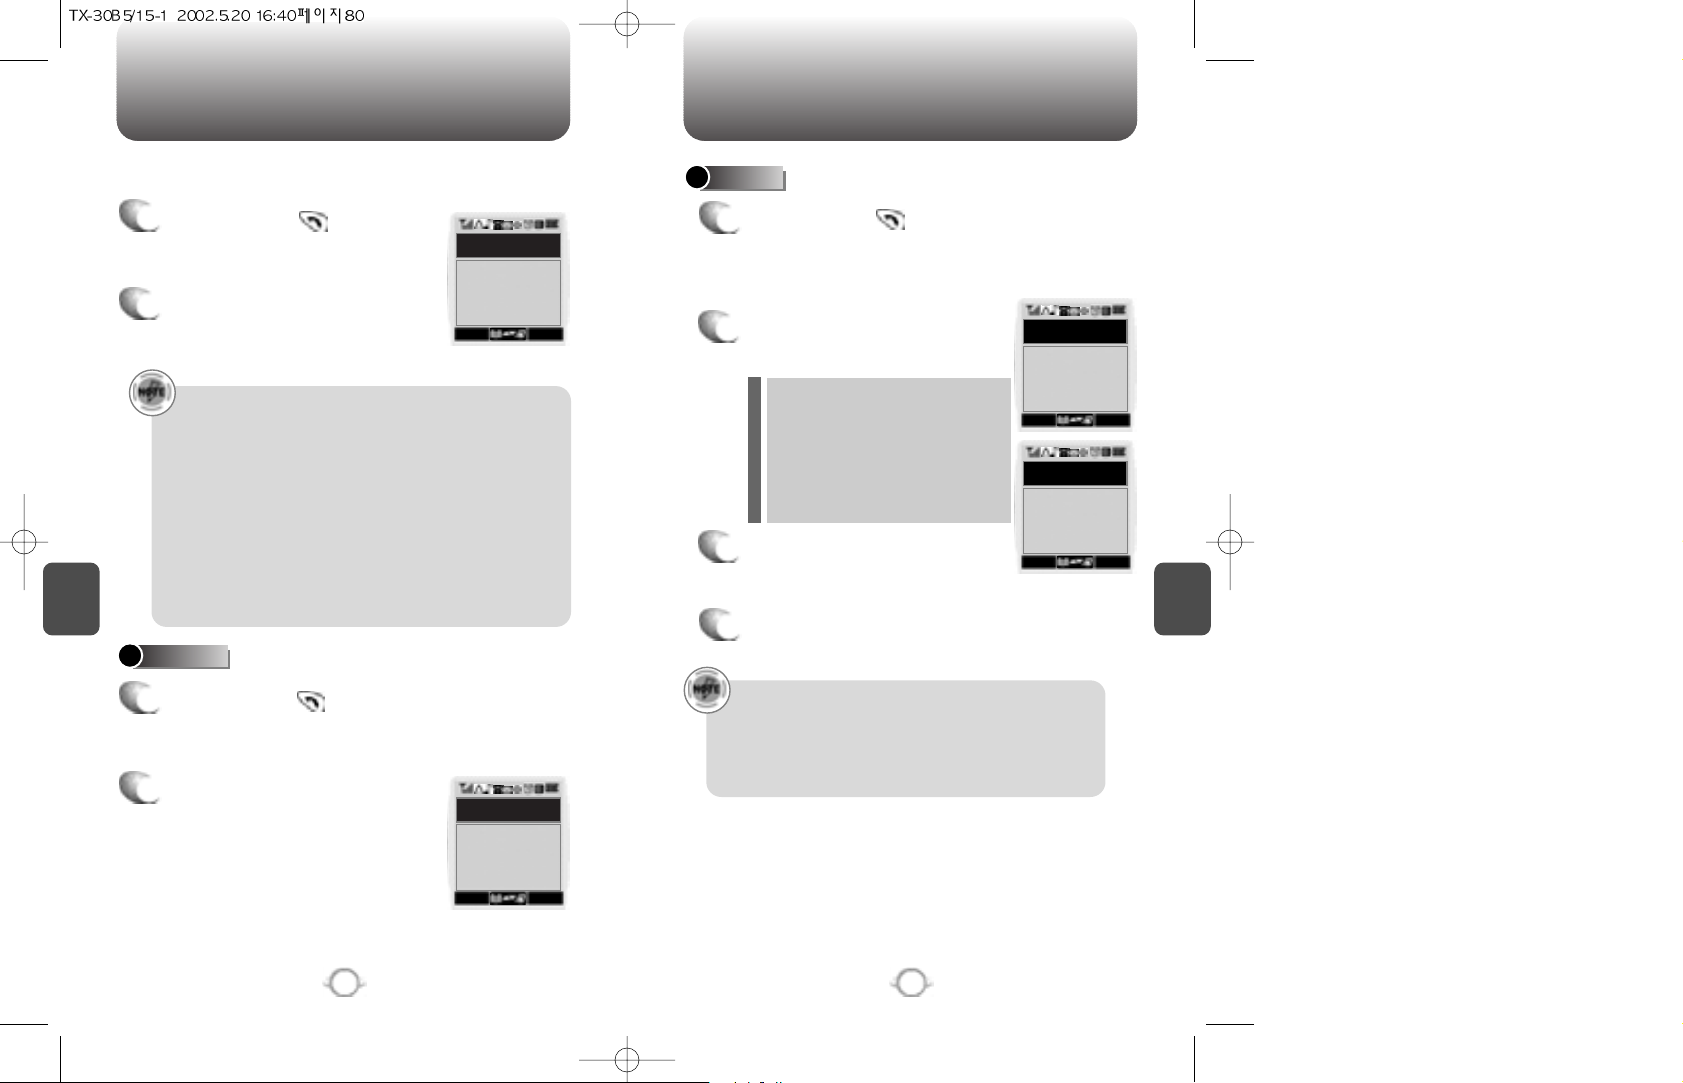
Press and hold until your
phone turns to VR mode.
C
H
5
81
VR MODE
C
H
5
80
VR MODE
NAME
DIAL
Depending on the prompt mode, expert or beginner, you
will hear either of the following prompts. The second prompt
automatically plays when nothing is said. (Please see page
92 for more information on prompt modes.)
Beginner Mode
- 1st : “Main Menu”
- 2nd : “Speak a name to call, or say dial, redial, voice
memo, phonebook or cancel”.
Expert Mode
- 1st : “Main Menu”
- 2nd : “Main Menu”
Once you say your selection, you will be taken through each
of the procedures (name, dial, redial, voice memo, phone
book, cancel).
Voice Recognition (VR) enables you to place calls using your voice
and to record voice memos.
1
Press and hold until your
phone turns to VR mode.
2
The display to the right will
appear when the phone turns
on VR mode.
1
Press and hold until your
phone turns to VR mode.
2
If you say a name or tag that is
already in the phone book, the
number and name will appear on the
display, and you will hear “Calling
<name>”.
2
Say “Dial” in the VR mode and you
will see the display on the right.
3
Press or say the digits of the
phone number.
4
Say “Call” after entering the entire number.
Depending on the prompt mode,
expert or beginner, you will hear
either of the following prompts.
The second prompt automatically
plays when nothing is said.
(Please see page 92 for more
information on prompt modes.)
1
SMS
VR Mode
Say a name or
a command
SMS
Name Dial
Calling....
John smith
720-XXXX
MENU
SMS
Digit Dial
Say digits one at
a time, or command
MENU
SMS
Digit Dial
XX-XXX-XXXX
MENU
MENU
Beginner mode
- 1stprompt :“Digit menu”
- 2ndprompt :“Say digits or verify, cancel, clear,or call”.
Expert mode
- 1stprompt : A sequence of high and low tones sound
- 2ndprompt :“Digit menu”
Page 43
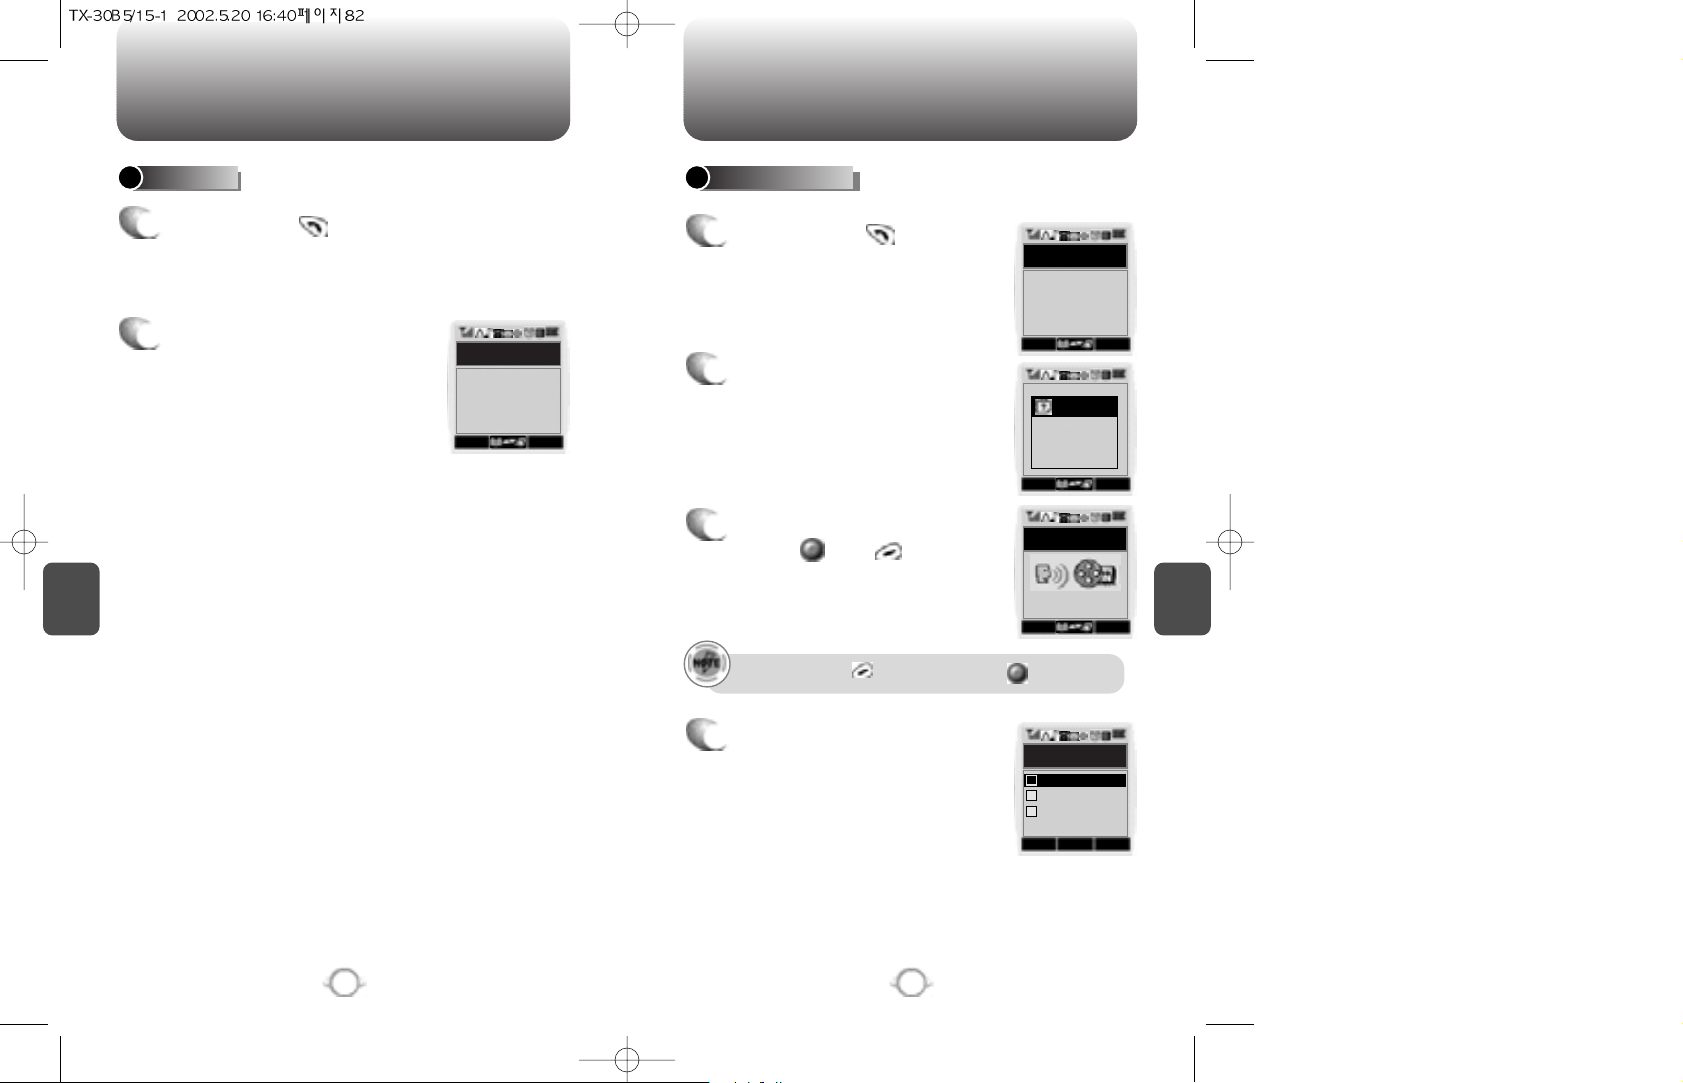
C
H
5
83
VR MODE
C
H
5
82
VR MODE
2
Say “Redial” to dial the last
dialed number.
1
Press and hold until your
phone turns to VR mode.
REDIAL VOICE MEMO
1
Press and hold until your
phone turns to VR mode.
2
Say “Voice Memo” and follow
the steps as instructed in the
display.
3
To stop recording a memo,
press and .
4
After recording a voice memo
you can REVIEW, RE-RECORD,
or SAVE.
To pause, press . To resume, press .
SMS
Redial
Calling...
John smith
720-XXXX
MENU
SMS
VR Mode
Voice Memo
MENU
MENU SMS
note
Please begin
recording after
the prompt tone
MENU SMS
Record
0:55
OK CNCL
Record
Re-record
Save
Review
1
2
3
Page 44
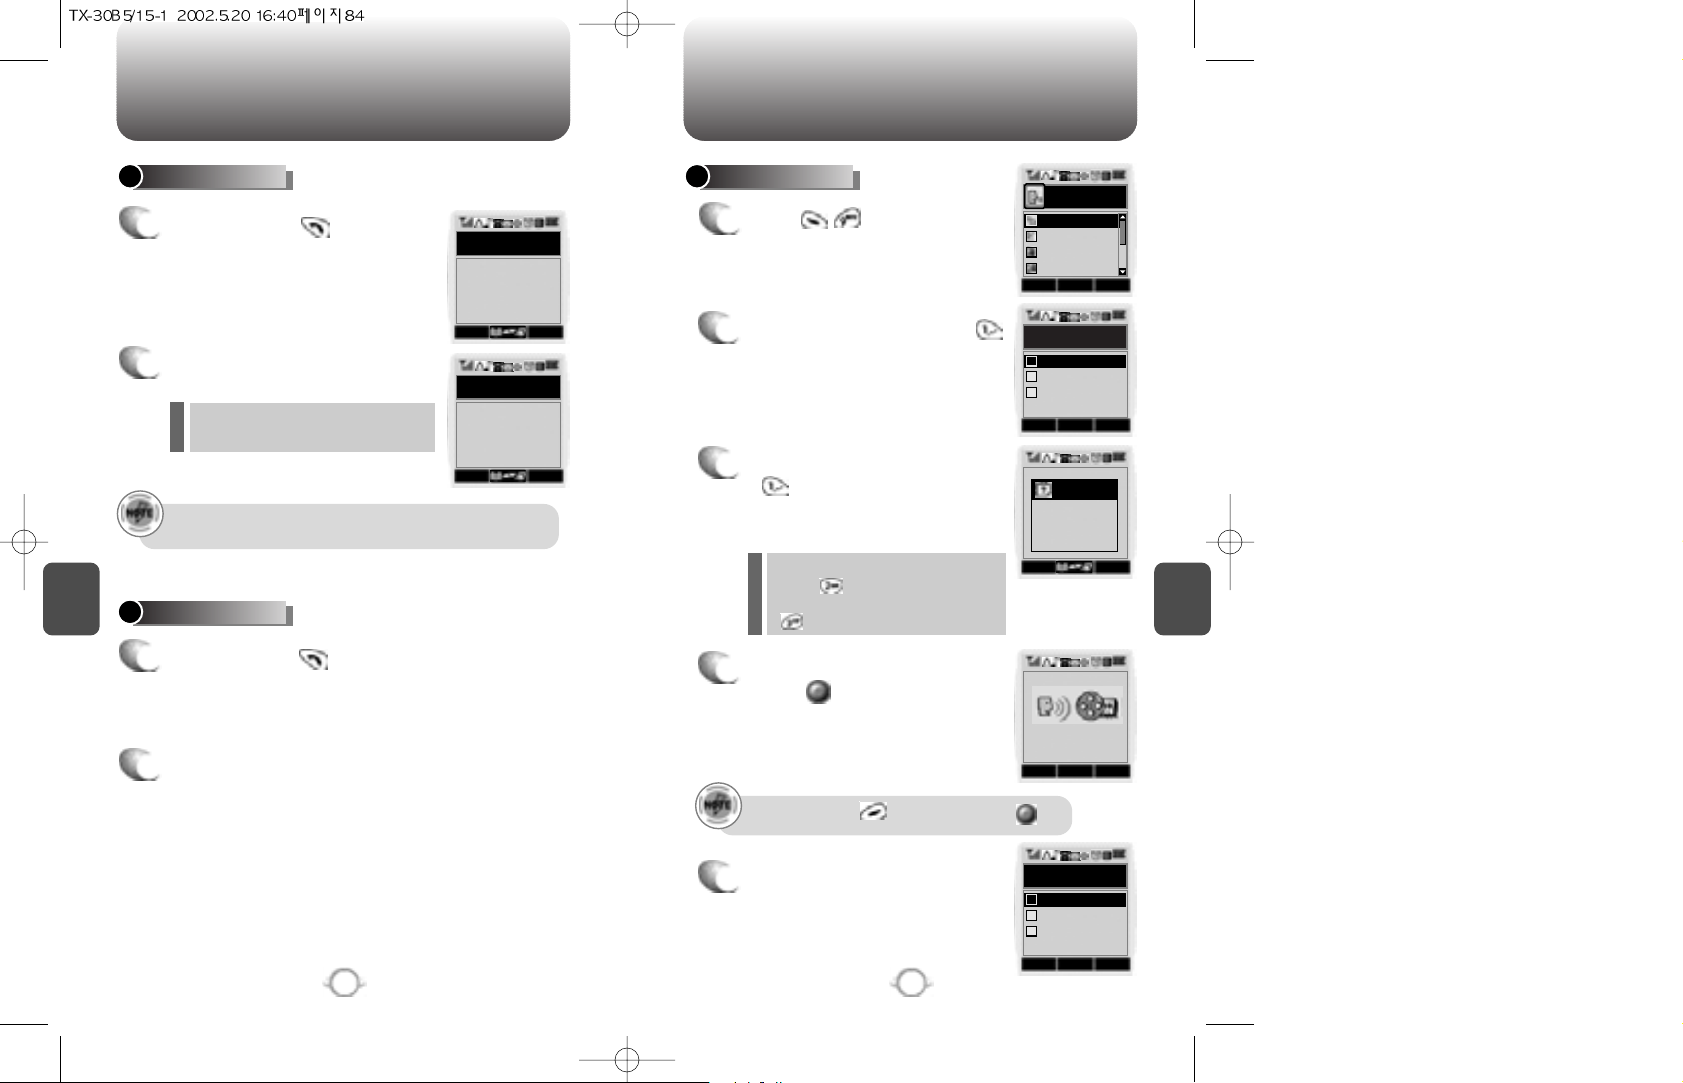
Press and hold until your
phone turns to VR mode.
C
H
5
84
VR MODE
C
H
5
85
VS MENU
1
P
ress to start VS menu.
2
To enter a voice memo, press .
3
To record a voice memo, press
. Instructions will be
displayedand you will hear
“Please record at the tone.”
4
To stop recording a memo,
press .
5
After recording a voice memo
you can REVIEW, RE-RECORD,
or SAVE.
To pause, press . To resume, press .
All phone book entries with voice
tags will appear and be played.
To view and play voice memos,
press .
To erase all voice memos, press
.
l
l
To call a phone number with an attached voice tag, say “yes”
while thevoice tag is playing.
2
Say “Phone book”
2
To exit the VR mode or return to the standby
mode, say “cancel.”
1
1
Press and hold until your
phone turns to VR mode.
PHONE BOOK VOICE MEMO
CANCEL
SMS
Phone Book
Listing Voice tags
MENU
SMS
Phone Book
Kim
720-XXXX
MENU
OK CNCL
Voice Service
Call Answer
Voice Com...
Voice Dial
Voice Memo
MENU SMS
note
Please begin
recording after
the prompt tone
MENU
STOP
PAUS
OK CNCL
Record
Re-record
Save
Review
1
2
3
OK CNCL
Voice Memo
Play
Clear All
Record
1
2
3
0:55
Page 45
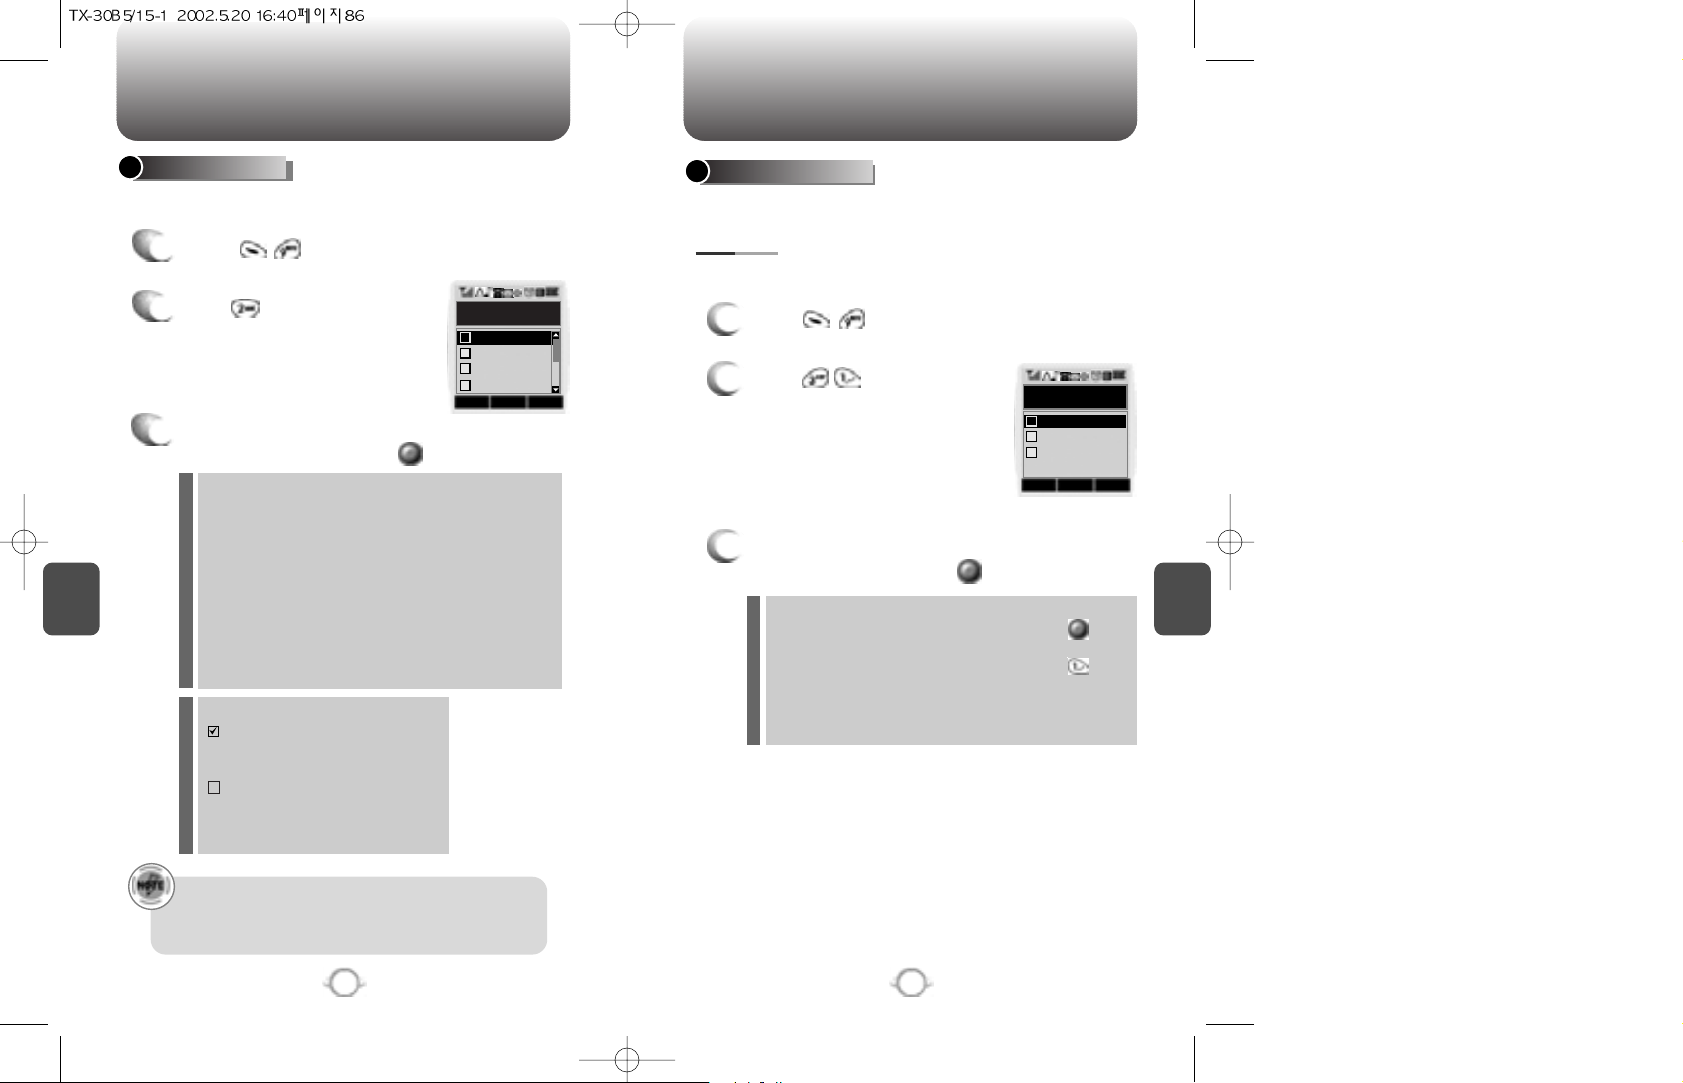
C
H
5
87
VS MENU
C
H
5
86
VS MENU
1
2
P
ress .
ON/OFF : Turns the Auto Answering machine on/off.
INBOX : Play or erase a recorded memo.
GREETING : Add an “s” to the end of “record”; delete
the word “your”
personalized greeting. You have the maximum 30
seconds to record a greeting.
CALL SPEAKER ON (OFF): change “recorded” to
“recording”
WAIT TIME : No Ringer, 5s, 10s, 18s.
The answering machine will be
operated in a specific time.
3
Select one of the following options with the
Navigation key and press .
Helps operate the answering machine.
1
2
P
ress .
List Words : Displays list of control words in the Yes/No
set. Select acontrol word, press and
either train, untrain or view the status of the
word. To train with a word, press and
follow the voice prompts.
Untrain All : Untrain Yes/No set to recognize trained
control words.
3
Select one of the following options with the
Navigation key and press .
Use the Yes/No to train or untrain the VR with the control words, yes
and no.
Trains the Control Words into categories as follows.
VOICE COMMAND
CALL ANSWER
Recording limitation :
There is a 10 voice memo limit including those in Auto
Answering.
Each voice memo has a 60 second limit.
Icons in the stored memo list
: A recorded memo in Answering
machine that you have not
checked yet.
: A recorded memo in Answering
machine that you have already
checked.
OK CNCL
Call Answer
Inbox
Greeting
On/Off
1
2
3
Call Speaker
4
OK CNCL
Train All
Train All
Untrain All
List Words
1
2
3
YES/NO
P
ress .
P
ress .
Page 46
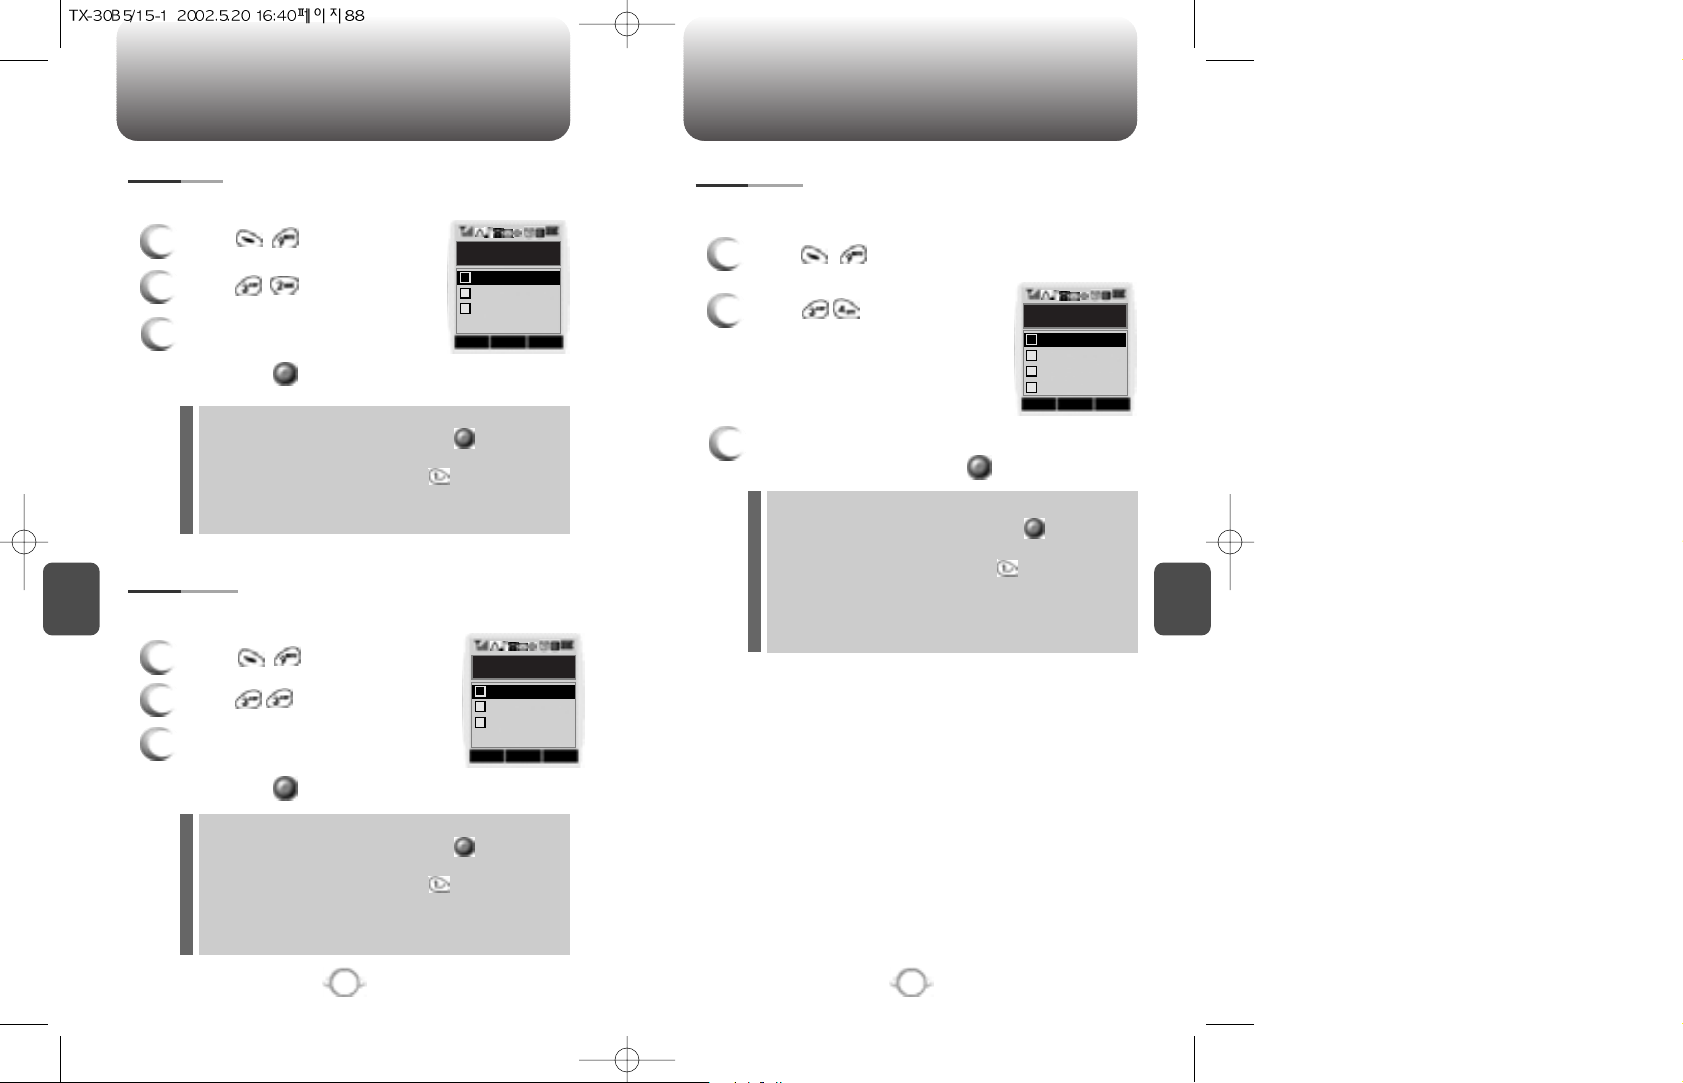
C
H
5
89
VS MENU
C
H
5
88
VS MENU
Use the Wake-Up to train or untrain the VR with the control word, wake
up.
3
Select one of the following
options with the Navigation key
and press .
Use the Top Level to train or untrain the VR with your control words.
(Dial, Redial, Voice memo, Phonebook, Cancel)
3
Select one of the following
options with the Navigation key
and press .
1
2
P
ress .
1
2
P
ress .
1
2
P
ress .
Use the Digit dial to train or untrain the VR with the control words
(1 to 9, Zero, Oh, Verify, Clear, Call)
3
Select one of the following options with the
Navigation key and press .
List Words : Displays list of control words in the Yes/No set.
Select a control word, press and either
train, untrain or view the status of the word. To
train with a word, press and follow the
voice prompts.
Untrain All : Untrain Digit dial set to recognize trained control
words.
OK CNCL
Train All
Train All
Untrain All
List Words
1
2
3
OK CNCL
Train All
Train All
Untrain All
List Words
1
2
3
OK CNCL
Train All
List Words2
Train All
List Words1
1
2
3
Untrain All
3
WAKE UP
TOP LEVEL
DIGIT DIAL
P
ress .
P
ress .
P
ress .
List Words : Displays list of control words in the Yes/No set.
Select a control word, press and either
train, untrain or view the status of the word. To
train with a word, press and follow the
voice prompts.
Untrain All : Untrain Top level set to recognize trained
control words.
List Words : Displays list of control words in the Yes/No set.
Select acontrol word, press and either
train, untrain or view the status of the word. To
train with a word, press and follow the
Untrain All: Untrain Wake-up to recognize trained control
words.
Page 47
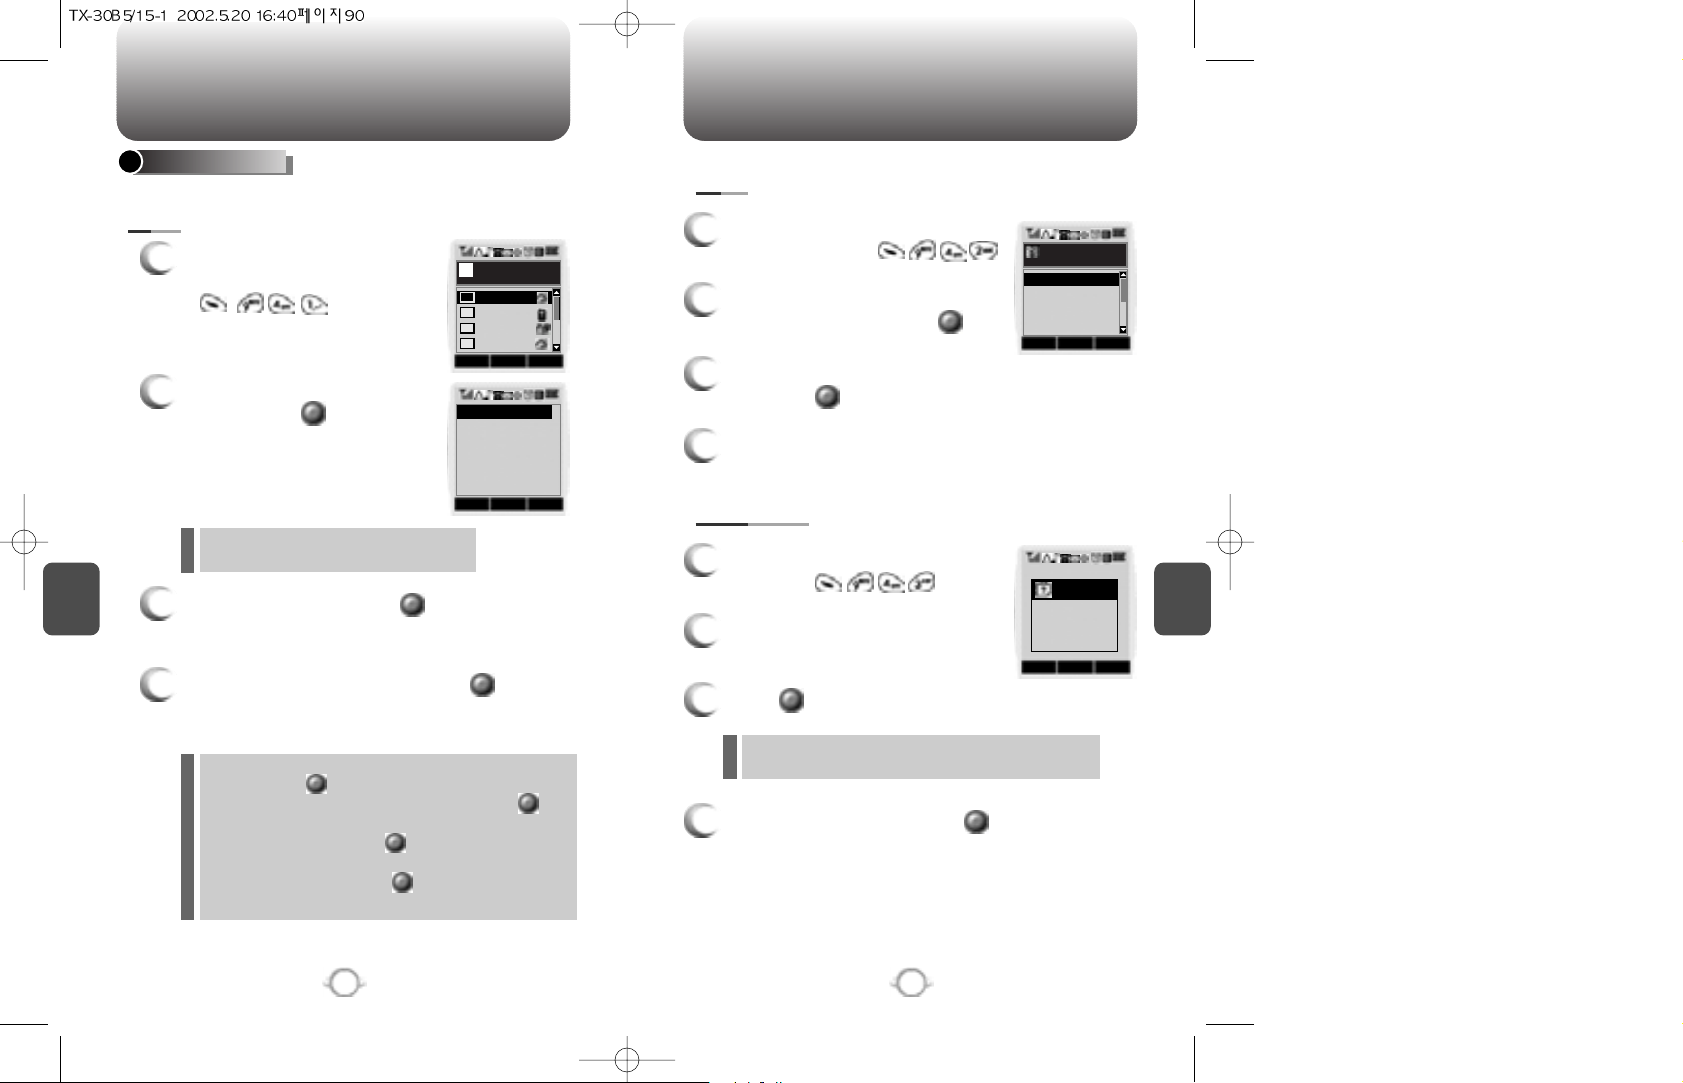
To edit an existing voice tag, press .
C
H
5
91
VS MENU
C
H
5
90
VS MENU
1
To list phone book entries with
attached voice tags, press
.
2
Select one with the Navigation
key and press .
3
To play a voice tag, press (this key is
missing – insert)
4
VOICE DIAL
1
To erase all voice tags in the
list, press .
2
You will see “Removing all
voice tags proceed?”.
OK : Proceed to erase all the voice tags.
CNCL : Return to the previous page.
EDIT : Retrain / Voice Setting / Clear
PLAY : Voice tag play.
1) Retrain - “Retrain Voice Name” displays. Press
then say a name.
2) Voice Setting - “Change” displays. Press ,
select a phone number, then
press again.
3) Clear - “Removing voice names proceed”
displays. Press and “All voice tags
were deleted successfully” appears.
3
Press and you will see a message.
4
To clear all voice tags, press .
1
To add a voice tag to a phone
book entry, press .
2
Select one group with the
Navigation key and press .
3
Select a phone number with the Navigation key
and press .
4
To add the voice tag, say the name.
Lists, adds, or erases phone book entry voice tags.
OK CNCL
Select Name
123
abcdef
ksh
John
01
02
03
04
PLAYEDIT CNCL
[01]John
XXXXXXXXX
OK CNCL
Select Group
Name
Friends
Work
Etc.
Family
OK CNCL
note
Removing
all voice tags
Proceed?
LIST
ADD
CLEAR ALL
Page 48
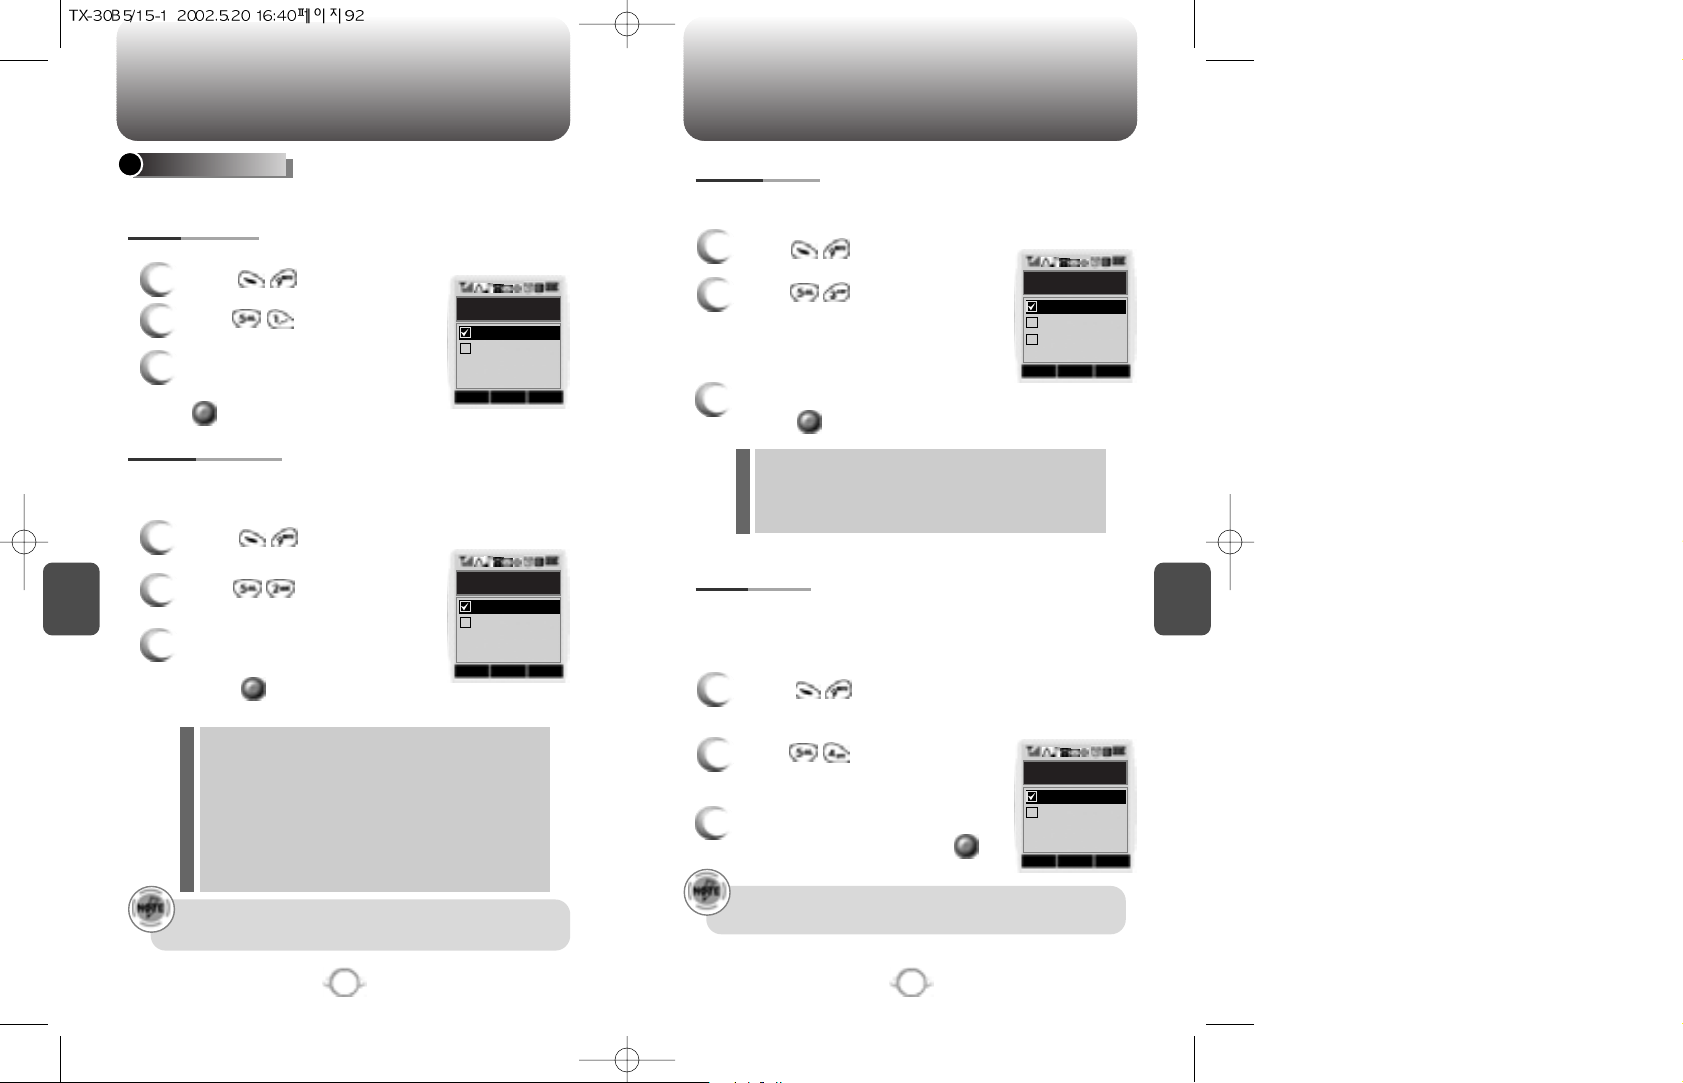
C
H
5
93
VS MENU
C
H
5
92
VS MENU
Use the Untrain All to untrain all trained control words.
3
Select “Yes” or “No” with the
Navigation key and press
.
VOICE SETTING
1
2
P
ress .
1
2
P
ress .
1
2
P
ress .
1
2
P
ress .
Use the prompt mode to select either beginner or expert mode.
The expert mode consists of shorter texts and just beeps as
opposed to the beginner mode that gives full instructions.
3
Select one from Beginner/Expert
with the Navigation key.
Press .
If nothing is said after the 1stand 2ndprompts are heard, VR
will time out and the phone will return to standby mode.
<Beginner mode>
1
st
prompt : “Main Menu ”followed by a short beep.
2
nd
prompt : “Speak a name to call, or say dial, redial,
voice memo, phone book, or cancel”,
followed by a short beep.
<Expert mode>
1
st
prompt : A sequence of low tone and high tone.
2
nd
prompt : “Main menu”.
Use the digit mode to select one of the following options ; ECHO,
BEEP, ECHO+BEEP.
Activates VR feature when phone is in hands free car kit (HFK)
mode.
3
Select one option with the Navigation key and
press .
3
Select “Off” or “On” with the
Navigation key and press .
A beep sounds the first time “Wake-up” is said. The second
time, “Wake-up” is said, the phone changes to VR mode.
ECHO : In VR mode, digit echoes when entered.
BEEP : In VR mode, digit beeps when entered.
ECHO+BEEP : In VR mode, digit echoes and beeps
when entered.
OK CNCL
Untrain All
Yes
No
OK CNCL
HFK Mode
On
Off
OK CNCL
Prompt Mode
Expert
Beginner
OK CNCL
Digit Mode
Echo + Beep
Beep
Echo
UNTRAIN ALL
DIGIT MODE
HFK MODE
PROMPT MODE
P
ress .
P
ress .
P
ress .
P
ress .
Page 49
C
H
6
95
C
H
5
94
MEMO
VOICE MAIL AND TEXT
MESSAGE
This chapter addresses Voice Mail and Text Messaging
functions including:
Sending Messages
Inbox Functions
Outbox Functions
Settings
Filing Messages
Erasing Messages
Chapter 6
Page 50
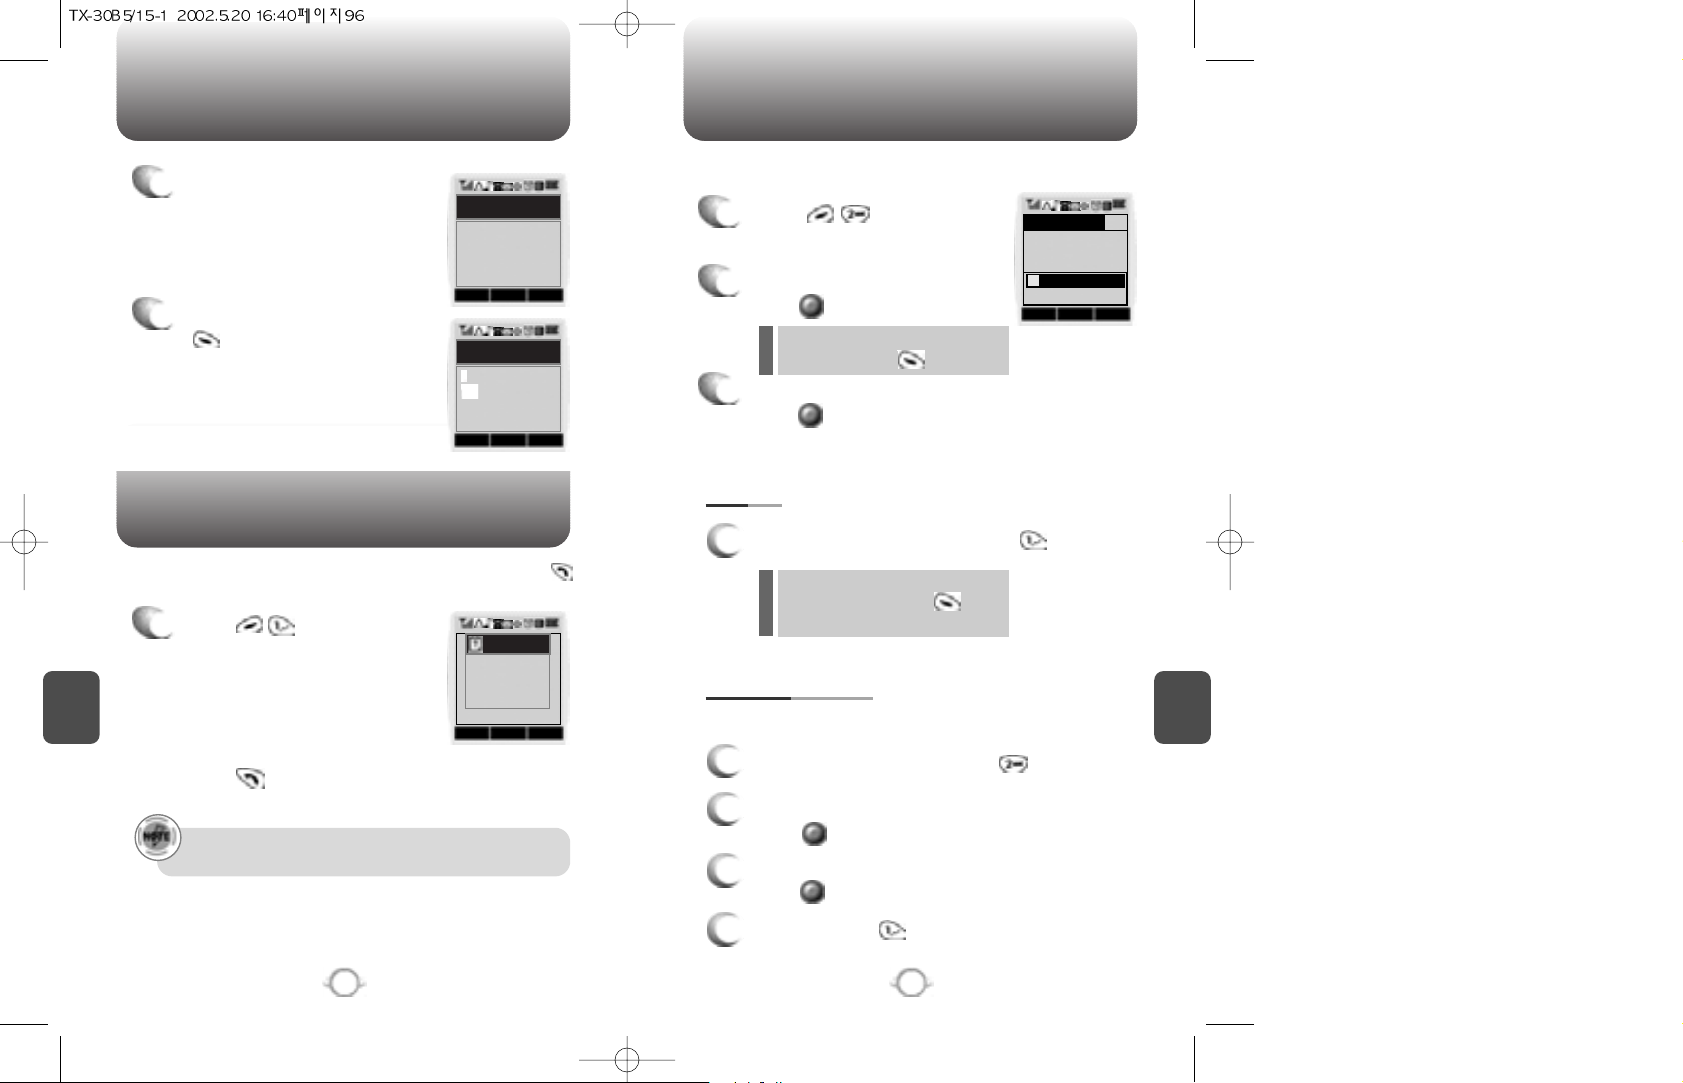
WHEN A NEW MESSAGE ARRIVES SEND NEW
C
H
6
97
C
H
6
96
1
The following display appears
when a new message arrives.
1
Press .
The screen displays the number
of new voice mails in your voice
mailbox.
To access your voice mailbox,
press .
Displays the number of voice mails and accesses them by pressing .
2
To display the message, press
.
1
Press .
2
Input a phone number and
press .
3
Input a text message and
press .
If “Delivery Failed. Retry in 3
mins?” appears, press to
select Auto Retry.
You can look it up from the phone
book by pressing .
1. SEND
1
To send the text message, press .
2. EDIT RECIPIENT
1
To change the recipient, press .
2
Input a new phone number, and
press .
3
Input a new text message, and
press .
4
To send, press .
To send a new message:
Edits the recipient’s information – select if a wrong number is
entered.
VOICE MAIL
(Please refer to page 31 for more details
on entering letters and numbers.)
NEXTPB MODE
1 ...
If there are no messages, “No Voice Message Available”
appears.
READ CNCL
SMS Arrived
XX NEW TEXT
XX VOICE MAIL
Fr : XXX-XXX
-XXX
SEL PREV
Inbox List
TEST1
TEST2
OKDEL CNCL
NUMBER 123
Note
no Voice
message
AVAILABLE!
Page 51
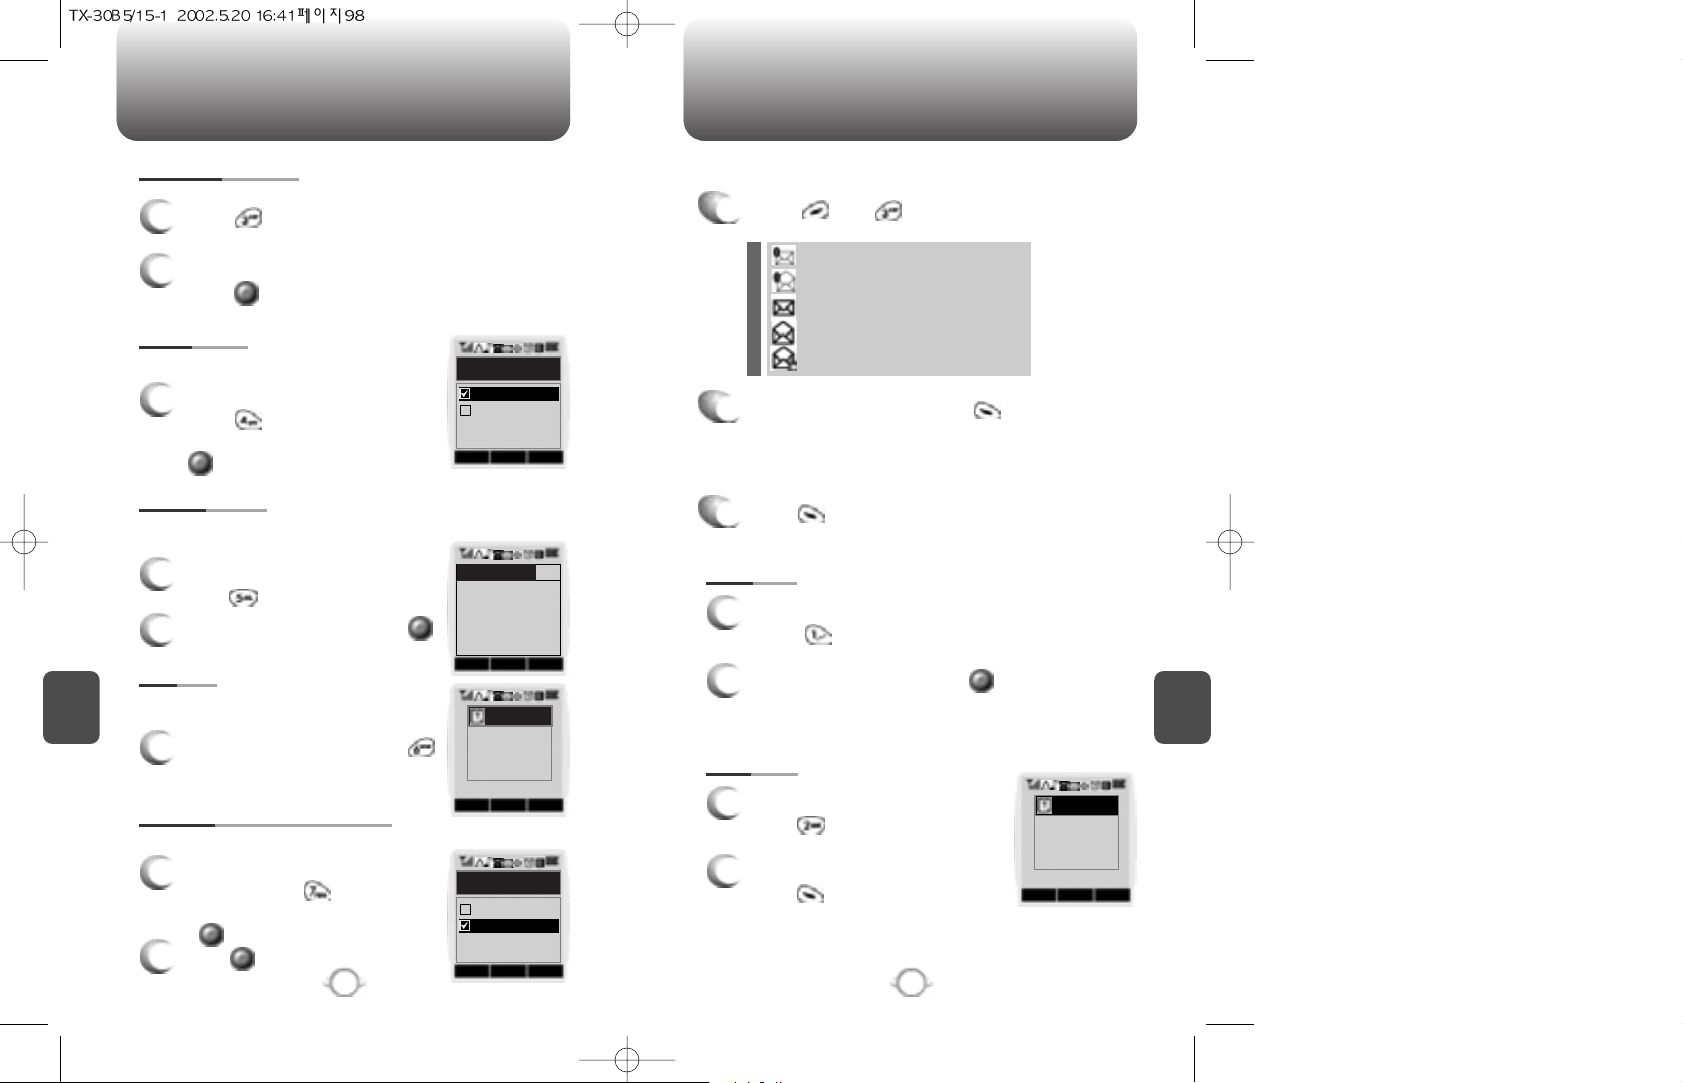
SEND NEW INBOX
C
H
6
99
C
H
6
98
3. EDIT MESSAGE
1
Press to change the text
message.
2
Input a new text message, and
press .
4. PRIORITY
1
To send an urgent message,
press and select “Urgent”
with the Navigation Key. Press
.
5. CALL BACK
1
To change the call back number,
press .
2
Input a call back number and press .
6. SAVE
1
To save the text message, press .
7. REQUEST DELIVERY ACK
1
To confirm that your message is
delivered, press and select
“Yes” with the Navigation Key. Press
.
2
Press .
Marks messages urgent.
Allows you to input a specific call back number. Your phone
number is the default.
This allows you to save the message into
‘Outbox’ folder to use later.
When activated, confirms if message was successfully delivered.
1
Press and .
2
Select a message and press .
The message is displayed.
press .
3
: Urgent New Msg(not read)
: Urgent Read Msg
: New Msg (not read)
: Old Msg (already read)
: Lock (already read and locked)
1. REPLY
1
To reply to the text message,
press .
2
Type your reply and press .
(See page 31 for more information on
entering letters, numbers and characters.)
2. ERASE
1
To erase the text message,
press .
2
When you see “Delete Msg?”
press .
Manages received text messages.
OK CNCL
Priority?
Urgent
Normal
OKPB PREV
CNCL
Note
Message Saved
in ‘outbox’ folder
OK CNCL
Request Deliv. Ack
NO
YES
YES NO
Warning
ERASE
THIS MESSAGE?
Callback Number 123
Page 52
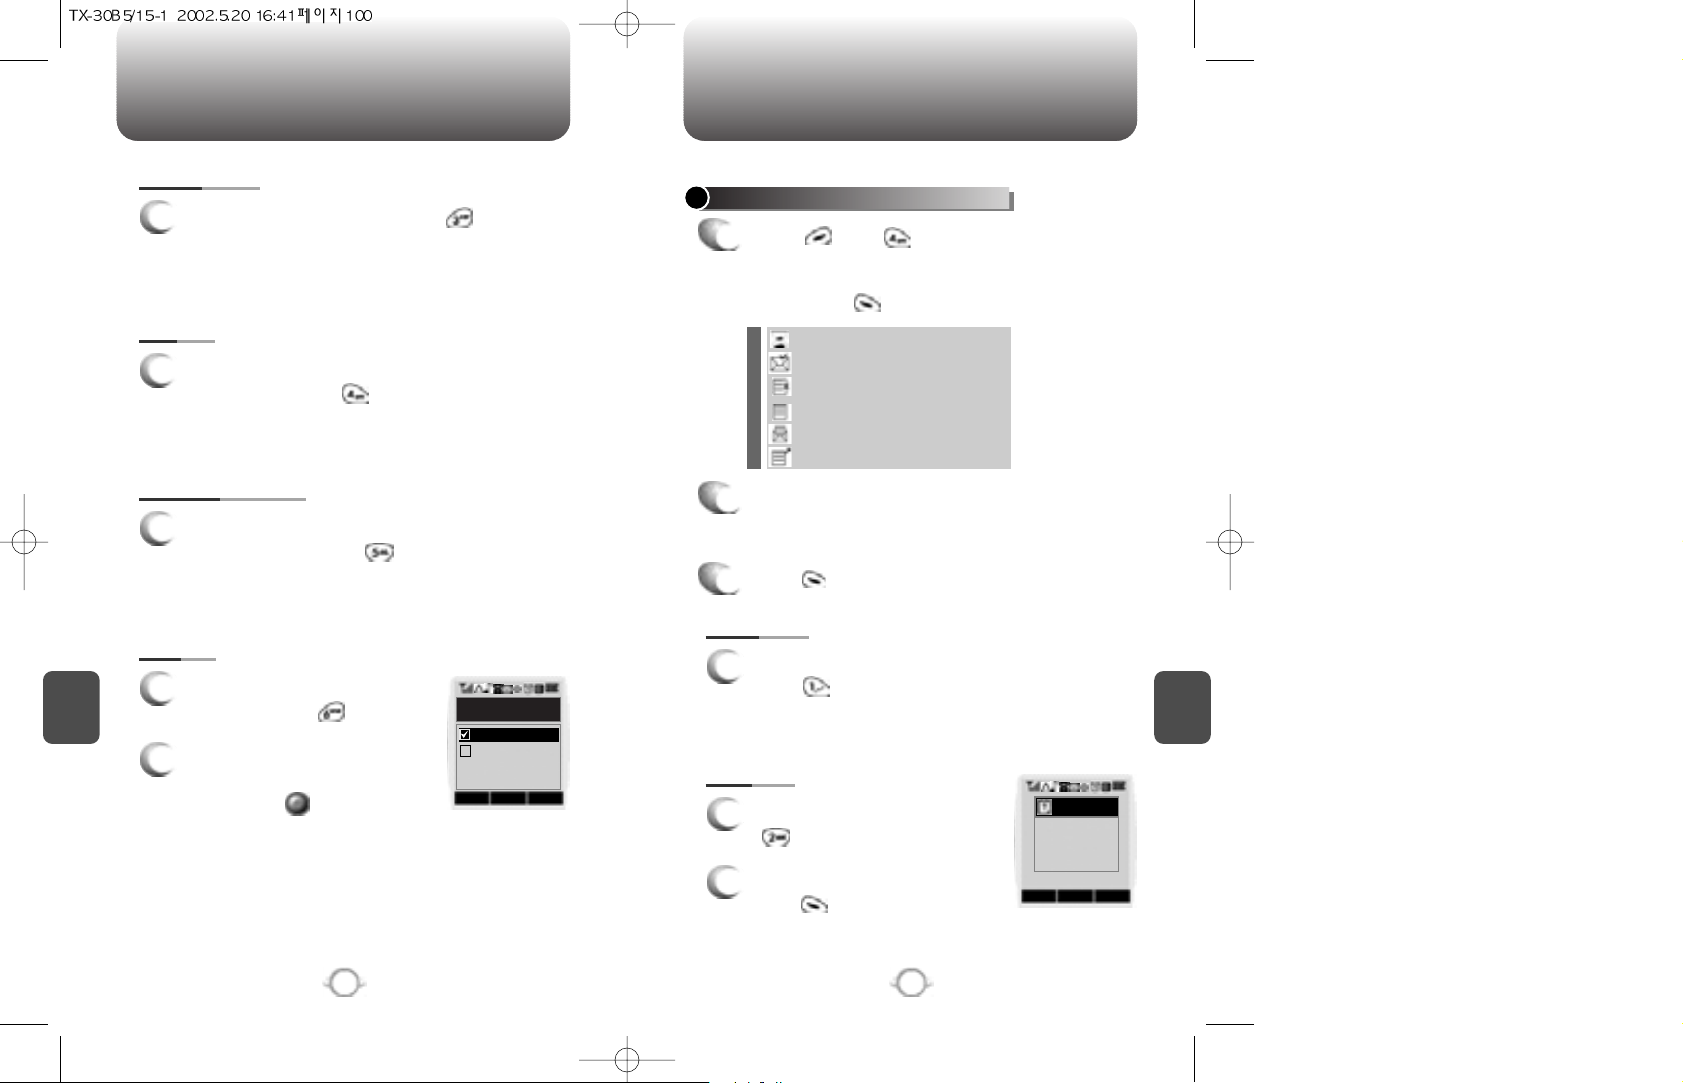
: Auto resend
: Delivered
: Fail
: Not send
: Read
: Sent
INBOX OUTBOX
C
H
6
101
C
H
6
100
3. FORWARD
1
To erase a text message, press .
4. SAVE
1
To save a text message in the
Filed Folder, press .
5. SAVE ADDRESS
1
To save the call back number of a message into
the phonebook, press .
6. LOCK
1
To lock or unlock a text
message, press .
2
Select “Lock ”or “Unlock” with
the Navigation key.
Then, press .
CHECKING SENT TEXT MESSAGES
1
Press and
Select a message with the
Navigation key.
Then, press .
2
The text message is displayed.
press .
3
1. RESEND
1
To resend a text message,
press .
2. ERASE
1
To erase a text message, press
.
2
When you see “Delete Msg?”
press .
Manages sent text messages or messages waiting to be sent.
OK CNCL
Lock&Unlock
Unlock?
Lock?
YES NO
Warning
ERASE
THIS MESSAGE?
Page 53
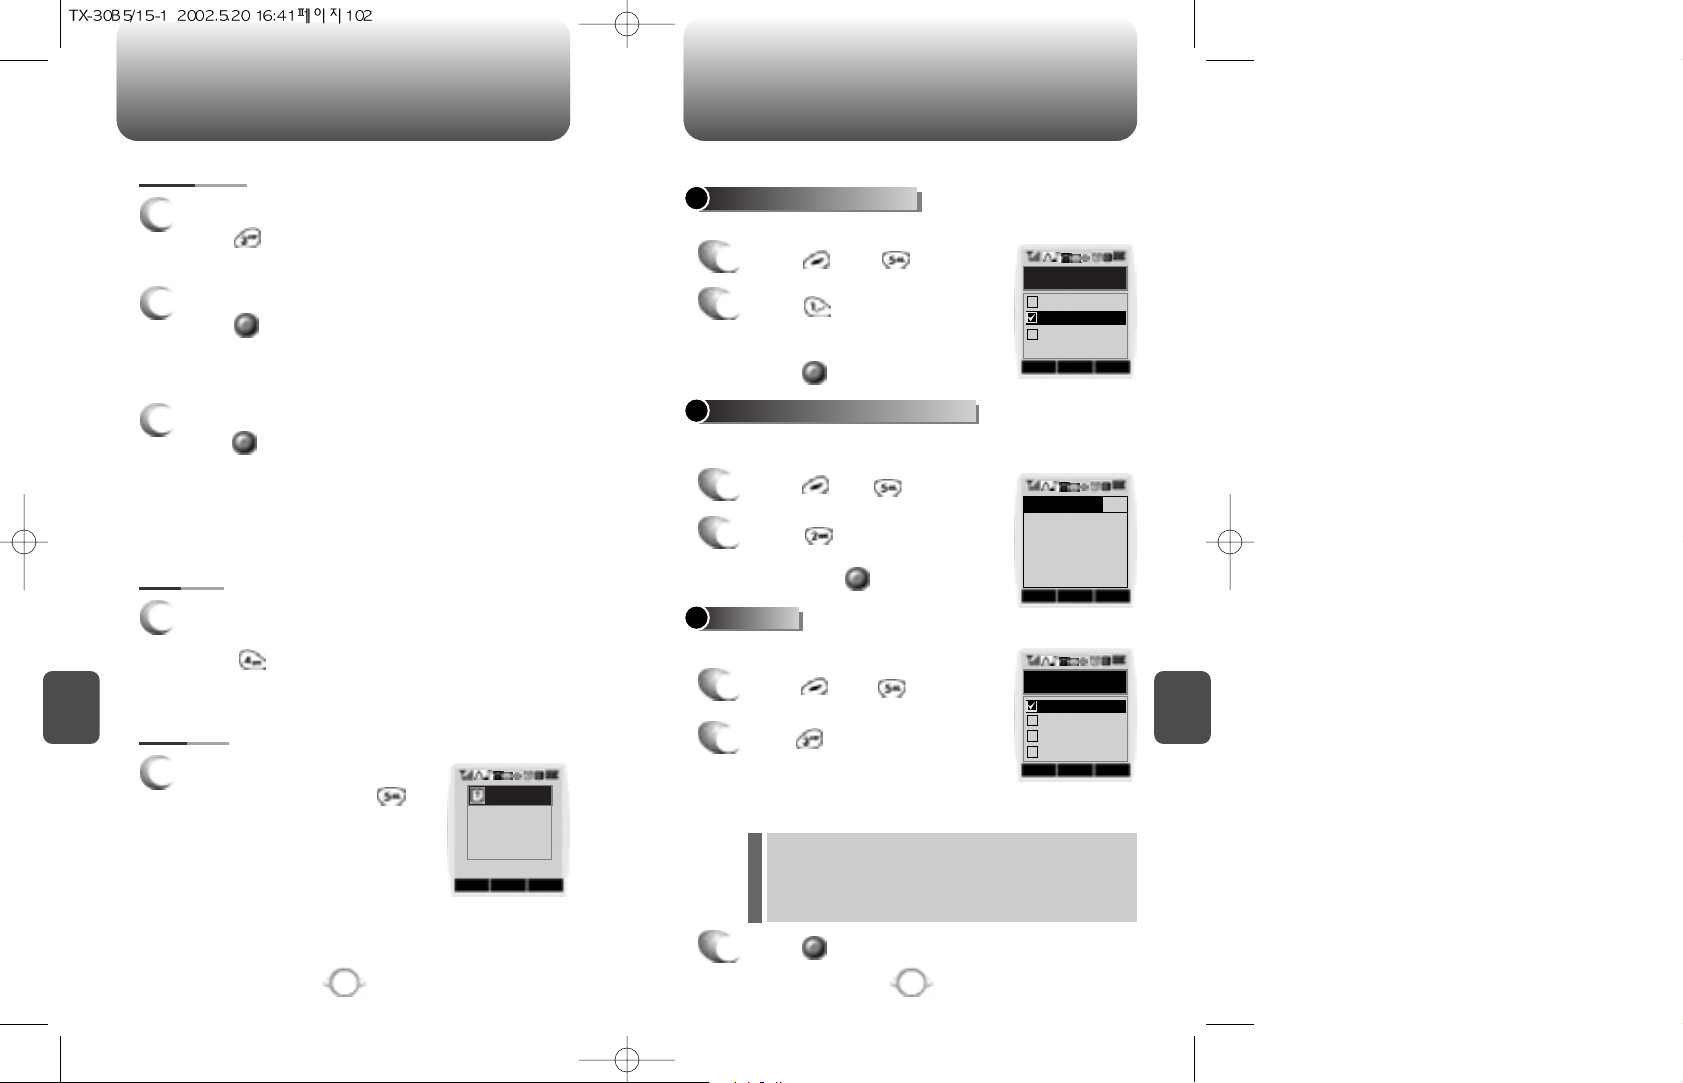
OUTBOX SETTINGS
C
H
6
103
C
H
6
102
4. SAVE
1
To save the outbox text
message in the Filed Folder,
press .
5. STATE
1
To display the status of an
outbox message, press .
3. SEND TO
1
To send a message to another person,
press .
2
Input phone number and
press .
3
Input a text message and
press .
SAVE SENT MESSAGES
1
Press then, .
2
Press .
Select one from No/Yes/Prompt
with the Navigation key.
Press .
DEFAULT CALL BACK NUMBER
1
Press and, .
2
Press .
Input a call back number.
Then press .
ALERT
1
Press then .
2
Press .
Select one from the Ringer/Vibrate/
Silent/Ringer & Remind/Vibrate &
Remind with the Navigation key.
3
Press .
Manages messaging features through various features.
Saves every sent message.
Edits a default call back number so that the recipient can call back or
reply.
Enables phone to alert you of an incoming message..
The Ringer & Remind or Vibrate & Remind rings or
vibrates every 2 minutes to remind you of an
incoming message. They will be cleared when any
key is pressed.
CNCL
Note
Cause_Code:00
Error_Code:00
OKPB PREV
OK CNCL
Save Sent Msg?
PROMPT
NO
YES
OK CNCL
Set Bell
Silent
Ringer & Re..
Vibrate
Ringer
Callback Number 123
Page 54
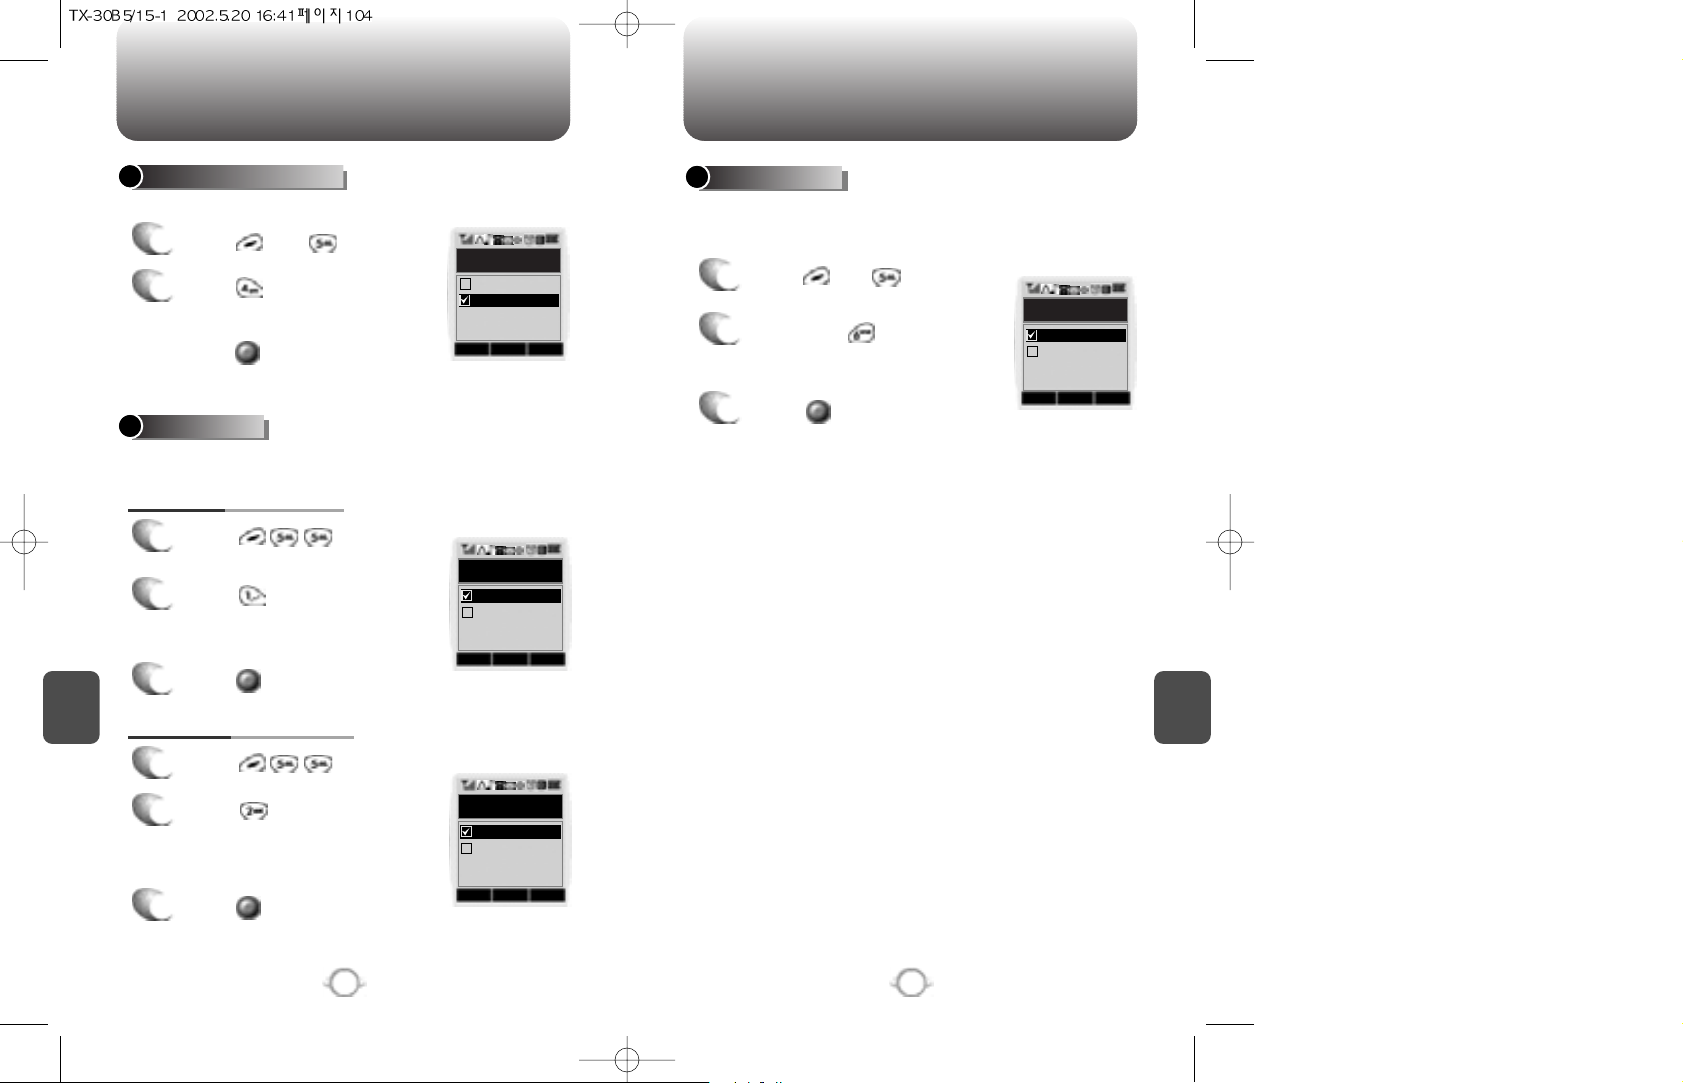
C
H
6
105
SETTINGS
HANDSET DESCRIPTION
C
H
6
DISPLAY DELIV.ACK
104
SETTINGS
1
Press and, .
2
Press .
Select one from No/Yes with the
Navigation key.
Press .
OK
CNCL
NO
YES
Display Deliv.ACK
AUTO ERASE
1
Press .
2
Press .
Select “Disable” or “Old Inbox”
with the Navigation key.
Automatically erases inbox/outbox messages when new messages
arrive.
3
Press .
1. AUTO ERASE INBOX
1
Press .
2
Press .
Select “Disable” or “Old Outbox”
with the Navigation key.
3
Press .
2. AUTO ERASE OUTBOX
OK CNCL
Inbox
Old Inbox
Disable
OK CNCL
Outbox
Old Outbox
Disable
ENTRY MODE
1
Press and .
2
Then press .
Select “T9 Mode ”or “Alpha
Mode ”with the Navigation key.
3
Press .
Sets an Entry Mode as a default.
The T9 mode indicator will appear whenever the input mode is
activated if the T9 mode is the default.
OK CNCL
Entry Mode
T9 Mode
Alpha Mode
Page 55
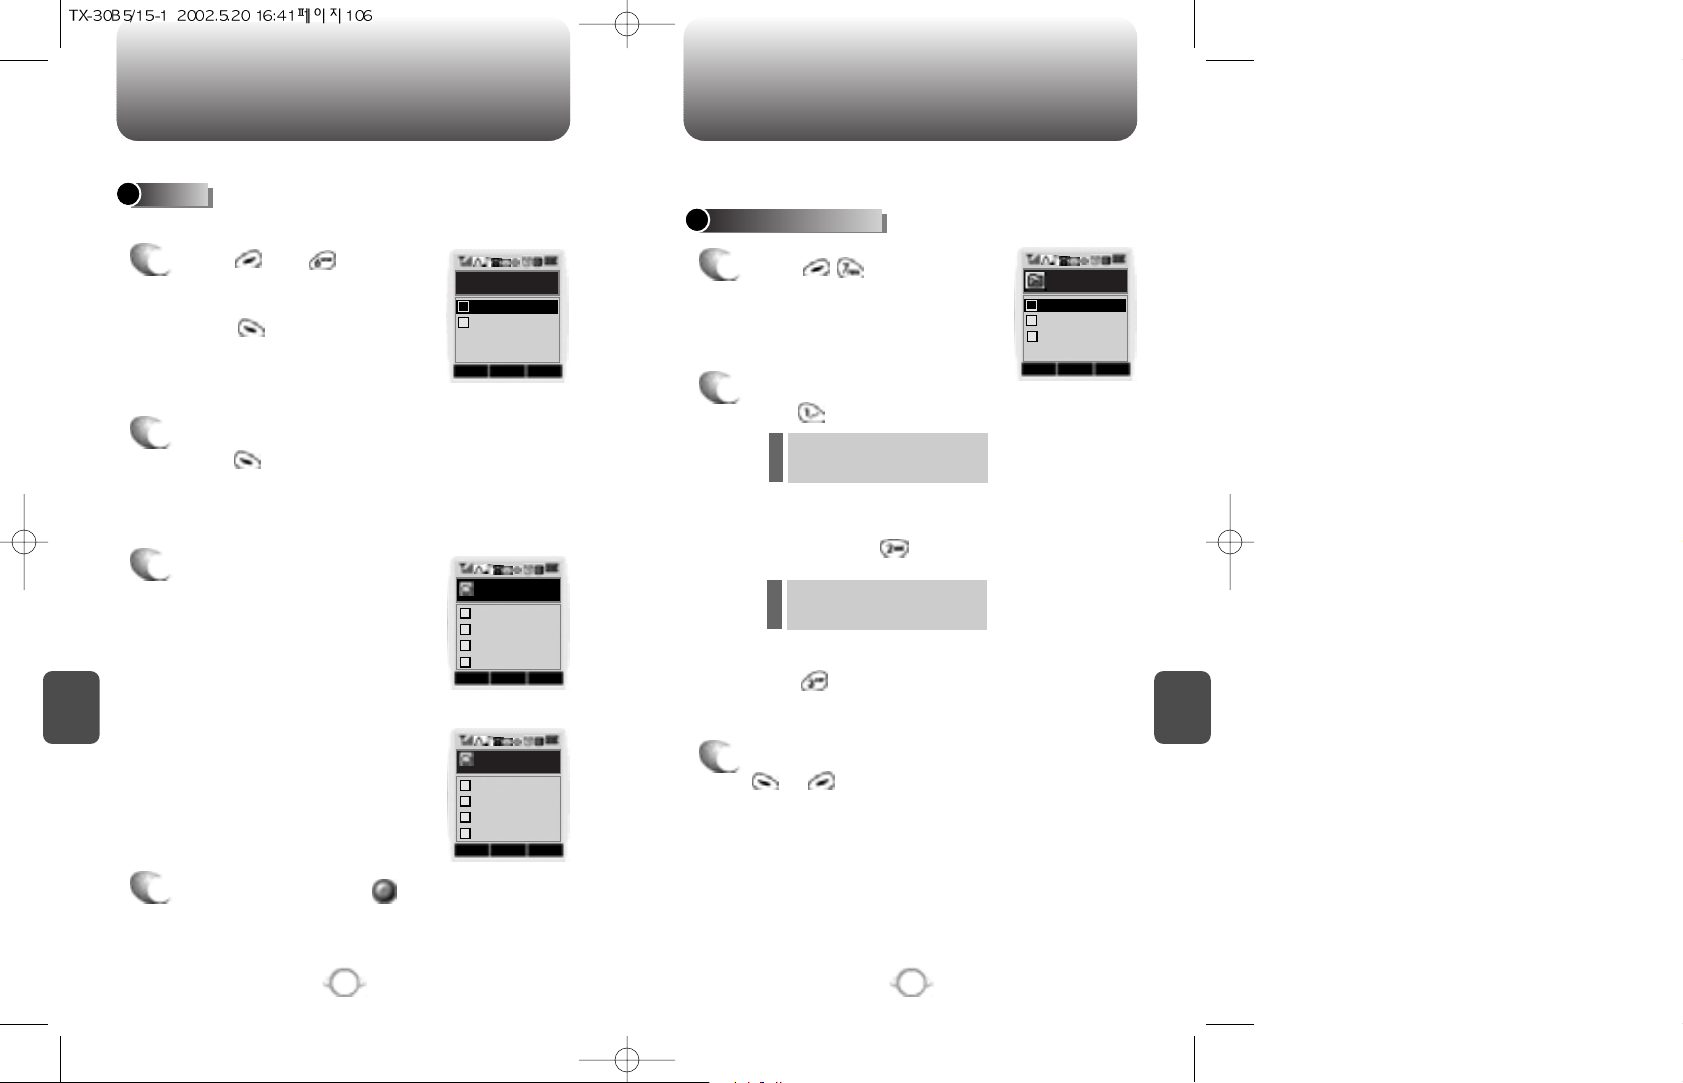
FILED ERASE ALL
C
H
6
107
C
H
6
106
Manages saved messages from the Inbox/Outbox.
FILED
1
Press and .
Select a text message with the
Navigation key.
Press .
2
The text message is displayed.
Press .
3
If the text message is saved
from the “Inbox” menu, this
screen will be displayed.
4
Select one by pressing .
If the text message is saved
from the “Outbox ” menu, this
screen will be displayed.
SEL PREV
Filed List
AAAAA
TEST 1
CNCL
Filed Option
Erase
2
Forward
3
Save Address
4
OKOKCNCL
Filed Option
Erase
2
Resend
1
Reply
1
Send to
3
State
4
ERASE MESSAGES
1
Press .
2
1. To erase all the inbox messages,
press .
3
Select “Yes” or “No” with
or .
2. To erase all the outbox
messages, press .
3. To erase the filed messages,
press .
Erases all the messages from the Inbox, Outbox or Filed folder.
Erases entire inbox or old
inbox.
OK CNCL
Erase All
Outbox(xx)
Inbox(xx/xx)
1
2
Filed(xx)
3
Erases entire outbox or old
outbox.
Page 56
MEMO
WEB BROWSING
This chapter addresses Internet services and web browsing.
For more detailed information contact your service provider.
Chapter 7
C
H
7
109
C
H
6
108
Page 57
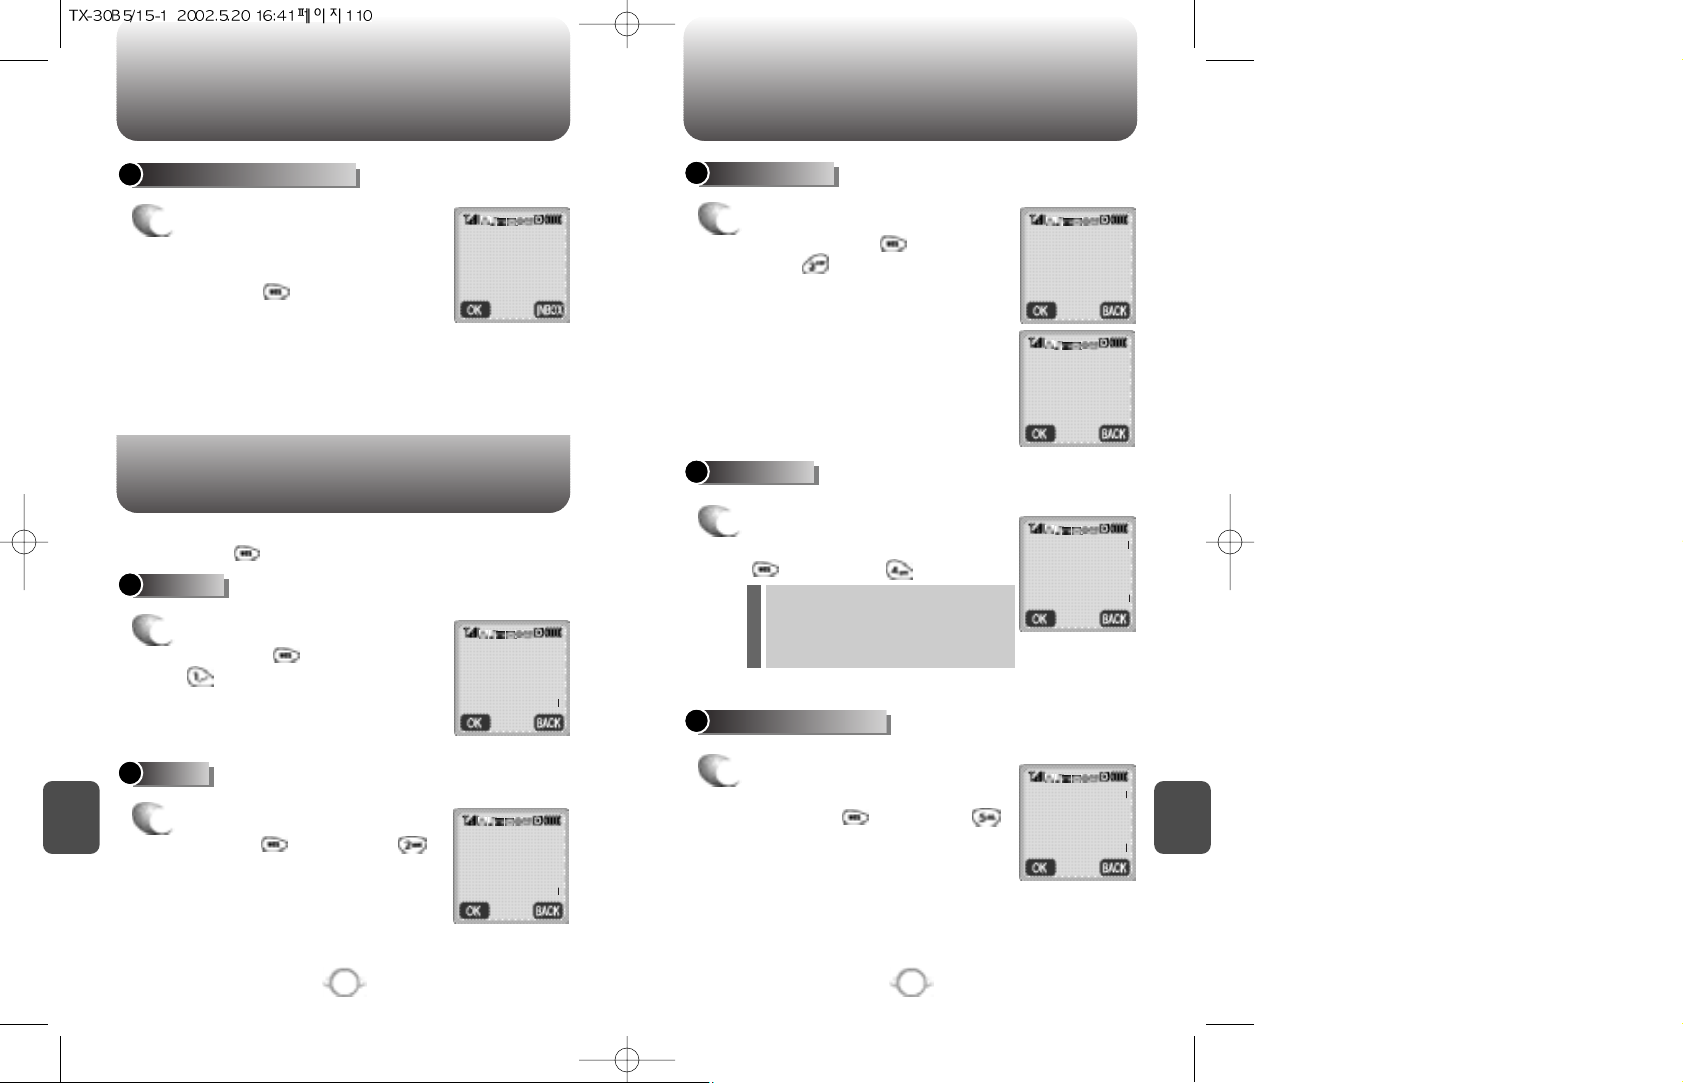
START INTERNET BROWSER BROWSER MENU
C
H
7
111
C
H
7
110
RELOAD
1
To reload the current page
Press hold then, press
.
ACCESS THE INTERNET
1
To start your Internet browser
and access websites through
your wireless handset Press
and hold .
HOME
1
to display the homepage Press
and hold then, press .
1 >Email
2 Contacts
3 Calendar
4 To do’s
5 Bookmarks
Browser Menu
1 >Reload
2 Home
3 Bookmarks
4 Mark Site
Browser Menu
1 Reload
2 >Home
3 Bookmarks
4 Mark Site
▼
▼
BOOKMARKS
1
To view your bookmark list,
press and hold , then
press .
This provides easy website
access without entering its
URL.
Browser menu
1 Reload
2 Home
3 >Bookmarks
4 Mark Site
Bookmarks
1 >Func3-Comp
2 Func3-Oem
3 Icon
4 Demo..Icon2
▼
MARK SITE
1
To add the current page to
your bookmark list Press hold
then, press .
“No bookmark service site ”is
displayed when the Internet site
cannot support the bookmark
service.
1 Reload
2 Home
3 Bookmarks
4 >Mark Site
5
About Openwave
▼
▼
ABOUT OPENWAVE
1
to view the browser version
and copyright information
Press hold then, press .
1 Reload
2 Home
3 Bookmarks
4 Mark Site
5 >
About Openwave
▼
▼
BROWSER MENU
The browser menu lists the actions necessary to operate the browser.
Press and hold to access the browser menu.
Page 58
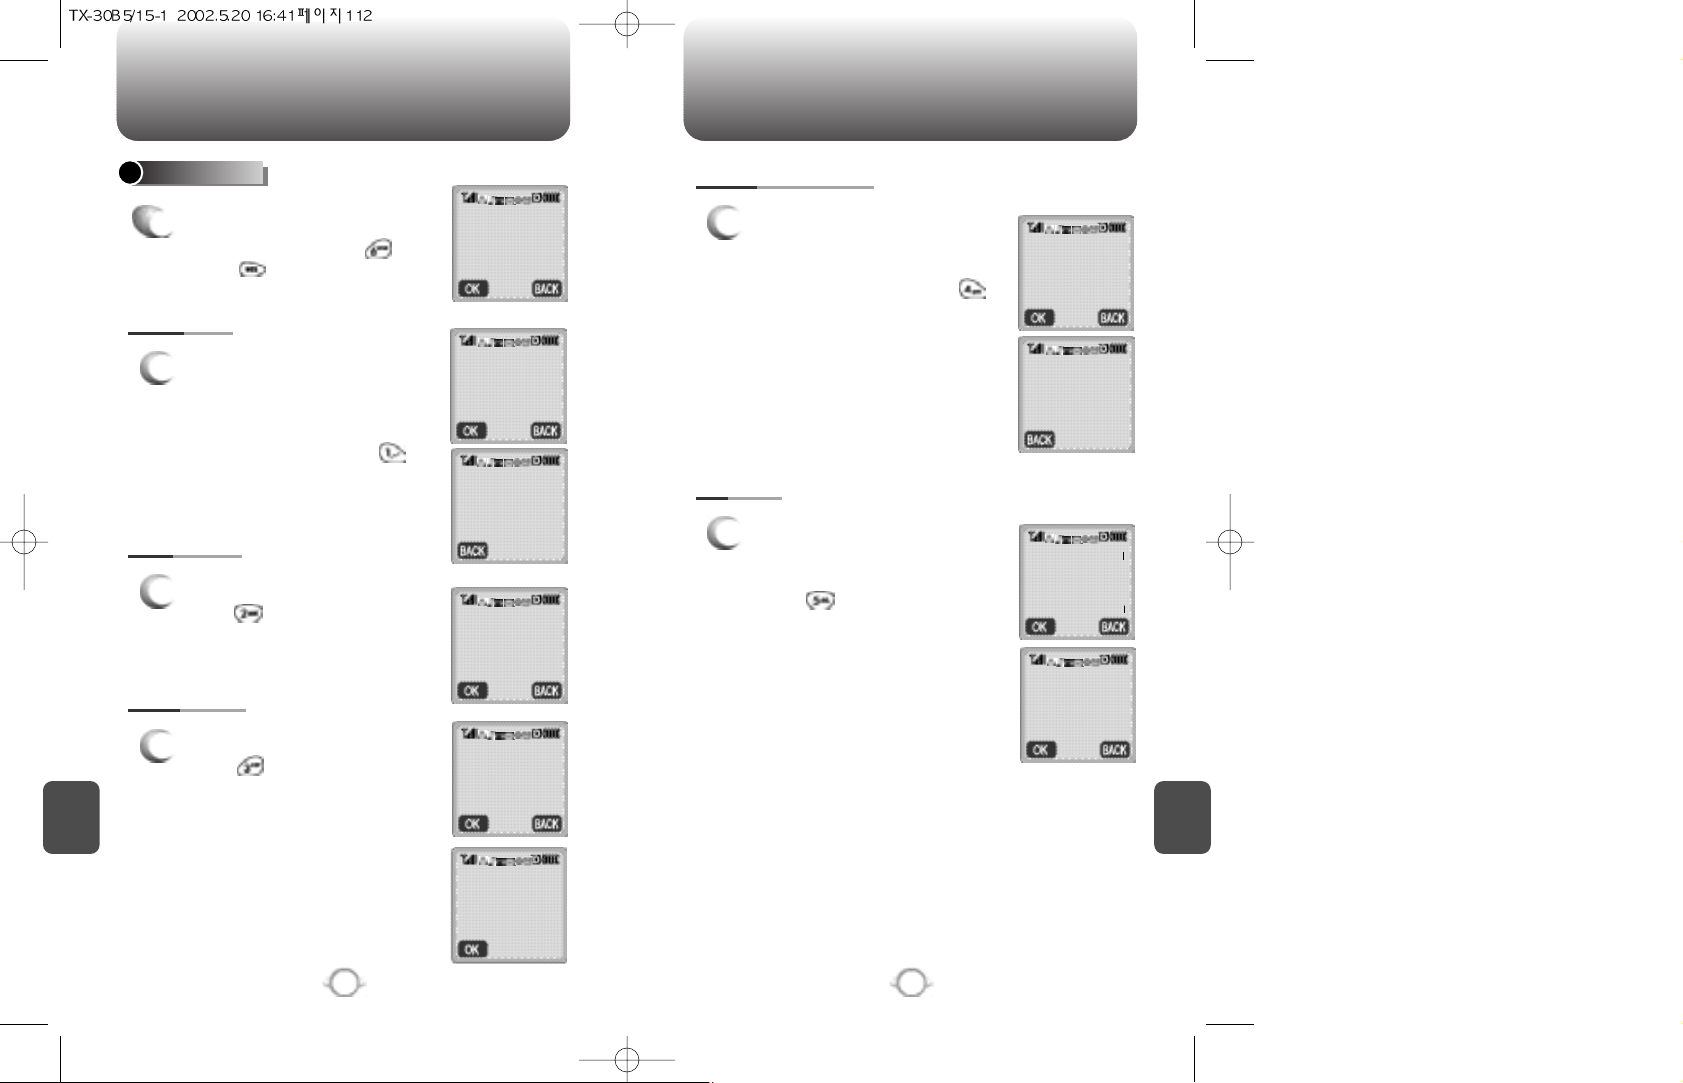
BROWSER MENU BROWSER MENU
C
H
7
113
C
H
7
112
1
To display the URL (Uniform
Resource Locator) of the current
page.
The URL is the address of a
website Press and hold .
SHOW URL
1
To change your homepage,
press . This is the first page
you will see when you access
the Internet.
HOMEPAGE
1
To select an alternate up.Link
Press .
SET UP.LINK
ADVANCED...
1
Tdisplay the following Advanced
menu, press and hold ,then
press .
2 Home
3 Bookmarks
4 Mark Site
5
About Openwave
6 >Advanced..
Advanced
1 >Show Url
2 Hompage
3 Set up. link
4 Offline
Advanced
1 Show url
2 >Hompage
3 Set up. link
4 Offline
Advanced
1 Show URL
2 Hompage
3 >Set UP. Link
4 Offline
1 >Link 1
2 Link 2
3 Link 3
http://www
Curitel.com/index
1
To navigate through the list of
installed channel applications
and guide you to the entry point
of the applications Press .
OFFLINE SERVICES
1
To display the number of items
that are delivery-pending and
how long they have been there
Press .
OUTBOX
Advanced
1 Show Url
2 Hompage
3 Set up. link
4 >Offline
2 Homepage
3 Set up. link
4 Offline
Service
5 >Outbox
OutBox
(Empty)
Offline Services
(Empty)
▼
▼
Page 59
BROWSER MENU
SAFETY AND
WARRANTY
This chapter addresses the safety guidelines and precautions
to follow when operating your phone. Please make sure to be
aware of all the details about the safety to operate your
phone in the way that you are supposed to.
This chapter contains the terms and conditions of services
and the warranty for your phone. Please review them
thoroughly.
Antenna Care
Driving and Talking on the Phone
Use Around Electronic Devices
Precautions
SAR Information
Chapter 8
115
C
H
7
C
H
.
8
114
1
To clear the history of viewed
pages and start a new session
with up.Link Press .
RESTART UP.BROWSER
1
Press to use for security.
ENCRYPTION
4 Offline
service
5 Outbox
6 >Restart
Up. Browser
1 >Email
2 Contacts
3 Calendar
4 To do’s
5 Bookmarks
Service
5 Outbox
6 Restart
Up. Browser
7 >Encryption
Encryption
1 >Verify key
2 New key
▼
▼
▼
▼
▼
Page 60
SAFETY INFORMATION FOR WIRELESS
HANDHELD PHONES
SAFETY INFORMATION FOR WIRELESS
HANDHELD PHONES
117
C
H
.
8
C
H
.
8
116
Your wireless handheld portable telephone is a low power radio
transmitter and receiver. When it is ON, it receives and also sends out
radio frequency (RF) signals.
In August 1996, the Federal Communications Commissions (FCC)
adopted RF exposure guidelines with safety levels for handheld
wireless phones. Those guidelines are consistent with the safety
standards previously set by both U.S. and international standards
bodies:
ANSI C95.1 (1992) *
NCRP Report 86 (1986) *
ICNIRP (1996) *
Those standards were based on comprehensive and periodic
evaluations of the relevant scientific literature. For example, over 120
scientists, engineers, and physicians from universities, government
health agencies, and industry reviewed the available body of research
to develop the ANSI Standard (C951).
The design of your phone complies with the FCC guidelines (and
those standards).
EXPOSURE TO RADIO FREQUENCY SIGNALS
Use only the supplied or an approved replacement antenna.
Unauthorized antennas, modifications, or attachments could damage
the phone and may violate FCC regulations.
ANTENNA CARE
Read This Information Before Using Your Handheld
Portable Cellular Telephone
Talking on the phone while driving is extremely dangerous and is
illegal in some states. Remember, safety comes first. Check the
laws and regulations on the use of phones in the areas where you
drive. Always obey them.
Also, if using your phone while driving, please:
l Give full attention to driving. Driving safely is your first
responsibility.
l Use hands-free operation, if available.
l Pull off the road and park before making or answering a call, if
driving conditions so require.
If you must use the phone while driving, please use one-touch, speed
dialing, and auto answer modes.
An airbag inflates with great force. DO NOT place objects, including
both installed or portable wireless equipment, in the area over the
airbag or in the air bag deployment area. If in-vehicle wireless
equipment is improperly installed and the air bag inflates, serious
injury could result.
DRIVING SAFETY
WARNING: Failure to follow these instructions may lead to
serious personal injury and possible property damage.
1* : American National Standards Institute.
2* : National Council on Radiation protection and measurements.
3* : International Commission on Nonionizing Radiation Protection.
Page 61
SAFETY INFORMATION FOR WIRELESS
HANDHELD PHONES
SAFETY INFORMATION FOR WIRELESS
HANDHELD PHONES
119
C
H
.
8
C
H
.
8
118
The Health Industry Manufacturers Association recommends that a
minimum separation of six (6”) inches be maintained between a
handheld wireless phone and a pacemaker to avoid potential
interference with the pacemaker. These recommendations are
consistent with the independent research by and recommendations
of Wireless Technology Research.
Persons with pacemakers :
l ALWAYS keep the phone more than six inches from your
pacemaker when the phone is turned on.
l Do not carry the phone in a breast pocket.
l Use the ear opposite the pacemaker to minimize the potential
for interference.
l If you have any reason to suspect that interference is taking
place, turn your phone OFF immediately.
PACEMAKERS
If you use any other personal medical device, consult the
manufacturer of your device to determine if they are adequately
shielded from external RF energy Your physician may be able to
assist you in obtaining this information.
Turn your phone OFF in healthcare facilities when any regulations
posted in these areas instruct you to do so. Hospitals or healthcare
facilities may be using equipment that could be sensitive to external
RF energy.
OTHER MEDICAL DEVICES
Turn your phone OFF where posted notices so require.
POSTED FACILITIES
ELECTRONIC DEVICES
Most modern electronic equipment is shielded from RF energy.
However, certain electronic equipment may not be shielded against
the RF signals from your wireless phone.
OTHER SAFETY GUIDELINES
FCC and Transport Canada Regulations prohibit using your phone
while in the air. Turn your phone OFF before boarding an aircraft.
AIRCRAFT
To avoid interfering with blasting operations, turn your phone OFF
when in a “blasting area” or in areas posted: “Turn off two-way
radio.” Obey all signs and instructions.
BLASTING AREAS
Turn your phone OFF when in any area with a potentially explosive
atmosphere and obey all signs and instructions. Sparks in such
areas could cause an explosion or fire resulting in bodily injury or
even death.
Areas with a potentially explosive atmosphere are often, but not
always, clearly marked. They include fueling areas such as gas
stations; below deck on boats; fuel or chemical transfer or storage
facilities; vehicles using liquefied petroleum gas (such as propane or
butane); areas where the air contains chemicals or articles, such as
grain, dust, or metal powders; and any other area where you would
normally be advised to turn off your vehicle’s engine.
POTENTIALLY EXPLOSIVE ATMOSPHERES
Page 62
SAFETY INFORMATION FOR WIRELESS
HANDHELD PHONES
SAFETY INFORMATION FOR
FCC RF EXPOSURE
121
C
H
.
8
C
H
.
8
120
PRECAUTIONS
Your Handheld Portable Telephone is a high quality piece of
equipment. Before operating, read all instructions and cautionary
markings on (1) AC Adaptor (2) Battery and (3) Product Using Battery.
DO NOT use this equipment in an extreme environment where
high temperature or high humidity exists.
DO NOT abuse the equipment. Avoid striking, shaking or
shocking. When not using, lay down the unit to avoid possible
damage due to instability.
DO NOT expose this equipment to rain or spilled beverages.
DO NOT use unauthorized accessories.
DO NOT disassemble the phone or its accessories. If service
or repair is required, return unit to an authorized Audiovox
cellular service center. If unit is disassembled, the risk of
electric shock or fire may result.
DO NOT short-circuit the battery terminals with metal items etc.
In August 1996 the Federal Communications Commossion (FCC) of
the United States with its action in Report and Order FCC 96-326
adopted an updated safety standard for human exposure to radio
frequency electromagnetic energy emitted by FCC regulated
transmitters. Those guidelines are consistent with the safety standard
previously set by both U.S. and international standards bodies. The
design of this phone complies with the FCC guidelines and these
international standards.
Use only the supplied or an approved antenna. Unauthorized
antennas, modifications, or attachments could impair call quality,
damage the phone, or result in violation of FCC regulations.
Do not use the phone with a demaged antenna. If a demaged
antenna comes into contact with the skin, a minor burn may result.
Please contact your local dealer for replacement antenna.
This device was tested for typical body-worn operation with the back
of the phone kept 1 inchs (2.54cm) from the body. To comply with
FCC RF exposure requirements, a minimum separation distance of 1
inchs (2.54cm) must be maintained between the user’s body and the
back of the phone, including the antenna, whether extended or
retracted. All belt-clips, holsters and similar accessories used by this
device must not contain any metallic components. Body-worn
accessories that do not meet these requirements may not comply
with FCC RF exposure limits and should be avoided.
BODY-WORN OPERATION
A minimum separation distance of 7.9 inches (20cm) must be
maintained between the user/bystander and the vehicle mounted
external antenna to satisfy FCC RF exposure requirements.
VEHICLE MOUNTED EXTERNAL ANTENNA
(OPTIONAL, IF AVAILABLE)
WARNING! Read this Information before using
CAUTIONS
For more information about RF exposure, please visit the
FCC website at www.fcc.gov
Page 63
SAR INFORMATION SAR INFORMATION
123
C
H
.
8
C
H
.
8
122
THIS MODEL PHONE MEETS THE GOVERNMENT’S
REQUIREMENTS FOR EXPOSURE TO RADIO WAVES.
Your wireless phone is a radio transmitter and receiver. It is designed
and manufactured not to exceed the emission limits for exposure to
radiofrequency (RF) energy set by the Federal Communications
Commission of the U.S. Government. These limits are part of
comprehensive guidelines and establish permitted levels of RF
energy for the general population. The guidelines are based on
standards that were developed by independent scientific
organizations through periodic and thorough evaluation of scientific
studies. The standards include a substantial safety margin designed
to assure the safety of all persons, regardless of age and health.
The exposure standard for wireless mobile phones employs a unit of
measurement known as the Specific Absorption Rate, or SAR. The
SAR limit set by the FCC is 1.6 W/kg. * Tests for SAR are conducted
with the phone transmitting at its highest certified power level in all
tested frequency bands. Although the SAR is determined at the
highest certified power level, the actual SAR level of the phone while
operating can be well below the maximum value. This is because the
phone is designed to operate at multiple power levels so as to use
only the power required to reach the network. In general, the closer
you are to a wireless base station antenna, the lower the power
output.
Before a phone model is available for sale to the public, it must be
tested and certified to the FCC that it does not exceed the limit
established by the governmentadopted requirement for safe exposure.
The tests are performed in positions and locations (e.g., at the ear and
worn on the body) as required by the FCC for each model. The highest
SAR value for this model phone when tested for use at the ear is 0.989
W/kg and when worn on the body, as described in this user guide, is
0.388W/kg. (Body-worn measurements differ among phone models,
depending upon available accessories and FCC requirements). While
there may be differences between the SAR levels of various phones
and at various positions, they all meet the government requirement for
safe exposure.
The FCC has granted an Equipment Authorization for this model
phone with all reported SAR levels evaluated as in compliance with
the FCC RF exposure guidelines. SAR information on this model
phone is on file with the FCC and can be found under the Display
Grant section of http://www.fcc.gov/ oet/fccid after searching on
PP4TX-30B.
Additional information on Specific Absorption Rates (SAR) can be
found on the Cellular Telecommunications Industry Asso-ciation
(CTIA) web-site at http://www.wow-com.com.
* In the United States and Canada, the SAR limit for mobile phones
used by the public is 1.6 watts/kg (W/kg) averaged over one gram of
tissue. The standard incorporates a sub-stantial margin of safety to
give additional protection for the public and to account for any
variations in measurements.
Page 64
PROTECT YOUR WARRANTY 12 MONTH LIMITED WARRANTY
C
H
.
8
125
C
H
.
8
124
Read your Warranty carefully, with the special consideration to
paragraph seven of the Limited Warranty for your unit.
“Warranty does not apply to... or to any product or part
thereof which has suffered through alteration... mishandling
misuse, neglect or accident”.
Many companies are making look alike accessories and in some
cases, promoting that their product is equal to or better than the
Audiovox product. Be careful. Some of these products may not be
compatible to use with your Audiovox product and may damage the
unit or cause it to malfunction. If service is required on your unit and it
is determined that a non-Audiovox accessory has created the
problem with your unit, the Warranty will not apply. In addition, if the
unit has already suffered irreversible damage by reason of a noncompatible accessory, the Warranty will be voided. To protect your
Warranty, use only compatible accessories which cannot damage or
interfere with the functioning of your Audiovox product.
AUDIOVOX COMMUNICATIONS CORP.
555 Wireless Blvd., Hauppauge, New York 11788, 800-229-1235
16808 Marquardt Avenue, Cerritos, California 90703, 562-802-5100
Audiovox Canada
5155 Spectrum Way, Unit #5, Mississauga, Ontario
Canada L4W 5A1, 800-465-9672
AUDIOVOX COMMUNICATIONS CORP. (the Company) warrants to
the original retail purchaser of this Audiovox Handheld Portable
Cellular Telephone, that should this product or any part
thereof(except the items listed below), under normal use and
conditions, be proven defective in material or workmanship within the
first twelve (12) month period from the date of purchase, such
defect(s) will be repaired or replaced (with new or rebuilt parts) at the
Company’s option, without charge for parts or labor directly related
to the defect (s).
The keypad and display are similarly warranted for ninety (90) days
from date of purchase.
The accessories consisting of the antenna and rechargeable battery
pack, desktop charger are similarly warranted for twelve (12) months
from original purchase.
This Warranty does not apply to batteries, fuses, or costs incurred for
testing or checking, or to any product or part hereof which has
suffered through alteration, serial number defacement, improper
installation, excessive temperature or humidity, environmental
conditions, mishandling misuse, neglect or accident. This Warranty is
not assignable or transferable.
To obtain repairs or replacement within the terms of this Warranty,
the product should be delivered with proof of warranty coverage,
specification of defect(s), transportation prepaid, to the Company at
the address shown below. For TRAVELERS WARRANTY SERVICE.
Call toll free to (800) 229-1235 for reference to an Authorized
Warranty Station in your area.
THE EXTENT OF THE COMPANY’S LIABILITY UNDER THIS
WARRANTY IS LIMITED TO THE REPAIR OR REPLACEMENT
PROVIDED ABOVE AND, IN NO EVENT, SHALL THE COMPANY’S
LIABILITY EXCEED THE PURCHASE PRICE PAID BY PURCHASER
FOR THE PRODUCT.
The Company disclaims liablity for geographic coverage, inadequates
signal to antenna, communications range or operation of the Cellular
System as a whole.
Page 65

12 MONTH LIMITED WARRANTY
C
H
.
8
126
ANY IMPLIED WARRANTIES, INCLUDING ANY IMPLIED WARRANTY
OF MERCHANTABILITY SHALL BE LIMITED TO THE DURATION OF
THIS WRITTEN WARRANTY. ANY ACTION FOR BREACH OF ANY
WARRANTY HEREUNDER INCLUDING ANY IMPLIED WARRANTY
OF MERCHANTABILITY MUST BE BROUGHT WITHIN A PERIOD OF
24 MONTHS FROM DATE OF ORIGINAL PURCHASE IN NO CASE
SHALL THE COMPANY BE LIABLE FOR ANY CONSEQUENTIAL OR
INCIDENTAL DAMAGES FOR BREACH OF THIS OR ANY OTHER
WARRANTY, EXPRESS OR IMPLIED, WHATSOEVER.
No person or representative is authorized to assume for the Company
any liability other than expressed herein in connection with the sale
of this product.
Some states do not allow limitations on how long an implied warranty
lasts or the exclusion or limitation of incidental or consaquential
damage so the above limitation or exclusions may not apply to you.
This Warranty gives you specific legal rights, and you may also have
other rights which vary from state to state.
IN U.S.A.: Audiovox Communications Corp.
555 Wireless Blvd.
Hauppauge, NY 11788
(800)229-1235
IN CANADA: Audiovox Canada Ltd.
5155 Spectrum Way, Unit #5
Mississauga, Ontario L4W 5A1
(800)465-9672
 Loading...