

Page 1

User Guide
P9090
Thank you for choosing the Pantech P9090, our latest smartphone.
The Pantech P9090 has many features designed to enhance your
mobile experience. With its unique, stylish design you will enjoy the
entire phone experience.
This User Guide contains important and useful information that will
maximize your familiarity with all that the Pantech phone has to offer.
Page 2

Some of the contents in this manual may differ from your phone depending on the software of the phone. Actual color
may vary.
Your phone is designed to make it easy for you to access a wide variety of content. For your protection, we want you to
be aware that some applications that you enable may involve the location of your phone being shared. For applications
available through XXXX, we offer privacy controls that let you decide how an application may use the location of your
phone and other phones on your account. However, the XXXX privacy tools do not apply to applications available
outside of XXXX. Please review the terms and conditions and the associated privacy policy for each location-based
service to learn how location information will be used and protected. In addition, your XXXX phone may be used to
access the internet and to download, and/or purchase goods, applications, and services from XXXX or elsewhere from
third parties. XXXX provides tools for you to control access to the Internet and certain Internet content. These controls
may not be available for certain devices which bypass XXXX controls.
Service provided by XXXX Mobility. Portions © 2012 XXXX Intellectual Property. All rights reserved. XXXX, the XXXX
logo and all other XXXX marks contained herein are trademarks of XXXX Intellectual Property and/or XXXX affiliated
companies. All other marks contained herein are the property of their respective owners.
Copyright © 2012. Pantech. All Rights Reserved.
Page 3

P9090
1
READ THIS FIRST
Important Safety Information
Trademarks
On-screen Indicators
3
Page 4

READ THIS FIRST
Important Safety Information
Safety Information
The following list shows how to maintain your mobile phone
and precautions to take as you use the device.
x Keep your mobile phone and its accessories out of the
reach of children and pets.
x Maintain your mobile phone in dry conditions and keep it
within normal operating temperatures. It may be damaged
at temperatures higher than 55 °C/131 °F or lower than
-20 °C/-4 °F.
x Do not dry your phone in a microwave oven. Sparks may
occur and cause an explosion or fire.
x Do not use or store your mobile phone in dusty, dirty areas.
x Do not disassemble your mobile phone.
x Do not drop or cause severe impact to your mobile phone.
x Do not clean your mobile phone with chemical products,
cleaning solvents or detergents.
x Contact your dealer immediately if your mobile phone does
not work properly.
x Use only authorized batteries, battery chargers and
accessories. Any malfunction or damage caused by the
use of unauthorized batteries, battery chargers and
accessories will void the limited product warranty.
x Ensure that the battery and the battery charger do not
come in contact with conductive objects.
x For optimal performance, use cases and accessories that
do not contain magnets.
Safety Precautions
x Using a mobile phone while driving is prohibited.
x Using a mobile phone while driving can distract your
attention and cause an accident. Always switch your phone
off to drive safely.
x In an emergency, use a hands-free device built into your car
or pull over in a safe place first.
x Check local laws and regulations and comply with them,
with regard to the prohibition of mobile phone use while
driving.
Switch off in restricted areas
Always switch your phone off in areas where mobile phone use
is restricted.
Switch off in an aircraft
Always switch your phone off or select the airplane mode when
you are in an aircraft. Electromagnetic waves emitted by your
phone may affect the electronic navigation equipment in the
aircraft.
Switch off in hospitals and near medical equipment
Always switch your phone off in hospitals and obey their
regulations. Switch your phone off when using medical
equipment for private purposes. Always consult with the
medical equipment’s manufacturer or an expert regarding
phone use near the medical equipment.
4
Page 5

READ THIS FIRST
Switch Off In Dangerous Areas
Always switch your phone off in areas where explosive or
dangerous materials (e.g. fuels or chemical products) are
located and obey relevant instructions or signals. Do not insert
or remove your mobile phone’s battery in such areas.
Install a Hands-free Device In a Safe Location
Install a hands-free device away from the steering wheel and
airbag expansion areas. Otherwise you can be injured in a car
accident.
Keep Away From Other Electronic Devices
Mobile phones emit electromagnetic waves that may affect
nearby electronic devices. After switching on your phone, do
not place it close to other electronic goods.
About the Battery Usage
Your phone is powered by a Lithium Ion (Li-Ion) battery. This
type of battery typically has a longer lifespan than other types
of batteries. However, it must be handled with care. Please read
and follow these battery guidelines:
x Do not use a damaged battery or charger.
x Do not disassemble, open, crush, bend, deform, puncture,
or shred the battery.
x Do not modify or remanufacture the battery, insert foreign
objects into the battery, immerse or expose the battery
to water or other liquids, or expose it to fire, explosions, or
other hazard.
x Dispose of and recycle used batteries in accordance with
local regulations. Do not dispose of batteries by burning as
they may explode. Do not use an unauthorized charger or
battery.
x Use the battery only for the device for which it is specified.
x Use the battery with a charging device that has been
qualified for the device. Use of an unqualified battery or
charger may present a risk of fire, explosion, leakage, or
other hazard.
x Do not short circuit a battery or allow metallic conductive
objects to contact battery terminals.
x Replace the battery only with another battery that has been
qualified with the device per the IEEE-Std-1725-2006.
x Children should not be allowed to handle the battery.
x Avoid dropping the phone or the battery. If the phone or the
battery is dropped, especially on a hard surface, and you
suspect damage, take it to a service center for inspection.
x Use your battery for its specified purpose only.
x The battery recharging time varies depending on the
remaining battery capacity and the battery and charger
type.
x Battery life inevitably shortens over time.
x Since overcharging may shorten battery life, remove the
phone from its charger once it is fully charged. Unplug
the charger once charging is complete. Do not store the
battery in exceedingly hot or cold places, such as inside
a car in the summer or winter as doing so may reduce its
capacity and life span.
5
Page 6

READ THIS FIRST
Table of Contents
1. READ THIS FIRST
Important Safety Information ..................................................................4
Trademarks...................................................................................................9
On-screen Indicators ............................................................................... 10
2. GETTING STARTED
Layout .......................................................................................................... 13
Inside the Package .................................................................................... 14
Using the SIM or USIM Card ...................................................................... 14
Using the Battery ....................................................................................... 15
Installing an optional microSD Card ...................................................... 17
Turning the Phone On or Off.................................................................... 17
Setting up the Phone ................................................................................ 18
Resetting the Phone ................................................................................. 18
Locking the Screen .................................................................................... 19
Unlocking the Screen ............................................................................... 20
Using the Touch Screen ............................................................................23
Entering Text ..............................................................................................24
3. PHONE EXPERIENCE
About the Phone Experience ..................................................................28
Setting the Phone Experience ................................................................28
Learning to Use the Pantech Easy Experience ....................................29
4. BASIC OPERATIONS
Understanding the Home Screen ...........................................................32
Customizing the Home Screen ..............................................................33
Using the Extended Launcher Bar .......................................................... 35
Using The Task Manager ...........................................................................35
Using the Applications Menu ...................................................................37
Connecting to the Internet ......................................................................38
Connecting to a Mobile Network ............................................................38
Setting up a Bluetooth Connection .......................................................39
Using Bluetooth .........................................................................................39
Installing or Uninstalling Applications .................................................. 41
5. CALLING & MESSAGING
Calling ..........................................................................................................43
Managing Contacts ...................................................................................45
Messaging ...................................................................................................47
6. COMMUNICATION
Using the Internet .................................................................................... 50
Setting Up Email Accounts ..................................................................... 50
Using Email ................................................................................................. 51
Setting up a Google Account ..................................................................53
Using Gmail .................................................................................................53
Using Google+ ............................................................................................55
Using Social World ..................................................................................... 55
Using Social Gallery .................................................................................. 57
Using Facebook..........................................................................................58
Using Twitter ..............................................................................................58
6
Page 7

READ THIS FIRST
7. MEDIA CENTER
Using the Camera ..................................................................................... 60
Capturing the Screen ...............................................................................63
Using the Gallery .......................................................................................63
Downloading Music or Video Files from a PC .......................................65
Using the Music Player ..............................................................................65
Using Play Music ....................................................................................... 66
Using the Video Player .............................................................................67
Using Movies .............................................................................................. 68
Using Play Movies ..................................................................................... 68
Enjoying YouTube ..................................................................................... 68
Using Qik Lite............................................................................................. 69
8. MENU FUNCTIONS
Alarm/Clock ................................................................................................ 71
Calculator ................................................................................................... 71
Calendar ......................................................................................................72
Converter ....................................................................................................72
Document Viewer ......................................................................................73
File Manager ...............................................................................................73
Key Ring .......................................................................................................74
Latitude .......................................................................................................74
Navigation ..................................................................................................76
Net Media ....................................................................................................76
NotePad.......................................................................................................79
Pill Reminder ............................................................................................. 80
Places .......................................................................................................... 80
Play Books ................................................................................................... 81
Pulse ............................................................................................................. 81
Talk ...............................................................................................................81
Tip Calculator ............................................................................................82
Weather .......................................................................................................82
Voice Recorder ..........................................................................................82
9. XXXX SERVICES
Amazon Kindle .......................................................................................... 84
XXXX Code Scanner ................................................................................. 84
XXXX Family Map ...................................................................................... 84
XXXX Locker .............................................................................................. 84
XXXX Navigator..........................................................................................85
XXXX Radio .................................................................................................85
XXXX Smart Wi-Fi ......................................................................................85
Live TV ........................................................................................................ 86
DeviceHelp ................................................................................................ 86
YPmobile .................................................................................................... 86
myXXXX ...................................................................................................... 86
Messages ................................................................................................... 86
10. SETTINGS
Pantech Settings ..................................................................................... 88
Wireless & Networks ............................................................................... 88
Device ......................................................................................................... 90
Personal ......................................................................................................92
System .........................................................................................................95
7
Page 8

READ THIS FIRST
11. APPENDIX
Cautions when Using External Memory Cards .................................. 100
Troubleshooting Checklist .................................................................. 100
Specifications ...........................................................................................101
Caution ......................................................................................................101
FCC Hearing-Aid Compatibility Regulations for Wireless Devices 102
FCC Regulatory Compliance .................................................................103
Warranty ...................................................................................................104
Legal Notice .............................................................................................106
8
Page 9

Trademarks
DivX® is a digital video format created by DivX, LLC, a subsidiary
of Rovi Corporation. This is an official DivX Certified
that plays DivX video. Visit www.divx.com for more information
and software tools to convert your files into DivX videos.
®
device
READ THIS FIRST
Manufactured under license from Dolby Laboratories.
Dolby and the double-D symbol are trademarks of Dolby
Laboratories.
®
About DivX Video-On-Demand
This DivX Certified® device must be registered in order to play
purchased DivX Video-on-Demand (VOD) movies. To obtain
your registration code, locate the DivX VOD section in your
device setup menu. Go to vod.divx.com for more information
on how to complete your registration.
DivX Certified
premium content.
®
DivX
Rovi Corporation or its subsidiaries and are used under licence.
Covered by one or more of the following U.S. patents:
7,295,673; 7,460,668; 7,515,710; 7,519,274
®
to play DivX® video up to HD 720p, including
, DivX Certified®, and associated logos are trademarks of
HDMI, the HDMI logo, and the term "High Definition Multimedia
Interface" are trademarks or registered trademarks of HDMI
Licensing LLC.
Manufactured under license under U.S. Patent Nos: 5,956,674;
5,974,380; 6,487,535 & other U.S. and worldwide patents issued
& pending. DTS, the Symbol, & DTS and the Symbol together
are registered trademarks & DTS 2.0 Channel is a trademark
of DTS, Inc. Product includes software. © DTS, Inc. All Rights
Reserved.
9
Page 10
READ THIS FIRST
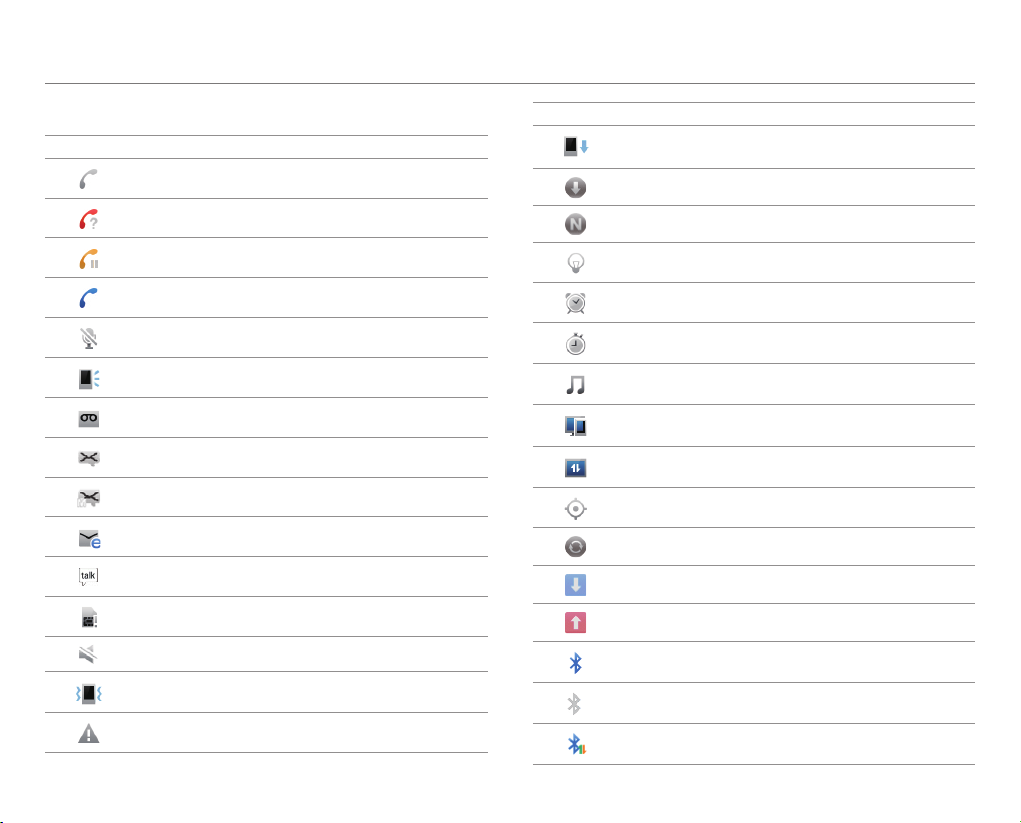
On-screen Indicators
Icon Description
A call is in progress.
Missed call
Call on hold
A call is in progress using a Bluetooth device.
Microphone muted
The speakerphone is active.
New voicemail
New SMS message
New MMS message
New Email
New Google Talk message
No SIM or USIM card
Silent mode activated
Vibrate mode activated
An error has occurred
Icon Description
Firmware upgrade is available.
Software upgrade is available.
New application is available.
Power saver mode is on.
An alarm has been set.
Timer has been set.
Music is playing.
Another device is attempting to play back
content.
Data manager is connected.
The GPS is active
Sync in progress
Downloading data
Uploading data
Connected to a Bluetooth headset
Bluetooth is active.
Bluetoothe tethering is active.
10
Page 11
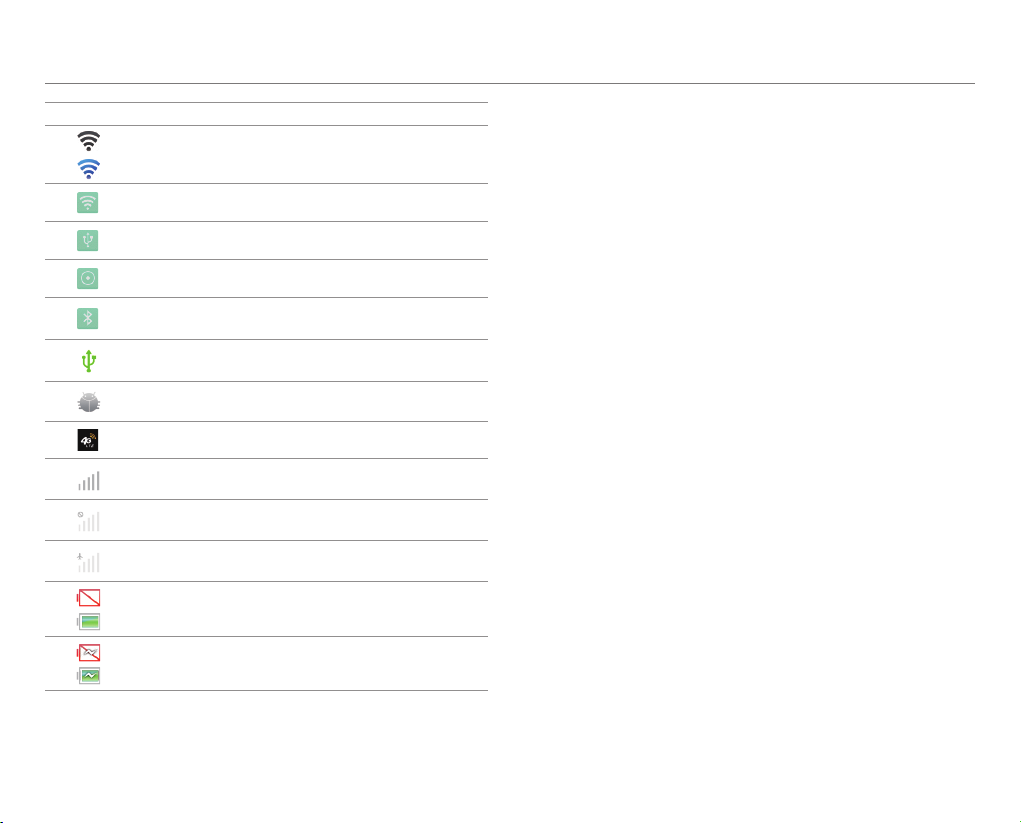
Icon Description
Wi-Fi signal strength
Portable Wi-Fi hotspot is active
USB tethering is active.
USB tethering and Wi-Fi hotspot are active.
Bluetooth tethering is active.
Connected to a computer via a supported
USB cable connection
USB debugging mode activated
Connected to the LTE 4G network
Signal strength: The number of bars increases
when the signal is strong.
No signal
Airplane mode is active.
Battery level: The greener the icon, the more
charge that is remaining.
READ THIS FIRST
The battery is charging.
11
Page 12

P9090
2
GETTING STARTED
Layout
Inside the Package
Using the SIM or USIM Card
Using the Battery
Installing an optional microSD Card
Turning the Phone On or Off
Setting up the Phone
Resetting the Phone
Locking the Screen
Unlocking the Screen
Using the Touch Screen
Entering Text
Page 13

GETTING STARTED
Layout
Front View
Earpiece
Front camera
Proximity
Sensor
VOLUME
Touch screen
Front microphone
Key Function
VOLUME Adjust sound volume. Adjust the ring mode.
Rear View
Earphone jack
Rear microphone
Rear camera
Flash
Speaker
Micro USB/
Charger connector
LOCK/POWER
Internal
antenna area
Battery cover
removal groove
Key Function
LOCK/PWR Lock the screen. Turn the phone on or off.
13
Page 14

GETTING STARTED
Note
x Your phone may not be compatible with all types of stereo
earphones.
x Do not cover the proximity sensor area with LCD protection file.
If you cover the sensor, the touch screen may not perform properly.
x Do not allow the touch screen to come in contact with water or
chemicals.
x Do not block the internal antenna embedded in the phone.
x Do not hold the handset too close to your face, as you may block
the microphone and prevent others from hearing you clearly.
Gripping the Phone
Hold the phone in the correct position to avoid blocking the
internal antenna.
Correct Incorrect
Note
x If you block the internal antenna, you may disrupt the wireless signal
and increase battery consumption.
x Do not use metallic cases or accessories, as they can interfere with
the signal reception.
Inside the Package
Check your product package for the following items:
x Handset
x Battery
x Adapter
x USB cable
x Quick Start Guide
Using the SIM or USIM Card
Before Using the Card
x Be careful not to damage your fingernails when you remove
the battery cover.
x Turn off the phone before installing the SIM or USIM card.
x Do not bend or force the card. Doing so may damage the
card or destroy data on the card.
x Turn off the phone before removing the SIM or USIM card.
x Do not expose the SIM or USIM card to moisture.
x Avoid static electricity.
x Do not lose or transfer your SIM or USIM card to someone.
Pantech is not responsible for damage due to theft or loss.
14
Page 15

GETTING STARTED
Installing the SIM or USIM Card
1. Insert your fingernail into the groove at the bottom of the
phone, and then lift up to remove the battery cover.
2. Remove the battery.
3. Insert the SIM or USIM card into the card slot. Ensure that
the gold contacts on the card are facing the metal contacts
on the phone.
4. Reinsert the battery and reattach the battery cover.
About SIM or USIM Cards
When you sign up for phone service, you will receive a SIM
or USIM card that contains your registration information,
PIN code, and other personal data. Keep the card secure
and handle it carefully. Do not bend or scratch the card and
keep it away from moisture and static electricity. Pantech is
not responsible for damages caused by theft or loss of your
personal data.
Using the Battery
Inserting the Battery
1. Turn off the phone, if it is not already turned off.
2. Insert your fingernail into the groove at the bottom of the
phone, and then lift up to remove the battery cover.
3. Align the gold contacts on the battery with the contacts
located at the top of the battery compartment.
4. Slide the battery into the phone until it lays flat in the
compartment.
15
Page 16

GETTING STARTED
5. Reattach the battery cover.
Note Be careful not to damage your fingernails when you remove the
battery cover.
About the Battery
Your battery uses a lithium ion (Li-Ion) battery. Use only
approved batteries and chargers with your phone. The average
battery life will vary, based on your usage patterns. For more
details, contact your retailer.
Charging the Battery
Insert the plug into a power outlet, and then connect the
charger adapter to the Micro USB/Charger connector of the
phone.
Note
x Do not use the handset while the battery is charging. Doing so may
result in an electric shock.
x Use only authorized adapters. Using unauthorized adapters may
cause the handset to malfunction or may damage the handset or
battery.
x Carefully align the connector as indicated in the image. Failure to
do so may damage the charger connector or prevent the battery
from charging.
16
Page 17

GETTING STARTED
Installing an optional microSD Card
Insert a microSD card to store files, such as photos or videos.
1. Insert your fingernail into the groove at the bottom of the
phone, and then lift up to remove the battery cover.
2. Remove the battery.
3. Insert the microSD card into the memory card slot. Ensure
that the gold contacts on the card face the metal contacts
on the phone.
4. Reinsert the battery and reattach the battery cover.
About the microSD Card
Inserting a microSD card allows you to store files and
application data. You can use up to a 32 GB microSD card. We
recommend that you format the microSD card before using it.
Turning the Phone On or Off
Turning the Phone On
Press and hold the LOCK/PWR key for more than two seconds.
Turning the Phone Off
1. Press and hold the LOCK/PWR key for more than two
seconds.
2. Tap Power off > OK.
Note If you forcibly shut down the phone by removing the battery,
the screen may malfunction shortly. This is normal and should not
affect the lifespan of the screen.
17
Page 18

GETTING STARTED
Setting Mute Mode
Press and hold the LOCK/PWR key for more than two seoncds,
and then tap
silenced.
. All sounds except multimedia and alarms are
Setting Vibrate Mode
Press and hold the LOCK/PWR key for more than two seconds,
and then tap
.
Setting Airplane Mode
Press and hold the LOCK/PWR key for more than two seconds,
and then tap Airplane mode to turn off Wi-Fi, Bluetooth, and
GPS functions. You can reactivate these functions individually,
if desired.
You can also drag the area at the top of the screen downward,
and then tap
.
Setting up the Phone
When you turn on the phone for the first time, a welcome
screen appears. To use Google applications and services,
you must create or sign into a Google account. You can
synchronize Contact, Calendar, and Gmail data for each
account if you register multiple accounts.
1. Select and tap a language, and then tap START.
2. Select and tap a phone experience, and then tap Next.
x Your phone provides two experiences, Pantech Easy and
Standard. For details about how to change the phone
experience, refer to chapter 3.
3. Tap Connect to Wi-Fi network, and then select and tap an
available Wi-Fi network.
x Tap Skip, and go to step 5 to connect to the network
later.
4. Tap Connect > Next.
x If the Wi-Fi network is secured, enter the password for it.
5. Tap Tap to set up Google account to set up a Google
account, and then follow the necessary steps.
x Tap Skip to set up an account later.
6. Tap OFF next to See location in applications (such as
Maps) using wireless networks to use Google location,
and then tap Agree for Location consent.
x Go to step 7 if you do not want to use Google location.
7. Tap Finish.
Resetting the Phone
Email, Google account information, and contacts will also be
deleted when you reset the phone. Before you reset the phone,
back up your contacts, messages, photos, and other data.
1. Tap
2. Tap Factory data reset.
3. Tap Reset phone.
4. Tap Erase everything.
> Settings > Backup & reset.
Note If you reset the phone, all data saved on the phone will be lost.
18
Page 19

GETTING STARTED
Locking the Screen
Press and hold the LOCK/PWR key briefly to lock the screen.
Changing the Screen Lock Type
1. Tap > Settings.
2. Tap Security > Screen lock.
3. Select and tap a screen lock type.
Setting an Unlock Pattern, PIN, or Password
You must connect at least four dots for a pattern lock, enter at
least four numbers for a PIN lock, or enter a password that is
at least four characters long (at least one character must be a
letter).
1. Tap
2. Tap Security > Screen lock.
3. Select and tap a lock type, and then follow the on-screen
> Settings.
instructions.
x Tap None to disable the screen lock.
Setting the Face Unlock Function
You can use this feature to recognize your face for unlocking
the phone. The face unlock function is less secure than locking
the phone with a pattern or PIN.
1. Tap
2. Tap Set it up > Continue.
3. Align your face with the figure on the screen.
4. Tap Continue when your face is captured.
5. Select and tap the secondary unlock type.
6. Configure the secondary unlock settings, and then tap OK.
> Settings > Security > Screen lock > Face Unlock.
19
Page 20
GETTING STARTED
Unlocking the Screen
Unlocking the Screen with a Pattern
1. Press the LOCK/PWR key if the
phone is automatically locked.
2. Draw a pattern on the screen.
Note You can make emergency calls without having to unlock the
screen.
If You Forget Your Pattern
If you draw an incorrect pattern more than five times in a
row, you cannot retry for 30 seconds. When this happens,
you can unlock the phone by entering your Google account
information.
If you draw an incorrect pattern more than 20 times total, you
must do one of the following to unlock it:
If you registered a Google account:
Enter your account information
If you did not register a Google account:
Visit the Pantech website
Visit a Pantech Service Center
Note For more details about registering your Google account, refer
to page 53.
20
Page 21
GETTING STARTED
Unlocking the Screen with a PIN or Password
1. Press the LOCK/PWR key if the
phone is automatically locked.
2. Enter your PIN or password, and
then tap OK, Done,
Note You can make emergency calls without having to unlock the
screen.
, or .
If you Forget Your PIN or Password
Visit a Pantech Service Center to unlock the phone.
Unlocking the Screen with Face Recognition
When you set the Face Unlock function, the screen unlocks
when you align your face to the figure on the screen. If the
phone fails to recognize your face, use a secondary unlock
type to unlock the phone.
1. Press the LOCK/PWR key if the phone is automatically
locked.
2. Align your face with the figure on the screen.
Unlocking the Phone with the Visual Lock
When you do not use the phone for a specified length of time
or press the LOCK/PWR key, the screen turns off and the phone
locks automatically.
1. Press the LOCK/PWR key.
2. Tap and drag
x You can also drag an application
shortcut to
the screen and launch the
application.
Adding a Screen Lock Wallpaper
To display wallpaper on the locked screen, tap > Settings
> User theme > Screen lock > Wallpaper, select a folder that
contains images, and then tap Save. If you do not select a
folder, only the default image will appear.
Changing Screen Lock Shortcuts
To change screen lock shortcuts, tap > Settings >
User theme > Screen lock > Shortcuts. You can change the
shortcuts to your favorite applications on the locked screen.
to .
to unlock
21
Page 22

GETTING STARTED
Unlocking the Phone with the Slide Lock
When you do not use the phone for a specified length of time
or press the LOCK/PWR key, the screen turns off and the phone
locks automatically.
1. Press the LOCK/PWR key.
2. Tap and drag
x You can also tap and drag
to
launch the camera application.
to .
to unlock the screen and
Unlocking the Phone with the Modern Lock
When you do not use the phone for a specified length of time
or press the LOCK/PWR key, the screen turns off and the phone
locks.
1. Press the LOCK/PWR key.
2. Tap and drag
x You can also drag an application
shortcut into the circle to
unlock the screen and launch
the application.
Adding a Screen Lock Wallpaper
To display wallpaper on the locked screen, tap > Settings >
User theme > Screen lock > Wallpaper > a category > an image
and then tap Save.
Note
x If you select an image from Gallery, you can crop the image to set
as wallpaper.
x If you select Home wallpaper image, the default image will appear.
Changing Screen Lock Shortcuts
To change screen lock shortcuts, tap > Settings >
User theme > Screen lock > Shortcuts. You can change the
shortcuts to your favorite applications on the locked screen.
into the circle.
22
Page 23

Using the Touch Screen
About the Touch Screen
x Do not subject the touch screen to strong impacts.
x Do not use sharp tools that can scratch the touch screen.
x Do not allow the touch screen to come in contact with water
or chemicals.
x Do not sit on the phone. Doing so may damage the touch
screen.
Performing Touch Screen Commands
x Ta p : Tap once to access a menu or an option.
x Drag: Tap and hold your finger on an item, and then move
your finger without lifting it from the the screen.
x Flick: Place a finger on the screen and move the screen up,
down, left, or right.
x Pinch: Place two fingers on the screen, and then spread
them apart to zoom in, or squeeze together to zoom out.
x Select and tap: Tap an item in a list.
x Tap and hold: Touch and hold an area for a few seconds.
GETTING STARTED
Ta p D r a g
Flick Tap and hold
23
Page 24

GETTING STARTED
Entering Text
Entering Text with the Android Keyboard
Enter text with the keypad at the bottom of the screen.
The keyboard shows word suggestions as you type.
Tap a word to use it.
1
7
6
No. Description
Change the case.
1
Clear your input.
2
Start a new line.
3
Insert a period.
4
Insert a space. Tap and hold to select an input method.
5
Switch to Voice mode. Tap and hold to open input
6
options.
Switch between ABC mode and Number/Symbol
7
mode.
2
5
34
Entering Text with SwiftKey for Pantech
SwiftKey predicts what you want to type before you type
your text. SwiftKey learns new words as you enter them, and
suggests those words in its future predictions. Tap one of
the three dynamic buttons above the keyboard to select a
prediction.
1 2 3
@
0
!
No. Description
Actual characters entered.
1
Primary Swiftkey prediction. Tap on the word or
hit space to enter (depending on your spacebar
2
settings.)
Secondary Swiftkey prediction. Tap on the word to
3
en
Clear you input.
4
Start a new line.
5
Insert a question mark.
6
Insert a period.
7
Insert a space.
8
4
6789
5
er.
t
24
Page 25
GETTING STARTED
No. Description
Insert a comma.
9
Switch to Voice mode. Tap and hold to open input
options or settings; share SwiftK
0
or more; view support.
Switch between ABC and Number/Symbol mode.
!
Change the case.
@
ey via Gmail, Twitter,
Entering Text with the Swype Keyboard
Swype is a fast and easy way to enter text. For example, drag
your finger on the screen keyboard as shown and input
Quick.
9 8217
No. Description
Change the case.
1
Clear your input.
2
Start a new line.
3
Switch to Voice mode.
4
3456
No. Description
Insert a period.
5
Insert a space.
6
Insert a comma.
7
Switch between ABC mode and Number/Symbol mode.
Tap and hold the k
8
text.
Tap and hold to open settings.
9
ey in Number/Symbol mode to edit
Entering Text with Your Voice
Use your voice to enter text with the Voice to Text feature.
1. Tap
2. Speak clearly into the microphone.
or on the keyboard.
Editing Text
1. Tap and hold a word that you want
to copy or cut.
2. Drag the handles to adjust the
selection.
x Tap
3. Tap
4. Tap the point where you want to
paste the text.
5. Tap the handle, and then tap
PASTE.
25
to select all text.
(cut) or (copy).
Page 26

GETTING STARTED
Adding a Word to the User Dictionary
Add frequently-used words to the user dictionary for later use.
You cannot add words that are already registered in the world
suggestion list.
1. Enter a word in the text input field.
2. Tap the word in the word suggestion list.
3. Tap the word again to add to the user dictionary.
To Insert a Word from the User Dictionary
Enter a few characters of the word, and then tap the word when
it appears in the word suggestion list.
26
Page 27

P9090
3
PHONE EXPERIENCE
About the Phone Experience
Setting the Phone Experience
Learning to Use the Pantech Easy Experience
Page 28

PHONE EXPERIENCE
About the Phone Experience
Your phone provides two phone experiences, Pantech Easy
and Standard. The Pantech Easy Experience provides an
easy-to-understand interface that helps you to use the phone
more simply. The Standard Experience is recommended for
general users. The instructions in this manual are based on the
Standard Experience.
Pantech Easy Experience Pantech Standard
Experience
Setting the Phone Experience
When you turn on the phone for the first time and set up the
phone, you are encouraged to select a phone experience. You
can change the phone experience at anytime in the Settings
menu.
Changing the Phone Experience
If you are using Pantech Easy Experience, tap > Settings
> Personalize > Change Experience > Pantech Standard
Experience.
If you are using Pantech Standard Experience, tap
Settings > Change Experience > Pantech Easy Experience.
Note Some functions and menus are not available in Pantech Easy
Experience.
>
28
Page 29

PHONE EXPERIENCE
Learning to Use the Pantech Easy Experience
Learn how to use the functions and menus in Pantech Easy
Experience.
Layout of the Home Screen
1
2
3
4 5
6
No. Description
1
2
3
4
5
6
7
8 9
7
Drag the area at the top of the screen downward to
access Quick settings or view ba
ttery usage, current
time and date, signal strength, or ongoing events.
View the current time, date, and temperature.
Access the web.
Open Quick Contacts.
Open shortcuts for applications.
Make calls.
Take pictures and record videos.
No. Description
Send and receive messages.
8
Open menus.
9
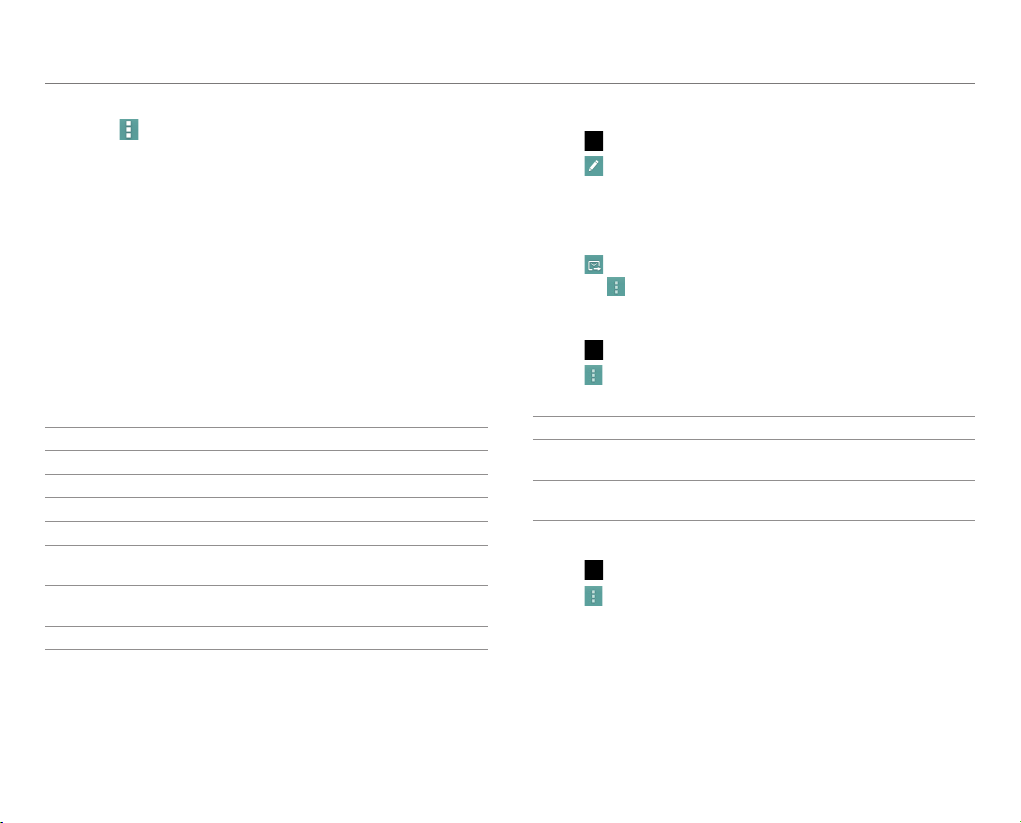
Menu Items in Pantech Easy Experience
1
2
3
4
5
6
7
8
No. Description
View contacts.
1
Send and receive messages.
2
Take pictures and record videos.
3
Start Document Viewer, Gallery, Music Player, or Video
4
5
6
7
8
er.
y
Pla
Access the web.
Play games or start applications.
Start Alarm/Clock, Calculator, Calendar, Converter,
ad, Pill Reminder, or Tip Calculator.
eP
Not
Access the settings. For details, refer to page 87
29
Page 30

PHONE EXPERIENCE
Locked Screen for the Pantech Easy Experience
Switch on to unlock the screen.
30
Page 31

P9090
4
BASIC OPERATIONS
Understanding the Home Screen
Customizing the Home Screen
Using the Extended Launcher Bar
Using The Task Manager
Using the Applications Menu
Connecting to the Internet
Connecting to a Mobile Network
Setting up a Bluetooth Connection
Using Bluetooth
Installing or Uninstalling Applications
31
Page 32

BASIC OPERATIONS
Understanding the Home Screen
Layout of the Home Screen
The Home screen is the starting point for using applications.
Here you can access widgets, shortcuts, or folders. The Home
screen consists of five panels. When you access the Home
screen for the first time, you will be shown usage tips for the
Home screen.
1
2
3
4
No. Description
Notification bar
View the phone's sta
1
time, and more.
5
6
tus, battery usage, current
4
No. Description
Home screen
x Flick t
o the left or right to move to another
panel. There are two panels to the left and two
2
3
4
5
6
panels to the right.
x Spread your fingers apart to hide icons.
x Pinch your fingers together to edit the Home
screen.
Panel location bar
View the number of panels and the loca
ent panel.
the curr
x Drag the white line to move to another panel.
x Tap the line below a panel to switch to that
panel.
Extended launcher bar
View shor
x Tap a shortcut to run an application.
x Tap a folder to open it.
Basic launcher bar
View shor
menu icon.
x Tap a shortcut to run an application.
x Tap
x Flick to the left or right to view the Extended
Navigation buttons
x
x
x
t
t
to open the menu screen.
launcher bar (4) .
(Back): Return to the previous screen.
(Home): Return to the Home screen.
(Recent applications): View a list of
recently-accessed applications.
tion of
cut icons and folders
cut icons and the applications
32
Page 33
BASIC OPERATIONS
Navigating the Quick Settings, Detail Settings,
and Notification Screen
The Quick settings, Detail settings, and Notification screens
help you manage important functions easily and keep
up events, network, GPS, or sound settings, or running
applications. Drag the area at the top of the screen downward.
1
2
No. Description
Quick settings
Turn on or off Vibr
1
mode, GPS, Bluetooth, data connection, Power
saver mode, Auto rotate, or Auto sync.
Detail settings
Access the settings f
2
Power saver, Bluetooth, lock, sync, mobile
hotspot, or application management.
Ongoing events or notifications
View running applica
3
application updates, missed calls, new emails, or
new messages.
Access the settings.
Close or open the Detail settings.
Clear all notifications.
3
Drag it upward to close the screen.
ate mode, Wi-Fi, Airplane
or sound, W
tions, notifica
i-Fi, display,
tions for
Customizing the Home Screen
Adding a Widget or Shortcut
1. On the Home screen, tap and hold an empty area.
x You can also flick the Home screen upward, or tap
2. Tap Widget.
3. Tap and hold an item, and then drag it to the desired
location.
x Tap an item to align it with other icons automatically.
Adding a Folder
Add a folder that contains shortcuts or application icons to the
Home screen.
1. On the Home screen, tap and hold an icon, and then drag it
onto another icon.
2. Release your finger when a folder is created.
To Add an Icon to a Folder
Tap and hold an icon on the Home screen, and then drag it on
to the folder.
Note
x Open the folder and tap to change the title or color of the folder.
x Tap to close the folder.
.
33
Page 34

BASIC OPERATIONS
Rearranging or Deleting an Icon, Widget, or
Folder
Rearrange or delete icons, widgets, or folders on the
Home screen or the Basic launcher bar.
1. On the Home screen or the Basic
launcher bar, tap and hold an icon,
widget, or folder.
2. Drag it to a desired location or to
at the top of the screen.
Rearranging or Deleting a Panel
1. On the Home screen, squeeze two
fingers together.
2. Tap and hold a panel, and then drag
it to a desired location or to
the top of the screen.
Add a new panel.
at
To Add a New Panel
Tap New Panel to add a new panel. You can create up to seven
panels.
Setting the Home Screen Wallpaper
1. On the Home screen, tap and hold an empty area.
x You can also flick the Home screen upward or tap
2. Tap Wallpaper.
3. Tap a tab.
4. Tap a wallpaper.
1
2
Example: When you tap the Gallery tab.
No. Description
Drag the blue lines to enlarge or reduce the area.
1
Tap the area inside the blue lines and drag it to another
2
location.
5
. Tap Set wallpaper or CROP.
.
34
Page 35

BASIC OPERATIONS
Changing the Home screen Theme
1. On the Home screen, tap and hold
an empty area.
x You can also flick the Home
screen upward or tap
2. Tap Home Theme.
3. Flick the screen to the left or right to
select a theme, and then tap Apply.
x Tap
x Tap
to edit the theme name.
to delete the theme.
.
Using the Extended Launcher Bar
Arranging Shortcut Icons or Folders
Move shortcut icons or folders from the Home screen to the
Extended launcher bar.
1. Flick the Basic launcher bar to the left or right.
2. Tap and hold a shortcut icon or folder on the Home screen,
and then drag it to a desired location.
To Create a Folder on the Extended launcher bar
Drag an icon onto another icon, and then release your finger
when a folder is created.
Arranging or Deleting Shortcut Icons or Folders
Move icons or folders from the Extended launcher bar to the
Home screen or delete icons or folders from the Extended
launcher bar.
1. Arrange icons or folders on the Extended launcher bar.
2. Tap and hold an icon or folder to move or delete, and then
drag it to a desired location or to
Note To arrange an icon in a folder on the Home screen or delete it,
open a folder, tap and hold an icon, and then drag it to
a desired location or to at the top of the screen.
at the top of the screen.
Using The Task Manager
Accessing Recently-used Applications
Use the Task Manager to access recently-used applications.
1. Tap
2. Tap an application.
.
x Flick the application to the left or
right to delete it from the list.
x Tap and hold the application to
delete it from the list or view the
application information.
35
Page 36

BASIC OPERATIONS
Closing Running Applications
If you start an application and do not close it with the Task
Manager, the application remains active even when you switch
to the Home screen or start another application. Launching
multiple applications can slown down the performance of the
device. Close unnecessary application with the Task Manager.
1. Tap
2. Tap End next to an application.
> Task Manager.
x Tap Total X apps End All to close all applications.
Optimizing the System
When you launch multiple applications at a time or the CPU's
usage is high, the consumption of the battery and the system
load will increase. Check the CPU's usage and RAM usage with
the Task Manager, and then optimize the system.
Tap
> Task Manager.
1 2 3
4
No. Description
Select a category.
1
Select a view type.
2
View the tips.
3
List of active applications.
4
x Tap an applica
it from forced closure.
tion to view its information or protect
36
Page 37
BASIC OPERATIONS
Using the Applications Menu
Layout of the Applications Menu Screen
You can sort pre-installed applications and downloaded
applications by group, in alphabetical order, or one at a time.
Press
to open the Applications menu.
1
Tap an icon to run the application.
x Tap and hold an icon to create
a shortcut on the Home
screen.
x Flick the screen to the left or
32
right to move to the previous
or next page.
No. Description
Create a new group.
1
Sort applications.
ap Groups to arrange icons manually.
x T
x Tap Alphabetical to sort icons in alphabetical order
2
(flick upward or downward to search for applications).
x Tap Downloads to view downloaded applications.
View application information, move, uninstall, or hide
applica
tions.
ap and hold an icon, and then drag it to another
x T
3
location.
x Tap an icon to uninstall, hide, or view the application
information.
Note You cannot uninstall pre-installed applications.
Using the Menu Options
Use the menu options to configure the menu screen.
1. Press
2. Tap
No. Description
1
2
3
4
5
6
7
Note When you tap , the items available will vary depending on the
sorting method (Groups, Alphabetical, or Downloads).
37
.
.
1
2
3
4
5
6
7
Search for an application.
Share applications with people.
Add, move, or delete groups.
View hidden applications.
Change icon style.
Access Play Store.
View the tips.
Page 38
BASIC OPERATIONS
Connecting to the Internet
Connecting to a Wi-Fi Network
When you activate Wi-Fi after turning on the phone for the first
time or resetting the phone, the Wi-Fi settings screen appears.
1. Drag the area at the top of the screen downward.
2. Tap
3. Select and tap a network in the Wi-Fi network list.
No. Description
Wi-Fi in Quick Settings to turn on Wi-Fi.
x Tap
1
2
3
4
Wi-Fi again to turn off Wi-Fi.
1
2
3
5
46
Turn Wi-Fi on or off.
Unsecured network
Secured network
Access advanced settings and configure a WPS
connection.
No. Description
Add a Wi-Fi network.
5
Search for available Wi-Fi networks again.
6
Note You must enter a password to connect to a secured Wi-Fi
network.
To Configure Wi-Fi Settings
If you turn off Wi-Fi, and then turn it on again, the phone
automatically connects to the most recently-used network. To
connect to another Wi-Fi network or configure Wi-Fi settings,
drag the area at the top of the screen downward, and tap
Wi-Fi Settings in Detail Settings. You can also tap >
Settings > Wi-Fi.
Connecting to a Mobile Network
You will need a data plan to access a mobile network.
1. Drag the area at the top of the screen downward.
2. Tap
To Configure Mobile Network Settings
Tap > Settings > More... > Mobile networks, and then check
Data Services to enable data access over mobile networks.
Data in Quick Settings to access the mobile
network.
x Tap
Data to disconnect from mobile network.
38
Page 39

BASIC OPERATIONS
Setting up a Bluetooth Connection
Bluetooth is a short-range wireless technology that enables
wireless connections between electronic devices over a
distance of about 10 meters (32 feet).
Turning on Bluetooth
1. Drag the area at the top of the screen downward.
2. Tap
Pairing with Devices
1. Drag the area at the top of the screen downward.
2. Tap
3. Select and tap a device from the list.
4. Tap Pair.
Bluetooth in Quick Settings to turn on Bluetooth.
Bluetooth to turn off Bluetooth.
x Tap
Bluetooth Settings in Detail Settings.
x Tap to rename the phone, set a visibility timeout, or
view received files.
x If you are prompted to enter a PIN, follow the
instructions on the screen.
Note
x You can also pair with devices by tapping > Settings >
Bluetooth.
x To unpair a device, tap next to the connected device, and then
tap Unpair.
x Some devices are unpaired as you tap them.
x To use the Bluetooth technology on a PC, the PC must have a
built-in Bluetooth capability or you must install an external
Bluetooth Dongle. Refer to your PC's User Manual for more details.
Using Bluetooth
Before Using
x You can send data up to 10 meters (32 feet), but if there are
obstacles between the devices, the operating distance may
be reduced. Other manufacturers' handsets or PCs may be
incompatible with your handset.
x Using the Bluetooth technology may affect battery
life. Turn off Bluetooth when it is not in use, to prevent
unnecessary battery consumption.
x Bluetooth may interfere with other wirless devices that use
the same frequency band.
x Headsets and hands-free devices may not be discoverable
when they are connected to and in use with other devices,
or when other devices are attempting to pair with them.
x When you make a call, listen to music, or watch TV with
a Bluetooth device, the sound quality degrades and the
Bluetooth device eventually disconnects as you move
farther away from the handset. If you exceed the operating
distance, the speakerphone feature will activate.
x When you use a Bluetooth headset, sound quality may
degrade, due to obstacles or interference. For optimal
performance, use a Bluetooth headset within a short
distance and remove obstacles from between the devices.
x You may have difficulty hearing some calls in noisy
environments or outdoors, due to surrounding noise.
x Some Bluetooth headsets may not be compatible with the
handset.
x When you connect the handset to a Bluetooth-enabled
car stereo and start the music player on the car stereo, the
music application on the handset will launch.
39
Page 40
BASIC OPERATIONS
Making a Call
If a Bluetooth headset or hands-free device is paired with the
handset, it automatically connects to the handset when you
make a call. You can make or answer a call by pressing the call
key on the Bluetooth headset or hands-free device.
1. Pair the handset with a Bluetooth headset or
hands-free device (refer to p. 39 "Setting up a Bluetooth
Connection").
2. Start talking.
Note
x Instructions on using Bluetooth headsets or hands-free devices
may vary depending on device type. Refer to the device user
manual for more details.
x Some headsets may automatically attempt to reconnect when
they are disconnected. The service status of the reconnection may
differ from your settings.
x You can switch between a headset and the handset by
long-pressing the call key on the Bluetooth headset when the
hands-free device is connected. You can also tap Bluetooth on the
screen during a call. Some Bluetooth headsets do not support the
swtiching function.
Enjoying Multimedia
Listen to music and watch video or TV with a Bluetooth
headset or hands-free device.
1. Pair the handset with a Bluetooth headset or
hands-free device (refer to p. 39 "Setting up a Bluetooth
Connection").
2. Tap
3. Tap Music Player, Video Player, or Live TV.
.
Note
x Instructions on using Bluetooth headsets or hands-free devices
may vary depending on device type. Refer to the device user
manual for more details.
x If you connect to another headset while a headset is connected in
stereo, the second headset can be connected in hands-free mode.
Sound quality may degrade when you connect two headsets, due
to differences in specifications between them.
x Adjusting the volume on a headset only affects the headset
volume. The volume of the handset must be adjusted on the
handset.
Transferring Data
Transfer multimedia files, contacts, and more from the phone
to other devices.
To Transfer Photos and Videos from Gallery
Pair the phone with a Bluetooth headset or hands-free device
(refer to "Setting up a Bluetooth Connection"). Tap
Gallery > a photo or video >
> Bluetooth >
a Bluetooth device.
To Transfer Contacts
Pair the phone with a Bluetooth headset or hands-free
device (refer to "Setting up a Bluetooth Connection"). Tap
> Contacts > tap and hold a contact > Share contact >
Bluetooth > a Bluetooth device.
Note
x The transfer procedure and available items may differ depending
on content type.
x If a device is disconnected while attempting to connect to the
handset, a window for entering a passcode will appear when you
attempt to pair again. You must enter the correct passcode to
complete the connection.
>
40
Page 41

BASIC OPERATIONS
Configuring Bluetooth Settings
1. Drag the area at the top of the screen downward.
2. Tap
3. Tap
Option Description
Rename phone Change the handset's Bluetooth name.
Visibility timeout
Show received
files
> Bluetooth Settings in Detail Settings.
x Turn on Bluetooth, if it is turned off.
> an option
Set the length of time during which the
handset is visible to other devices.
View received files via Bluetooth.
Installing or Uninstalling Applications
Installing Applications from Play Store
Download useful applications from Play Store and use them for
your purposes. You must consent to the Play Store Terms of
Service if you are accessing the Play Store for the first time.
1. Tap
2. Search for an application.
3. Select and tap an application.
4. Follow the on-screen instructions to install the application.
> Play Store.
x You can also tap Play Store from the Home screen.
Note
x Settings screens and steps may vary.
x To view installed applications, tap and move to the last page, or
tap the bottom-left corner of the screen to select Downloads.
x You can view the installation progress by dragging the area at the
top of the screen downward.
x When you access Play Store for the first time, the account
registration screen appears. Follow the on-screen instructions to
register an account.
Deleting Applications
1. Tap .
2. Tap
3. Tap
4. Select and tap an application to delete, and then tap
Groups at the bottom-left corner of the screen to
select Downloads.
.
Uninstall > OK > OK.
41
Page 42

P9090
5
CALLING & MESSAGING
Calling
Managing Contacts
Messaging
Page 43

CALLING & MESSAGING
Calling
Making a Call
1. Tap Phone.
2. Enter a phone number.
3. Tap
4. Tap
Note
x Tap and hold a speed dial number to make a call. If the speed dial
x You must tap
x Available items that appear when you tap differ depending on
at the bottom of the screen.
x Tap
number is two digits, tap the first digit, and then tap and hold the
second digit.
during a call, drag the area at the top of the screen downward, and
then tap .
how you dial the number (manually or via speed dial).
to access settings.
to end a call.
to end a call. If you are using other functions
Making a Call by Voice
You can make a call or open an application with your voice.
1. Tap
2. Say a command.
> Voice Dialer.
Adding a Pause or a Wait to a Phone Number
To Add Pause
1. Tap Phone.
2. Enter the phone number.
3. Tap
4. Enter the additional number.
5. Tap
To Add Wait
1. Tap Phone.
2. Enter the phone number.
3. Tap
4. Enter the additional numbers.
5. Tap
6. Tap Yes when the Send following tones? message appears
> Add 3-sec pause.
.
x The additional numbers will be entered automatically
after 3 seconds.
> Add wait.
.
on the screen.
43
Page 44

CALLING & MESSAGING
Answering a Call
1. Drag into the circle to answer a call.
x Drag
x Press
2. Start talking.
3. Tap
Note
x The Caller ID may be displayed differently or may not be displayed
depending on the caller's preferences. Contact your service
provider for more details.
x You must tap
a call, drag the top of the screen downward, and then tap .
into the circle to reject a call with a message.
(volume key) or the LOCK/PWR key to mute
the ringtone or stop the vibration.
to end a call.
to end a call. If are using other functions during
Rejecting a Call
Drag into the circle to reject a call. You can also send a
message after rejecting a call by dragging
To Check Missed Calls
Drag the the area at the top of the screen downward when
appears on the notification bar. You can also view missed calls
by tapping
Phone > Call log.
into the circle.
Using Functions During a Call
Tap the menu icons that appear on the screen during a call to
use the following functions:
Function Description
Speaker Talk through the speaker.
More Turn Bluetooth On. Turn Noise Suppression Off.
Hold Place a call on hold.
Swap Switch between two calls.
Mute Mute the phone.
Dialpad Switch to the dialpad.
End End a call.
Add call Dial a second call.
Merge Make a conference call.
Note You can adjust the volume by pressing (volume key).
Managing Call Logs
Tap the menu icons that appear on the screen during a call to
use a variety of functions.
1. Tap Phone > Call log.
2. Tap a call log to view details.
x Tap and hold to make a call, send a message, send an
email, view a contact, or delete an item from a log.
3. View the log.
Note Up to 500 entries can be displayed in the received or dialed call
logs.
44
Page 45

CALLING & MESSAGING
Managing Contacts
Creating Contacts
Save new contacts to your phone or your Google account. If
you have registered more than two Google accounts, you can
select an account for saving contacts.
1. Tap Contacts.
2. Tap
3. Enter related information.
4. Tap Save.
1
or .
x Tap > Join to choose a contact to merge with the new
contact.
2
No. Description
Register a photo.
1
Enter a name, phone number, or email address; set a
2
one; or select a group.
ringt
Setting a Speed Dial Number
1. Tap Contacts.
2. Tap
3. Select and tap a number, and tap Add.
4. Select and tap a contact.
> Speed dial setting.
Viewing Saved Contacts
1. Tap Contacts.
2. Select and tap a contact.
x Type the first letter of the name to show names that
start with that letter.
3. View the contact information.
x Tap
x Tap
x Tap
Example: When you save a contact on your phone.
to designate the contact as a favorite.
to edit the contact.
to open menus.
45
Page 46

CALLING & MESSAGING
To Delete Contacts
Tap and hold a contact to delete, and then tap Delete contact
> OK.
Exporting or Sharing Contacts Information
1. Tap Contacts.
2. Tap
3. Select and tap an item.
Item Function
SIM card contacts
Export to SIM
card(Copy)
Export to SIM
card(Move)
Import from SD card
Export to SD card
> Import/Export.
View and edit contacts on the SIM or
USIM card.
Copy contacts from the phone to the
SIM or USIM card.
Move contacts from the phone to the
SIM or USIM card.
Import contacts from the SD card to
the phone.
Export contacts from the phone to
the SD card.
Note Contact items that can be exported may differ depending on
the SIM or USIM manufacturer or service provider.
Syncing Contacts with Google Account
1. Tap Contacts.
2. Tap
3. Select and tap an account.
4. Tap the check box next to Sync Contacts.
> Accounts
x Turn on Accounts & sync if it is turned off.
Note You must register a Google account to sync contacts with it.
For more details, refer to page 53.
Setting Contacts Groups
Manage multiple contacts in groups. If you have registered
more than two Google accounts, you must select an account
for setting groups.
1. Tap Contacts > Groups
2. Tap .
3. Select and tap an account.
4. Enter a group name and add group members.
5. Tap Save.
To Add Group Members
Tap and hold a group in the group list, and then tap Edit group.
Tap the Add group member button, and select the names of
the members to add.
To Manage Groups
Tap and hold a group in the group list, and then select and tap
one of the menu items. You can edit the group or set a group
ringtone. Alternatively, select and tap the group, and then tap
. You can send a message to up to 10 group members by
tapping Send.
.
46
Page 47

CALLING & MESSAGING
Adding to Favorite Contacts
1. Tap Contacts.
2. Select and tap a contact, and then tap
x You can also tap and hold a desired contact, and then
tap Add to favorites.
Note You can view your favorite contacts by tapping Contacts >
Favorites.
.
Messaging
Viewing the Conversations List
1. Tap Messages.
2. View the conversations list.
x Tap to delete a conversation, search messages, sort
conversations, select a quick text, manage templates,
check a voice mail, or access settings.
To Search Messages
In the conversations list, tap > Search and enter a keyword.
To Sort Convesations
In the conversations list, tap > Sort by > an option.
Note
x Available options differ depending on the message type (sent or
received) or contact information.
x You can enlarge or reduce the font size by spreading two fingers
apart or squeezing them together.
Viewing a Conversation
View sent and received messages in a conversation and sort
converstions by date or contact name.
1. Tap Messages.
2. Select and tap a conversation.
x Tap the photo to add to contacts or view options when
the address is already saved.
3. View the messages.
x Tap and hold a message to view the message detail, lock
it or unlock it, edit it, forward it, save the attachment,
copy the message as text, delete it, view message
information, move to the SIM or USIM card, add to
contacts, call the number, or send an email.
x Tap
x Tap
to attatch a picture, video, audio, contact, or
other file.
to reply, insert text, add a slide, add cc or bcc
fields, discard a message, save as a template, move to
the SIM or USIM card, or delete.
Sending a New Message
Send text (SMS) or multimedia (MMS) messages.
1. Tap Messages.
2. Tap
3. Enter the recipient's number or email address.
4. Tap the message input field and enter a message.
47
.
x Tap
x Tap
to attatch a picture, video, audio, contact, or
other file.
to insert text, add a slide, add cc or bcc fields,
discard a message, load a template, start the slide
manager, save the message as a template, preview the
message, remove a slide, set the slideshow layout, or set
the slideshow duration.
Page 48
CALLING & MESSAGING
5. Tap Send.
1
2
3
No. Description
Recipient input field
1
Select recipients from contacts, call log, or group.
2
Message input field
3
Note You can add multiple recipients in the recipient input field by
adding a comma, space, or semicolon between each recipient's
phone number or email address.
Configuring Message Settings
1. Tap Messages.
2. Tap
3. Select and tap an item.
Item Function
Storage settings
Signature settings
Text message (SMS)
settings
Multimedia message
(MMS) settings
Notification settings
> Settings.
Set the old message auto-deletion
limit. Set the text message or
multimedia message limit. View used
memory.
Edit your signature. Set the Signature
auto-append function.
Manage SIM card messages.
Set the Auto-retrieve function. Access
extra settings. Set the storage for
saving attachments.
Configure the message notification
setting. Select a ringtone. Configure
the vibration setting.
48
Page 49

P9090
6
COMMUNICATION
Using the Internet
Setting Up Email Accounts
Using Email
Setting up a Google Account
Using Gmail
Using Google+
Using Social World
Using Social Gallery
Using Facebook
Using Twitter
Page 50
COMMUNICATION
Using the Internet
Accessing the Internet
Search for information on the Internet and bookmark your
favorite websites.
1. Tap
2. Tap the address bar, and then enter a URL or keyword.
3. Tap
2 3
> Web .
, Go or .
x Tap
x Tap and hold unlinked text to copy or share it, find it on
x Drag
No. Description
1
2
3
to open menus and options, such as Forward,
Tab management, New incognito tab, Bookmarks, Save
to bookmarks, Share page, Brightness, Find on page,
Request desktop site, Save for offline reading, or Settings.
the page, or search for the text on the web.
upward to open the toolbar.
1
Open a new tab.
View bookmarks, browsing history, or saved pages.
Refresh a page.
To Download Files from the Internet
Tap and hold a picture, link, or file, and then tap Save image or
Save link. You can find downloaded files at
> Downloads.
Using the Google Search
1. Tap > Search.
2. Enter a keyword in the search box,
and then tap
x Tap
view help.
x Tap
, or .
to access settings or
to search by voice.
Setting Up Email Accounts
Setting Up Email Accounts Automatically
1. Tap > Email.
2. Select and tap an email service.
3. Enter your email address and password, and then tap
NEXT.
4. Configure the settings, and then tap
5. Enter an account name and your name, and then tap
50
.
.
Page 51
COMMUNICATION
To Add Another Email Account
After setting up the email account, in the mail list screen, tap
> Accounts > . You can also tap > Settings >
Accounts & sync > ADD ACCOUNT > Email.
Setting Up Email Accounts Manually
1. Tap > Email.
2. Select and tap an email service.
3. Enter your email address and password, and then tap
MANUAL SETUP.
4. Select and tap an account type.
5. Enter the server information, and then tap
6. Configure the settings, and then tap
7. Enter an account name and your name, and then tap
.
.
Synchronizing Emails
1. Tap > Settings > Accounts & sync.
2. Select and tap an email account.
3. Tap the check box next to Sync Email.
Using Email
Viewing Email Messages
1. Tap > Email.
2. Tap a message to view it.
x Tap
x Tap the check boxes next to emails, and then tap
.
No. Description
1
2
3
to refresh, search email, select another account,
sort emails, turn on or off the conversation mode,
manage folders, or access the settings.
move them or mark them as read or unread.
2 3
1
Switch to another account.
Switch to another mailbox.
Create a message.
to
51
Page 52
COMMUNICATION
3. View the message.
x Tap
to move, delete, save to calendar, or mark the
message as unread.
1 2 3 4
6
5
7
No. Description
View the mail list.
1
Reply
2
Reply to all.
3
Forward
4
Show or hide the sent date and time, sender's name
5
and email addr
Add the email address to contacts or view options
6
when the address is alr
View or save the attachment.
7
ess, or st
ar.
eady saved.
Create an Email Message
1. Tap > Email.
2. Tap
to create a new message.
3. Tap the To field and enter the recipient’s email address.
4. Tap the Subject field and enter a subject.
5. Tap the text input field and write a message.
6. Tap
to send the message.
x Tap
to open menus.
Changing Email Settings
1. Tap > Email.
2. Tap
3. Select and tap an option.
Option
General
Pre-registered
accounts
To Delete an Email Account
1. Tap > Email.
2. Tap
3. Select and tap an email account to remove.
4. Tap Remove account > OK.
> Settings.
Settings
Automatic picture view, Ask to show
pictures, View mode.
Account settings, Detail settings,
Notification settings, Remove account.
> Settings.
52
Page 53

COMMUNICATION
Setting up a Google Account
Registering a Google Account
1. Tap > Settings > Accounts & sync.
2. Tap ADD ACCOUNT > Google.
3. Tap New to create a new account.
x Tap Existing if you have a Google account.
4. Follow the on-screen instructions.
Note
x You must sign in to your Gmail account to use applications that
require a Google account.
x You can add other accounts, such as Facebook, Picasa or Twitter.
Synchronzing Google Accounts
1. Tap > Settings > Accounts & sync.
2. Select and tap an account.
3. Tap the check box next to Sync Gmail.
x Sync Calendar: Sync calendar entries with a Google
account.
x Sync Contacts: Sync contacts with a Google account.
x Sync Gmail: Sync mails with a Google account.
x Sync Google Photos: Sync photos with a Google
account.
x Sync Google Play Books: Sync books with a Google
account.
x Sync Web: Sync bookmarks with a Google account.
Using Gmail
Viewing Gmail Messages
1. Tap > Gmail.
2. From the Gmail inbox, tap a message to view it.
1
2
3 4
5
6 7
No. Description
Switch to another account or mailbox.
1
Number of unread messages.
2
Create a message.
3
Search for mail.
4
Show all labels.
5
Refresh
6
Label settings, Settings, Help, Send feedback
7
53
Page 54
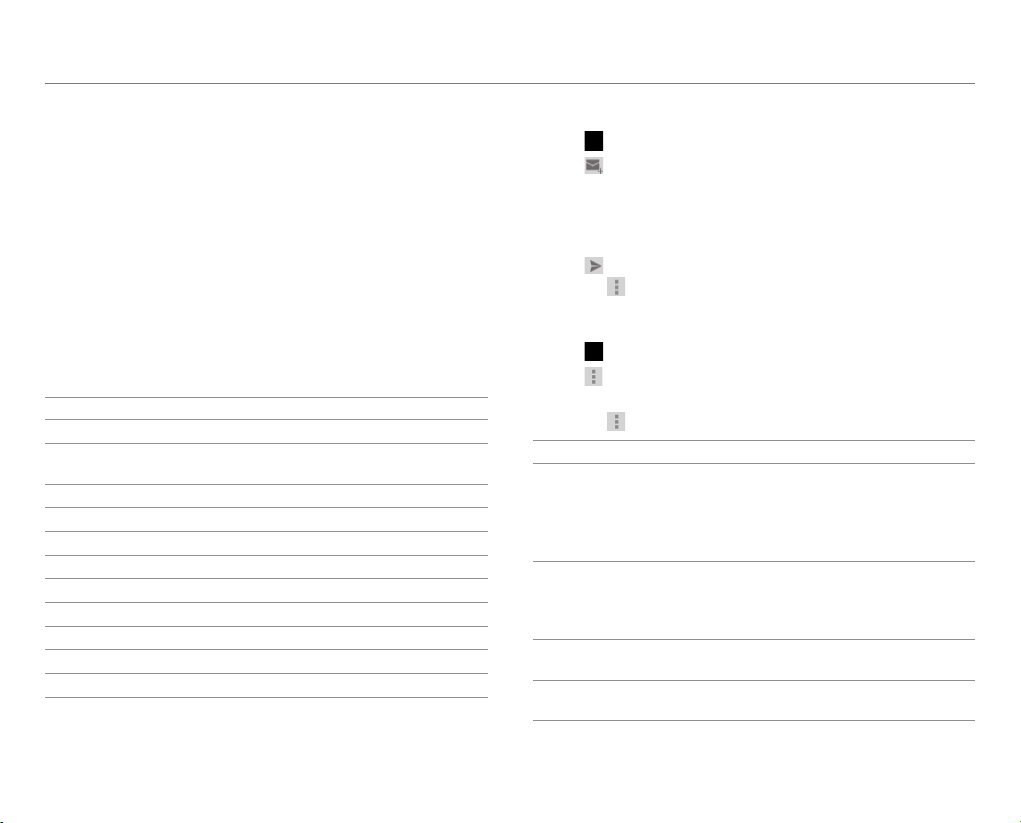
COMMUNICATION
3. View the email message.
1
2 4
6
7 8
9
3
0 !
5
No. Description
Return to the mailbox.
1
Add the email address to contacts or view options
2
when the addr
Designate as a favorite.
3
Send a reply.
4
Reply to all or forward.
5
View or save the attachment.
6
Archive a message.
7
Delete a mail.
8
Change labels.
9
Mark unread.
0
Open menus.
!
ess is already saved.
Creating a Gmail Message
1. Tap > Gmail.
2. Tap
to create a new message.
3. Tap the To field and enter the recipient’s email address.
4. Tap the Subject field and enter a subject.
5. Tap the Compose email field and write a message.
6. Tap
to send the message.
x Tap
to open menus.
Changing Gmail Settings
1. Tap > Gmail.
x Tap
> Settings.
to view help or send feedback.
Settings
Confirm before deleting, Confirm before
archiving, Confirm before sending,
Reply all, Auto-advance, Message text size,
Hide checkboxes, Message actions,
Clear search history, Ask to show pictures
Priority Inbox, Email notifications,
Ringtone & vibrate, Signature,
Gmail sync, Days of mail to sync,
Manage labels, Download attachments
Gmail Version, Send feedback,
Report a problem, License information
Enable full text search, Enable drag and
drop contact chip
2. Tap
3. Select and tap an option.
Option
General
settings
Pre-registered
accounts
About Gmail
Experiments
54
Page 55

COMMUNICATION
Using Google+
Google+ allows you share things with people, send messages,
and more.
1. Tap
2. Tap New to create a new account.
3. Follow the on-screen instructions.
4. Select and tap a menu.
> Google+.
x Tap Existing if you have a Google account.
1
2 3
No. Description
Search for posts or people.
1
Notifications
2
Open menus.
3
Note Tap > Messenger to start the Messenger function manually.
Using Social World
Social World allows you use social services, such as
Facebook,Twitter, and LinkedIn.
Setting up Social World Accounts
1. Tap > Social World.
2. Tap
3. Enter your username or email address and password.
on the right side of a Social World service.
1
No. Description
1
2
3
2
3
All feeds
Pre-registered accounts
View all notifications.
55
Page 56

COMMUNICATION
Using Social World Facebook
1. Tap > Social World.
2. Select and tap your Facebook account.
3. Select and tap a tab.
2
1
No. Description
Post a new message on Facebook.
1
Search, Friends, Groups, My profile, Refresh, Settings
2
Note Tap and hold a message to view the available options.
Using Social World Twitter
1. Tap > Social World.
2. Select and tap your Twitter account.
3. Select and tap a tab.
2
1
No. Description
Post a new message on Twitter.
1
Search, Friends, Favorite, My profile, Refresh, Settings
2
56
Page 57

COMMUNICATION
Using Social World LinkedIn
1. Tap > Social World.
2. Select and tap your LinkedIn account.
3. Select and tap a tab.
2
1
No. Description
Post a new message on LinkedIn.
1
Search, Connections, My profile, Refresh, Settings
2
Using Social Gallery
Social Gallery allows you to view photos and videos on your
social service accounts or your phone.
Setting up Accounts
1. Tap > Social Gallery > .
2. Select and tap a service to add your SNS account.
3. Enter your username or email address and password.
Using Social Gallery
1. Tap > Social Gallery.
2. Select and tap a tab.
1 2
No. Description
1
2
3
4
57
3 4
Pictures from My gallery
Pictures from Friends’ SNS account.
Items selected as favorites
Place
Page 58

COMMUNICATION
3. Select and tap a folder from the list.
4. Select and tap a photo or video.
1 2 3 4 5
6
No. Description
Share the picture via Bluetooth, Facebook, Gmail, or
1
other method.
Post a new message with the selected photo.
2
Write a comment or delete the file.
3
View the picture on a map.
4
View pictures in a slideshow.
5
Write a caption. Save the picture. View the file
tion. Print the photo. Set as a contact photo or
orma
inf
6
wallpaper.
Using Facebook
1. Tap > Facebook.
2. Enter your email address and password, and then tap
Login.
x Tap Sign Up for Facebook if you do not have a Facebook
account.
3. Select and tap a contacts sync option, and then tap Sync or
Done.
4. Tap
to select and tap a tab.
x Tap
to view the menus.
Using Twitter
1. Tap > Twitter.
2. Tap Sign In, and then enter your username or email address
and password.
x Tap Sign Up if you do not have a Twitter account.
3. Select and tap a tab.
x Tap
to view the menus.
58
Page 59

P9090
7
MEDIA CENTER
Using the Camera
Capturing the Screen
Using the Gallery
Downloading Music or Video Files from a PC
Using the Music Player
Using Play Music
Using the Video Player
Using Movies
Using Play Movies
Enjoying YouTube
Using Qik Lite
59
Page 60

MEDIA CENTER
Using the Camera
Before Using
x It is recommened that you take pictures in bright areas.
Avoid direct fluorescent or harsh lighting.
x To achieve good pictures, ensure that the subject is steady
and hold the phone firmly.
x The camera sensor needs some time to automatically
adjust the exposure. Wait until the camera achieves the
correct exposure.
x The built-in camera is vulnerable to impacts. Be careful not
to drop the phone. Wipe the camera lens regularly with a
soft, clean cloth.
x The phone consumes more battery power when you use
the camera. It is recommended that you carry additional
batteries.
x Location information may be saved to pictures, depending
on the GPS settings.
x Use the camera responsibly and adhere to all laws and
regulations concerning its use.
Taking Pictures
The camera automatically detects a scene and adjusts the
focus. You can tap the screen to focus on a desired area.
Captured pictures are saved in the Camera folder under the
Gallery application.
1. Tap
2. Tap
1
> Camera.
.
2
3
6
4
5
No. Description
Open menus and options.
1
Switch to the front camera.
2
Switch to video or panorama mode.
3
Set the HDR function.
4
View captured pictures.
5
Zoom in or out.
6
Note
x You can also zoom in or out by pressing the volume key up or down
or spreading your fingers apart or pinching them together.
x Available picture resolutions differ when you use the front camera.
Tap
> Options > Resolution to view available resolutions.
x The High Dynamic Range (HDR) function automatically adjusts the
bright and the dark areas of a photo. It allows a greater dynamic
range between the brightest and darkest areas of a photo.
60
Page 61

MEDIA CENTER
Using Options for Taking Pictures
Configure the camera settings to match shooting conditions.
1. Tap
2. Tap
3. Tap a menu > an item.
Menu Setting (when you use the rear camera)
Options
Mode Normal, Self, Instant Film, Division, Speed
Effects Color Effect
Settings
> Camera.
.
x Tap and hold an item, and then drag it into an orange
box to add a shorcut.
x Tap and hold a shortcut, and then drag it off of the menu
bar to delete it.
Exposure, Timer, Flash, Resolution,
White Balance, Scene Mode
Review Screen, Photometry, GPS, Shutter Sound,
Save Location
Note
x Instant Film mode allows you to apply the instant camera effect
and edit pictures.
x If you set the Review Screen function, you can use the album, edit,
share, and delete menus after taking pictures.
x If you tap
downward to view items.
in portrait mode, you can drag the screen upward or
Recording Videos
Record videos with the built-in camera. You can also capture
an image during playback. Captured videos and photos are
saved in the Camera folder under the Gallery application.
1. Tap
2. Tap
3. Tap
1
4. T
> Camera.
> to switch to the video mode.
.
2
3
5
4
No. Description
Open menus and options.
1
Switch to the front camera.
2
Switch to picture or panorama mode.
3
View captured videos.
4
Zoom in or out.
5
ap to stop recording.
x Tap
Note You can also zoom in or out by pressing the volume key up or
down or spreading your fingers apart or pinching them together.
to capture a picture during recording.
61
Page 62

MEDIA CENTER
Using Options for Recording Videos
Configure the camera settings to match shooting conditions.
1. Tap
2. Tap
3. Tap a menu > an item.
Menu Setting (when you use the rear camera)
Options
Effects Color Effect, Time Lapse Effect
Settings
> Camera.
.
x Tap and hold an item, and then drag it into an orange
box to add a shorcut.
x Tap and hold a shortcut, and then drag it off of the menu
bar to delete it.
Exposure, Time Lapse, Flash, Resolution,
White Balance, Scene Mode
Review Screen, Voice Rec., MMS Rec., GPS,
Shutter Sound, Save Location
Taking Panoramic Pictures
Take a wide panoramic scene in a single picture. Captured
pictures are saved in the Camera folder under the Gallery
application.
1. Tap
2. Tap
3. Tap
> Camera.
> to switch to panorama mode.
.
No. Description
Switch to picture or video mode.
1
View captured pictures.
2
1
2
Viewing Captured Picture or Videos
1. Tap > Camera.
2. After finishing capturing, tap the image viewer at the
bottom right of the screen.
Note The Gallery application starts when you tap the image viewer
(refer to page 63).
62
Page 63

MEDIA CENTER
Capturing the Screen
Press the Volume Down or Up key, and the Lock/PWR key
together for more than two seconds to capture an image of
the screen. You can edit and share the captured image, and
also set it as a wallpaper or contact photo. You cannot capture
images from videos or the camera preview.
Viewing Captured Images
Drag the area at the top of the screen downward, and then tap
Screenshot captured. You can also view captured images by
tapping
> Gallery > Screenshots.
Using the Gallery
Viewing Pictures
1. Tap > Gallery.
2. Select and tap a folder.
3. Select and tap a picture.
x Tap
x Tap
x Tap and hold a picture to share or delete or view menu
to play a slide show.
to select items or view pictures in groups.
items.
63
Page 64
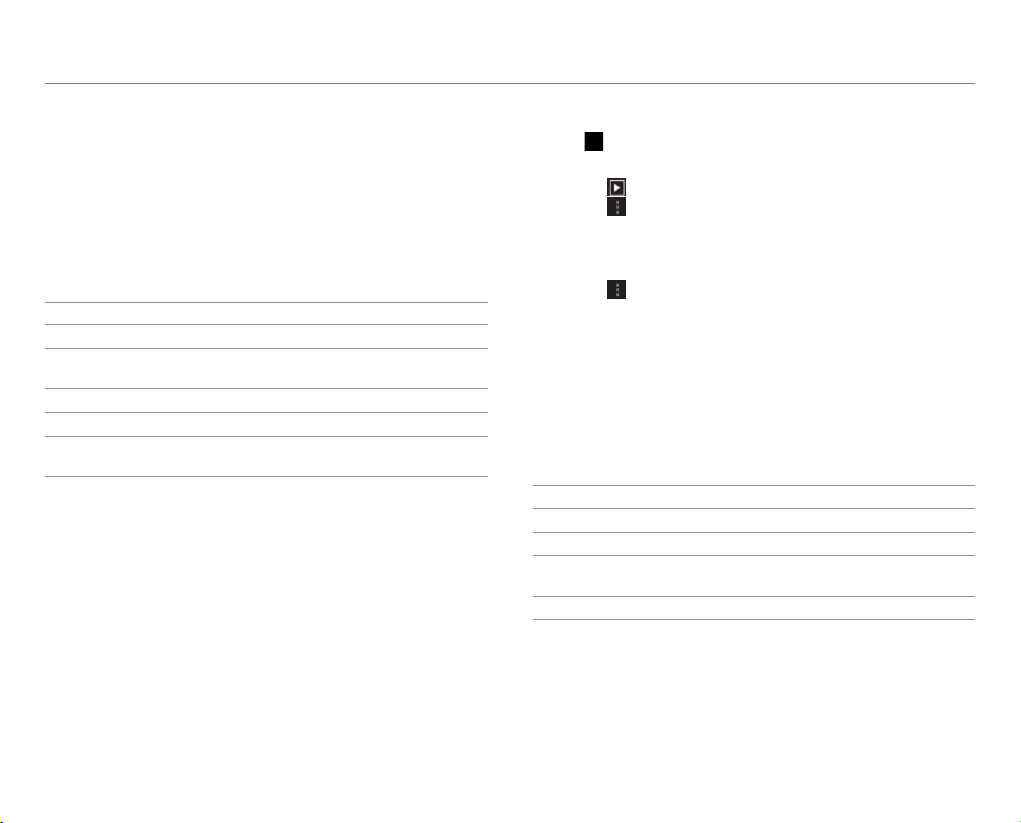
MEDIA CENTER
4. View the picture.
1
5
2 3
4
Example: When you select a picture in the Camera folder.
No. Description
Return to the folder.
1
Share a picture via Social World, Bluetooth, or other
2
method.
Delete a picture.
3
View the menus.
4
The selected picture
5
o view or hide the option menus.
ap t
x T
Viewing Videos
1. Tap > Gallery.
2. Select and tap a folder > a video.
x Tap
x Tap
x Tap and hold a video to share or delete or view menu
3. View the video.
x Tap
2
3 4
No. Description
1
2
3
4
to play a slide show.
to select items or view videos in groups.
items.
to share the video, view the file information, or
access the settings. If the video has a caption, you can
adjust the caption settings.
1
Set the sound effects.
Playback progress bar
View the thumbnails of a video.
ap a thumbnail t
x T
o move to that scene.
Adjust the screen size.
64
Page 65
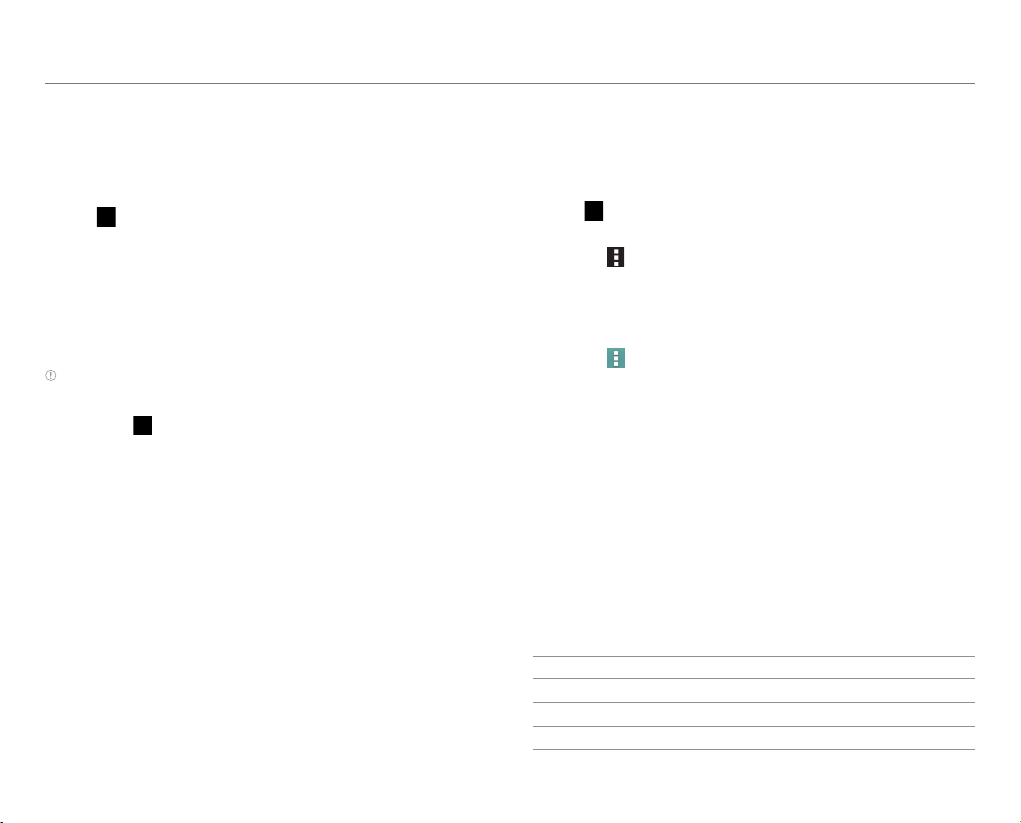
MEDIA CENTER
Downloading Music or Video Files from a PC
Share music or video files with a PC via the data cable. You
must first install Windows Media Player 10 or higher.
1. Tap
2. Connect the phone to a PC with the data cable.
3. Open the MTP device on the PC, and then transfer files from
4. Disconnect the data cable when the transfer completes.
> Settings > USB connection settings >
Media device (MTP).
x Tap Tips to view tips about connection modes.
the PC to your phone.
Note
x To connect the phone to a PC in MTP mode, the PC and Windows
Media Player must meet the requirements under the following
path. Tap
then tap the Media device (MTP) tab.
x If you do not tap the check box next to Show settings when USB
Connected. in the USB connection settings screen, the screen will
not appear next time you connect your phone to a PC. In that case,
drag the area at the top of the screen downward, and then tap PC
data mode to open the USB connection settings screen.
x The USB connection may fail depending on your PC's operating
system. Tap Tips in the USB connection settings screen for
details.
> Settings > USB connection settings > Tips, and
Using the Music Player
Listening to Music
Enjoy music on the phone.
1. Tap
2. Select and tap a tab.
3. Select and tap a file to play.
5
> Music Player.
x Tap to delete files or access the settings.
x Tap and hold a file to set it as a ringtone, add it to
a playlist or player, delete it, send it, or view file
information.
x Tap
to add it to a playlist, set it as ringtone, set the
sleep mode, or access settings.
1
2
4
6
7 8
3
No. Description
Search for the file in an application.
1
Rate the file.
2
Set the sound effects.
3
65
Page 66

MEDIA CENTER
No. Description
Album cover
x Drag t
4
Additional features
5
Progress bar
6
Set random play.
7
Set repeat play.
8
o the left or right to skip to the previous or
next track.
x T
ap
x Tap
x Tap
to switch to the play list.
to view similar songs on YouTube and share
the information via SNS.
to view the song information.
To Control Music on the Locked Screen
If the screen is locked when you play music, drag the CD image
at the upper-right of the screen to the left. You can use the
playback bar to pause, playback, or skip to the previous or next
track.
Note
x The playback screen differs when you rotate the phone to
landscape mode.
x The instructions in this manual are based on the default playback
screen. Available items may differ depending on the options you
select.
Creating a Playlist
1. Tap > Music Player.
2. Drag the list to the left and tap Playlists.
3. Tap
4. Enter a name for the playlist, and then tap OK.
5. Select and tap the tracks that you want to add to the
6. Tap
> New playlist.
playlist.
.
To Add Songs to a Playlist
Tap and hold a track, and then tap Add to playlist > a playlist.
To Edit Playlists
Drag the list to the left, tap Playlists, and tap and hold a playlist.
You can edit the playlist by tapping one of the menu items.
Using Play Music
Play Music allows you to play music stored on your Google Play
music library or on your phone.
1. Tap > Play Music.
2. Tap and select a track.
3. Follow the on-screen instructions.
66
Page 67
MEDIA CENTER
Using the Video Player
Before Using
x Supported video formats and codecs are H.263, H.264 AVC,
MPEG-4, VC-1(WMV), DivX/XviD.
x Supported files types and container formats are .3gp, .3g2,
.mp4, .mkv, .avi, .wmv, .asf, .divx.
x Some videos may not appear as thumbnails in Gallery or
other applications due to performance limitations.
x Damaged or incompatible files may not play or may play
abnormally.
x The maximum resolution is 1920 X 1080. Some files
in certain formats or codecs may not play or may play
abnormally according to encoding options such as profile
or level, frames per second, or bit rate.
x Some files may not play or may play abnormally due to
performance or memory limitations.
x Large video files may take longer to start playing or to
search.
x If you play video files with a Bluetooth headset connected,
playback may differ depending on file formats or codecs.
x Subtitles (.smi or .srt) are supported with video files.
Viewing Videos
1. Tap > Video Player.
2. Select and tap a video.
x Tap
x Tap and hold a video file to delete, share, search for, or
3. View the video.
x Tap
No. Description
1
2
3
4
to play selected files; to delete, share, or sort
files; or go to DivX registration.
view the file information.
to view the current playlist, share the video, view
the file information, or access the settings. If the video
has a caption, you can adjust the caption settings.
1
3
Set the sound effects.
Playback progress bar
View thumbnails of a video.
ap a thumbnail t
x T
Adjust the screen size.
2
4
o move to that scene.
67
Page 68
MEDIA CENTER
Using Movies
Movies allows you to rent movies that can be played on your
phone.
1. Tap > Movies.
x You must allow installation of non-Market applications
from Settings. Tap
check Unknown sources.
2. Read the Terms of Service, enter the required information,
and then tap OK.
3. Follow the on-screen instructions to rent movies.
> Settings > Security, and then
Using Play Movies
Play Movies allows you to rent movies from Google Play and
watch them on your phone.
1. Tap > Play Movies.
2. Log in with your Google account.
3. Follow the on-screen instructions to rent movies.
Enjoying YouTube
Watching Videos
1. Tap > YouTube.
2. Select and tap a video.
3. View the video.
3 4
2
1
5
6
No. Description
Log in with your Google account. Add accounts.
1
Share via Gmail, Messages, Bluetooth, or other
2
method.
Search for videos.
3
Copy the URL, flag the video, send feedback, access
4
settings, or view the help
Playback screen
5
x Tap t
o pause or resume a video.
Rate the video.
6
Note Rotate the phone to landscape mode to switch to full screen
view.
68
.
Page 69

MEDIA CENTER
Uploading Videos
1. Tap > YouTube.
2. Tap the ACCOUNT tab.
3. Select and tap an account.
x Tap Add account to create an account.
4. Tap
5. Select and tap a folder > a video.
6. Select and tap an upload option.
7. Enter the title, description, and tags for the video, and then
8. Tap Upload.
.
set the privacy settings.
Using Qik Lite
Qik Lite allows you to make video calls, send video mail, and
share videos with people over Wi-Fi networks.
1. Tap > Qik Lite.
2. Tap Already a Qik User?, and then log in with your
username and password.
x Tap Get started! to create an account.
3. Select an option, and then follow the on-screen
instructions.
Option Description
Video Chat Make two-way video calls.
Record & Share Record and share videos.
Video Mail Send video mail.
Video Gallery View your videos in a gallery.
69
Page 70

P9090
8
MENU FUNCTIONS
Alarm/Clock
Calculator
Calendar
Converter
Document Viewer
File Manager
Key Ring
Latitude
Navigation
Net Media
NotePad
Pill Reminder
Places
Play Books
Pulse
Talk
Tip Calculator
Weather
Voice Recorder
70
Page 71

MENU FUNCTIONS
Alarm/Clock
Set alarms, view the world clock, use a timer, or set a
stopwatch.
Adding a New Alarm
1. Tap > Alarm Clock.
2. Tap Alarm > Add alarm.
x Tap to turn on or off an alarm.
x Tap
x Tap
x Tap
3. Select an alarm time from the numbers displayed, and then
tap Set.
4. Adjust the settings for the alarm, and then tap Save.
x A red bar appears under the alarm.
Note To change the alarm setting, tap the alarm time.
to use your phone as a desk clock.
to delete alarms.
to access alarm settings.
Using the Timer
1. Tap > Alarm Clock.
2. Tap Timer.
3. Set the timer by tapping the middle of the screen, and then
tap Set.
4. Tap Start.
Note You can reset the timer by tapping Reset while the timer is
running.
Using the Stopwatch
1. Tap > Alarm Clock.
2. Tap Stopwatch.
3. Tap Start to start the stopwatch and tap Record to
measure lap/split times.
Viewing the World Time
1. Tap > Alarm Clock.
2. Tap World Time > Add new city.
3. Enter the first letter of a city.
4. Select and tap the name of the city.
Note To delete cities, tap , select and tap the cities, and then tap
again.
Calculator
Perform basic mathematical calculations.
1. Tap
2. Enter numbers and tap the appropriate mathematical
3. Tap = to view the result.
71
> Calculator.
operators.
x Tap C to delete a number.
x Tap and hold C to delete all numbers.
Note Rotate your smartphone horizontally to use the scientific
calculator feature.
Page 72
MENU FUNCTIONS
Calendar
Manage your schedules and events.
1. Tap > Calendar.
2. Log in with your Google account.
3. Select and tap a date.
x Tap
No. Description
1
2
3
4
ap
4. T
5. Enter information, and then tap Done.
to refresh, search, select calendars to display, or
access settings.
2 3
1
4
View the calendar by day, week, month, or agenda.
Add an event.
Move to today.
Events for the selected day.
at the top of the screen.
Converter
Convert values for length, volume, weight, temperature, area
and speed.
1. Tap > Converter.
2. Select a unit type.
3. Enter a value.
4. Select the original unit.
5. Select a target unit.
x The converted value is shown.
72
Page 73

MENU FUNCTIONS
Document Viewer
Read documents in a variety of formats (pdf, excel, ppt, word,
and more) on the phone.
1. Tap > Document Viewer.
2. Select and tap a document.
x Tap and hold a document to share it, delete it, or view
the document information.
3. Tap anywhere on the screen while a document is open to
use the following options:
x To zoom in or out, squeeze two fingers together or
spread them apart.
1
3
5
No. Description
Document name
1
Go to a page. Search for words. Share or delete a
2
documen
Highlighted portion of the screen
3
Zoom in or out.
4
2
6 7 84
t. Access the color settings.
No. Description
Move to the previous page.
5
Current page number/total number of pages
6
Move to the next page.
7
Reset the screen height or width.
8
File Manager
Manage files that are stored in the phone or on a memory card.
1. Tap
2. Select and tap a folder > a file.
4
6
> File Manager.
x Tap and hold a folder or file to cut, copy, delete, rename,
share, zip, or view information.
1 2 3
5
No. Description
Switch between internal memory and a memory card.
1
Search for files.
2
73
Page 74

MENU FUNCTIONS
No. Description
View favorites. Create a new folder. Select a view type.
Select a sort type. View the st
3
Access the settings.
Move up one level in the file directory.
4
Current location
5
Folders and files
6
orage capacity. Refresh.
Key Ring
Collect all your loyalty cards in one application.
Adding a Card
1. Tap > Key Ring.
2. Read the Terms and Conditions carefully, and then tap
Accept to continue.
3. Read the on-screen instructions carefully, and then tap
Get Started!.
4. Register an account or log in with your account.
5. Tap ADD CARD to add a card.
6. Scan the barcode from your loyalty cards with your smart
phone’s camera.
x If the scan isn't recognized, tap Won't Scan.
x If you do not have a barcode, tap No Barcode.
7. Fill in the remaining fields, and then tap Create Card.
Latitude
Share your location with your friends or view your friends'
locations. You must have a Google account to use Latitude.
Joining Latitude
1. Tap > Latitude.
2. Log in with your Google account.
3. Tap OK for the tip on the updated map.
4. Tap Share location with family or friends.
5. Tap Agree & Continue for Latitude location sharing.
Sharing Location with Your Friends
1. Tap > Latitude.
2. From the FRIENDS LIST screen, tap
Contacts or Add via email address.
3. Select and tap a contact or enter an email address.
4. Tap Yes to send sharing requests.
> Select from
74
Page 75

MENU FUNCTIONS
Accepting Invitation from Friends
1. Tap > Latitude.
2. Tap new sharing request on the top of the screen.
3. Select and tap an option to share your location.
x Tap Accept and share back to add the person to your
friends list and share your location as well.
x Tap Accept, but hide my location to add the person to
your friends list and keep your location hidden.
x Tap Don’t accept if you do not want to add the person to
your friends list.
x Tap Block to block all future requests from the person.
This option is available only after you turn down the
person’s request.
Managing Friends
1. Tap > Latitude.
2. Select and tap a friend from the FRIENDS LIST screen.
x Tap Ping for check in, and then select the time interval
for refreshing locations.
x Tap Manage sharing and select an option.
x Tap Remove this friend and tap OK.
View Your Location History
1. Tap > Latitude.
2. Tap your name from the FRIENDS LIST screen.
x You can see your name, Gmail account, and current
location.
3. Tap Location history.
4. View your location history.
x Tap Enable location history, and then follow the
on-screen instructions if you have not turned on the
location history feature.
Managing Location Settings
1. Tap > Latitude.
2. Tap
3. Adjust the settings.
Option Description
Location reporting Set how to report your location.
Enable location
history
Manage your
friends
Sign out of
Latitude
> Location settings.
Set to record your location history.
Add or remove friends who can see
your location.
Sign out of Latitude.
75
Page 76

MENU FUNCTIONS
Navigation
Find a route to your destination with the navigation feature.
Searching for a Destination
1. Tap > Navigation.
2. Select and tap an option.
Option Description
STARRED
SHORTCUTS
RECENT
DESTINATIONS
CONTACTS
3. Select and tap a destination.
Note You can also search for a destination by typing it or selecting it
in the contacts.
Checking Traffic Conditions
Flick the screen along the suggested route to the destination.
x Depending on the traffic conditions, the road will be
highlighted in green (good), yellow (slow), or red (heavily
congested).
Select the destination from starred
places.
x Speak destination: Search for the
destination by voice.
x Type destination: Search for the
destination by typing.
x Go home: Find a way back home.
x Map: View traffic condition on the map.
View the addresses of recent
destinations.
Select the destination from your
contacts.
Net Media
Play or share media files between DLNA-supported devices.
Note The DLNA-supported devices must be connected to the same
Wi-Fi network.
About Digital Living Network Alliance (DLNA)
The Digital Living Network Alliance (DLNA) is a collaborative
organization that leads commercialization of global home
network services. Its goal is to build compatible platforms by
using standards- based technology to make it easier for DLNAcertified device users to share media contents over a home
network.
Playing Media Files via Net Media
1. Tap > Net Media.
2. Select and tap a device to import contents from.
x To upload files from your phone to another device,
select your phone.
3. Select and tap a device to play contents with.
4. Tap Next.
5. Select and tap a file category.
76
Page 77

6. Select and tap a file to view.
x To upload to another device, tap and hold the file, and
then tap Upload.
x To download to your phone, tap and hold the file, and
then tap Download.
2
1
3
No. Description
Search for a file.
1
Move to main. Select a playlist. Select files to download
or upload. View files by content type or folder type.
2
Change the sorting order.
File list
3
7.
View the file.
1 2
3
Example: When you view a photo.
No. Description
Start a slide show.
1
View the file information.
2
Zoom in or out.
3
MENU FUNCTIONS
77
Page 78

MENU FUNCTIONS
1
2
3
Example: When you play music.
No. Description
Adjust the volume.
1
Create a playlist. View the file information.
2
Set repeat or random play.
3
Select a device to play the file with.
4
3
4
1 2
4
No. Description
Set repeat or random play.
3
Select a device to play the file with.
4
Sharing Media Files with Other Devices via Net
Media
1. Tap > Net Media.
2. Select and tap a device to import contents from.
x To upload files from your phone to another device,
select your phone.
3. Select and tap a device to play contents with.
4. Tap Next.
5. Select and tap a file category.
6. Select and tap a file or files to share.
x To upload to another device, tap and hold the file, and
then tap Upload.
x To download to your phone, tap and hold the file, and
then tap Download.
x To select multiple files, tap
Select Download.
7. Select a device.
8. Tap Next.
x If you upload a file, select a location to save a file, and
then tap Confirm this position.
> Select Upload or
Example: When you play a video.
No. Description
Adjust the volume.
1
Create a playlist. View the file information.
2
78
Page 79

MENU FUNCTIONS
Permitting Other Devices to Search My Device
1. Tap > Net Media.
2. Tap Permit in the question that pops up when another
device tries to access your contents through Net Media.
Note To view devices that can access your contents, tap >
Contents share device.
Customizing Settings
1. Tap > Net Media.
2. Tap
Option Description
Device Name
Network Info Connected Wi-Fi network
Net Media
Server On
Contents Share Permit other devices to search the phone.
Contents share
device
Contents
Position
Contents Share
Folder
Download
directory
Upload
directory
.
Change the device name. You can add up
to 32 characters for the name.
Set to use the phone as DLNA server.
View devices that can access your
contents.
Change the place where contents to
share are saved. Tap Internal Memory or
SD Card if the microSD™ card is inserted.
Change the folder where shared contents
will be saved.
Select the directory to download files.
Select the directory to upload files.
NotePad
Create and share memos.
Creating a New Memo
1. Tap > NotePad.
2. Tap to add a new memo.
3. Enter the text using the on-screen keypad.
4. Tap Done to save the memo.
Layout of the Memo List Screen
21 3 4
5
No. Description
Select a folder.
1
Create a memo.
2
Search for a memo.
3
Delete, sort, or move memos.
4
Memo list
5
Note Tap and hold a memo to edit, share, move, or delete it.
79
Page 80
MENU FUNCTIONS
Setting a Folder
You can create a folder or change the name of an existing
folder. When you first start NotePad, only the Default Folder
exists.
1. Tap
2. Tap
3. Tap
4. Enter the name of the folder and select a color of the folder.
5. Tap Done.
> NotePad.
> Setting.
to add a folder or tap an existing folder.
Locking or Syncing Memos
You can lock your memos or sync them with your Google
account.
1. Tap
2. Tap
3. To lock memos, tap Set password, and then configure
> NotePad.
> Lock & sync.
settings.
x To sync memos, tap Add account, and then configure
account settings.
Pill Reminder
Pill Reminder reminds you to take your medications regularly.
1. Tap > Pill Reminder.
2. Tap
3. Set options.
4. Tap Save.
.
Places
Find restaurants, cafes, bars, attractions, and other
businesses.
1. Tap
2. Select and tap one of the business categories.
3. Select and tap a business.
> Places.
80
Page 81
MENU FUNCTIONS
Play Books
Shop books and read them on your phone.
1. Tap
2. Log in with your Google account.
3. Read the Terms and Conditions carefully, and then tap
4. Search for a book.
5. Follow the on-screen instructions.
> Play Books.
Accept to continue.
Pulse
Collect updated news from your favorite websites.
1. Tap
2. Select and tap an article from the updated news list.
3. View the article.
> Pulse.
x Tap
x Tap
x Tap
to save the article.
to share the article via Facebook, Twitter, or
Google+.
to share the article via applications such as
Facebook, Gmail, Google+, Messages, NotePad,
Social World, and Twitter.
Talk
Talk is an instant messenger offered by Google that allows you
to chat with your friends.
1. Tap
2. Tap Existing to log in with your Google account.
3. Enter your email address and password, and then tap
4. Configure the backup and restore settings, and then tap
5. Chat with your friends.
81
> Talk.
x Tap New to create a Google account.
Sign in.
Next.
4
2 3
1
5
6
No. Description
Current account
1
2
3
4
ap t
o select another account.
x T
Search Google Talk.
Send a chat invitation.
View the menus.
Page 82

MENU FUNCTIONS
No. Description
Your account
5
x Tap t
o change your status or status message.
Friends list
x
: Online
x
x
x
: Away
: Busy
: Offline
6
Tip Calculator
Calculate tips and split bills.
1. Tap
2. Enter the total amount of the bill, the tip percentage, and
3. Tap Done.
> Tip Calculator.
the number of people that are splitting the bill.
Weather
View weather information for certain cities.
Adding a New City
1. Tap > Weather.
2. Tap
3. Enter the name of the city you want to add, and then tap
4. Select and tap the city.
5. Tap the city on the list to view weather forecast.
at the upper-right of the screen.
x Skip to step 3 if you are adding a city for the first time.
, , or .
x Current weather information for the city appears on the
list.
Viewing Weather Information
1. Tap > Weather.
2. Select and tap a city in the list.
3. Tap
to view updated information.
Changing the Weather Settings
1. Tap > Weather.
2. Tap
3. Adjust the settings.
Option Description
Temperature
scale
Auto update
Current
location
> Settings.
Choose a temperature unit.
Choose a time period for auto updating
weather information.
View weather for your current location
automatically in the city list.
Voice Recorder
Record an audio file.
1. Tap
2. Tap
3. Tap
> Voice Recorder.
to start recording.
x Tap
x Tap
x Once you stop the audio recording, the audio file is
to view the file list.
to set the location for saving files.
to stop recording.
saved automatically.
82
Page 83

P9090
9
XXXX SERVICES
Amazon Kindle
XXXX Code Scanner
XXXX Family Map
XXXX Locker
XXXX Navigator
XXXX Radio
XXXX Smart Wi-Fi
Live TV
DeviceHelp
YPmobile
myXXXX
Messages
83
Page 84

XXXX SERVICES
Make your phone do more for you with useful applications from
XXXX.
Amazon Kindle
Read books on your smartphone.
1. Tap
2. Tap Get Kindle for Android.
3. Log in with your Google account.
4. Log in with your Amazon account.
> Amazon Kindle.
Note The first time you open this application, you need to download
the updated application from the Play Store.
XXXX Code Scanner
Read UPC, QR, and Data Matrix barcodes found on products,
magazines, and the Internet.
1. Tap > XXXX Code Scanner.
Note The first time you open this application, you need to download
the updated application from the Play Store.
2. Log in with your Google account.
3. Read the Terms and Conditions carefully, and then tap
Accept to continue.
4. When the pop-up appears, tap OK.
5. Enter your personal information, and then tap Done.
6. View the tutorial.
7. Place your phone 2 to 5 inches away from a barcode.
x The scanner will automatically scan the barcode.
x Ensure that the barcode is completely within the frame.
8. Tap Yes to see the information provided by the barcode.
XXXX Family Map
View the location of your family members at any time for a
monthly fee.
1. Tap > XXXX Family Map.
Note The first time you open this application, you need to download
the updated application from the Play Store.
2. Log in with your Google account.
3. Enter your phone number and password, and then tap
Submit.
4. Follw the on-screen instructions.
XXXX Locker
Store and share your contents in a cloud server.
1. Tap
2. Log in with your Google account.
3. Follw the on-screen instructions.
> XXXX Locker.
Note The first time you open this application, you need to download
the updated application from the Play Store.
84
Page 85
XXXX SERVICES
XXXX Navigator
XXXX Navigator takes you to your destination with turn-by turn
voice and on-screen driving directions.
1. Tap > XXXX Navigator.
Note To use this feature, you must have a data plan.
2. Read the Terms and Conditions carefully, and then tap
Accept to continue.
3. Enter your phone number in the text box provided, and then
tap Continue.
4. Follw the on-screen instructions.
Note This application is an XXXX subscription service. To new XXXX
Navigator customers, a 30 day free trial is provided. If you do not
cancel the service after the trial period is over, you will be charged
the monthly fee automatically.
XXXX Radio
XXXX Radio allows you listen to radio stations anywhere you go.
1. Tap
2. Log in with your Google account.
3. Read theTerms and Conditions carefully, and then tap
4. Enter your phone number in the text box provided.
5. Tap OK to allow to use your current location.
6. Follow the on-screen instructions.
> XXXX Radio.
Accept to continue.
Note This application is an XXXX subscription service.
XXXX Smart Wi-Fi
XXXX Smart Wi-Fi provides an easy way to manage your access
to Wi-Fi Hot Spots.
1. Tap > XXXX Smart-Wifi.
Note The first time you open this application, you need to download
and install the application from the Play Store.
2. Log in with your Google account.
3. Configure the auto-connect Wi-Fi hotspot setting.
Option Description
My Spots
Popular
Public
4. Select and tap an available hot spot to connect to.
Only enable and connect to Wi-Fi near XXXX
Wi-Fi Hot Spots and saved networks.
Only enable Wi-Fi near My Spots and Popular
Hotspots.
Enable Wi-Fi near My Spots, Popular
Hotspots, and Public Hotspots.
85
Page 86

XXXX SERVICES
Live TV
Watch live and on-demand TV shows on your phone.
1. Tap
2. Log in with your Google account.
3. Read the License Agreement, and then tap Accept to
4. Follow the on-screen instructions.
> Live TV.
Note The first time you open this application, you need to download
the updated application from the Play Store.
continue.
Note This application is an XXXX subscription service.
DeviceHelp
View videos and tutorials about how to use the features of your
phone.
1. Tap > DeviceHelp.
2. Select and tap an item.
YPmobile
Find local business and the best gas prices.
1. Tap
2. Read the License Agreement, and then tap Accept.
3. Read the instructions, and then tap Continue.
4. Tap OK to allow this feature to use your current location.
5. Enter keywords to begin searching or tap one of the
6. Select and tap a result to view its details.
> YPmobile.
Note The first time you open this application, you need to download
the updated application from the Play Store.
business categories.
myXXXX
myXXXX is an online account management application.
1. Tap
2. Log in with your Google account.
3. Read the Terms and Conditions carefully, and then tap
4. Enter your wireless number and password in the text box
5. Follow the on-screen instructions.
> myXXXX.
Note The first time you open this application, you need to download
the updated application from the Play Store.
Accept to continue.
provided, and then tap Login.
Messages
XXXX Messages brings your calls, text messages, and
voicemails together and syncs them across all devices.
1. Tap > Messages.
2. Log in with your Google account.
x If you launch the application for the first time, you will be
connected to Play Store. Install XXXX Messages from
Play Store.
3. Tap Record Greeting to record a personal greeting.
x Tap Skip to do it later.
4. Follow the on-screen instructions.
86
Page 87

P9090
10
SETTINGS
Pantech Settings
Wireless & Networks
Device
Personal
System
87
Page 88
SETTINGS
Pantech Settings
Change Experience
Change the home screen type.
1. Tap
2. Select an option.
Option Description
Pantech Easy
Experience
Pantech
Standard
Experience
User Theme
Customize the hold screen and dial pad, and set default
programs.
1. Tap > Settings > User theme.
2. Select an option.
Option Description
Screen lock
Dialpad Set a type of dial pad.
Default
programs
> Settings > Change Experience.
Streamlined, easy-to-use experience with:
– One home screen for quick access to key
features.
– Easy navigation with limited scrolling.
– Large text and buttons.
User experience you can make your own with
all the customization options that Android
has to offer - widgets, shortcuts and more.
Select a lock screen type and lock screen
wallpapers or select shortcuts on the lock
screen.
Set default programs for each application.
Wireless & Networks
Set and manage the wireless and network options.
1. Tap
2. Select an option.
Option Description
Wi-Fi
> Setting.
x Turn on or off Wi-Fi.
x SCAN: Scan for networks.
x ADD NETWORK: Add a network.
x Network notification: Notify when an
open network is available.
x Automatic connection: Automatically
connect to XXXX Wi-Fi networks.
x Keep Wi-Fi on during sleep: Set when to
keep Wi-Fi on during sleep.
x Wi-Fi Signal Filter: Filter Wi-Fi networks
based on signal strength.
x MAC address:View the MAC address.
x IP address: View the IP address.
x WPS connection: Set to connect to
WPS-enabled devices by entering a PIN
or pressing a button.
88
Page 89

SETTINGS
Option Description
x Turn on or off the Bluetooth feature.
x Set your phone to be visible to nearby
Bluetooth devices.
Bluetooth
Data usage
Call settings
x SEARCH FOR DEVICES: Search for
Bluetooth devices.
x Rename phone: Rename the phone.
x Visibility timeout: Set a visibility timeout.
x Show received files: View received files.
x Turn on or off Mobile data.
x Set mobile data limit: Set to disable
mobile connection when the specified
limit is reached.
x Data usage cycle: Set the data usage
cycle.
x View the data usage by applications.
x Data roaming: Turn on or off data
roaming.
x Restrict background data: Set to restrict
background data.
x Show Wi-Fi usage: Set to view the Wi-Fi
usage.
x Fixed Dialing Numbers: Manage Fixed
Dialing Numbers.
– Enable FDN: Enable or disable Fixed
Dialing Numbers.
– Change PIN2: Change PIN for FDN
access.
– FDN list: Manage phone numbers list.
x Volume Key Answer: Set to answer calls
by pressing the Volume Up key.
x Voicemail service: Select a voicemail
service.
Option Description
x Voicemail settings: Manage voicemail
settings.
x Auto Redial: Turn on or off the auto redial
option.
x TTY mode: Set the TTY mode.
Note To use the TTY mode, an earphone must be
plugged into the earphone jack.
x Caller ID: Choose how your Caller ID will
be displayed.
x Call forwarding: Set call forwarding
options. (Always forward, Forward
when busy, Forward when unanswered,
Forward when unreachable)
x Call barring settings: Set call barring
options. (All outgoing, Outgoing
International, Outgoing International
roaming, All incoming, Incoming calls
when roaming)
x Call waiting: Set the phone to notify
when there is an incoming call during
another call.
x Noise Suppression: Turn on or off the
noise suppression option. This feature
allows you to hear clear sounds by
suppressing background noise.
89
Page 90

SETTINGS
Option Description
x Airplane mode: Set whether or not to use
Wi-Fi, Bluetooth, and GPS functions.
x VPN: Set up and manage virtual private
networks.
x Tethering & portable hotspot: Set the
phone to provide other devices with an
Internet connection by becoming a Wi-Fi
hotspot.
More...
x Wi-Fi direct: Turn on or off the Wi-Fi
direct option.
x Wi-Fi direct settings: Manage Wi-Fi
direct options.
x Mobile networks: Enable data access
over mobile networks. Turn on or off the
international data roaming option. Set
the access point name (APN). Select
network operators.
Note
x If you turn on Airplane mode, wireless functions will be disabled.
You can turn on the Wi-Fi function separately on an airplane that
supports Wi-Fi service.
x The phone may not connect to a Wi-Fi network when the signal is
weak, if the "Wi-Fi network is available" message appears on the
screen.
x Windows 2000 does not support the USB tethering function. On
Windows XP, update the OS with Service Pack 3(SP3) or later to
use the USB tethering function. If you use Windows XP SP2 or the
computer does not detect the USB tethering device, visit
http://support.microsoft.com/kb/959765, click "View and request
hotfix downloads", and then install the driver on the computer.
Device
Sound
Change various sound settings.
1. Tap
2. Select an option.
General Options
Option Description
Volumes
Silent mode
Dolby Mobile
Ringtone & Notifications
Option Description
Phone
rigntone
Default
notification
Vibrate and
ring
> Settings > Sound.
Set the volume for music, videos, games,
and other media. Set rigntones and
notifications. Set alarm sounds.
Set the silent mode to Off(normal), Vibrate,
or Mute.
Apply a video EQ effect to all media
contents. Select a video preset. Apply an
audio EQ effect to all media contents. Select
an audio preset. Customize user presets.
Set a ringtone for incoming calls.
Set a ringtone for notifications.
Set the phone to both vibrate and ring.
90
Page 91
SETTINGS
System
Option Description
Dial pad
touch tones
Touch
sounds
Screen lock
sound
Vibrate on
touch
Set to emit a sound when you tap the dial
pad.
Set to emit a sound when you tap the screen.
Set to emit a sound when you lock or unlock
the screen.
Set to vibrate when you touch some screens
or use the soft keys.
Display
Change various display settings.
1. Tap
2. Select an option.
Option Description
Brightness
Wallpaper Set the wallpaper.
Auto-rotate
screen
Sleep
Font size Adjust the font size.
> Settings > Display.
Adjust the brightness of the screen or set
the automatic brightness option.
Make the screen rotate automatically
when you move the phone horizontally or
vertically.
Set the time delay for automatically turning
off the screen when you perform no
operations.
Storage
View the storage information for the internal storage or
SD card and mount or unmount an SD card.
1. Tap
2. Select an option.
Option Description
Mount
SD card/
Unmount
SD card
Erase
SD card
> Settings > Storage.
Recognize an SD card inserted into the
phone. Remove an SD card from the phone
safely.
Erase all data on the SD card.
USB Connection Settings
Manage settings for connecting the phone to the computer
via USB.
1. Tap > Settings > USB connection settings.
2. Select an option.
Option Description
Media device
(MTP)
Camera
(PTP)
External
memory
(SD card)
Set to transfer media files between the
phone and computer.
Set to transfer photos from the phone to a
PC.
Set to use the SD card as external memory
and transfer files between the SD card and
PC.
91
Page 92

SETTINGS
Option Description
PC data
mode
Show
settings
when USB
connected.
Tips View tips on USB connection settings.
Set to transfer files with PC tools.
Set to view settings when connected via
USB.
Battery
View the battery usage information of the phone.
1. Tap
2. View the battery usage.
> Settings > Battery.
x Tap the check box at the upper-right of the screen to
display the remaining battery life percentage on the
notification bar.
Apps
View and manage applications installed on the phone.
1. Tap
2. Select an option.
Option Description
Downloaded Manage downloaded applications.
Running Manage running applications.
All Manage all applications.
> Settings > Apps.
Power Saver
Turn the power saving feature on or off or adjust the power
saving options.
1. Tap
2. Tap the power button to turn on the power saving feature.
> Settings > Power saver.
x Tap More options to customize the settings.
Personal
Accounts & Sync
Add a new account and manage the sync options.
1. Tap
2. Tap an account.
3. Select an option.
Option Description
Sync options
Remove
accout
Sync now Start the sync.
> Settings > Accounts & sync.
Set the account to sync Books, Calendar,
Contacts, Gmail, Google Photos,
Google Play Books, or Web data.
Delete an account from the list.
Note The sync options that appear on the screen may differ
depending on the type of account selected.
92
Page 93

SETTINGS
Location Services
Set the options for location services.
1. Tap
2. Select an option.
Option Description
Google's
location
service
GPS
satellites
Location
& Google
search
> Settings > Location services.
Let applications use data from sources such
as Wi-Fi and mobile networks to determine
your approximate location.
Let applications use GPS to pinpoint your
location.
Let Google use your location to improve
search results and other services.
Security
Manage security options.
1. Tap
2. Select an option.
Screen Security
Option Description
Screen lock Select a screen lock type.
Lock detail
settings
Make pattern
visible
> Settings > Security.
Select a lock screen type and lock screen
wallpapers or select shortcuts on the lock
screen.
Set your screen lock to display as you enter
it on screen.
Option Description
Automatically
lock
Power button
instantly locks
Vibrate on
touch
Owner info
Note The screen security options that appear on the screen may
differ depending on the type of screen lock selected.
Set the device to automatically lock after a
specified length of time of inactivity.
Set the device to instantly lock as you press
LOCK/PWR key
Set the device to vibrate on touch.
View the owner information on a locked
screen.
Encryption
Option Description
Encrypt
phone
Require a numeric PIN or password to
decrypt the phone each time you power it
on.
SIM Card Lock
Option Description
Set up SIM
card lock
Lock or unlock the SIM card. Change the SIM
PIN.
Passwords
Option Description
Make
passwords
visible
Set whether or not to display the PIN entered
on the PIN unlock screen.
93
Page 94

SETTINGS
Device Administration
Option Description
Device
administrators
Unknown
sources
View or deactivate device administrators.
Set to allow installation of non-market
applications.
Credential Storage
Option Description
Trusted
credentials
Install from
SD card
Clear
credentials
View the list of trusted credentials and set
whether or not applications will use the
credentials.
Install certificates from an SD card.
Remove all certificates.
Language & Input
Set language and text input options.
1. Tap
2. Select an option.
Language Options
Option Description
Language Set a language for the display text.
Spelling
correction
Personal
dictionary
Keyboard & Input Methods
Option Description
Default Verify the default keboard.
Android
keyboard
Google voice
typing
> Settings > Language & input.
Set the automatic spelling correction
option.
Manage word suggestions for entering text.
Set options for the Android keyboard.
x Select input languages: Set the voice
input language. Available languages
may vary depending on the voice input
languages supported by Google.
x Block offensive words: Hide offensive
text. When checked, Google voice
recognition replaces those words
in transcriptions with a placeholder
comprised of hash symbols ( # ).
94
Page 95

SETTINGS
Option Description
SwiftKey for
Pantech
Swype Set to use the Swype keyboard.
Set to use the SwiftKey keyboard.
Speech
Option Description
Voice search
Text-tospeech
output
Select a language for the voice search.
Set the SafeSearch option. Block offensive
words.
x PREFERRED ENGINE: Select the
preferred TTS engine between Google
Text-to-speech Engine or Pico TTS.
x Speech rate: Set speed at which the text
is spoken.
x Listen to an example: Play a short
demonstration of speech synthesis.
Mouse/Trackpad
Option Description
Pointer
speed
Adjust the pointer speed when using a
Bluetooth device or other pointing device.
Backup & Reset
Set backup and reset options.
1. Tap
2. Select an option.
> Settings > Backup & reset.
Backup & Restore
Option Description
Back up my
data
Backup
account
Automatic
restore
Set to back up application data, Wi-Fi
passwords, and other settings to Google
servers.
Add or select an account to back up data.
Set to restore backed up settings and data
when reinstalling an application.
Personal Data
Option Description
Factory data
reset
Erases all data on the phone.
System
Date & Time
Set date and time options.
1. Tap
2. Select an option.
Option Description
Automatic
date & time
Automatic
time zone
> Settings > Date & time.
Set to use the network-provided time.
Set to use the network-provided time zone.
95
Page 96
SETTINGS
Option Description
Set date Set the current date manually.
Set time Set the current time manually.
Select time
zone
Use 24-hour
format
Select date
format
Select a time zone manually.
Set to use the 24-hour format.
Select a date display type.
Accessibility
Set the accessibility options to help people with physical
challenges use the phone more easily.
1. Tap > Settings > Accessibility.
2. Select an option.
Services
Option Description
TalkBack
System
Option Description
Large text Set to enlarge fonts on the screen.
Power button
ends call
Turn on or off TalkBack, which provides
spoken feedback to help blind or
visually-impaired users.
Set to end calls when you press Power
button.
Option Description
Auto-rotate
screen
Speak
passwords
Touch & hold
delay
Install web
scripts
Set the screen to rotate automatically when
you rotate the phone.
Set the phone to say passwords as you enter
them.
Adjust the recognition time for touching and
holding the screen.
Set applications to install scripts from
Google that make web content more
accessible.
Developer Options
Set application development options.
1. Tap
2. Select an option.
General Options
Option Description
USB
debugging
Development
device ID
Allow mock
locations
Desktop
backup
password
> Settings > Developer options.
Set to activate the debug mode when the
phone is connected to a computer via USB.
View the phone's development device ID.
Set the phone to send mock locations for
testing.
Set a backup password.
96
Page 97
SETTINGS
User Interface
Option Description
Strict mode
enabled
Pointer
location
Show
touches
Show screen
updates
Show CPU
usage
Force GPU
rendering
Window
animation
scale
Transition
animation
scale
Set the screen to flash when applications do
long operations on a main thread.
Set to display the current touch data.
Set to display a feedback for touches.
Set the updating area of the screen to flash.
Set to display the current CPU usage.
Set to use 2D hardware acceleration in
applications.
Set a window animation scale.
Set a transition animation scale.
Apps
Option Description
Don't keep
activities
Background
process limit
Show all
ANRs
Set to clear activity history as soon as an
application ends.
Set a limit for background processes.
Set to show a pop-up window when
background applications do not respond.
Setup Wizard
Specify basic information, such as language, network
connection, location service, and account when you turn on
the phone for the first time.
1. Tap
2. Select and tap a language, and then tap START.
3. Tap Connect to Wi-Fi network, and then select and tap an
4. Follow the necessary steps, and then tap Next.
5. Tap Add a Google Account to set up a Google account, and
6. Tap OFF next to See location in applications (such as
7. Tap Finish.
> Settings > Setup wizard.
available Wi-Fi network.
x Tap Skip, and go to step 5 to connect to the network
later.
then follow the necessary steps.
x Tap Skip to skip this step.
Maps) using wireless networks to use Google location.
97
Page 98
SETTINGS
XXXX Software Update
Check and update your software without visiting the dealer.
1. Tap
2. Select an option.
Option Description
Check for
updates
Continue
update
> Settings > XXXX software update.
Check for software updates.
Resume a postponed software update.
Note After downloading the software, the device will ask you to
update the software now. If you choose to update the software now,
it will restart the handset. If you postpone updating the software, you
can select to be reminding in 1 hour, 4 hours, or 8 hours in Options.
After selecting an option, you will be sent back to standby mode.
To resume an update, tap Continue update.
About Phone
View general information of your phone.
1. Tap
2. Select an option.
Option Description
Status
Legal
information
Model
number
Android
version
Baseband
version
Kernel
version
Build number View the build number.
> Settings > About phone.
View the battery status, battery level,
network, signal strength, mobile network
type, service state, roaming, mobile network
state, your phone number, IMEI, IMEI SV,
IP address, Wi-Fi Mac address, Bluetooth
address, serial number, and Up time.
View the Open source licenses and Google
legal information.
View the model number.
View the Android OS version.
View the baseband version.
View the kernel version.
98
Page 99

11
APPENDIX
Cautions when Using External Memory Cards
Troubleshooting Checklist
Specifications
Caution
FCC Hearing-Aid Compatibility Regulations for Wireless Devices
FCC Regulatory Compliance
Warranty
Legal Notice
P9090
99
Page 100

Appendix
Cautions when Using External Memory Cards
x Unstable voltages may cause memory cards or the phone
to malfunction.
x Avoid using or storing memory cards near strong magnetic
fields or electrical noise.
x Avoid using or storing memory cards in areas with high
temperature, high humidity, or corrosive substances.
x Do not bend, drop, or subject memory cards to heavy
impact or pressure.
x Keep memory cards away from small children or pets.
x Memory cards may heat up after using the device for an
extended period time. This is normal and does not indicate
a malfunction.
x Ensure that a memory card is inserted in the correct
direction. Inserting a memory card in the wrong direction
may cause a malfunction.
x This phone supports only microSD memory cards. Use the
correct type of memory card.
x You cannot use a memory card when its lifespan has
expired. In this case, use a new memory card.
x Handle all memory card carefully.
x Format a memory card only on your computer or the phone
where it will be used.
x Do not remove the battery from the phone when a memory
card is being used. This may corrupt the data or cause a
malfunction. Pantech is not responsible for any loss of data.
x Your phone supports only microSD memory cards in
sizes up to 32 GB. Some memory cards may not work on
your phone depending on the capacity or manufacturer.
Pantech does not guarantee the functionality or
compatibility of memory cards.
x You can store photos, videos, documents, MP3 files, and
more on a memory card. Ensure your memory card has
enough available space. Your phone cannot recognize a
memory card that is full.
x To remove a memory card from your phone safely, tap
Menu > Settings > Storage > Unmount SD card or turn off
the phone before removing the card.
Troubleshooting Checklist
When the audio quality is poor:
End the call and try again.
When the other party cannot hear you speaking:
Your phone may be set to mute. Disable the mute function.
Ensure that your hand is not covering the microphone.
When battery life is shorter than usual:
This may happen when you are in an area with low signal
strength. Turn off your phone when it is not in use. Change the
battery when necessary.
When you cannot turn on your phone:
Make sure your battery is charged. Check to see if your phone
works while recharging the battery.
When you are unable to send a message:
This may happen when you are not registered to receive SMS
service, you may be in an area where your network service
provider cannot provide such a service, your phone memory is
full, or the Fixed Dialing Numbers feature is set.
100
 Loading...