

Page 1
RT2HT
MLT TENSIONING TOOL OPERATION INSTRUCTIONS
© Panduit Corp. 2017
INTRODUCTION
The RT2HT Tool installs Panduit Pan-Steel coated and
uncoated MLTEH (Extra Heavy Cross Section), MLTEH15
(Extra Heavy Cross Section .015” Thick Body), and
MLTSH (Super Heavy Cross Section .015” and .025”
Thick Body) stainless steel ties.
Note: This tool is not intended for other uses such as
cutting or tensioning other types of fastening
devices.
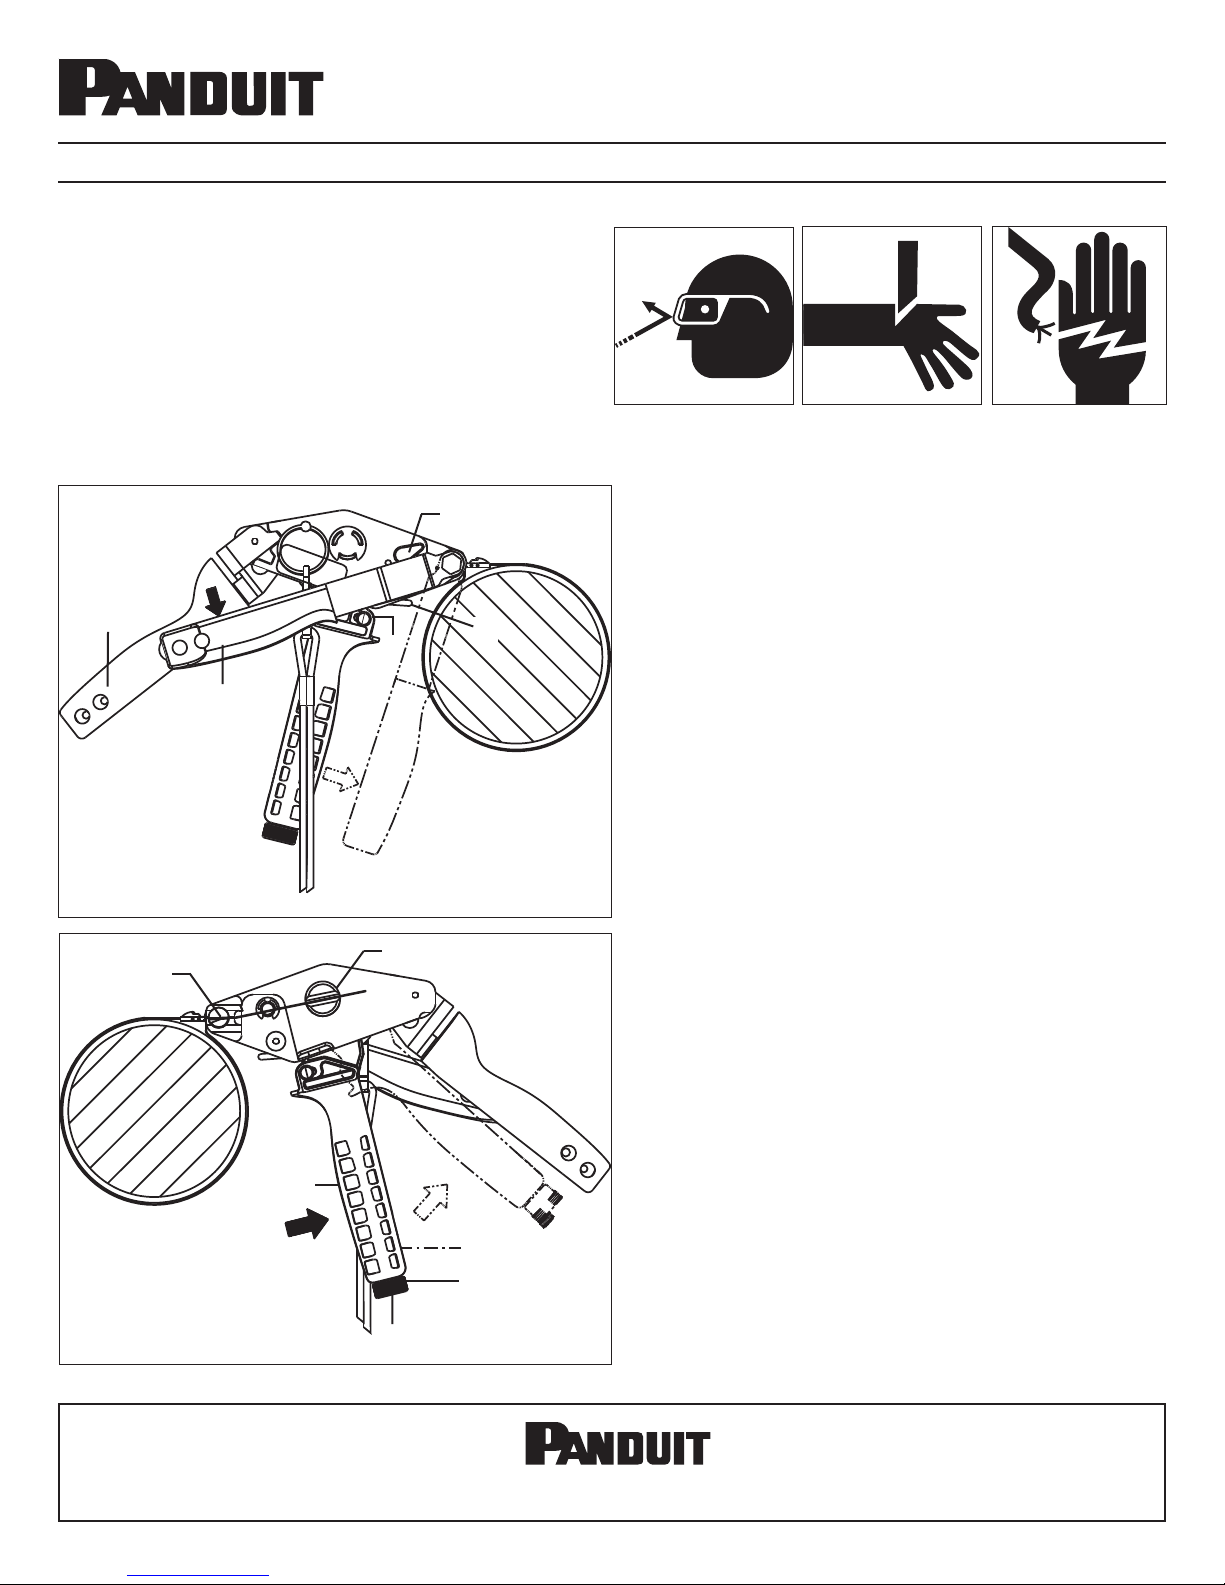
TOOL FEATURES
A25757A01
P
Rev: 02 5-2017
FIGURE 1
A
F
B
C
D
E
G
A. Rear Handle
B.* Tension Pawl Release - Knob pointing towards the front
of tool for pawl engagement and to rear of tool for
disengagement.
C.* Anti-Backup Pawl Release - Lever up against tool for
pawl engagement and pulled down to disengage pawl.
D.* Detent Lock Pins - For controlled tension, pull both pins
forward; for manual tension, push both pins backward.
E. Cutter Handle - Cuts tie when tie is tensioned properly.
F. Cutter Blade
G. Tensioning Mandrel
H.* Tension Indicator Window - Located on the back of front
handle.
I.* Adjustment Knob - Adjust tension of tie application and
lock to desired tension with tension locking screw.
J. Tension Locking Screw
K. Front Handle - With ratchet controlled tensioning.
* See Page 2 for Feature Detail
TOOL OPERATION
K
FIGURE 2
E-mail:
techsupport@panduit.com
J
1. Loop tie around bundle, thread tie into nose of tool and
through slot of tensioning mandrel.
2. Pull front handle to tension tie. Under controlled tension,
the front handle will break free when pre-determined
tension is attained.
H
I
www.panduit.com
Page: 1 of 2
3. Push cutter lever downward to cut tie.
4. Remove cut-off portion of tie from tool.
For Technical Support:
1-800-777-3300
Page 2
© Panduit Corp. 2017
OPERATION INSTRUCTIONS
RT2HT
TOOL MAINTENANCE
TO INHIBIT CORROSION AND MAINTAIN PERFORMANCE OF THE TOOL, KEEP THE METAL SURFACES COATED
ITH A LIGHT OIL (WD-40
W
®
R EQUIVALENT).
O
A
MULTI-POSITION HANDLE
ALLOWS ACCESS TO TIGHT AREAS.
B
C
TROUBLESHOOTING
O RELEASE AND REMOVE TIE
T
FROM TOOL BEFORE CUTTING,
DISENGAGE BOTH KNOB AND
LEVER.
PUSH BACKWARD
FOR MANUAL
TENSION
D
PULL FORWARD
FOR CONTROLLED
TENSION
Page: 2 of 2
 Loading...