

Page 1

NETRUNNER End Panels
Part Numbers: WMPV45EPB1, NREPB1
© Panduit Corp. 2017
WMPV45EPB1
(2) End Panels
(4).375-16 Acorn nuts
(4).375 -16 Bolts
INSTRUCTIONS CM406D
WMPV45EPB1 Installation Instructions
Note: Install lower end panel first when
using a stacked configuration.
Mounting Location 1
Mounting Location 2
Mounting Locations
Assembly:
Step 1:
Insert bolt into mounting
location one.
Step2:
Place End Panel over the
bolt and hand tighten nut.
Step 3:
Insert bolt into location two
a secure with acorn nut.
Tighten acorn nut in location one.
Step 4:
Repeat steps 1-3 for upper
End Panel
Mounting Location 1
Mounting Location 2
End Panel
WMPV45EPB1 (Shown)
Geometry modified for clarification: Not
all molded fingers are shown
FOR TECHNICAL SUPPORT www.panduit.com/resources/install_maintain.asp
Page 1 of 2
Page 2
INSTRUCTIONS CM406D
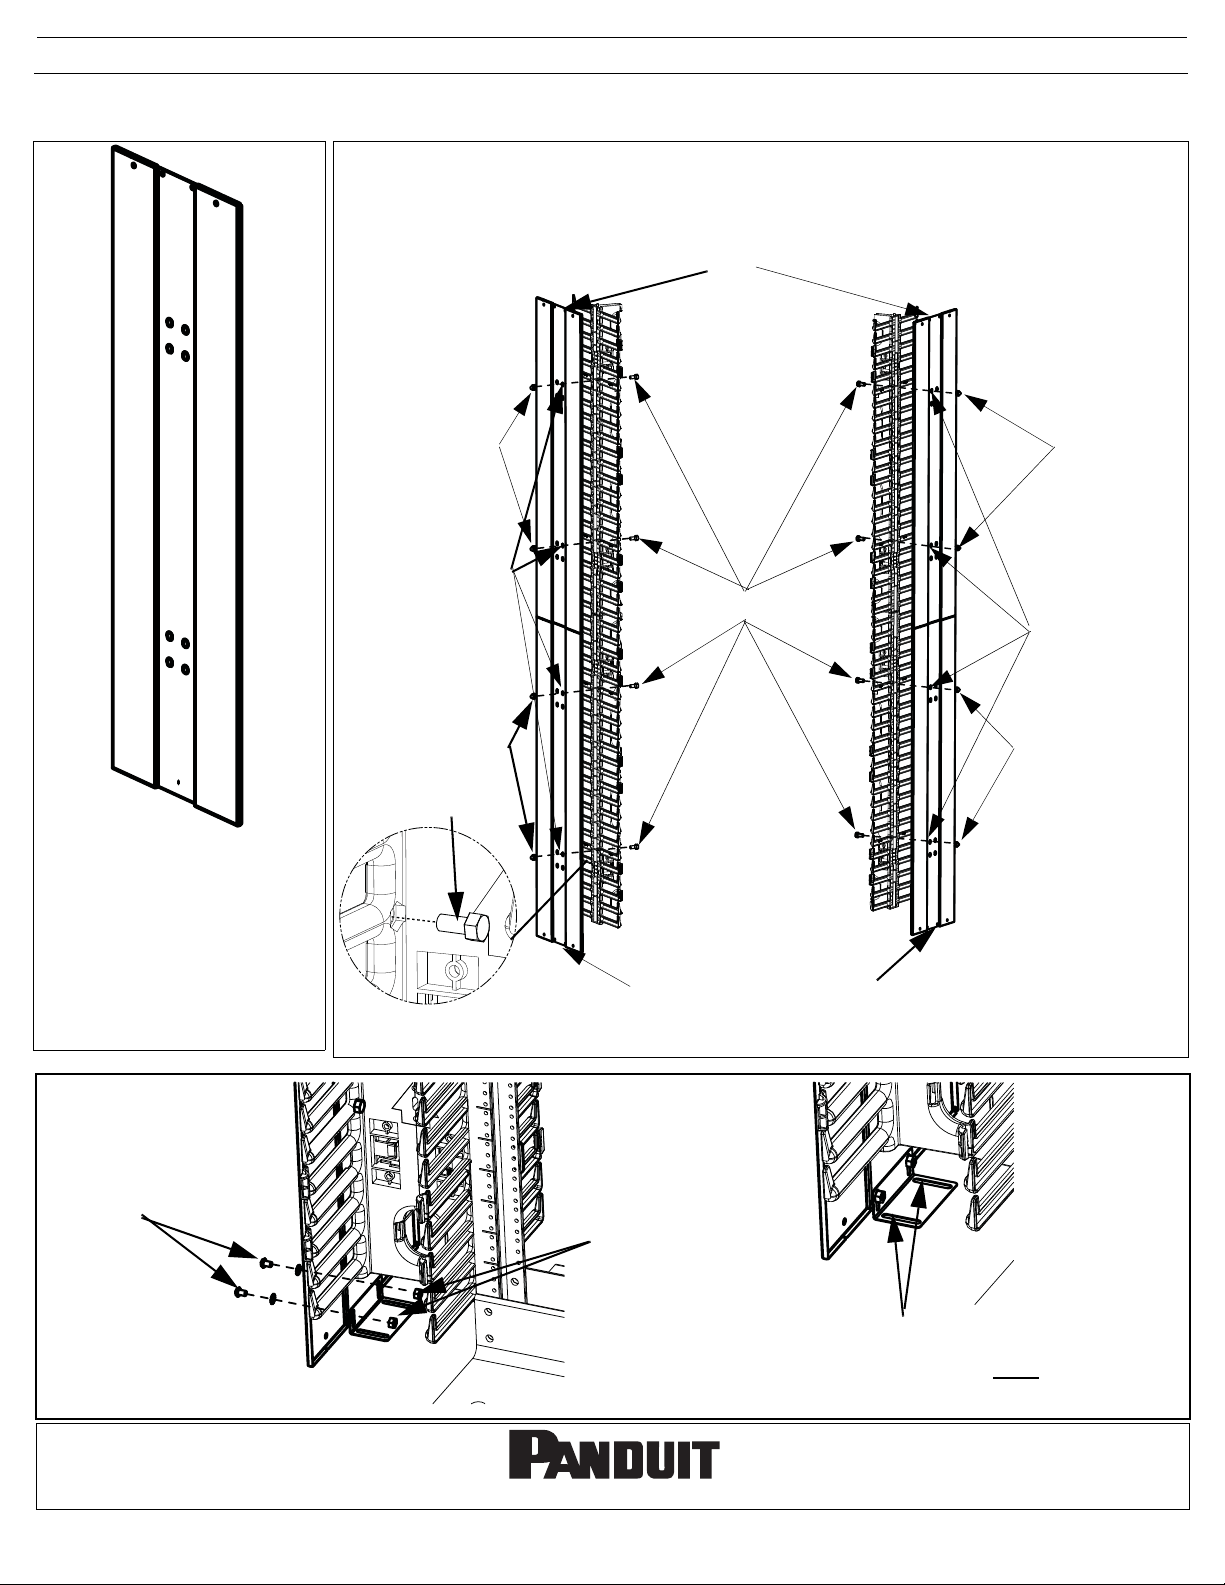
NREPB1 Installation Instructions
Note: Install lower end panel first when using a stacked configuration.
Determine knockouts to be removed by lining up panel against manager.
Bracket holes are orientated
Installation to left
side of rack
on top of top panel.
Installation to right
side of rack
NREPB1
(2) End Panels
(4) 3/8-16 Acorn Nuts
(4) 3/8 Bolts
(2) 1/4” Washers
(2) 1/4-20 X 3/8” Screws
(2) 1/4-20 Nuts
3/8-16 Nuts
tighten by hand
Knockouts to
be removed
3/8-16 Nuts
tighten by hand
3/8-16 Bolt
Close up of bolt
mounting locations
3/8-16 Bolts
Bracket Holes
Bracket holes are orientated
on bottom of bottom panel.
3/8-16 Nuts
tighten by hand
Knockouts to be
removed
3/8-16 Nuts
tighten by hand
1/4-20 Bolts and
Washers
For instuctions in Local Languages
and Technical Support:
www.panduit.com/resources/install_maintain.asp
1/4-20 Nuts
www.panduit.com
Page 2 of 2
Bracket may be anchored to floor using these slots
(Hardware not included). Bracket may be orientated
on either inside or outside of panel. Note:
must be mounted outward when Cool Boot is used.
Bracket
E-mail:
cs@panduit.com
Fax:
(708)444-6448
 Loading...