

Page 1
NET-A
(N2RCFR, N5RCFR, N8RCFR, N1RCFR Set of Four Cage Nut Equipment Rails
(N2RTFR, N5RTFR, N8RTFR, N1RTFR Set of Four Tapped Equipment Rails
CCESS
N-Type Switch Cabinets
Part numbers:
)
)
© Panduit Corp. 2016
INSTALLATION INSTRUCTIONS
V00029CX
WARNING
FALLING EQUIPMENT HAZARD
Remove all equipment installed onto equipment rails before performing any adjustments to equipment rail spacing.
FAILURE TO FOLLOW THESE INSTRUCTIONS CAN LEAD TO SERIOUS INJURY, DEATH, OR DAMAGE TO YOUR EQUIPMENT.
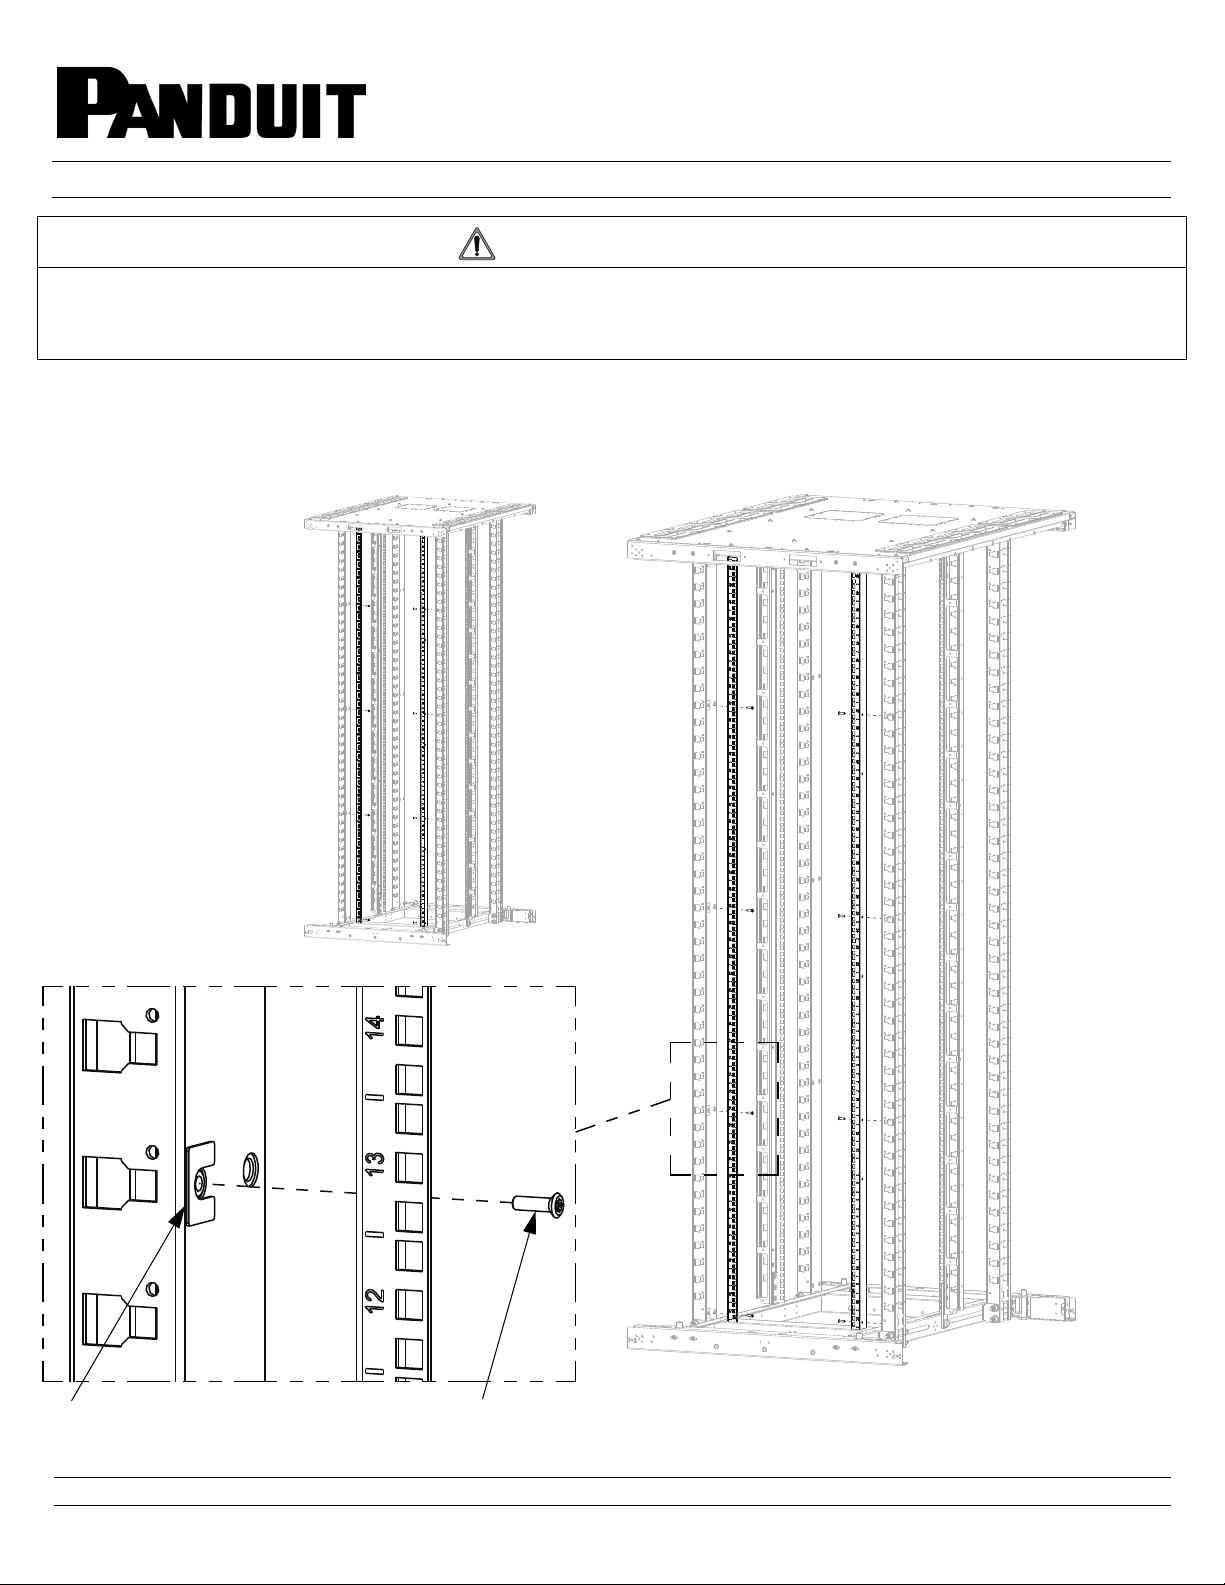
Front Equipment Rail Installation
• Remove existing front rails from cabinet posts (use T25 Torx bit to remove existing screws)
• Install [2] Front Equipment Rails to Front Cabinet Posts with [5] Countersunk Torx screws per rail (use T25 Torx bit)
• Use supplied shims (as necessary) to ensure proper EIA spacing of front equipment rails
REMOVE EXISITING
FRONT EQUIPMENT RAILS
(use T25 Torx bit)
Shim
(**use as necessary**)
Countersunk Torx Screw
(use T25 Torx bit)
[5] screws per rail
For Technical Support: www.panduit.com/resources/install_maintain.asp
Page 1 of 3
Page 2
© Panduit Corp. 2016
INSTALLATION INSTRUCTIONS
V00029CX
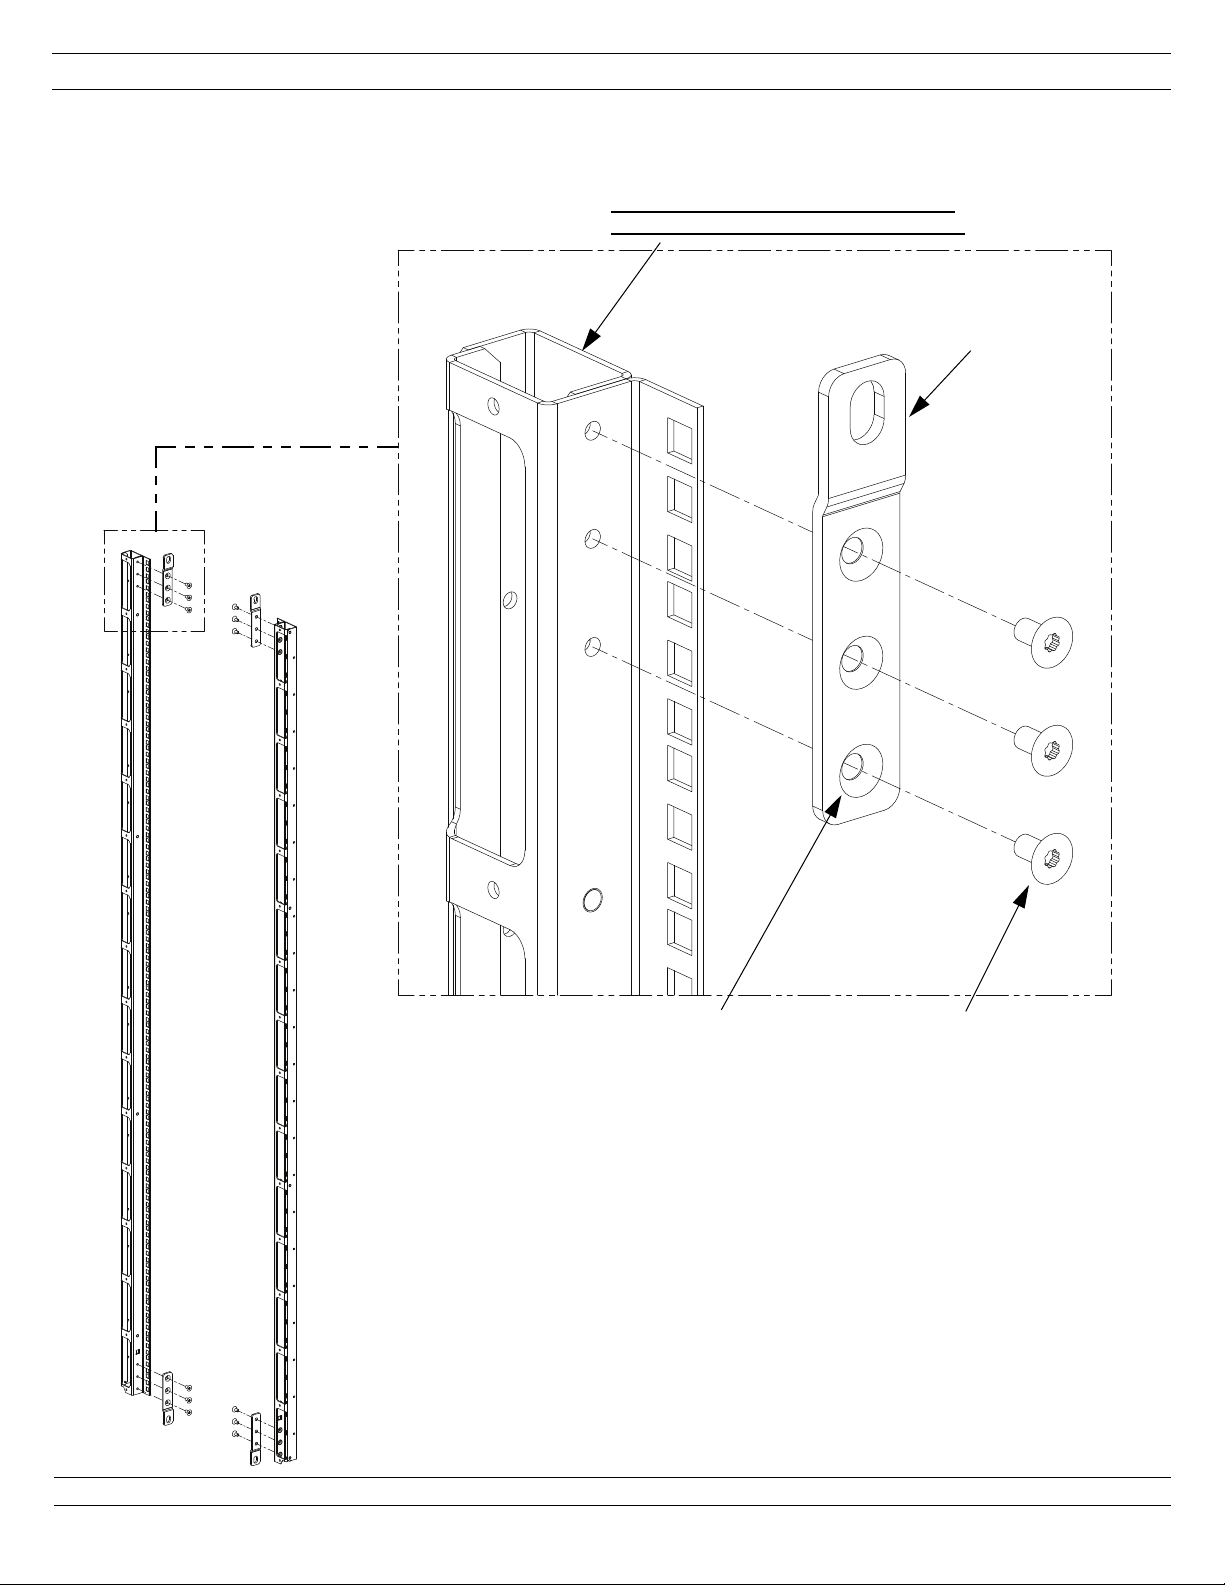
Rear Equipment Rail Installation
• Install [4] Equipment Rail Mounting Brackets to Equipment Rails with [3] Countersunk Torx screws per bracket (use T25 Torx bit)
• Ensure that countersunk holes of brackets are oriented to match heads of countersunk screws
NOTE - HARDWARE KITS ARE SHIPPED
INSIDE OF EQUIPMENT RAIL CHANNELS
Equipment Rail
Mounting Bracket
Ensure that countersunk holes
of bracket match screw
Countersunk Torx Screw
(use T25 Torx bit)
For Technical Support: www.panduit.com/resources/install_maintain.asp
Page 2 of 3
Page 3

© Panduit Corp. 2016
INSTALLATION INSTRUCTIONS
Rear Equipment Rail Installation
• Locate desired Equipment Rail position
• Insert [2] Equipment Rail Mount Nuts through slots of Front-to-Back Beam (top and bottom locations)
• Fasten [2] M10 Hex Screws to E-Rail Mount Nuts at top and bottom of Equipment Rail
• Tighten M10 Hex Head Screw to 30.0 +/- 5.0 N-m [22.1 +/- 3.7 Ft-lbs]
INSTALL EQUIPMENT RAILS
V00029CX
M10 Hex Head Screw
(use 15mm socket wrench)
Equipment Rail
Mount Nut
(Finger Grip Area)
Barbed Surface
(face to outside
of cabinet)
Slot of
Front-to-Back Beam
Equipment Rail
Mount Nut
M10 Hex Head Screw
(use 15mm socket wrench)
For Instructions in Local Languages
and Technical Support:
www.panduit.com/resources/install_maintain.asp
www.panduit.com
Page 3 of 3
M10 Hex Head Screw
(use 15mm socket wrench)
E-mail:
techsupport@panduit.com
Phone:
866-405-6654
Rev. 02
 Loading...