

Panduit DAP3BB-S0, DAP3BC-00-55, DAP3BC-00, DAP3BC-S0, DAP3BC-S0-5 Installation Instructions Manual
...Page 1
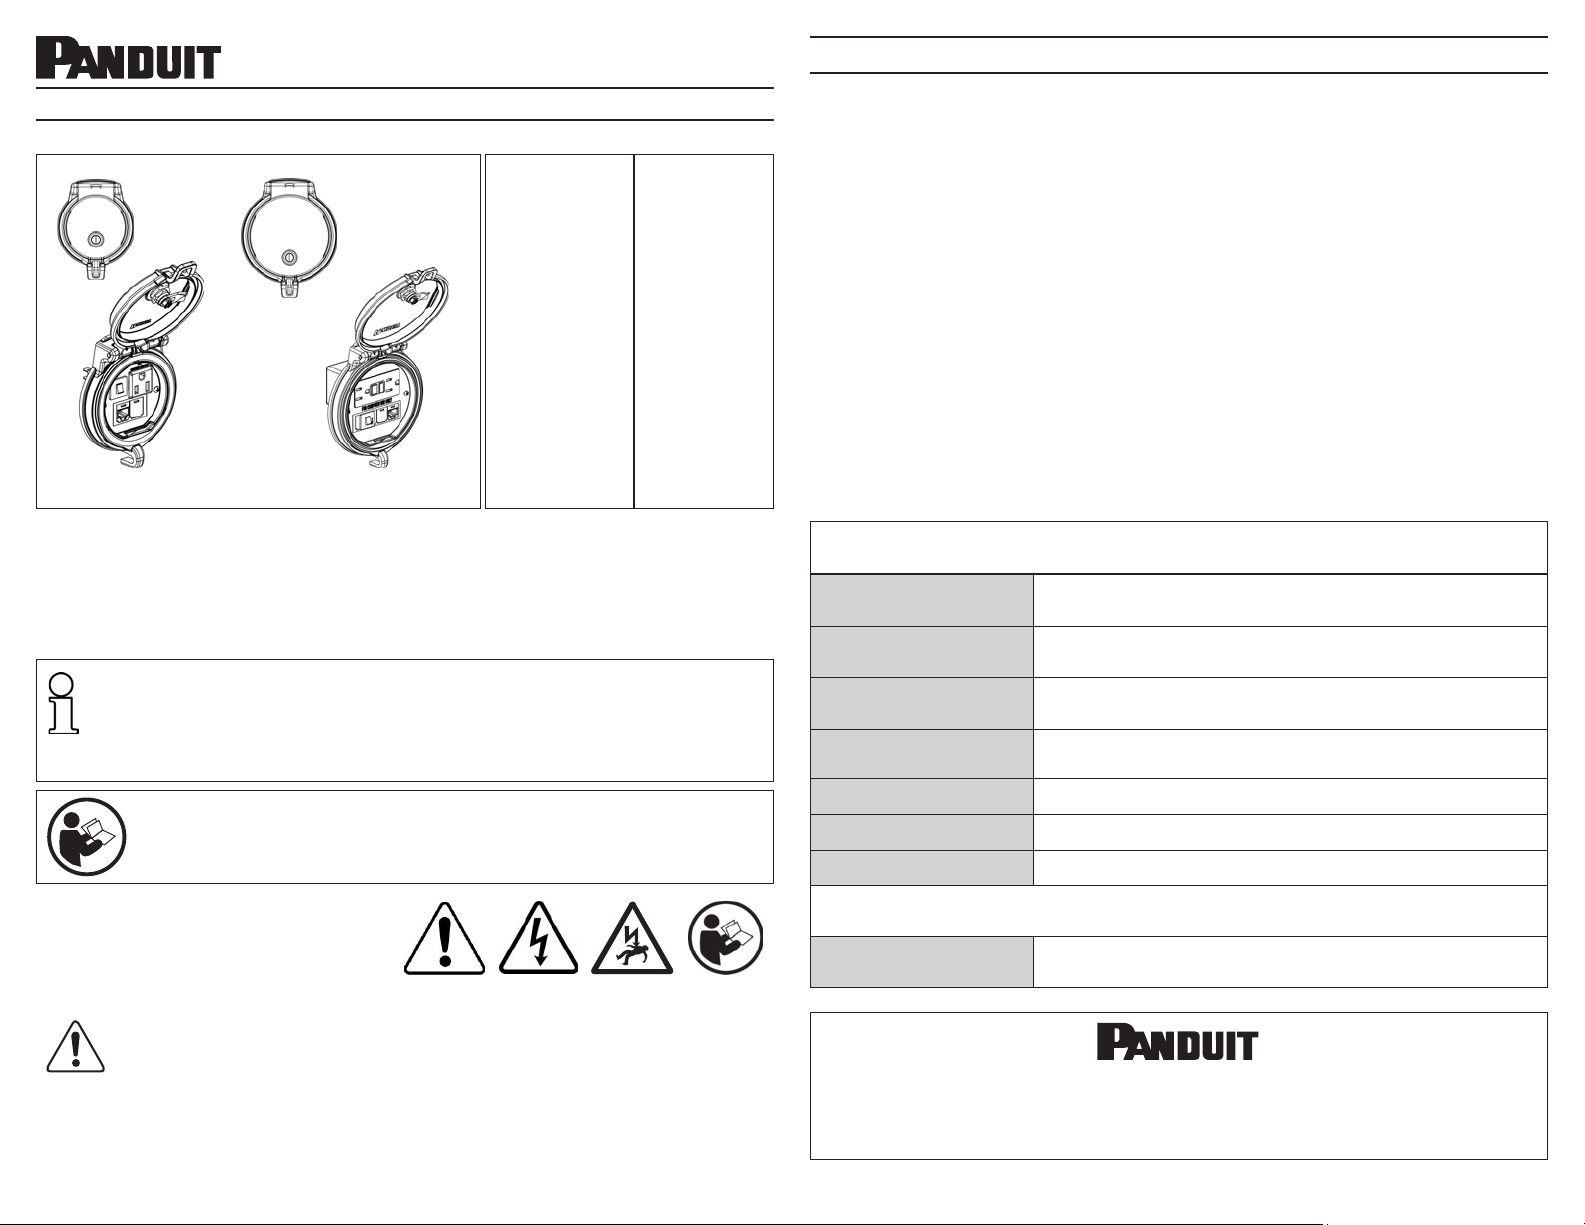
DATA ACCESS PORT
Rev: 00 3-2019
B21102
© Panduit Corp. 2019 INSTALLATION INSTRUCTIONS DAP
INSTALLATION INSTRUCTIONS
© Panduit Corp. 2019
Shown: DAP3BC-G3-5
DAP3 PART #:
DAP3BB-S0
DAP3BC-00
DAP3BC-00-55
DAP3BC-S0
DAP3BC-S0-4
DAP3BC-S0-5
DAP3BC-S0-55
DAP3BC-S0-5U
DAP3BC-S0-6
DAP3BC-S3-4
DAP3BC-S3-5
DAP3BC-S3-6
Shown: DAP4BC-G3-5
DAP4 PART #:
DAP4BB-G0
DAP4BC-G0
DAP4BC-G0-4
DAP4BC-G0-5
DAP4BC-G0-5U
DAP4BC-G0-6
DAP4BC-G3-4
DAP4BC-G3-5
DAP4BC-G3-6
DAP4BC-X0
Data Access Ports (DAP), provide end users a safe and secure means to maintain and
monitor performance of PLCs, VFDs, and industrial networks.
Integrated security features shall prevent the disruption of service or unwanted
access by unauthorized personnel. Non-arc flash certified personnel can access networks
within the panel which reduces cost, increases efficiency, and promotes overall safety.
Furthermore, the new, innovative circular design allows for quick and easy installation.
NOTE: In the interest of higher quality and value, Panduit products are continually
being improved and updated. Consequently, pictures may vary from the
enclosed product.
NOTE: Updates to this Instruction Manual may be available.
Check www.panduit.com for the latest version of this manual.
TO REDUCE THE RISK OF INJURY, USER MUST READ
INSTRUCTION MANUAL
Warning
• Always de-energize power before accessing an electrical enclosure.
• Always follow safety and lockout/tagout procedures when working on or near electrical
systems and equipment.
• Use proper personal protective equipment (PPE) when working around sources of
hazardous electrical energy.
• Do not use this product outside of the specified performance and environmental limits.
• This product must be installed by a qualified worker.
• Always comply with local installation codes and standards.
Information de Sécurité
• Toujours éteindre l'alimentation électrique avant d'accéder à un boîtier électrique.
• Suivez toujours les procédures de sécurité et de verrouillage / étiquetage (lockout/tagout)
quand vous travaillez sur ou à
proximité de systèmes et d'équipements électriques.
• Utilisez un équipement de protection individuelle approprié (EPI) lorsque vous travaillez
autour de sources d'énergie électrique dangereuse.
• N'utilisez pas ce produit en dehors des performances spécifiées et des limites
environnementales.
• Ce produit doit être installé par un ouvrier qualifié.
• Respectez toujours les codes et les normes d'installation locaux.
Standards
UL 50E
UL 50
CSA C22.2 NO. 94.1
CSA C22.2 NO. 94.2
UL 508A STANDARD FOR INDUSTRIAL CONTROL PANELS
CSA C22.2 NO. 14-13 INDUSTRIAL CONTROL EQUIPMENT
IEC 60529 DEGREES OF PROTECTION REQUIRED BY ENCLOSURE
ENCLOSURES FOR ELECTRICAL EQUIPMENT,
ENVIRONMENTAL CONSIDERATIONS
ENCLOSURES FOR ELECTRICAL EQUIPMENT,
NON-ENVIRONMENTAL CONSIDERATIONS
ENCLOSURES FOR ELECTRICAL EQUIPMENT,
NON-ENVIRONMENTAL CONSIDERATIONS
ENCLOSURES FOR ELECTRICAL EQUIPMENT,
ENVIRONMENTAL CONSIDERATIONS
Safety Information
Failure to comply with the warnings and
information in this manual could result in
product failure, electrical shock, severe
injury or death.
Technical Specifications
Warning: Do not use this product outside of the specified performance and environmental
limits. Failure to comply with these specifications could result in product failure,
personal injury, or death.
Page: 1 of 2
Application
Degree of Protection
For Flat Surface Mounting in a TYPE (UL, NEMA and CSA)
4, 4X, 12, 13, IP65 and IP66 Enclosures.
www.panduit.com
Technical Support:
1-800-777-3300
Email: techsupport@panduit.com
Page 2
© Panduit Corp. 2019 INSTALLATION INSTRUCTIONS DAP
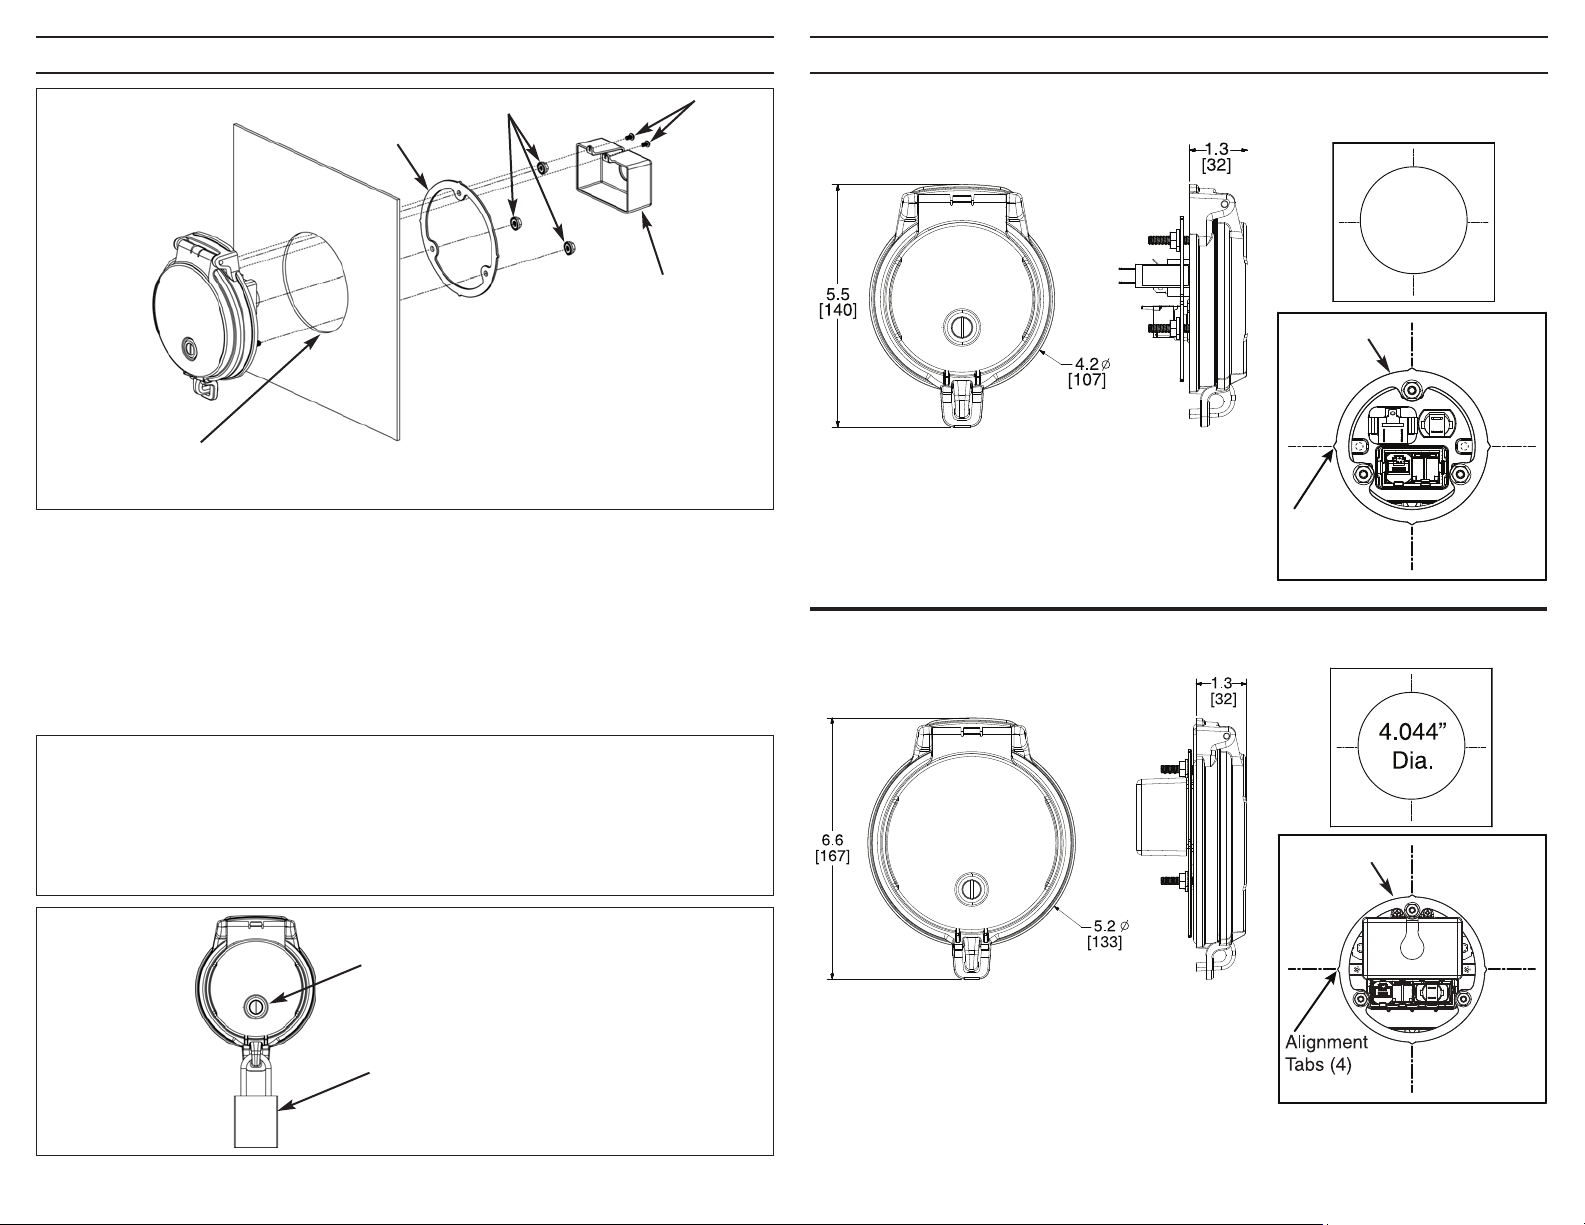
Alignment
Tabs (4)
2.914”
Dia.
© Panduit Corp. 2019 INSTALLATION INSTRUCTIONS DAP
SERRATED NUTS
LOCK RING
HANGING BOX:
To be installed after wiring
for the GFCI is completed.
PUNCHED HOLE:
1) Use 2-1/2 inch conduit hole punch for DAP3 Data Access Ports
2) Use 3-1/2 inch conduit hole punch for DAP4 Data Access Ports
Installation Instructions:
1. Punch recommended hole size per application.
2. Install Data Access Port in front side of panel.
3. Install Lock Ring over supplied Bolts (3) [not shown].
4. Secure Lock Ring with supplied Serrated Nuts (3) by torquing the nuts to 32 IN*LB.
5. Insure all nuts are torqued to 32 IN*LB after initial torque down.
6. Wire electrical components per local electrical code.
7. Install Hanging Box with supplied Bolts (2) [only applicable on the DAP4 Data Access
Port with GFCI outlet].
BOLTS
General Dimensions
DAP3 Data Access Port
LOCK RING
The features on the lock ring shown can be lined up
with the scribe lines on the inside of the panel door for
proper orientation of the Data Access Port.
DAP4 Data Access Port
Punch Die Numbers
DAP3: DAP4:
Greenlee 738BB (mild steel) Greenlee 741BB (mild steel)
Greenlee 745H-2-1/2 (stainless steel) Greenlee 745H-3-1/2 (stainless steel)
Panduit DAP3PUNCH-MS (mild steel) Panduit DAP4PUNCH-MS (mild steel)
Panduit DAP3PUNCH-SS (stainless steel) Panduit DAP4PUNCH-SS (stainless steel)
Quarter Turn Latch for
locking cover
Install Padlock for extra security
(sold separately)
LOCK RING
The features on the lock ring shown can be lined up
with the scribe lines on the inside of the panel door for
proper orientation of the Data Access Port.
Page: 2 of 2
 Loading...