

Page 1

NET-A
CCESS
N-Type and S-Type Cabinets
(CCL3 - Combination Lock Swing Handle
INSTRUCTIONS V00029AF Rev. 01
© Panduit Corp. 2013, 2014
CCL3 - Combination Lock Swing Handle Installation
• Reference the latest revisions of the following instruction sheets for door removal (if necessary):
• N-Type Cabinets: CM598
• S-Type Cabinets: CM599
Combination Lock Swing Handle Operation
• Default combination: “0,0,0”
• Set [3] dials to correct combination, or use key to open handle
SET NEW COMBINATION
• Open swing handle
• Rotate handle insert counter-clockwise 30º (from unlocked position) or
210º (from locked position)
• Set [3] dials to desired combination
• Return handle insert to original position
• Close swing handle
)
NOTE
Entire handle assembly
must be removed from door
prior to installation of CCL3
FOR TECHNICAL SUPPORT www.panduit.com/resources/install_maintain.asp
[3] Dials
Handle Insert (from unlocked)
(rotate counter-clockwise 30º
from unlocked position to set
new combination)
Handle Insert (from locked)
(rotate counter-clockwise 210º
from locked position to set new
combination)
Page 1 of 4
Page 2
INSTRUCTIONS V00029AF Rev. 01
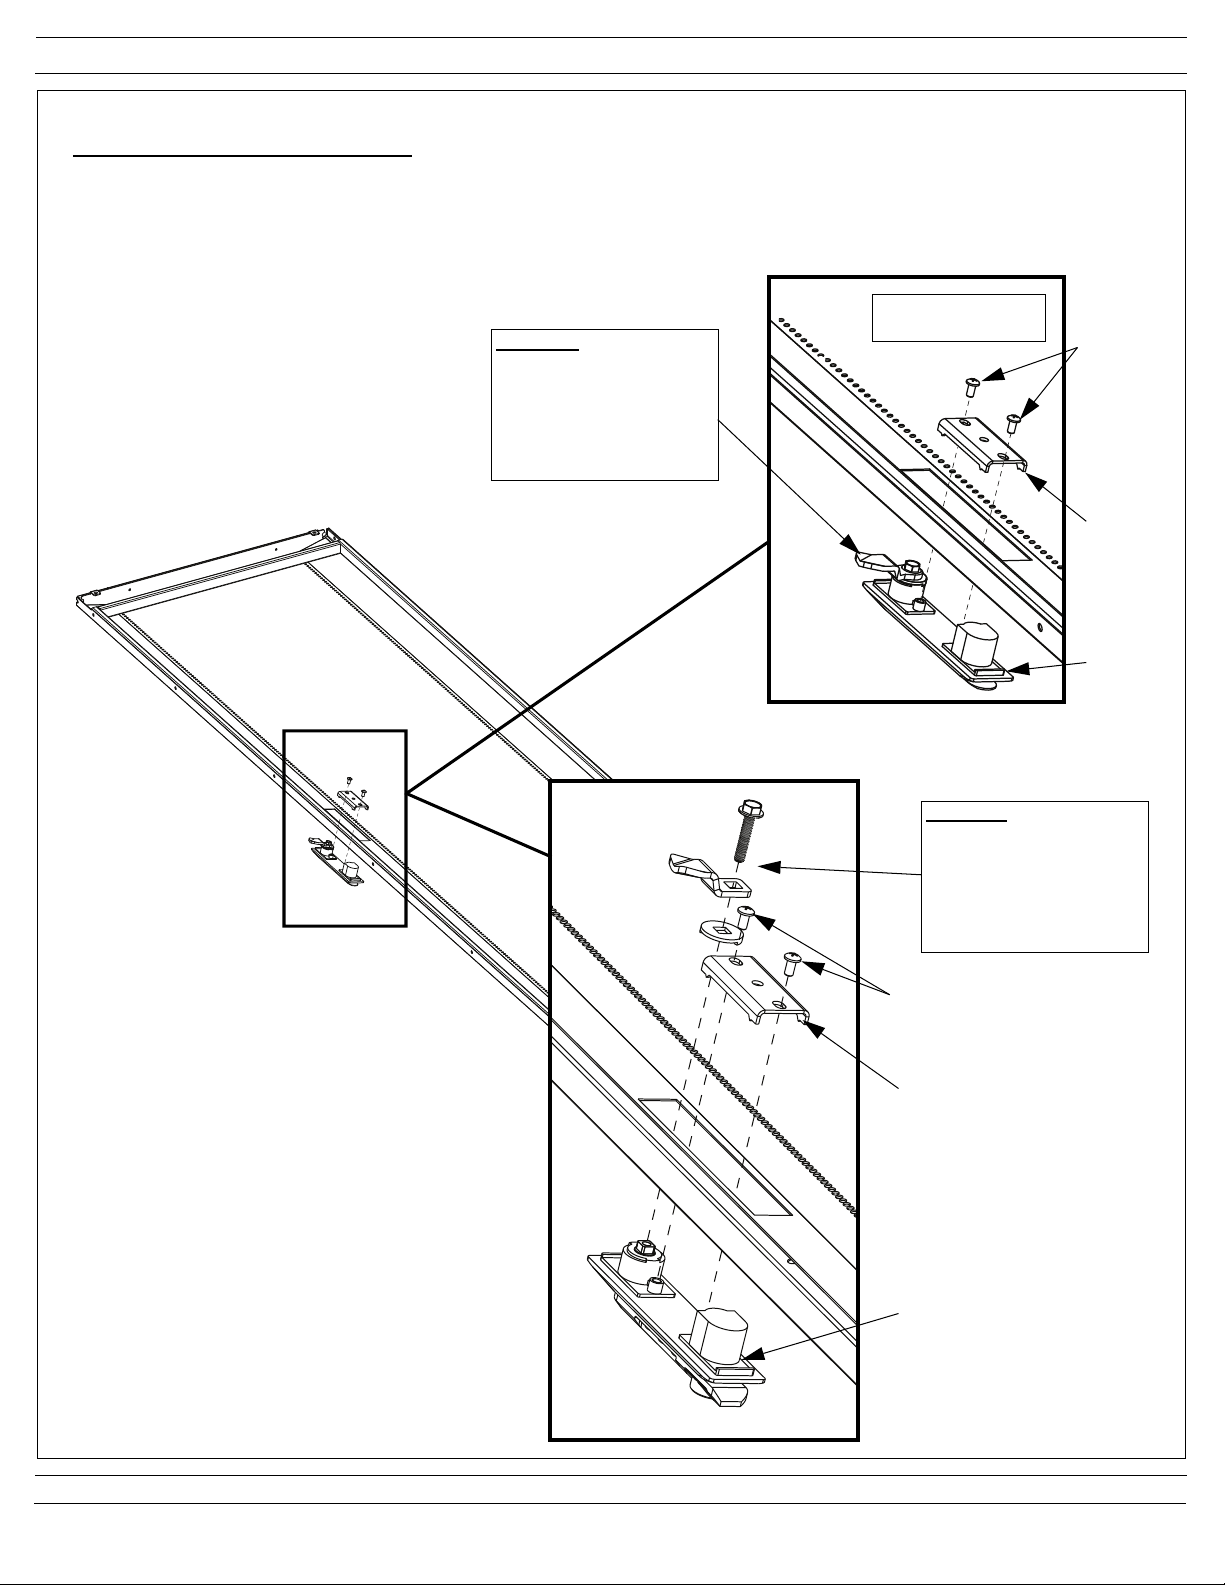
S-Type Single Hinge Door
Combination Lock Swing Handle Installation
• Remove Cam Screw (use 10mm socket wrench), Cam Stop (note orientation of Cam Stop), and Cam from existing handle
• Remove Door Handle Backing Plate and remove existing door handle (remove [2] Phillips screws)
• Install Combination Lock Swing Handle by securing Door Handle Backing Plate to Swing Handle with [2] Phillips screws
• Install Cam, Cam Stop, and Cam Screw (use 10mm socket wrench)
• Note orientation of Cam Stop
REMOVE:
-Cam Screw
(use 10mm socket wrench)
-Door Cam
-Cam Stop
(note orientation)
REMOVE EXISTING
DOOR HANDLE
[2] Phillips
Screws
Door
Handle
Backing
Plate
INSTALL:
-Cam Screw
(use 10mm socket wrench)
-Door Cam
-Cam Stop
(note orientation)
[2] Phillips
Screws
Door Handle
Backing Plate
Existing
Door
Handle
Combination Lock
Swing Handle
For Technical Support: www.panduit.com/resources/install_maintain.asp
Page 2 of 4
Page 3
INSTRUCTIONS V00029AF Rev. 01
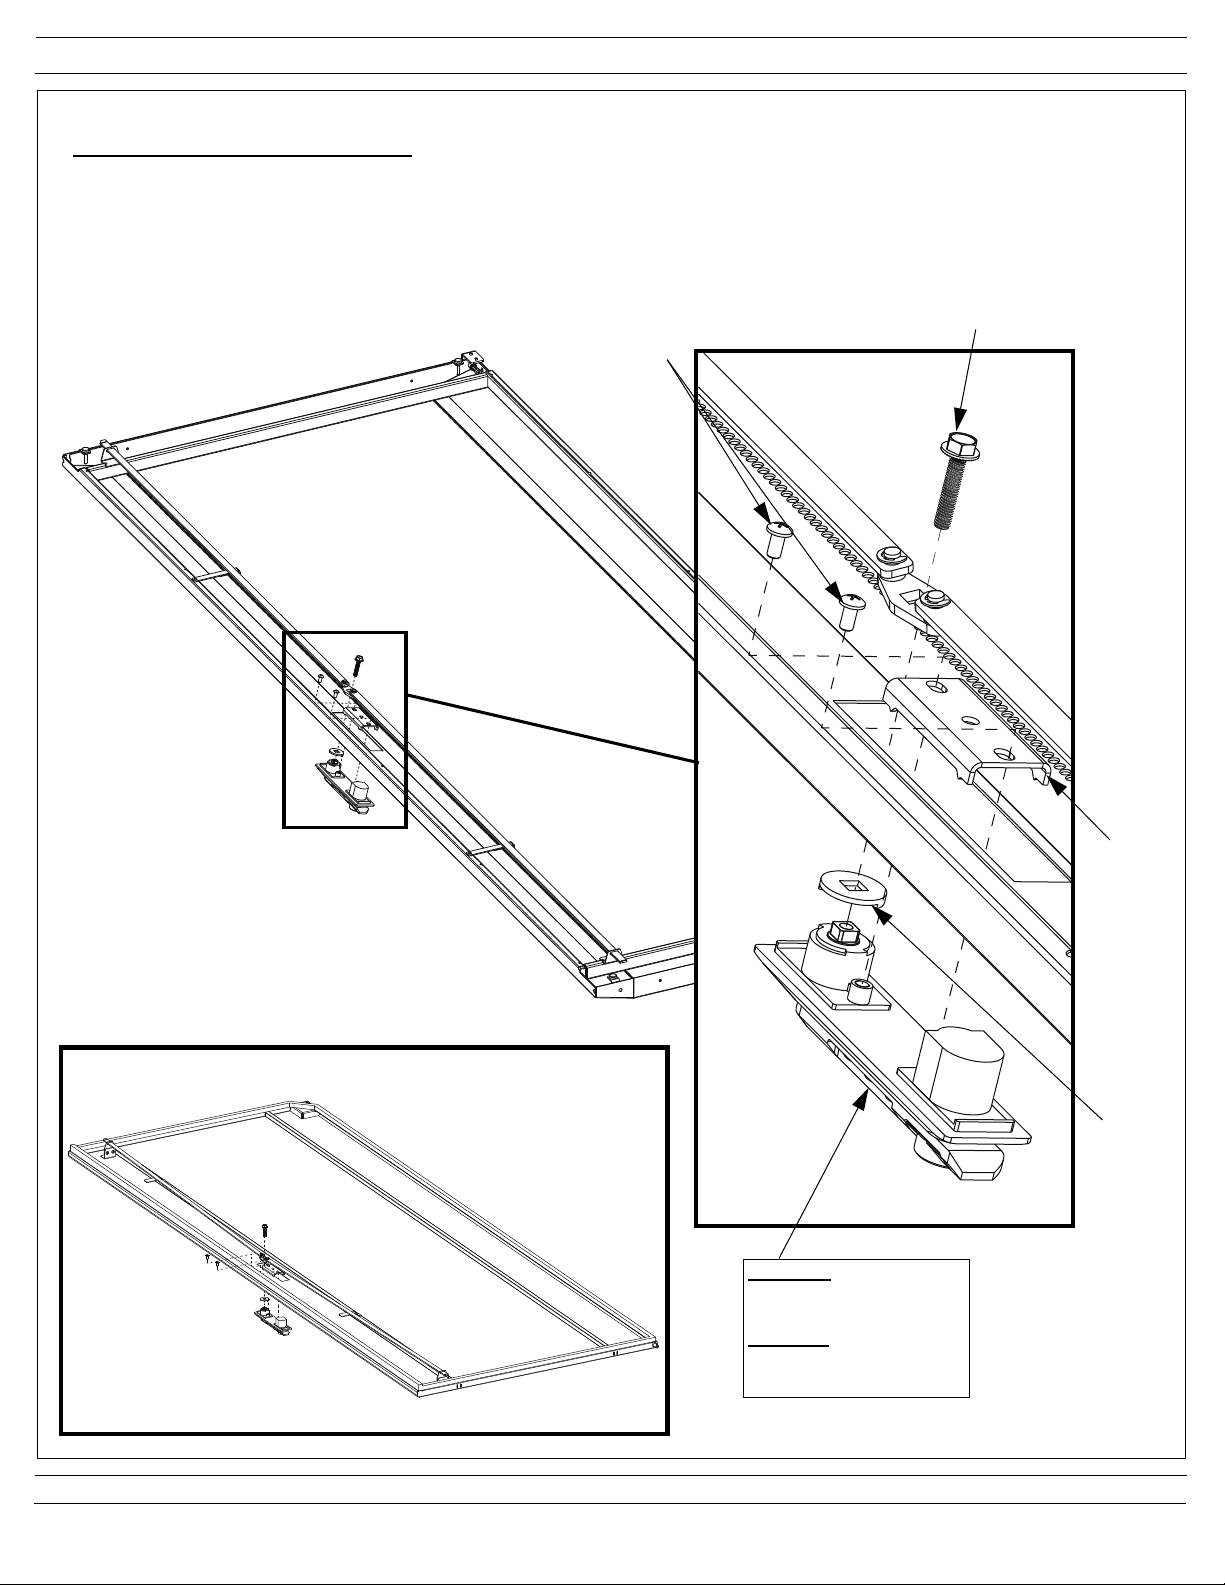
N-Type Single Hinge Door; N-Type & S-Type Solid Rear Door
Combination Lock Swing Handle Installation
• Remove Cam Screw (use 10mm socket wrench) and Cam Stop (note orientation of Cam Stop) from existing handle
• Remove Door Handle Backing Plate and remove existing door handle (remove [2] Phillips screws)
• Install Combination Lock Swing Handle by securing Door Handle Backing Plate to Swing Handle with [2] Phillips screws
• Install Cam Stop and Cam Screw (use 10mm socket wrench)
• Note orientation of Cam Stop
• Ensure that square cutout of Door Rod Assembly sits securely on Combination Lock Swing Handle
• Ensure that door rods are behind door rod guides
[2] Phillips
Screws
Cam Screw
(use 10mm Socket Wrench)
N-Type & S-Type Solid Rear Door
Follow procedure for N-Type Single Hinge Door hanle replacement
REMOVE:
-Existing Door Handle
INSTALL:
-Combination Lock
Swing Handle
Door
Handle
Backing
Plate
Cam
Stop
For Technical Support: www.panduit.com/resources/install_maintain.asp
Page 3 of 4
Page 4
INSTRUCTIONS V00029AF Rev. 01
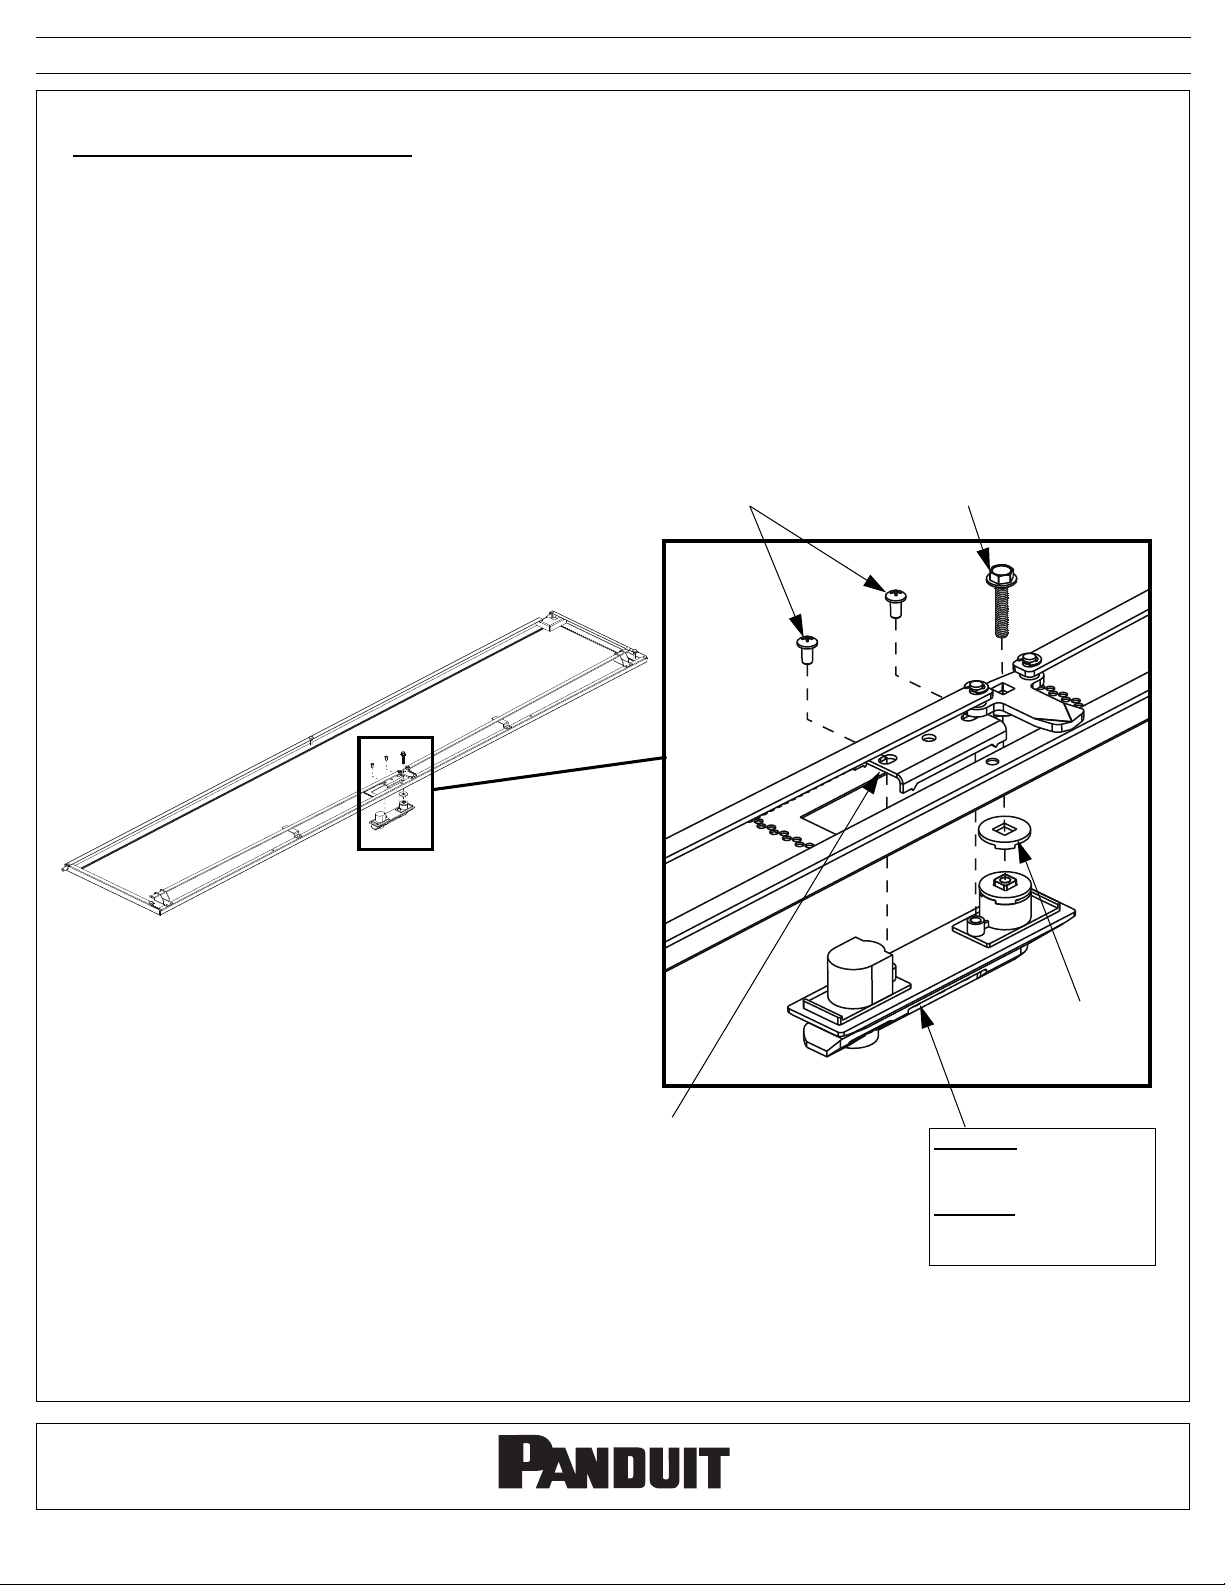
N-Type and S-Type Split Door
Combination Lock Swing Handle Installation
• Remove Cam Screw (use 10mm socket wrench) and Cam Stop (note orientation of Cam Stop) from existing handle
• Remove Door Handle Backing Plate and remove existing door handle (remove [2] Phillips screws)
• Install Combination Lock Swing Handle by securing Door Handle Backing Plate to Swing Handle with [2] Phillips screws
• Install Cam Stop and Cam Screw (use 10mm socket wrench)
• Note orientation of Cam Stop
• Ensure that square cutout of Door Rod Assembly sits securely on Combination Lock Swing Handle
[2] Phillips
Screws
Cam Screw
(use 10mm Socket Wrench)
Cam
Stop
For Instructions in Local Languages
and Technical Support:
www.panduit.com/resources/install_maintain.asp
Door
Handle
Backing
Plate
www.panduit.com
Page 4 of 4
REMOVE:
-Existing Door Handle
INSTALL:
-Combination Lock
Swing Handle
E-mail:
techsupport@panduit.com
Phone:
866-405-6654
 Loading...