How it Works
Log In / Sign Up
Buy Points
How it Works
FAQ
Contact Us
Questions and Suggestions
Users
Panasonic of North America
Loading...
#
29082EB BHX70A
5Z6KX P8415
5Z6UE 608026
5Z6UE 608049
8D8 EUE24B
932A HPDC
932CQ BT5107
932CQ BT5557
932CQ EP1660
932CQ EP1660WB
932CQ EX0770
932CQ EX0772
932CQ RXBT490
932CQ SM5559U
932CR BT4509
932CR SM4208U
932CY BT100U
932CY MH646
96NBB GT1540
96NBB HCM371A
96NBL C30A
96NBL VT164W
96NFV LKVK1
96NKX A405
96NKX CC2000
96NKX CC2000BS
96NKX FG2451
96NKX FPG379
96NKX FPG391
96NKX HDV430
96NKX HGC200
96NKX HNB700
96NKX HNC300
96NKX HNC700
96NKX HNC710
96NKX HNC800
96NKX HNK102
96NKX HNM300
96NKX HNS107
96NKX HNZ108
96NKX NCP0158
96NKX PRL260
96NKX PRS120
96NKX PRSA10
96NKX T0155
96NKX T0158
96NKX TD7696
96NKX TD7895
96NKX TG1031
96NKX TG1061
96NKX TG1221
96NKX TG2200
96NKX TG2382
96NKX TG2431
96NKX TG2550R
96NKX TG2583
96NKX TG2584
96NKX TG3031
96NKX TG4131
96NKX TG4221
96NKX TG4321
96NKX TG4741
96NKX TG4771
96NKX TG5110
96NKX TG5240
Loading...
Loading...
Nothing found
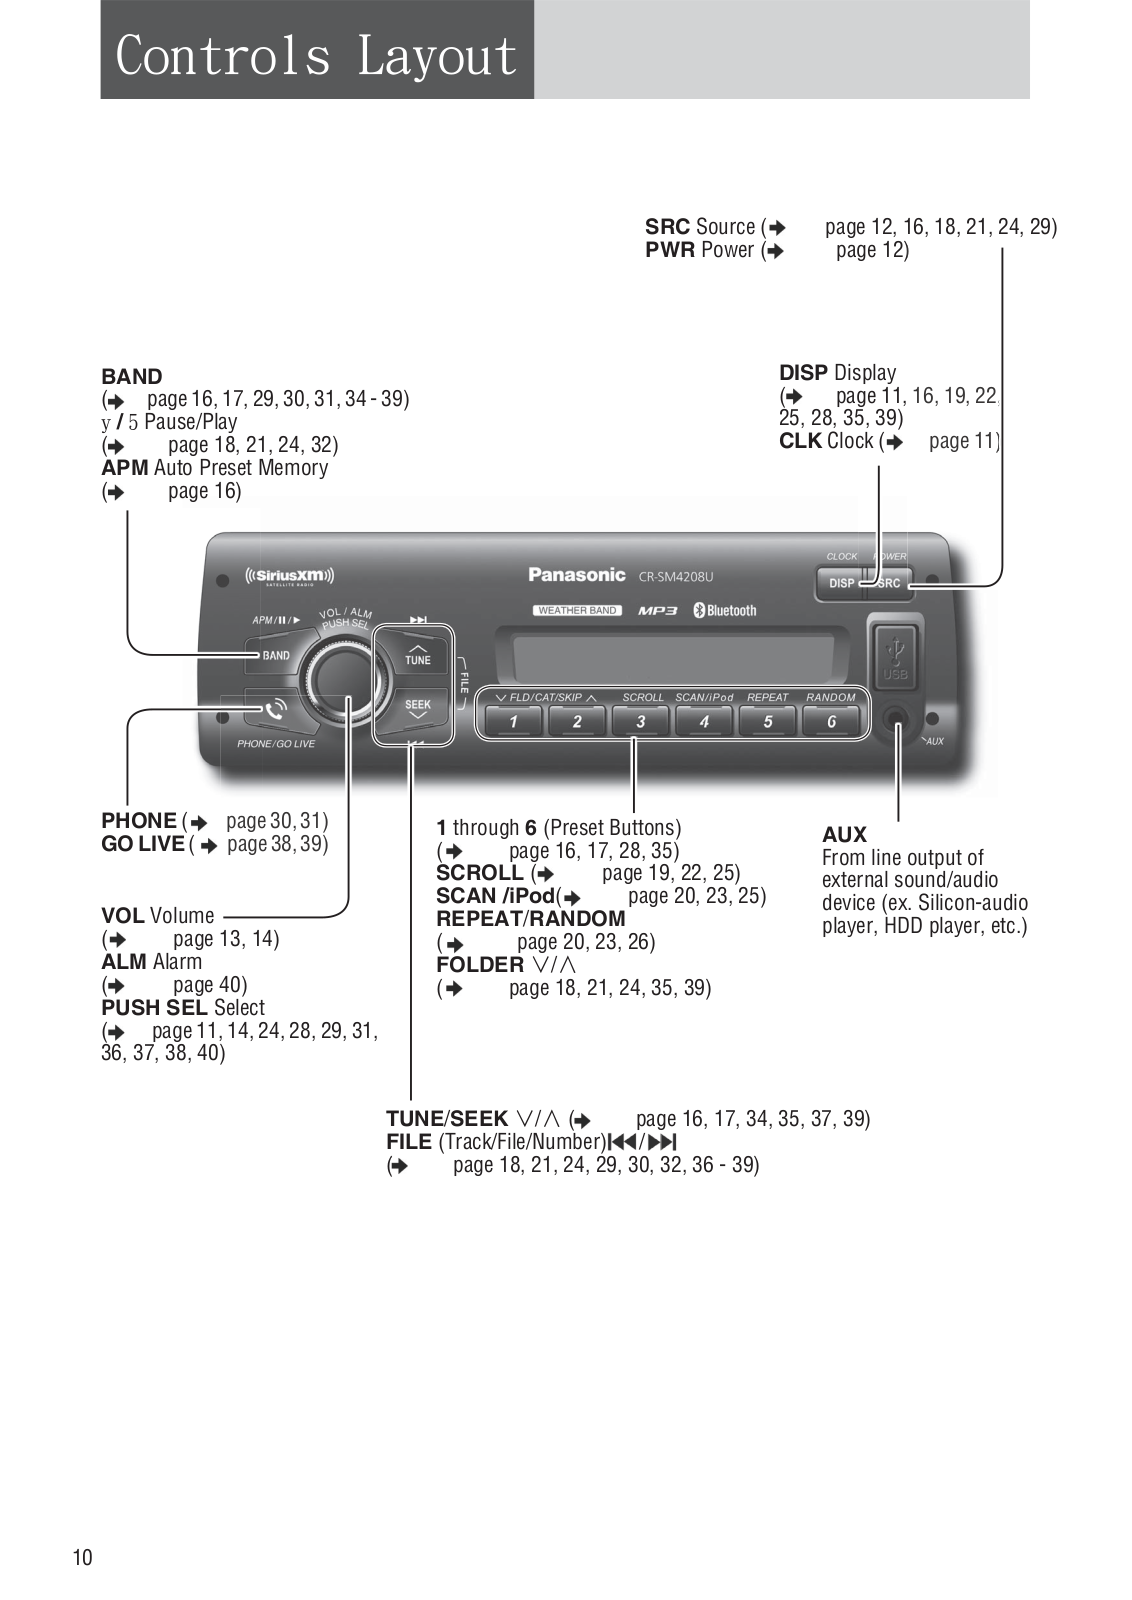
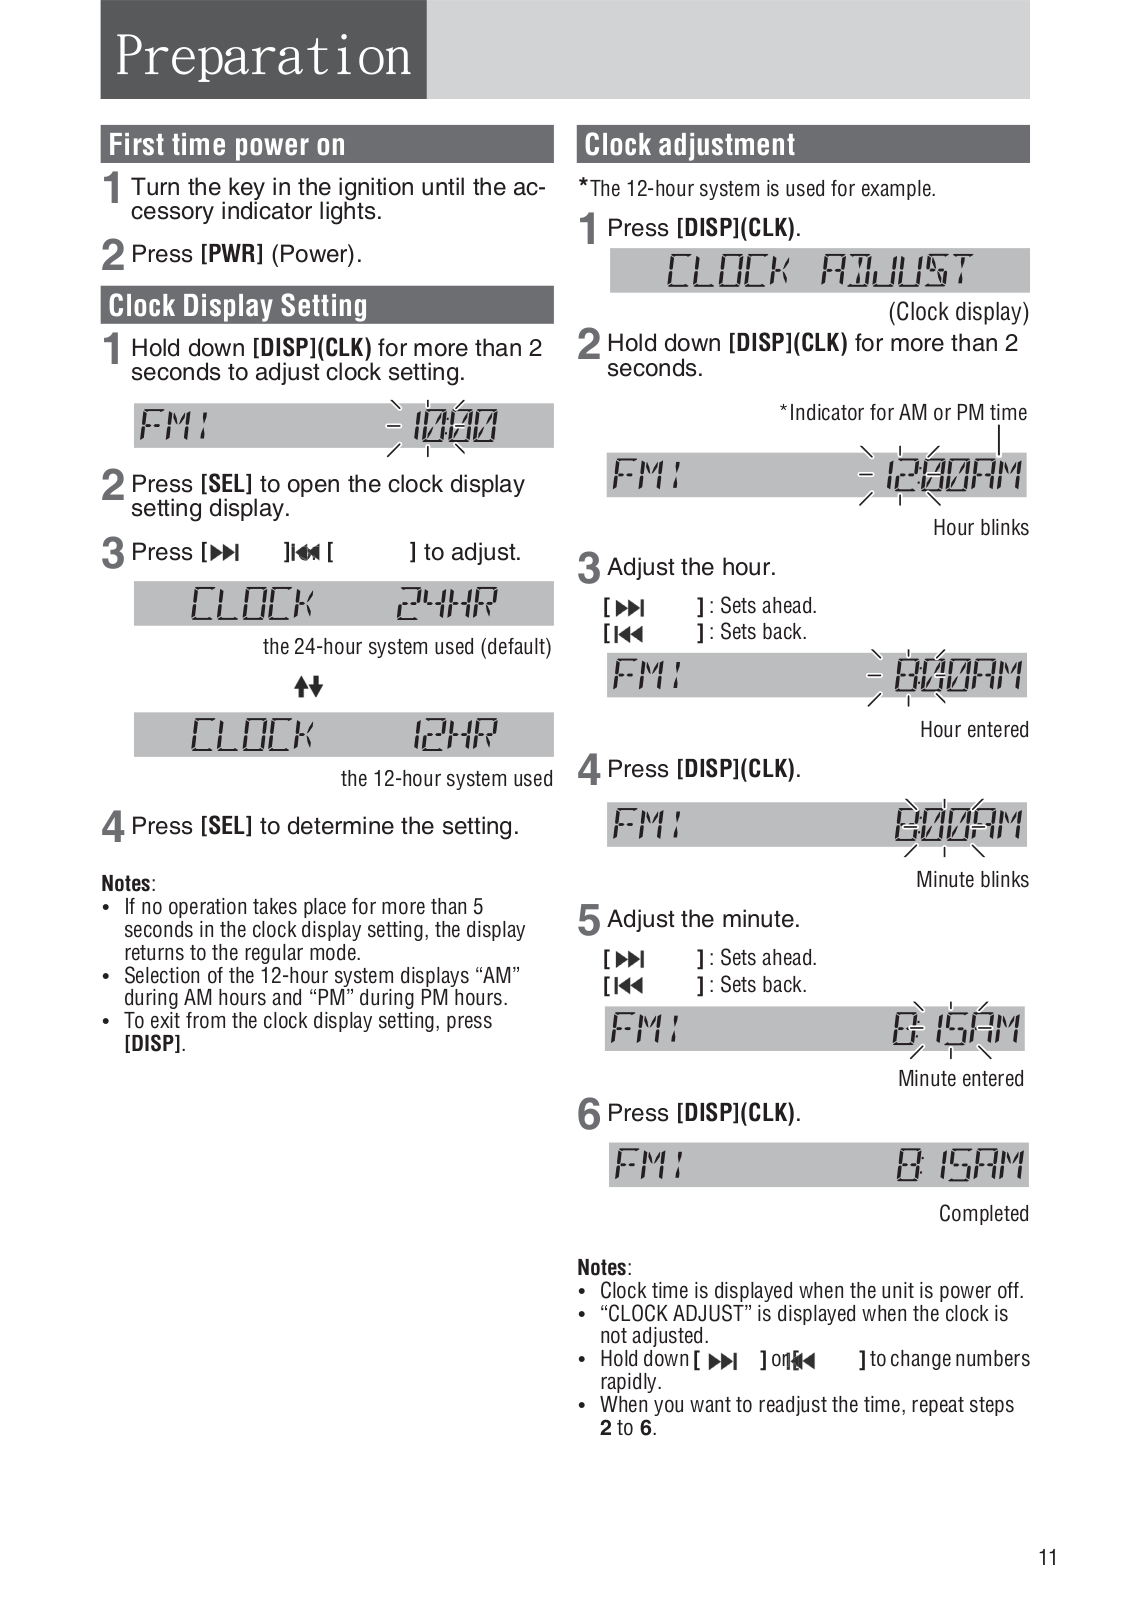
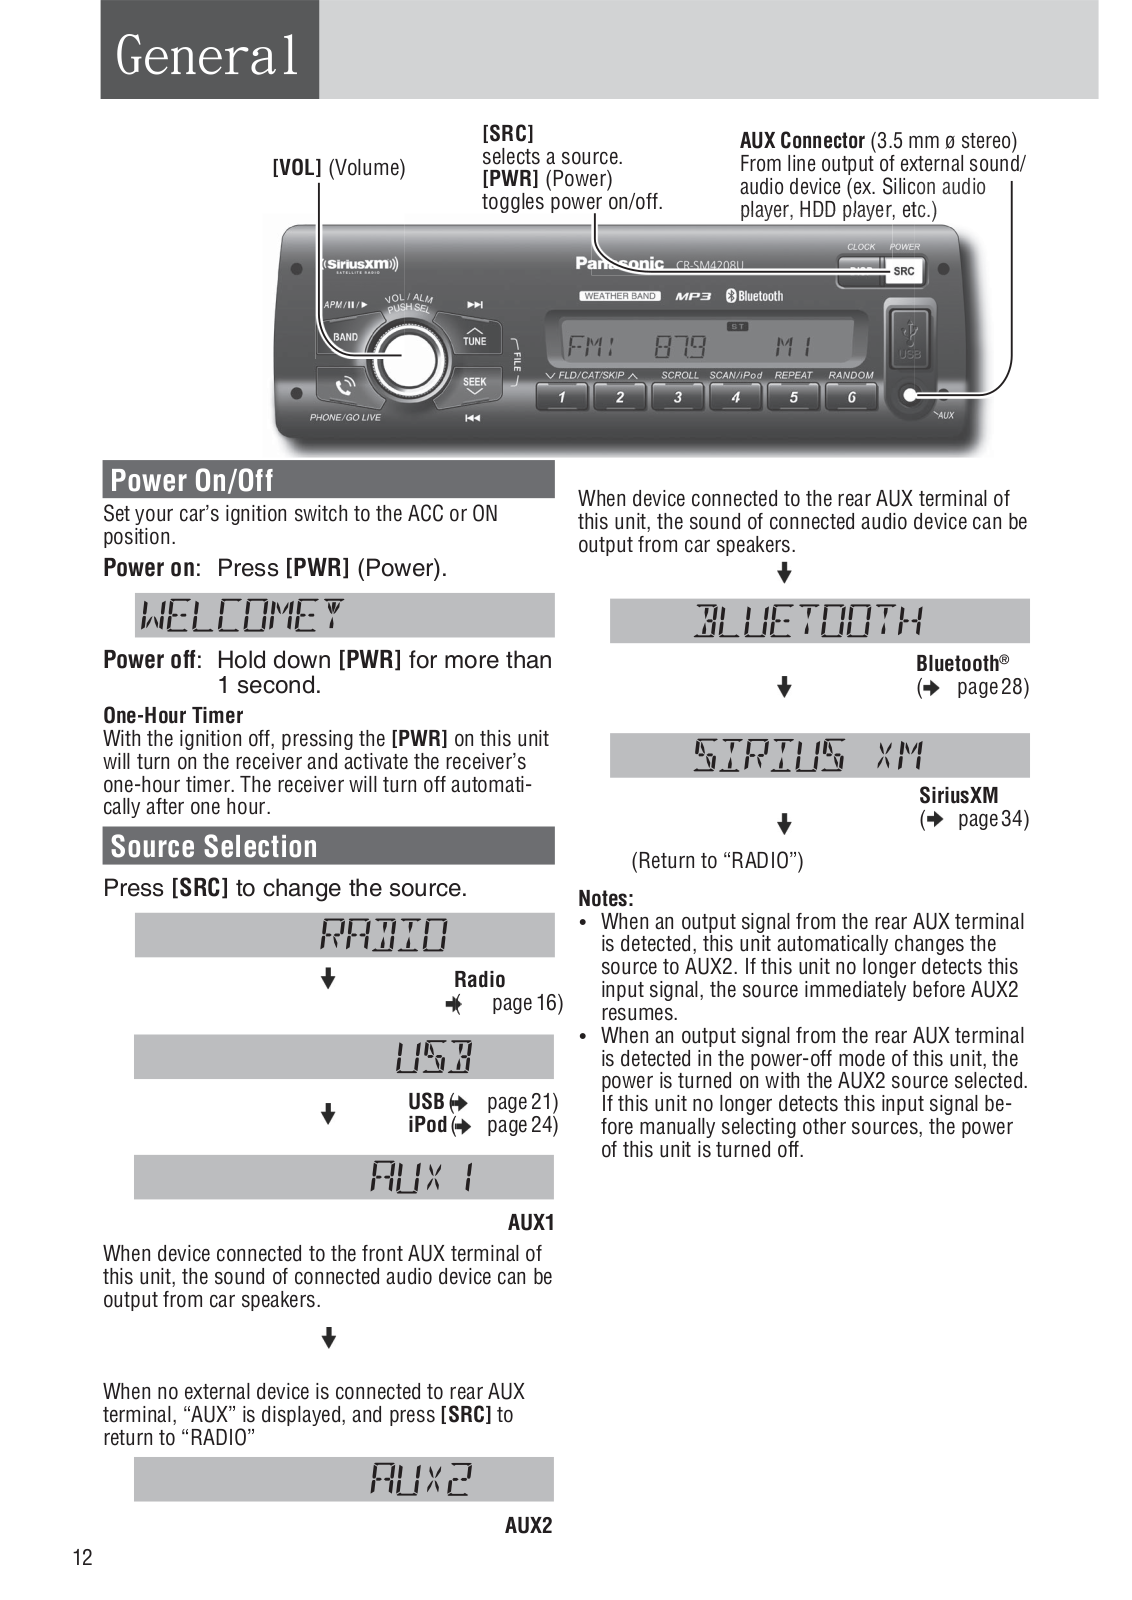
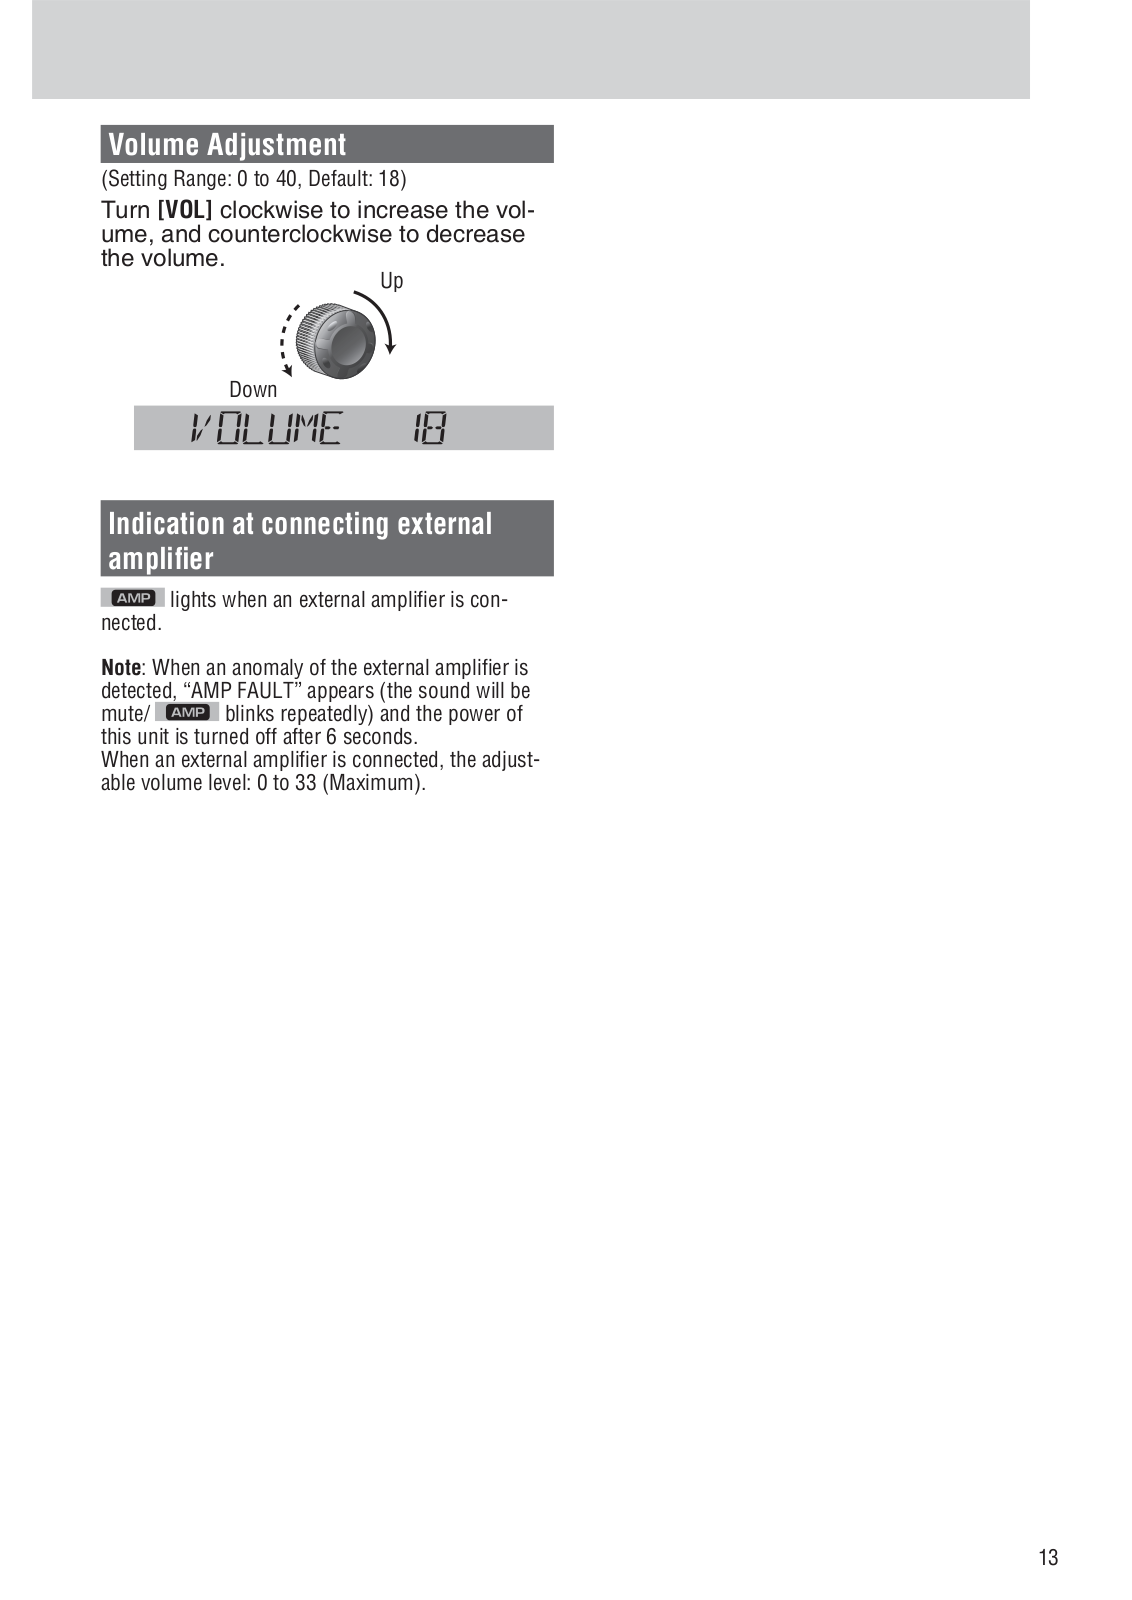
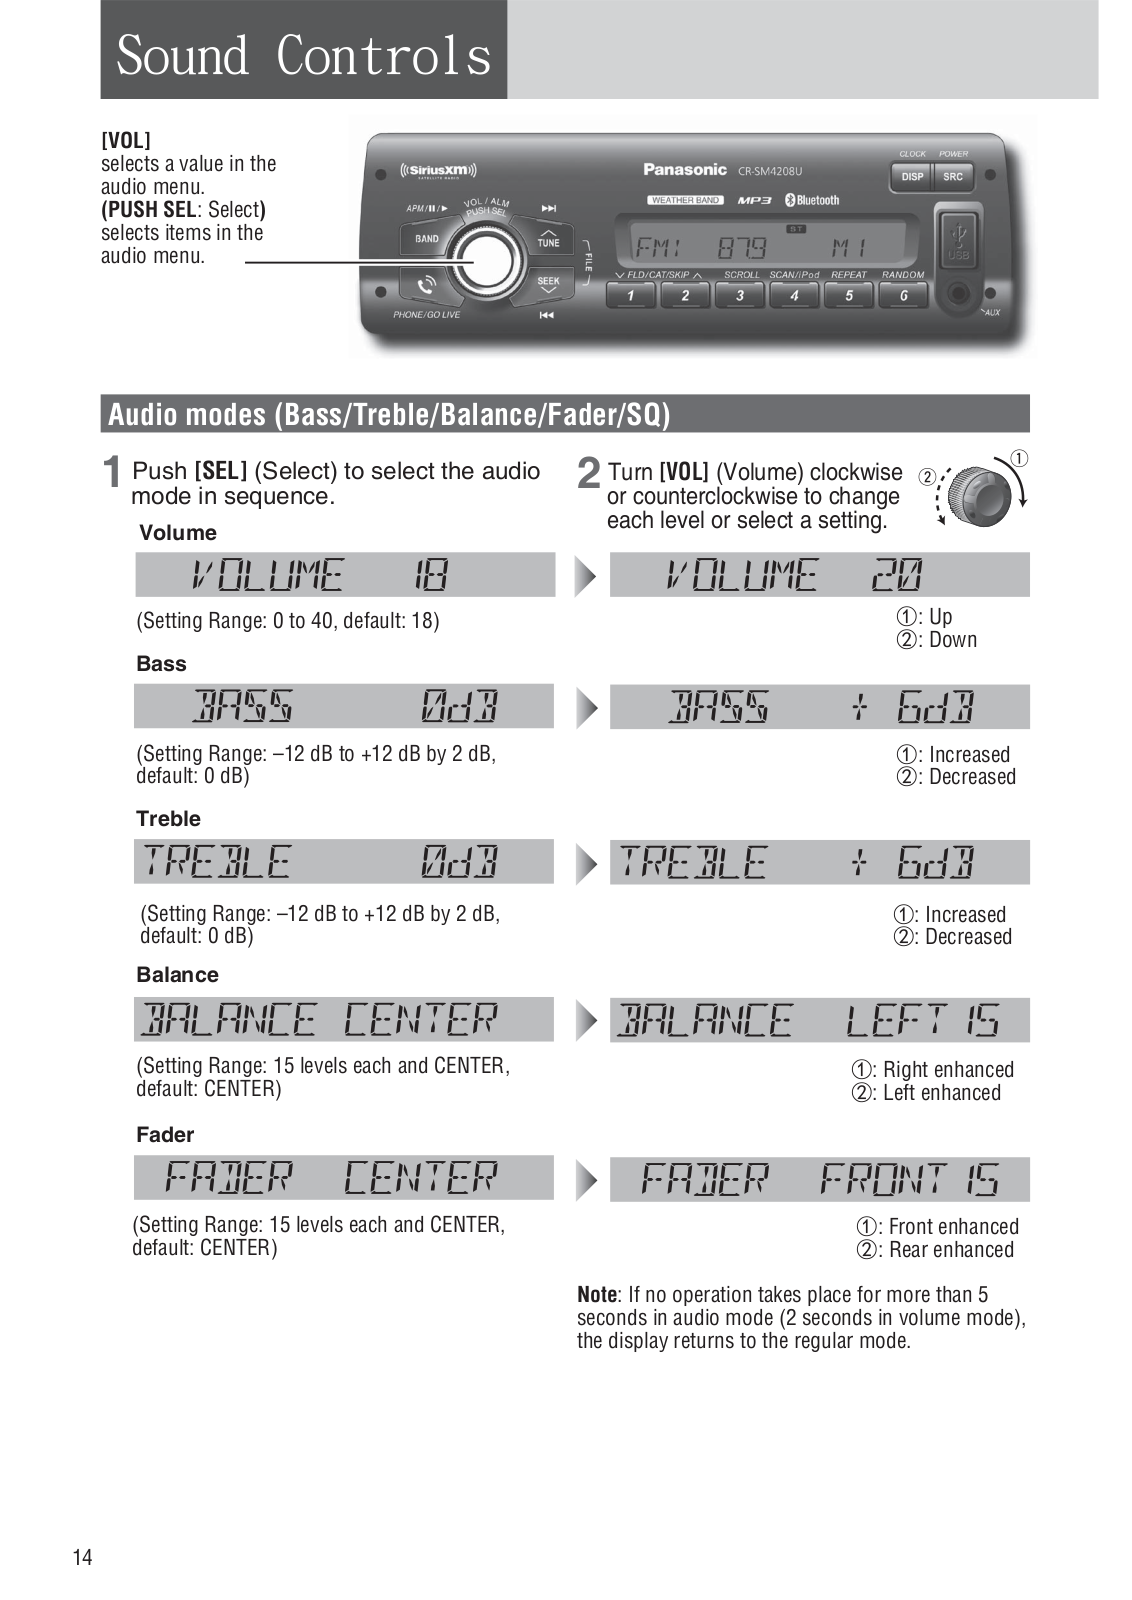
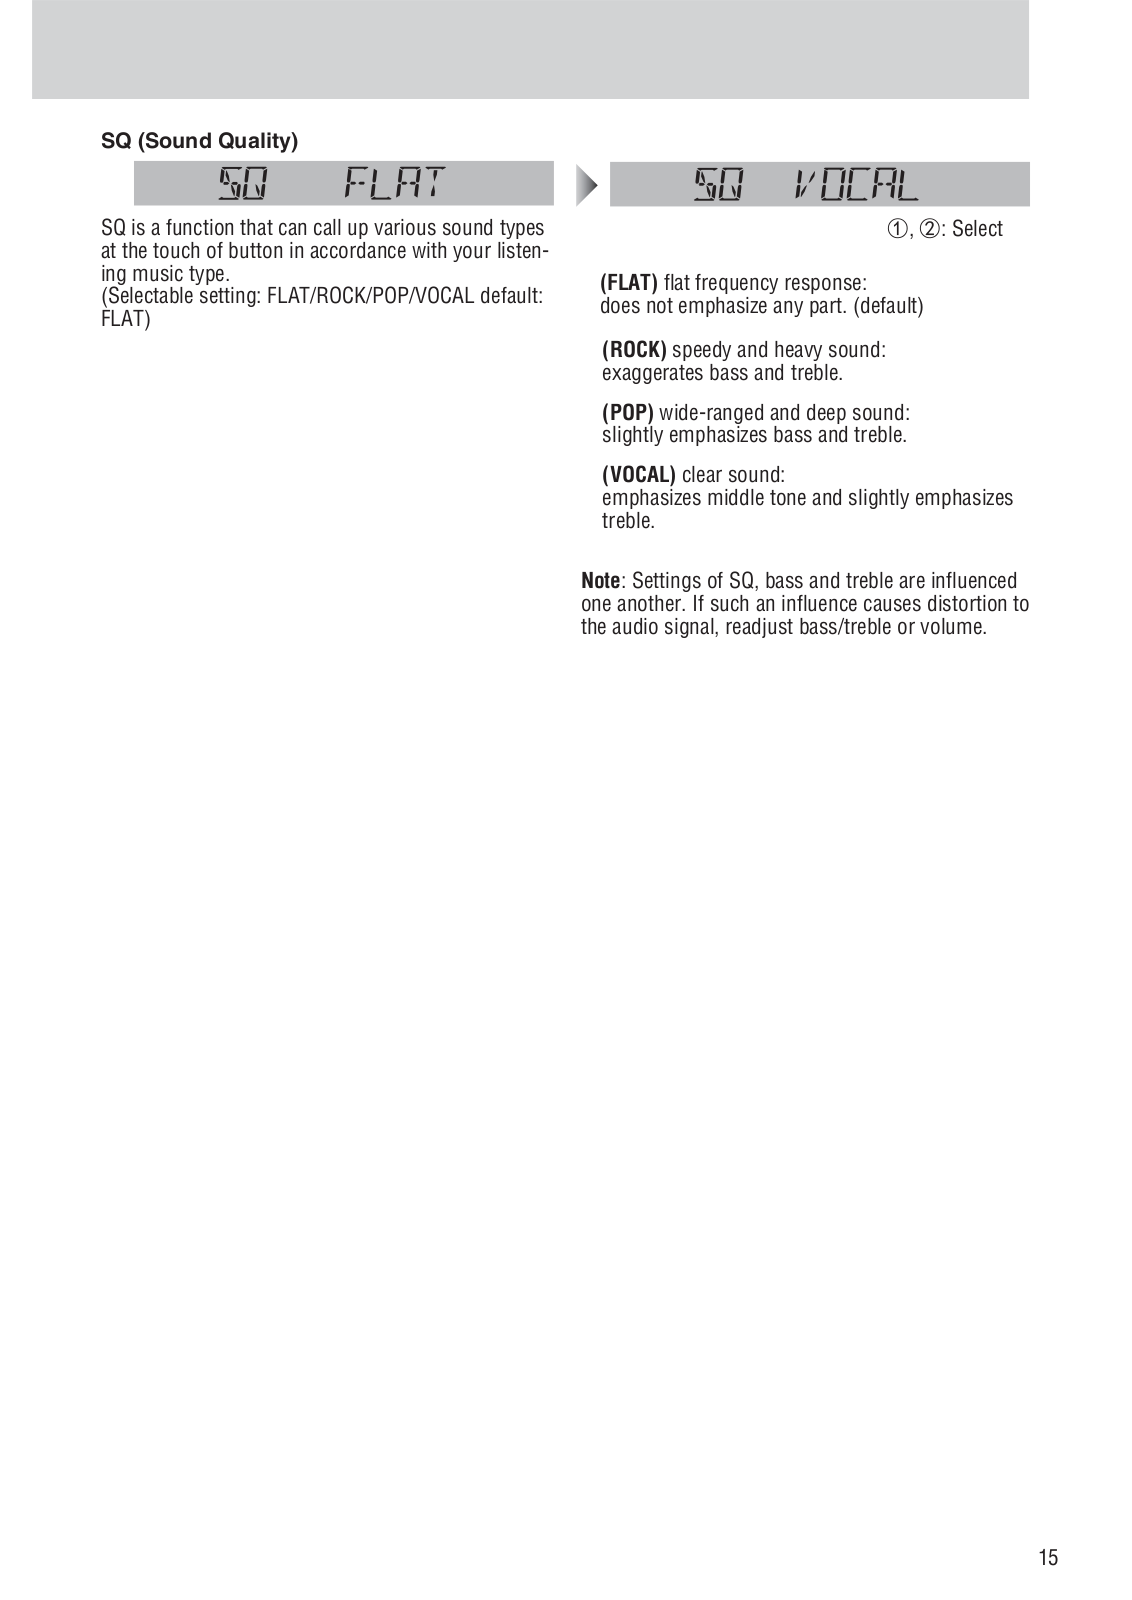
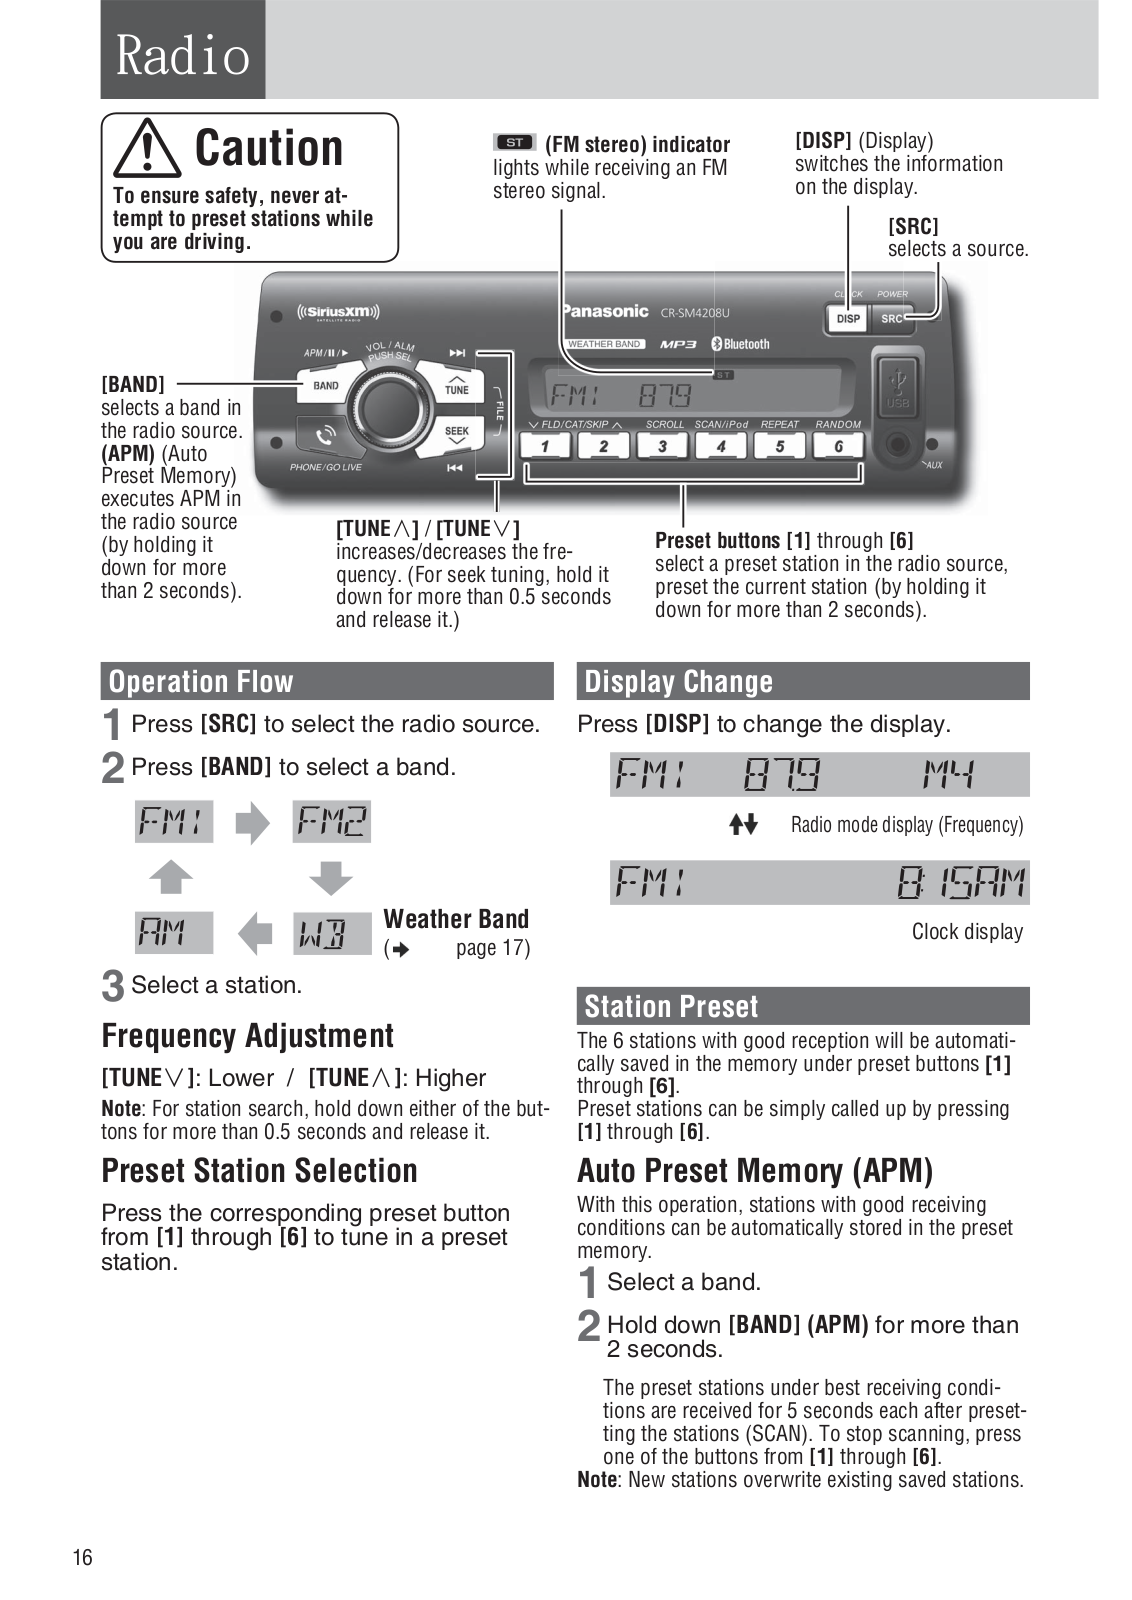
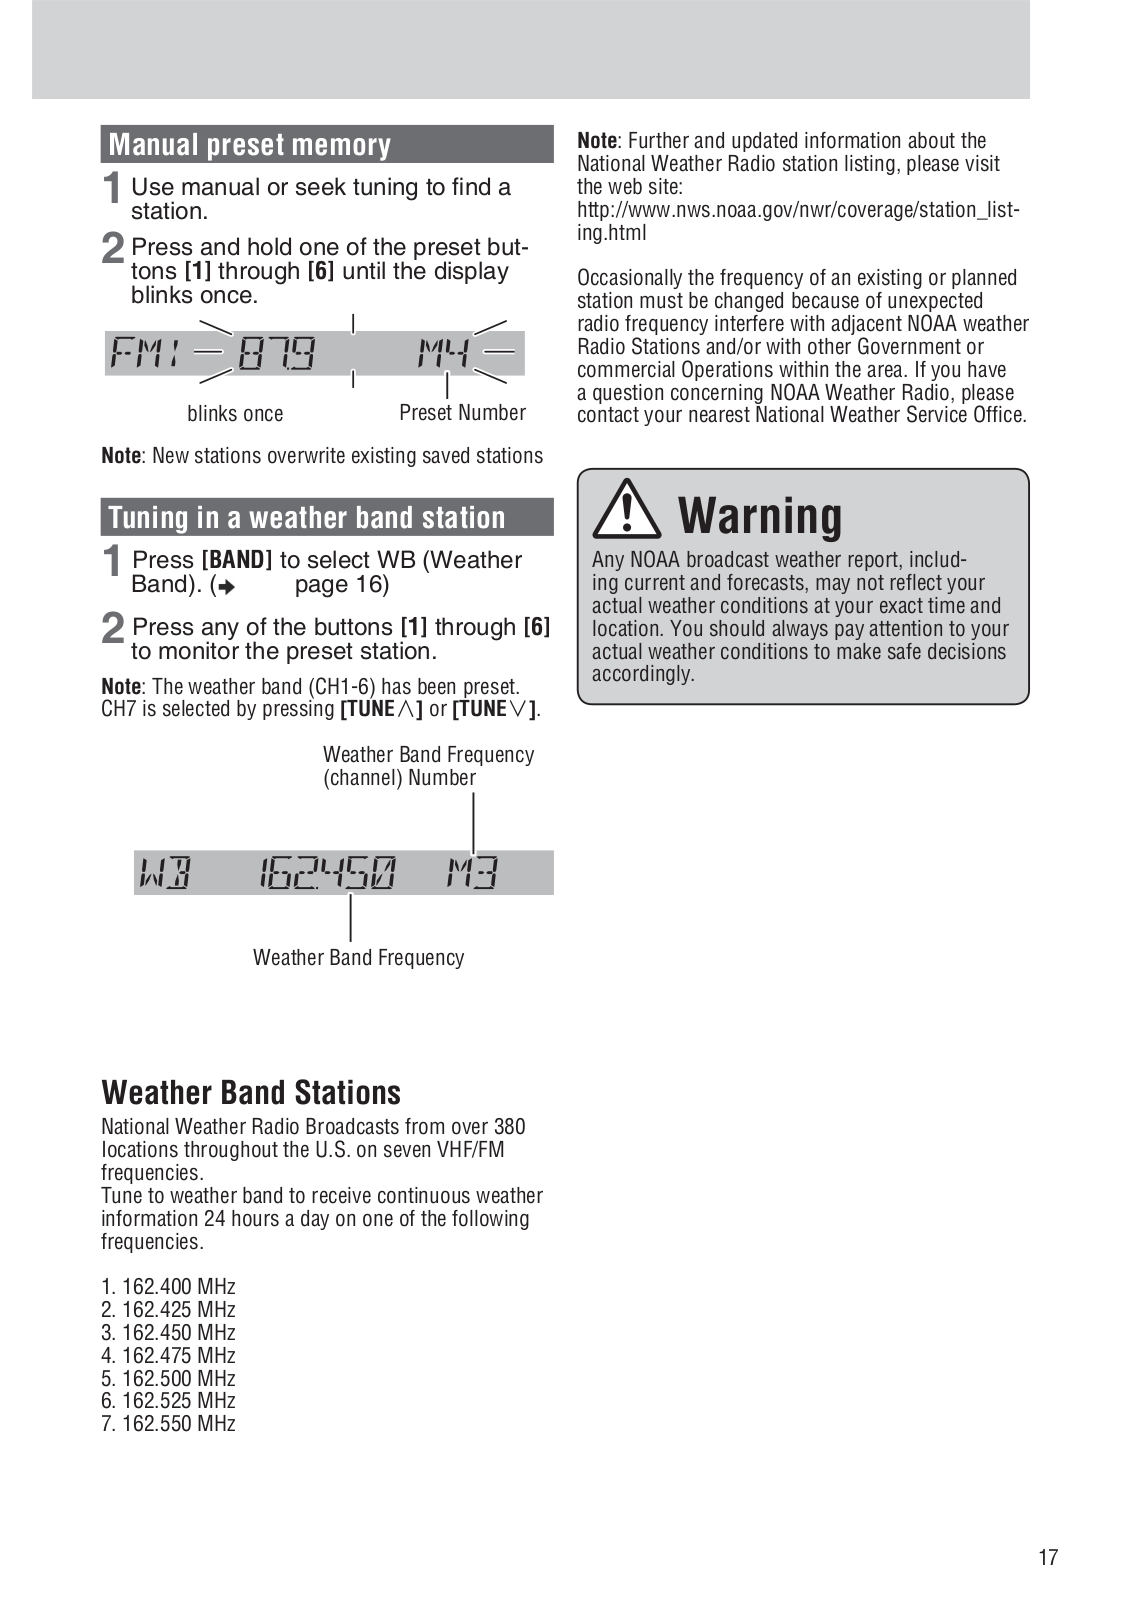
932CR SM4208U
User Manual
61 pgs
2.82 Mb
0
Table of contents
Loading...
Panasonic of North America 932CR SM4208U User Manual
...
Panasonic of North America User Manual
Download
Specifications and Main Features
Frequently Asked Questions
User Manual
Download
Loading...
+
42
hidden pages
Unhide
You need points to download manuals.
1 point = 1 manual.
You can buy points or you can get point for every manual you upload.
Buy points
Upload your manuals