

Panasonic WV-CF5SA Operating Instructions Manual
Operating Instructions
Included Installation Instructions
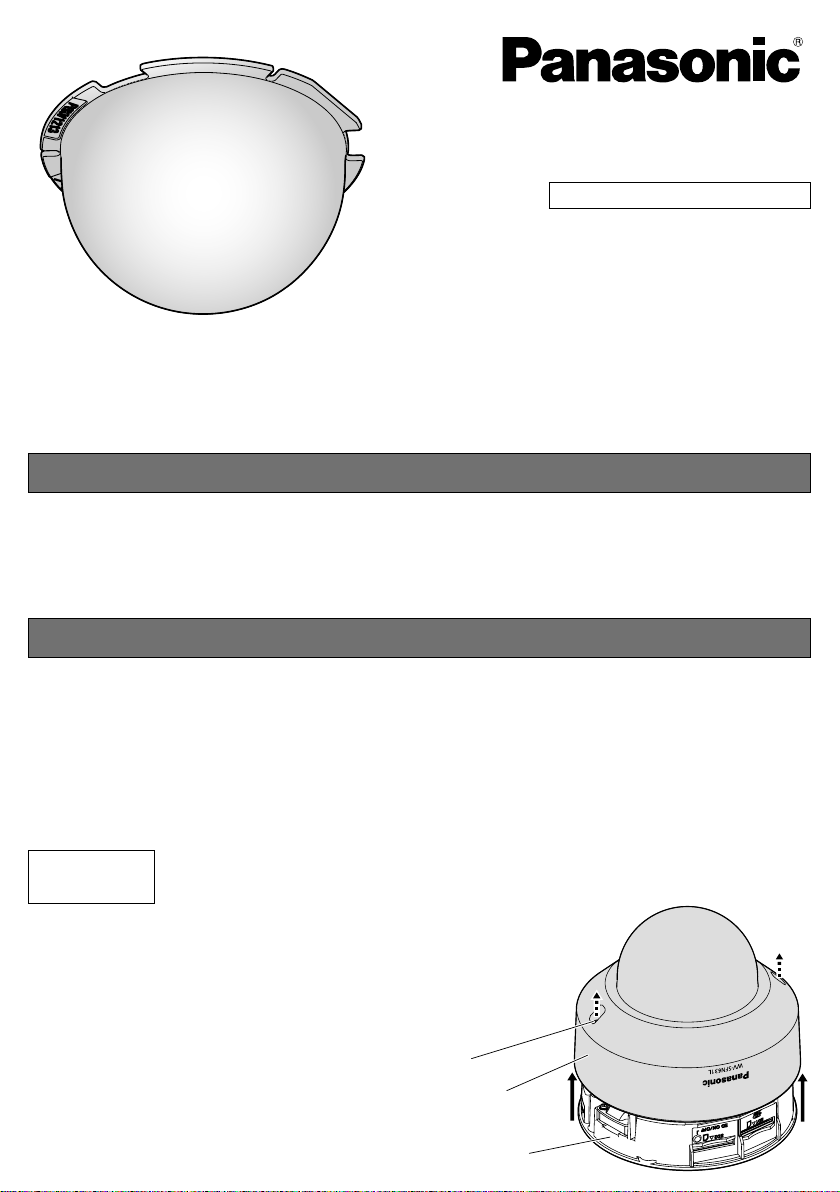
Dome Cover
Model No.
Before attempting to connect or install this product,
please read these instructions carefully and save this manual for future use.
The model number is abbreviated in some descriptions in this manual.
WV-CF5SA
Precautions
Refer installation work to the dealer.
Installation work requires technique and experience. Failure to observe this may cause fire, electric
shock, injury, or damage to the product.
Be sure to consult the dealer.
Mounting procedures
Note:
● When a smoke type dome cover is used, the IR LED irradiation distance and the illuminance level
for switching between color and monochrome are lower than for a standard clear type dome
cover. Check the settings after attaching the enclosure.
n Attach to WV-SFN631L/WV-SFN611L
Read the following descriptions together with the Installation Guide of the camera. The WV-SFN631L
is used as an example in these descriptions.
Step1
Use the bit included with the camera to
loosen the 2 screws that secure the
enclosure, and then remove the enclosure from the camera body.
Remove the enclosure from camera
Enclosure fixing
screws (x2)
Enclosure
Camera body
Step2
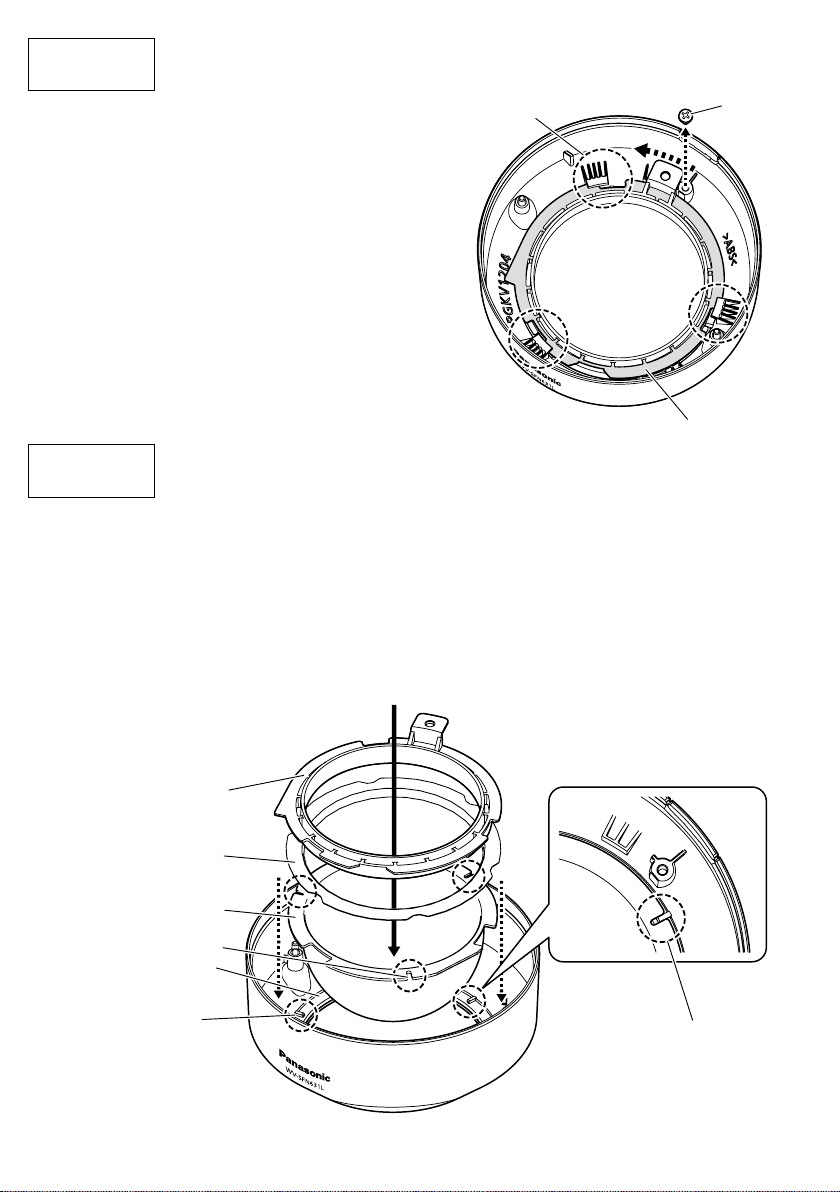
Remove the dome cover
Remove the screw that secures the dome cover holder
and the enclosure. Rotate the dome cover holder counterclockwise until the dome cover holder can be
removed.
You can remove the dome cover holder, light-blocking
sheet, and dome cover (in this order) once the 3 protrusions on the enclosure are lined up with the notched
areas of the dome cover holder. (Do not remove the
case ring.)
The screw, dome cover holder, and light-blocking sheet
will be used again in step 3.
Protrusions on
the enclosure
Screw
Dome cover holder
Step3
Replace the dome cover
1 Remove the cover film from the outside of the dome cover (WV-CF5SA). Keep the removed cover
film for future use. (Take care not to damage the outside or inside of the dome cover.)
2 Attach the dome cover (WV-CF5SA) to the enclosure. When attaching, align the 3 notched areas
on the dome cover with the 3 protrusions on the case ring.
3 Attach the light-blocking sheet and dome cover holder removed in step 2 to the dome cover from
the top, and then rotate the dome cover holder clockwise and secure it using the screw from step
2. (The recommended tightening torque: 0.39 N·m {0.29 lbf·ft})
4 Attach the cover film removed in 1 to the surface of the dome cover.
Dome cover holder
Light-blocking sheet
Dome cover
Notched areas on
the dome cover
Case ring
Protrusions on
the case ring
Notched areas on the
dome cover, and protrusions on the case ring
2
Step4
Attach the enclosure to the camera
Secure the camera to the enclosure with the 2 enclosure fixing screws.
(The recommended tightening torque of the enclosure fixing screws is 0.59 N·m {0.44 lbf·ft})
⇒ Refer to the Installation Guide for more information about installing the camera.
IMPORTANT:
● When the enclosure is attached, the camera's focus may go out of focus. Use the "Auto focus"
function in the setup menu to adjust the focus.
● Remove the cover film after installation is complete.
● If there are fingerprints or dirt on the dome cover, wipe it clean with a soft cloth.
n Attach to WV-SF538/WV-SF539 and other models
Models that can use the WV-CF5S dome cover can also use the WV-CF5SA dome cover.
Read the following descriptions together with operating instructions of the camera.
Step1
Remove the enclosure from camera
1 Remove the enclosure fixing screw (M3, step screw).
2 Rotate the enclosure counterclockwise twice, align the marker with "OPEN", and then remove the
enclosure.
Marker
OPEN
ADJUST
1 Remove the
fixing screw.
Enclosure
2
AF
LOCK
3
 Loading...