

Panasonic SXKC211 User Manual
KEYBOARD
SX-KC211
QQTG0598AENGLISH
Caution for AC Mains Lead
(For AC cord type only)
For your safety, please read the followi ng text carefully.
This appliance is s up plied with a mo ulded three pin
mains plug for your sa fety and conven ience. A 5ampere fuse is fitted in this plug. Sho uld the fuse
need to be replaced please ensure that the replacement fu se has a rating of 5-ampere an d that it is
approved by ASTA or BSI to BS1362. Check for the
ASTA mark or the BSI mark on the body
of the fuse.
If the pl ug cont ains a remov abl e fuse c over y ou mu st
ensure that it is re fitted when the fu se is rep laced.
If you lo se the fuse cover the plug must not be used
until a re plac ement c over is ob tained.
A replacement fuse cover can be purcha sed from
your local dealer.
CAUTION!
IF THE FITTED MOULDED PLUG IS
UNSUITABLE FOR THE SOCKET OUTLET IN
YOUR HOME THEN THE FUSE SHOULD BE
RE-MOVED AND THE PLUG CUT OFF AND
DIS-POSED OF SAFELY. THERE IS A
DANGER OF SEVERE ELECTRICAL SHOCK
IF THE CUT OFF PLUG IS INSERTED INTO
ANY 13-AMPERE SOCKET.
If a new plu g i s t o be fi tt ed plea se o bser v e th e w ir ing
code as stated below. If in any doubt please consul t
a quali fied elec trician.
WARNING: DO NOT CONNECT EITHER WIRE TO
THE EARTH TERMINAL WHICH IS MARKED WITH
THE LETTER E, BY THE EART H SYMBOL O R
COLOURED GREEN OR GREEN/ YELLOW.
THIS PLUG IS NOT WATERPROOF
—KEEP DRY.
Before use
Remo ve th e conne ctor cover .
How to replace the fuse
The location of the fuse di ffer according to the type
of AC mains plug (figures A and B). C onfirm the A C
mains plug fitted and follow the instructions below.
Illustrations may differ from actual AC mains plug.
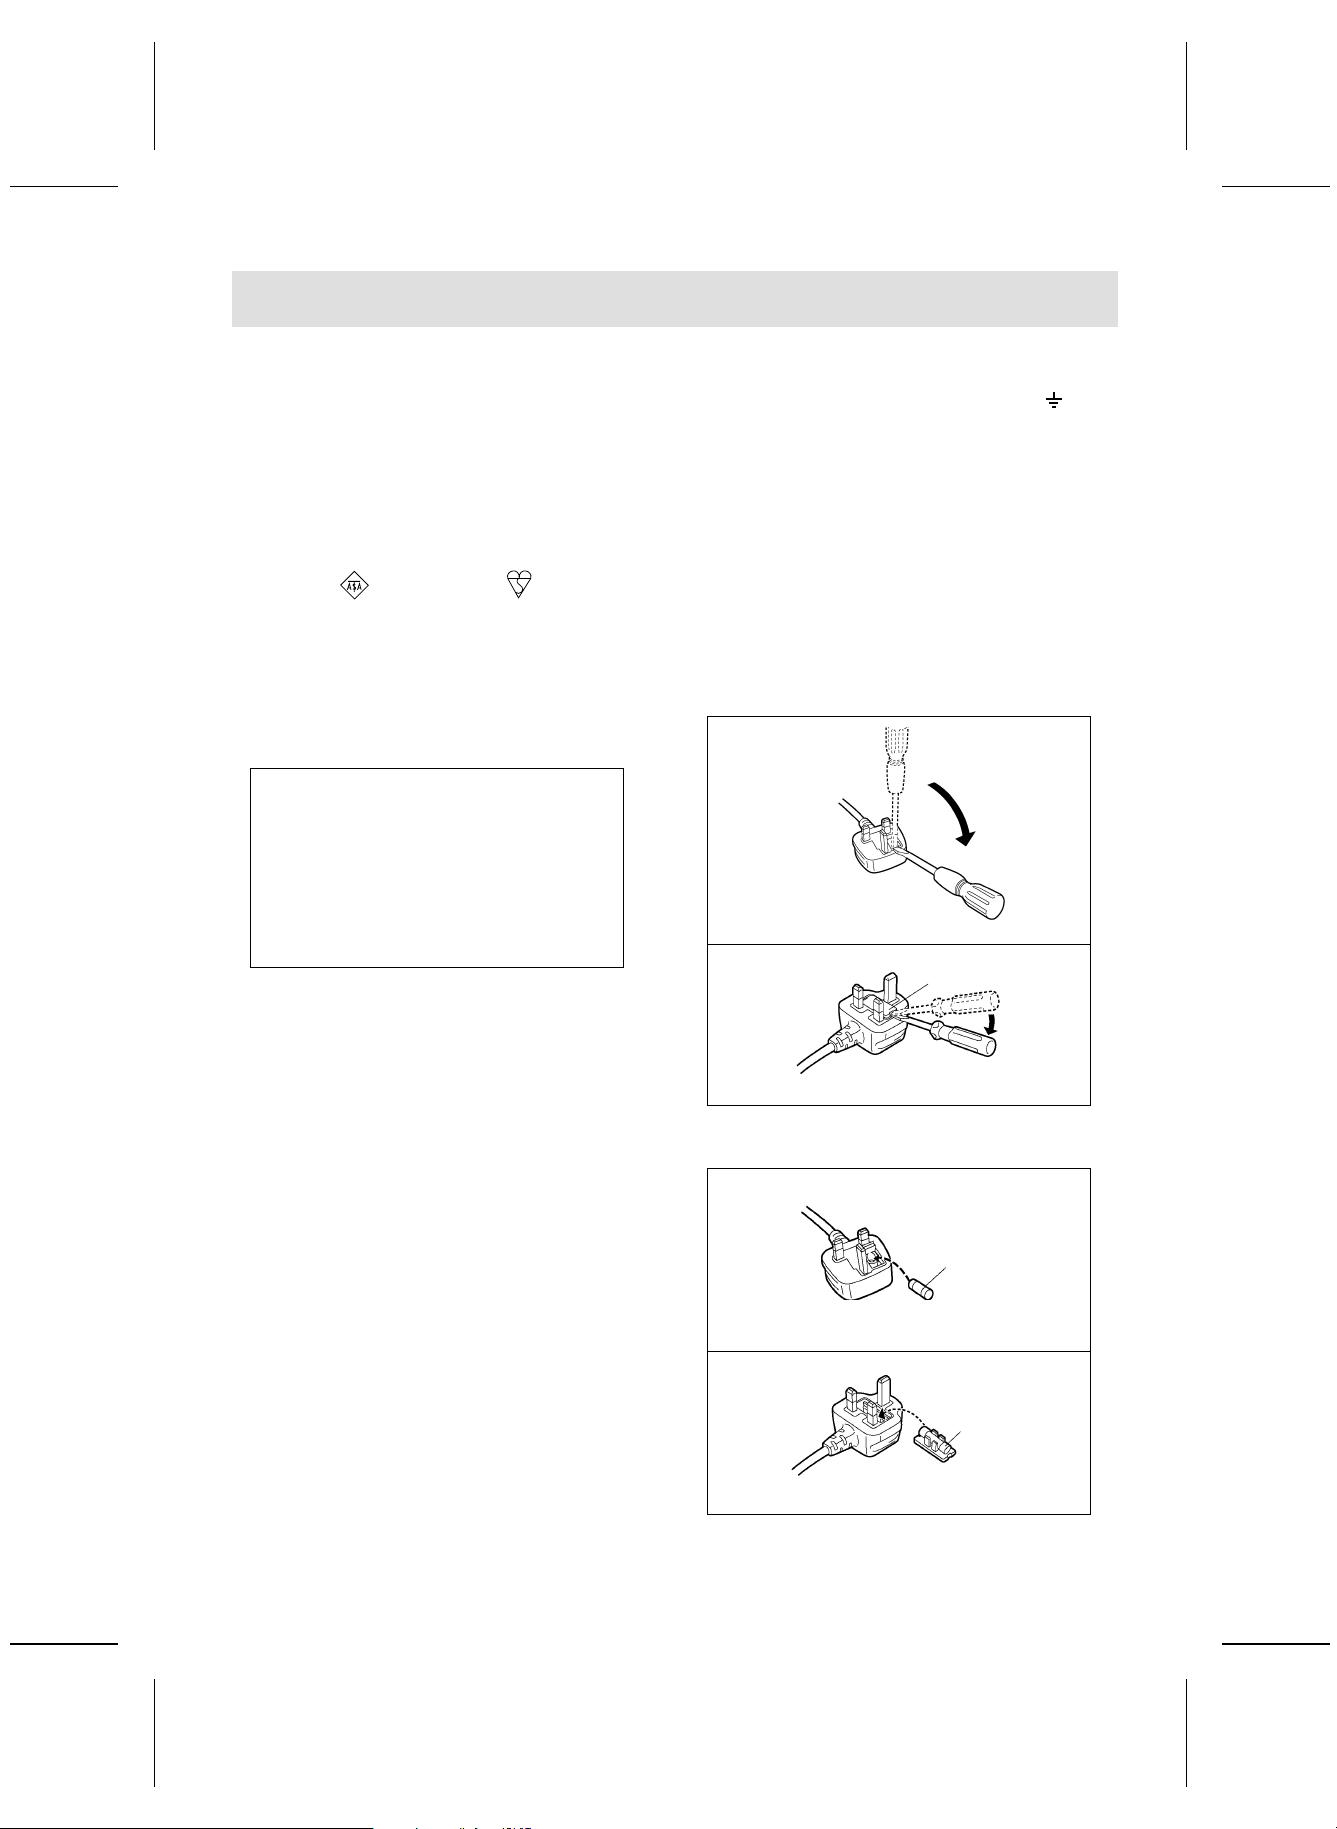
1.Open the fuse cover with a screwdriver.
Figure A
Figure B
Fuse cover
IMPORTANT
The wires in th is mains lead are coloured in accordance with the following code:
Blue: Neutral, Brown: Live.
As thes e colo urs m ay not corre spond with t he co loured markings identifying the terminals in your
plug, p roceed a s follo ws:
The wire which is colour ed B lue mu st be connec te d
to the t erminal which is marke d with th e le tter N or
coloure d Blac k or Blue .
The wire which is coloured Brown must be connected to the terminal which is marked with the letter
L or coloured Brown or Red.
2
QQTG0598
2.Replace the fuse an d close or att ach the fuse
cover.
Figure A
Fuse
(5 ampere)
Figure B
Fuse
(5 ampere)

OWNER’S MANUAL
Caution
Voltage (exc ept North Ameri ca, Mexico, Euro pe, Australia, New Zealand, Ch ina and
Russia)
Be sure the v oltage adj uster loca ted on the AC ada ptor is in accordanc e with local voltage
in your area before using this unit. U se a screwdri ver to set the volt age adjus ter to the loc al
voltage.
WARNING: TO RE DUCE THE RI SK OF FIRE OR E LECTRIC SHOCK , DO NOT
EXPOSE THIS PRODUCT TO RAIN OR MOISTURE.
BEFORE YOU PLAY, PLEASE READ THE CAUTIONARY COPY APPEARING ON
PAGE 4.
Before you play
For long and pleasurable use of this instrument, and to gain a thorough understanding of your KC211
Keyboard, it is strongly recommended that you read through this Owner’s Manual once.
The Owner’s Manual is comprised of the f ollowing parts.
BASIC FUNCTIONS
This part includes an explanation of basic procedures and points you should be aware of for
proper operation of your instrument.
PRACTICAL APPLIC ATIONS
This part comprises a detailed explanation of sound, effect, rhythm, Recording, Disk Drive and
Setting functions.
REFERENCE GUIDE (separate booklet)
Reference guide for the contents of the Sound Li st, Drum Kits, MIDI Implementation Chart.
QQTG0598
3

Cautions for safest use of this unit
Installation location
1. A well-ventilated place.
Take care not to us e this un it in a place whe re it
will not rec eive suf ficient v entilatio n, and n ot to permit the ventilation holes to be covered by curtains,
or any similar materials.
2. Place a way fro m dire ct sunlig ht and e xcessiv e heat
from heating equipment.
3. A place where humidity, vibration and dust are minimized.
Power source
1. For the power source, use ONLY the included AC
adaptor. Use of a diffe rent A C adapt or may r esult i n
malfunct ion or ev en dam age to t he equ ipment.
2. If the unit is not to be used for some time, rem ove
the AC adaptor from th e wall socket.
Handling the power cord
1. Nev er touc h the po wer cor d, or i ts plu g, with wet
hands.
2. Don’t pull the power cord.
Metal items inside the unit may result in electric shock or damage.
Do not permit m etal article s to get inside the unit.
Be especia lly caref ul with re gard to th is point if child-
ren are near this unit. They should be warned never
to try to put an ything inside.
If, neverthele ss, some such a rticle does ge t inside, disconnect t he po wer cord plug f rom the e lectric al outle t,
and contact the store where the unit was purchased.
If water gets into the unit
Disconnect the power cord plug from the electrical outlet, and cont act the s tore w here i t was pur chased .
As a prec autio n, it is sugg ested th at fl ower va ses and
other containers which hold liquids not be placed on
the top of this un it.
If operation seems abnormal
Immediately turn off the power, disconnect the power
cord plu g from the elec trical outle t, and contact the
store where it was purchased.
Discontinue using the unit at once. Failure to do so
may resul t in ad dition al dama ge or som e other unexpected damage or accident.
•Be cause t he powe r sourc e is lo cated in side t he unit,
it is normal for the cabinet to become warm.
A word about the power cord
If the power cord is scarred, is partially cut or broken,
or has a bad co ntact, it may cause a fire or serio us
electrical shoc k if used. NEVER use a dam aged
power cord for any appliance. Moreover, the power
cord should never be forcibly bent.
Don’t touch the inside parts of this unit.
Some pl aces ins ide this unit hav e high vo ltage potential. Never try to remove the top or back panels of this
unit, or to touc h ins ide part s by ha nd or wit h tool s.
Contact someone who is qualified in order to inspect
the inside, or to replace a fuse, if such becomes necessary. Never attem pt to do these thin gs yourself.
Maintenance
The foll owing s uggest ions wi ll assist you in ke eping
the unit in top condition.
•Be sure to switch the inst rument off afte r use, and
do not s witch th e unit on and o ff in q uick suc cession, as this places an undue load on the electronic
components.
•To keep th e lust er of th e surfa ce and b utton s,
simply use a clean, damp cloth; polish with a soft,
dry cloth . Polis h may be used bu t do n ot use th inners or pe tro- chemic al-based polishe s.
•A w ax-bas ed polis h may be used on the c abinet, al-
though you will find that rubbing with a soft cloth will
suffi ce.
4
QQTG0598
Marking si gn is locat ed on bottom of the unit.
SERVICE MUST BE CARRIED OUT BY DEALER
OR OTHER QUALIFIED PERSON

Contents
Cautions for sa fes t us e o f this un it . . . . . . . . . . . . . . . . . . . . . . . . . . . . . . . . . . . . . . . . 4
Controls and f unc ti on s . . . . . . . . . . . . . . . . . . . . . . . . . . . . . . . . . . . . . . . . . . . . . . . . . .6
BASIC FUNCTIONS
Getting started . . . . . . . . . . . . . . . . . . . . . . . . . . . . . . . . . . . . . . . . . . . . . . . . 8
Playing . . . . . . . . . . . . . . . . . . . . . . . . . . . . . . . . . . . . . . . . . . . . . . . . . . . . . . 9
Add an automatic accompaniment . . . . . . . . . . . . . . . . . . . . . . . . . . . . . .10
Play back the 100 Songs . . . . . . . . . . . . . . . . . . . . . . . . . . . . . . . . . . . . . .12
Beat Master . . . . . . . . . . . . . . . . . . . . . . . . . . . . . . . . . . . . . . . . . . . . . . . . .14
PRACTICAL APPL ICATIO NS
About the display . . . . . . . . . . . . . . . . . . . . . . . . . . . . . . . . . . . . . . . . . . . . . 17
Part I Sounds and eff ects
Sound . . . . . . . . . . . . . . . . . . . . . . . . . . . . . . . . . . . . . . . . . . . . . . . . . . . . . . 18
Solo Piano . . . . . . . . . . . . . . . . . . . . . . . . . . . . . . . . . . . . . . . . . . . . . . . . . .18
Sustain . . . . . . . . . . . . . . . . . . . . . . . . . . . . . . . . . . . . . . . . . . . . . . . . . . . . . 19
Touch . . . . . . . . . . . . . . . . . . . . . . . . . . . . . . . . . . . . . . . . . . . . . . . . . . . . . . 19
Transpose . . . . . . . . . . . . . . . . . . . . . . . . . . . . . . . . . . . . . . . . . . . . . . . . . .19
Harmony . . . . . . . . . . . . . . . . . . . . . . . . . . . . . . . . . . . . . . . . . . . . . . . . . . . .20
Part II Playing the rhythm
Rhythm . . . . . . . . . . . . . . . . . . . . . . . . . . . . . . . . . . . . . . . . . . . . . . . . . . . . . 21
Synchro Start . . . . . . . . . . . . . . . . . . . . . . . . . . . . . . . . . . . . . . . . . . . . . . . .21
Tempo . . . . . . . . . . . . . . . . . . . . . . . . . . . . . . . . . . . . . . . . . . . . . . . . . . . . .22
Rhythm performance . . . . . . . . . . . . . . . . . . . . . . . . . . . . . . . . . . . . . . . . .22
Auto Play Chord . . . . . . . . . . . . . . . . . . . . . . . . . . . . . . . . . . . . . . . . . . . . .23
Chord Finder . . . . . . . . . . . . . . . . . . . . . . . . . . . . . . . . . . . . . . . . . . . . . . . .25
One Touch Play . . . . . . . . . . . . . . . . . . . . . . . . . . . . . . . . . . . . . . . . . . . . . .26
Party Pads . . . . . . . . . . . . . . . . . . . . . . . . . . . . . . . . . . . . . . . . . . . . . . . . . . 27
Part III Menu
Outline of the procedure . . . . . . . . . . . . . . . . . . . . . . . . . . . . . . . . . . . . . . .28
Setting menus . . . . . . . . . . . . . . . . . . . . . . . . . . . . . . . . . . . . . . . . . . . . . . .29
Symptoms w hic h a ppe ar to be signs of tr oub le . . . . . . . . . . . . . . . . . . . . . . . . . . . .31
Connections . . . . . . . . . . . . . . . . . . . . . . . . . . . . . . . . . . . . . . . . . . . . . . . . . . . . . . . . . . .32
Separately sold option . . . . . . . . . . . . . . . . . . . . . . . . . . . . . . . . . . . . . . . . . . . . . . . . . . 32
Index . . . . . . . . . . . . . . . . . . . . . . . . . . . . . . . . . . . . . . . . . . . . . . . . . . . . . . . . . . . . . . . . .33
Specifications . . . . . . . . . . . . . . . . . . . . . . . . . . . . . . . . . . . . . . . . . . . . . . . . . . . . . . . . . 34
Demo Perf orma nce L ist . . . . . . . . . . . . . . . . . . . . . . . . . . . . . . . . . . . . . . . . . . . . . . . . .35
Supplied acce ssorie s
Please check the supplied accessories.
Music stand
AC adaptor
SONG BOOK
QQTG0598
5

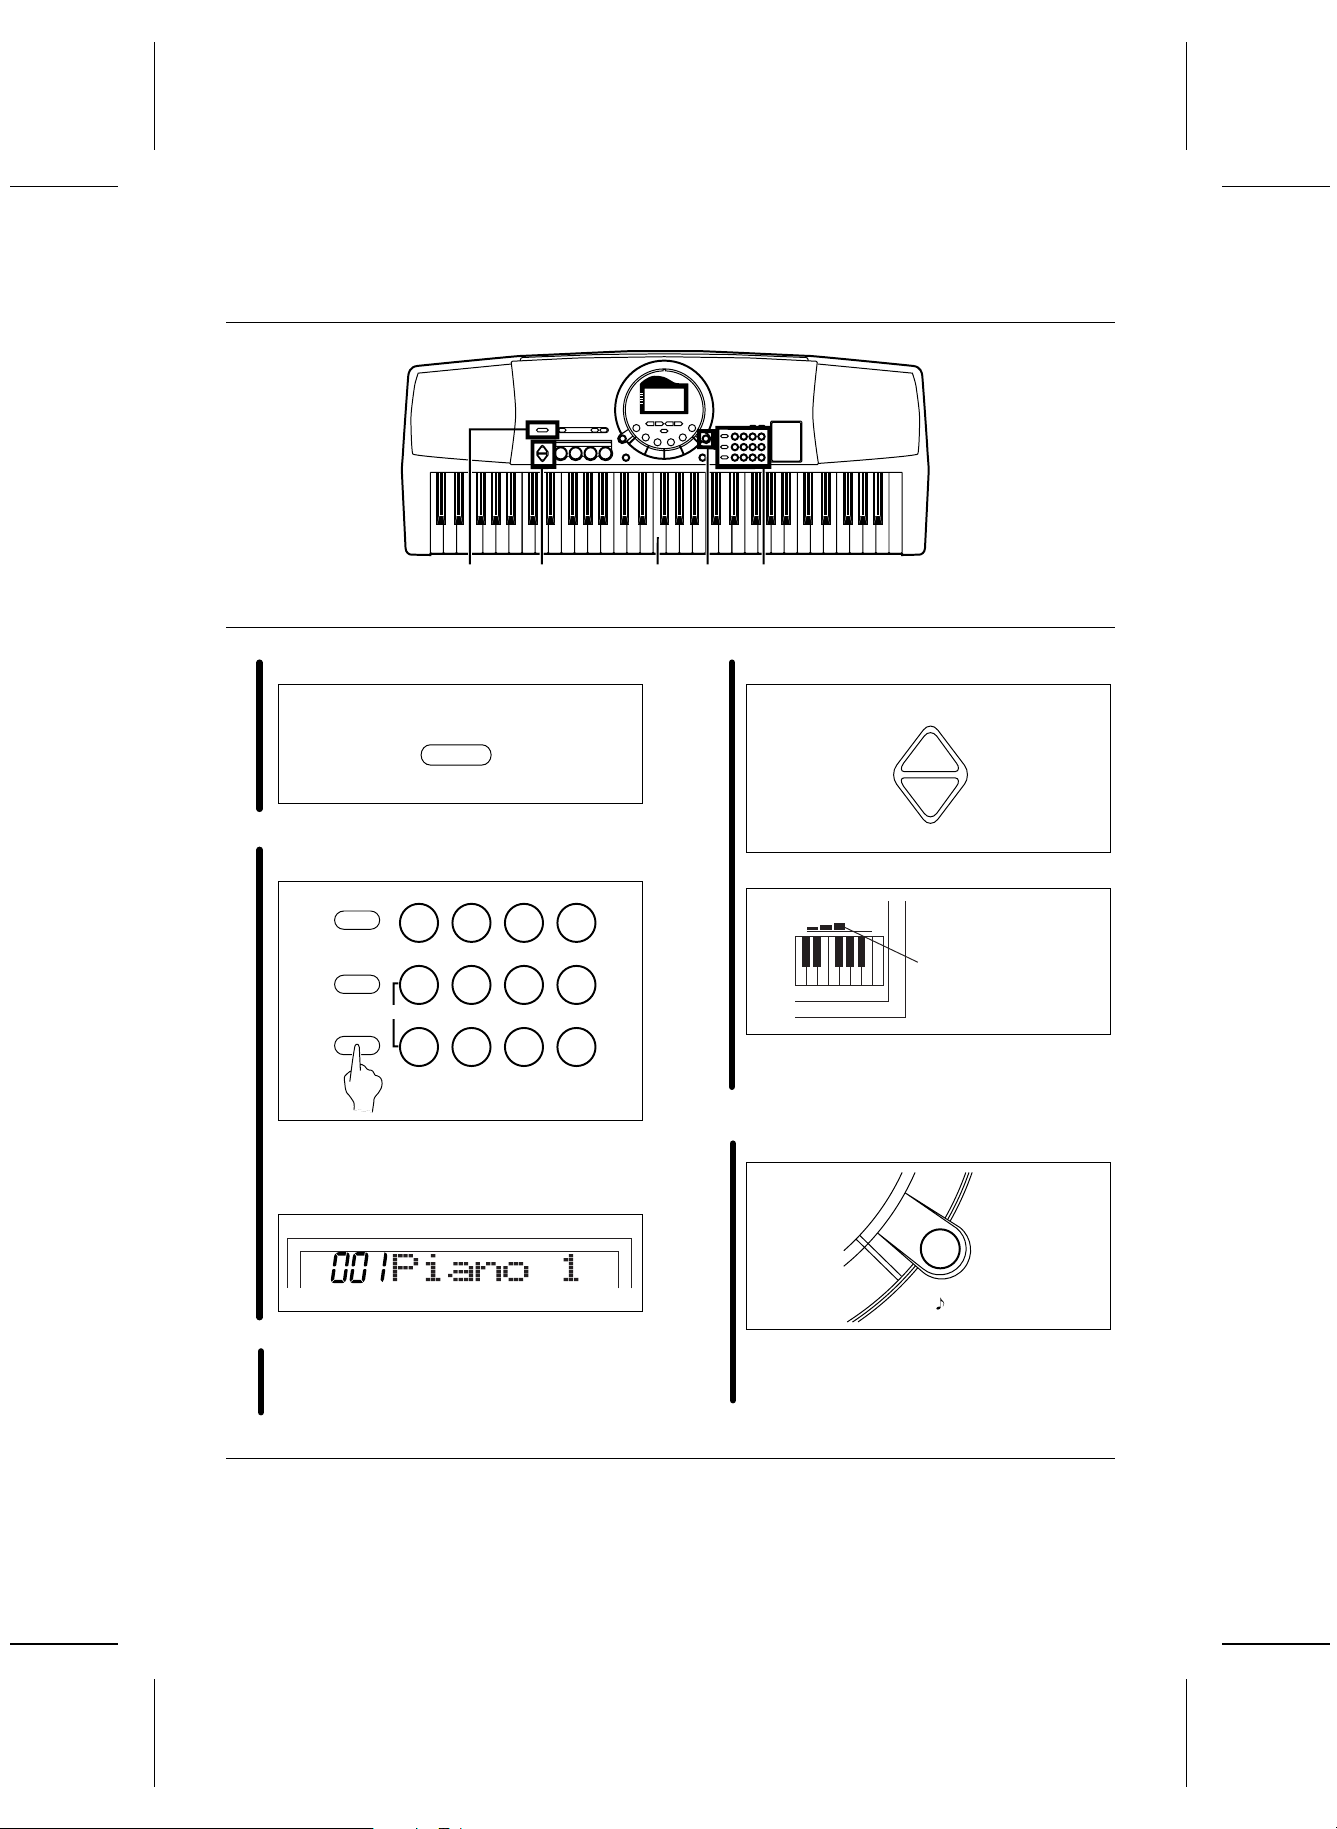
Controls and functions
AUTO PLAY CHORD
An automatically accompaniment is
added t o your pla ying me rely b y
specify ing a ch ord. (R efer to page 23 .)
PLAY
OFF/ON
MAIN VOLUME
UP
AUTO PLAY
CHORD
PARTY PADS / BEAT MASTER
APC/SONG
VOLUME
DOWN UP
BEAT MASTER
A fun wa y to de velop y our se nse
of rhythm. (Refer to page 14.)
SX-KC211
TOUCH
SUSTAIN
HARMONY
APC
SYNCHRO
PROGRAM
BEAT MASTER
CHALLENGE
TEMPO
PARTY PADS
BANK
BEAT MASTER
TRAINING
RESET
FILL IN
CHORD
FINDEF
6
QQTG0598
DOWN
1234
PARTY PADS/BEAT MASTER
Just press a pad button to add a fun sound effect to
your playing. You can also tap the pad buttons in
time with the b eat. (Refer to pag es 14, 27.)
ONE TOUCH PLAY
ONE TOUCH PLAY
An appropriate combination of sounds,
etc. for you r sele cted r hythm are
automatically set up for the au tomatic
accompa niment . (Ref er to pa ge 26 .)

Display
Displays the st atus of y our in strum ent
and is a lso used for se ttin g the va rious
functio ns. (R efer to page 17 .)
MUSIC TRAINER
The MUSIC TRAINER function inc orpora ted in this
instrum ent can be a hel pful a id to imp roving your
performance.
Example
BEAT MASTER, to develop your s ense of rhythm .
CHORD FINDER, to teach you how to play chords.
MINUS ONE lets you prac tice the melod y part while
listening to the other song parts.
The displ ay show s a visual illust ration of t he keys
and notes you play.
TRANSPOSE
PROGRAM
SOLO
PIANO
FF
MINUS
ONE
100
SONGS
PLAY/PAUSE
START/STOP
SYNCHRO START
DEMO
100 SONG S
Play back the internal song data.
(Refer t o page 12.)
HARMONY
MENU
RHYTHM
SOUND
TOUCH
SUSTAIN
0 1 2 3
+ 4 5 6
CANCEL
– 7 8 9
Number butt ons
Specify the de sired sounds and rh ythms
etc. by number .
7
QQTG0598
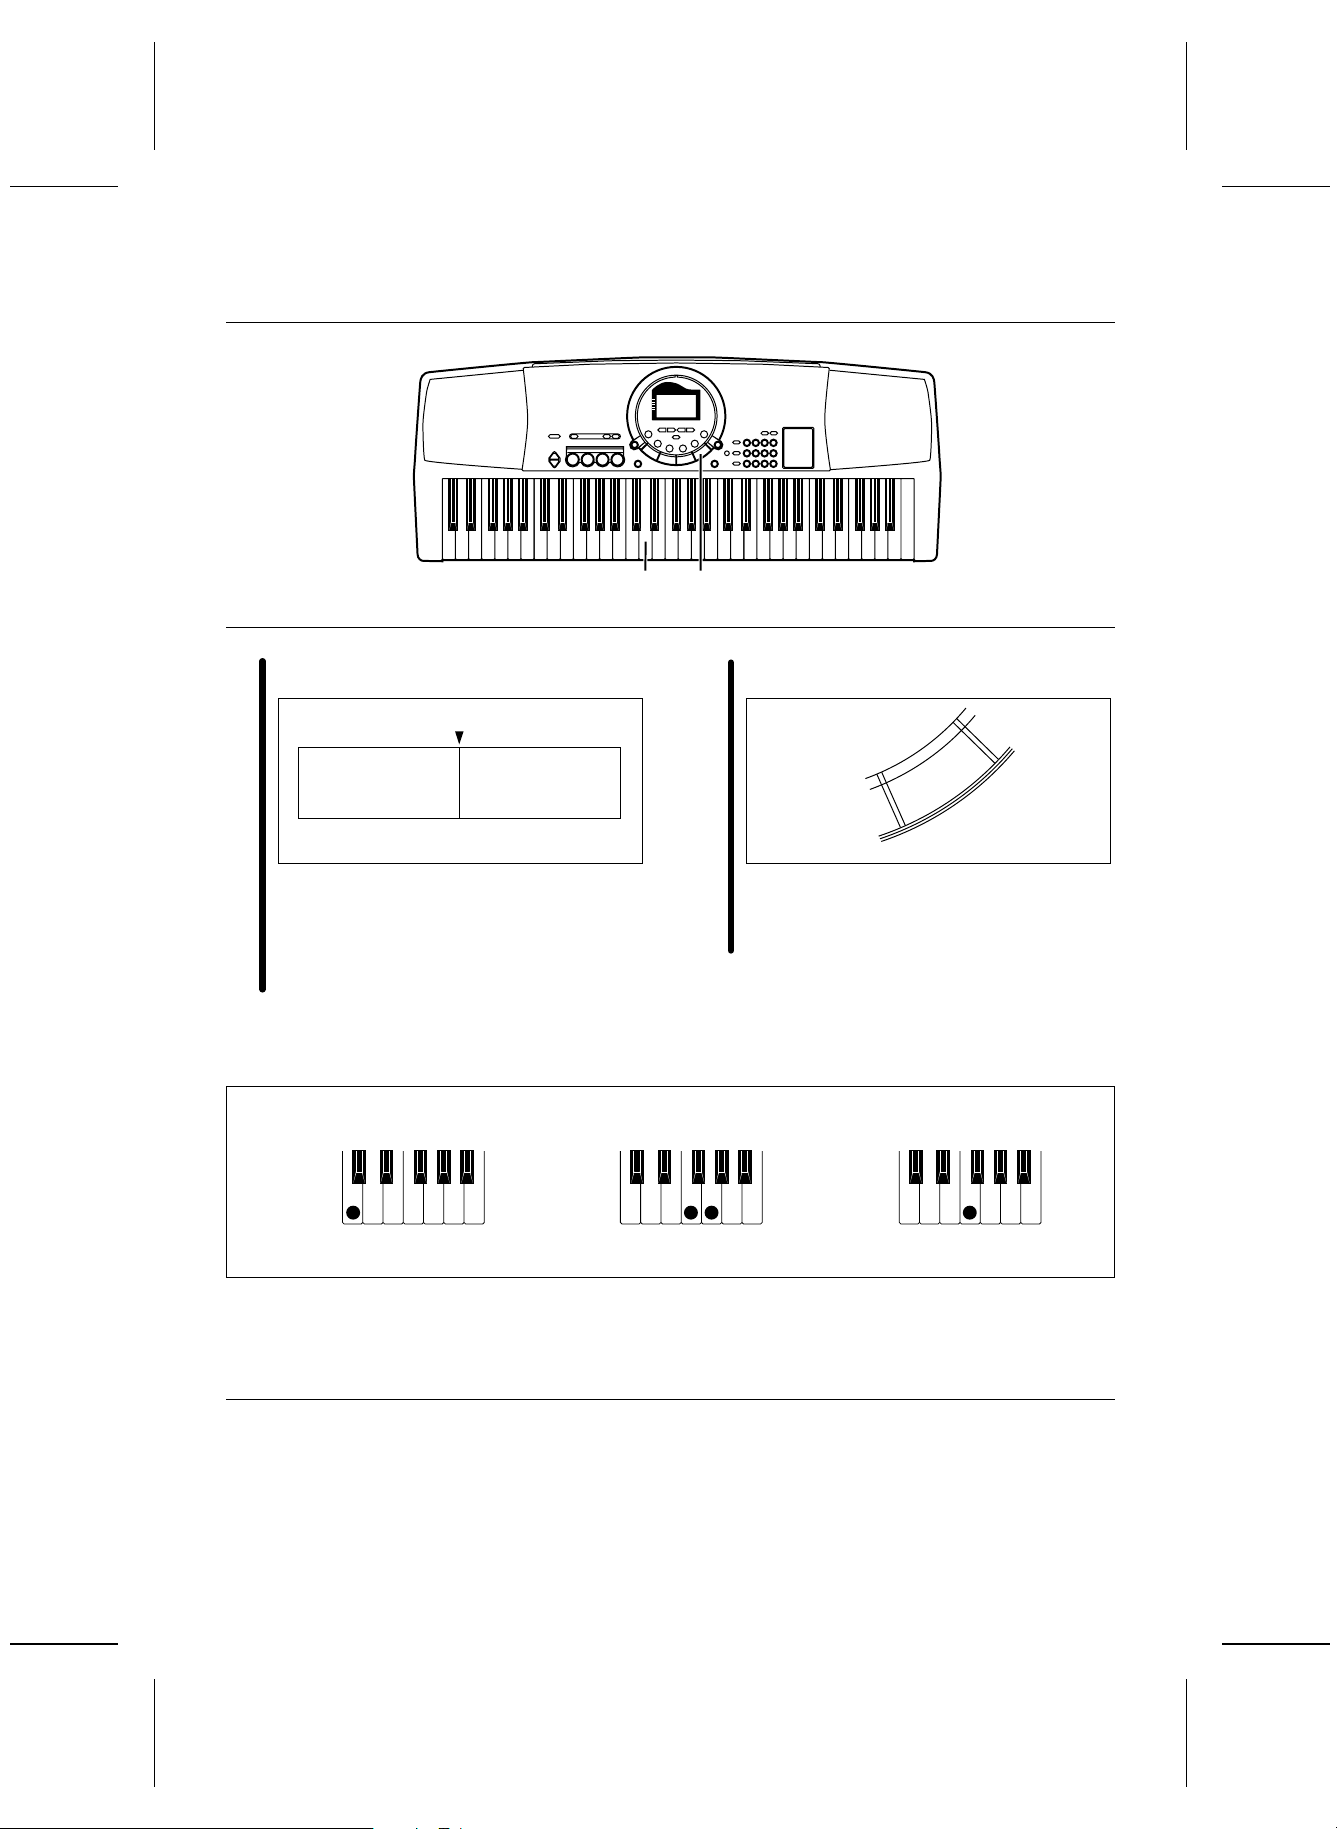
Getting started
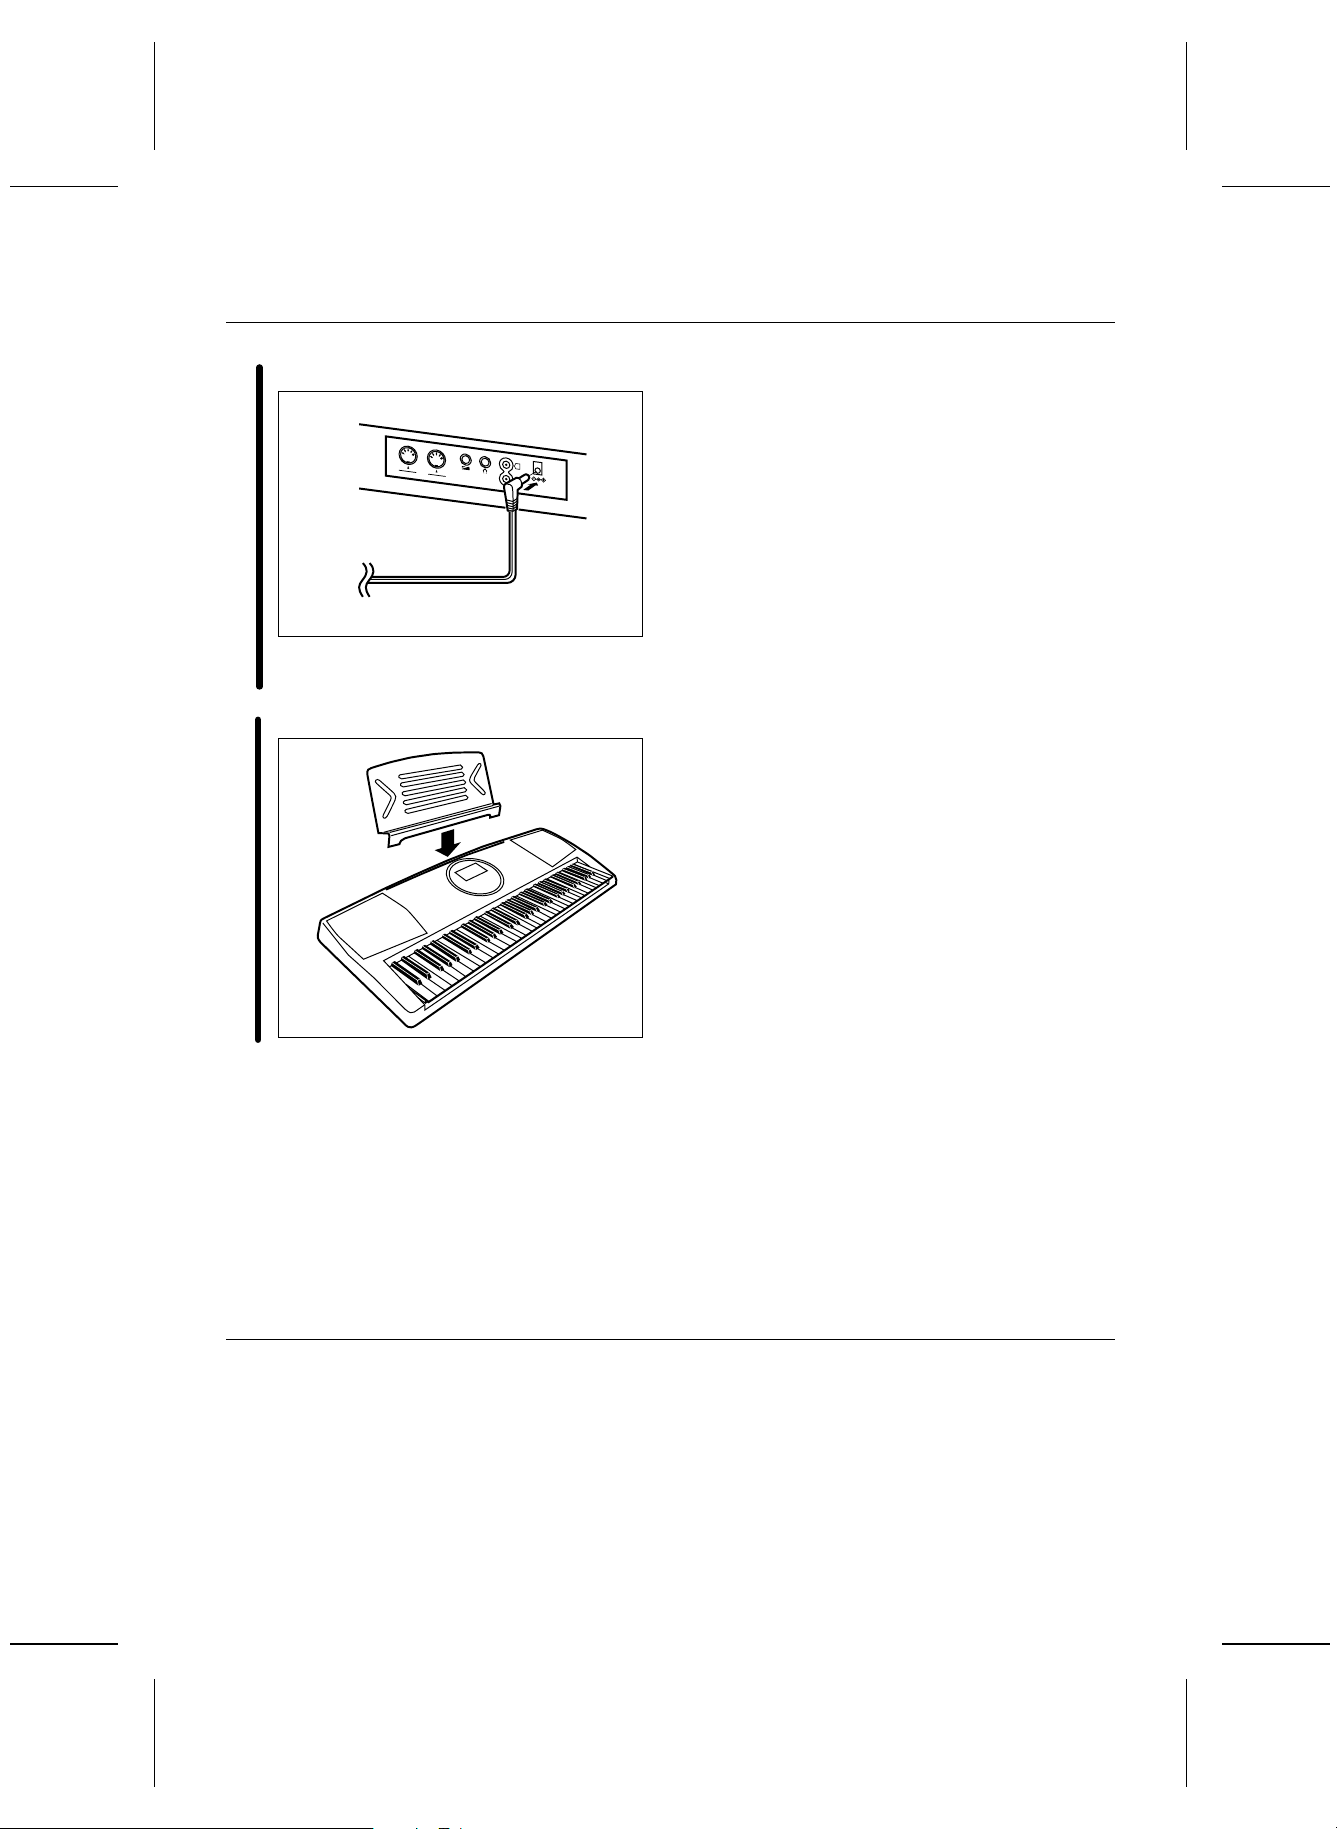
Connec t the AC a dapto r (inclu ded).
1
OUT
IN
MIDI
L
AUX IN
FOOT
PHONES/
SW
R
LINE OUT
(Rear panel)
• Do not di sconne ct and connec t the AC adaptor when the PLAY but ton is on .
Affix t he mu sic st and as s hown.
2
• The unit is in the standby condition when the AC
adapto r is conne cted. The prim ary circ uit is alw ays
“live” as l ong as th e AC ada ptor is connec ted to an
electric al out let.
• When leaving the p roduct unused for a long time ,
turn off the PLAY bu tton of the unit and p ull the AC
adapto r out of the so cket for powe r savi ng. (Th e product co nsumes a powe r of 2 W e ven wi th the PLAY
button of the uni t turned off.)
8
QQTG0598
Memory function
The vari ous sett ings a nd memor y cont ents of t his instrume nt are ma intain ed as lo ng as the AC adap tor is
connecte d to th is instr ument and plug ged int o an ou tlet.
Playing
1 4 3 A 2
Press the PLAY button to turn it on.
1
PLAY
OFF/ON
Press the SOUND button, a nd use t he nu mber
button s to se lect a sound n umber (three digit s).
2
MENU
RHYTHM
SOUND
• The l ist of SOUNDS is found near the right
side of t he pa nel.
• The name and number of the selected sound
are show n on th e disp lay.
0 1 2 3
+ 4 5 6
CANCEL
— 7 8 9
Set the MAIN VOLUME to an appropr iate lev el.
4
• The v olum e settin g is show n on th e disp lay.
VOLUME
• Ea ch gra duation repr esents t wo deg rees o f
volume chan ge.
MAIN VOLUME
UP
DOWN
Volume settin g
DEMO
Press the DEMO button.
A
SOUND
Play the keyboard.
3
• The p itch o f this ins trume nt can b e adjust ed, fo r example, when p laying wit h othe r instr umen ts. (Refe r
to pages 28 and 30.)
DEMO
• The d emons tration perfo rmance b egin s.
• The two demo tunes are playing continuously
until yo u pres s the DEMO button again.
• For detaile d informa tion abo ut select ing sound s,
refer to page 18 .
• So me of the butto ns do no t wor k during t he de monstrati on per forma nce.
9
QQTG0598
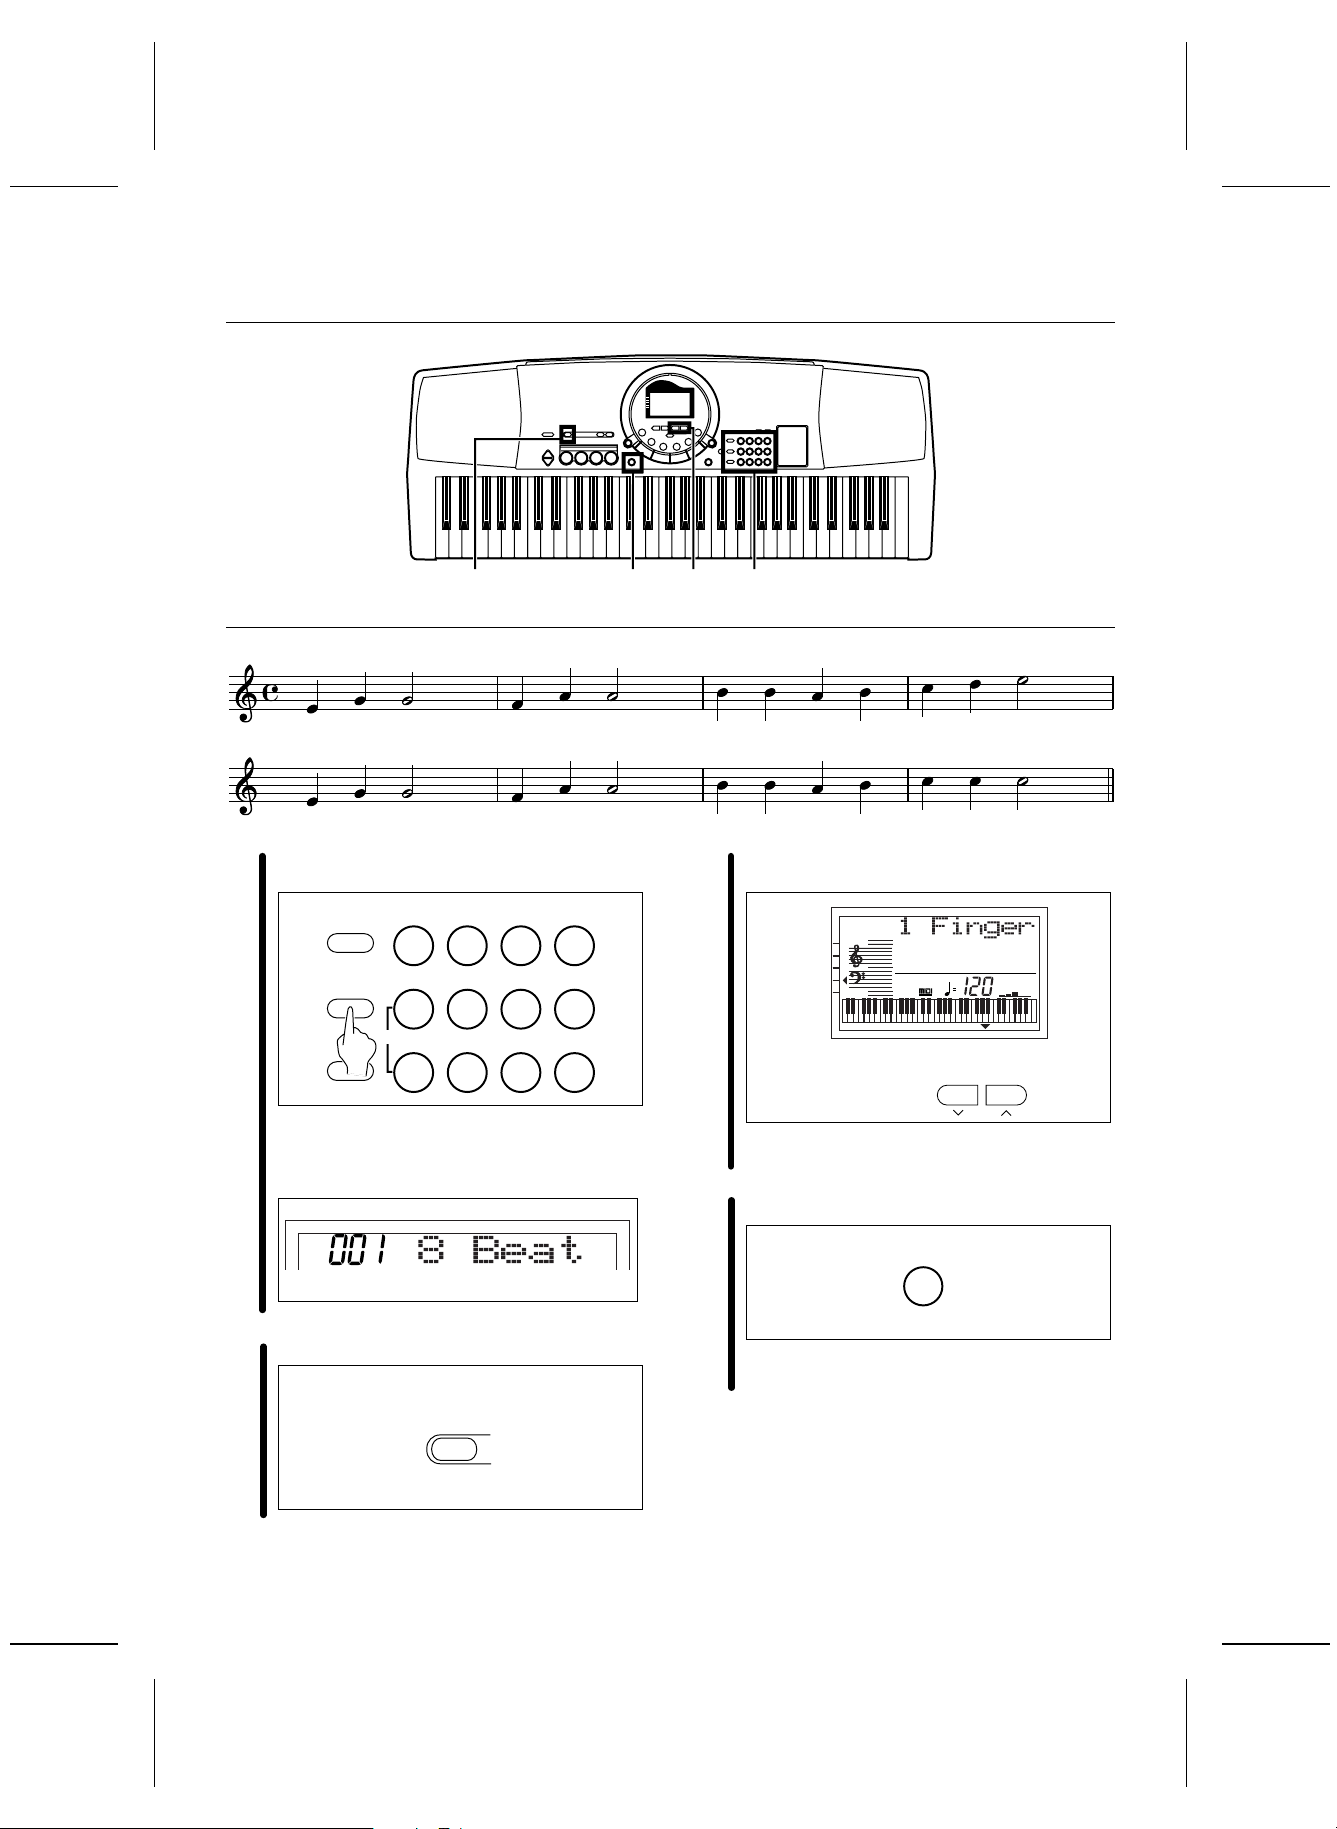
Add an automatic accompaniment
C F G
C
2 34 1
7
C F G7 C
Press the RHYTHM button, and u se the nu mber
buttons to select a rhythm number (three digits).
1
MENU
RHYTHM
SOUND
• The l ist of RHYTHMS is shown near the left
end of th e pan el.
• The r hythm numbe r and n ame are s hown o n
the di splay.
RHYTHM
Press the AUTO PLAY CHORD button.
0 1 2 3
+ 4 5 6
CANCEL
— 7 8 9
2
AUTO PLAY
CHORD
Use the T RANSPOSE/PROGRAM buttons to
show “1 Finger” on the display.
3
TEMPO
TRANSPOSE
CHORD
VOLUME
PROGRAM
TOUCH
SUSTAIN
HARMONY
APC
SYNCHRO
• Per form this operatio n while the PROGRAM in dication is flashing on the display.
Press the ONE TOUCH PLAY button.
TRANSPOSE
GENERAL
4
ONE TOUCH PLAY
• The s ounds, etc. a pprop riate fo r the sele cted
rhythm are automatically set up.
10
QQTG0598
65
Play the chord with your left hand, and the
melody with your right hand.
5
C3
Chord
• Wh en you p lay th e keybo ard wit h your l eft
hand, th e aut omatic a ccomp animen t starts
(SYNCHRO START).
• For examp le, whe n you pre ss a C key , an
automatic ac companime nt in the C ma jor
chord be gins to play.
C chord
Melody
6
G7 chord
When yo u are f inish ed playi ng the song, p ress
the START/STOP button.
PLAY/PAUSE
START/STOP
• The a utom atic acc ompan iment stops.
• To en d your perfo rmance wi th the automa tic
accompaniment, press the AUTO PLAY
CHORD button a gain.
F chord
• For informa tion about selecting rhythm s, refer to
page 21 .
• For informa tion a bout the autom atic ac compan iment,
refer to page 23 .
11
QQTG0598
 Loading...