

Page 1
EB
Thank you for purchasing this product.
Please read these instructions carefully before using this product, and save this
manual for future use.
Sales and Support Information
Customer Communications Centre
• For customers within the UK: 0344 844 3899
• For customers within Ireland: 01 289 8333
• Monday–Friday 9:00 am – 5:00 pm
(Excluding public holidays).
• For further support on your product, please visit our website:
www.panasonic.co.uk
Direct Sales at Panasonic UK
•
Order accessory and consumable items for your product with ease and
confidence by phoning our Customer Communications Centre
Monday–Friday 9:00 am – 5:00 pm
(Excluding public holidays).
• Or go on line through our Internet Accessory ordering application at
www.pas-europe.com
• Most major credit and debit cards accepted.
• All enquiries transactions and distribution facilities are provided directly by
Panasonic UK.
• It couldn’t be simpler!
• Also available through our Internet is direct shopping for a wide range of
finished products. Take a browse on our website for further details.
Model number suffix “EB” denotes UK model.
.
Operating Instructions
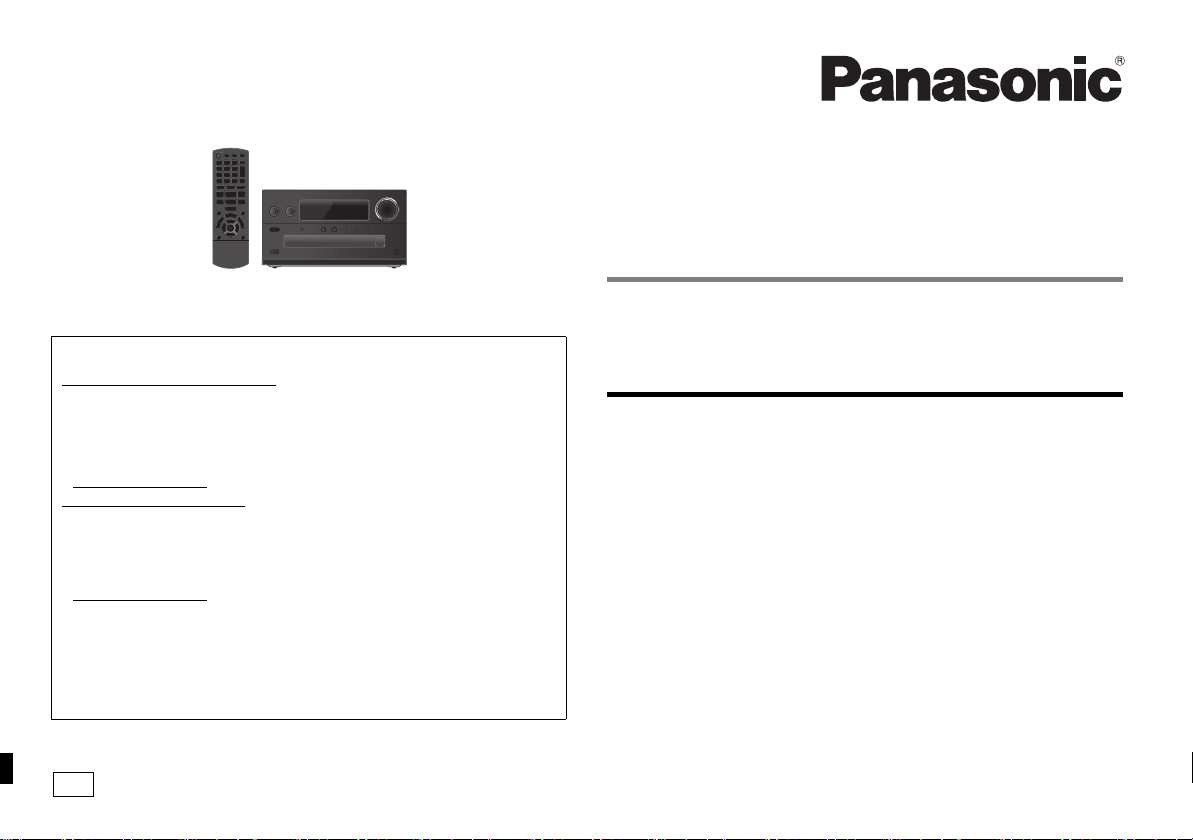
CD Stereo System
Model No. SA-PMX82M
Table of contents
Safety precautions ................................................................................2
Caution for AC Mains Lead .................................................................. 3
Supplied accessories ...........................................................................3
Maintenance ..........................................................................................3
Preparing the remote control............................................................... 3
Making the connections ....................................................................... 4
Overview of controls ............................................................................5
About Bluetooth
Bluetooth® operations ..........................................................................6
Media information ................................................................................. 7
Inserting media .....................................................................................8
Media playback controls ......................................................................8
FM radio ................................................................................................. 9
DAB/DAB+ .............................................................................................9
Clock and timers ................................................................................. 10
Sound effects ......................................................................................11
Using the auxiliary input ....................................................................11
Using the PC input .............................................................................. 11
Others ..................................................................................................12
Troubleshooting..................................................................................12
Specifications...................................................................................... 14
®
..................................................................................6
TQBJ0997
Page 2
Do the procedures with the remote control. You can
0700
also use the buttons on this unit if they are the same.
MPEG Layer-3 audio coding technology licensed from Fraunhofer
IIS and Thomson.
The Bluetooth® word mark and logos are registered trademarks
owned by Bluetooth SIG, Inc. and any use of such marks by
Panasonic Corporation is under license.
Other trademarks and trade names are those of their respective
owners.
“Made for iPod”, “Made for iPhone”, and “Made for iPad” mean
that an electronic accessory has been designed to connect
specifically to iPod, iPhone, or iPad, respectively, and has been
certified by the developer to meet Apple performance standards.
Apple is not responsible for the operation of this device or its
compliance with safety and regulatory standards.
Please note that the use of this accessory with iPod, iPhone, or
iPad may affect wireless performance .
iPad, iPhone, iPod, iPod nano, iPod touch,
trademarks of Apple Inc., registered in the U.S. and other countries.
iPad mini and iPad Pro are trademarks of Apple Inc.
TQBJ0997
iPad Air,
and Retina are
2
Safety precautions
WARNING!
Unit
• To reduce the risk of fire, electric shock or product damage,
- Do not expose this unit to rain, moisture, dripping or
splashing.
- Do not place objects filled with liquids, such as vases, on
this unit.
- Use only the recommended accessories.
- Do not remove covers.
- Do not repair this unit by yourself. Refer servicing to
qualified service personnel.
CAUTION!
Unit
• To reduce the risk of fire, electric shock or product damage,
- Do not install or place this unit in a bookcase, built-in
cabinet or in another confined space. Ensure this unit is
well ventilated.
- Do not obstruct this unit’s ventilation openings with
newspapers, tablecloths, curtains, and similar items.
- Do not place sources of naked flames, such as lighted
candles, on this unit.
• This unit is intended for use in moderate climates.
• The mains plug is the disconnecting device.
Install this unit so that the mains plug can be unplugged
from the socket outlet immediately.
• This unit may receive radio interference caused by mobile
telephones during use. If such interference occurs, please
increase separation between this unit and the mobile
telephone.
• This unit utilizes a laser. Use of controls or adjustments or
performance of procedures other than those specified
herein may result in hazardous radiation exposure.
Battery
• Do not break open or short-circuit the battery.
• Do not charge the alkaline or manganese battery.
• Do not use the battery if the cover has peeled off.
• Do not heat or expose to flame.
• Do not leave the battery(ies) in a car exposed to direct
sunlight for a long period of time with doors and windows
closed.
• Remove the battery if you do not use the remote control for
a long period of time. Keep in a cool, dark area.
• Danger of explosion if battery is incorrectly replaced.
Replace only with the type recommended by the
manufacturer.
• When disposing of the batteries, please contact your local
authorities or dealer and ask for the correct method of
disposal.
Declaration of Conformity (DoC)
Hereby, “Panasonic Corporation” declares that this product
is in compliance with the essential requirements and other
relevant provisions of Directive 1999/5/EC.
Customers can download a copy of the original DoC to our
R&TTE products from our DoC server:
http://www.doc.panasonic.de
Contact to Authorised Representative:
Panasonic Marketing Europe GmbH,
Panasonic Testing Centre, Winsbergring 15, 22525
Hamburg, Germany
Disposal of Old Equipment and Batteries
Only for European Union and countries with
recycling systems
collection points in accordance with your national
legislation.
By disposing of them correctly, you will help to save
valuable resources and prevent any potential negative
effects on human health and the environment.
For more information about collection and recycling,
please contact your local municipality.
Penalties may be applicable for incorrect disposal of
this waste, in accordance with national legislation.
These symbols on the products,
packaging, and/or accompanying
documents mean that used electrical
and electronic products and batteries
must not be mixed with general
household waste.
For proper treatment, recovery and
recycling of old products and used
batteries, please take them to applicable
Note for the battery symbol (bottom
symbol):
This symbol might be used in
combination with a chemical symbol. In
this case it complies with the
requirement set by the Directive for the
chemical involved.
Page 3
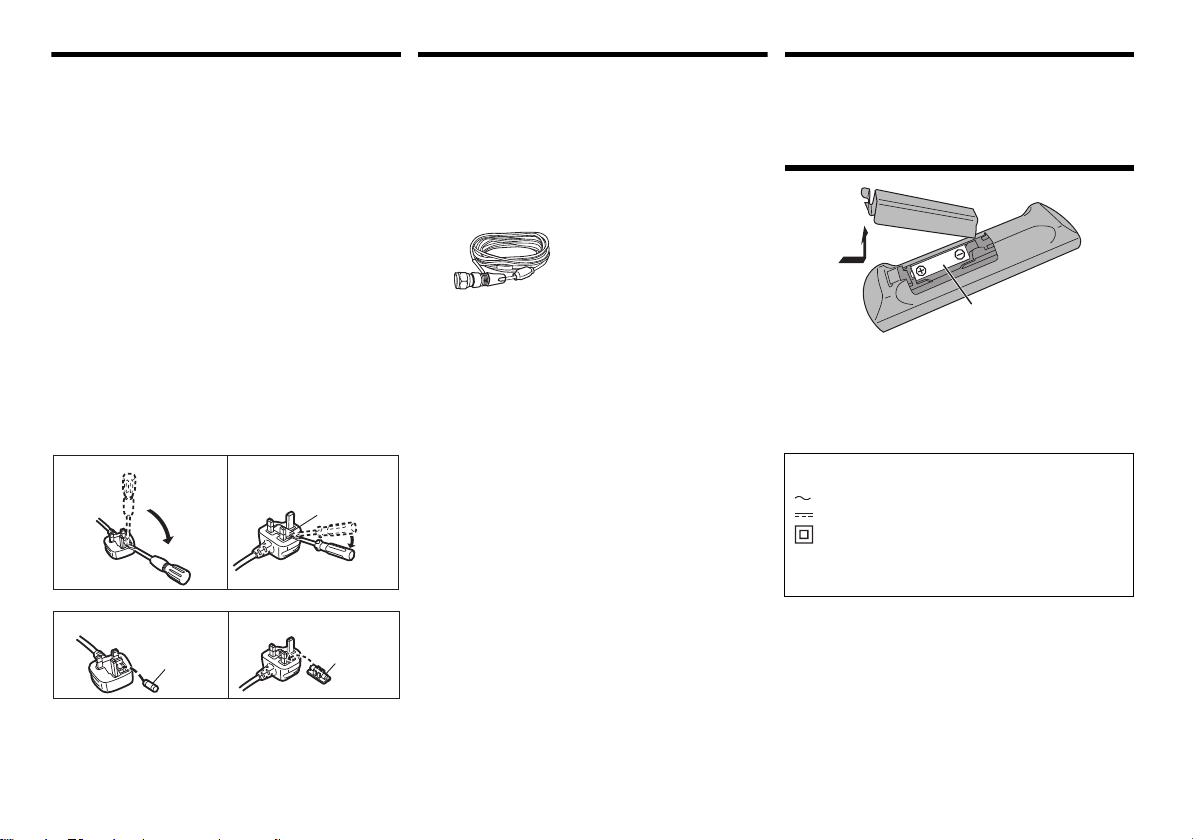
Caution for AC Mains Lead
Figure A
Figure B
Fuse cover
Figure A
Fuse
(5 ampere)
Figure B
Fuse
(5 ampere)
R6/LR6, AA
(For the AC mains plug of three pins)
For your safety, please read the following text carefully.
This appliance is supplied with a moulded three pin
mains plug for your safety and convenience.
A 5-ampere fuse is fitted in this plug.
Should the fuse need to be replaced please ensure that
the replacement fuse has a rating of 5-ampere and that it
is approved by ASTA or BSI to BS1362.
Check for the ASTA mark Ï or the BSI mark Ì on the
body of the fuse.
If the plug contains a removable fuse cover you must
ensure that it is refitted when the fuse is replaced.
If you lose the fuse cover the plug must not be used until
a replacement cover is obtained.
A replacement fuse cover can be purchased from your
local dealer.
Before use
Remove the connector cover.
How to replace the fuse
The location of the fuse differ according to the type of AC
mains plug (figures A and B). Confirm the AC mains plug
fitted and follow the instructions below.
Illustrations may differ from actual AC mains plug.
1. Open the fuse cover with a screwdriver.
2. Replace the fuse and close or attach the fuse cover.
Supplied accessories
Check and identify the supplied accessories.
∏ 1 x AC mains lead
(K2CT2YY00089)
∏ 1 x Remote control
(N2QAYB001101)
∏ 1 x Remote control battery
∏ 1 x DAB antenna
(N1CYYYY00022)
• Product numbers provided in these operating instructions
are correct as of February 2017. These may be subject to
change.
Maintenance
• To clean this system, wipe with a soft, dry cloth.
• Never use alcohol, paint thinner or benzine to clean
this system.
• Before using chemically treated cloth, read the
instructions that came with the cloth carefully.
Preparing the remote control
• Use alkaline or manganese battery.
• Install the battery so that the poles (+ and –) align with
those in the remote control.
• Point the remote control at the remote control sensor,
away from obstacles, at a maximum range of 7 m
directly in front of this unit, within an angle of
approximately 30° to the left and right.
The symbols on this product (including the
accessories) represent the following:
AC
DC
Class II equipment (The construction of the
product is double-insulated.)
IOn
Í Standby
TQBJ0997
3
Page 4
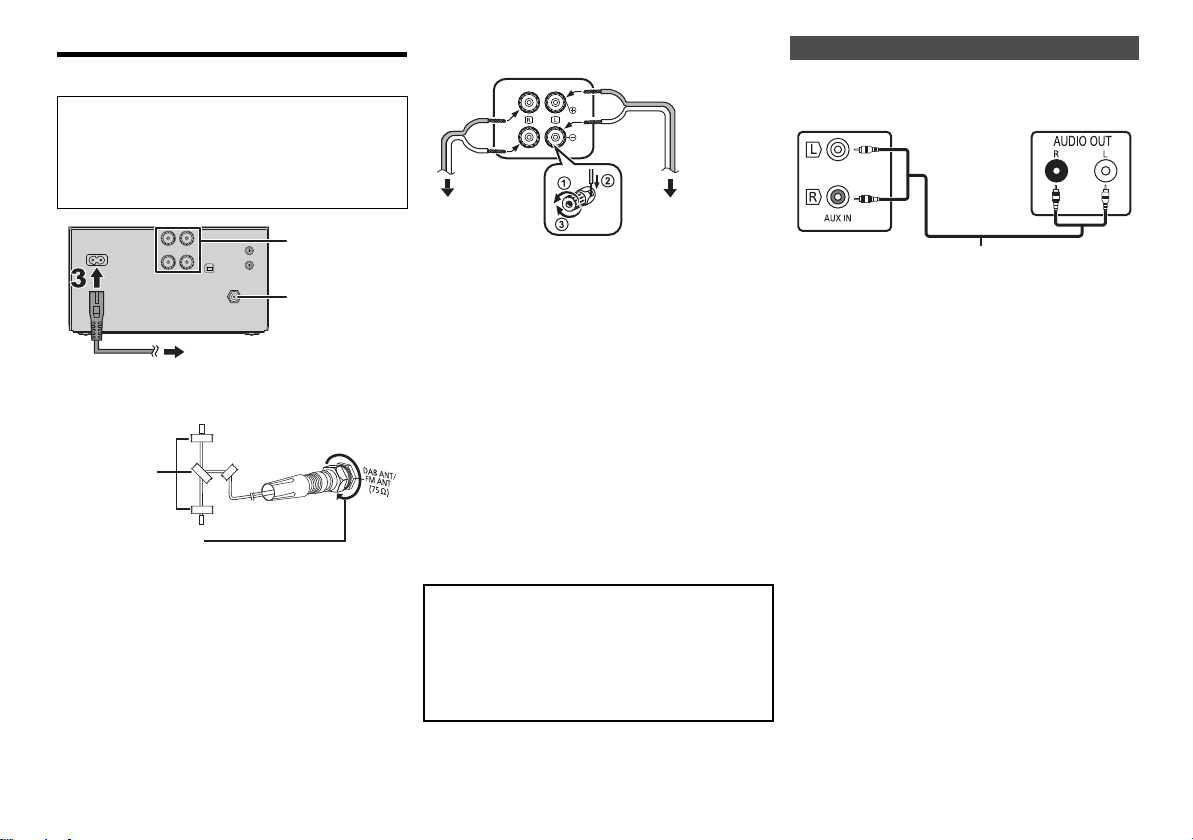
Making the connections
2
To household mains socket
Tape
(not supplied)
Be sure to fully tighten
the nut.
This unit (rear)
To right speaker
To left speaker
e.g. DVD player
(not supplied)
This unit (rear)
Audio cable (not supplied)
Connect the AC mains lead only after all the other
connections have been made.
Compatible speaker system (sold separately)
Use this unit with a 2 channel speaker system.
(Impedance: 3 ™ - 16 ™)
• Using other speakers can damage the unit, and sound
quality will be negatively affected.
Refer to the operating instructions for the speaker
system for details.
2 Connect the speakers (sold separately).
Connecting other equipment
You can connect a VCR, DVD player etc.
1 Connect the antenna.
Place the antenna where reception is best.
• If radio reception is poor, use an outdoor antenna (not supplied).
TQBJ0997
4
2
1
Be careful not to cross (short-circuit) or reverse
the polarity of the speaker wires as doing so may
damage the speakers.
3 Connect the AC mains lead.
Do not use an AC mains lead with other equipment.
Conserving power
The system consumes a small amount of power ( 14),
even when it is in standby mode. Disconnect the power
supply if you do not use the system.
Some settings will be lost after you disconnect the
system. You have to set them again.
Note:
• Keep your speakers more than 10 mm from this unit for
ventilation.
• Put the speakers on a flat safe surface.
• When you play at high levels for a long period, it can cause
damage to the system and decrease the life of the system.
• Decrease the volume in these conditions to prevent
damage:
- When you play distorted sound.
- When you adjust the sound quality.
CAUTION!
• Use the speakers only with the recommended
system. If not, you can cause damage to the
amplifier and speakers and can cause a fire.
Consult an approved service personnel if damage
occurs or if there is a sudden apparent change in
performance.
• Do the procedures included in these instructions
when you attach the speakers.
Note:
• Disconnect the AC mains lead before connection.
• Switch off all equipment and read the appropriate operating
instructions.
• Components and cables are sold separately.
• If you want to connect equipment other than those
described, refer to the audio dealer.
• Sound distortion can occur when you use an adaptor.
Page 5
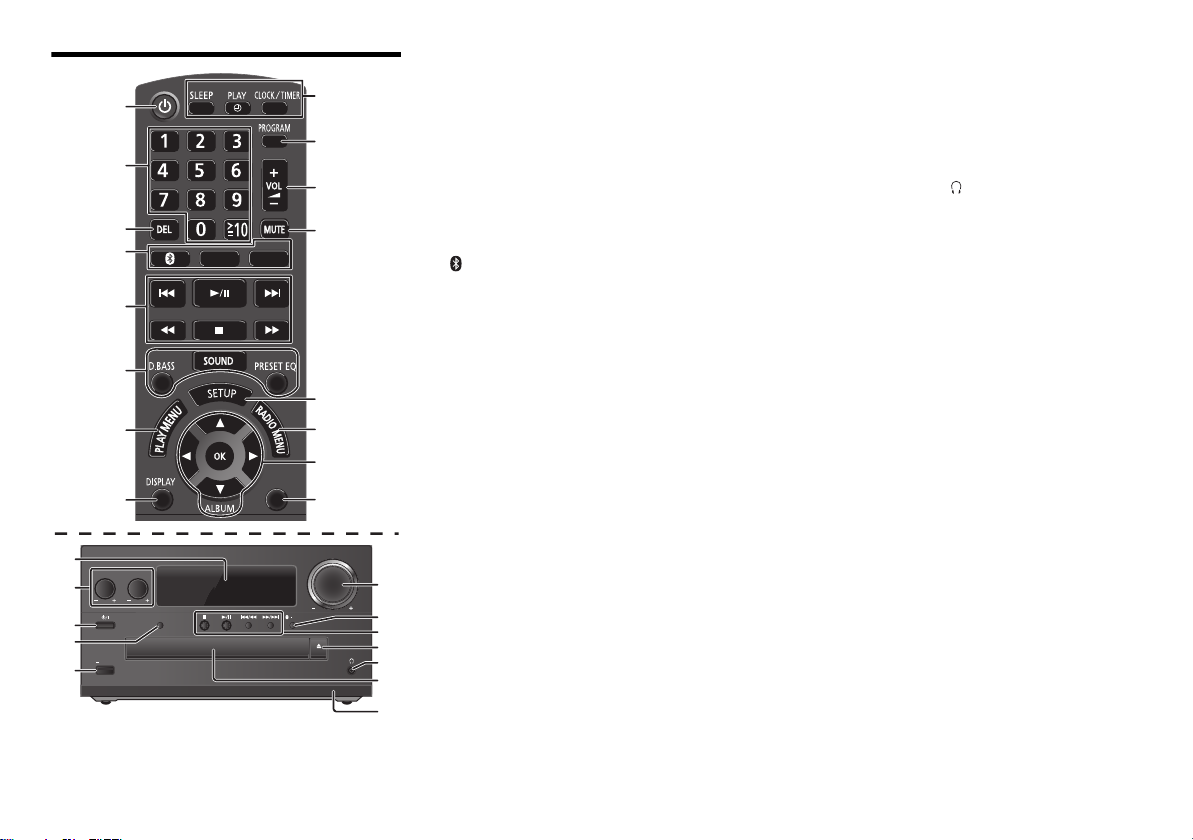
Overview of controls
1
2
3
17
18
4
5
6
7
8
BASS
TREBLE
6
1
4
5V 2.1A
CD/USB
SELECTOR
EXT-IN
RADIO
DIMMER
PAIRING
OPEN/CLOSE
10
11
12
13
14
15
16
1 Standby/on switch [Í], [Í/I]
Press to switch the unit from on to standby mode or
vice versa. In standby mode, the unit is still
9
consuming a small amount of power.
2 Numeric buttons [1 to 9, 0, S10]
• To select a 2-digit number
Example: 16: [S10]
• To select a 3-digit number
Example: 124: [S10]
> [1] > [6]
> [S10] >[1] > [2]> [4]
3 Delete a programmed track
4 Select audio source
On the remote control
[ ]: “BLUETOOTH”
[CD/USB]: “CD”
[RADIO, EXT-IN]: “DAB+” ----------------. “FM”
On this unit
[SELECTOR]:
“CD”
---------. “BLUETOOTH” ---------. “DAB+”
^-
“PC”( “USB”
(
*1 ( “AUX”
. “USB”*
^
-- “PC”
1
(-
(
“AUX”
“FM”
(b
(b
5 Basic playback control
17 Display panel
18 Port for iPhone/iPad/iPod and USB devices
®
19 Bluetooth
• Press to select “BLUETOOTH” as the audio source.
• Press and hold to enter pairing mode ( 6) or
disconnect a Bluetooth
-pairing button
®
device ( 7).
20 Open or close the disc tray
21 Headphones jack ( )
• Plug type: 3.5 mm stereo (not supplied)
• Avoid listening for prolonged periods of time to prevent
hearing damage.
• Excessive sound pressure from earphones and
headphones can cause hearing loss.
• Listening at full volume for long periods may damage
the user’s ears.
22 Disc tray
• Do not put any object in front of the disc tray.
23 Remote control sensor
*1: The display will automatically change to “IPOD” when a
compatible iPhone/iPad/iPod is connected to the port for
iPhone/iPad/iPod.
6 Select the sound effects
7 Set the play menu item
8 View content information
9 Clock and timer operation
10 Set the programme function
VOLUME
11 Adjust the volume of the system
12 Mute the sound of the system
11
19
20
21
22
23
Press the button again to cancel.
“MUTE” is also cancelled when you adjust the
volume or when you switch off the system.
5
13 Enter setup menu
14 Set the radio menu item
15 Select the option
16 Dim the display panel
Press the button again to cancel.
TQBJ0997
5
Page 6
About Bluetooth
Panasonic bears no responsibility for data and/or
information that is compromised during a
wireless transmission.
Frequency band used
• This system uses the 2.4 GHz frequency band.
Certification of this device
• This system conforms to frequency restrictions and
has received certification based on frequency laws.
Thus, a wireless permit is not necessary.
• The actions below are punishable by law in some
countries:
- Taking apart or modifying this system.
- Removing specification indications.
Restrictions of use
• Wireless transmission and/or usage with all Bluetooth
equipped devices is not guaranteed.
• All devices must conform to standards set by Bluetooth
SIG, Inc.
• Depending on the specifications and settings of a
device, it can fail to connect or some operations can be
different.
• This system supports Bluetooth
depending on the operating environment and/or
settings, this security is possibly not sufficient.
Transmit data wirelessly to this system with caution.
• This system cannot transmit data to a Bluetooth
device.
Range of use
• Use this device at a maximum range of 10 m.
The range can decrease depending on the
environment, obstacles or interference.
Interference from other devices
• This system may not function properly and troubles
such as noise and sound jumps may arise due to radio
wave interference if this system is located too close to
other Bluetooth
2.4 GHz band.
• This system may not function properly if radio waves
from a nearby broadcasting station, etc. is too strong.
Intended usage
• This system is for normal, general use only.
• Do not use this system near an equipment or in an
TQBJ0997
environment that is sensitive to radio frequency
interference (example: airports, hospitals, laboratories,
6
etc).
®
®
security features. But
®
devices or the devices that use the
Bluetooth® operations
By using the Bluetooth® connection, you can listen to the
sound from the Bluetooth
wirelessly.
• Refer to the operating instructions of the Bluetooth
device for details.
Connecting via Bluetooth® menu
Preparation
• Turn on the Bluetooth
the device near this unit.
Pairing with Bluetooth® devices
®
audio device from this system
®
feature of the device and place
1 Press [ ] to select “BLUETOOTH”.
®
If “PAIRING” is indicated on the display, go to step 3.
2 Press [PLAY MENU] to select “PAIRING” and
then press [OK].
Alternatively, press and hold
unit.
3 Select “SA-PMX82M” from the Bluetooth
device’s Bluetooth
®
The MAC address (e.g., 6C:5A:B5:B3:1D:0F) may
be displayed before “SA-PMX82M” is displayed.
The name of the connected device is indicated on
the display for a few seconds.
4 Start playback on the Bluetooth
[ -PAIRING] on the
®
menu.
®
device.
®
Connecting a paired Bluetooth® device
1 Press [ ] to select “BLUETOOTH”.
®
“READY” is indicated on the display.
2 Select “SA-PMX82M” from the Bluetooth
device’s Bluetooth
The name of the connected device is indicated on
the display for a few seconds.
3 Start playback on the Bluetooth
Note:
• If prompted for the passkey, input “0000”.
• You can register up to 8 devices with this unit. If a 9th
device is paired, the device that has not been used for the
longest will be replaced.
• This unit can only be connected to one device at a time.
• When “BLUETOOTH” is selected as the source, this unit
will automatically try and connect to the last connected
®
Bluetooth
during this process.) If the connection attempt fails, try to
establish a connection again.
device. (“LINKING” is indicated on the display
®
menu.
®
Bluetooth® transmission mode
You can change the transmission mode to prioritise
transmission quality or sound quality.
Preparation
• Press [ ] to select “BLUETOOTH”.
• If a Bluetooth
it.
®
device is already connected, disconnect
1 Press [PLAY MENU] repeatedly to select
“LINK MODE”.
device.
®
2 Press [2, 1] to select the mode and then press
[OK].
MODE 1: Emphasis on connectivity
MODE 2: Emphasis on sound quality
Note:
• Select “MODE 1” if the sound is interrupted.
• When enjoying video contents with this function, the video
and audio output may not be synchronised. In this case,
select “MODE 1”.
• The factory default is “MODE 2”.
Page 7
Bluetooth® input level
If the sound input level from the Bluetooth® device is too
low, change the input level setting.
Preparation
• Connect a Bluetooth
1
Press [PLAY MENU] repeatedly to select “INPUT
LEVEL”.
2
Press [
2, 1]
“LEVEL 0” ,. “LEVEL i1” ,. “LEVEL i2”
®
device.
to select the level and then press [OK].
^---------------------------------------------J
Note:
• Select “LEVEL 0” if the sound is distorted.
• The factory default is “LEVEL 0”.
Disconnecting a Bluetooth® device
1 While a Bluetooth
Press [PLAY MENU] repeatedly to select
“DISCONNECT?”.
2 Press
Note:
• You can also disconnect the Bluetooth® device by pressing
• The Bluetooth
[
2, 1] to select “OK? YES” and then press
[OK].
and holding [ -PAIRING] on the unit.
audio source (e.g., “CD”) is selected.
®
device is connected:
®
device will be disconnected if a different
Bluetooth® standby
When “SA-PMX82M” is selected from a paired
®
Bluetooth
on automatically from standby mode and establish a
Bluetooth
device’s Bluetooth® menu, this unit will turn
®
connection.
1 Press [SETUP] repeatedly to select
“BLUETOOTH STANDBY”.
2 Press [2, 1] to select “ON” and then press [OK].
Note:
• To turn the function off, select “OFF” in step 2.
• The factory default is “OFF”. If this function is set to “ON”,
the standby power consumption will increase.
Media information
• Please be aware that Panasonic accepts no
responsibility for the loss of data and/or information.
Compatible iPhone/iPad/iPod
iPhone 7 Plus / iPhone 7 / iPhone SE /
iPhone 6s Plus / iPhone 6s / iPhone 6 Plus / iPhone 6 /
iPhone 5s / iPhone 5c / iPhone 5 / iPhone 4s
iPad Pro (9.7-inch and 12.9-inch) / iPad Air 2 /
iPad Air / iPad (3rd and 4th generation) / iPad 2 /
iPad mini 4 / iPad mini 3 / iPad mini 2 (iPad mini
with Retina display) / iPad mini
iPod touch (5th and 6th generation)
iPod nano (7th generation)
• For the latest information, visit
http://panasonic.jp/support/global/cs/audio/
(This site is in English only.)
Note:
• Do not connect models not listed in the above. Unexpected
behaviour may occur.
• Compatibility depends on the software version. Update
your iPhone/iPad/iPod to the latest software before using it
with this unit.
• Read the User Guide of the iPhone/iPad/iPod for the
operating instructions.
Compatible USB devices
• This unit does not guarantee connection with all USB
devices.
• FAT12, FAT16 and FAT32 file systems are supported.
• This unit supports USB 2.0 High Speed.
• USB devices with storage capacity of more than 32 GB
cannot work in some conditions.
• Supported file formats and extensions:
MP3 (“.mp3”), AIFF (“.aiff”), FLAC (“.flac”),
WAV (“.wav”), AAC (“.m4a”), DSD (“.dff”, “.dsf”)
• Depending on how you create the files, they may not
play in the order you numbered them or may not play
at all.
Note:
• Files are defined as tracks and folders are defined as
albums.
• This system can access up to:
- 800 albums (including root folder)
- 8000 tracks
- 999 tracks in one album
(as of February 2017)
Compatible CD
• This system can play back discs that conform to the
CD-DA format.
• This system can play back CD-R/RW with CD-DA or
MP3 format content.
• The unit may not be able to play some discs due to the
condition of the recording.
• Before playback, finalise the disc on the device it was
recorded on.
• If the disc includes both MP3 and normal audio data
(CD-DA), the unit plays the type recorded in the inner
part of the disc.
• This unit cannot play files recorded using packet write.
• Disc must conform to ISO9660 level 1 or 2 (except for
extended formats).
Note:
• Some CD-R/RW cannot be played because of the
condition of the recording.
• MP3 files are defined as tracks and folders are defined as
albums.
• This system can access up to:
- CD-DA: 99 tracks
- MP3: 999 tracks, 255 albums (including root folder)
• Recordings will not necessarily be played in the order you
recorded them.
TQBJ0997
7
Page 8
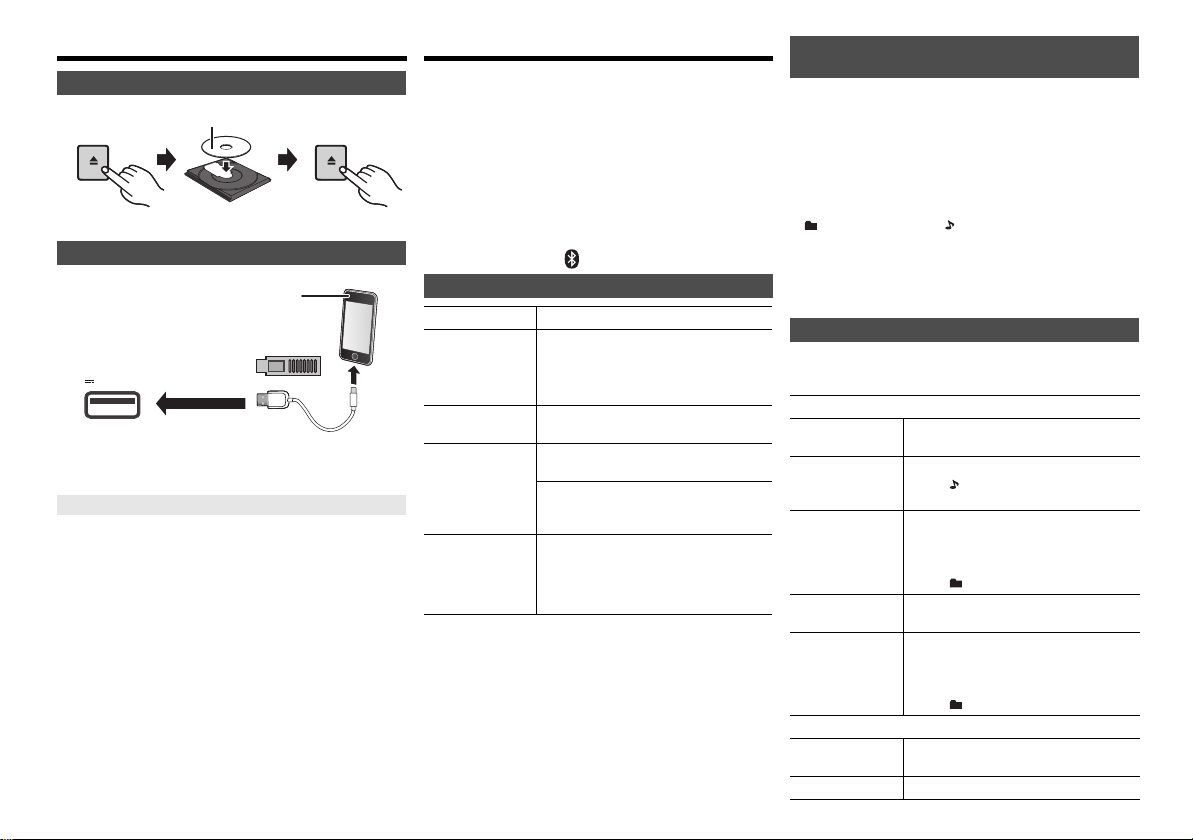
Inserting media
OPEN/CLOSE
OPEN/CLOSE
Label facing up
• Connect only compatible iPhone/
iPad/iPod models ( 7).
Failure to do so may result in
unexpected behaviour.
CD
Press [CD/USB] repeatedly to select “CD”.
iPhone/iPad/iPod or USB device
5V 2.1A
Press [CD/USB] repeatedly to select “USB”.
The display will automatically change to “IPOD” when a
compatible iPhone/iPad/iPod is connected to the port.
Charging an iPhone/iPad/iPod
During unit on, charging starts when an iPhone/iPad/
iPod is connected to this unit.
• After the iPhone/iPad/iPod has started charging, you
can turn the unit to standby mode.
• Check the iPhone/iPad/iPod to see if the battery is fully
charged. (Once fully charged, remove the iPhone/iPad/
iPod.)
Note:
• Remove the CD only after it stops rotating.
• When connecting an iPhone/iPad/iPod, use the dedicated
USB cable (not supplied).
• Insert the USB device directly. Do not use any USB
extension cable.
• Please disconnect the USB device if you finish using.
TQBJ0997
• Before removing the USB device, select a source other
8
than “USB”.
Media playback controls
The following marks indicate the availability of the feature.
[CD]: CD audio in CD-DA format or a CD that
[iPod]: Compatible iPhone/iPad/iPod connected to
[USB]: USB devices containing MP3/AIFF/FLAC/
[Bluetooth]:
Preparation
• Turn the unit on.
• Insert the media or connect the Bluetooth
• Press [CD/USB] or [ ] to select the audio source.
Basic controls [CD] [iPod] [USB] [Bluetooth]
Play Press [1/;].
Stop Press [∫].
Pause Press [1/;].
Skip Press [:] or [9] to skip track.
Search During play or pause
Note:
• There will be no sound in search operation when playing
DSD files at USB selector.
• To use this unit’s remote control with a Bluetooth
the Bluetooth
Remote Control Profile).
Depending on the status of the device, some controls may
not work.
• Operation results may vary depending on the iPhone/iPad/
iPod models.
•
[CD] [USB]:Tracks can be selected by pressing the numeric
buttons.
contains MP3 files
the USB port.
WAV/AAC/DSD files
Connected Bluetooth
• [USB]: The position is memorised and
“RESUME” is displayed.
• [USB]: Press [∫] twice to stop the
playback fully.
®
device
®
device.
Press again to continue playback.
(this unit: [:/6] or [5/9])
[CD] [USB]
: Press [3] or [4] to skip the
MP3/AIFF/FLAC/WAV/AAC/DSD
album.
Press and hold [6] or [5].
(this unit: [:/6] or [5/9])
• [iPod]: Backwards search is only within
the current track.
®
®
device must support AVRCP (Audio Video
device,
Viewing available information [CD] [USB]
[Bluetooth]
You can display the track, artist, album name, file type,
bit rate, and other information. (The information varies
depending on the audio source.)
Press [DISPLAY] repeatedly.
e.g. [USB] (MP3)
“A”: Album number
“T”: Track number
(“ ” stands for a number.)
“”:Album “ ”:Track
Note:
• Maximum characters that can be shown:
approximately 32
• This system supports ver. 1 and 2 ID3 tags.
• Text data that the system does not support can show differently.
Play menu [CD] [USB]
1
Press [PLAY MENU] to select “PLAYMODE” or “REPEAT”.
2
Press [2,1] to select the setting and then press [OK].
PLAYMODE
OFF
PLAYMODE
1-TRACK Only plays the selected track.
1-ALBUM Only plays the selected MP3/AIFF/
RANDOM Plays the contents randomly.
1-ALBUM
RANDOM
REPEAT
ON REPEAT Turns on repeat mode.
OFF REPEAT Turns off repeat mode.
Cancels the play mode setting.
• “1”, “ ” is displayed.
(Skip to the desired track.)
FLAC/WAV/AAC/DSD album.
• Press [3] or [4] to select the MP3/
AIFF/FLAC/WAV/AAC/DSD album.
• “1”, “ ” is displayed.
• “RND” is displayed.
Plays the tracks in the selected MP3/AIFF/
FLAC/WAV/AAC/DSD album randomly.
• Press [3] or [4] to select the MP3/
AIFF/FLAC/WAV/AAC/DSD album.
• “1”, “ ”, “RND” is displayed.
•“`” is displayed.
Page 9

Note:
• During random playback, you cannot skip to tracks which
have been played or press the numeric buttons.
• Playmode function does not work with “Programme
playback”.
• The mode is cancelled when you open the disc tray or
remove the USB device.
Programme playback [CD] [USB]
This function allows you to programme up to 24 tracks.
[CD] (CD-DA)
1 Press [PROGRAM] in the stop mode.
“PROGRAM” is shown for a few seconds.
2 Press the numeric buttons to select the desired
track.
Do this step again to programme other tracks.
3 Press [1/;] to start playback.
[CD] (MP3), [USB]
1 Press [PROGRAM] in the stop mode.
“PROGRAM” is shown for a few seconds.
2 Press [3, 4] to select the desired album.
3 Press [9] and then press the numeric buttons
to select the desired track.
4 Press [OK].
Do steps 2 through 4 again to programme other
tracks.
5 Press [1/;] to start playback.
Check
programme
contents
Clear the last
track
Cancel
programme
mode
Clear all
programmed
tracks
Note:
• The programme memory is cleared when you open the
disc tray or remove the USB device.
Press [:] or [9] in the stop
mode.
Press [DEL] in the stop mode.
Press [PROGRAM] in the stop
mode.
• “PGM OFF” is shown for a few
seconds.
Press [∫] in the stop mode. “CLEAR
ALL” is shown. Within 5 seconds,
press [∫] again.
FM radio
30 FM stations can be preset.
Preparation
Press [RADIO, EXT-IN] repeatedly to select “FM”.
Automatic presetting
1 Press [RADIO MENU] to select “A.PRESET”.
2 Press [2, 1] to select “LOWEST” or
“CURRENT” frequency.
LOWEST:
To begin auto preset with the lowest frequency (FM
87.50).
CURRENT:
To begin auto preset with the current frequency.*
1
3 Press [OK] to start presetting.
• The tuner starts to preset all the stations it can receive
into the channels in ascending order.
To cancel, press [∫].
*1: To change the frequency, refer to “Manual tuning and
presetting”.
Manual tuning and presetting
1 Press [6] or [5] to tune in to the station.
• Alternatively, press [:/6] or [5/9] on this
unit when “MANUAL” is selected as the tune mode*
To tune automatically, press and hold the button until
the frequency starts changing quickly.
2
2 Press [PROGRAM].
3 Press the numeric buttons to select a preset
number.
Do steps 1 through 3 again to preset more stations.
The new station replaces any station that occupies
the same preset number.
Selecting a preset station
Press the numeric buttons, [:] or [9] to select
the preset station.
• Alternatively, press [:/6] or [5/9] on this unit
when “PRESET” is selected as the tune mode*
*2: To change the tune mode
1 Press [RADIO MENU] repeatedly to select “TUNE
MODE”.
2 Press [2, 1] to select “MANUAL” or “PRESET”, and
then press [OK].
2
.
To display the current FM signal status
Press [DISPLAY]
“FM ST”: FM stereo broadcast is being received.
“FM - - - -”: No broadcast is received or FM broadcast
“FM MONO”:
Note:
• “STEREO” is displayed when this unit tunes to a stereo
broadcast.
received is weak or in monaural.
You have set the “FM MODE” to
“MONO”. ( 12, “If noise is excessive
during FM reception.”)
DAB/DAB+
Preparation
Press [RADIO, EXT-IN] repeatedly to select “DAB+”.
If you select “DAB+” for the first time, the system will
start the “DAB AUTO SCAN” procedure.
Note:
• If no station is detected, “SCAN FAILED” is shown.
Adjust the antenna and try again.
DAB/DAB+ auto scan
1 Press [RADIO MENU] to select “AUTOSCAN” and
then press [OK].
“START?” is shown.
.
2 Press [OK].
“DAB AUTO SCAN” is shown.
TQBJ0997
9
Page 10
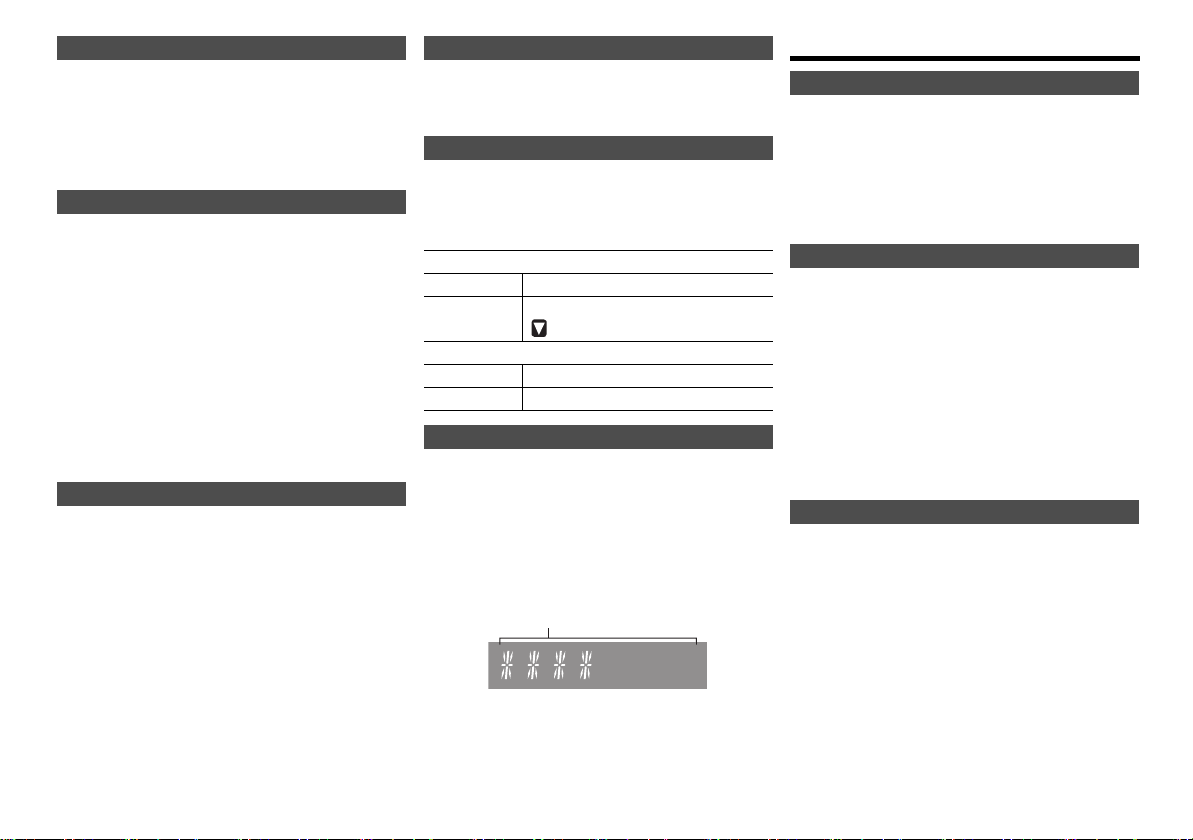
DAB/DAB+ manual tuning
Reception quality
0 (poor) to 8 (excellent)
“SLEEP 30” -. “SLEEP 60” -. “SLEEP 90” -. “SLEEP 120”
^------------------- “OFF” (Cancel) (------------------
b
To find the best antenna position, use manual tuning to
search selected DAB/DAB+ frequency block.
1 Press [RADIO MENU] repeatedly to select
“MANUAL SCAN”.
2 Press [2, 1] to select a frequency block to scan
and then press [OK].
Memory presetting
You can preset up to 20 DAB/DAB+ stations.
1 Press [6] or [5] to select a station.
• Alternatively, press [:/6] or [5/9] on this
unit when “STATION” is selected as the tune mode*
2 Press [PROGRAM].
3 Press the numeric buttons to select a preset
number.
Do steps 1 through 3 again to preset more stations.
Note:
• A station previously stored is overwritten when another
station is stored in the same preset number.
• You cannot preset a station when the station is not
broadcasting or when you have selected a secondary
service.
• Previous station memory is cleared during auto scan.
Selecting a preset station
Press the numeric buttons, [:] or [9] to select
the preset station.
• Alternatively, press [:/6] or [5/9] on this unit
when “PRESET” is selected as the tune mode*
*1: To change the tune mode
1 Press [RADIO MENU] repeatedly to select “TUNE
MODE”.
2 Press [2, 1] to select “STATION” or “PRESET”, and
then press [OK].
TQBJ0997
10
Viewing available information
You can view information about the DAB/DAB+
broadcast, programme type, ensemble label, frequency
and time.
Press [DISPLAY] to view available information.
DAB/DAB+ settings
1 Press [RADIO MENU] repeatedly to select an
option.
2 Press [2, 1] to select the desired setting and
then press [OK].
DAB SECONDARY
1
.
PRIMARY To listen to primary service.
SECONDARY To listen to secondary services.
AUTO CLOCK ADJ
ON ADJUST Start auto clock adjustment.
OFF ADJUST Cancel auto clock adjustment.
“ ” is shown.
DAB/DAB+ signal quality
When adjusting the antenna, you can check the
reception quality.
1 Press [RADIO MENU] repeatedly to select
“SIGNAL QUALITY”.
2 Press [2, 1] to select frequency.
1
.
The current frequency block is displayed and then
the reception quality is indicated.
Clock and timers
Setting the clock
This is a 24-hour clock.
1 Press [CLOCK/TIMER] to select “CLOCK”.
2 Press [3, 4] to set the time and then press [OK].
To check the time
Press [CLOCK/TIMER].
Note:
• Reset the clock regularly to maintain accuracy.
Sleep timer
The sleep timer switches off the system after the set
time.
Press [SLEEP] repeatedly to select the setting (in
minutes).
Note:
• The remaining time is indicated on the unit’s display at
every minute except when other operations are performed.
“SLEEP 1” is always shown when only 1 minute remains.
• The sleep timer can be used together with the play timer.
• The sleep timer always comes first. Be sure not to set an
overlap of timers.
Play timer
You can set the timer to come on at a certain time to
wake you up.
Preparation
Set the clock.
1 Press [CLOCK/TIMER] repeatedly to select
“TIMER ADJ”.
2 Press [3, 4] to set the s tarti ng tim e (“ON TIME”)
and then press [OK].
3 Press [3, 4] to set the finishing time
(“OFF TIME”) and then press [OK].
4 Press [3, 4] to select the music source*
then press [OK].
1
and
Page 11
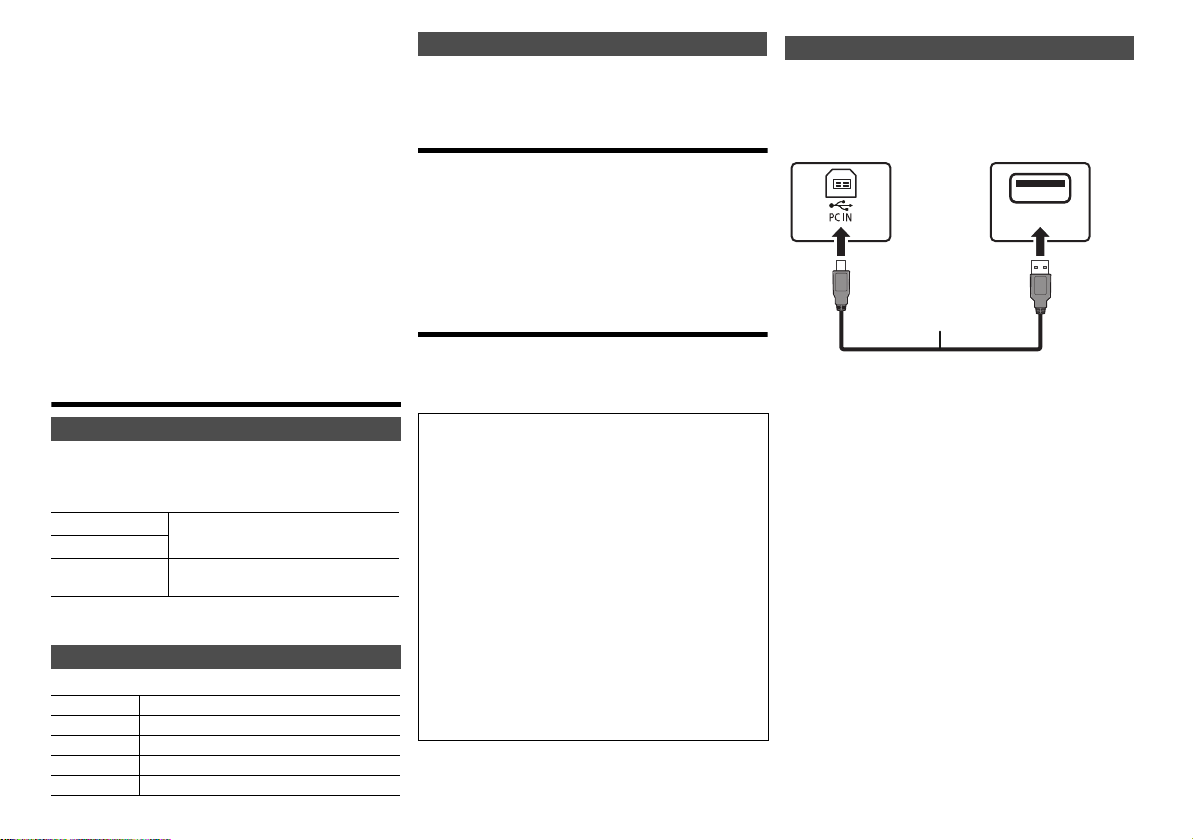
Turning the timer on
USB
USB 2.0 cable
(not supplied)
This unit (rear)
USB-DAC port
Typ e AType B
PC
1 Prepare the selected music source and set the
desired volume.
2 Press [F, PLAY].
“F” is shown.
To cancel, press [F, PLAY] again.
The system must be switched off for the timer to operate.
To check the settings
Press [CLOCK/TIMER] repeatedly to select “TIMER ADJ”.
(During standby, press [CLOCK/TIMER] twice.)
Note:
• The timer starts at a low volume and increases gradually to
the preset level.
• The timer comes on at the set time every day if the timer is
on.
• If you switch off the system and switch on again while a
timer is in operation, the timer will not stop at the end time.
*1: “CD”, “USB”, “DAB+”, and “FM” can be set as the music
source.
• For timer music source through the port for iPhone/
iPad/iPod and USB devices, select “USB”.
Sound effects
Changing the sound quality
Press [SOUND] repeatedly to select a sound
1
effect.
2 Press [2, 1] to select the desired setting.
BASS
TREBLE
SURROUND “ON SURROUND” or
By this unit only
Turn [BASS] or [TREBLE] to adjust the level.
Preset EQ
Press [PRESET EQ] repeatedly to select a setting.
HEAVY Adds punch to rock
SOFT For background music
CLEAR Clarifies higher frequencies
VOCAL Adds gloss to vocal
FLAT Cancels the sound effect
-4 to +4
“OFF SURROUND”
D.BASS
This function lets you enjoy a powerful bass effect.
Press [D.BASS] to select “ON D.BASS” or “OFF
D.BASS”.
Using the auxiliary input
You can connect a VCR, DVD player etc. and listen to
the audio through this system.
Preparation
Connect the external equipment.
1 Press [RADIO, EXT-IN] repeatedly to select
“AUX”.
2 Play the external equipment.
Using the PC input
You can play back music on the PC with connected
speakers by connecting a PC to the PC IN terminal on
this unit.
About supported format, refer to “Specifications” ( 14).
Before connecting to a PC
Follow the steps below.
• Refer to the following for the recommended OS
versions for your PC:
– Windows 7, Windows 8, Windows 8.1, Windows 10
– OS X 10.7, 10.8, 10.9, 10.10, 10.11, 10.12
1 Download and install the dedicated driver to the
PC. (Only for Windows OS)
Download and install the driver from the website
below.
http://panasonic.jp/support/global/cs/audio/
(This site is in English only.)
2 Download and install the dedicated app
“Panasonic Audio Player 2” (free of charge) on
your PC. (For Windows OS and OS X)
Download and install the app from the website
below.
http://panasonic.jp/support/global/cs/audio/
(This site is in English only.)
(as of February 2017)
Listening to audio from a PC
1 Disconnect the AC mains lead.
2 Connect this unit and a PC.
3 Connect the AC mains lead to this unit and turn
this system on.
4 Press [RADIO, EXT-IN] repeatedly to select “PC”.
5 Operate the PC for playback.
Note:
• When you play back high-resolution audio, it is
recommended that you use a compatible USB 2.0 High
Speed Cable.
TQBJ0997
11
Page 12

Others
Auto off function
As a factory default, this unit will turn to standby mode
automatically if there is no sound and it is not being used
for approximately 20 minutes.
To cancel this function
1 Press [SETUP] repeatedly to select “AUTO OFF”.
2 Press [2, 1] to select “OFF” and then press
[OK].
Note:
• To turn the function on, select “ON” in step 2.
• This setting cannot be selected when radio is the source.
• When connected to a Bluetooth
not work.
®
device, the function does
Software update
Occasionally, Panasonic may release updated software
for this unit that may add or improve the way a feature
operates. These updates are available free of charge.
For more details, refer to the following website.
http://panasonic.jp/support/global/cs/
(This site is in English only.)
Checking the software version
Press [SETUP] repeatedly to select “SW VER.” and
then press [OK].
The version of the installed software is displayed.
• Press [OK] to exit.
Troubleshooting
Before requesting service, make the following checks. If
you are in doubt about some of the check points, or if the
solutions indicated do not solve the problem, consult
your dealer for instructions.
Common problems
Cannot turn on the unit.
• After connecting the AC mains lead, wait about
10 seconds before turning on the unit.
TQBJ0997
No operations can be done with the remote control.
• Examine that the battery is installed correctly.
12
Sound is distorted or no sound.
• Adjust the volume of the system.
• Switch off the system, determine and correct the
cause, then switch the system on again. It can be
caused by straining of the speakers through excessive
volume or power, and when using the system in a hot
environment.
• Ensure the speaker cables are connected correctly
and securely. ( 4)
A “humming” sound can be heard during playback.
• An AC mains lead or fluorescent light is near the
cables. Keep other appliances and cords away from
the cables of this system.
The unit does not work.
• One of the unit’s safety devices may have been
activated.
1 Press [Í/I] on the unit to switch the unit to standby.
• If the unit does not turn off, disconnect the AC mains
lead from the AC outlet, reconnect it to the outlet after
about 30 seconds. Then wait for about 10 seconds.
2 Press [Í/I] on the unit to switch it on. If the unit still
cannot be operated, consult the dealer.
Noise is heard.
• During “AUX” mode, when a device is connected to
both the AUX IN terminals and the USB port, noise
may be generated depending on the device. In this
case, remove the USB cable from the USB port.
Disc
Display not shown correctly.
Playback does not start.
• You have not put in the disc correctly. Put it in correctly.
• Disc is dirty. Clean the disc.
• Replace the disc if it is scratched, warped, or
non-standard.
There is condensation. Let the system dry for 1 to 2 hours.
•
Radio
Reception is poor or a beat sound is heard.
• Keep the antenna away from computers, TVs, other
cables and cords.
• Use an outdoor antenna.
• Switch off the TV or move it away from the system.
If noise is excessive during FM reception.
• Change the audio to be output as monaural.
1 Press [RADIO MENU] repeatedly to select “FM MODE”.
2 Press [2, 1] to select “MONO” and then press [OK].
The sound becomes monaural.
• To cancel, select “STEREO” or change the frequency.
In normal circumstances, select “STEREO”.
iPhone/iPad/iPod
Cannot charge or operate.
• Check that the iPhone/iPad/iPod is connected properly.
• Connect the iPhone/iPad/iPod again or try to restart
the iPhone/iPad/iPod.
• During standby mode, charging will not start from the
USB cable connection.
Turn this unit on and make sure the charging has
started before turning this unit to standby mode.
• The battery of the iPhone/iPad/iPod is depleted.
Charge the iPhone/iPad/iPod, and then operate again.
– When using the port, turn this unit on. Do not turn this
unit off until the iPhone/iPad/iPod becomes operational.
USB
The USB device or the contents in it cannot be read.
• The format of the USB device or the contents in it is/
are not compatible with the system.
Slow operation of the USB device.
• Large content size or large memory USB device takes
longer time to read.
The elapsed time shown is different from the actual
play time.
• Transfer the data to another USB device or backup the
data and reformat the USB device.
Bluetooth
Pairing cannot be done.
• Check the Bluetooth
The device cannot be connected.
• The pairing of the device was unsuccessful or the
registration has been replaced. Try pairing the device
again.
• This system might be connected to a different device.
Disconnect the other device and try pairing the device
again.
• If “MODE 2” is selected in “LINK MODE”, select
“MODE 1”. ( 6)
• If the problem persists, turn the unit off and on, then try
again.
®
®
device condition.
Page 13

The device is connected but audio cannot be heard
through this system.
• For some built-in Bluetooth
the audio output to “SA-PMX82M” manually. Read the
operating instructions for the device for details.
The sound is interrupted.
• The device is out of the 10 m communication range.
Bring the Bluetooth
• Remove any obstacle between this system and the
device.
• Other devices that use the 2.4 GHz frequency band
(wireless router, microwaves, cordless phones, etc.)
are interfering. Bring the Bluetooth
this system and distance it from the other devices.
• Select “MODE 1” for stable communication. ( 6)
®
devices, you have to set
®
device closer to this system.
®
device closer to
PC
The PC does not recognise this system.
• Check your operating environment. ( 11)
• Restart the PC, turn off and on this system, and then
reconnect the USB cable.
• Use another USB port of the connected PC.
• Install the dedicated driver if using a PC with Windows.
This unit displays
“--:--”
• You connected the AC mains lead for the first time or
there was a power failure recently. Set the clock.
“ADJUST CLOCK”
• Clock is not set. Adjust the clock accordingly.
“ADJUST TIMER”
• Play timer is not set. Adjust the play timer accordingly.
“AUTO OFF”
• The unit has been left unused for about 20 minutes
and will shut down in a minute. Press any button to
cancel it.
“CHECKING CONNECTION”
• The unit is checking the connected iPhone/iPad/iPod
or USB device.
• If this display keeps appearing, make sure that the
battery of the iPhone/iPad/iPod is not depleted and
that the iPhone/iPad/iPod is turned on and connected
correctly.
“ERROR”
• An incorrect operation was done. Read the instructions
and try again.
“F” / “F” (“ ” stands for a number.)
• There is a problem with this unit.
Disconnect the AC mains lead from the AC outlet, reconnect
it to the outlet after about 30 seconds. Wait for about 10
seconds, then turn on the unit. If the problem still persists,
disconnect the AC mains lead and consult your dealer.
“NO DEVICE”
• The iPhone/iPad/iPod or USB device is not connected.
Examine the connection.
• The battery of the iPhone/iPad/iPod is depleted. Charge
the iPhone/iPad/iPod and turn it on before connecting.
“NO DISC”
• You have not put in a disc or put in a disc that the
system cannot play.
“NO PLAY”
• Examine the content. You can only play supported
format. ( 14)
• The files in the USB device can be corrupted. Format
the USB device and try again.
• The unit may have a problem. Turn the unit off and
then on again.
“NO PRESET”
• There are no preset DAB/DAB+ stations to select.
Preset some channels.
“NO SIGNAL”
• This station cannot be received. Check your antenna.
“DEVICE NO RESPONSE”
“HUB NOT SUPPORTED”
“NOT SUPPORTED”
• You have connected an iPhone/iPad/iPod that cannot
be played.
• If the iPhone/iPad/iPod is compatible, turn it on and
connect it correctly.
• You have connected an unsupported USB device.
“PC UNLOCKED”
• “PC” is selected, but a PC is not connected.
“PGM FULL”
• The number of programmed tracks is more than 24.
“PLAYERROR”
• You played an unsupported file. The system will skip
that track and play the next one.
“READING”
• The unit is checking the CD information. After this
display has disappeared, start operating.
• When starting playback of DSD files, it may take time
to read the file. Wait until reading completes.
“REMOTE ” (“ ” stands for a number.)
• The remote control and this unit are using different
codes. Change the code on the remote control.
– When “REMOTE 1” is displayed, press and hold [OK]
and [1] for at least 4 seconds.
– When “REMOTE 2” is displayed, press and hold [OK]
and [2] for at least 4 seconds.
“SCAN FAILED”
• Stations are not receivable. Check your antenna and try
DAB/DAB+ manual tuning.
“USB OVER CURRENT ERROR”
• The iPhone/iPad/iPod or USB device is drawing too
much power. Remove the iPhone/iPad/iPod or USB
device. Switch the system off and on again.
“VBR”
• The system cannot show the remaining play time for
variable bit rate (VBR) tracks.
“WAIT”
• This is displayed, for example, when this unit is turning
off.
Memory reset (initialisation)
Reset the memory when the following situations occur:
• There is no response when buttons are pressed.
• You want to clear and reset the memory contents.
1 Disconnect the AC mains lead.
Wait 30 seconds before you continue with step 2.
2 While you press and hold [Í/I] on this unit,
connect the AC mains lead again.
Keep holding down [Í/I] until “---------” appears on
the display.
3 Release [Í/I].
All the settings are set back to the factory default.
It is necessary to set the memory items again.
Remote control code
When other Panasonic equipment responds to the
remote control of this system, change the remote control
code for this system.
To set the code to “REMOTE 2”
1
Press [SELECTOR] on this unit to select “CD”.
2
Press and hold [∫] on this unit and [2] on the remote
control until “REMOTE 2” is shown.
3 Press and hold [OK] and [2] for a minimum of
4 seconds.
• The factory default is “REMOTE 1”.
• To change the mode back to “REMOTE 1”, repeat the
steps above but replace the button pressed on the
remote control from [2] to [1].
TQBJ0997
13
Page 14
Specifications
General
Power supply AC 220 V to 240 V, 50 Hz
Power consumption 44W
Dimensions
Mass Approx. 2.8 kg
Operating temperature range 0 °C to +40 °C
Operating humidity range
Power consumption in standby mode*
(When “BLUETOOTH STANDBY” is “ON”)*
Amplifier section
RMS output power (both ch driven)
Total RMS power (3 ™)120W
Total RMS power (6 ™)70W
Speaker load impedance 3 ™ to 16 ™
FM section
Preset memory 30 stations
Frequency range
Antenna terminals 75 ™ (unbalanced)
(W x H x D) 211 mm x 114 mm x 267 mm
35% to 80% RH (no condensation)
1, 2
0.35 W (approx.)
2
0.45 W (approx.)
60 W per channel (3 ™), 1 kHz, 10% THD
35 W per channel (6 ™), 1 kHz, 10% THD
87.50 MHz to 108.00 MHz (50 kHz step)
Terminals section
USB Port Terminal type: USB-A
USB port power DC OUT 5 V 2.1 A
USB standard USB 2.0 High Speed
Media file format support
WAV (
Audio Support format
3
MP3*
/
Sampling frequency 32/44.1/48 kHz
Audio word size 16 bits
Channel count 2 ch
AIFF/FLAC*
Sampling frequency
Audio word size 16 bits/24 bits
Channel count 2 ch
DSD 2.8 MHz
USB device file system FAT12, FAT16, FAT32
PC IN (EXT-IN)*
USB standard USB 2.0 High Speed
USB Audio Class specification
Audio support format
LPCM
Sampling frequency
Audio word size 16 bits/24 bits
Channel count 2 ch
DSD 2.8 MHz
Headphones Stereo, 3.5 mm jack
AUX IN (EXT-IN) Pin jack
DAB section
DAB memories 20 channels
Frequency band (wavelength)
Band III 5A to 13F
Sensitivity *BER 4x10
Min requirement –98 dBm
DAB external antenna terminal F-Connector (75 ™)
(174.928 MHz to 239.200 MHz)
-4
Disc section
Disc played (8 cm or 12 cm)
TQBJ0997
Pick up
14
Wavelength 790 nm (CD)
CD, CD-R/RW (CD-DA, MP3*3)
3
(¢.mp3)
, AIFF (
¢.aiff
MP3*
¢.
wav), AAC (¢.m4a), DSD (¢.dff/¢.dsf)
4
AAC
*
5
/WAV
), FLAC (¢.flac),
32/44.1/48/88.2/96/176.4/192 kHz
6
Terminal type: USB-B
USB Audio Class 2.0, Asynchronous mode
32/44.1/48/88.2/96/176.4/192 kHz
Bluetooth® section
®
Versio n Bluetooth
Class Class 2
Supported Profiles A2DP, AVRCP
Frequency band 2.4 GHz band FH-SS
Operation Distance 10 m Line of sight
Supported Codec AAC, SBC
Note:
• Specifications are subject to change without notice. Mass
and dimensions are approximate.
• Total harmonic distortion is measured by the digital
spectrum analyzer.
*1: “BLUETOOTH STANDBY” is “OFF”.
*2: No device is connected to the USB port before turning to
standby mode.
*3: MPEG-1 Layer 3, MPEG-2 Layer 3
*4: Support profile AAC-LC only.
*5: Uncompressed FLAC files may not operate correctly.
Support block size from 1152 to 4096.
*6: USB-DAC port
FLAC Decoder
Copyright (C) 2000,2001,2002,2003,2004,2005,2006,2007,
2008,2009 Josh Coalson
Redistribution and use in source and binary forms, with or
without modification, are permitted provided that the following
conditions are met:
- Redistributions of source code must retain the above copyright
notice, this list of conditions and the following disclaimer.
- Redistributions in binary form must reproduce the above copyright
notice, this list of conditions and the following disclaimer in the
documentation and/or other materials provided with the distribution.
- Neither the name of the Xiph.org Foundation nor the names of its
contributors may be used to endorse or promote products derived
from this software without specific prior written permission.
THIS SOFTWARE IS PROVIDED BY THE COPYRIGHT HOLDERS
AND CONTRIBUTORS “AS IS” AND ANY EXPRESS OR IMPLIED
WARRANTIES, INCLUDING, BUT NOT LIMITED TO, THE IMPLIED
WARRANTIES OF MERCHANTABILITY AND FITNESS FOR A
PARTICULAR PURPOSE ARE DISCLAIMED. IN NO EVENT SHALL
THE FOUNDATION OR CONTRIBUTORS BE LIABLE FOR ANY
DIRECT, INDIRECT, INCIDENTAL, SPECIAL, EXEMPLARY, OR
CONSEQUENTIAL DAMAGES (INCLUDING, BUT NOT LIMITED TO,
PROCUREMENT OF SUBSTITUTE GOODS OR SERVICES; LOSS
OF USE, DATA, OR PROFITS; OR BUSINESS INTERRUPTION)
HOWEVER CAUSED AND ON ANY THEORY OF LIABILITY,
WHETHER IN CONTRACT, STRICT LIABILITY, OR TORT
(INCLUDING NEGLIGENCE OR OTHERWISE) ARISING IN ANY WAY
OUT OF THE USE OF THIS SOFTWARE, EVEN IF ADVISED OF THE
POSSIBILITY OF SUCH DAMAGE.
Ver.2.1+EDR
Page 15

15
TQBJ0997
Page 16
(Back of product)
Manufactured by:
Importer for Europe:
Panasonic Corporation
Kadoma, Osaka, Japan
Panasonic Marketing Europe GmbH
Panasonic Testing Centre
Winsbergring 15, 22525 Hamburg, Germany
Panasonic Corporation
Web Site: http://www.panasonic.com
p
C Panasonic Corporation 2017
TQBJ0997
F0217YM0
EU
 Loading...