

Page 1
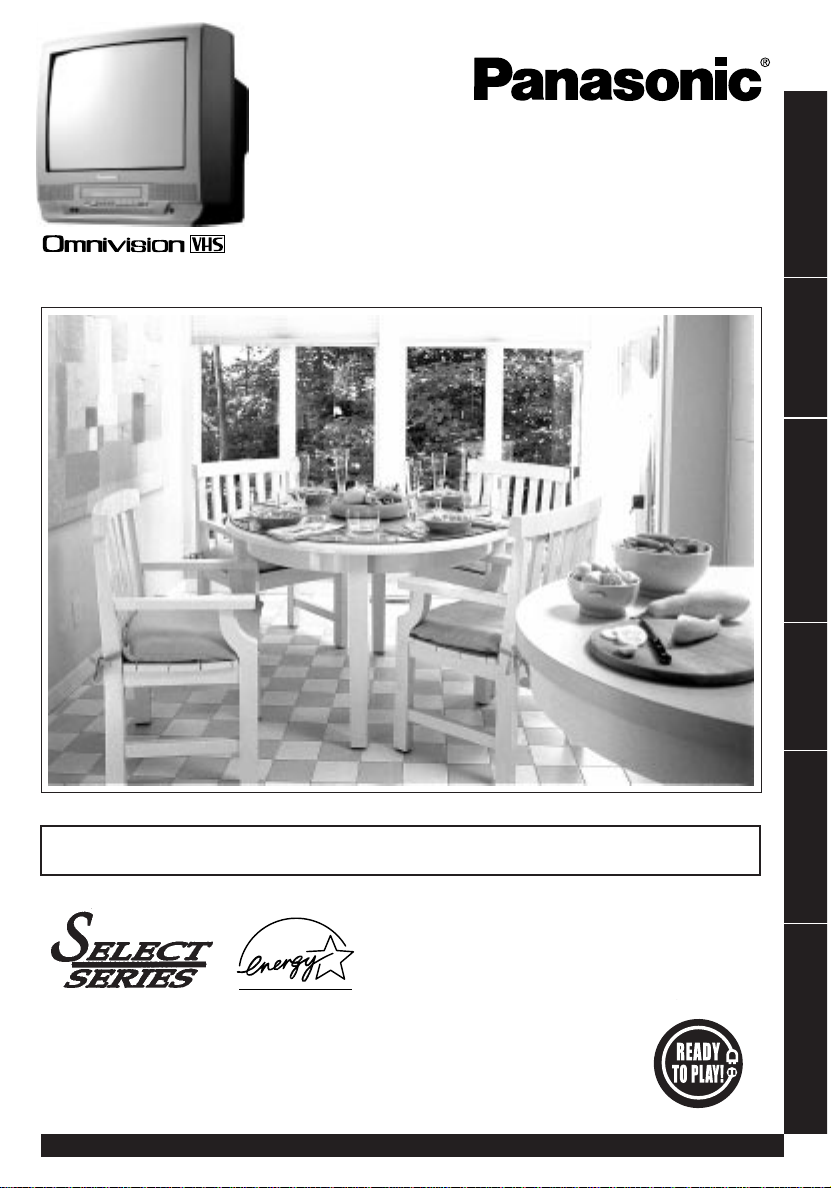
Combination VCR
Operating Instructions
Initial Setup
Models No.
PVQ-1312W / PVQ-1312B
Basic Operation
PVQ-2012 / PVQ-2512
TV Operation
Timer Operation
Advanced Operation
• Initial Setup and Connection Procedures are on pages 8 and 9.
As an ENERGY STAR® Partner,
Matsushita Electric Corporation of America has
determined that this product or product model meets
the ENERGY STAR® guidelines for energy efficiency.
Please read these instructions carefully before attempting to connect,
operate, or adjust this product. Please save this manual.
Spanish Quick Use Guide is included.
(Guía para rápida consulta en español está incluida.)
For assistance, please call : 1-800-211-PANA(7262) or send e-mail to : consumerproducts@panasonic.com
For Your Information
LSQT0605A
Page 2

Important Safeguards and Precautions
READ AND RET AIN ALL SAFETY AND
OPERATING INSTR UCTIONS. HEED ALL
WARNINGS IN THE MANU AL AND ON UNIT
INSTALLATION
1 POWER SOURCE CA UTION
Operate only from power source indicated on unit
or in this manual. If uncertain, have your Electric
Utility Service Company or Video Products Dealer
verify your home power source.
2 POWER CORD PLUG
For safety, this unit has a polarized type plug (one
wide blade), or a three-wire grounding type plug.
Always hold the plug firmly and make sure your
hands are dry when plugging in or unplugging the
AC power cord. Regularly remov e dust, dirt, etc.
on the plug.
POLARIZED PLUG CAUTION:
The plug fits into outlet one way. If it cannot be fully
inserted, try reversing it. If it still will not fit, hav e an
electrician install the proper wall outlet. Do not
tamper with the plug.
GROUNDING PLUG CAUTION:
The plug requires a three-hole grounding outlet.
If necessary, have an electrician install the proper
outlet. Do not tamper with the plug.
3 POWER CORD
T o av oid unit malfunction, and to protect against
electrical shock, fire or personal injury:
-Keep power cord away from heating appliances
and walking traffic. Do not rest heavy objects on,
or roll such objects over the power cord.
-Do not tamper with the cord in any way.
-An extension cord should have the same type
plug (polarized or grounding) and must be
securely connected.
-Overloaded wall outlets or extension cords is a
fire hazard.
-Frayed cords, damaged plugs, and damaged or
cracked wire insulation are hazardous and
should be replaced by a qualified electrician.
4 DO NOT BLOCK VENTILATION HOLES
Ventilation openings in the cabinet release heat
generated during operation. If bloc ked, heat
build-up may result in a fire hazard or heat
damage to cassettes.
For your protection:
a.Never cover v entilation slots while unit is ON,
or operate unit while placed on a bed, sofa,
rug, or other soft surface.
b.Avoid built-in installation, such as a book case
or rack, unless properly ventilated.
5
A VOID EXTREMEL Y HO T LOCA TIONS OR
SUDDEN TEMPERATURE CHANGES
Do not place unit over or near a heater or
regulator, in direct sunlight, etc. If unit is suddenly
moved from a cold place to a warm place,
moisture may condense in unit and on the tape
causing damage.
6 T O AV OID PERSONAL INJUR Y
• Never place unit on support or
stand that is not firm, level,
and adequately strong.
The unit could fall causing
serious injury to a child or
adult and damage to the unit.
• Move any appliance and cart
combination with care. Quick
stops, excessive force, and unev en
surfaces may cause objects to overturn.
• Carefully follow all operating instructions.
2
For assistance, please call : 1-800-211-PANA(7262) or send e-mail to : consumerproducts@panasonic.com
OUTDOOR ANTENNA INSTALLATION
1 SAFE ANTENNA AND CABLE CONNECTION
An outside antenna or cable system must be properly
grounded to provide some protection
against built up static charges
and voltage. Section 810 of
the National Electrical Code,
ANSI/NFPA 70 (in Canada,
part 1 of the Canadian
Electrical Code) provides
information regarding proper
grounding of the mast and supporting structure, grounding
of the lead-in wire to an antenna discharge unit, size of
grounding conductors, location of antenna discharge unit,
connection to grounding electrodes, and requirements for
the grounding electrode.
2 KEEP ANTENNA CLEAR OF HIGH V O LT AGE
POWER LINES OR CIRCUITS
Locate an outside antenna system well away from power
lines and electric light or power circuits so it will never touch
these power sources should it ever f all. When installing
antenna, absolutely never touch power lines , circuits or
other power sources as this could be fatal.
NEC - NATIONAL
ELECTRICAL CODE
ELECTRIC
SERVICE
EQUIPMENT
GROUND
CLAMP
ANTENNA LEAD
IN WIRE
ANTENNA
DISCHARGE UNIT
(NEC SECTION 810-20)
GROUNDING
CONDUCTORS
(NEC SECTION 810-21)
GROUND CLAMPS
POWER SERVICE
GROUNDING
ELECTRODE SYSTEM
(NEC ART 250, PART H)
USING THE UNIT
Before unit is brought out of storage or moved to a new location,
refer again to the INSTALLATION section of these safeguards.
1 KEEP UNIT WELL AW AY FR OM W ATER OR
MOISTURE, such as vases, sinks, tubs, etc.
2 IF EXPOSED TO RAIN, MOISTURE, OR STR ONG
IMP A CT , unplug unit and have it inspected by a qualified
service technician before use.
3 ELECTRICAL STORMS
During a lightning storm, or before leaving unit unused for
extended periods of time, disconnect all equipment from the
power source as well as the antenna and cable system.
4 WHEN UNIT IS PLUGGED IN
• DO NOT OPERATE IF:
- liquid has spilled into unit.
- unit was dropped or otherwise damaged.
- unit emits smoke, malodors, or noises.
Immediately unplug unit, and have it inspected by a service
technician to avoid potential fire and shock hazards .
• Never drop or push any object through openings in unit.
T ouching internal parts may cause electric shock or fire hazard.
• Keep magnetic objects, such as speakers, away from unit
to avoid electrical interference.
5 USING ACCESSORIES
Use only accessories recommended by the manufacturer to
avoid risk of fire, shock, or other hazards.
6 CLEANING UNIT
Unplug unit. Use a clean, dry , chemically untreated cloth to gently
remove dust or debris. DO NOT USE cleaning fluids, aerosols, or
forced air that could over-spra y , or seep into unit and cause
electrical shock. Any substance , such as wax, adhesive tape, etc.
may mar the cabinet surface. Exposure to greasy , humid, or dusty
areas may adversely aff ect internal parts.
SERVICE
1 DO NOT SER VICE PR ODUCT YOURSELF
If, after carefully following detailed operating instructions, the
unit does not operate properly, do not attempt to open or
remove cov ers, or make an y adjustments not described in the
manual. Unplug unit and contact a qualified service technician.
2 REPLACEMENT OF P ART S
Make sure the service technician uses only parts specified
by the manufacturer, or have equal safety characteristics as
original parts. The use of unauthorized substitutes may
result in fire, electric shock, or other hazards.
3 SAFETY CHECK AFTER SERVICING
After unit is serviced or repaired, request that a through safety
check be done as described in the manufacturer’ s service
literature to insure video unit is in safe operating condition.
Page 3
Safety Precautions/Mesures de sécurité
Warning : To prevent fire or shock hazar d, do not expose this equipment to rain or moisture.
Caution : T o prevent electric shock, match wide blade of plug to wide slot, fully insert.
Avertissement : Afin de prévenir tout risque d’incendie ou de chocs électriques, ne
Attention : Pour éviter les chocs électriques, introduire la lame la plus large de la fiche
This video recorder, equipped with the HQ (High Quality) System, is compatible with
existing VHS equipment. Only use those tapes with the mark. It is recommended that
only cassette tapes that have been tested and inspected for use in 2, 4, 6, and 8 hour
VCR machines be used. This television receiver provides display of television closed
captioning in accordance with §15.119 of the FCC rules.
FCC WARNING : Any unauthorized changes or modifications to this
equipment would void the user’s authority to operate.
CAUTION
RISK OF ELECTRIC SHOCK
DO NOT OPEN
CAUTION: TO REDUCE THE RISK
OF ELECTRIC SHOCK, DO NOT
REMOVE COVER (OR BACK)
NO USER-SERVICEABLE PARTS
INSIDE REFER SERVICING TO
QUALIFIED SERVICE PERSONNEL
pas exposer cet appareil à la pluie ou à une humidité excessive.
dans la borne correspondante de la prise et pousser jusqu’au fond.
This symbol warns the user that uninsulated voltage within the unit may
have sufficient magnitude to cause electric shock. Therefore , it is
dangerous to make any kind of contact with any inside part of this unit.
This symbol alerts the user that important literature concerning the
operation and maintenance of this unit has been included.
Therefore, it should be read carefully in order to avoid an y prob lems .
Congratulations
on your purchase of one of the most sophisticated
and reliable products on the market today. Used
properly, it will bring you and your family years of
enjoyment. Please fill in the information below.
The serial number is on the tag located on the
back of your unit.
Date of Purchase
Dealer Purchased From
Dealer Address
Dealer Phone No.
Model No.
Serial No.
Accessories
Remote Control
LSSQ0308
(PVQ-1312W)
LSSQ0280
(PVQ-1312B
/PVQ-2012/PVQ-2512)
Batteries 2 “AA”
To order accessories,
call toll free 1-800-332-5368.
3
Page 4

Head Cleaning
V I DE
O
HEADS MAY
LEAN I NG
NEED C
PL
EASE
I
NSERT HEAD
C
LEAN I NG CASSETTE
OR
REFER TO MANUAL
END : PLAY K
EY
Record/Playback Time
Only use tapes with the mark in this unit.
SP (Standard Play)
LP (Long Play)
SLP (Super Long Play)
4
For assistance, please call : 1-800-211-PANA(7262) or send e-mail to : consumerproducts@panasonic.com
1 Hour
2 Hours
3 Hours 8 Hours
2 Hours
40 Minutes
5 Hours
20 Minutes
Page 5

Table of Contents
Important Safeguards and Precautions / Safety Precautions .. 2, 3
Before Using ....................................................................................... 3
Unit Information ................................................................................. 4
Table of Contents ............................................................................... 5
Location of Controls........................................................................... 6
Connections / Initial Setup (Ready to Play) ................................. 8, 9
Reset Language, Channels, Clock, Time Zone Adjust ........... 10, 11
Playback a Tape ................................................................................ 12
Record On a Tape ............................................................................. 12
Copy Your Tapes (Dubbing) ............................................................ 13
TV Operation .................................................................................... 14
Picture Adjustment.......................................................................... 15
TV Timer Features ..................................................................... 16, 17
Closed Caption System............................................................. 18, 19
Timer Recording ........................................................................ 20, 21
Initial Setup
Basic Operation
TV Operation
Timer Operation
Tape Operation ........................................................................... 22~24
Special VCR Features ............................................................... 25, 26
V-Chip Control Feature ............................................................. 27~29
On-Screen Display (OSD) ................................................................ 30
Before Requesting Service .............................................................. 31
Servicenter List ................................................................................. 32
Limited Warranty .............................................................................. 33
Spanish Quick Use Guide / Guía para rápida consulta ......... 34, 35
Index.................................................................................................. BC
Advanced Operation
For Your Information
5
Page 6

Location of Controls
Remote Control Buttons
EJECT button:
When EJECT is pressed, the tape is ejected from Cassette Compartment.
If EJECT is pressed during recording, the unit will not respond to the command.
6
For assistance, please call : 1-800-211-PANA(7262) or send e-mail to : consumerproducts@panasonic.com
Page 7
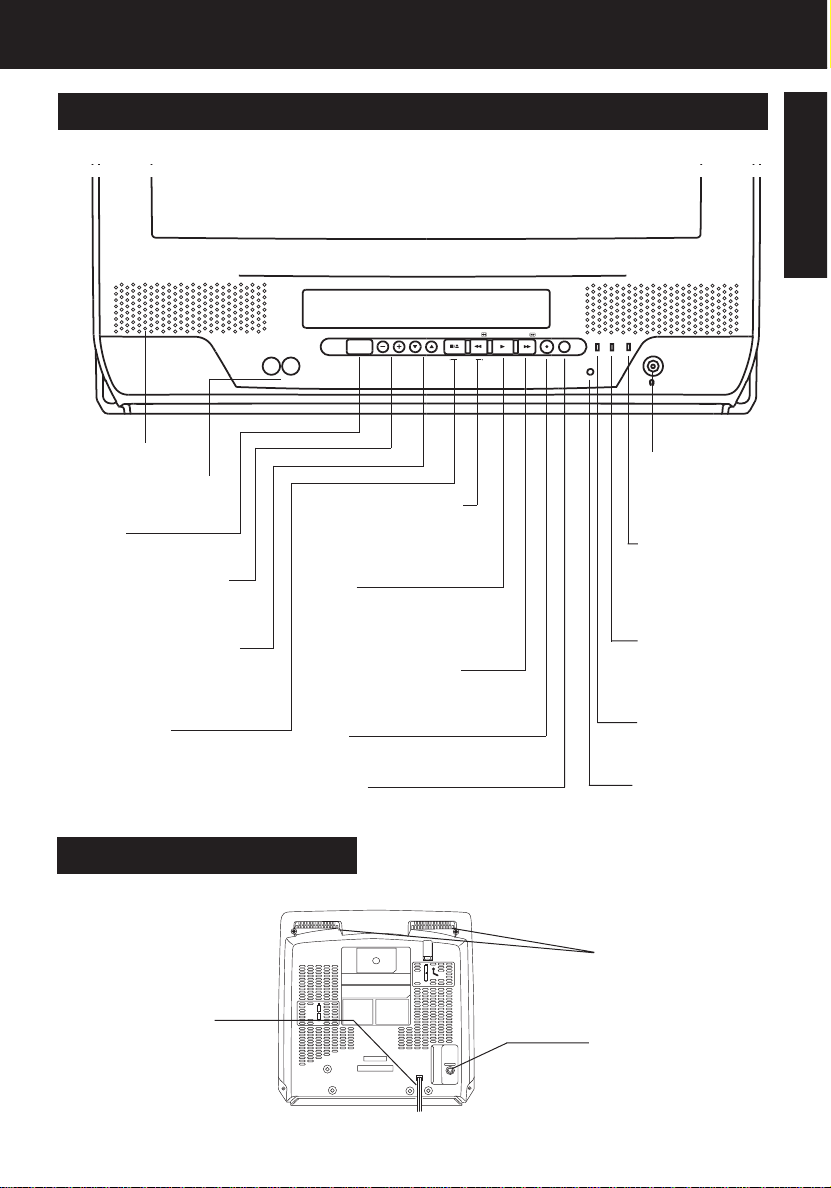
Front View of the unit and Indicators on the Front Panel
<Model PVQ-2012 unit shown>
Initial Setup
VIDEO IN AUDIO IN
VIDEO IN AUDIO IN
POWER VOL CH
POWER VOL CH
STOP/EJECT REW/
STOP/EJECT REW/
ACTION
ACTION
PLAY/REPEAT
PLAY/REPEAT
Built-In Speaker
AUDIO VIDEO IN Jack
For dubbing.
POWER
See previous page.
VOLUME UP/DOWN
SET/BACK SPACE
See previous page.
CHANNEL UP/DOWN
TRACKING UP/DOWN
SELECT UP/DOWN
See previous page.
STOP/EJECT
See previous page.
ACTION
Press together with REW .
REWIND/SEARCH
See previous page.
ACTION
Press together with STOP.
PLAY
See previous page.
REPEAT
Repeats a recording.
FAST FORWARD/
SEARCH
See previous page.
REC
See previous page.
TIMER
Sets a timer alarm up 60.
Rear View of the Unit
<Models PVQ-1312W/PVQ-1312B unit shown>
FF/ REC TIMER/FM
FF/ REC TIMER/FM
PROG TIMERPROG TIMER
REC ON TIMER
REC ON TIMER
PHONES Jack
Connect an
earphone or
headphones.
PROG TIMER
Indicator
Lights when the
unit is set for
Timer Recording.
ON TIMER
Indicator
Lights when the
On-Timer is set.
REC Indicator
Lights during
recording.
Remote Sensor
See above.See
previous page.
AC Power Plug
When plugged into
an AC outlet, the
unit consumes 2.5 W
of electric power in
OFF condition.
Easy Grip-Handle
Use when transporting the unit.
VHF/UHF
VHF/UHF Antenna
In from your Antenna or Cable.
Input Terminal
Page 8.
7
Page 8

Connections/ Initial Setup (Ready to Play)
Please make all cable or antenna connections before plugging into
the AC outlet. Plugging the unit power cord into an AC outlet starts
How to Connect
auto channel and clock set.
Connecting
For ANT./Cable
Connect the cable from
Antenna/Cable to the VHF/UHF
terminal on the unit.
For DSS/Cable Box
Connect the OUT jack on your
cable box to the VHF/UHF
terminal on the unit with a RF
cable.
WARNING:
Overtightening "Nut type" RF coaxial cables
may damage jacks. Finger tighten only.
Initial Setup (Ready to Play)
Plug the unit power cord into an
1
AC wall outlet.
Press Power* on the remote or
unit. The unit comes on and auto
2
channel and clock set starts.
UNIT
3
IN from
ANT./CABLE
VHF/UHF
VHF/UHF
VHF/UHF
VHF/UHF
VHF/UHF
Cable TV
Converter Box
IN from
ANT./CABLE
Settings are made
automatically. When setup is
done, this screen appears.
2 / 6 / 2002
WED 12 : 00PM
MPL
DST : O
ETED
SETT I NG : CH 1
A
UTO CLOCK SET
CO
N
0
CH AUTO SET PROCEEDING
• If you use a cable box, turn it on and set it to the
Public Broadcasting Service (PBS) channel in
your time zone. If you use a DSS reciever, it
must be turned off.
AUTO CLOCK SET
PROCEEDING
CANCEL : PRESS STOP KEY
8
For assistance, please call : 1-800-211-PANA(7262) or send e-mail to : consumerproducts@panasonic.com
If AUTO CLOCK SET IS
INCOMPLETE screen
appears, set the clock using
MANUAL CLOCK SET
procedure on next page.
UTO CLOCK SET
A
I S I NCO
MPL
ETE
PLEASE SET CLOCK BY
R
ESS I NG ACT I ON KEY
P
Page 9

Manual Clock Set
If AUTO CLOCK SET was incomplete, manually
set the clock as follows.
Press ACTION on the Remote to
display SET CLOCK Menu screen.
1
CLOC
K
SET
1 / /
SELE CT MONTH
SELECT :
SET :
END
:
ACT I ON
DST
:
: ON
Reset all unit Memory Functions
When moving unit to a new location, or if a
mistake was made in the Initial Setup section.
• Make sure a tape is not inserted in the unit.
<Model PVQ-2012 unit shown>
POWER VOL CH
STOP/EJECT REW/
STOP/EJECT REW/
FF/ REC TIMER/FM
FF/ REC TIMER/FM
PLAY/REPEAT
PLAY/REPEAT
PROG TIMERPROG TIMER
REC ON TIMER
REC ON TIMER
ACTION
ACTION
POWER VOL CH
VIDEO IN AUDIO IN
VIDEO IN AUDIO IN
Initial Setup
Press
and press to set. In the same
2
manner, select and set the date,
to select the month
year, time, and DST. (Daylight
Saving Time)
CLOC
K
SET
2 / 6/
SELE CT
SET :
END
2002
COMPLETED
:
WED
ACT I ON
Press ACTION twice to start
CLOCK and exit.
3
POWER
ACTION
:
12
00
PM
DST : O
N
SELECT/SET
:CH UP
:CH DOWN
:VOL UP
:VOL DOWN
Turn the unit
1
Power on.
Press and hold both PLAY and
2
FF on the unit for more than 5
seconds.
• The power will shut off.
• Please ignore “NO CASSETTE” warning.
Do “Initial Setup” on page 8.
3
Note to CABLE System Installer
This reminder is provided to call the
CABLE (Cable TV) System Installers
attention to Article 820-40 of the NEC
that provides guidelines for proper
grounding and, in particular, specifies
that the cable ground shall be connected to the grounding system of the
building, as close to the point of cable
entry as practical.
9
Page 10

Reset Language, Channels, Clock,
M A I N MENU
1
SELECT :
SET : ACT I ON
VCR
T V
CLOC
K
C H
Language
2
1) Press to
select language
icon.
M A I N MENU
T V
VCR
T V
CLOC
C H
SELECT :
SET : ACT I ON
2) Press ACTION
repeatedly.
MENU
PR I NC I PAL
T V
VCR
T V
CANAL
ELEG I R :
F I JAR :
SEL. :
REGLER : ACT I O
SELECT :
SET : ACT I ON
3) Press to
select “EXIT.”
Press ACTION to
exit.
REL OJ SAL I R
ACT I O
For Spanish
MEN
T
ELE
MAGNET .
HORLOGECANAL
For French
M A I N MENU
T V
VCR
T V
CLOC
C H
For English
LANGUAGE
LANGUAGE
K
N
U
N
LANGUAGE
K
EX I T
EX I T
H
O L A
IDIOMA
BONJOUR
GU
LAN
SORT I E
H
ELL
EX I T
Press ACTION
to display MAIN MENU.
Channels
1) Press to
select “CH.”
M A I N MENU
VCR
T
V
CLOC
C H
SELECT :
SET : ACT I ON
2) Press ACTION.
SET UP CHA
ANT
ENNA
: CABLE
A
UTO SE
T
CHA
NNEL
CAPT I
W
E
O
EAK S I GNAL D I
SELECT :
SET
END
:
: ACT I ON
3) Press to select
“ANTENNA,” then
press to set your
antenna system
(“TV” or “CABLE”).
4) Press to select
“AUTO SET,” then
press .
• After Channel Auto Set is
finished, Clock Auto Set
will be performed. (If clock is
set manually, Clock Auto
Set will not be performed.)
LANGUAGE
K
NNE
ON
SPLAY : OFF
EX I T
L
Clock
1) Press
select “CLOCK.”
M A I N MENU
T V
C H
C H
SELECT :
SET : ACT I ON
2) Press ACTION.
SET CLOCK
AUTO CLOCK SET
MANU
AL
T I M
E ZONE AD
SELECT :
SET
:
END
: ACT I ON
(“TIME ZONE ADJUST”
appears only when auto
clock is set.)
3)Press
“MANUAL” or
“AUTO CLOCK
SET” and press
• For Auto Clock Set,
select “AUTO CLOCK
SET,” then press .
SET
2 / 6/
20022002
SELE CT
HOUR
SELECT :
SET :
END
:
ACT I ON
4)Press and
press to select
and set the month,
date, year, time,
and DST (Daylight
Saving Time).
5) Press ACTION
twice to start the
clock and exit this
mode.
VCR
CLOC
CLOC
WEDWED
LANGUAGE
K
EX I T
JUS
T :
to select
K
:
1212
0000
DST
: ON
to
0
.
PM
10
For assistance, please call : 1-800-211-PANA(7262) or send e-mail to : consumerproducts@panasonic.com
Page 11

Time Zone Adjust
POWER
NUMBER Keys
Time Zone Adjust
(Only when Auto Clock is set.)
1) Press to
select “CLOCK.”
M A I N MENU
VCR
CLOC
LANGUAGE
K
JUS
JUS
EX I T
T :
T :
0
+1
T V
C H
C H
SELECT :
SET : ACT I ON
2) Press ACTION.
SET CLOCK
AUTO CLOCK SET
MANU
AL
T I M
E ZONE AD
SELECT :
SET
:
END
: ACT I ON
3) Press to
select TIME ZONE
ADJUST and
press or to
subtract or add
hour(s) as
necessary.
SET CLOCK
AUTO CLOCK SET
MANU
AL
T I M
E ZONE AD
SELECT :
SET
:
END
: ACT I ON
ACTION
ACTION key on
the unit
On Unit
You can operate the
menu screen using
unit buttons. To display
the menu, press STOP/
EJECT and REW
together with no tape
inserted. To exit the
menu, repeat above
with or without tape
inserted until normal
screen appears.
ADD/DLT
SELECT/SET
:CH UP
:CH DOWN
:VOL UP
:VOL DOWN
Using keys
VOL CH
On Remote
On Unit
: CH UP
: CH DOWN
: VOLUME UP
: VOLUME DO WN
Whenever the menu or
program screen is displayed,
CHANNEL UP/DOWN function
as
and VOLUME UP/
DOWN function as
only.
Basic Operation
4)Press ACTION
twice to exit.
Add or Delete a Channel
To add channel:
Select channel with
number keys and
press ADD/DLT.
C
HANNEL
08 ADDED
To delete channel:
Select channel with
CH
and press ADD/DLT.
or number keys
C
HANNEL
08 DELE T
ED
11
Page 12

Playback a Tape
Record On a Tape
Ready Check List
All connections are made.
Your unit is plugged in.
Insert a cassette.
1
Record
tab
To prevent tape jam,
remove loose or peeling
labels from tapes.
Press PLAY.
• Playback begins if cassette has no record
2
tab.
■ Forward/Reverse scene search
=> Press FF or REW
=> PRESS again or PLAY to release.
■ Still (Freeze) picture
=> Press PAUSE/SLOW
=> Press PLAY to release.
■ Slow Motion picture
=> Hold down PAUSE/SLOW in
Still mode
=> Press PLAY to release.
■ Frame by Frame picture
=> Press PAUSE/SLOW in Still mode
=> Press PLAY to release.
Notes
• These features work best in SP or SLP mode.
• After the unit is in Still or Slow mode for 3
minutes, it will switch to Stop mode automatically
to protect the tape and the video head.
• The unit power comes
on automatically.
Insert a cassette with record tab.
• The unit power comes on automatically.
1
Press CH or number keys
to Select Channel.
2
• For “LINE” input, see bottom of next page.
Press SPEED to select recording
speed (see page 4).
3
SP = Standard Play
LP = Long Play
SLP = Super Long Play
• Selected speed is displayed.
Press REC to start recording.
• To edit out unwanted portions, press
4
■ Stop => Press STOP
■ One Touch Recording (OTR)
• After the unit has been in Rec Pause mode for
• The remaining recording time of an OTR can be
PAUSE/SLOW to pause and resume
recording.
• You cannot view another channel during
recording.
Press REC repeatedly
to set the recording
length (30 min - 4 hours).
• The unit stops recording at a preset time.
• PROG TIMER indicator lights on the unit.
Notes
5 minutes, it will stop automatically to protect
the tape and the video head.
displayed by pressing DISPLAY.
Normal Rec
0:30 1:00
1:302:003:004:00
■ Stop => Press STOP
■ Rewind tape => Press REW in Stop mode
■ Fast forward tape =>
■ Eject tape => Press EJECT on the remote or
STOP/EJECT on the unit
You can operate on the unit
■ Press to stop and/or eject tape.
12
For assistance, please call : 1-800-211-PANA(7262) or send e-mail to : consumerproducts@panasonic.com
Press FF in Stop mode
REC Indicator
Page 13

Copy Your Tapes (Dubbing)
1
2
3
125LINE
(CABLE)
69
(TV)
or
Connections you’ll need to make.
Playing (Source) VCR
AUDIO
OUT
IN
VIDEO
IN FROM ANT.
OUT TO TV
Playback (Source)
Insert pre-
1
Our Vacation
recorded tape.
2
Press PLAY then
3
(Perform operation of steps 4 and 5 on both units at same time.)
PAUSE at starting
point to put in
Standby mode.
Recording (Editing) unit
VIDEO IN
AUDIO IN
AUDIO IN
Recording (Editing) unit
Insert blank tape with
record tab.
• Dubbing tapes protected
with Copy Guard will have
poor quality results.
Select “LINE” mode.
See “Selecting Input Mode” below.
Press REC, then
PAUSE/SLOW
immediately to put in
Standby mode.
Basic Operation
Press PLAY
4
5
Caution
• Unauthorized exchanging
and/or copying of copyrighted
recordings may be copyright
infringement.
STOP
to start dubbing.
Press STOP
to stop dubbing.
Press PAUSE/SLOW
to start dubbing.
Press STOP
to stop dubbing.
Selecting Input Mode
Method 1:
Press CH . The display will change as follows.
Method 2:
a Press ACTION for MAIN MENU.
b Press to select “TV”, then press
ACTION for SET UP TV screen.
c Press to select “INPUT SELECT,” and
then press to select “TUNER” or “LINE.”
d Press ACTION twice to exit this mode.
13
Page 14

TV Operation
Press POWER on the remote or unit.
1
Use CH or
0 8
number keys to
A
2
3
24
NIGHT (NITE) Mode
Color and picture intensity levels are adjusted so the screen
is easier on your eyes during night time use.
N I GHT
BC
select a channel.
Press VOL + or VOL
- to adjust volume.
Press NITE to set
NIGHT mode.
• NIGHT mode may be
selected when watching TV
or playing a tape.
Ready Check List
All connections are made.
Your unit is plugged in.
<Model PVQ-2012 unit shown>
VOL + / VOL
VIDEO IN AUDIO IN
POWER
POWER VOL CH
CH
-
PLAY/
REPEAT
STOP/EJECT REW/
FF/ REC TIMER/FM
PLAY/REPEAT
ACTION
PROG TIMER
REC ON TIMER
PHONES
Jack
Press NITE to cancel.
• Previous settings are restored.
• NIGHT mode is canceled
when power is turned off or
power failure occurs.
■ Using the 100 key
When selecting CABLE channels 100 to 125 with the number keys, first press the 100
key, and then enter the remaining two digits.
■ Rapid Tune
Press R-TUNE to display the last channel you were watching.
■ Audio Mute
Press MUTE to instantly mute the sound. Press again to restore the previous sound level.
■ Phones
Connect an earphone (not supplied) or headphones (not supplied) to the Phones Jack.
14
For assistance, please call : 1-800-211-PANA(7262) or send e-mail to : consumerproducts@panasonic.com
Page 15

Picture Adjustment
Press ACTION to display MAIN MENU.
1
POWER
100 Key
RAPID
TUNE
MUTE
VOL UP/
DOWN
ACTION
NITE
NUMBER
Keys
CH UP/
DOWN
2
3
4
M A I N MENU
VCR
T V
CLOC
C H
SELECT :
SET : ACT I ON
SET
PT I ON
SELECT
CT :
:
: ACT I ON
COLOR
T I NT
B
R I GHTNESS
P I CTUR
E
SHARPNESS
M
AL
NOR
SELECT :
ADJUST :
END
: ACT I ON
COLOR
T I NT
B
R I GHTNESS
P I CTUR
E
SHARPNESS
M
AL
NOR
SELECT :
SET
:
END
: ACT I ON
UP TV
LOCK
CA
I NPUT
V I DEO ADJUST
SELE
SET
END
LANGUAGE
K
: TUNER
1)Press to
select “TV.”
2)Press ACTION to
EX I T
display SET UP TV
screen.
1)Press to select
VIDEO ADJUST.
2)Press to display
screen.
1)Press to select
an adjustment item.
(See below left.)
2)Press to
adjust.
To Reset Picture
Controls.
Press and to
select and set
“NORMAL.”
All controls return to
their factory settings.
TV Operation
Picture Adjustment
■■
■ COLOR Control
■■
Adjust color intensity.
■■
■ TINT Control
■■
Adjust for natural flesh tones.
■■
■ BRIGHTNESS Control
■■
Adjust picture brightness.
■ ■
■ PICTURE Control
■ ■
Adjust picture intensity by
adjusting both contrast and
color level in the proper
balance.
■ ■
■ SHARPNESS Control
■ ■
Adjust picture sharpness.
Press ACTION three times to exit.
5
15
Page 16

TV Timer Features
ON-TIMER with Alarm
This unit can be set to automatically power on in one of 2
modes (TV, Playback).
You can also combine the On-Timer with a one minute alarm
that gradually increases in volume.
Press PROG to display SET PROGRAM
screen.
1
SET PROGRAM
2
3
4
T I MER PR
OGRAMMING
ON TIMER
SELECT :
SET :
END
ALARM : O
SELE CT HOU
SELECT :
SET :
END
• ON-TIMER mode
selection order
CH02CH
CH01
ALARM : O
SELE CT
C
ANCEL : ADD / DLT
SELECT :
SET :
END
: PROG
O
N T I MER
6
:--
AM CH
N
R
: PROG
03
PLAY
O
N T I MER
6:00AM CH08
N
ALARM
: PROG
ABC
--
When “ON” is selected,
an alarm will gradually increase in volume for one
minute or until canceled by pressing any button
(including VOL + -).
To Make Corrections,
use
and to move back and correct.
1)Press to select
“ON TIMER.”
2)Press to display
ON TIMER screen.
1)Press to select
desired settings.
2)Press to set the
ON-TIMER TIME or
ON-TIMER mode.
• Make sure a tape is
inserted if Playback
mode is selected.
CH125
Press to select
ALARM “ON” or
“OFF.”
Ready Check List
The clock is set to correct time.
<Model PVQ-2012 unit shown>
TIMER
CH
ON TIMER
indicator
Press PROG to set ON TIMER.
• “ON TIMER SET” is displayed.
5
• ON TIMER Indicator lights on the unit.
To Cancel ON-TIMER set,
Repeat steps 1 and 2. Then, press ADD/DLT to
clear the time in step 3. Now, press PROG to end.
“ON TIMER END” briefly appears on-screen.
16
For assistance, please call : 1-800-211-PANA(7262) or send e-mail to : consumerproducts@panasonic.com
Note
• If no button on the remote or unit
(including a button used to turn off
the alarm) is pressed within 60
minutes after unit turns itself on,
it will turn itself back off.
Page 17

Sleep Timer
This unit can be set for auto power off.
Press SLEEP repeatedly
SLEEP TIMER 30
to set SLEEP TIMER.
• Pressing DISPLAY with
sleep timer set displays
remaining time.
SLEEP TIMER 60
SLEEP TIMER 90
Press SLEEP repeatedly
until “SLEEP TIMER 00”
appears to cancel.
SLEEP TIMER 00
Instant Alarm
You can set a timer alarm up to 60 min. Useful when you are
cooking, etc.
Press TIMER on the unit to display the
instant alarm CANCEL/SET screen.
1
TV Operation
1:00
(one minute)
2:00
3:00
10:00
15:00
20:00
25:00
30:00
40:00
50:00
60:00 (Max)
9:00
one-minute
increase
until 10:00
five-minute
increase
until 30:00
ten-minute
increase
until 60:00
Note
• While timer function is in progress,
you can change channels on the unit
with CH while “CANCEL/SET”
screen is not displayed.
Press CH on the
unit with CANCEL/SET
screen displayed to set
2
5 : 20
PM
alarm. (Time changes in
/
CANCEL : ADD
SET : CH
• Pressing TIMER repeatedly on the unit
will change display as follows.
To cancel, press TIMER then press ADD/DLT on
the remote while CANCEL/SET screen is displayed.
To increase timer in progress, repeat step 2. Time
will be rounded up to next 1, 5, or 10 minute interval.
(See chart left.)
<Example>
• If current time remaining is 12:15, countdown will
restart from 15:00.
• If current time remaining is 9:15, countdown will
restart from 10:00.
DLT 02 :
KEY ON UN I T
Remaining Time
the order shown left.)
00
Alarm will sound at 0: 00.
Press any button to stop
3
• The volume of the alarm gradually increases
for one minute and then continues to beep
until any button is pressed.
17
Page 18

Closed Caption System
Closed Caption is ...
This multi-use system not only allows the hearing impaired to enjoy selected programs,
but also makes useful information from TV stations available to everyone.
Closed Caption Mode Feature
Press ACTION
to display MAIN MENU.
1
2
3
4
M A I N MENU
T V
C H
SELECT :
SET : ACT I ON
SET
LOCK
PT I ON
CA
I NPUT
SELECT
V I DEO ADJUST
CT :
SELE
SET
:
END
: ACT I ON
CAPT I ON
CAPT I ON MODE
CC ON MUTE
SELECT :
SET :
END
: ACT I ON
OFF
TEXT C2
CAP C2
VCR
CLOC
K
UP TV
: TUNER
:
CAP C1
LANGUAGE
:
1)Press to
select “TV.”
2)Press ACTION to
EX I T
display SET UP
TV screen.
1)Press to
select “CAPTION”.
2)Press to display
CAPTION screen.
1)Press to
CAP C1
CAP C1
select CAPTION
MODE.
2)Press
repeatedly to
select mode.
(See left.)
TEXT C1
Closed Caption Mode
Selections
Caption Mode: CAP C1 or C2
A narration of selected TV
programs is displayed.
Check TV program listings for
CC(Closed Caption)
broadcasts.
Caption Mode: TEXT C1 or
C2
The lower half of the screen
will be blocked out. When the
TV station broadcasts
information, such as program
listings, it will appear in this
space.
Caption Mode: OFF
Closed Caption / Text narration
will not be displayed.
NOTE :
The closed caption or text
signal may be broadcast over
C1, C2, or both. Also, text
contents can vary so you may
wish to try different settings.
Press ACTION three times to return
to the normal screen.
5
Recording and Playing Back a Closed Caption/Text Program
Record: Record normally.
Playback: Start playback. Do above steps to select desired caption mode.
18
Closed Caption/ Text signal, if present, is recorded automatically.
For assistance, please call : 1-800-211-PANA(7262) or send e-mail to : consumerproducts@panasonic.com
Page 19

Caption On Mute Feature
Closed Caption narration, if available, is displayed
when MUTE button is pressed for silence.
Press ACTION to display MAIN MENU.
1
2
3
4
5
M A I N MENU
VCR
T V
CLOC
C H
SELECT :
SET : ACT I ON
SET
LOCK
PT I ON
CA
I NPUT
SELECT
V I DEO ADJUST
CT :
SELE
SET
:
END
: ACT I ON
CAPT I ON
CAPT I ON MODE
CC ON MUTE
SELECT :
SET :
END
: ACT I ON
NO
CAP C2
LANGUAGE
K
UP TV
: TUNER
:
:
CAP C1
1)Press
select “TV.”
2)Press ACTION to
EX I T
display SET UP TV
screen.
1)Press
select “CAPTION”.
2)Press to display
CAPTION screen.
1)Press
OFF
CAP C1
select CAPTION
MODE.
2)Press
repeatedly to
select “OFF.”
1)Press
CC ON MUTE.
2)Press repeatedly
to select desired
mode.
• Each press of will
change the display as
shown left.
• The caption may be
broadcast over CAP C1
or C2.
to
TV Operation
to
to
to select
Press ACTION three times to return to
the normal screen.
6
Press MUTE to mute the sound and
display closed captioning.
7
• To cancel, press MUTE again.
19
Page 20

20
For assistance, please call : 1-800-211-PANA(7262) or send e-mail to : consumerproducts@panasonic.com
Page 21

Cancel a Timer Recording:
(Recording is in progress)
Hold down STOP for a few seconds
to cancel the Timer Recording.
• Any future daily or weekly recordings
will be performed as programmed.
ADD/DLT
SELECT/SET
:CH UP
:CH DOWN
:VOL UP
:VOL DOWN
PROG
STOP
Review, Replace or Clear Program
Contents : (Recording is not in progress)
Repeat steps 1 and 2 on page 20.
1
START
STOP CH
9 : 00p 12 : 00a 08
8 10 : 00a 12 : 00p
10 8 : 00p 9 : 00p 10
SU
9 : 00p 10 : 00p
CANCEL : ADD / DLT
SELECT
1 - 8
E
NTER
:
END
: PROG / ACT I ON
2
P DT
1 day
2
3
4
To Replace program...
3
DATE
S
TART
8 SAT 9:00
TODA
Y
----------------------------------------------
SELE CT
START DAT
SELECT :
SET
:
END
: PROG /
To Clear program...
P DT START
1 -- -- : --
2
3
4
STOP CH
-- : -- --
8 10 : 00p 12 : 00a
10 8 : 00p 9 : 00p 10
SU
9 : 00p 10 : 00p
SELECT
1 - 8
E
NTER
:
END
: PROG / ACT I ON
125
L
:
S
TOP
P 12: 00A
E
ACT I ON
125
L
:
S
PD
Press to select
SP
SP
the desired program.
SP
LP
1) Press to display.
CH
2) Press to select
08
ABC
and press or
SP
to set new program
contents.
3) Press PROG (or
ACTION).
S
PD
Press ADD/DLT.
--
SP
SP
LP
Timer Operation
Press PROG twice (or ACTION)
to exit this mode.
4
Notes
• 2 minutes before Timer recording is performed,
“PLEASE PREPARE FOR TIMER REC” appears and/
or the PROG TIMER Indicator flashes. Be sure a
cassette with record tab is loaded and the unit is in
Stop mode.
• If the start times of two programs overlap, the lower
numbered program will have priority.
• If the start time for a Timer Recording comes up during
a normal recording or One Touch Recording (page 12),
the Timer Recording will not be performed.
• If there is a power interruption of more than one minute,
the recording may not be performed or continued.
• If “INCOMPLETE” appears after all items have been
set, check all entries and make necessary corrections.
21
Page 22

Tape Operation
Search System is ...
Each time a recording is made, an invisible index mark is placed on the tape.
When timer recordings are made, program index and information are also included.
These index marks can be used to access or scan recordings.
Index Search
Go directly to the desired recording.
I NDEX SEARCH
ENTER I NDEX NUMBER : 1
1
US I
NG 1- 9
KEYS
FOR
W
2
ARD SEARCH : FF
REVERSE SEARCH
NEXT
:
I T :
EX
I NDEX
SEARCH
STOP
S
EARCH 3
I NDEX
S
I NDEX SEARCH
:
REW
EARCH
3
FOR
W
ARD SEARCH : FF
REVERSE SEARCH
■■
■ To calculate the Index Number
■■
Example 1:
To go to rec. 2 from rec. 4, enter 3 and press REW.
:
REW
Press SEARCH in
Playback or Stop
mode to display
INDEX SEARCH
screen.
Press number
keys to select the
recording number.
• To calculate number,
see below.
Press FF or REW
to start search.
• Play begins at search
end. To search
forward or back 1
index, press FF or
REW while screen left
in displayed (10
seconds).
Program End Search
Locates end point of recording for continuity.
Press SEARCH twice in Playback
or Stop mode to display
1
PROGRAM END SEARCH screen
.
PROGRAM END SEARCH
2
SEARCH START : FF
EX
I T :
SEARCH
Example of Program End Search operation.
Fig.1
Program 1
Press SEARCH button
Fig.2
Program 1
Press SEARCH button
Fig.3
If search exceeds a few seconds in BLANK area.
Program 1
End Point
PLAYBACK DIRECTION
FF
BLANK
Press SEARCH button
INDEX
INDEX
FF
BLANK
FF
Press FF to
start search.
Program 2 or BLANK
End Point
Program 2
INDEX
BLANK
End Point
Program 2
6157234
Example 2:
To go to rec. 6 from rec. 2, enter 4 and press FF.
17534 62
NOTE: indicates start points of each recording.
Notes
• Make each entry within 10 seconds, or the Index
Search mode will be canceled.
• If Index Search is started very close to an index
mark, that index mark may not be counted in the
search.
22
For assistance, please call : 1-800-211-PANA(7262) or send e-mail to : consumerproducts@panasonic.com
Upon locating end point...
The unit searches slightly past end point,
reverse searches, and plays the last few
seconds of the program, then stops.
Press SEARCH button
Notes
• If Program End Search is started very
close to an index mark, that mark may be
skipped over.
• To cancel, press PLAY or STOP.
Page 23

<Model PVQ-2012 unit shown>
POWER VOL CH
STOP/EJECT REW/
FF/ REC TIMER/FM
PLAY/REPEAT
PROG TIMER
VIDEO IN AUDIO IN
REW
REC ON TIMER
ACTION
FF
Auto Operation Functions
■■
■ Auto Shut Off
■■
No broadcast signal in TV, blank tape is
Played for 5 minutes
=> Power turns off
• This feature is canceled if any button is
pressed during above mode.
■■
■ Auto Playback
■■
Insert a tape in Power off mode
=> Power turns on
• Playback begins if tape has no record tab.
■■
■ Auto Rewind
■■
Tape reaches its end
=> Rewind => Stop
■■
■ Playback Auto Eject
■■
(Repeat Play is “OFF”)
Tape with no record tab reaches its end
Rewind => Stop => Eject
Tape Position Display
To find out present tape position and amount of tape
remaining.
Tape position cannot be detected for
C-Cassettes, tapes under 30 minutes, and some
other tapes.
Press TAPE POSITION to detect
current tape position.
1
DETECT I NG TAPE POS I T I ON
• “DETECTING TAPE POSITION”
is displayed only when a
cassette is first inserted and it
takes several seconds for
correct tape position to appear.
• The present tape position
indication and amount of tape
remaining (according to tape
speed) is displayed.
• Tape remaining time display may
not be precise.
Press TAPE POSITION (or wait 5
seconds) to return to normal screen.
2
Note
• This function cannot display exact amount of
tape remaining for tapes 30 minutes or less, or
for tapes over 120 minutes in length.
Advanced Operation
23
Page 24

Tape Operation (continued)
Zero Search
To quickly return to a specific tape counter location.
Press DISPLAY during playback to
display the Counter.
1
Press COUNTER
0 : 00 : 00
2
BEG I N END
Continue playback, rewind, or
fast forward.
3
Press STOP.
RESET at the
desired position to
reset to “0:00:00.”
4
Press CM/ZERO
1 : 23 : 45
5
BEG I N END
• Unit goes into FF or REW mode and stops at
the last point the Counter was set to 0:00:00.
Note
• If a blank portion exists on the tape, and
depending on the position of the mark, the
mark display may be out of position.
in stop mode to
start ZERO
SEARCH.
: Present position mark
•
: Zero position mark
Repeat Play
Set to see a recording over and over.
Press ACTION to display
MAIN MENU.
1
1)Press
2
3
Press ACTION twice
to end setup.
4
Notes
• Playback repeats when tape end is reached or
unrecorded portion over 30 seconds is detected.
• During playback, you may also press PLAY/
REPEAT repeatedly on the unit to select
REPEAT “ON” or “OFF.”
to select “VCR.”
2)Press
ACTION to
display SET
UP VCR
screen.
1)Press to
select
“REPEAT
PLAY.”
2)Press to
set REPEAT
PLAY “ON” or
“OFF.”
Commercial Skip
By pressing the CM/ZERO button in Playback mode
you can skip over 1 to 3 minutes of recorded tape in
just a few seconds.
Press CM/ZERO repeatedly to
select skip time in Play mode.
1
• No indication appears.
24
For assistance, please call : 1-800-211-PANA(7262) or send e-mail to : consumerproducts@panasonic.com
Page 25

Special VCR Features
Weak Signal Display ON/OFF
When “ON” is selected, the picture is displayed even
when a broadcast signal is weak or non-existent.
Press ACTION to display MAIN
MENU.
1
2
3
Notes
• “ON” =Picture is displayed regardless of signal
• If unit is connected to equipment which has blue
condition, and may not always be clearly
visible.
“OFF” =Screen turns solid blue when signal is
absent or weak.
back feature, selecting “ON” will have no effect on
the other equipment.
1)Press
to select “CH.”
2)Press ACTION
to display SET
UP CHANNEL
screen.
1)Press to
select WEAK
SIGNAL
DISPLAY .
2)Press to set
“ON” or “OFF.”
<Model PVQ-2012 unit shown>
REC
Press ACTION twice
to return to the normal screen.
4
VCR Lock
All operations are prohibited except Timer recording
and tape eject. Useful for families with small children.
In stop mode, hold
down REC on the unit
without a cassette
inserted for 7 seconds
to turn “ON.” Please
ignore NO CASSETTE
warning.
Repeat above with or
without cassette to
turn “OFF.”
• VCR Lock is canceled automatically
after about 24 hours if clock is set.
• “Auto power on” is not prohibited when
VCR Lock is activated.
Advanced Operation
25
Page 26

Special VCR Features (continued)
Channel Caption is ...
Station names, e.g. ABC, TNN, etc. are set so they
will appear when a channel is selected. Choose 24
preset names.
Preset Caption
Press ACTION to display MAIN MENU.
1
2
M A I N MENU
VCR
T V
CLOC
C H
SELECT :
SET : ACT I ON
LANGUAGE
K
1) Press
to select “CH.”
2)Press ACTION
EX I T
to display SET
UP CHANNEL
screen.
1)Press to
L
select CHANNEL
CAPTION.
2)Press to
display screen.
1)Press to
- -
-
-
-
-
-
-
select a station.
2)Press to
move cursor to
the right.
3)Press to
6 2
2
1
5
2
1
2
3
select channel
number.
4)Press to set
preset captions.
• Repeat step 4 until the
Caption List is complete.
3
4
SET UP CHA
ANT
ENNA
: CABLE
A
UTO SE
T
CHA
NNEL
CAPT I
W
EAK S I GNAL D I
SELECT :
SET
:
END
: ACT I ON
PRESET CAPT I ON
ABC
- -
- -
CBS
-
-
FOX
-
-
NBC
-
-
SELECT :
SET
:
END
: ACT I ON
PRESET CAPT I ON
TNT
4 2
UPN
- -
W
B
3 5
DSC
- -
CLEA
R : ADD / DLT KEY
SELE
CT :
SET
:
END
: ACT I ON
-
-
-
-
-
-
NNE
ON
SPLAY : OFF
PB
S
C
NN
ESPN
H
BO
CBC
C
TV
T
S
N
GLOB
To Make Corrections
Press , then to select channel number.
Press to change, or ADD/DLT to delete.
Press ACTION four times to end setup.
5
ACTION
NUMBER Keys
ADD/DLT
SELECT/SET
:CH UP
:CH DOWN
:VOL UP
:VOL DOWN
26
For assistance, please call : 1-800-211-PANA(7262) or send e-mail to : consumerproducts@panasonic.com
Page 27

V-Chip Control Feature
Process of V-Chip Control
Feature
Enter Code
Setup
Blocking
V-Chip Control Feature is...
This unit has a built-in V-Chip Control which allows
you to block unwanted TV usage based on US
MOVIES and US TV PROGRAMS Ratings.
Enter Secret Code
A 4-digit code must be entered to view a blocked program or
change rating settings.
Press ACTION to display MAIN MENU.
1
M A I N MENU
2
3
4
T V
C H
SELECT :
SET : ACT I ON
LOCK
PT I ON
CA
I NPUT
SELECT
V I DEO ADJUST
SELE
CT :
SET
:
: ACT I ON
END
ENTER 4-D I G I T
ENTER : 0
: ACT I ON
END
VCR
CLOC
SET
UP TV
LOCK
----
-
9
K
: TUNER
LANGUAGE
To Make Corrections
Press
repeatedly to
move the cursor. Press
number keys to make
the correction.
LOCK
CONF I RM 4-D I G I T CODE
5
CHANGE
CONT
END
: ACT I ON
****
RECOGN I ZED
****
CODE : ADD / DLT
I
NUE :
1)Press
select “TV.”
2)Press ACTION to
EX I T
display SET UP TV
screen.
1)Press to select
LOCK.
2)Press to display
screen.
1)Press number
CODE
keys to enter your
secret code.
2)Enter same code
again for confirmation.
• Step 2) not necessary
when changing rating
or secret code.
• Take care that you are
not observed entering
the secret code.
Press to display US
Ratings menu
(see page 28).
Or
Press ACTION
three times to exit.
to
Advanced Operation
Changing your secret code
• You will need your current
code. Do steps 1 ~ 4. In step
5, press ADD/DLT to clear
current code. Repeat steps 4
and 5 to enter new code.
Notes
• DO NOT forget your secret code.
• Once ratings are set, restricted tapes
or programs cannot be accessed
unless the secret code is entered.
27
Page 28

Enter Code
Setup US MOVIES Ratings
1)Press to
1
Note
• “NEXT PAGE” displays CANADIAN V-Chip
setting menu. Not necessary except when
viewing Canadian tapes or broadcasts.
2
3
NR (Not Rated) PROGRAMS
Some movies, such as old movies or
foreign movies usually have no ratings.
select US
MOVIES.
2)Press to set
1)Press to
select
CHANGE
SETTINGS.
2)Press to
display screen.
1)Press
to select
VIEW NR
PROGRAMS?.
2)Press to set
“YES” or “NO.”
Setup US TV PROGRAMS Ratings
1)Press to
1
Note
• “NEXT PAGE” displays CANADIAN V-Chip setting
menu. Not necessary except when viewing
Canadian tapes or broadcasts.
2
3
NR (Not Rated) PROGRAMS
Some TV shows, such as news, sports,
weather, bulletins, emergency
information usually have no ratings.
select US TV
PROGRAMS.
2)Press to set
“ON” or “OFF.”
1)Press to
select
CHANGE
SETTINGS.
2)h6
1)Press
to select
VIEW NR
PROGRAMS?.
2)Press to set
“YES” or “NO.”
Press to
4
Press ACTION to redisplay LOCK
menu and continue with US TV
5
PROGRAMS Ratings Setup (this
page).
Or, press ACTION four times to exit.
28
For assistance, please call : 1-800-211-PANA(7262) or send e-mail to : consumerproducts@panasonic.com
select and to
set ratings to be
blocked.
(See ratings
chart next page.)
Press ACTION four times
to exit this mode.
5
Page 29

Process of V-Chip Control Feature
Enter Code
Setup
Blocking
Blocking Message
<When V-Chip Control is activated>
• If a program or
ABC
movie exceeds the
PROGRAM
RAT I NG
I NG : PG-1
RAT
ACCESS CODE
ENTER :
EXCEEDED
3
0-9
To View a Blocked Program / Movie
[Temporarily Deactivate V-Chip Control]
Enter your secret code (ACCESS CODE)
in the Blocking Message screen.
• V-Chip Control is reactivated when power is
turned off or power failure occurs.
[Deactivate V-Chip Control]
Enter your secret code (steps 1-4 page 27).
Then, set US MOVIES and/or US TV
PROGRAMS to “OFF” using and
keys. (Ratings set on page 28 is retained
and will be in effect when V-Chip Control is
activated again.)
ratings you have
set, a message will
----
appear on a black
background and
sound is muted.
US MOVIES RATINGS
G
GENERAL AUDIENCE:
All ages admitted.
PARENTAL GUIDANCE:
PG
Some material may not be suitable for
PG-13
NC-17
children.
PARENTS CAUTIONED:
Some material may be inappropriate
for children under 13.
R
RESTRICTED:
Children under 17 must be
accompanied by a parent or adult.
OVER AGE 17 ONLY:
No one 17 and under admitted.
X
ADULTS ONLY:
US TV PROGRAMS RATINGS:Chart 1
TV-Y
FOR ALL CHILDREN:
Content specifically geared to young
viewers ages 2-6.
TV-Y7
FOR AGE 7 AND OLDER:
May contain mild physical or comedic
violence which may frighten children
under 7.
TV-G
GENERAL AUDIENCE:
Contains little or no violence, strong
language, or sexual dialogue or
TV-PG
TV-MA
situations.
PARENTAL GUIDANCE:
May contain infrequent coarse
language, limited violence, some
suggestive sexual dialogue and
situations.
TV-14
PARENTS CAUTIONED:
May contain sophisticated themes,
sexual situations, strong language, and
more intense violence.
MATURE AUDIENCE:
May contain mature themes, profane
language, graphic violence, and sexual
situations.
Advanced Operation
US TV PROGRAMS RATINGS: Chart 2
Fantasy Violence
FV
Violence
V
Sexual Situations
S
Adult Language
L
Sexually Suggestive Dialogue
D
29
Page 30

On-Screen Display (OSD)
0 8
A
BC
VCR Status & Clock Display
Press DISPLAY
to display or remove the overlay.
Channel Caption
(See page 26.)
Function Status
Rec Time
Remaining
(OTR mode only,
see page 12.)
Current Time
REC
1 2 : 0 0P
0 : 25
Counter
ABC
M
-0 : 1 2 : 3 4
SP
Tape Speed
Warning and Instruction Displays
OSD
PLEASE SET CLOCK BEFORE
PROGRAMMING
Caution
• If you attempt to set or review a Timer Recording,
or set the On-Timer and the Clock is not set...
Blue Screen Display
Whenever a blank section of a tape comes
up in Play mode, or when the selected
channel has no broadcast signal with the
Weak Signal Display set to “OFF” (see
page 25), the screen will turn solid blue.
Channel & Function Display
When a function button is pressed (PLAY,
FF, etc.) or you change channels, the unit
mode or channel number will be displayed.
(Some station names may also appear if
Channel Caption is set. See page 26.)
These displays will alert you to a missed
operation or provide further instructions.
Page
8 - 11
CHECK CASSETTE RECORD TAB
TO CANCEL TIMER REC HOLD DOWN
STOP KEY FOR APPROX 3 SEC
NO CASSETTE
PLEASE INSERT A CASSETTE
PLEASE PREPARE FOR TIMER REC
VIDEO HEADS MAY NEED CLEANING
PLEASE INSERT HEAD CLEANING
CASSETTE OR REFER TO MANUAL
END: PLAY KEY
VCR LOCK ACTIVATED
30
For assistance, please call : 1-800-211-PANA(7262) or send e-mail to : consumerproducts@panasonic.com
• If you press REC, and a cassette is inserted with
no record tab...
• If you press STOP during a Timer Recording...
• If you press PLAY, FF, REW, or REC without a
cassette inserted...
• If the unit is not in Stop mode or a cassette with
record tab is not inserted two minutes before a
Timer Recording is about to begin...
• If head cleaning becomes necessary while playing
back a tape...
• If you press a function button other than STOP/EJECT
or POWER while the unit is in VCR Lock mode...
3, 12
21
12
20, 21
4
25
Page 31

Before Requesting Service
Check the following points once again if you are having trouble with your unit.
Power
No power…
Monitor
No picture or sound...
Poor picture with normal sound...
Poor sound with normal picture...
Poor TV reception...
No color or poor color...
Ghost (multiple) images...
TV programs cannot be watched...
Channel cannot be selected...
VCR
TV program cannot be
recorded...
Timer recording cannot be
performed…
No playback picture, or the playback
picture is noisy or contains streaks...
VCR cannot be controlled...
Remote Control
Unit cannot be controlled...
ACTION, PROG and FM/TV
buttons cannot be selected...
Correction
• Completely insert Power Plug into an AC outlet.
• Set POWER button to ON.
Correction
• Make sure your antenna system (TV or CABLE), is correctly set. (P. 8)
• Completely insert Power Plug into an AC outlet.
• Set POWER button to ON.
• Adjust BRIGHTNESS, SHARPNESS, and PICTURE controls in
the SET UP TV menu. (P. 15)
• Adjust VOLUME control. (P. 14)
• Adjust SHARPNESS and PICTURE controls in the SET UP TV menu. (P. 15)
• Adjust TINT and COLOR controls in the SET UP TV menu. (P. 15)
• Install a directional antenna.
• Make sure the selected channel is in unit’s memory. (P. 10, 11)
• Only the channel being recorded can be viewed on this unit.
Correction
• Make sure your antenna system (TV or CABLE), is correctly set. (P. 8)
• Make sure cassette record tab is intact. (P.3)
• Check that clock is set to current time and date.
• Make sure DSS/CABLE box (if used) is left on and tuned to
channel to be recorded.
• Set recording Start/Stop times correctly. (P. 20-21)
• Timer recording may not be performed or continued if a power
interruption of more than 1 minute occurs before or during a Timer
recording even after power is restored.
• Adjust TRACKING control in either direction. (P. 4)
• Try Head Cleaning. (P. 4)
• Make sure VCR LOCK is set to off. (P. 25)
• Make sure unit is not in a Timer Record operation.
Correction
• Aim remote at remote sensor on unit (P. 7) so that signal is
unobstructed.
• Inspect the remote batteries. (P. 3)
• Make sure VCR LOCK is set to off. (P. 25)
• Exposing unit remote sensor to direct fluorescent or outdoor light
may cause signal interference.
• Check remote batteries.
Miscellaneous
Video cassette cannot be inserted...
Video cassette cannot be removed...
Tape cannot be ejected or inserted...
Video cassette ejects when a
recording is started, or the power
is turned off for timer recording...
In Stop mode, the VCR motor
(CYLINDER) continues to rotate...
VCR cannot be controlled...
Correction
• Insert the cassette window side up; record tab facing you.
• Completely insert Power Plug into an AC outlet.
• Try ejecting or inserting the tape again after turning POWER off, then back on.
• Make sure cassette record tab is intact. (P. 3)
• To enable Quick Play mechanism, the VCR cylinder will rotate for
about 3 minutes. This reduces response time from Stop to Play
mode and from Play to Rewind Search mode.
• Make sure VCR LOCK is set to off. (P. 25)
If you cannot resolve the problem, please call the Customer Satisfaction Center for
product assistance at 1-800-211-PANA(7262).
To locate an authorized servicenter call toll free 1-800-211-PANA(7262)
or send e-mail to : consumerproducts@panasonic.com.
For Your Information
31
Page 32

Service Center List
For Product Information, Operating Assistance, Literature Request, Dealer Locations,
and all Customer Service inquires please contact:
1-800-211-PANA(7262), Monday-Friday 9am-9pm Saturday-Sunday 9am-7pm, EST.
or send e-mail : consumerproducts@panasonic.com
Web Site: http://www.panasonic.com
You can purchase parts, accessories or locate your
nearest servicenter by visiting our Web Site.
Accessory Purchases:
1-800-332-5368 (Customer Orders Only)
Panasonic Services Company 20421 84th Avenue South, Kent, WA 98032
(6 am to 5 pm Monday - Friday; 6 am to 10:30 am Saturday; PST)
(Visa, Master Card, Discover Card, American Express, Check)
Factory Servicenter Locations
CALIFORNIA
6550 Katella Avenue
Cypress, CA 90630
800 Dubuque Avenue
S. San Francisco,
CA 94080
3878 Ruffin Road
Suite A
San Diego, CA 92123
FLORIDA
3700 North 29th Avenue
Suite 102
Hollywood, FL 33020
GEORGIA
8655 Roswell Road
Suite 100
Atlanta, GA 30350
ILLINOIS
1709 North Randall Road
Elgin, IL 60123
MASSACHUSETTS
60 Glacier Drive,
Suite G
Westwood, MA 02090
MINNESOTA
7850-12th Avenue South
Airport Business Center
Bloomington, MN 55425
OHIO
2236 Waycross Road
Civic Center Plaza
Forest Park, OH 45240
PENNSYLVANIA
2221 Cabot Blvd. West
Suite B
Langhorne, PA 19047
TEXAS
13615 Welch Road
Suite 101
Farmers Branch,
TX 75244
WASHINGTON
20425-84th Avenue
South
Kent, WA 98032
HAWAII
99-859 Iwaiwa Street
Aiea, Hawaii 96701
Phone (808) 488-1996
Fax (808) 486-4369
Service in Puerto Rico
Matsushita Electric of Puerto Rico, Inc. Panasonic Sales Company/ Factory Servicenter:
Ave. 65 de Infanteria. Km. 9.5 San Gabriel Industrial Park Carolina, Puerto Rico 00985
Phone (787) 750-4300 Fax (787) 768-2910
As of June 2001
32
For assistance, please call : 1-800-211-PANA(7262) or send e-mail to : consumerproducts@panasonic.com
Page 33

Limited Warranty
Panasonic Consumer Electronics Company,
Division of Matsushita Electric Corporation
of America, One Panasonic Way
Secaucus, New Jersey 07094
Panasonic Sales Company,
Division of Matsushita Electric of Puerto Rico, Inc.
AVE. 65 de Infantería, Km. 9.5 San Gabriel
Industrial Park Carolina, Puerto Rico 00985
PANASONIC/QUASAR Video Products
Limited Warranty
Panasonic Consumer Electronics Company or Panasonic Sales Company (collectively referred to as “the
Warrantor”) will repair or replace this product with new or refurbished parts or equivalent product, free of charge, in
the USA or Puerto Rico, in the event of a defect in materials or workmanship as follows (all time periods commence
from the date of the original purchase):
PRODUCT
CAMCORDER
DVD/VCR DECK
DIGITAL STILL
CAMERA
A/V MIXER
TV/VCR, TV/DVD
TV/DVD/VCR
COMBINATION
TV/HDR
COMBINATION
Batteries (if included) - New rechargeable batteries in exchange for defective rechargeable batteries for ten (10)
days. Non-rechargeable batteries are not warranted.
Tape (if included) - New video cassette tape in exchange for a defective video cassette tape for five (5) days.
Memory cards (if included) - Exchange defective item for new one for ninety (90) days.
In-home, carry-in or mail-in service, as applicable, in the USA can be obtained during the warranty period by
contacting a Panasonic Services Company (PASC) Factory Servicenter listed in the Servicenter Directory.
Or call toll free contact number listed above, to locate an authorized PASC Servicenter. Carry-in or mail-in service
in Puerto Rico can be obtained during the warranty period by calling the Panasonic Sales Company telephone
number listed in the Servicenter Directory.
This warranty is extended only to the original purchaser. A purchase receipt or other proof of the date of the original
purchase is requires before warranty service is rendered.
This warranty only covers failures due to defects in materials and workmanship, which occur during normal use and
does not cover normal maintenance, including, but not limited to, video and audio head cleaning. The warranty
does not cover damage which occurs in shipment, or failures which are caused by products not supplied by the
warrantor, or failures which result from accident, misuse, abuse, neglect, mishandling, misapplication, alteration,
modification, faulty installation, set-up adjustments, improper antenna, inadequate signal pickup, maladjustment of
consumer controls, improper operation, power line surge, improper voltage supply, lightning damage, commercial
use such as hotel, office, restaurant, or other business or rental use of the product, or service by anyone other than
a PASC Factory Servicenter or a PASC authorized Servicenter, or damage that is attributable to acts of God.
LIMITS AND EXCLUSIONS
There are no express warranties except as listed above.
THE WARRANTOR SHALL NOT BE LIABLE FOR INCIDENTAL OR CONSEQUENTIAL DAMAGES (INCLUDING,
WITHOUT LIMITATION, DAMAGE TO RECORDING MEDIA) RESULTING FROM THE USE OF THIS PRODUCTS,
OR ARISING OUT OF ANY BREACH OF THE WARRANTY. ALL EXPRESS AND IMPLIED WARRANTIES,
INCLUDING THE WARRANTIES OF MERCHANTABILITY AND FITNESS FOR PARTICULAR PURPOSE, ARE
LIMITED TO THE APPLICABLE WARRANTY PERIOD SET FORTH ABOVE. Some states do not allow the
exclusion or limitation of incidental or consequential damages, or limitations on how long an implied warranty lasts, so
the above exclusions or limitations may not apply to you. This warranty gives you specific legal rights and you may
also have other rights, which vary, from state to state. If a problem with this product develops during or after the
warranty period, you may contact your dealer or Servicenter. If the problem is not handled to your satisfaction, then
write to the Consumer Affairs Department at the Panasonic Consumer Electronics Company address above.
SERVICE CALLS WHICH DO NOT INVOLVE DEFECTIVE MATERIALS OR WORKMANSHIP AS DETERMINED
BY THE WARRANTOR, IN ITS SOLE DISCRETION, ARE NOT COVERED. COSTS OF SUCH SERVICE CALLS
ARE THE RESPONSIBILITY OF THE PURCHASER.
warvid 02/ 12/ 2001
PARTS
ONE (1) YEAR, EXCEPT
CCD IMAGE SENSOR
CCD IMAGE SENSOR
- SIX (6) MONTHS
ONE (1) YEAR
ONE (1) YEAR, EXCEPT
CCD IMAGE SENSOR
CCD IMAGE SENSOR
- SIX (6) MONTHS
ONE (1) YEAR
ONE (1) YEAR,
EXCEPT CRT
CRT - TWO (2) YEARS
ONE (1) YEAR,
EXCEPT CRT
CRT - TWO (2) YEARS
LABOR
NINETY (90) DAYS
NINETY (90) DAYS
NINETY (90) DAYS
NINETY (90) DAYS
NINETY (90) DAYS
NINETY (90) DAYS
NINETY (90) DAYS
CRT - NINETY (90) DAYS
NINETY (90) DAYS
CRT - NINETY (90) DAYS
SERVICE
Carry-In or Mail-In
Carry-In or Mail-In
Carry-In or Mail-In
Carry-In or Mail-In
Carry-In: 21” CRT and
Smaller
In-Home or Carry-In:
22” CRT and Larger
In-Home or Carry-In
CONTACT NUMBER
1-800-211-PANA(7262)
1-800-211-PANA(7262)
1-800-272-7033
1-800-211-PANA(7262)
1-800-211-PANA(7262)
1-888-843-9788
33
For Your Information
Page 34

Spanish Quick Use Guide/Guía para rápida consulta
ELE
ES
/ /
Connexiones/Configurcion Inicial
Conecte por favor todas las conexiones
del cable o de la antena antes de turing
potencia. Conectando el cordon AC de la VCR
en toma de pared iniciara automaticamente la
busqueda de canales y colocacion de tiempo
Conectando
Para Ant./Cable
Conecte Ant./Cable a la entrada de
antena de la TV (VHF/UHF).
Para Sistema Digital de Satelite (DSS)/
Convertidor de cable
Conecte la salida del convertidor de cable la
"VHF/UHF" con el RF cable.
Realizando Configuracion Inicial
Tape el cable electrico de la unidad en el
enchufe de pared de la CA. POWER de
la prensa en el telecontrol o la unidad.
1
La unidad se adelanta y comienzo auto
del canal y del reloj.
CH AUTO SET PROCEEDING
AUTO CLOCK SET
PROCEEDING
CANCEL : PRESS STOP KEY
2
2 / 6 / 2002
SETT I NG : CH 1
UTO CLOCK SET
A
MPL
CO
WED 12 : 00PM
ETED
Si usa convertidor de
cable, enciendala y
seleccione el Servicio
Publico de Canales de
Television (PBS) en su
horario de uso o tiempo
de su zona. Si utiliza
receptor DSS este debe
de estar apagado.
Selecciones se
DST : O
N
realizaran
0
automaticamente cuando
la configuracion termine,
la pantalla siguiente
aparecera.
Ajuste Manual del Reloj
Si el ajuste automático del reloj no se
ha completado, ajuste el reloj
manualmente de la siguiente manera:
1) Presione la tecla ACTION en el
control remoto para visualizar la
pantalla del menú RELOJ.
2) Presione ▲▼ para seleccionar
el mes y
para ajustar. De la
misma forma, seleccione y
ajuste la fecha, año, hora y DST
(Hora de Verano).
3) Presione dos veces la tecla
ACTION para poner el RELOJ
en marcha y salir.
Ajustar de nuevo el reloj
Presione ACTION para exhiba
el menú.
1
2
3
4
MENU
PR I NC I PAL
C
R
V
TV
CANAL
REL OJ SAL I R
ELEG I R :
F I JAR : ACT I ON
F I J
AR RELO
F I JAC I ON AUTOMAT I CA
MANUAL
AJUSTE ZONA HORA : 0
G I R :
ELE
F I JAR
:
TERM I
NAR : ACT I ON
F I J
AR RELO
1 / /
VERANO :
ELE
G I R
M
ES
ELE
G I R :
F I JAR
:
TERM I
NAR : ACT I ON
IDIOMA
J
J
ACT
::
Presione
▲▼ para
seleccionar
“RELOJ”.
Presione
ACTION.
Presione
▲▼ para
seleccionar
“MANUAL”
y luego
presione .
Presione
▲▼ y
para
seleccionar
y ajustar la
hora y la
fecha.
UTO CLOCK SET
A
I S I NCO
MPL
ETE
PLEASE SET CLOCK BY
R
ESS I NG ACT I ON KEY
P
Si "AUTO CLOCK SET IS
INCOMPLETE" aparece en
pantalla, coloque el tiempo
usando el procedimiento
manual (MANUAL CLOCK
SET), vealo enseguida..
Presione ACTION dos veces
para que el reloj comience a
5
funcionar y salir desde este
modo.
For assistance, please call : 1-800-211-PANA(7262) or send e-mail to : consumerproducts@panasonic.com
34
Por ayuda, llame al : 1-800-211-PANA(7262) o envie e-mail a : consumerproducts@panasonic.com
Page 35

Operaciones básicas para la
reproducción
Inserte un casete.
• El videograbador combinado se enciende
1
automáticamente.
Presione PLAY.
• La reproducción comienza
2
automáticamente si el casete no tiene la
lengüeta para prevención de grabación.
■■
■ Para encontrar una escena en particular
■■
Búsqueda hacia adelante => Presione FF
Búsqueda hacia atrás => Presione REW
■■
■ Para ver una imagen fija (congelada) => Presione
■■
PAUSE/SLOW
■■
■ Para ver en cámara lenta => Mantenga pulsado el
■■
botón PAUSE/SLOW en el modo de imagen fija
■■
■ Para ver imágenes cuadro a cuadro => Presione
■■
PAUSE/SLOW en el modo de imagen fija
■■
■ Para parar => Presione STOP
■■
■■
■ Para rebobinar la cinta => Presione REW
■■
■■
■ Para hacer avanzar la cinta rápidamente =>
■■
Presione FF
■■
■ Para expulsar la cinta => Presione EJECT
■■
en el control remoto o STOP/EJECT en el
videograbador combinado
Operaciones básicas para la
grabación
Inserte un casete con la lengüeta
para prevención de grabado.
1
• El videograbador combinado se enciende
automáticamente.
Seleccione el canal.
Presione CH ▲▼ o las teclas
2
numéricas correspondiente.
Seleccione la velocidad de grabación.
Presione SPEED.
3
4
SP = reproducción normal
LP = reproducción larga
SLP = reproducción super larga
• La velocidad seleccionada debe aparecer
en la pantalla.
Comience la grabación.
Presione REC.
• Para editar partes no deseadas de una
grabación, presione P AUSE/SLO W para
hacer una pausa durante la grabación.
• No podrá ver otro canal durante la
grabación.
■ Para parar => Presione STOP.
■■
■ El videograbador combinado deja
■■
de grabar a una hora prefijada.
(Grabación de un toque)
Presione REC repetidamente para
ajustar la hora de grabación (30 min
- 4 horas.)
Grabación normal
4:00
3:00
2:00
0:30
1:00
1:30
Grabación con temporizador
Exhiba FIJAR PROGRAMACION.
Presione PROG.
1
F I J
AR
PROGRAMAC I ON
TEMPOR l
2
• Si ya existe un programa en la memoria,
presione ▲▼ y
de programa sin usar.
3
•1 - 31 = Grabación única
•DIARIO = a la misma hora de lunes a viernes
•SEMANAL = a la misma hora una vez a la
Fecha de hoy
Repita el paso 3 para ajustar:
hora de comienzo, hora de parada, canal
(o LINEA para una fuente exterior), velocidad
(SP, LP, SLP)
4
ZADOR
ENCENDIDO AUTOMATICO
ELEG l R :
F I JAR
:
TERM l
NAR : PRO
G
FECHA INICIO PARADA
7 VIE --:-- --:--
HOY
- - - - - - - - -- - - - - - - -- - - - - - -
ELEGIR FECHA DE INICIO
ELEG l R :
F I JAR
:
TERM l
NAR : PRO
G / ACTION
semana
N I
C
PARADA
P FE I
D I 9 : 00
p 12 : 00
1
2
-- -- : -- -- : -- -- --
3
-- -- : -- -- : -- -- --
4
-- -- : -- -- : -- -- -ANCELAR : ADD/DLT
C
ELEG I R 1ENTRAR :
TER
M I
a
8 :
NAR : PROG / ACT I ON
Para introducir más programas.
presione ▲▼ y
ajustar el número de programa en
blanco, y luego repita los pasos 3 y 4.
Salga de este modo.
Presione PROG dos veces (o
5
ACTION.)
•Si está usando un decodificador de TV
cable, asegúrese que se encuentra en el
canal deseado y que la alimentación
queda conectada para grabar con
temporizador.
•El indicador PROG TIMER se enciende
en el videograbador combinado.
Exhiba
TEMPORIZADOR.
1) Presione ▲▼
para seleccionar.
2) Presione
para
exhibir.
para seleccionar un número
Ajuste la fecha de
C
A
--
grabación.
SLP
1) Presione ▲▼
para seleccionar.
2) Presione
o
para ajustar.
CA VEL
Termine el
08 SP
programa.
Presione PROG
(o ACTION.)
para seleccionar y
For Your Information
35
Page 36

INDEX
A Accessories ................................................ 3
Audio Mute................................................ 14
Auto Operation Functions ......................... 23
B Batteries .......................................................3
Before Requesting Service.......................... 31
Before Using .................................................3
Blocking Message .......................................29
Blue Screen Display....................................30
C
Caption On Mute.........................................19
Channel ................................................ 10, 30
Channel Caption ..........................................26
Clock .......................................................... 10
Closed Caption ...........................................18
Commercial Skip .........................................24
Connections..................................................8
Connections, DSS / Cable Box......................8
Connections, Outdoor Antenna .....................8
Copy Your Tapes (Dubbing) .......................13
D DST (Daylight Saving Time)..........................4
E Eject tape ....................................................12
F Fast Forward ..............................................12
Forward Search .......................................... 12
Frame by Frame Advance .......................... 12
Front Panel Indicators...................................7
Function Display .........................................30
H Head Cleaning ..............................................4
I Important Safeguards and Precautions .........2
Index Search .............................................. 22
Initial Setup for ANT. / Cable Connection .......8
Initial Setup for DSS / Cable box Connection ......8
Input Mode .................................................. 13
INSTANT ALARM .......................................17
L Language .................................................... 10
Limited Warranty .........................................33
Location of Controls ................................ 6 - 7
N NIGHT Mode ..............................................14
O 100 Key ......................................................14
One Touch Recording.................................12
ON-TIMER with Alarm................................. 16
P Phones.................................................. 14
Playback ............................................... 12
Picture Adjustment................................ 15
Program End Search ............................ 22
Q Quality Picture ........................................ 4
R Rapid Tune ........................................... 14
Rec(ord) ................................................ 12
Record/Playback Speed Settings ........... 4
Remote Control Buttons ......................... 6
Repeat Play .......................................... 24
Reset Language, Channels, Clock ....... 10
Reset unit................................................ 9
Reverse Search .................................... 12
Rewind .................................................. 12
S Secret Code .......................................... 27
Service Center List ............................... 32
Sleep Timer .......................................... 17
Slow Motion .......................................... 12
Spanish Quick Use Guide..................... 34
Special VCR Features .......................... 25
Specifications.......................................... 4
Still Picture ............................................ 12
STOP .................................................... 12
T Tape Erasure Prevention ........................ 3
Tape Position Display ........................... 23
Time Zone Adjust.................................. 11
Timer Program Review, Replace, Clear 21
Timer Recording ................................... 20
Timer Recording Cancellation .............. 21
TV Operation......................................... 14
TV Timer Features ................................ 16
U Unit, Front/Rear view.............................. 7
US MOVIES/TV PROGRAMS Ratings . 29
V VCR Lock.............................................. 25
VCR Status & Clock Display................. 30
V-Chip Control Feature......................... 27
W Warning and Instruction Displays ......... 30
Weak Signal Display ON/OFF .............. 25
Z Zero Search .......................................... 24
Panasonic Consumer Electronics Company,
Division of Matsushita Electric Corporation of America
One Panasonic Way Secaucus,
New Jersey 07094
LSQT0605A
Panasonic Sales Company (“PSC”),
Division of Matsushita Electric of Puerto Rico, Inc.
Ave. 65 de Infanteria. Km. 9.5
San Gabriel Industrial Park, Carolina, Puerto Rico 00985
P
Printed in Indonesia
LSQT0605A
M0202-0
 Loading...