

Page 1
-12-
Limited Warranty/Servicentre List
Reset Language, Channels, Clock, Time Zone Adjust Limited Warranty/Servicentre List
Panasonic Canada Inc.
5770 Ambler Drive, Mississauga, Ontario L4W 2T3
PANASONIC PRODUCT – LIMITED WARRANTY
Panasonic Canada Inc. warrants this product to be free from defects in material and workmanship
and agrees to remedy any such defect for a period as stated below from the date of original
purchase.
COMBINATION VHS VCR TV / VCR DVD TV:
21Ǝ and under
Carry-in Service
Only
One (1) year, parts (including Picture Tube) and labour
22Ǝ and over In-home Service One (1) year, parts (including Picture Tube) and labour
In-home Service will be carried out only to locations accessible by roads and within 50 km of an
authorized Panasonic service facility.
LIMITATIONS AND EXCLUSIONS
This warranty does not apply to products purchased outside Canada or to any product which has
been improperly installed, subjected to usage for which the product was not designed, misused or
abused, damaged during shipping, or which has been altered or repaired in any way that affects
the reliability or detracts from the performance, nor does it cover any product which is used
commercially. Dry cell batteries are also excluded from coverage under this warranty.
This warranty is extended to the original end user purchaser only. A purchase receipt or other proof
of date of original purchase is required before warranty service is performed.
THIS EXPRESS, LIMITED WARRANTY IS IN LIEU OF ALL OTHER WARR ANTIES, EXPRESS
OR IMPLIED, EXCLUDING ANY IMPLIED WARRANTIES OF MERCHANTABILITY OR FITNESS
FOR A PARTICULAR PURPOSE .
IN NO EVENT WILL PANASONIC CANADA INC. BE LIABLE FOR ANY SPECIAL, INDIRECT
OR CONSEQUENTIAL DAMAGES.
In certain instances, some jurisdictions do not allow the exclusion or limitation of incidental or
consequential damages, or the exclusion of implied warranties, so the above limitations and
exclusions may not be applicable.
WARR ANTY SERVICE
For product operation and information assistance, please contact your Dealer or our Customer Care Centre
at: Telephone #: (905) 624-5505 Fax #: (905) 238-2360 Web: www.panasonic.ca
For product repairs, please contact one of the following :
• Your Dealer who will inform you of an authorized Servicentre nearest you.
• Our Customer Care Centre at (905) 624-5505 or www.panasonic.ca
• A Panasonic Factory Servicentre listed below:
IF YOU SHIP THE PRODUCT TO A SERVICENTRE
Carefully pack and send prepaid, adequately insured and preferably in the original carton.
Include details of the defect claimed, and proof of date of original purchase.
Richmond, British Columbia Calgary, Alberta Mississauga, Ontario
Panasonic Canada Inc.
12111 River si de Wa y
Richmond, BC V6W 1K8
Tel : ( 604) 27 8-4 211
Fax: (604) 278-5627
Panasonic Canada Inc.
6835 -8th St. N. E.
Calgar y, AB T2E 7H7
Tel : ( 40 3) 29 5-3 95 5
Fax: (4 03) 274- 5493
Panasonic Canada Inc.
5770 Ambler Dr.
Mississauga, ON L4W 2T3
Tel : ( 905) 624-8 4 47
Fax: (905) 238-2418
Lachine, Québec
Panasonic Canada Inc.
3075, rue Louis A. Amos
Lachine, QC H8T 1C4
Tel : ( 514) 633 - 86 84
Fax: (514) 633- 8020
-11 -
Reset Language, Channels, Clock, Time Zone Adjust
Language Channels Clock
Time Zone Adjust
and press Ź
repeatedly to
select mode.
(“TI ME ZONE ADJUST”
appears only when auto
clock is set.)
For En glish
For Sp ani sh
For French
Press ACTION to display MAIN MENU.
0
+
1
-
1
Add or Delete a Channel
■ To add channel
Select channel with number keys and press
ADD/DLT.
■ To delete channel
Select channel with CH Ÿź or number keys and
press ADD/DLT.
MAIN MENU
TV LOCK LANGUAGE
CH CLOCK EXIT
SELECT:
SET :ACTION
1
Press Ÿź Ż Ź to
select
“LANGUAGE.”
MAIN MENU
TV LOCK LANGUAGE
CH CLOCK EXIT
SELECT:
SET :ACTION
2
Press ACTION
repeatedly.
MENU PRINCIPAL
TV BLOQUEO IDIOMA
CANAL RELOJ SALIR
ELEGIR:
FIJAR :ACTION
MENU
TELE BLOCAGE LANGUE
CANAL HORLOGE SORTIE
SEL. :
REGLER:ACTION
MAIN MENU
TV LOCK LANGUAGE
CH CLOCK EXIT
SELECT:
SET :ACTION
3
Press Ÿź Ż Ź to
select “EXIT,”
and press
ACTION to exit.
1
Press Ÿź Ż Ź
to select “CH,”
and press
ACTION.
MAIN MENU
TV LOCK LANGUAGE
CH CLOCK EXIT
SELECT:
SET :ACTION
2
Press Ÿź to
select
“AN TE NNA,”
then press Ź to
set your antenna
system (“TV” or
“CABLE”).
SET UP CHANNEL
ANTENNA : TV
AUTO SET
WEAK SIGNAL DISPLAY:ON
SELECT: SET:
END :ACTION
3
Press Ÿź to
select “AUTO
SET,” then press
Ź.
• After Channel Auto
Set is ¿nished, Clock
Auto Set will be
performed. (If clock
is set manually,
Clock Auto Set will
not be per formed.)
1
Press Ÿź Ż Ź to select “CLOCK,” and
press ACTION.
2
Press Ÿź to
select
“MANUAL” or
“AUTO CLOCK
SET” and press
Ź.
SET CLOCK
AUTO CLOCK SET
MANUAL
TIME ZONE ADJUST : 0
SELECT: SET:
END :ACTION
3
Press Ÿź and
press ŻŹ to
select and set
the month,
date, year, time,
and DST
(Daylight
Saving Time).
(If select “MANUAL”)
SET CLOCK
1/ 4/2004 SUN 12:00AM
DST:ON
-----------------------
SELECT: SET:
START :ACTION
4
Press ACTION
twice to start
the clock and
exit this mode.
2
Press Ÿź to
select “TIME
ZONE ADJUST,”
3
Press ACTION
twice to exit.
CHANNEL 08 ADDED
(Only when Auto Clock
is set.)
Table of Contents
IMPORTANT SAFEGUARDS AND PRECAUTIONS ........................................2
Safety Precautions ............................................................................................3
Before Using......................................................................................................4
Connections/Initial Setup (Ready to Play).........................................................5
Basic Operation (Unit) .......................................................................................6
Basic Operation (Tape)......................................................................................7
Location of Controls ....................................................................................9~10
Reset Language, Channels, Clock, Time Zone Adjust....................................11
Limited Warranty .............................................................................................12
Please read these instructions carefully before attempting to
connect, operate, or adjust this product. Please save this manual.
Models No.
PV-C1324-K/PV-C1334W-K/
PV-C2024-K
LSQT0804 A
As an
E
NERGY STAR® Participant, Panasonic has determined
that this product or product model meets the ENERGY STAR
®
guidelines for en ergy ef ¿ciency.
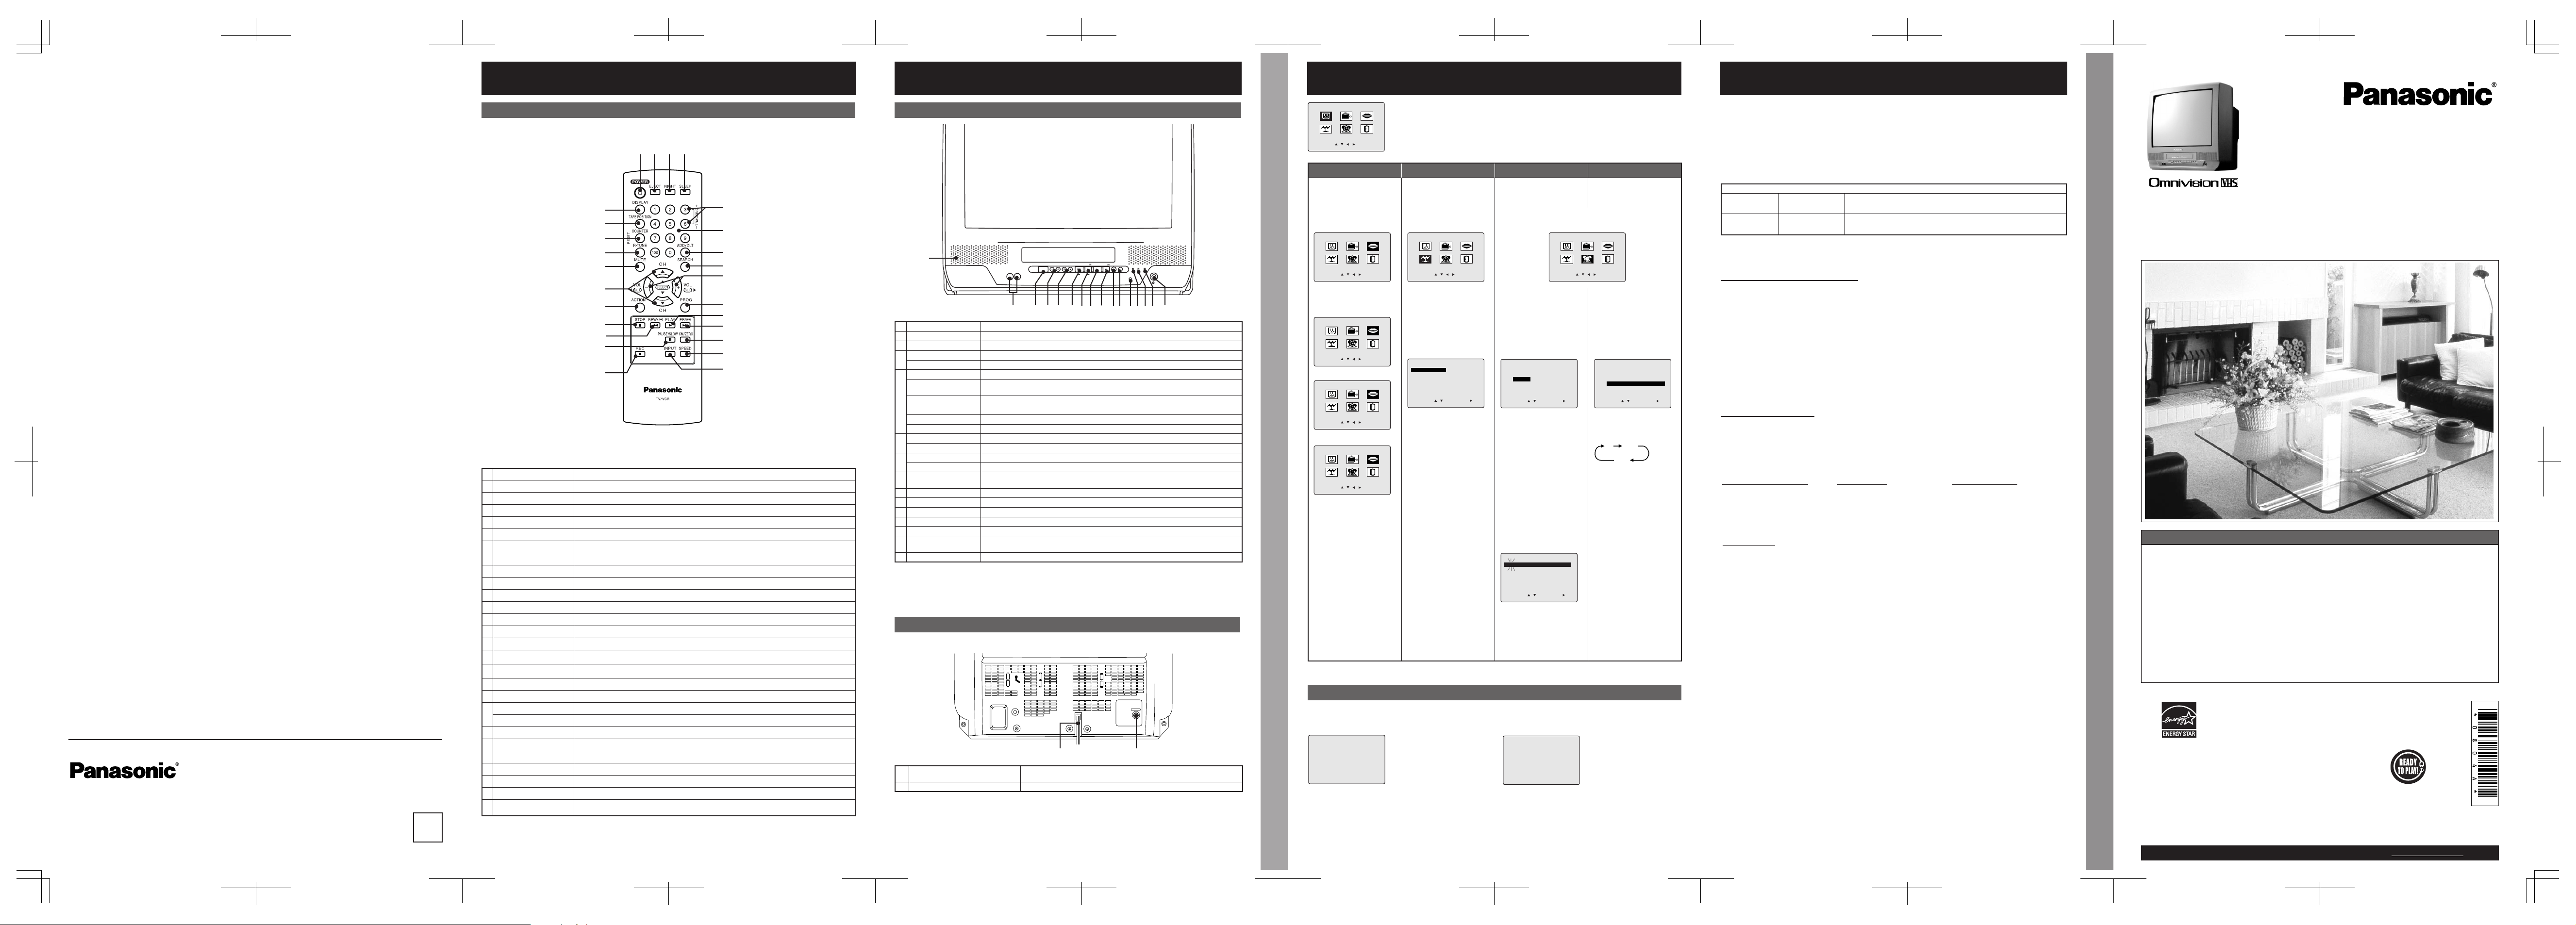
Combination VCR
Operating Instructions
(Basic Operations)
For advanced operations, see the separate
“Advanced Operations” instruction book.
For assistance, please call : 1-800-561-5505 or visit us at www.panasonic.ca
This operating instruction book is designed for use with models
PV-C1324-K, PV-C1334W-K and PV-C2024-K. Illustrations in
this manual show the PV-C2024-K.
-10-
Location of Controls (continued)
Front View of the Unit and Indicators
9,'(2,1 $8',2,1
32:(5 92/ &+
6723(-(&7 5(:
3/$<5(3($7
)) 5(& ,1387
$&7,21
5(& 217,0(5
352*7,0(5
Rear View of the Unit
VHF/UHF
1
AC Power Plug
When plugged into an AC outlet, the unit consumes 2.5 W of electric
power in OFF condition.
2
VHF/UHF Antenna Input Terminal In from your Antenna or Cable.
Remote Control Buttons Front View of the Unit and Indicators Rear View of the Unit
1
2345678910111213141516
12
1 Built-In Speaker Equipped with 2 front speakers.
2AUDIO/VIDEO IN JackFor dubbing.
3 POWER Turns unit on or off.
4
VOLUME UP/DOWN Adjusts volume.
SET/BACK SPACE Sets a selected menu, or goes back to correct.
5
CHANNEL UP/DOWN Selects a channel.
TRACKING
UP/DOWN
Reduces picture noise during Playback and Slow Motion.
SELECT UP/DOWN Controls navigation around on-screen menu.
6
STOP Stops rec ording or playback.
EJECT Ejects tape.
ACTION Press together with REW.
7
REWIND/SE ARCH Rewinds tape, and searches previous scene.
ACTION Press together with STOP.
8
PLAY Begins playback.
REPEAT Repeats a recording.
9
FAST FORWARD /
SEARCH
Fast forwards tape, and searches next scene.
10 REC Records the p rogram.
11 INPUT Selects LINE input.
12 Remote Sensor Receives infrared signal from remote control.
13 REC Indicator Lights during recording.
14 ON TIMER Indicator Lights when the On-Timer is set.
15
PROG TIMER
Indicator
Lights when the unit is set for Timer Recording.
16 PHONES Jack Connect an earphone or headphones.
-9-
Location of Controls
Remote Control Buttons
1
2
3
4
5
6
7
8
9
10
11
12
13
25 24
23
22
21
20
19
18
17
16
15
14
26
1
POWER Turns unit on or of f.
2
DISPL AY Displays VCR status and clock.
3
TAPE POSITION Locates tape position and amount of tape remaining.
4
COUNTER RESET Resets to “0:00:00.”
5
RAPID TUNE Displays the last channel you were watching.
6
MUTE Mutes the sound instantly.
7
CHANNEL UP/DOWN Selects a channel.
SELECT UP/DOWN Controls navigation around on-screen menu.
8
ACTION Displays Main Menu.
9
STOP Stops recording or playback.
10
REWIND/SEARCH Rewinds tape, and searches previous scene.
11
PAUSE/SLOW Pauses and slow motion and frame advance picture.
12
REC Records the program.
13
INPUT Selects LINE input.
14
SPEED Selects recording speed.
15
CM SKIP/ZERO
SEARCH
In Stop mode, goes to the counter “0:00:0 0.” In Play mode, skips over 1 to 3 minutes of
tape.
16
FAST
FORWARD/SEARCH
Fast forwards tape, and searches next scene.
17
PLAY Begins playback.
18
PROGR AM Displays SET PROGRAM screen. You can set Timer Program and On-Timer.
19
VOLUME UP/DOWN Adjusts volume.
SET/BACK SPACE Sets a selected menu, or goes back to correct.
20
SEARCH Goes directly to the desired recording. Locates end point of recording.
21
ADD/DELETE Adds or deletes a channel.
22
NUMBER Keys Selects channel directly.
23
TRACKING UP/ DOWN Reduces picture noise during Play and Slow.
24
SLEEP Turns off the unit automatically.
25
NIGHT Colour and picture intensity level are adjusted for night time use.
26
EJECT Ejects tape. Eject is not available during recording.
-8-
Printed in Indonesia
LSQT0804 A
S0104-0
K
Montréal:
3075 Louis A. Amos, Lachine, Québec H8T 1C4 (514) 633- 8684
Tor ont o:
5770 Ambler Drive, Mississauga, Ontario L4W 2T3 (905) 624-8447
Calgary:
6835 - 8th Street N.E., Calgary, Alberta T2E 7H7 (403) 295 -3955
Vanc ouver:
12111 Riverside Way, Richmond, BC V6W 1K8 (604) 278 -4211
Panasonic Canada Inc.
5770 Ambler Drive,
Mississauga, Ontario L4W 2T3
(905) 624-5010
www.panasonic.ca
MAIN MENU
TV LOCK LANGUAGE
CH CLOCK EXIT
SELECT:
SET :ACTION
SET CLOCK
AUTO CLOCK SET
MANUAL
TIME ZONE ADJUST : 0
SELECT: SET:
END :ACTION
CHANNEL 08 DELETED
Page 2

-6-
Basic Operation (Unit)
REC 12:00PM CH 08
0:47 0:12:20
SLP
NO V-CHIP DATA
Press POWER on remote or unit.
Use CH Ÿź or NUMBER keys to select
a channel.
Press VOL + or VOL - to adjust volume.
■ Using 100 key
When selecting CABLE channels 100 to 125 with
the NUMBER keys, ¿rst press 100 key, and then
enter the remaining t wo digits.
■ Rapid Tune
Press R-TUNE to display the last channel you were
watching.
■ Audio Mute
Press MUTE to instantly mute the sound. Press
again to restore the previous sound level.
■ Phones
Connect an earphone (not supplied) or headphones
(not supplied) to PHONES Jack.
NIGHT Mode
Colour and picture intensity levels are adjusted so
the screen is easier on your eyes during night time
use.
Press NIGHT to set.
Press NIGHT to cancel.
• Previous settings are
restored.
• NIGHT mode is cancelled
when power is turned off or
power failure occurs.
TV Operation
Selecting Input Mode
■ Method 1
Press INPUT repeatedly.
Channel Number Ù LINE
1
2
3
125LINE
(CABLE)
69
(TV)
or
Press DISPLAY to display or remove overlay.
Whenever a blank section of a tape comes up in
Play mode, or when the selected channel has no
broadcast signal with the Weak Signal Display set
to “OFF”, the screen will turn solid blue.
Function Status Current Ti me
Rec Time Remaining
(OTR mode only, see p. 7)
Counter
Tap e Sp eed
Channel
VCR Status & Clock Display
Blue Screen Display
ACTION key on unit
Using ŸźŻ Ź keys
Ÿ : CH UP
ź : CH DOWN
Ź : VOLUME UP
Ż : VOLUME DOWN
Whenever the menu or program screen is
displayed, CHANNEL UP/DOWN function as Ÿź
and VOLUME UP/DOWN function as ŻŹ only.
On Remote On Unit
On Unit
You can operate the menu screen using unit
buttons. To display the menu, press STOP/EJECT
and REW together with no tape inserted. To exit the
menu, repeat above.
STOP/EJECT REW/
ACTI ON
VOL CH
Auto Operation Functions
■ Auto Shut Off
No broadcast signal in TV (Only when Weak Signal
Display is set to OFF), blank tape is played for 5
minutes
Ö Power turns off
• This feature is cancelled if any button is pressed during
above mode.
■ Auto Playback
Insert a tape Ö Power comes on
Ö Play starts if there is no record tab
■ Auto Rewind
Tap e en d Ö Rewind Ö Stop
■ Playback Auto Eject
(Repeat Play is “OFF”)
Play Ö Tap e e nd Ö Rewind Ö Stop
Ö Tape ejects if there is no record tab
1
2
CH 08
3
24
NIGHT
■ Method 2
Press CH Ÿź . Display will change as below.
Note:
• You can set the Input mode from M ENU.
MAIN MENU
Ö TV Ö INPUT SELECT Ö TUNER or
LINE
-5-
VHF/UHF
VHF/UHF
VHF/UHF
VHF/U
H
F
■ For ANT./Cable
Connect the cable from Antenna/Cable to
the VHF/UHF terminal on unit.
IN from
ANT./CABLE
VHF/UHF
Please make all cable or antenna connections before power on.
Cable TV
Converter Box
Connecting
IN from
ANT./CABLE
UNI T (rear view)
UNI T (rear view)
■ For DSS/Cable Box
Connect the OUT jack on your cable box to
the VHF/UHF terminal on unit with a RF
cable.
VHF/UHF
CAUTION
Overtightening “Nut type” RF coaxial cables
may damage jacks. Finger tighten only.
Connections/Initial Setup (Ready to Play)
If “AUTO CLOCK SET IS INCOMPLETE”
appears, manually set clock. See “Manual
Clock Set” section.
Initial Setup (Ready to Play)
Plug unit power cord into AC wall
outlet.
• If you use a cable
box, turn it on and set
it to the Public
Broadcasting Service
(PBS) channel in your
time zone. If you use
a DSS receiver, it
must be turned off.
Settings are made automatically.
When setup is complete, this screen
appears.
Press POWER on remote or unit.
Notes:
• Function buttons are void during Initial Setup.
• To eject a tape during Auto Set, press EJECT on
remote. Then make settings manually. (See p11.)
• If Auto Clock Set takes more than 30 minutes, press
STOP and per form settings manually. (See p11.)
Manual Clock Set
If AUTO CLOCK SET was incomplete.
Press ACTION on remote to display
SET CLOCK menu.
Press Ÿź to select the month and
Ź to set. In the same manner,
select and set the date, year, time,
and DST. (Daylight Saving Time)
Press ACTION to start clock and
exit.
Reset all unit Memory Functions
Returns to factory setting. Use if relocating
unit, or if Initial Setup needs to be redone.
• Make sure a tape is not inserted in unit.
Turn un it Pow er on.
Press and hold both PLAY/REPEAT
and FF on unit for more than 5
seconds.
• The power will shut off.
• Please ignore “NO CASSETTE” warning.
Do “Initial Setup” at left.
Congratulations Loading the
Batteries
Head Cleaning Features for a
Quality Picture
Record/Playback
Time
DST (Daylight
Saving Time)
Accessories Prevent
Accidental Tape
Erasure
SpeciÀcations Connecting Initial Setup
(Ready to Play)
Manual Clock Set Reset all unit
Memory
Functions
1
2
CH AUTO SET PROCEEDING
AUTO CLOCK SET
PROCEEDING
CANCEL:STOP
4
1/ 4/2004 SUN 12:00PM
DST:ON
SETTING : CH
AUTO CLOCK SET
COMPLETED
AUTO CLOCK SET
IS INCOMPLETE
PLEASE SET CLOCK BY
PRESSING ACTION KEY
1
2
3
1
2
3
Auto channel and clock set starts.
3
SELECT LANGUAGE
PRESS CH :English
APPUYER CH :Français
OPRIMIR VOL+ :Español
Press CH Ÿ to select
English.
Or
Press CH ź to select
French (Français).
Or
Press VOL+ to select
Spanish (Español).
Note to CABLE System Installer
This reminder is provided to call the CABLE
(Cable TV) System Installers attention to
Article 820- 40 of the NEC that provides
guidelines for proper grounding and, in
par ticular, speci¿es that the cable ground
shall be con nect ed to the grounding system
of the building, as close to the point of cable
entry as practical.
-4-
Head Clog Sensor
Screen-left appears during
play if clogging is detected.
To remove screen, press
PLAY.
Congratulations
• Date of Purchase
• Dealer Purchased From
• Dealer Address
• Dealer Phone No.
• Model No.
• Serial No.
Accessories
Battery replacement caution
• Do not mix old and new batteries.
• Do not mix alkaline with manganese batteries.
Break off the tab to
prevent recording.
Record
Tab
Screwdriver
To record again.
Cover the hole with
cellophane tape.
Loading the Batteries Prevent Accidental Tape Erasure
■ Remote Control
■ Batteries 2 “AA”
On your new purchase! With proper use, this
dependable product will provide years of
enjoyment. Please ¿ll in the information below.
(Serial number is on tag on back of unit.)
EUR7723010
Old or damaged tapes may clog heads.
Head Cleaning
Record/Playback Time
Only use tapes with the mark in this unit.
Digital Auto Tracking
Continuously analyses the signal and adjusts for
optimum picture quality.
Manual Tracking Control (to reduce picture noise)
Use during Playback and Slow Motion mode to
reduce picture noise. Press the 3 or 6 number key on
the remote control or CH Ÿź on the unit until the
picture clears up. To return to Auto Tracking, press
POWER off, then on again a few seconds later.
Features for a Quality Picture
Tape Speed
Setting
Type of Video Cassette
T120 T160 T18 0
SP
(Standard
Play)
2 Hours
2 Hours
40
Minutes
3 Hours
SLP
(Super Long
Play)
6 Hours8 Hours9 Hours
• Use “dry” type head cleaning cassette only.
(Part No. NV-TCL30 PT is recommended.)
• Follow cleaning tape instructions carefully.
Excessive use of tape can shorten head life.
Unit auto adjusts clock for DST.
DST (Daylight Saving Time)
■ Spring (First Sunday in April)
DST: ON Ö Sets clock ahead one hour.
■ Autumn (Last Sunday in October)
DST: ON Ö Turns clock back one hour.
• If your area does not observe Daylight Saving Time,
select DST: OFF.
• Keep these time changes in mind when programming
unit for timer recordings.
VIDEO HEADS MAY
NEED CLEANING
PLEASE INSERT HEAD
CLEANING CASSETTE
OR REFER TO MANUAL
END:PLAY
Before Using
Speci¿cations
Note:
• Designs and spec i¿ca tions are sub ject to change without
no tice.
Display
Picture Tube
• 13 inch measured diagonal 9 0°
deÀection Picture Tube
(PV-C1324-K/ PV-C1334W-K)
• 20 inch measured diagonal 90°
deÀection Picture Tube
(PV-C2024-K)
VCR
Video Recording
System
2 rotary heads helical scanning
system
Audio Track 1 track
Tun er
Broad cast Channels VHF 2 ~ 13, UHF 14 ~ 69
CA BLE Channels
Midband A through I (14 ~ 22)
Superband J through W (23 ~ 36)
Hyperband AA ~ EEE (37 ~ 6 4)
Lowband A-5 ~ A-1 (95 ~ 99)
Special CABLE chan nel 5A(01)
Ultraband 65 ~ 94, 100 ~ 125
General
Power Source 120 V AC, 60 Hz
Power
Consumption
Power
On
• Approx. 69 W (PV-C1324-K /
PV-C1334W-K)
• Approx. 110 W (PV-C2024 -K)
Power
Off
Approx. 2.5 W
Tel ev is io n Syst em EI A S ta nd ar d N TS C c ol our
Speak er 1 pieces
Op erat ing
Tem per atu re
5 °C ~ 40 °C (41 °F ~ 104 °F)
Operating Humidity 10 % ~ 75 %
Weight
• 12 Kg (26.4 lbs.) (PV-C1324-K/
PV-C1334W-K)
• 23 Kg (50.6 lbs.) (PV-C2024-K)
Di men sions
(W X H X D)
• 386 mm (15-3/16Ǝ) X 3 85 mm
(15- 3/16Ǝ) X 374 mm (14-3 /4Ǝ)
(PV-C1324-K/ PV-C1334W)
• 515 mm (20-5/16Ǝ) X 505 mm
(19-7/8 Ǝ) X 474 mm (18-11/16Ǝ)
(PV-C2024-K)
-3-
Safety Precautions
This symbol warns the user that uninsulated voltage
within the unit may have suf¿cient magnitude to cause
electric shock. Therefore, it is dangerous to make any
kind of contact with any inside part of this unit.
#!54)/.4/2%$5#%4(%2)3+
/&%,%#42)#3(/#+$/./4
2%-/6%#/6%2/2"!#+
./53%23%26)#%!",%0!243
).3)$%2%&%23%26)#).'4/
15!,)&)%$3%26)#%0%23/..%,
2)3+/&%,%#42)#3(/#+
$/./4/0%.
#!54)/.
This video recorder, equipped with the HQ (High Quality) System, is compatible with existing VHS
equipment. Only use those tapes with the mark. It is recommended that only cassette tapes
that have been tested and inspected for use in 2, 4, 6, and 8 hour VCR machines be used. This
television receiver provides display of television closed captioning in accordance with §15.119 of
the FCC rules.
Important Safeguards and Pre cau tions Safety Precautions
TO PREVENT FIRE OR SHOCK HAZARD, DO NOT EXPOSE THIS
EQUIPMENT TO RAIN OR MOIS TURE.
WARNING
CAUTION
TO PREVENT ELECTRIC SHOCK, MATCH WIDE BLADE OF PLUG
TO WIDE SLOT, FULLY INSERT.
This symbol alerts the user that important literature
concerning the operation and main tenance of this unit
has been included. Therefore, it should be read carefully
in order to avoid any problems.
-2-
OUTDOOR ANTENNA INSTALLATION
USING THE UNIT
INSTALLATION
1 POWER SOURCE CAUTION
Operate only from power source indicated on unit
or in this manual. If uncertain, have your Electric
Utility Service Company or Video Products Dealer
verify your home power source.
2 POWER CORD PLUG
For safety, this unit has a polarized type plug (one
wide blade), or a three-wire grounding type plug.
Always hold the plug ¿rmly and make sure your
hands are dry when plugging in or unplugging the
AC power cord. Regularly remove dust, dirt, etc. on
the plug.
POLARIZED PLUG CAUTION:
The plug ¿ts into outlet one way. If it cannot be fully
inserted, try reversing it. If it still will not ¿t, have an
electrician install the proper wall outlet. Do not
tamper with the plug.
GROUNDING PLUG CAUTION:
The plug requires a three-hole grounding outlet. If
necessary, have an electrician install the proper
outlet. Do not tamper with the plug.
3 POWER CORD
To avoid unit malfunction, and to protect against
electrical shock, ¿re or personal injury:
- Keep power cord away from heating appliances and
walking traf¿c. Do not rest heavy objects on, or roll such
objects over the power cord.
- Do not tamper with the cord in any way.
- An extension cord should have the same type plug
(polarized or grounding) and must be securely
connected.
- Overloaded wall outlets or extension cords are ¿re
hazards.
- Frayed cords, damaged plugs, and damaged or cracked
wire insulation are hazardous and should be replaced by
a quali¿ed electrician.
4 DO NOT BLOCK VENTILATION HOLES
Ventilation openings in the cabinet release heat
generated during operation. If blocked, heat
build-up may result in a ¿re hazard or heat damage
to cassettes.
For your protection:
a. Never cover ventilation slots while unit is ON, or
operate unit while placed on a bed, sofa, rug, or
other soft surface.
b. Avoid built-in installation, such as a book case
or rack, unless properly ventilated.
5 AVOID EXTREMELY HOT LOCATIONS
OR SUDDEN TEMPERATURE CHANG ES
Do not place unit over or near a heater or ra di ator,
in di rect sunlight, etc. If unit is sud denly moved
from a cold place to a warm place, mois ture may
condense in unit and on the tape caus ing damage.
6 TO AVOID PERSONAL INJURY
• Never place unit on support or stand
that is not ¿rm, level, and adequately
strong. The unit could fall causing
serious injury to a child or adult and
damage to the unit.
• Move any appliance and cart
combination with care. Quick stops,
excessive force, and uneven surfaces
may cause objects to overturn.
• Carefully follow all operating
instructions.
Before unit is brought out of storage or moved to a
new location, refer again to the INSTALLATION
section of these safe guards.
1 KEEP UNIT WELL AWAY FROM WATER
OR MOISTURE, such as vases, sinks,
tubs, etc.
2 IF EXPOSED TO RAIN, MOISTURE, OR
STRONG IMPACT, unplug unit and have it
inspected by a quali¿ed service technician
before use.
3 ELECTRICAL STORMS
During a lightning storm, or before leaving unit
unused for extended periods of time, disconnect all
equipment from the power source as well as the
antenna and cable system.
4 WHEN UNIT IS PLUGGED IN
• DO NOT OPERATE IF:
- liquid has spilled into unit.
- unit was dropped or otherwise damaged.
- unit emits smoke, malodors, or noises.
Immediately unplug unit, and have it inspected by a
service technician to avoid potential ¿re and shock
hazards.
• Never drop or push any object through openings in unit.
Touching internal parts may cause electric shock or ¿re
hazard.
• Keep magnetic objects, such as speakers, away from
unit to avoid electrical interference.
5 USING ACCESSORIES
Use only accessories recommended by the
manufacturer to avoid risk of ¿re, shock, or other
hazards.
6 CLEANING UNIT
Unplug unit. Use a clean, dry, chemically untreated
cloth to gently remove dust or debris. DO NOT USE
cleaning Àuids, aerosols, or forced air that could
over-spray, or seep into unit and cause electrical
shock. Any substance, such as wax, adhesive tape,
etc. may mar the cabinet surface. Exposure to
greasy, humid, or dusty areas may adversely affect
internal parts.
SERVICE
1 DO NOT SERVICE PRODUCT
YOURSELF
If, after carefully following detailed operating
instruc tions, the unit does not operate properly, do
not attempt to open or remove covers, or make any
adjustments not described in the manual. Unplug
unit and contact a quali¿ed service tech nician.
2 REPLACEMENT OF PARTS
Make sure the ser vice technician uses only parts
speci¿ed by the manufacturer, or have equal safety
char ac ter istics as original parts. The use of
unauthorized substitutes may result in ¿re, electric
shock, or other hazards.
3 SAFETY CHECK AFTER SERVICING
After unit is serviced or repaired, request that a
through safety check be done as described in the
manufacturer’s service literature to ensure video
unit is in safe operating condition.
TO REDUCE THE RISK OF ELECTRIC SHOCK, FIRE, INJURY TO PERSONS OR
DAMAGE TO THIS PRODUCT, READ AND RETAIN ALL SAFETY AND OPERATING
INSTRUCTIONS. HEED ALL WARNINGS IN THE MANUAL AND ON THE PRODUCT.
WARNING
IMPORTANT SAFEGUARDS AND PRE CAU TIONS
1 SAFE ANTENNA AND CABLE
CONNECTION
An outside antenna or cable system must be
properly grounded to provide some protection
against built up static charges and voltage. Section
810 of the National Electrical Code, ANSI/NFPA
70 (in Canada, par t 1 of the Canadian Electrical
Code) provides information regarding proper
grounding of the mast and supporting structure,
grounding of the lead-in wire to an antenna
discharge unit, size of grounding conductors,
location of antenna discharge unit, con nec tion to
grounding electrodes, and requirements for the
grounding electrode.
2 KEEP ANTENNA CLEAR OF HIGH
VOLTAGE POWER LINES OR CIRCUITS
Locate an outside antenna system well away from
power lines and electric light or power circuits so it
will never touch these power sources should it ever
fall. When installing antenna, absolutely never
touch power lines, circuits or other power sources
as this could be fatal.
GROUND
CLAMP
ELECTRIC
SERVICE
EQUIPMENT
ANTENNA LEAD
IN WIRE
ANTENNA
DISCHARGE UNIT
(NEC SECTION 810-20)
GROUNDING
CONDUCTORS
(NEC SECTION 810-21)
GROUND CLAMPS
POWER SERVICE
GROUNDING
ELECTRODE SYSTEM
(NEC ART 250, PART H)
NEC - NATIONAL
ELECTRICAL CODE
-7-
Playback a Tape
Record tab
1
Insert a tape.
• Unit power comes
on automatically.
• Loose or peeling
labels may cause
tape jam.
2
Press PLAY.
• Playback begins if
tape has no record
tab.
Basic Operation (Tape)
TV
Operation
VCR Status &
Clock Display
Blue Screen
Display
Auto Operation
Functions
NIGHT Mode Selecting
Input Mode
ACTION
key on
unit
Usingʆʈ ʉ ʇ
keys
Playback a Tape Timer
Recording
Record On a Tape Review, Replace or
Clear Program
Contents
Cancel a Timer
Recording
Record On a Tape
Note:
• After 5 minutes in Pause mode, unit stops to protect
the tape and the video heads.
■ One Touch Recording (OTR)
Press REC repeatedly to set length as follows:
30 min. Ö 1 hr. Ö 1:30 Ö 2:00 Ö 3:00 Ö 4:00
Ö exit
■ To Replace program...
■ To Clear program...
Cancel a Timer Recording
Press ADD/DLT.
Review, Replace or Clear Program Contents
Tod ay ’s
Date
Example
DAILY
7
2
1
31
68 9
SELECT / Selection Order
WEEKLY
(SAT)
WEEKLY
(MON)
WEEKLY
(SUN)
Notes:
• 2 minutes before Timer recording is performed,
“PLEASE PREPARE FOR TIMER REC” appears
and/or the PROG TIMER Indicator Àashes. Be sure
a cassette with record tab is loaded and the unit is
in Stop mode.
• If there is a power interr uption of more than one
minute, the recording may not be performed or
continued.
Hold down STOP for a few seconds to cancel
the Timer Recording.
• Any future daily or weekly recordings will be
performed as programmed.
(Recording is not in progress)
(Recording is in progress)
Timer Recording
1
Press PROG to display SET
PROGRAM screen.
2
Press Ÿź to select TIMER PROGR AMMING.
SET PROGRAM
TIMER PROGRAMMING
ON TIMER
SELECT: SET:
END :PROG
3
Press Ź to display screen.
P DT START STOP CH SPD
1 -- --:-- --:-- -- --
2 -- --:-- --:-- -- -3 -- --:-- --:-- -- -4 -- --:-- --:-- -- --
SELECT: SET:
END :PROG
4
5
Press PROG to end the program.
To Enter More Programs, press Ÿź to
select and Ź to set an unused
program. Then repeat step 4.
P DT START STOP CH SPD
1 10 9:00a12:00p 08 SP
2 -- --:-- --:-- -- -3 -- --:-- --:-- -- -4 -- --:-- --:-- -- --
SET COMPLETED
CANCEL:ADD/DLT
SELECT: SET:
END :PROG
6
Press PROG twice to exit this mode.
• If you’re using a cable box, make sure that it is
tuned to the desired channel and the power is
left on for timer recording.
• PROG TIMER indicator lights on unit.
1
Insert a tape with record tab.
• The unit power comes on automatically.
2
Press CH Ÿź or NUMBER keys to
select a channel.
• For “LINE” input, see p. 6.
3
4
Press REC to start recording.
• To edit, press PAUSE/SLOW to pause, and
again to resume recording.
5
Press STOP to stop recording.
1
Repeat steps 1~3 at left.
2
Press Ÿź to select the desired
program.
3
Press PROG twice to exit this
mode.
• 1~31 = One time
• DAILY = Mon,~Fri.
• WEEKLY = Same time
each week
1) Press Ź.
2) Set record DATE,
press Ÿź to select:
3) Set remaining items,
press Ź to set
START / STOP times,
Channel or LINE, and
tape speed. Then
press Ÿź to select.
Press SPEED to select recording
speed. (P. 4)
1) Pr ess Ź.
2) Repeat step 4
(at left) to set
new programs.
3) Press PROG.
■ Press REW to rewind tape
■ Press FF to fast for ward tape
■ Press EJECT on remote or
STOP/EJECT on unit to eject tape
■ Press FF to forward scene search
■ Press REW to reverse scene search
Notes:
• After search has begun, each additional press of
FF or REW changes speed.
• FF and REW search speed may vary depending
on current tape position.
• After 10 minutes in search mode, unit returns to
Play mode to protect the tape and the video
heads.
3
Press STOP.
Notes:
• These features work best in SLP mode.
• After 3 minutes in Still or Slow mode, unit stops to
protect the tape and the video heads.
■
Press PAUSE/SLOW to still (freeze) picture
■ Hold down PAUSE/SLOW in Still
mode to slow motion picture
Ö Press PLAY to release.
SET CLOCK
1/ 1/2004 THU 12:00AM
-----------------------
SELECT: SET:
END :ACTION
1/ 4/2004 SUN 12:00AM
-----------------------
SELECT: SET:
START :ACTION
DST:ON
SET CLOCK
DST:ON
P DT START STOP CH SPD
1 10 9:00a12:00p 08 SP
2day 11:00a11:30a125 SLP
3 12 8:00p 9:30p L SP
4 -- --:-- --:-- -- --
CANCEL:ADD/DLT
SELECT: SET:
END :PROG
P DT START STOP CH SPD
1 10 9:00a12:00p 08 SP
2day 11:00a11:30a125 SLP
3 12 8:00p 9:30p L SP
4 -- --:-- --:-- -- --
SELECT: SET:
EXIT :PROG
P DT START STOP CH SPD
1 -- --:-- --:-- -- --
2day 11:00a11:30a125 SLP
3 12 8:00p 9:30p L SP
4 -- --:-- --:-- -- --
SELECT: SET:
END :PROG
Page 3
-12-
These displays will alert you to a missed operation or provide further instructions.
Warning and Instruction Displays
Copy Your Tapes (Dubbing) Warning and Instruction Displays
OSD CAUTION Page
PLEASE SET CLOCK BY
PRESSING ACTION KEY
If you attempt to set or review a Timer
Recording, or set the On-Timer and the
Clock is not set...
See page 7 of Basic
Operations and see
page 2 of Advanced
Operations book.
CHECK CASSETTE
RECORD TAB
If you press REC, and a cassette is inserted
with no record tab...
See pages 4 and 7 of
Basic Operations book
TO CANCEL TIMER REC
HOLD DOWN STOP KEY
FOR APPROX 3 SEC
If you press STOP during a Timer
Recording...
See page 7 of Basic
Operations book
NO CASSETTE
If you press PL AY, FF, REW, or REC without
a cassette inserted...
PLEASE PREPARE
FOR TIM ER REC
If the unit is not in Stop mode, or cassette is
not inserted, or cassette has no record tab,
or tape is at its end two minutes before a
Timer Recording is about to begin...
VIDEO HEADS MAY
NEED CLEANING
PLEASE INSERT HEAD
CLEANING CASSETTE
OR REFER TO MANUAL
END: PLAY
If head cleaning becomes necessary while
playing back a tape...
See page 4 of Basic
Operations book
VCR LOCK ACTIVATED
If you press a function button other than
STOP/EJECT or POWER while the unit is in
VCR Lock mode...
See page 10
-11 -
Copy Your Tapes (Dubbing)
Connections you’ll need to make.
Playback (Source) Recording (Editing) unit
(Perform operation of steps 4 and 5 on both units at same time.)
STOP
Recording (Editing) unit
OUT
IN
AUDIO
AUDIO INVIDEO IN
IN FROM ANT.
OUT TO TV
VID EO
Playing (Source) VCR
1
Insert pre-recorded tape.
2
Press PLAY then PAUSE at starting
point to put in Standby mode.
3
Press PLAY to start dubbing.
4
Press STOP to stop dubbing.
1
Insert blank tape with record tab.
• Dubbing tapes protected with Copy Guard will have
poor quality results.
2
3
Press REC, then PAUSE/SLOW
immediately to put in Standby mode.
4
Press PAUSE/SLOW to start dubbing.
5
Press STOP to stop dubbing.
Unauthorized exchanging and/or copying of copyrighted recordings may be copyright infringement.
IMPORTANT
Select “LINE” mode.
See “Selecting Input Mode” (p. 6 of
Basic Operations book.)
-10-
VCR Features (continued)
Tape Position and Tape Status Display
• “DETECTING TAPE
POSITION” only
appears the ¿rst time a
cassette is inserted
and it takes several
seconds for correct
indication to appear.
To ¿nd out present tape position and amount of
tape remaining.
When set to “ON,” picture is displayed
regardless of signal strength.
Weak Signal Display ON/OFF
Notes:
• “ON”: Picture is displayed even if signal is very weak
but qualit y may be poor.
“OFF”: Screen turns solid blue when signal is weak
or non-existent.
• Selecting “ON” has no effect on connected
equipment with blue back feature.
VCR Lock
All operations are prohibited except Timer
recording and tape eject. Useful for families
with small children.
Note:
• VCR Lock cancels in 24 hours.
To t ur n o n,
hold down REC on
the unit in Stop
mode with no tape
inserted for 7 sec.
(Please ignore the
NO CASSETTE
warning.)
To t ur n o ff,
repeat above.
• The present tape
position indication and
amount of tape
remaining (according
to tape speed) is
displayed. Tape
remaining time display
may not be precise.
1
Press TAPE POSITION to detect
tape position.
DETECTING TAPE POSITION
SLP
R 120 MIN.
BEGIN END
2
Press TAPE POSITION to return to
normal screen.
1
Press ACTION to display menu.
2
Press Ÿź Ż Ź to select “CH,” and
press ACTION.
MAIN MENU
TV LOCK LANGUAGE
CH CLOCK EXIT
SELECT:
SET :ACTION
3
Press Ÿź to select “WEAK SIGNAL
DISPLAY,” and press Ź to set “ON”
or “OFF.”
SET UP CHANNEL
ANTENNA : TV
AUTO SET
WEAK SIGNAL DISPLAY:ON
SELECT: SET:
END :ACTION
4
Press ACTION twice to return to
normal screen.
Tape S elect
Select your tape length so the tape position
and amount of tape remaining is properly
displayed.
(See “Tape Position and Tape Status Display”
section below.)
1
Press ACTION to display menu.
2
Press Ÿź to select “TV,” and press
ACTION.
MAIN MENU
TV LOCK LANGUAGE
CH CLOCK EXIT
SELECT:
SET :ACTION
3
Press Ÿź to select “TAPE SELECT,”
and press Ź to set “T-120,” “T-160”
or “T-180.”
SET UP TV
CAPTION
INPUT SELECT :TUNER
VIDEO ADJUST
TAPE SELECT :T-120
SELECT: SET:
END :ACTION
• Select “T-120” for
tapes 120 minutes or
less, “T-160” if 140 or
160 minutes, and
“T-180” if 180 minutes.
4
Press ACTION twice to return to
normal screen.
VCR LOCK ACTIVATED
VCR LOCK OFF
T-120 T-160 T-180
Before Requesting
Service
Index Search Commercial Skip Zero Search Repeat Play Tape select Tape Position Display VCR Lock Weak Signal
Tape position is displayed incorrectly in the
following cases:
• If VHS- C type cassettes, tapes under 30 minutes,
tapes over 180 minutes, or incompatible tapes are
used.
• If the correct tape length is not selected.
(See “Tape Select ” section above.)
-9-
VCR Features
For each recording, an invisible index mark is
placed on the tape. A program index and
information and also included for Timer recordings.
These marks are used to access or Scan recording.
Index Search
NOTE:
indicates start points of each recording.
■ To Calculate Index Number
Example 2:
To go to rec. 6 from rec. 2, enter 4 and press FF.
6
157
2 34
17
5
34 6
2
Example 1:
To go to rec. 2 from rec. 4, enter 3 and press REW.
Note:
• If Index Search is star ted very close to an index mark,
that index mark may not be counted in the search.
Zero Search
To quickly return to a speci¿ed tape location.
• Unit will go into FF or REW mode and stops at the last
point the Counter was set to 0:00:00.
Commercial Skip
Unit fast forwards (skips) over 1, 2, or 3 minutes of
recorded tape as desired.
Repeat Play
Set to see a recording over and over.
Note:
• Play repeats at tape end or if unrecorded position
over 30 sec. is detected.
In PLAY mode, press
PLAY/ REPEAT on
unit to turn “ON.”
Repeat above to turn
“OFF.”
Press SEARCH in Stop or Play mode,
and then press NUMBER keys to select
recording number.
• To calculate number, see below.
Press FF or REW to start search.
INDEX SEARCH
ENTER INDEX NUMBER :1
USING 1-9 KEYS
FORWARD SEARCH :FF
REVERSE SEARCH :REW
EXIT:SEARCH
Play begins at search end. To search
forward or back 1 index, press FF or
REW while screen below is displayed
(10 sec.).
• To cancel, press PLAY.
INDEX SEARCH
FORWARD SEARCH :FF
REVERSE SEARCH :REW
Press CM/ZERO in Play mode.
• Press CM/ZERO repeatedly to change skip time as
shown below.
• No indication appears.
1
Press COUNTER RESET during play to
display Counter.
2
Press COUNTER RESET at the desired
position to reset to “0:00:00.”
0:00:00
3
Continue to record, playback, etc.
4
Press STOP.
5
Press CM/ZERO in Stop mode to start
ZERO SEARCH.
-1:23:45
PLAY
REPEAT ON
PLAY
REPEAT OFF
1
2
1
-8-
Check the following points once again if you are having trouble with your unit.
(BO: refers to “Basic Operations” Instruction book.)
(AO: refers to “Advanced Operations” Instruction book.)
Power CORRECTION
No power…
Completely insert Power Plug into an AC outlet.
Set POWER button ON.
Monitor CORRECTION
No picture or sound...
Make sure your antenna system (TV or CABLE) is correctly set. (BO p. 11)
Completely insert Power Plug into an AC outlet.
Set POWER button to ON.
Poor picture with normal
sound...
Adjust BRIGHTNESS, SHARPNESS, and PICTURE controls in the SET
UP TV menu. (AO p. 2)
Poor sound with normal
picture...
Adjust VOLUME control. (BO p. 6)
Poor TV reception...
Adjust SHARPNESS and PICTURE controls in the SET UP TV menu. (AO
p. 2)
No colour or poor colour...
Adjust TINT and COLOR controls in the SET UP TV menu.
(AO p. 2)
Ghost (multiple) images... Install a directional antenna.
TV programs cannot be
watched...
Make sure the selected channel is in unit’s memory. (BO p. 11)
Channel cannot be selected... Only the channel being recorded can be viewed on this unit.
VCR CORRECTION
TV program cannot be
recorded...
Make sure your antenna system (TV or CABLE) is correctly set.
(BO p. 11)
Make sure cassette record tab is intact. (BO p. 4)
Timer recording cannot be
performed…
Check that clock is set to current time and date.
Make sure DSS/CABLE box (if used) is left on and tuned to channel to be
recorded.
Set recording Start/Stop times correctly. (BO p. 7)
Timer recording may not be performed or continued if a power interruption
of more than 1 minute occurs before or during a Timer Recording, even
after power is restored.
No playback picture, or the
playback picture is noisy or
contains streaks...
Adjust TRACKING control in either direction. (BO p. 4)
Try Head Cleaning. (BO p. 4)
VCR cannot be controlled...
Make sure VCR LOCK is set to off. (AO p. 10)
Make sure unit is not in a Timer Record operation.
Remote Control CORRECTION
Unit cannot be controlled...
Aim remote at remote sensor on unit (BO p. 10) so that signal is
unobstructed.
Inspect the remote batteries. (BO p. 4)
Make sure VCR LOCK is set to off. (AO p. 10)
Exposing unit remote sensor to direct Àuorescent or outdoor light may
cause signal inter ference.
ACTION and PROG buttons
cannot be selected...
Check remote batteries.
Miscellaneous CORRECTION
Video cassette cannot be
inserted...
Insert the cassette window side up; record tab facing you.
Video cassette cannot be
removed...
Completely insert Power Plug into an AC outlet.
Tape cannot be ejected or
inserted...
Try ejecting or inserting the tape again after turning POWER off, then back
on.
Video cassette ejects when a
recording is started, or the
power is turned off for timer
recording...
Make sure cassette record tab is intact. (BO p. 4)
In Stop mode, the VCR motor
(CYLINDER) continues to
rotate...
To enable Quick Play mechanism, the VCR cylinder will rotate for about 3
minutes. This reduces response time from Stop to Play mode and from
Play to Rewind Search mode.
VCR cannot be controlled... Make sure VCR LOCK is set to off. (AO p. 10)
Before Requesting Service
Printed in Indonesia
LSQT0805 B
S0104-1034
K
Montréal:
3075 Louis A. Amos, Lachine, Québec H8T 1C4 (514) 633- 8684
Tor ont o:
5770 Ambler Drive, Mississauga, Ontario L4W 2T3 (905) 624-8447
Calgary:
6835 - 8th Street N.E., Calgary, Alberta T2E 7H7 (403) 295 -3955
Vanc ouver:
12111 Riverside Way, Richmond, BC V6W 1K8 (604) 278-4211
Panasonic Canada Inc.
5770 Ambler Drive,
Mississauga, Ontario L4W 2T3
(905) 624-5010
www.panasonic.ca
Please read these instructions carefully before attempting to connect,
operate, or adjust this product. Please save this manual.
As an
E
NERGY STAR® Participant, Panasonic has determined
that this product or product model meets the ENERGY STAR
®
guidelines for en ergy ef ¿ciency.
Models No.
PV-C1324-K/PV-C1334W-K/
PV-C2024-K
Combination VCR
Operating Instructions
(Advanced Operations)
For Basic operations, see the separate
“Basic Operations” instruction book.
This operating instruction book is designed for use with models
PV-C1324-K, PV-C1334W-K and PV-C2024-K. Illustrations in this
manual show the PV-C2024-K.
For assistance, please call : 1- 800-561-5505 or visit us at www.panasonic.ca
Table of Contents
TV Features.......................................................................................................2
Closed Caption System .....................................................................................3
V-Chip Control Features....................................................................................4
Before Requesting Service................................................................................8
VCR Features....................................................................................................9
Copy Your Tapes (Dubbing) ............................................................................11
Warning and Instruction Displays ....................................................................12
LSQT0805 B
Page 4
-6-
V-Chip Control Features (continued)
Canadian English Language Ratings
E (Exempt) PROGRAMS
Some TV shows, such as news, sports, weather,
bulletins, and emergency information have no
ratings.
If LOCK menu is not displayed, do “Enter Secret
Code” steps on page 6.
Enter Code Setup Blocking
1
Press Ÿź to select “NEXT PAGE,” and
press Ź.
LOCK
US MOVIES :OFF
CHANGE SETTINGS
US TV PROGRAMS :OFF
CHANGE SETTINGS
NEXT PAGE
SELECT: SET:
END :ACTION
2
Press Ÿź to select “CANADIAN
ENGLISH,” and press Ź to set “ON” or
“OFF.”
LOCK
CANADIAN ENGLISH :OFF
CHANGE SETTINGS
CANADIAN FRENCH :OFF
CHANGE SETTINGS
PREVIOUS PAGE
SELECT: SET:
END :ACTION
■ “ON” ➞ V-Chip Control is activated.
■ “OFF” ➞ V-Chip Control is deactivated.
3
Press Ÿź to select “CHANGE
SETTINGS,” and press Ź.
LOCK
CANADIAN ENGLISH :OFF
CHANGE SETTINGS
CANADIAN FRENCH :OFF
CHANGE SETTINGS
PREVIOUS PAGE
SELECT: SET:
END :ACTION
4
Press Ÿź to select “VIEW E
PROGRAMS?,” and press Ź to set
“YES” or “NO.”
VIEW E PROGRAMS? : YES
C UNLOCKED
C8+
G
PG
14+
18+
EXEMPT
SELECT: SET:
END :ACTION
5
Press Ÿź to select and Ź to set
ratings. (See ratings chart on page 7.)
VIEW E PROGRAMS? : YES
C UNLOCKED
C8+
G
PG
14+
18+
FOR CHILDLEN
SELECT: SET:
END :ACTION
6
Press ACTION to continue with
Canadian French Language Ratings
Setup (see page 7.) Or, press ACTION
three times to exit.
Canadian French Language Ratings
1
Press Ÿź to select “NEXT PAGE,” and
press Ź.
2
Press Ÿź to select “CANADIAN
FRENCH,” and press Ź to set “ON” or
“OFF.”
■ “ON”
➞ V-Chip Control is activated.
■ “OFF” ➞ V-Chip Control is deactivated.
LOCK
US MOVIES :OFF
CHANGE SETTINGS
US TV PROGRAMS :OFF
CHANGE SETTINGS
NEXT PAGE
SELECT: SET:
END :ACTION
LOCK
CANADIAN ENGLISH :OFF
CHANGE SETTINGS
CANADIAN FRENCH :OFF
CHANGE SETTINGS
PREVIOUS PAGE
SELECT: SET:
END :ACTION
E (Exempt) PROGRAMS
Some TV shows, such as news, sports, weather,
bulletins, and emergency information have no
ratings.
3
Press Ÿź to select “CHANGE
SETTINGS,” and press Ź.
4
Press Ÿź to select “VIEW E
PROGRAMS?,” and press Ź to set
“YES” or “NO.”
5
Press Ÿź to select and Ź to set
ratings. (See ratings chart on page 7.)
6
Press ACTION three times to exit this
mode.
LOCK
CANADIAN ENGLISH :OFF
CHANGE SETTINGS
CANADIAN FRENCH :OFF
CHANGE SETTINGS
PREVIOUS PAGE
SELECT: SET:
END :ACTION
VIEW E PROGRAMS? : YES
G UNLOCKED
8ANS+
13 ANS+
16 ANS+
18 ANS+
EXEMPT
SELECT: SET:
END :ACTION
VIEW E PROGRAMS? : YES
G UNLOCKED
8ANS+
13 ANS+
16 ANS+
18 ANS+
GENERAL AUDIENCE
SELECT: SET:
END :ACTION
-5-
V-Chip Control Features (continued)
Note:
• “NEX T PAGE” displays CANADIAN V-Chip menu.
Please refer to pages 6-7 for more details on
Canadian tapes or broadcasts.
Setup US TV PROGRAMS Ratings
NR (Not Rated) PROGRAMS
Some TV shows, such as news, spor ts,
weather, bulletins, emergency information have
no ratings.
Note:
• You may select from standard TV ratings (chart 1),
or customize to a speci¿c c ontent rating (chart 2).
■ “ON” ➞ V-Chip Control is activated.
■ “OFF” ➞ V-Chip Control is deactivated.
If LOCK menu is not displayed, do “Enter
Secret Code” steps on page 4.
Enter Code Setup Blocking
1
Press Ÿź to select “US TV
PROGRAMS,” and press Ź to set
“ON” or “OFF.”
LOCK
US MOVIES :OFF
CHANGE SETTINGS
US TV PROGRAMS :OFF
CHANGE SETTINGS
NEXT PAGE
SELECT: SET:
END :ACTION
2
Press Ÿź to select “CHANGE
SETTINGS,” and press Ź.
LOCK
US MOVIES :OFF
CHANGE SETTINGS
US TV PROGRAMS :OFF
CHANGE SETTINGS
NEXT PAGE
SELECT: SET:
END :ACTION
3
Press Ÿź to select “VIEW NR
PROGRAMS?,” and press Ź to set
“YES” or “NO.”
VIEW NR PROGRAMS? : YES
TV-Y UNLOCKED
TV-Y7 FV
TV-G
TV-PG V S L D
TV-14 V S L D
TV-MA V S L
CONTAINS NO RATING
SELECT: SET:
END :ACTION
4
Press Ÿź to select and Ź to set
ratings. (See ratings charts on page
7.)
• Ratings highlighted in G reen will be blocked.
Ratings in white letters will not be blocked.
VIEW NR PROGRAMS? : YES
TV-Y UNLOCKED
TV-Y7 FV
TV-G
TV-PG V S L D
TV-14 V S L D
TV-MA V S L
FOR ALL CHILDREN
SELECT: SET:
END :ACTION
5
Press ACTION three times to exit
this mode.
Enter Secret Code Setup US MOVIES Ratings Setup US TV PROGRAMS Ratings
-4-
V-Chip Control Features
Enter Secret Code
This unit has a built-in V-Chip Control which allows you to block unwanted TV usage based on US
MOVIES, US T V PROGRAMS Ratings, Canadian English Language Ratings and Canadian French
Language Ratings.
A 4-digit code must be entered to view a blocked
program or change rating settings.
Notes:
• DO NOT forget your secret code.
• Once ratings are set, restricted tapes or programs
cannot be accessed unless the secret code is entered.
■ Changing your secret code
• Take care that you are
not observed entering
the secret code.
To M ak e C or rec ti ons,
Press Ż repeatedly to move the cursor, and press
Number keys to make the correction.
Enter Code Setup Blocking
If LOCK menu is not displayed, do “Enter Secret
Code” steps at left.
Setup US MOVIES Ratings
NR (Not Rated) PROGRAMS
Some movies, such as old movies or foreign
movies have no ratings.
• You will need your current code. Perform steps 1~3.
In step 4, press ADD/ DLT to clear current code.
Repeat steps 3 and 4 to enter new code.
Note:
• “NEXT PAGE” displays CANADI AN V-Chip menu.
Please refer to pages 6-7 for more details on Canadian
tapes or broadcasts.
■ “ON” ➞ V-Chip Control is activated.
■ “OFF” ➞ V-Chip Control is deactivated.
1
Press ACTION to display menu.
2
Press Ÿź Ż Ź to select “LOCK,” and
press ACTION.
MAIN MENU
TV LOCK LANGUAGE
CH CLOCK EXIT
SELECT:
SET :ACTION
3
Press Number keys to enter your secret
code, and enter same code again for
con¿rmation.
LOCK
ENTER 4-DIGIT CODE
----
ENTER :0-9
END :ACTION
4
Press Ź to display US Ratings menu
(see at right).
Or
Press ACTION twice to exit.
LOCK
CONFIRM 4-DIGIT CODE
RECOGNIZED
CHANGE CODE:ADD/DLT
CONTINUE:
END :ACTION
Enter Code Setup Blocking
1
Press Ÿź to select “US MOVIES,” and
press Ź to set “ON” or “OFF.”
LOCK
US MOVIES :OFF
CHANGE SETTINGS
US TV PROGRAMS :OFF
CHANGE SETTINGS
NEXT PAGE
SELECT: SET:
END :ACTION
2
Press Ÿź to select “CHANGE
SETTINGS,” and press Ź.
LOCK
US MOVIES :OFF
CHANGE SETTINGS
US TV PROGRAMS :OFF
CHANGE SETTINGS
NEXT PAGE
SELECT: SET:
END :ACTION
3
Press Ÿź to select “VIEW NR
PROGRAMS?,” and press Ź to set
“YES” or “NO.”
VIEW NR PROGRAMS? : YES
G UNLOCKED
PG
PG-13
R
NC-17
X
CONTAINS NO RATING
SELECT: SET:
END :ACTION
4
Press Ÿź to select and Ź to set
ratings. (See ratings chart on page 7.)
VIEW NR PROGRAMS? : YES
G UNLOCKED
PG
PG-13
R
NC-17
X
GENERAL AUDIENCE
SELECT: SET:
END :ACTION
5
Press ACTION to continue with US TV
PROGRAMS Ratings Setup (see page
7).
Or, press ACTION three times to exit.
-3-
/&&
#!0#
4%8 4#
#!0#
4%8 4#
Closed Caption Mode Feature
This multi-use system not only allows the hearing impaired to enjoy selected programs, but also
makes useful information from TV stations available to ever yone.
■ Recording and Playing Back a
Closed Caption/Text Program
Caption On Mute Feature
Closed Caption narration is displayed when
MUTE button is pressed for silence.
Record:
Record normally. Closed Caption / Text
signal is recorded automatically.
Playback:
Start playback, and do above steps to
select desired caption mode.
Note:
• The closed caption or text signal may be broadcast
over C1, C2, or both. Also, text contents can vary so
you may wish to try different settings.
1
Press ACTION to display menu.
2
Press Ÿź Ż Ź to select “TV,” and
press ACTION.
MAIN MENU
TV LOCK LANGUAGE
CH CLOCK EXIT
SELECT:
SET :ACTION
3
Press Ÿź to select “CAPTION,” and
press Ź.
6(78379
&$37,21
,13876(/(&7781(5
9,'(2$'-867
7$3(6(/(&77
6(/(&76(7
(1'$&7,21
4
Press Ÿź to select “CAPTION
MODE,” and press Ź repeatedly to
select mode. (See below.)
CAPTION
CAPTION MODE : CAP C1
CC ON MUTE : NO
SELECT: SET:
END :ACTION
■ CAP C1 or CAP C2
A narration of selected TV programs is
displayed. Check T V program listings for
CC (Closed Caption) broadcasts.
■ TEXT C1 or TEXT C2
The lower half of the screen will be blocked
out. When the TV station broadcasts
information, such as program listings, it will
appear in this space.
■ OFF
Closed Caption / Text narration will not be
displayed.
5
Press ACTION three times to exit.
1
Do steps 1~3 at left.
2
Press Ÿź to select “CAPTION
MODE,” and press Ź repeatedly to
select “OFF.”
CAPTION
CAPTION MODE : OFF
CC ON MUTE : CAP C1
SELECT: SET:
END :ACTION
3
Press Ÿź to select “CC ON MUTE,”
and press Ź repeatedly to select a
mode. (See below.)
CAPTION
CAPTION MODE : OFF
CC ON MUTE : CAP C1
SELECT: SET:
END :ACTION
4
Press ACTION three times to exit.
5
Press MUTE to mute the sound and
display closed captioning.
• To cancel, press MUTE again.
Closed Caption System
Picture Adjustment ON-TIMER Sleep Timer Closed Caption Mode Feature Caption On Mute Feature
-2-
TV Features
Picture Adjustment
To Reset Picture Controls,
press Ÿź and Ź to select and set “NORMAL.” All
controls return to their factory settings.
■ COLOR Control
Adjust colour intensity.
■ TINT Control
Adjust for natural Àesh tones.
■ BRIGHTNESS Control
Adjust picture brightness.
■ PICTURE Control
Adjust picture intensity by adjusting both contrast
and colour level in the proper balance.
■ SHARPNESS Control
Adjust picture sharpness.
Press SLEEP repeatedly to set SLEEP TIMER.
• Pressing DISPLAY with sleep timer set displays
remaining time.
To c an cel,
press SLEEP repeatedly until “SLEEP TIMER 0”
appears.
Sleep Timer
This unit can be set for auto power off.
SLEEP TIMER 30
SLEEP TIMER 60
SLEEP TIMER 90
SLEEP TIMER 0
1
Press ACTION to display menu.
2
Press Ÿź Ż Ź to select “TV,” and press
ACTION.
MAIN MENU
TV LOCK LANGUAGE
CH CLOCK EXIT
SELECT:
SET :ACTION
3
Press Ÿź to select “VIDEO ADJUST,”
and press Ź.
SET UP TV
CAPTION
INPUT SELECT :TUNER
VIDEO ADJUST
TAPE SELECT :T-120
SELECT: SET:
END :ACTION
4
Press Ÿź to select an adjustment item
(see below.), and press ŻŹ to adjust.
COLOR
TINT
BRIGHTNESS
PICTURE
SHARPNESS
NORMAL
SELECT: ADJUST:
END :ACTION
5
Press ACTION three times to exit.
COLOR
TINT
BRIGHTNESS
PICTURE
SHARPNESS
NORMAL
SELECT: SET:
END :ACTION
This unit can be set to automatically power on in
one of 2 modes (TV, Playback).
Press PROG to display SET PROGRAM
screen.
• Make sure a tape is inserted if Playback mode is
selected.
• ON-TIMER mode
selection order
Press PROG to set ON TIMER.
• “ON TIMER SET” is displayed.
• ON TIMER Indicator lights on unit.
Press Ÿź to select “ON TIMER,” and
press Ź to display ON TIMER screen.
To C an cel ON-TI MER ,
Repeat steps 1 and 2. Then, press ADD/DLT to
clear the time in step 3. Now, press PROG to end.
“ON TIMER END” brieÀy appears on-screen.
ON-TIMER
1
2
3
4
Press Ÿź to select desired settings,
and press Ź to set the ON-TIMER time
and ON-TIMER mode.
To Make Corrections, use Ÿź and ŻŹ to
move back and correct.
-7-
V-Chip Control Features (continued)
Blocking Message
If a program or movie exceeds the ratings you
have set, a message will appear and sound is
muted.
<When V-Chip Control is activated>
■ To View a Blocked Program / Movie
[Temporarily Deactivate V-Chip Control]
Enter your secret code (ACCESS CODE) in the
Blocking Message screen.
• V-Chip Control is reactivated when power is turned
off or power failure occurs.
[Deactivate V-Chip Control]
Enter your secret code (see page 4).
Then, set US MOVIES and/or US TV
PROGRAMS and/or CANADIAN ENGLISH
LANGUAGE and/or CANADIAN FRENCH
LANGUAGE to “OFF” using Ÿź and Ź.
(Ratings set is retained and will be in effect
when V-Chip Control is activated again.)
US TV PROGRAMS RATINGS:
Chart 2
US TV PROGRAMS RATINGS:
Chart 1
US MOVIES RATINGS
G
GENERAL AUDIENCE:
All ages admitted.
PG
PARENTAL GUIDANCE:
Some material may not be suitable for
children.
PG-13
PARENTS CAUTIONED:
Some material may be inappropriate for
children under 13.
R
RESTRICTED:
Children under 17 must be accompanied
by a parent or adult.
NC-17
OVER AGE 17 ONLY:
No one 17 and under admitted.
XADULTS ONLY:
FV Fantasy Violence
VViolence
SSexual Situations
LAdult Language
D Sexually Suggestive Dialogue
TV-Y
FOR ALL CHILDREN:
Content speci¿cally geared to young
viewers ages 2-6.
TV-Y7
FOR AGE 7 AN D OLDER:
May contain mild physical or comedic
violence which may frighten children
under 7.
TV-G
GENERAL AUDIENCE:
Contains little or no violence, strong
language, or sexual dialogue or
situations.
TV-PG
PARENTAL GUIDANCE:
May contain infrequent coarse language,
limited violence, some suggestive sexual
dialogue and situations.
TV-14
PARENTS CAUTIONED:
May contain sophisticated themes, sexual
situations, strong language, and more
intense violence.
TV-MA
MATURE AUDIENCE:
May contain mature themes, profane
language, graphic violence, and sexual
situations.
Enter Code Setup Blocking
CH 08
PROGRAM RATING EXCEEDED
RATING:PG-13
ACCESS CODE ----
ENTER :0-9
• If DISPLAY is pressed, even when V-Chip control is
deactivated, rating is displayed on-screen.
• If DISPLAY is pressed, if there is no V-Chip data,
“NO V- CHIP DATA” is displayed on-screen.
Canadian English Language Ratings Canadian French Language Ratings Blocking Message Ratings Charts
CH 08
PROGRAM RATING EXCEEDED
RATING:13ANS+
ACCESS CODE ----
ENTER : 0-9
<Canadian Ratings> <US Ratings>
PLAY 12:00AM
0:12:34
SP
RATING:13ANS+
PLAY 12:00AM
0:12:34
SP
RATING:PG-13
<Canadian Ratings> <US Ratings>
PLAY 12:00AM
0:12:34
SP
NO V-CHIP DATA
Canadian English Language
RATINGS
CChildren
C8+ Children 8 years and older
G General Audience
PG Parental Guidance
14+ Viewers 14 years and older
18+ Adult Programming
Canadian French Language
RATINGS
G General Audience
8 ANS + Not recommended for young children
13 ANS + Programming may not be suitable for
children under the age of 13
16 ANS + Programming is not suitable for children
under the age of 16
18 ANS + Programming restricted to adults
SET PROGRAM
TIMER PROGRAMMING
ON TIMER
SELECT: SET:
END :PROG
ON TIMER
10:--AM CH --
SELECT: SET:
END :PROG
ON TIMER
10:00AM CH 05
CANCEL:ADD/DLT
SELECT: SET:
END :PROG
CH01
CH02CH
PLAY
03
CH125
./
#!0#
#!0#
Page 5

-12-
Garantie/Liste des centres de service
Modification des réglages de la langue, des canaux, de l’horloge et du fuseau horaire Garantie/Liste des centres de service
Panasonic Canada Inc.
5770 Ambler Drive, Mississauga, Ontario L4W 2T3
Certi¿cat de garantie limitée Panasonic
Panasonic Canada Inc. garantit cet appareil contre tout vice de fabrication et accepte, le cas échéant,
de remédier à toute défectuosité pendant la période indiquée ci-dessous et commençant à partir de la
date d’achat original.
Combinés télé-magnétoscope et téléviseur/magnétoscope/lecteur DVD
21 po ou moins Service en atelier seulement
Un (1) an, pièces, main-d’oeuvre et lampe-écran
comprises
22 po et plus Service à domicile
Un (1) an, pièces, main-d’oeuvre et lampe-écran
comprises
Le service à domicile ne sera offert que dans les régions accessibles par routes et situées dans un
rayon de 50 km d’un centre de service agréé Panasonic.
LIMITATIONS ET EXCLUSIONS
Cette garantie n’est valide que pour les appareils achetés au Canada et ne couvre pas les dommages
résultant d’une installation incorrecte, d’un usage abusif ou impropre ainsi que ceux découlant d’un
accident en transit ou de manipulation. De plus, si l’appareil a été altéré ou transformé de façon à
modi¿er l’usage pour lequel il a été conçu ou utilisé à des ¿ns commerciales, cette garantie devient
nulle et sans effet. Les piles sèches ne sont pas couvertes sous cette garantie.
Cette garantie est octroyée à l’utilisateur original seulement. La facture ou autre preuve de la date
d’achat original sera exigée pour toute réparation sous le couvert de cette garantie.
CETTE GARANTIE LIMITÉE ET EXPRESSE REMPLACE TOUTE AUTRE GARANTIE, EXPRESSE
OU IMPLICITE, EXCLUANT LES GARANTIES IMPLICITES DU CARACTÈRE ADÉQUAT POUR LA
COMMERCIALISATION OU UN USAGE PARTICULIER.
PANASONIC N’AURA D’OBLIGATION EN AUCUNE CIRCONSTANCE POUR TOUT DOMMAGE
DIRECT, INDIRECT OU CONSÉCUTIF.
Certaines juridictions ne reconnaissent pas les exclusions ou limitations de dommages indirects ou
consécutifs, ou les exclusions de garanties implicites. Dans de tels cas, les limitations stipulées
ci-dessus peuvent ne pas être applicables.
RÉPARATION SOUS GARANTIE
Pour de l’aide sur le fonctionnement de l’appareil ou pour toute demande d’information, veuillez
contacter votre détaillant ou notre service à la clientèle au :
N° de téléphone: (905) 624-5505 N° de télécopieur: (905) 238-2360
Site Internet: www.panasonic.ca
Pour la réparation des appareils, veuillez consulter :
• votre détaillant, lequel pourra vous renseigner sur le centre de service agréé le plus près de votre domicile ;
• notre service à la clientèle au (905) 624-5505 ou www.panasonic.ca ;
• un de nos centres de service de la liste ci-dessous :
Richmond,
Colombie-Britannique
Calgary, Alberta Mississauga, Ontario Lachine, Québec
Panasonic Canada Inc.
12111 Riverside Way
Richmond, BC V6W 1K8
Tél. : (604) 278-4211
Téléc. : (604) 278-5627
Panasonic Canada Inc.
6835-8
th
St. N.E.
Calgary, AB T2E 7H7
Tél. : (403) 295-3955
Téléc. : (403) 274-5493
Panasonic Canada Inc.
5770 Ambler Dr.
Mississauga, ON L4W 2T3
Tél. : (905) 624-8447
Téléc. : (905) 238-2418
Panasonic Canada Inc.
3075, rue Louis A. Amos
Lachine, QC H8T 1C4
Tél. : (514) 633-8684
Téléc. : (514) 633-8020
Expédition de l’appareil à un centre de service
Emballer soigneusement l’appareil, de préférence dans le carton d’origine, et l’expédier port payé et
assuré au centre de service.
Inclure la description détaillée de la panne et la preuve de la date d’achat original.
-11 -
Langue Canaux Horloge Fuseau horaire
Modification des réglages de la langue, des canaux, de l’horloge et du fuseau horaire
puis appuyer sur Ź à
répétition pour
sélectionner un mode.
(“FUSEAU HORAIRE” ne
s’affiche qu’une fois
l’hor loge réglée.)
Espagnol
Franç ais
Appuyer sur ACTION pour afficher l’écran MENU.
0
+
1
-
1
Ajout ou effacement d’un canal
■ Pour ajouter un canal
Sélectionner le canal au moyen des touches
numériques, puis appuyer sur ADD/DLT.
■ Pour supprimer un canal
Sélectionner le canal au moyen des touches CH Ÿ
ź ou des touches numériques, puis appuyer sur
ADD/DLT.
MENU
TELE BLOCAGE LANGUE
CANAL HORLOGE SORTIE
SEL. :
REGLER:ACTION
1
Appuyer sur Ÿź
ŻŹ pour
sélectionner
“LANGUE”.
MENU
TELE BLOCAGE LANGUE
CANAL HORLOGE SORTIE
SEL. :
REGLER:ACTION
2
Appuyer à
répétition sur
ACTION.
MENU PRINCIPAL
TV BLOQUEO IDIOMA
CANAL RELOJ SALIR
ELEGIR:
FIJAR :ACTION
MENU
TELE BLOCAGE LANGUE
CANAL HORLOGE SORTIE
SEL. :
REGLER:ACTION
Anglais
MAIN MENU
TV LOCK LANGUAGE
CH CLOCK EXIT
SELECT:
SET :ACTION
3
Appuyer sur Ÿź
ŻŹ pour
sélectionner
“SORTIE”.
Appuyer sur
ACTION pour
quitter.
1
Appuyer sur Ÿ
źŻ Ź pour
sélectionner
“CANAL”, puis
appuyer sur
ACTION.
MENU
TELE BLOCAGE LANGUE
CANAL HORLOGE SORTIE
SEL. :
REGLER:ACTION
2
Appuyer sur Ÿź
pour sélectionner
“ANTENNE”, puis
appuyer sur Ź
pour sélectionner
l’entrée
d’antenne (TELE
ou CABLE).
REGLAGE CANAL
ANTENNE :TELE
REGLAGE AUTO
AVIS SIGNAL FAIBLE:OUI
SEL. : REGLER:
FIN :ACTION
3
Appuyer sur Ÿź
pour
sélectionner
“REGLAGE
AUTO”, puis
appuyer sur Ź.
• Une fois le réglage
automatique des
canaux terminé, le
réglage automatique
de l’horloge
s’amorce. (Si
l’horloge a été réglée
manuellement, le
réglage automatique
de l’horloge n’est
pas fait
automatiquement.)
1
Appuyer sur Ÿź Ż Ź pour sélectionner
“HORLOGE”, puis appuyer sur
ACTION.
MENU
TELE BLOCAGE LANGUE
CANAL HORLOGE SORTIE
SEL. :
REGLER:ACTION
2
Appuyer sur Ÿź
pour
sélectionner
“MANUEL” ou
“REGLAGE
AUTOMATIQUE”,
puis appuyer sur
Ź.
REGLAGE HORLOGE
REGLAGE AUTOMATIQUE
MANUEL
FUSEAU HORAIRE : 0
SEL. : REGLER:
FIN :ACTION
3
Appuyer sur Ÿź
et sur ŻŹ pour
sélectionner et
régler le mois, la
date, l’année,
l’heure et l’heure
avancée (HR
ETE).
(Si “MANUEL” est
sélectionné)
REGLAGE HORLOGE
1/ 4/2004 DIM 12:00AM
HR ETE:OUI
-----------------------
SEL. : REGLER:
MARCHE:ACTION
4
Appuyer à deux
reprises sur
ACTION pour
mettre l’horloge
en marche et
quitter ce mode.
2
Appuyer sur Ÿź
pour
sélectionner
“FUSEAU
HORAIRE”,
3
Appuyer à deux
reprises sur
ACTION pour
quitter.
CANAL 08 AJOUTE
(Seulement lorsque le
réglage de l’horloge a
été fait
automatiquement.)
Table des matières
IMPORTANTES MESURES DE SÉCURITÉ.....................................................2
Mesures de sécurité ..........................................................................................3
Préparatifs .........................................................................................................4
Raccordements/Réglage initial (Prêt pour la lecture)........................................5
Fonctions de base (appareil) .............................................................................6
Fonctions de base (cassette) ............................................................................7
Emplacement des commandes .........................................................................9
Modification des réglages de la langue, des canaux, de l’horloge et du fuseau horaire
............11
Garantie/Liste des centres de service.............................................................12
Nous vous recommandons de lire attentivement ces instructions
avant de brancher, d’utiliser ou de régler l’appareil et de les
conserver pour référence ultérieure.
Modèles
PV-C1324-K/PV-C1334W-K/
PV-C2024-K
À titre de participant au programme ENERGY STAR®, Panasonic
assure que cet appareil, ou ce modèle,
satisfait aux normes d’ef¿cacité énergétique du programme.
Combiné télé-magnétoscope
Manuel d’utilisation
(Fonctions de base)
Pour les fonctions avancées, consulter le manuel
d’utilisation des fonctions avancées.
Pour de l’aide, composez le 1-800-561-5505 ou visitez notre site Internet à www.panasonic.ca
Ce manuel d’utilisation se rapporte aux modèles PV-C1324-K,
PV-C1334W-K et PV-C2024-K. Les illustrations figurant dans ce
manuel s’appliquent au PV-C2024-K.
LSQT0808 A
-10-
Emplacement des commandes (suite)
Panneau avant de l’appareil et indicateurs
9,'(2,1 $8',2,1
32:(5 92/ &+
6723(-(&7 5(:
3/$<5(3($7
)) 5(& ,1387
$&7,21
5(& 217,0(5
352*7,0(5
Panneau arrière
VHF/UHF
1
Prise d’alimentation c.a.
Une fois l’appareil branché sur le secteur, sa consommation d’énergie
sera de 2,5 W (avec le contact coupé).
2
Prise d’entrée de l’antenne
VHF/UHF
Prise pour le raccordement d’une antenne ou du câble.
Télécommande Panneau avant de l’appareil et indicateurs Panneau arrière
1
2345678910111213141516
12
1 Haut-parleur incorporé 2 haut-parleurs avant.
2
Prise d’entrée audio
vidéo
Pour le doublage.
3 Interrupteur Mise en/hors marche de l’appareil.
4
Volume Réglage du volume.
Réglage/recul Règle un menu sélectionné ou recul pour corriger.
5
Changement de canal Sélection d’un canal.
Pistage Réduction du bruit vidéo pendant la lecture et le ralenti.
Sélection Pour naviguer dans le menu affiché à l’écran.
6
Arrêt Arrêt de l’enregistrement ou de la lecture en cours.
Éjection Éjection de la cassette.
Action Appuyer de pair avec la touche REW.
7
Rebobinage/repérage Rebobinage de la bande et repérage arrière de séquence.
Action Appuyer de pair avec la touche STOP.
8
Lecture Amorce la lecture.
Reprise Lecture en reprise d’un enregistrement.
9
Avance
accélérée/repérage
Défilement avant rapide de la bande et repérage avant de séquence.
10 Enregistrement Enregistrement d’un programme.
11 Entrée Sélection de l’entrée LIGNE.
12
Capteur de signal de la
télécommande
Reçoit le signal infrarouge émis par la télécommande.
13
Indicateur
d’enregistrement
S’allume pendant l’enregistrement.
14 Indicateur de minuterie
S’allume pour confirmer la programmation de la minuterie de mise sous tension
automatique.
15
Indicateur
d’enregistrement
différé
S’allume pour confirmer le réglage d’un enregistrement différé.
16
Prise de casque
d’écoute
Permet le branchement d’écouteurs ou d’un casque d’écoute.
-9-
Emplacement des commandes
Télécommande
1
2
3
4
5
6
7
8
9
10
11
12
13
25 24
23
22
21
20
19
18
17
16
15
14
26
1
Interrupteur Mise en/hors marche de l’appareil.
2
Affichage Affichage de l’état du magnétoscope et de l’heure du jour.
3
Affichage de position de
la bande
Pour connaître la position actuelle de la bande et la durée restante.
4
Remise à zéro du
compteur
Remise à “0:00:00” à la position désirée.
5
Syntonisation rapide Affichage du dernier canal syntonisé.
6
Réglage silencieux Coupure instantanée du son.
7
Changement de canal Sélection d’un canal.
Sélection Pour naviguer dans le menu affiché à l’écran.
8
Action Affichage du menu principal.
9
Arrêt Arrêt de l’enregistrement ou de la lecture en cours.
10
Rebobinage/repérage Rebobinage de la bande et repérage arrière de séquence.
11
Pause/ralenti Pause, ralenti et défilement image par image.
12
Enregistrement Enregistrement d’un programme.
13
Entrée Sélection de l’entrée LIGNE.
14
Vitesse Sélection de la vitesse de défilement à l’enregistrement.
15
Saut de pauses
publicitaires/repérage à
zéro
En mode d’arrêt, permet de défiler jusqu’à la position correspondant au point 0:00:00. En
mode de lecture, permet de sauter entre 1 et 3 minutes d’enregistrement (saut de
publicité).
16
Avance
accélérée/repérage
Défilement avant rapide de la bande et repérage avant de séquence.
17
Lecture Amorce la lecture.
18
Programmation
Pour appeler l’écran REGLAGE PROGRAMMATION. Permet la programmation de
l’enregistrement différé et de la minuterie de mise sous tension automatique.
19
Volume Réglage du volume.
Réglage/recul Règle un menu sélectionné ou recul pour corriger.
20
Recherche Repérage rapide de l’enregistrement désiré. Repère la fin des enregistrements.
21
Ajout/effacement Mémorise ou efface un canal.
22
Touches numériques Syntonisation directe d’un canal.
23
Pistage Réduction du bruit vidéo pendant la lecture et le ralenti.
24
Minuterie-sommeil Mise hors marche automatique.
25
Nuit
Le niveau de la couleur et la luminosité de l’image sont réglés pour un visionnement dans
des conditions de faible éclairage ambiant.
26
Éjection Une pression de cette touche pendant un enregistrement demeure sans effet.
-8-
Imprimé en Indonésie
LSQT0808 A
S0104-0
K
Montréal:
3075 Louis A. Amos, Lachine, Québec H8T 1C4 (514) 633-8684
Tor onto:
5770 Ambler Drive, Mississauga, Ontario L4W 2T3 (905) 624-8447
Calgary:
6835 - 8th Street N.E., Calgary, Alberta T2E 7H7 (403) 295-3955
Vancouver:
12111 Riverside Way, Richmond, BC V6W 1K8 (604) 278-4211
Panasonic Canada Inc.
5770 Ambler Drive,
Mississauga, Ontario L4W 2T3
(905) 624-5010
www.panasonic.ca
REGLAGE HORLOGE
REGLAGE AUTOMATIQUE
MANUEL
FUSEAU HORAIRE : 0
SEL. : REGLER:
FIN :ACTION
CANAL 08 EFFACE
Page 6
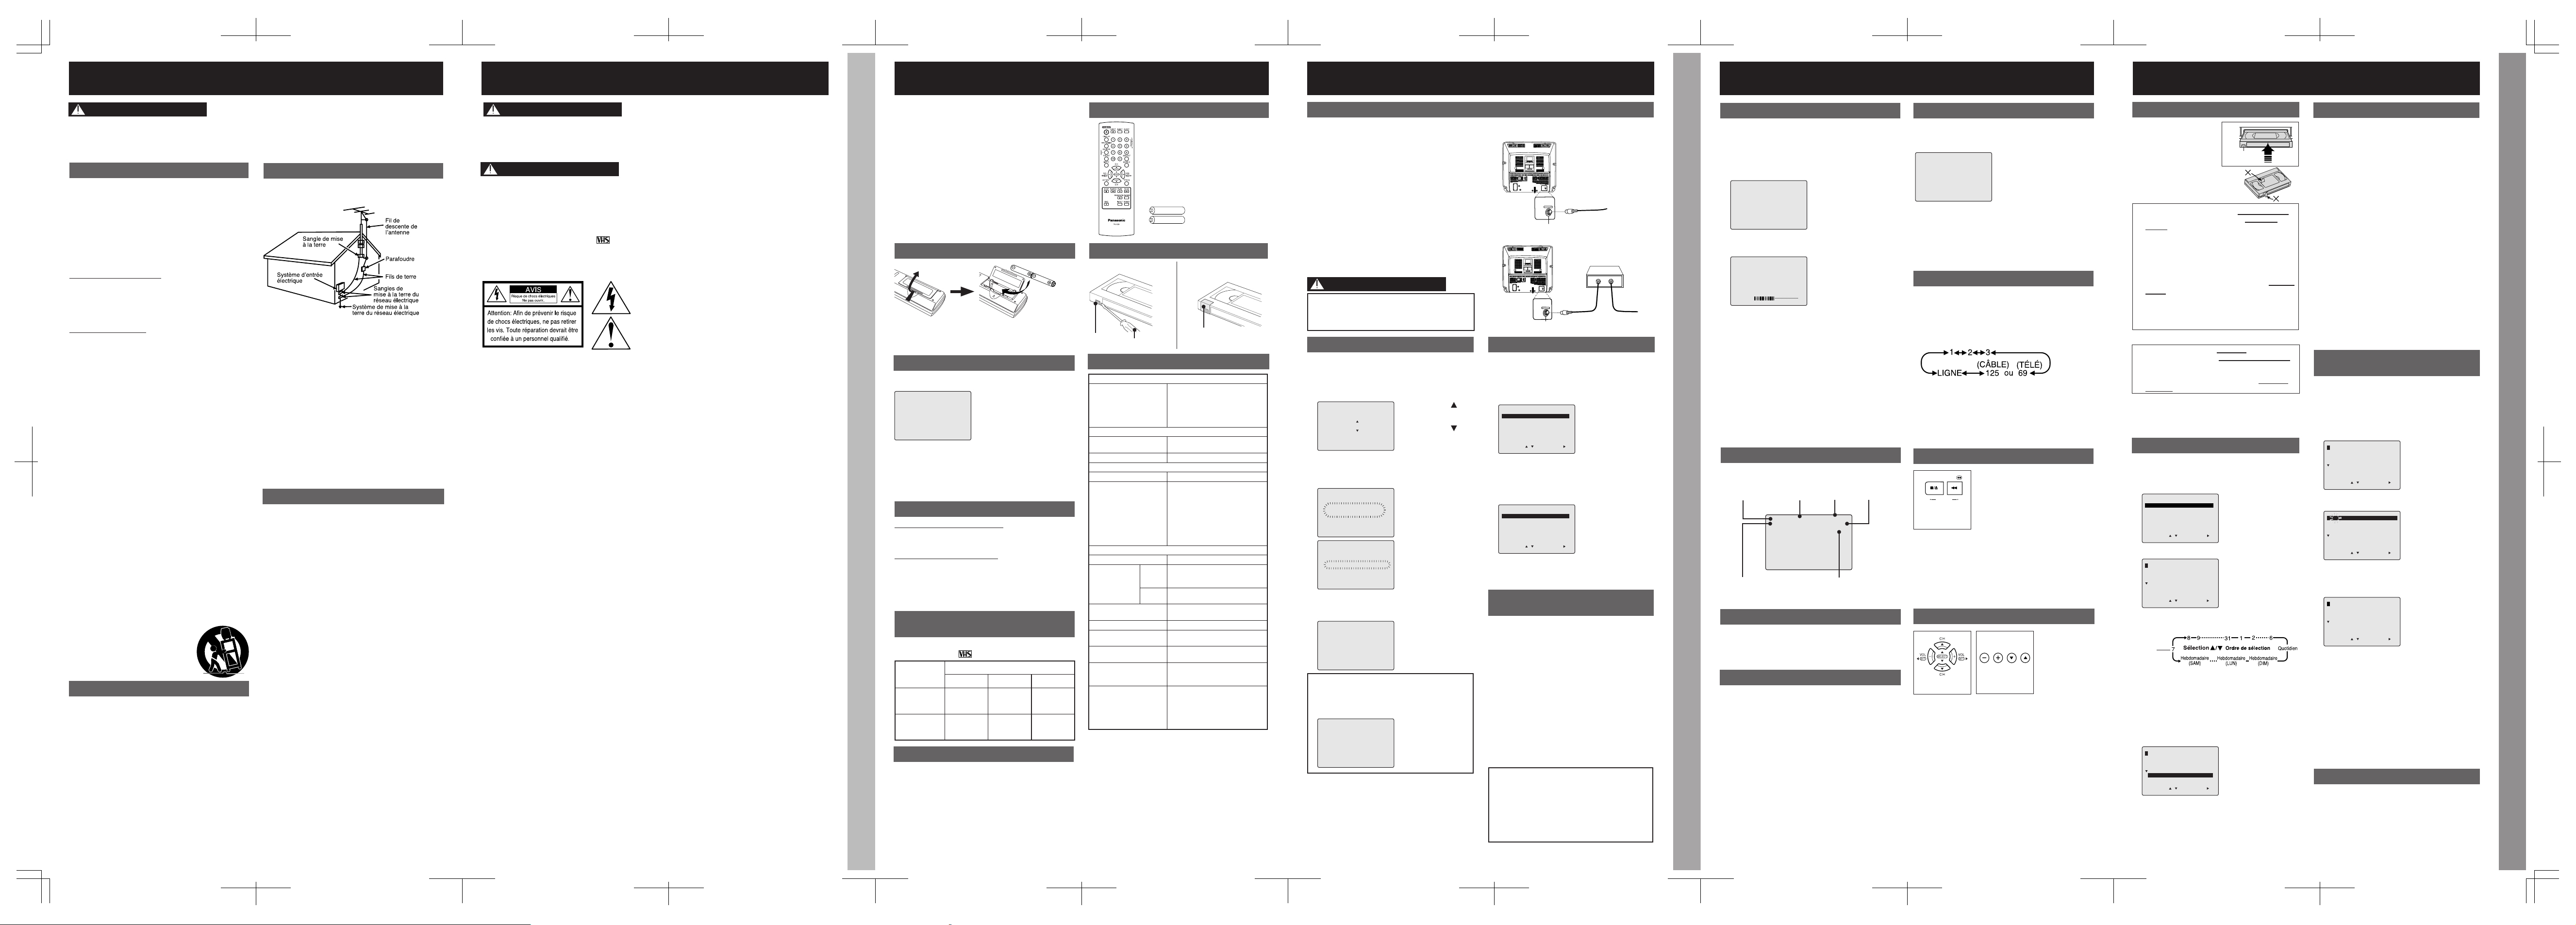
-6-
Fonctions de base (appareil)
ENREG 12:00PM CA 08
0:47 0:12:20
SLP
AUCUN VISA EMIS
Appuyer sur POWER sur l’appareil ou
sur la télécommande.
Utiliser CH Ÿź ou les touches
numériques pour sélectionner un
canal.
Appuyer sur VOL+ ou VOL- pour régler
le volume.
■ Utilisation de la touche 100
Pour sélectionner les canaux 100 à 125 au moyen
des touches numériques, appuyer d’abord sur la
touche 100, puis entrer les deux autres chiffres.
■ Syntonisation rapide
Appuyer sur la touche R-TUNE pour syntoniser le
dernier canal sélectionné.
■ Réglage silencieux
Appuyer sur MUTE pour couper instantanément le
son. Appuyer de nouveau pour rétablir le son à son
volume d’origine.
■ Casque d’écoute
Brancher un casque d’écoute ou des écouteurs
(vendus séparément) dans la prise de casque
d’écoute.
Mode nuit
Le rendu chromatique et le niveau de luminosité
sont adoucis de manière à ne pas fatiguer les yeux
lors d’un visionnement nocturne.
Appuyer sur NIGHT pour
régler.
Appuyer sur NIGHT pour
annuler.
• Les réglages précédents
sont rétablis.
• Le mode NUIT est désactivé
lors de la coupure du contact
ou à la suite d’une panne de
courant.
Visionnement
Sélection du mode d’entrée
■ Méthode 1
Appuyer à répétition sur INPUT.
Numéro de canal Ù LIGNE
Appuyer sur DISPLAY pour faire apparaître ou
disparaître l’affichage.
Dans le cas où un passage d’une cassette est
vierge ou qu’il n’y a pas de signal sur le canal
syntonisé et que l’avertisseur de signal faible est
désactivé, l’écran devient bleu.
Fonction Heu re
Durée restante (mode autoenregistrement seulement, voir
page 7)
Compteur
Vitesse de
défilement
Identification
des canaux
Ligne d’état et affichage de l’heure
Écran bleu
Commande ACTION sur le combiné
Utilisation des touches Ÿź Ż Ź
Ÿ : Avance des canaux
ź : Régression des canaux
Ź : Augmentation du volume
Ż : Diminution du volume
Lorsque le menu ou l’écran de programmation est
affiché, les touches de syntonisation CH Ÿź et de
vol ume ne peuvent être utilisées qu’à la manière de
touches fléchées ŸźŻ Ź.
Sur la
télécommande
Sur le combiné
Sur le combi né
Il est possible de naviguer dans les menus au
moyen des touches de commande du combiné.
Pour afficher le menu, appuyer simultanément sur
les touches STOP/EJECT et REW sans qu’il n’y ait
de cassette dans l’appareil. Pour quitter le menu,
recommencer comme décrit ci-dessus.
STOP/EJECT REW/
ACTI ON
VOL CH
1
2
CA 08
3
24
NUIT
■ Méthode 2
Appuyer sur CH Ÿź. L’affichage change dans I’ordre
suivant.
Nota:
• Il est possible de régler le mode d’entrée à partir du
menu.
MENU Ö TELE Ö SELECT SOURCE Ö BLC ACCORD
ou LIGNE
Fonctions automatiques
■ Coupure automatique du contact
Si aucun signal n’est émis en mode télé (seulement
lorsque l’avis de signal faible est réglé sur NON) ou
lors du défilement d’une portion vierge pendant 5
minutes:
Ö Le contact se coupe automatiquement.
• Cette fonction est désactivée dans le cas où une touche
est pressée lors d’une des conditions mentionnées
ci-dessus.
■ Lecture automatique
Insérer une cassette. Ö Mise sous tension
automatique. Ö
La lecture s’amorce si la cassette n’a
pas sa languette de protection.
■ Rebobinage automatique
Fin de bande Ö Rebobinage Ö Arrêt
■ Éjection automatique après lecture
(la lecture en reprise est réglée à “NON”)
Lecture Ö Fin de bande Ö Rebobinage Ö Arrêt
Ö
Éjection de la cassette (sans languette de protection)
-5-
VHF/UHF
VHF/UHF
VHF/UHF
VHF/U
H
F
■ Antenne/Câblodistribution
Brancher le câble en provenance de
l’antenne ou de la câblodistribution à la
borne VHF/UHF de l’appareil.
Entrée de l’antenne ou de la
câblodistribution
VHF/UHF
S’assurer d’effectuer tous les raccordements avant de mettre l’appareil sous tension.
Câblosélecteur
Raccordements
Entrée de l’antenne ou de la
câblodistribution
Panneau arrière
Panneau arrière
■ Câblosélecteur/Récepteur DSS
Au moyen d’un câble RF, relier la prise OUT
du câblosélecteur à la borne VHF/UHF de
l’appareil.
VHF/UHF
Si les câbles RF coaxiaux utilisés sont de
type à écrou, ne serrer les écrous qu’à la
main. Les serrer trop pourrait endommager
les bornes.
Raccordements/Réglage initial (Prêt pour la lecture)
Si l’écran “REGLAGE AUTOMATIQUE DE
L’ H O R LO G E I N C O M P L E T ” a p p a r aî t ,
l’horloge doit être réglée manuellement
selon la marche à suivre décrite sur cette
même page.
Réglage initial (Prêt pour la lecture)
Brancher le cordon d’alimentation
dans une prise.
• Lors de l’utilisation
d’un câblosélecteur, le
mettre en contact et
syntoniser le canal
PBS. Si un récepteur
DSS est utilisé, il doit
être mis hors contact.
Le réglage se fait automatiquement.
Une fois le réglage terminé, l’écran
ci-dessous apparaît.
Appuyer sur POWER sur la
télécommande ou l’appareil.
Nota:
• Les touches de fonction sont inopérantes lors du
réglage initial.
• Pour retirer une cassette lors du réglage
automatique, appuyer sur la touche EJECT de la
télécommande. Ensuite, effectuer les réglages
manuellement. (Voir à la page 11.)
• Si le réglage automatique de l’horloge prend plus de
30 minutes, appuyer sur STOP et effectuer les
réglages manuellement. (Voir à la page 11.)
Réglage manuel de l’horloge
Dans le cas où le réglage automatique serait
incomplet.
Appuyer sur ACTION sur la
télécommande pour faire afficher le
menu REGLAGE HORLOGE.
Appuyer sur Ÿź pour sélectionner
le mois et appuyer sur Ź pour
régler. Régler la date, l’année,
l’heure et l’heure avancée (HR ETE)
de la même façon.
Appuyer sur ACTION pour mettre
l’horloge en marche et quitter.
Réinitialisation de toutes les
fonctions en mémoire
Retourne aux réglages d’usine. Utiliser cette
fonction lors du déplacement de l’appareil à un
autre endroit ou en cas d’erreur lors du réglage
initial.
• S’assurer qu’aucune cassette ne se trouve dans le
logement.
Établir le contact sur l’appareil.
Maintenir simultanément enfoncées
les touches PLAY/REPEAT et FF de
l’appareil pendant plus de 5
secondes.
• Le contact est coupé.
• Ignorer l’avertissement “AUCUNE CASSETTE
INSEREE”.
Refaire le “Réglage initial (Prêt pour
la lecture)” ci-contre.
Félicitations Insertion
des piles
Nettoyage
des têtes
Contrôle de la
qualité de
l’image
Durée maximum
d’enregistrement
et de lecture
Heure avancée
(heure d’été)
Accessoires Protection
contre
l’effacement
Données
techniques
Raccordements Réglage initial
(Prêt pour la
lecture)
Réglage
manuel de
l’horloge
Réinitialisation de
toutes les fonctions
en mémoire
1
2
REGLAGE AUTOMATIQUE
EN COURS
REGLAGE AUTOMATIQUE
DE L’HORLOGE EN COURS
ANNULER:STOP
4
1/ 4/2004 DIM 12:00PM
HR ETE:OUI
REGLAGE : CA
REGLAGE AUTOMATIQUE DE
L’HORLOGE COMPLETE
REGLAGE AUTOMATIQUE DE
L’HORLOGE INCOMPLET
REGLER L’HORLOGE
EN APPUYANT SUR ACTION
1
2
3
1
2
3
Le réglage automatique des canaux
et de l’horloge s’amorce.
3
SELECT LANGUAGE
PRESS CH :English
APPUYER CH :Français
OPRIMIR VOL+ :Español
Appuyer sur CH pour
sélectionner English.
Ou
Appuyer sur CH pour
sélectionner Français.
Ou
Appuyer sur VOL+ pour
sélectionner Español.
Note à l’intention de l’installateur du
câble:
Ne pas oublier de rappeler au technicien
installant le câble que le Code canadien de
l’électricité contient des directives quant à la
mise à la terre de l’installation; il précise en
outre que le câble doit être relié à la mise à
la terre de l’immeuble aussi près du point
d’entrée du câble que possible.
ATTENTION
-4-
Têtes vidéo avec système
de détection
Si les têtes ont besoin d’être
nettoyées, l’écran ci-contre
apparaît à la lecture d’une
cassette. Pour quitter l’écran,
appuyer sur la touche PLAY
de la télécommande ou de
l’appareil.
Félicitations
Accessoires
Avertissement
• Ne pas utiliser une pile neuve avec une pile usagée.
• Ne pas utiliser une pile alcaline avec une pile au
manganèse.
Briser la languette.
Languette de
protection
Tou r nev is
Pour enregistrer à
nouveau.
Recouvrir l’ouverture
avec du ruban adhésif.
Insertion des piles Protection contre l’effacement
■ Tél écomm ande
■ Deux piles “AA”
Vous avez arrêté votre choix sur l’un des produits les plus
perfectionnés et les plus fiables sur le marché. Utilisé
correctement, il ne manquera pas de procurer à vous et à
votre famille des années de plaisir. Veuillez prendre le
temps de remplir l’encadré ci-dessous. Le numéro de
série est inscrit sur l’étiquette apposée sur le panneau
arrière de l’appareil.
EUR7723010
La lecture de bandes usées ou endommagées peut
encrasser les têtes vidéo.
Nettoyage des têtes
Durée maximum
d’enregistrement et de lecture
N’utiliser dans cet appareil que des cassettes
portant la marque
.
Pistage numérique automatique
Cette fonction analyse constamment le signal et effectue
les corrections nécessaires en vue d’assurer une qualité
d’image optimale.
Commande de pistage manuel
Pendant la lecture ou le ralenti, utiliser cette fonction pour
réduire la distorsion de I’image. Appuyer sur les touches
numériques 3 ou 6 de la télécommande ou les touches
des canaux de I’appareil jusqu’à ce que I’image soit nette.
Pour revenir au mode de pistage automatique, couper le
contact puis le rétablir quelques secondes plus tard.
Contrôle de la qualité de l’image
• N’utiliser que des cassettes de nettoyage “à sec”.
(Cassette NV-TCL30PT recommandée)
• S’assurer de se conformer aux instructions d’utilisation
de la cassette de nettoyage. Des nettoyages fréquents
peuvent réduire la durée de vie des têtes.
Cet appareil permet le réglage automatique de
l’horloge à l’heure avancée.
Heure avancée (heure d’été)
■
Au printemps (Premier dimanche d’avril)
HR ETE : OUI Ö l’horloge est avancée d’une heure.
■
À l’automne (Dernier dimanche d’octobre)
HR ETE : OUI Ö l’horloge recule d’une heure.
• Si l’heure avancée n’est pas en vigueur dans votre région,
sélectionner HR ETE : NON.
• Tenir compte de ces modifications lors de la
programmation de l’appareil.
LE NETTOYAGE DES TETES
PEUT ETRE NECESSAIRE
INSERER UNE CASSETTE DE
NETTOYAGE OU CONSULTER
LE MANUEL
FIN:PLAY
Préparatifs
Données techniques
Nota:
• Les caractéristiques et données techniques peuvent être
modifiées sans préavis.
• Date d’achat ________________________
• Détaillant ___________________________
• Adresse du détaillant _________________
• N° de téléphone du détaillant ___________
• N° de modèle _______________________
• N° de série _________________________
Vitesse
Type de cassette vidéo
T120 T160 T180
SP
(Standard)
2 heures
2 heures
40 minutes
3 heures
SLP
(Ultra longue
durée)
6 heures 8 heures 9 heures
Affichage
Tub e image
• Tube image de 33 cm (13 po),
mesuré en diagonale, à 90°
(PV-C1324-K/ PV-C1334W-K)
• Tube image de 50,8 cm (20 po),
mesuré en diagonale, à 90°
(PV-C2024-K)
Magnétoscope
Système
d’enregistrement vidéo
Balayage hélicoïdal à 2 têtes
rotatives
Système audio 1 piste
Bloc d’accord
Canaux télévisés VHF 2 à 13, UHF 14 à 69
Canaux câblodistribués
Bande moyenne “A” à “I” (14 à 22)
Bande supérieure “J” à “W” (23 à
36)
Bande hyper “AA” à “EEE” (37 à
64)
Bande inférieure “A5” à “A1” (95 à
99)
Canal spécial 5A (01) Ultrabande
65 à 94, 100 à 125
Divers
Alimentation 120 V c.a., 60 Hz
Consommation
En
contact
• Environ 69 watts (PV-C1324-K /
PV-C1334W-K)
• Environ 110 watts (PV-C2024-K)
Hors
contact
Environ 2,5 watts
Système de télédiffusion
Standard EIA, signal couleur
NTSC
Haut-parleur 1 élément
Tem pé rature de
fonctionnement
5 °C à 40 °C (41 °F à 104 °F)
Humidité de
fonctionnement
10 % à 75 %
Poids
• 12 kg (26,4 lb) (PV-C1324-K/
PV-C1334W-K)
• 23 kg (50,6 lb) (PV-C2024-K)
Dimensions
(L x H x P)
• 386 mm (15 3/16 po) x 385 mm
(15 3/16 po)x 374 mm (14 3/4 po)
(PV-C1324-K/ PV-C1334W)
• 515 mm (20 5/16 po) x 505 mm
(19 7/ 8 po) x 474 mm
(18 11/16 po) (PV-C2024-K)
-3-
Mesures de sécurité
Le symbole de l’éclair dans un triangle équilatéral
indique la présence d’une tension suffisamment élevée
pour engendrer un risque de chocs électriques. Il est
dangereux de toucher à une pièce interne de l’appareil.
Ce télé-magnétoscope muni du système HQ est compatible avec le matériel VHS. N’utiliser que
des cassettes portant la marque
. Il est recommandé de n’utiliser que des cassettes qui ont été
testées pour l’utilisation avec des magnétoscopes permettant une durée d’enregistrement de 2, 4,
6 et 8 heures.
Cet appareil permet I’affichage des sous-titres.
Importantes mesures de sécurité Mesures de sécurité
AFIN DE PRÉVENIR TOUT RISQUE D’INCENDIE OU DE CHOCS
ÉLECTRIQUES, NE PAS EXPOSER CET APPAREIL À LA PLUIE OU À
UNE HUMIDITÉ EXCESSIVE.
POUR ÉVITER LES CHOCS ÉLECTRIQUES, INTRODUIRE LA LAME
LA PLUS LARGE DE LA FICHE DANS LA BORNE
CORRESPONDANTE DE LA PRISE ET POUSSER JUSQU’AU FOND.
Le point d’exclamation dans un triangle équilatéral
indique que le manuel d’utilisation inclus avec l’appareil
contient d’importantes recommandations quant au
fonctionnement et à l’entretien de ce dernier. Il faut
donc le lire attentivement.
AVERTISSEMENT
ATTENTION
-2-
Installation d’une antenne extérieure
Utilisation de l’appareil
Installation
1 Mise en garde – Alimentation
N’alimenter l’appareil que sur le type de courant indiqué dans ce
manuel ou sur l’appareil. Dans le doute, consulter un détaillant
ou la compagnie d’électricité.
2 Fiche polarisée ou avec retour à la terre
Par mesure de sécurité, cet appareil est muni soit d’une fiche
polarisée (branches de largeur différente) ou d’une fiche à trois
branches. S’assurer d’insérer le cordon d’alimentation à fond.
Ne jamais le manipuler avec les mains mouillées lors de son
branchement ou débranchement. Nettoyer le cordon
régulièrement.
Mise en garde – Fiche polarisée:
Cette fiche ne peut être insérée dans une prise que dans un
sens. Si elle ne peut être entièrement insérée, essayer l’autre
sens. Si elle ne peut être insérée dans aucun des deux sens,
consulter un électricien pour faire modifier l’installation
électrique. Ne pas contourner cette mesure de sécurité en
modifiant la fiche.
Fiche avec retour à la terre:
Cette fiche ne peut être insérée que dans une prise avec retour à
la terre (prise à trois trous). Si cela s’avérait nécessaire,
consulter un électricien pour installer une prise adéquate. Ne
pas contourner cette mesure de sécurité en modifiant la fiche.
3 Cordon d’alimentation
Afin d’assurer le bon fonctionnement de l’appareil et d’éviter tout
risque de chocs électriques, d’incendie ou de blessure:
• Placer le cordon dans un endroit loin des appareils de chauffage et
dans un endroit où il ne risque pas d’être écrasé ou étiré. Ne pas
placer d’objet lourd sur le cordon.
• Ne pas essayer d’altérer le cordon.
• Si une rallonge devenait nécessaire, s’assurer qu’elle comporte une
fiche polarisée ou une fiche avec retour à la terre et que le
raccordement puisse se faire de manière sécuritaire.
• Les prises murales surchargées et les rallonges peuvent être cause
d’incendie ou de chocs électriques.
• Toute prise, fiche ou cordon endommagés doivent être remplacés par
un électricien qualifié.
4 Ne pas bloquer les évents d’aération
Les évents d’aération du boîtier assurent l’évacuation de la
chaleur produite par le fonctionnement de l’appareil. Le blocage
des évents peut entraîner une surchauffe et un risque d’incendie
ou de dommage aux cassettes. Pour plus de protection:
a. Ne jamais placer cet appareil sur un lit, divan ou tapis, ni
recouvrir les évents pendant l’utilisation de l’appareil.
b. Éviter d’encastrer l’appareil dans une étagère ou une unité
murale à moins d’assurer une ventilation adéquate.
5 Éviter les pièces surchauffées ou les
changements soudains de température
Ne jamais installer l’appareil sur un radiateur ou une bouche de
chaleur, ni l’exposer aux rayons directs du soleil. Si l’appareil est
soumis à une hausse soudaine de température ambiante, il peut
y avoir formation d’humidité à l’intérieur, ce qui est susceptible
d’endommager l’appareil.
6 Afin de prévenir tout accident
• N’utiliser que des supports fermes et de niveau.
• Déplacer avec précaution toute table roulante
portant un appareil. Afin de ne pas renverser
l’appareil et la table roulante, éviter les arrêts
et les déplacements brusques ainsi que les
surfaces inégales.
• Pour un bon fonctionnement de l’appareil
suivre attentivement les recommandations du
manuel d’utilisation.
Après rangement ou lors du déplacement de l’appareil,
consulter la section Installation de ces mesures de
sécurité.
1 Éloigner l’appareil de toute source
d’humidité et le protéger de l’eau.
2 Si l’appareil a été exposé à la pluie,
l’humidité ou a subi un choc violent, le
débrancher et le faire vérifier par un
technicien qualifié avant de l’utiliser.
3 En cas d’orage
Pendant un orage ou si l’appareil n’est pas utilisé pendant
une période prolongée, débrancher tout équipement des
prises de courant ainsi que l’antenne ou le câble.
4 Avec l’appareil branché
• NE PAS UTILISER L’APPAREIL SI:
- un liquide a été répandu à l’intérieur
- l’appareil a été laissé tombé ou endommagé
- l’appareil émet des bruits, des odeurs ou de la fumée. Afin
d’éviter tout risque d’incendie ou de chocs électriques,
débrancher immédiatement l’appareil et le faire vérifier par un
technicien qualifié.
• Ne jamais insérer ou laisser tomber des objets à l’intérieur de
l’appareil. Certaines pièces internes sont porteuses de hautes
tensions et peuvent donc causer des chocs électriques ou
provoquer des incendies.
• Afin d’éviter tout risque d’interférences, éloigner l’appareil de
tout champ magnétique (tels haut-parleurs).
5 Utilisation des accessoires
N’utiliser que les accessoires recommandés par le
manufacturier afin d’éviter tout risque d’incendie, de
chocs électriques ou autre danger.
6 Nettoyage de l’appareil
Débrancher l’appareil. Utiliser un chiffon doux, sec et
propre pour nettoyer l’appareil. NE PAS utiliser de
produits nettoyants, de vaporisateurs ou toute autre
méthode qui pourrait entraîner la pénétration de liquides à
l’intérieur de l’appareil causant ainsi des risques de
chocs électriques. Toute substance comme la cire ou du
ruban adhésif risque d’endommager le fini du boîtier. Les
éléments internes peuvent être endommagés par un
environnement graisseux, humide ou poussiéreux.
Entretien
1 Ne pas tenter de réparer l’appareil soi-même
Si, après avoir suivi attentivement les instructions du
manuel, l’appareil ne fonctionne pas adéquatement, ne
pas ouvrir ses couvercles ni essayer de faire des réglages
qui ne sont pas décrits dans le manuel. Débrancher
l’appareil et contacter un technicien qualifié.
2 Remplacement de pièces
S’assurer que le technicien n’utilise que des pièces
recommandées par le manufacturier ou ayant des
caractéristiques identiques. Toute autre substitution peut
provoquer un risque d’incendie ou de chocs électriques.
3 Demander au technicien d’effectuer des
vérifications de sécurité
Après tout entretien ou service, demander au technicien
d’effectuer des vérifications de sécurité comme
mentionné dans le manuel de service du fabricant afin de
confirmer le fonctionnement normal de l’appareil.
AFIN DE PRÉVENIR TOUT RISQUE DE CHOCS ÉLECTRIQUES, D’INCENDIE, DE BLESSURES
AINSI QUE TOUT DOMMAGE À L’APPAREIL, LIRE ET CONSERVER LES MESURES DE
SÉCURITÉ ET LE MANUEL D’UTILISATION. TENIR COMPTE ÉGALEMENT DE TOUTES LES
MISES EN GARDE INDIQUÉES DANS LE MANUEL ET INSCRITES SUR L’APPAREIL.
IMPORTANTES MESURES DE SÉCURITÉ
1 Raccordement sécuritaire à une
antenne ou à la câblodistribution
Si l’appareil doit être raccordé à une antenne
extérieure ou à la câblodistribution, s’assurer que
l’antenne ou le câble soit raccordé à la terre afin de
protéger l’appareil contre les surtensions et des
décharges d’électricité statique. La partie 1 du
Code canadien de l’électricité contient les
informations concernant la mise à la terre des mâts
d’antenne et de leurs structures, celle du fil de
descente à un parafoudre, le calibre des
conducteurs de mise à la terre, l’emplacement du
parafoudre, le raccordement et les exigences
requises pour les électrodes de terre.
2 Éloigner l’antenne des lignes et des
circuits à haute tension
Installer toute antenne extérieure à l’abri des lignes
à haute tension, circuit d’éclairage ou lignes
d’alimentation au cas où elle viendrait à tomber.
Lors de cette installation, tout contact avec les
lignes et circuits à haute tension, ou toute source
d’alimentation électrique, pourrait être fatal.
AVERTISSEMENT
-7-
Lecture
Languette de
protection
■ Appuyer sur REW pour rebobiner la bande.
■ Appuyer sur FF pour un défilement avant rapide
de la bande.
■ Appuyer sur EJECT de la télécommande ou
STOP/EJECT du magnétoscope pour éjecter la
cassette.
Nota:
• Ces caractéristiques offrent de meilleurs résultats
en mode SLP.
• Après 3 minutes en mode arrêt sur image ou ralenti,
l’appareil passe en mode arrêt pour protéger la
bande et les têtes vidéo.
1
Insérer une cassette.
• L’appareil est automatiquement
mis en marche.
• Afin de prévenir tout risque de
blocage, s’assurer que la
cassette ne porte aucune
étiquette décollée ou déchirée.
2
Appuyer sur PLAY.
• La lecture débute si la cassette n’est pas
munie de sa languette de protection.
3
Appuyer sur STOP.
Fonctions de base (cassette)
Visionnement Ligne d’état
et affichage
de l’heure
Écran bleu Fonctions
automatiques
Mode nuit Sélection du
mode
d’entrée
Commande
ACTION sur le
combiné
Utilisation
des touches
ʆʈʉ ʇ
Lecture Enregistrement
différé
Enregistrement Révision, modification
ou annulation de la
programmation
Annulation d’un
enregistrement
différé
Enregistrement
Nota:
• Après cinq minutes en mode pause, l’appareil est
automatiquement mis hors marche afin de protéger la
bande et les têtes vidéo.
■ Auto-enregistrement
Appuyer sur REC à plusieurs reprises pour régler la
durée comme suit : 30 min Ö 1 h Ö 1:30 Ö 2:00 Ö
3:00 Ö 4:00 Ö quitter
■ Remplacement d’un programme...
■ Annulation d’un programme...
Annulation d’un enregistrement différé
Appuyer sur
ADD/DLT.
Révision, modification ou annulation de la
programmation
Date
actuelle
Exemple
Nota:
• 2 minutes avant le début de l’enregistrement, l’indication
“VEUILLEZ FAIRE LES PREPARATIFS POUR
L’ENREGISTREMENT DIFFERE” apparaît et/ou
l’indicateur d’enregistrement différé clignote. Vérifier si
une cassette avec languette de prévention d’effacement
a été insérée dans l’appareil et que l’appareil est en mode
arrêt.
• S’il y a coupure du contact pendant plus d’une minute,
l’enregistrement ne peut être effectué ou se poursuivre.
Enfoncer STOP pendant quelques secondes
pour annuler l’enregistrement.
• Tous les autres enregistrements quotidiens ou
hebdomadaires, s’il y a lieu, seront effectués tel
que prévu.
(Aucun enregistrement en cours)
(Enregistrement en cours)
Enregistrement différé
1
Appuyer sur PROG pour afficher l’écran
REGLAGE PROGRAMMATION.
2
Appuyer sur Ÿź pour sélectionner
“PROGRAMMATION MINUTERIE”.
REGLAGE PROGRAMMATION
PROGRAMMATION MINUTERIE
MINUTERIE MISE S/TENSION
SEL. : REGLER:
FIN :PROG
3
Appuyer sur Ź pour afficher.
P DT DEBUT FIN CA VIT
1 -- --:-- --:-- -- --
2 -- --:-- --:-- -- -3 -- --:-- --:-- -- -4 -- --:-- --:-- -- --
SEL. : REGLER:
FIN :PROG
4
5
Appuyer sur PROG pour mettre fin à la
programmation.
Pour entrer d’autres programmes, appuyer sur Ÿź
pour sélectionner, et sur Ź pour afficher un numéro
de programme libre. Répéter ensuite l’étape 4.
P DT DEBUT FIN CA VIT
1 10 9:00a12:00p 08 SP
2 -- --:-- --:-- -- -3 -- --:-- --:-- -- -4 -- --:-- --:-- -- --
PROGRAMMATION TERMINEE
ANNULER:ADD/DLT
SEL. : REGLER:
FIN :PROG
6
Appuyer à deux reprises sur PROG pour
quitter ce mode.
• Lors de l’utilisation d’un câblosélecteur, s’assurer
que le contact est établi sur le câblosélecteur et que
le canal approprié est syntonisé.
• L’indicateur d’enregistrement différé apparaît sur le
panneau avant.
1
Insérer une cassette munie de sa
languette de protection.
• L’appareil est automatiquement mis en marche.
2
Appuyer sur CH Ÿź ou sur les touches
numériques pour sélectionner le canal.
• Pour sélectionner “LIGNE” voir à la page 6.
3
4
Appuyer sur REC pour lancer
l’enregistrement.
• Pour ne pas enregistrer certains passages, appuyer
sur PAUSE/SLOW pour interrompre l’enregistrement
et le poursuivre par la suite.
5
Appuyer sur STOP pour annuler
l’enregistrement.
1
Recommencer les étapes 1 à 3
ci-contre.
2
Appuyer sur Ÿź pour sélectionner le
programme désiré.
P DT DEBUT FIN CA VIT
1 10 9:00a12:00p 08 SP
2 QT 11:00a11:30a125 SLP
3 12 8:00p 9:30p L SP
4 -- --:-- --:-- -- --
ANNULER:ADD/DLT
SEL. : REGLER:
FIN :PROG
P DT DEBUT FIN CA VIT
1 10 9:00a12:00p 08 SP
2 QT 11:00a11:30a125 SLP
3 12 8:00p 9:30p L SP
4 -- --:-- --:-- -- --
ANNULER:ADD/DLT
SEL. : REGLER:
QUITTER:PROG
P DT DEBUT FIN CA VIT
1 -- --:-- --:-- -- --
2 QT 11:00a11:30a125 SLP
3 12 8:00p 9:30p L SP
4 -- --:-- --:-- -- --
SEL. : REGLER:
FIN :PROG
3
Appuyer à deux reprises sur PROG
pour quitter ce mode.
• 1-31 = Une fois
• QUOTIDIEN = LUN~VEN
• HEBDOMADAIRE =
Même heure une fois par
semaine
1) Appuyer sur Ź.
2) Pour programmer la
date d’enregistrement,
appuyer sur Ÿź pour
sélectionner:
3) Pour les autres paramètres, appuyer sur Ź pour
régler les heures de DÉBUT et de FIN, le canal (CA)
ou l’entrée (LIGNE) et la vitesse de défilement.
Ensuite, appuyer sur Ÿź pour les sélectionner.
Appuyer sur SPEED pour sélectionner
la vitesse de défilement (voir page 4).
1) Appuyer sur Ź.
2) Recommencer
l’étape 4 (ci-contre)
pour entrer un
nouveau
programme.
3) Appuyer sur PROG.
■ Appuyer sur FF pour faire une recherche avant.
■ Appuyer sur REW pour faire une recherche
arrière.
Nota:
• Une fois la recherche en cours, chaque pression additionnelle
sur FF ou REW modifie la vitesse.
• La vitesse d’avance accélérée ou de rebobinage peut varier
selon la position sur la bande.
• Après 10 minutes en mode recherche, l’appareil passe en
mode lecture pour protéger la bande et les têtes vidéo.
■ Appuyer sur PAUSE/SLOW pour faire un arrêt sur
image.
■ En mode arrêt sur image, maintenir une pression
sur la touche PAUSE/SLOW pour la lecture au
ralenti.
Ö Appuyer sur PLAY pour désactiver.
REGLAGE HORLOGE
1/ 1/2004 JEU 12:00AM
-----------------------
SEL. : REGLER:
FIN :ACTION
1/ 4/2004 DIM 12:00AM
-----------------------
SEL. : REGLER:
MARCHE:ACTION
HR ETE:OUI
REGLAGE HORLOGE
HR ETE:OUI
Page 7
-12-
Ces affichages indiquent une erreur d’opération ou donnent des instructions supplémentaires.
Avertissements et directives
Duplication (Copie de cassettes) Avertissements et directives
Affichage à l’écran Explication Page
REGLER L’HORLOGE
EN APPUYANT SUR ACTION
Si la programmation est ef fectuée ou
vérifiée ou que la mise en contact différée
est réglée sans que l’horloge n’ait été
réglée...
Voir à la page 7 du
manuel
d’utilisation des
fonctions de base,
puis voir à la page
2 du manuel
d’utilisation des
fonctions
avancées.
VERIFIER CASSETTE
LANGUETTE DE PROTECTION
Si la touche REC de la télécommande ou
de l’appareil a été pressée et que la
cassette utilisée n’est munie d’aucune
languette de prévention d’effacement...
Voir aux pages 4
et 7 du manuel
d’utilisation des
fonctions de base.
PR ANNULER
ENREG. MINUTERIE
APP. POWER PUIS STOP
Si la touche d’arrêt est pressée durant un
enregistrement différé...
Voir à la page 7 du
manuel
d’utilisation des
fonctions de base.
AUCUNE CASSETTE INSEREE
Si les touches PLAY, FF, REW ou REC de
la télécommande ou de l’appareil ont été
pressées sans qu’aucune cassette
n’ait été insérée...
VEUILLEZ FAIRE LES
PREPARATIFS POUR
L’ENREGISTREMENT DIFFERE
Si, deux minutes avant l’heure prévue pour
le début d’un enregistrement différé,
l’appareil n’est pas en mode arrêt, qu’une
cassette sans languette de protection a été
insérée, ou bien encore en l’absence d’une
cassette dans l’appareil ou si la cassette
est en fin de bande.
LE NETTOYAGE DES TETES PEUT
ETRE NECESSAIRE
INSERER UNE CASSETTE DE
NETTOYAGE OU CONSULTER
LE MANUEL
FIN : PLAY
Si, lors de la lecture, le nettoyage des têtes
s’avérait nécessaire...
Voir à la page 4 du
manuel
d’utilisation des
fonctions de base.
MAGNETOSCOPE
VERROUILLE
Si une touche de fonction autre que
STOP/EJECT ou POWER a été pressée
alors que le télé-magnétoscope est en
mode verrouillage...
Voir à la page 10.
-11 -
Appuyer sur PLAY puis sur PAUSE au
point de départ désiré pour passer en
mode attente.
Appuyer sur PLAY pour amorcer la
duplication.
Appuyer sur STOP pour arrêter la
duplication.
Duplication (Copie de cassettes)
Raccordements nécessaires
Magnétoscope de lecture (source)
Télé-magnétoscope d’enregistrement (montage)
(Effectuer les étapes 4 et 5 simultanément sur les deux appareils.)
STOP
Télé -ma gnét oscope
d’enregistrement (montage)
OUT
IN
AUDIO
AUDIO INVIDEO IN
IN FROM ANT.
OUT TO TV
VID EO
Magnétoscope de lecture (source)
1
Insérer une cassette préenregistrée.
3
4
5
1
Insérer une cassette vierge munie de
sa languette de protection.
• La duplication de cassettes protégées contre la
copie donne de mauvais résultats.
2
3
Appuyer sur REC puis immédiatement
sur PAUSE/SLOW pour mettre en mode
attente.
4
Appuyer sur PAUSE/SLOW pour
amorcer la duplication.
5
Appuyer sur STOP pour arrêter la
duplication.
L’échange ou la copie non autorisés d’enregistrements peut enfreindre la loi sur les droits d’auteur.
IMPORTANT
Sélectionner l’option “LIGNE”.
Voir la section “Sélection du mode
d’entrée” (Voir à la page 6 du manuel
d’utilisation des fonctions de base.)
-10-
Caractéristiques spéciales du magnétoscope (suite)
Affichage de position de la
bande et de la durée restante
• L’affichage
“RECHERCHE
POSITION BANDE”
apparaît seulement à
la première insertion
d’une cassette;
l’indication de la
position de la bande
s’affiche après
plusieurs secondes.
Pour connaître la position actuelle de la bande
et la durée restante.
Lorsque “OUI” est sélectionné, une image est
affichée indépendamment de la qualité du
signal.
Avis de signal faible
Nota:
• “OUI” = L’image est affichée indépendamment de la
qualité du signal (l’image peut même être à peine
visible).
“NON” = En l’absence de signal ou en présence d’un
signal faible, l’écran est complètement bleu.
• Si le combiné est branché à un équipement muni
d’une fonction d’écran bleu, la sélection de l’option
“OUI” n’aura aucun effet sur ce dernier.
Verrouillage du magnétoscope
Toute opération autre que l’enregistrement
différé et l’éjection de la cassette est interdite.
Cela s’avère particulièrement utile pour des
parents ayant de jeunes enfants.
Nota:
• Le mode verrouillage du magnétoscope est annulé
après 24 heures.
Activation :
En mode arrêt,
maintenir enfoncée la
touche REC du
magnétoscope
pendant 7 secondes
sans cassette dans
l’appareil. (Ignorer le
message AUCUNE
CASSETTE
INSEREE.)
Désactivation :
Répéter la marche à
suivre ci-dessus.
• L’indication de la
position actuelle de la
bande et la durée (en
minutes) restante (en
fonction de la vitesse
de défilement)
s’affichent. La durée
restante affichée peut
ne pas être exacte.
1
Appuyer sur TAPE POSITION pour
détecter la position de la bande.
RECHERCHE POSITION BANDE
SLP
R 120 MIN.
DEBUT FIN
2
Appuyer sur TAPE POSITION pour
revenir à l’écran normal.
1
Appuyer sur ACTION pour afficher
l’écran MENU.
2
Appuyer sur Ÿź Ż Ź pour
sélectionner “CANAL”, puis appuyer
sur ACTION.
3
Appuyer sur Ÿź pour sélectionner
“AVIS SIGNAL FAIBLE”, puis
appuyer sur Ź pour régler “OUI” ou
“NON”.
REGLAGE CANAL
ANTENNE : TELE
REGLAGE AUTO
AVIS SIGNAL FAIBLE:OUI
SEL. : REGLER:
FIN :ACTION
4
Appuyer à deux reprises sur
ACTION pour revenir à l’écran
normal.
Sélection de bande
Sélectionner la durée de la bande pour que
l’affichage de la position et de la durée restante
soit correct. (Voir “Affichage de position de la
bande et la durée restante” ci-dessous.)
1
Appuyer sur ACTION pour afficher
le menu.
2
Appuyer sur Ÿź pour sélectionner
“TELE” et appuyer sur ACTION.
3
Appuyer sur Ÿź pour sélectionner
“SELECTIONNER LA BANDE”, puis
appuyer sur Ź pour sélectionner
“T-120”, “T-160” ou “T-180”.
REGLAGE TELEVISEUR
SOUS-TITRES
SELECT SOURCE :LIGNE
REGLAGE VIDEO
SELECTIONNER LA BANDE
T-160
SEL. : REGLER:
FIN :ACTION
• Sélectionner “T-120”
pour les bandes de
120 minutes ou
moins, “T-160” pour
les bandes de 140 ou
160 minutes et
“T-180” pour les
bandes de 180
minutes.
4
Appuyer sur ACTION à deux
reprises pour revenir à l’écran
normal.
MAGNETOSCOPE VERROUILLE
MAGNETO. DEVERROUILLE
T-120 T-160 T-180
Guide de dépannage Recherche de
programme par index
Saut de pauses
publicitaires
Repérage à zéro Lecture en reprise Sélection de bande Affichage de position
de la bande et de la
durée restante
Verrouillage du
magnétoscope
Avis de signa l
faible
L’affichage de position de la bande est inexact
dans les cas suivants:
• À l’utilisation de bandes VHS-C, de cassettes de
moins de 30 minutes et plus de 180 minutes ou de
bandes non compatibles.
• Si la durée correcte de la bande n’a pas été
sélectionnée. (Voir “Sélection de bande”
ci-dessus.)
(Voir “Sélection de bande” ci-dessus.)
MENU
TELE BLOCAGE LANGUE
CANAL HORLOGE SORTIE
SEL. :
REGLER:ACTION
MENU
TELE BLOCAGE LANGUE
CANAL HORLOGE SORTIE
SEL. :
REGLER:ACTION
-9-
Caractéristiques spéciales du magnétoscope
À chaque enregistrement, un signal d’index est
enregistré sur la bande.
Lors d’un enregistrement différé, un index est
assigné au programme et des informations sont
également enregistrées. Les signaux d’index sont
par la suite utilisés pour le repérage et le balayage
des séquences.
Recherche de programme par index
NOTA:
La flèche indique le point de départ de chaque
enregistrement.
■ Pour déterminer un numéro d’index
Exemple 2:
Pour passer de l’enregistrement 2 à 6, entrer 4 puis
appuyer sur FF.
6
157
2 34
17
5
34 6
2
Exemple 1:
Pour passer de l’enregistrement 4 à 2, entrer 3 puis
appuyer sur REW.
Nota:
• Si la fonction de repérage par index est lancée à
proximité d’un signal d’index, il est possible que ce signal
ne soit pas compté.
Repérage à zéro
Cette fonction permet de revenir à un point donné
sur la bande.
• Le combiné passe en mode avance accélérée ou
rebobinage puis s’arrête au dernier point réglé à
“0:00:00”.
Saut de pauses publicitaires
L’appareil saute 1, 2 ou 3 minutes d’enregistrement
selon le choix.
NON
1 pression
2 pressions
3 pressions
saut de 1 min
saut de 2 min
saut de 3 min
Lecture en reprise
Cette fonction permet de répéter plusieurs fois la
lecture d’un même enregistrement.
Nota:
• En fin de bande ou si un passage vierge de plus de 30
secondes est détecté, la lecture recommence.
En mode lecture,
appuyer sur
PLAY/REPEAT sur le
combiné pour activer
cette fonction.
Répéter la marche à
suivre ci-dessus pour
désactiver cette
fonction.
En mode lecture ou arrêt, appuyer sur
SEARCH, puis appuyer sur les touches
numériques pour sélectionner le
numéro de l’enregistrement.
• Pour déterminer le numéro, voir ci-dessous.
Appuyer sur la touche FF ou REW pour
lancer la recherche.
RECHERCHE INDEX
ENTRER NUMERO INDEX :1
AVEC TOUCHES 1-9
RECHERCHE AVANT :FF
RECHERCHE ARRIERE:REW
QUITTER:SEARCH
La lecture s’amorce après la fin de la
recherche. Pour avancer ou reculer
d’un numéro d’index, appuyer sur la
touche FF ou REW pendant l’affichage
de l’écran illustré ci-dessous (10
secondes).
• Pour annuler, appuyer sur PLAY.
RECHERCHE INDEX
RECHERCHE AVANT :FF
RECHERCHE ARRIERE:REW
Appuyer sur CM/ZERO en mode
lecture.
• Appuyer sur CM/ZERO à plusieurs reprises pour
modifier la durée dans l’ordre indiqué ci-dessous.
• Aucune indication n’apparaît.
1
Appuyer sur COUNTER RESET
pendant la lecture pour afficher le
compteur.
2
Appuyer sur COUNTER RESET à la
position désirée pour remettre à
“0:00:00”.
0:00:00
3
Poursuivre l’enregistrement, la lecture,
etc.
4
Appuyer sur STOP.
5
Appuyer sur CM/ZERO en mode arrêt
pour lancer le repérage à zéro.
-1:23:45
LECTURE
REPRISE ACTIVEE
LECTURE
REPRISE DESACTIVEE
1
2
1
-8-
Vérifier les points suivants si l’appareil présente des problèmes de fonctionnement.
(FB : fait référence au manuel d’utilisation des fonctions de base)
(FA : fait référence au manuel d’utilisation des fonctions avancées)
Alimentation Solution
Pas d’alimentation ...
Insérer la fiche du cordon d’alimentation bien à fond dans la prise secteur.
S’assurer que le contact est établi.
Écran Solution
Pas d’image ni de son...
S’assurer que la sélection de l’entrée d’antenne est appropriée (CABLE ou TELE). (FB
p. 11)
S’assurer que l’appareil est bien branché dans une prise secteur.
S’assurer que le contact est établi.
Image de mauvaise qualité mais
son normal...
Régler la brillance, la netteté et l’image dans le menu réglage téléviseur. (FA p. 2)
Son mauvais mais image
normale...
Régler le volume. (FB p. 6)
Mauvaise réception... Régler la netteté et l’image dans le menu réglage téléviseur. (FA p. 2)
Pas de couleur ou couleur de
mauvaise qualité...
Ajuster la nuance et la couleur dans le menu réglage téléviseur. (FA p. 2)
Images fantômes (multiples)... Installer une antenne directionnelle.
Visionnement d’émissions
impossible...
S’assurer que le canal syntonisé a bien été mémorisé. (FB p. 11)
Sélection de canal impossible...
La conception de cet appareil ne permet que le visionnement du canal en cours
d’enregistrement.
Magnétoscope Solution
Les émissions télévisées ne
peuvent pas être enregistrées...
S’assurer que la sélection de l’entrée d’antenne est appropriée (CABLE ou TELE). (FB
p. 11)
S’assurer que la languette de prévention d’effacement de la cassette est intacte. (FB
p. 4)
L’enregistrement différé ne peut se
faire ...
Vérifier le réglage de l’horloge.
Si le câblosélecteur/récepteur DSS est utilisé, s’assurer qu’il est en contact et
syntonisé sur le canal approprié.
Régler correctement l’heure du début et de la fin de l’enregistrement. (FB p. 7)
Il est possible que l’enregistrement différé ne puisse commencer ou continuer si le
courant est coupé pendant plus d’une minute avant ou pendant l’enregistrement,
même si le courant est plus tard rétabli.
Il n’y a pas d’image à la lecture ou
l’image est parasitée ou comporte
des lignes...
Utiliser la commande de pistage (TRACKING) pour régler l’image. (FB p. 4)
Vérifier si le nettoyage des têtes réussit à régler le problème. (FB p. 4)
Les commandes du
magnétoscope n’ont aucun effet...
S’assurer que la fonction de verrouillage du magnétoscope est désactivée. (FA p. 10)
S’assurer qu’un enregistrement différé n’a pas été programmé.
Télécommande Solution
Le télé-magnétoscope ne peut être
télécommandé...
Diriger la télécommande vers le capteur de signal sur l’appareil (FB p. 10) en évitant
tout obstacle.
Vérifier l’état des piles de la télécommande; leur remplacement peut s’avérer
nécessaire. (FB p. 4)
S’assurer que la fonction de verrouillage du magnétoscope est désactivée. (FA p. 10)
L’exposition du capteur de signal de télécommande de l’appareil aux rayons directs
du soleil ou à un éclairage fluorescent peut causer de l’interférence.
Les touches ACTION et PROG ne
peuvent être utilisées...
Vérifier I’état des piles.
Divers Solution
Il est impossible d’insérer la
cassette ...
Insérer la cassette avec le côté fenêtre sur le dessus et la languette de prévention
d’effacement dirigé vers soi.
Il est impossible d’enlever la
cassette ...
S’assurer que la fiche du cordon d’alimentation est insérée à fond dans la prise
secteur.
L’éjection ou l’insertion de la
cassette ne fonctionnent pas ...
Essayer d’éjecter ou d’insérer la cassette à nouveau après avoir coupé le contact
puis l’avoir rétabli.
La cassette est éjectée au début
d’un enregistrement ou lorsque le
contact est coupé pour enclencher
un enregistrement différé ...
S’assurer que la languette de prévention d’effacement de la cassette est toujours
intacte. (FB p. 4)
En mode arrêt, le moteur
magnétoscope (cylindre) continue
de tourner ...
Pour permettre l’enclenchement rapide du mode lecture, le cylindre tourne pendant
environ 3 minutes. Cela réduit le temps de passage de l’arrêt à la lecture ainsi que
de la lecture au repérage.
Les commandes du
magnétoscope n’ont aucun effet...
S’assurer que la fonction de verrouillage du magnétoscope est désactivée. (FA p. 10)
Guide de dépannage
Imprimé en Indonésie
LSQT0809 B
S0104-1034
K
Montréal:
3075 Louis A. Amos, Lachine, Québec H8T 1C4 (514) 633-8684
Tor onto:
5770 Ambler Drive, Mississauga, Ontario L4W 2T3 (905) 624-8447
Calgary:
6835 - 8th Street N.E., Calgary, Alberta T2E 7H7 (403) 295-3955
Vancouver:
12111 Riverside Way, Richmond, BC V6W 1K8 (604) 278-4211
Panasonic Canada Inc.
5770 Ambler Drive,
Mississauga, Ontario L4W 2T3
(905) 624-5010
www.panasonic.ca
Modèles
PV-C1324-K/PV-C1334W-K/
PV-C2024-K
Combiné télé-magnétoscope
Manuel d’utilisation
(Fonctions avancées)
Pour les fonctions de base, consulter le
manuel d’utilisation des fonctions de base.
Table des matières
Caractéristiques spéciales du téléviseur ...........................................................2
Affichage des sous-titres...................................................................................3
Discrétion parentale...........................................................................................4
Guide de dépannage .........................................................................................8
Caractéristiques spéciales du magnétoscope...................................................9
Duplication (Copie de cassettes).....................................................................11
Avertissements et directives............................................................................12
Nous vous recommandons de lire attentivement ces instructions
avant de brancher, d’utiliser ou de régler l’appareil et de les
conserver pour référence ultérieure.
À titre de participant au programme ENERGY STAR®, Panasonic
assure que cet appareil, ou ce modèle,
satisfait aux normes d’ef¿cacité énergétique du programme.
Pour de l’aide, composez le 1-800-561-5505 ou visitez notre site Internet à www.panasonic.ca
Ce manuel d’utilisation se rapporte aux modèles PV-C1324-K,
PV-C1334W-K et PV-C2024-K. Les illustrations figurant dans ce
manuel s’appliquent au PV-C2024-K.
LSQT0809 B
Page 8

-6-
Discrétion parentale (suite)
Classifications canadiennes
Émissions exemptées
Certaines émissions de télévision telles que
bulletins de nouvelles, reportages sportifs, bulletins
météo et informations d’urgence ne font
généralement l’objet d’aucune classification.
1
Appuyer sur Ÿź pour sélectionner
“PAGE SUIVANTE”, puis appuyer sur Ź.
BLOCAGE
FILMS USA :NON
MODIFIER REGLAGE
EMISSIONS TELE USA:NON
MODIFIER REGLAGE
PAGE SUIVANTE
SEL. : REGLER:
FIN :ACTION
2
Appuyer sur Ÿź pour sélectionner
“CANADA”, puis appuyer sur Ź pour
régler “OUI” ou “NON”.
BLOCAGE
CANADA :NON
MODIFIER REGLAGE
CANADA-QUEBEC:NON
MODIFIER REGLAGE
PAGE PRECEDENTE
SEL. : REGLER:
FIN :ACTION
■ “OUI” ➞ la fonction de discrétion parentale
est activée.
■ “NON” ➞ la fonction de discrétion
parentale est désactivée.
3
Appuyer sur Ÿź pour sélectionner
“MODIFIER REGLAGE”, puis appuyer
sur Ź.
BLOCAGE
CANADA :NON
MODIFIER REGLAGE
CANADA-QUEBEC:NON
MODIFIER REGLAGE
PAGE PRECEDENTE
SEL. : REGLER:
FIN :ACTION
4
Appuyer sur Ÿź pour sélectionner
“EMISSIONS EXEMPTEES?”, puis
appuyer sur Ź pour régler “OUI” ou
“NON”.
EMISSIONS EXEMPTEES?:OUI
C DEBLOQUE
C8+
G
PG
14+
18+
EXEMPTEES
SEL. : REGLER:
FIN :ACTION
5
Appuyer sur Ÿź pour sélectionner et
appuyer sur Ź pour régler “BLOQUE”
ou “DEBLOQUE”. (Voir le tableau de
classification à la page 7.)
EMISSIONS EXEMPTEES?:OUI
C DEBLOQUE
C8+
G
PG
14+
18+
POUR ENFANTS
SEL. : REGLER:
FIN :ACTION
6
Appuyer sur ACTION pour faire afficher
à nouveau le menu de BLOCAGE et
poursuivre le réglage selon les
instructions données à la page 7.
Ou appuyer à trois reprises sur
ACTION pour quitter.
Classifications québécoises
1
Appuyer sur Ÿź pour sélectionner
“PAGE SUIVANTE”, puis appuyer sur Ź.
2
Appuyer sur Ÿź pour sélectionner
“CANADA-QUEBEC”, puis appuyer sur
Ź pour régler “OUI” ou “NON”.
■ “OUI”
➞ la fonction de discrétion parentale
est activée.
■ “NON” ➞ la fonction de discrétion
parentale est désactivée.
BLOCAGE
FILMS USA :NON
MODIFIER REGLAGE
EMISSIONS TELE USA:NON
MODIFIER REGLAGE
PAGE SUIVANTE
SEL. : REGLER:
FIN :ACTION
BLOCAGE
CANADA :NON
MODIFIER REGLAGE
CANADA-QUEBEC:NON
MODIFIER REGLAGE
PAGE PRECEDENTE
SEL. : REGLER:
FIN :ACTION
Émissions exemptées
Certaines émissions de télévision telles que
bulletins de nouvelles, reportages sportifs, bulletins
météo et informations d’urgence ne font
généralement l’objet d’aucune classification.
3
Appuyer sur Ÿź pour sélectionner
“MODIFIER REGLAGE”, puis appuyer
sur Ź.
4
Appuyer sur Ÿź pour sélectionner
“EMISSIONS EXEMPTEES?”, puis
appuyer sur Ź pour régler “OUI” ou
“NON”.
5
Appuyer sur Ÿź pour sélectionner et
appuyer sur Ź pour régler “BLOQUE”
ou “DEBLOQUE”. (Voir le tableau de
classification à la page 7.)
6
Appuyer à trois reprises sur ACTION
pour quitter ce mode.
BLOCAGE
CANADA :NON
MODIFIER REGLAGE
CANADA-QUEBEC:NON
MODIFIER REGLAGE
PAGE PRECEDENTE
SEL. : REGLER:
FIN :ACTION
EMISSIONS EXEMPTEES?:OUI
G DEBLOQUE
8ANS+
13 ANS+
16 ANS+
18 ANS+
EXEMPTEES
SEL. : REGLER:
FIN :ACTION
EMISSIONS EXEMPTEES?:OUI
G DEBLOQUE
8ANS+
13 ANS+
16 ANS+
18 ANS+
AUDITOIRE GENERAL
SEL. : REGLER:
FIN :ACTION
Si le menu BLOCAGE n’est pas affiché, se reporter
à la section “Entrer le mot de passe” à la page 4.
Entrer code Réglages Blocage
-5-
Discrétion parentale (suite)
Nota:
• La sélection “PAGE SUIVANTE” affiche les
classifications canadiennes. Se reporter aux pages 6 et
7 pour plus de détails.
Sélection des cotes des
émissions de télévision USA
Programmes sans cote (visa)
Certaines émissions de télévison (bulletins
d’informations, reportages sportifs, bulletins météo,
informations d’urgence) ne sont généralement pas
cotées.
Nota:
• La sélection peut se faire à partir des cotes normalisées
(Tableau 1) ou à partir d’une classification personnalisée
(Tableau 2).
■ “OUI” ➞ la fonction de discrétion parentale
est activée.
■ “NON” ➞ la fonction de discrétion
parentale est désactivée.
Si le menu BLOCAGE n’est pas affiché, se reporter
à la section “Entrer le mot de passe” à la page 4.
1
Appuyer sur Ÿź pour sélectionner
“EMISSIONS TELE USA”, puis appuyer
sur Ź pour régler “OUI” ou “NON”.
BLOCAGE
FILMS USA :NON
MODIFIER REGLAGE
EMISSIONS TELE USA:NON
MODIFIER REGLAGE
PAGE SUIVANTE
SEL. : REGLER:
FIN :ACTION
2
Appuyer sur Ÿź pour sélectionner
“MODIFIER REGLAGE”, puis appuyer
sur Ź.
BLOCAGE
FILMS USA :NON
MODIFIER REGLAGE
EMISSIONS TELE USA:NON
MODIFIER REGLAGE
PAGE SUIVANTE
SEL. : REGLER:
FIN :ACTION
3
Appuyer sur Ÿź pour sélectionner
“SANS VISA – REGARDER?”, puis
appuyer sur Ź pour régler “OUI” ou
“NON”.
SANS VISA-REGARDER?: OUI
TV-Y DEBLOQUE
TV-Y7 FV
TV-G
TV-PG V S L D
TV-14 V S L D
TV-MA V S L
AUCUN VISA EMIS
SEL. : REGLER:
FIN :ACTION
4
Appuyer sur Ÿź pour sélectionner et
appuyer sur Ź pour régler “BLOQUE”
ou “DEBLOQUE”. (Voir le tableau de
classification à la page 7.)
• Les cotes apparaissant en VERT sont bloquées.
Les cotes qui ne sont pas en surbrillance (en blanc)
ne seront pas bloquées.
SANS VISA-REGARDER?: OUI
TV-Y DEBLOQUE
TV-Y7 FV
TV-G
TV-PG V S L D
TV-14 V S L D
TV-MA V S L
POUR ENFANTS
SEL. : REGLER:
FIN :ACTION
5
Appuyer à trois reprises sur ACTION
pour quitter ce mode.
Entrer le mot de passe Sélection des cotes des films USA Sélection des cotes des émissions de télévision USA
Entrer code Réglages Blocage
-4-
Discrétion parentale
Entrer le mot de passe
Le combiné est équipé d’une fonction de discrétion parentale qui permet de bloquer la réception d’émissions
et de films de classifications américaines, canadiennes ou québécoises.
Un code à 4 chiffres doit être entré pour permettre
le visionnement d’une émission “bloquée” ou pour
changer le réglage de la classification.
Nota:
• NE PAS oublier le code secret.
• Une fois les classifications entrées, les bandes vidéo et
les programmes faisant l’objet d’une restriction ne
pourront être visionnés que si le code secret est entré.
■ Modification du mot de passe
• Prendre soin que le code
secret ne soit connu de
personne d’autre.
Pour apporter des corrections
Appuyer à répétition sur Ż pour déplacer le
curseur, puis sur les touches numériques pour faire
les corrections.
Entrer code Réglages Blocage
Si le menu BLOCAGE n’est pas affiché, se reporter
à la section “Entrer le mot de passe” à gauche.
Sélection des cotes des films USA
Programmes sans cote (visa)
Certains films, tels que de vieux longs métrages ou
des films étrangers, peuvent ne pas avoir de cote.
• Il sera nécessaire d’entrer le code courant. Suivre les
étapes 1 à 3. À l’étape 4, appuyer sur ADD/DLT pour
supprimer le code courant. Recommencer les étapes
3 et 4 pour entrer un nouveau code.
Nota:
• La sélection “PAGE SUIVANTE” affiche les
classifications canadiennes. Se reporter aux pages 6 et
7 pour plus de détails.
■ “OUI” ➞ la fonction de discrétion parentale
est activée.
■ “NON”
➞ la fonction de discrétion
parentale est désactivée.
1
Appuyer sur ACTION pour afficher
l’écran MENU.
2
Appuyer sur Ÿź Ż Ź pour sélectionner
“BLOCAGE”, puis appuyer sur ACTION.
MENU
TELE BLOCAGE LANGUE
CANAL HORLOGE SORTIE
SEL. :
REGLER:ACTION
3
Appuyer sur les touches numériques
pour entrer le mot de passe, puis
répéter la saisie du code pour fins de
confirmation.
BLOCAGE
ENTRER UN CODE
A 4 CHIFFRES
----
ENTRER:0-9
FIN :ACTION
4
Appuyer sur Ź pour afficher le menu
BLOCAGE (voir ci-contre).
Ou
Appuyer à deux reprises sur ACTION
pour quitter.
BLOCAGE
CONFIRMER LE CODE ENTRE
ACCEPTE
CHANGER CODE:ADD/DLT
CONTINUER:
FIN :ACTION
1
Appuyer sur Ÿź pour sélectionner
“FILMS USA”, puis appuyer sur Ź pour
régler “OUI” ou “NON”.
BLOCAGE
FILMS USA :NON
MODIFIER REGLAGE
EMISSIONS TELE USA:NON
MODIFIER REGLAGE
PAGE SUIVANTE
SEL. : REGLER:
FIN :ACTION
2
Appuyer sur Ÿź pour sélectionner
“MODIFIER REGLAGE”, puis appuyer
sur Ź.
BLOCAGE
FILMS USA :NON
MODIFIER REGLAGE
EMISSIONS TELE USA:NON
MODIFIER REGLAGE
PAGE SUIVANTE
SEL. : REGLER:
FIN :ACTION
3
Appuyer sur Ÿź pour sélectionner
“SANS VISA – REGARDER?”, puis
appuyer sur Ź pour régler “OUI” ou
“NON”.
SANS VISA-REGARDER?: OUI
G DEBLOQUE
PG
PG-13
R
NC-17
X
AUCUN VISA EMIS
SEL. : REGLER:
FIN :ACTION
4
Appuyer sur Ÿź pour sélectionner et
appuyer sur Ź pour régler “BLOQUE”
ou “DEBLOQUE”. (Voir le tableau de
classification à la page 7.)
SANS VISA-REGARDER?: OUI
G DEBLOQUE
PG
PG-13
R
NC-17
X
AUDITOIRE GENERAL
SEL. : REGLER:
FIN :ACTION
5
Appuyer sur ACTION pour faire afficher
à nouveau le menu de BLOCAGE et
poursuivre le réglage selon les
instructions données à la page 7.
Ou appuyer à trois reprises sur ACTION
pour quitter.
Entrer code
Réglages Blocage
-3-
NON
S/T C1
TEXTE C1
S/T C2
TEXTE C2
Mode affichage des sous-titres
Ce système permet non seulement aux malentendants de suivre certains programmes, mais aussi
la lecture d’informations diffusées par les stations de télévision.
■ Enregistrement et lecture d’une
émission avec sous-titres/texte
NON
S/T C1
S/T C2
Affichage des sous-titres avec
réglage silencieux
Sur réception d’une émission avec sous-titrage,
une pression de la touche MUTE appelle
l’affichage des sous-titres.
Enregistrement:
Suivre les instructions pour un
enregistrement ordinaire. Le combiné
enregistre automatiquement les sous-titres
ou les textes d’information.
Lecture:
Amorcer la lecture. Suivre les étapes
ci-dessus pour sélectionner le mode
d’affichage des sous-titres désiré.
Nota:
• Le signal de sous-titrage ou de texte peut être
diffusé en mode C1 ou C2, ou les deux à la fois. De
plus, les informations textuelles peuvent varier ;
aussi est-il recommandé de faire l’essai des
différents modes d’affichage.
1
Appuyer sur ACTION pour afficher
l’écran MENU.
2
Appuyer sur Ÿź Ż Ź pour
sélectionner “TELE”, puis appuyer
sur ACTION.
3
Appuyer sur Ÿź pour sélectionner
“SOUS-TITRES”, puis appuyer sur
Ź.
REGLAGE TELEVISEUR
SOUS-TITRES
SELECT SOURCE :LIGNE
REGLAGE VIDEO
SELECTIONNER LA BANDE
T-160
SEL. : REGLER:
FIN :ACTION
4
Appuyer sur Ÿź pour sélectionner
“MODE S/TITRES”, puis appuyer
sur Ź à plusieurs reprises pour
sélectionner le mode. (Voir
ci-dessous.)
SOUS-TITRES
MODE S/TITRES : S/T C1
S/TITRES-SOURDINE:NON
SEL. : REGLER:
FIN :ACTION
■ S/T C1 ou S/T C2
Tout programme télévisé codé pour
malentendants est reçu avec affichage de
sous-titres. Vérifier le guide-télé pour la liste
de telles émissions.
■ TEXTE C1 ou TEXTE C2
Le bas de l’écran est réservé pour l’affichage
de textes télédiffusés par certaines stations,
tels que liste de programmes télé,
informations diverses, etc.
■ NON
Aucun sous-titre n’est affiché même si une
émission codée pour malentendants est
diffusée.
5
Appuyer à trois reprises sur
ACTION pour quitter ce mode.
1
Suivre les étapes 1 à 3 ci-contre.
2
Appuyer sur Ÿź pour sélectionner
“MODE S/TITRES”, puis appuyer
sur Ź à plusieurs reprises pour
sélectionner “NON”.
SOUS-TITRES
MODE S/TITRES : NON
S/TITRES-SOURDINE:S/T C1
SEL. : REGLER:
FIN :ACTION
3
Appuyer sur Ÿź pour sélectionner
“S/TITRES-SOURDINE”, puis
appuyer sur Ź à plusieurs reprises
pour sélectionner le mode. (Voir
ci-dessous.)
SOUS-TITRES
MODE S/TITRES : NON
S/TITRES-SOURDINE:S/T C1
SEL. : REGLER:
FIN :ACTION
4
Appuyer à trois reprises sur
ACTION pour quitter ce mode.
5
Appuyer sur MUTE pour couper le
son et afficher les sous-titres.
Pour annuler, appuyer à nouveau sur MUTE.
Affichage des sous-titres
Réglage de l’image Minuterie de mise sous tension Minuterie-sommeil Mode affichage des sous-titres Aff ichage des sous-titres avec réglage
silencieux
MENU
TELE BLOCAGE LANGUE
CANAL HORLOGE SORTIE
SEL. :
REGLER:ACTION
-2-
Caractéristiques spéciales du téléviseur
Réglage de l’image
Réinitialisation des réglages de l’image
Appuyer sur Ÿź et Ź pour sélectionner et régler
“NORMAL” de manière à rétablir tous les réglages
implicites.
■ Couleur
Pour régler l’intensité des couleurs.
■ Nuances
Pour obtenir une carnation plus naturelle.
■ Brillance
Pour régler la brillance de l’image.
■ Image
Pour régler l’intensité de l’image en équilibrant le
contraste et les couleurs.
■ Netteté
Pour régler la finesse du trait.
Appuyer à répétition sur SLEEP pour régler la
minuterie-sommeil.
• Si la touche DISPLAY est pressée alors que la minuterie
est en marche, la durée restante est affichée.
Pour annuler,
appuyer à répétition sur SLEEP jusqu’à ce que
“MINUTERIE-SOMMEIL 0” apparaisse.
Minuterie-sommeil
Il est possible de programmer la mise hors contact
différée de l’appareil.
MINUTERIE-SOMMEIL 30
MINUTERIE-SOMMEIL 60
MINUTERIE-SOMMEIL 90
MINUTERIE-SOMMEIL 0
1
Appuyer sur ACTION pour afficher
l’écran MENU.
2
Appuyer sur Ÿź Ż Ź pour sélectionner
“TELE”, puis appuyer sur ACTION.
3
Appuyer sur Ÿź pour sélectionner
“REGLAGE VIDEO”, puis appuyer sur
Ź.
REGLAGE TELEVISEUR
SOUS-TITRES
SELECT SOURCE :LIGNE
REGLAGE VIDEO
SELECTIONNER LA BANDE
T-160
SEL. : REGLER:
FIN :ACTION
4
Appuyer sur Ÿź pour sélectionner le
paramètre à régler (voir ci-dessous),
puis appuyer sur ŻŹ pour effectuer le
réglage.
COULEUR
NUANCES
BRILLANCE
IMAGE
NETTETE
NORMAL
SEL. : NIVEAU:
FIN :ACTION
5
Appuyer sur ACTION à trois reprises
pour quitter ce mode.
COULEUR
NUANCES
BRILLANCE
IMAGE
NETTETE
NORMAL
SEL. : REGLER:
FIN :ACTION
Il est possible de programmer la mise en contact
automatique en 2 modes (téléviseur ou lecture
magnétoscope).
Appuyer sur PROG pour faire afficher
l’écran REGLAGE PROGRAMMATION.
• S’assurer qu’une cassette est insérée si le mode
lecture magnétoscope est sélectionné.
• Ordre des options de
réglage de la
minuterie:
Appuyer sur PROG pour compléter le
réglage de la minuterie de mise sous
tension.
• Le message “MINUTERIE DE MISE SOUS
TENSION REGLEE” est affiché.
• L’indicateur de minuterie s’allume sur le panneau
avant.
Appuyer sur Ÿź pour sélectionner
“MINUTERIE MISE S/TENSION”, puis
appuyer sur Ź pour afficher l’écran
MINUTERIE MISE S/TENSION.
Pour annuler,
répéter les étapes 1 et 2. Appuyer ensuite sur
ADD/DLT pour annuler l’heure (voir l’étape 3).
Appuyer maintenant sur PROG pour quitter.
“MINUTERIE DE MISE SOUS TENSION
ANNULEE” apparaît pendant quelques secondes.
Minuterie de mise sous tension
1
2
3
4
Appuyer sur Ÿź pour sélectionner le
réglage désiré, puis appuyer sur Ź
pour régler l’heure de la mise sous
tension ou pour sélectionner une
option de réglage.
Pour procéder à des corrections, utiliser
les touches Ÿź et ŻŹ pour passer au
réglage à corriger.
MENU
TELE BLOCAGE LANGUE
CANAL HORLOGE SORTIE
SEL. :
REGLER:ACTION
-7-
Discrétion parentale (suite)
Message de blocage
Si la cote d’un film ou d’une émission dépasse
la cote sélectionnée, un message s’affiche sur
fond noir et le son est mis en sourdine.
<Fonction de discrétion parentale activée>
■ Pour visionner un film ou une
émission censurés
[Désactivation temporaire de la puce
antiviolence]
Avec l’écran du message de blocage affiché,
entrer le code secret (code d’accès).
• La puce antiviolence est réactivée sur coupure du
contact ou en cas de panne de courant.
[Désactivation de la puce antiviolence]
Entrer le code secret (voir page 4), puis mettre
la sélection de classifications choisie (émissions
télé/films - US/Canada) à “NON” au moyen des
touches Ÿź et Ź. (Les réglages effectués sont
conservés en mémoire et seront rappelés lors
de la réactivation de la puce antiviolence.)
ÉMISSIONS TÉLÉ USA
Tableau 2
ÉMISSIONS TÉLÉ USA
Tableau 1
COTES DES FILMS USA
G
AUDITOIRE GÉNÉRAL:
Convient à tous les auditoires.
PG
SUPERVISION PARENTS:
Certaines scènes pourraient ne pas
convenir à un jeune auditoire.
PG-13
JUGEMENT PARENTS:
Certaines scènes pourraient ne pas
convenir à des enfants de moins de 13
ans.
R
17 ANS +:
Les enfants de moins de 17 ans doivent
être accompagnés d’un adulte.
NC-17
+DE 17 ANS SEULEMENT
Interdit aux enfants de moins de 17 ans.
XAUDITOIRE ADULTE
FV Violence-fiction
VViolence
SSexualité
LLangage vulgaire
DSujet délicat
TV-Y
POUR ENFANTS:
Contenu conçu spécialement pour
enfants de 2 à 6 ans.
TV-Y7
7 ANS +:
L’émission comporte des scènes de
violence burlesque pouvant effrayer de
jeunes enfants.
TV-G
VISA GÉNÉRAL:
L’émission comporte peu ou pas de
scènes de violence, ni paroles grossières,
ni dialogues ou scènes de nature
érotique.
TV-PG
SUPERVISION PARENTS:
L’émission peut contenir des scènes de
violence, des propos parfois grossiers et
certains dialogues ou scènes de nature
érotique.
TV-14
JUGEMENT PARENTS:
L’émission peut traiter de sujets délicats
et comporter des scènes de violence,
des propos grossiers et des scènes de
nature érotique.
TV-MA
AUDITOIRE ADULTE:
L’émission peut traiter de sujets délicats
et compor ter des propos grossiers et des
scènes érotiques.
CA 08
CLASSIFICATION REFUSEE
COTE:PG-13
CODE D’ACCES ----
ENTRER:0-9
• Une pression sur la touche DISPLAY fait afficher la
classification même quand la fonction de discrétion
parentale est désactivée.
• Une pression sur la touche DISPLAY fait afficher
“AUCUN VISA EMIS” même quand les données de
classification sont absentes.
Classifications canadiennes Classifications québécoises Message de blocage Tableaux de classification
CA 08
CLASSIFICATION REFUSEE
COTE:13ANS+
CODE D’ACCES ----
ENTRER:0-9
<Clas sification ca nadienn e> < Classific ation amér icaine>
LECTURE 12:00AM
0:12:34
SP
COTE:13ANS+
LECTURE 12:00AM
0:12:34
SP
COTE:PG-13
LECTURE 12:00AM
0:12:34
SP
AUCUN VISA EMIS
Classifications canadiennes
CPour enfants
C8+ Pour enfants de 8 ans et plus
G Auditoire général
PG Surveillance parentale
14+ 14 ans et plus
18+ 18 ans et plus
Classifications québécoises
G Auditoire général
8 ANS + Non recommandé pour de jeunes enfants
13 ANS +
Contenu pourrait ne pas convenir à des
enfants de moins de 13 ans
16 ANS +
Contenu pourrait ne pas convenir à des
enfants de moins de 16 ans
18 ANS + Adultes seulement
Entrer code Réglages Blocage
<Clas sification ca nadienn e> < Classific ation amér icaine>
REGLAGE PROGRAMMATION
PROGRAMMATION MINUTERIE
MINUTERIE MISE S/TENSION
SEL. : REGLER:
FIN :PROG
MINUTERIE MISE S/TENSION
10:--AM CA --
SEL. : REGLER:
FIN :PROG
MINUTERIE MISE S/TENSION
10:00AM CA 05
ANNULER:ADD/DLT
SEL. : REGLER:
FIN :PROG
CA01
CA02CA
03
Lecture
CA125
 Loading...