

Panasonic PT-L785U User Manual

Network Function Edition
(PT-L785U)
This projector has networking functions which allow it to be
controlled through a web browser on a PC.
The controlled items are:
• Projector’s settings and adjustment
• Projector’s status display
• Transmission of a E-mail message when the projector has a
problem
TQBJ0158

Contents
Connecting a PC ..................................................3
Projector Settings ................................................4
Using Web Browser Control ...............................6
System requirements ...............................................3
Connection example ................................................3
Network settings screen ..........................................4
Network status screen .............................................5
Access procedure ....................................................6
Basic control page ...................................................7
Detail control page ...................................................8
Status information page ..........................................9
Error information page...........................................10
E-mail setup page...................................................12
DNS server setup page ..........................................14
POP server setup page ..........................................15
Adjust clock page...................................................16
Network status page ..............................................17
Password change page..........................................18
Trademarks:
• Windows is a trademark or registered trademark of U.S.
Microsoft Corporation in the U.S. and other countries.
• Other company names, product names or other names noted in
this manual are trademarks or registered trademarks of the
respective companies. Note that ® and TM marks are not
indicated in the text of this manual.
2
Connecting a PC
System requirements
The following system specifications are required in order to use the networking
functions.
Hardware requirements
OS: Windows XP/2000/Me (Millennium Edition)/98SE (Second Edition)
CPU: Pentium III or faster or compatible processor
(Celeron 633 MHz or faster is recommended)
RAM: 64 MB or more (128 MB or more for Windows XP/2000)
Hardware conditions: If you want to use the e-mail function, make sure the system
can handle e-mail.
Web browser: Internet Explorer 6.0 or newer, Netscape Communicator 7.0 or newer
LAN cable
Type: Category 5 compatible straight cable
Length: 100 meters or less
Note:
Note that operation is not guaranteed when used with system environments
other than the above or on homemade computers.
Operation is not guaranteed for all computers that
meet the above conditions.
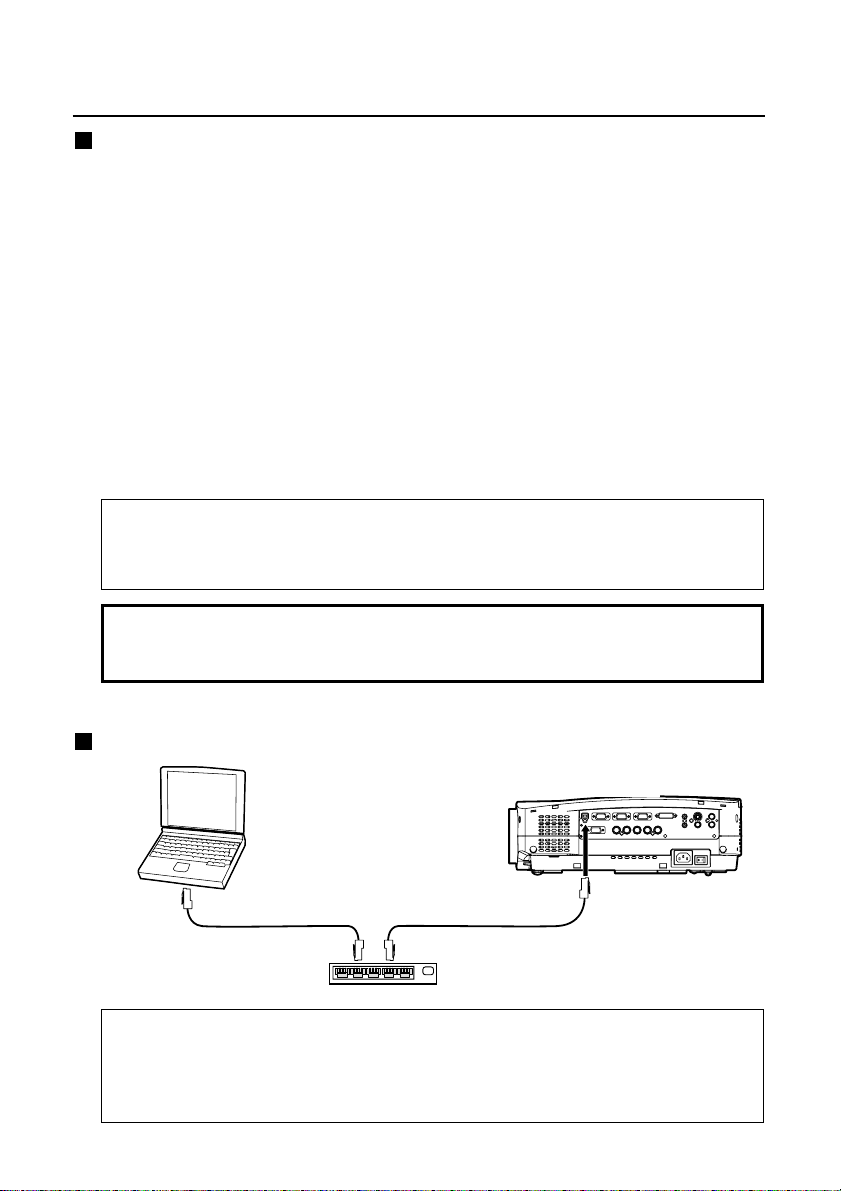
Connection example
Projector
Personal
computer
10 BASE-T or 100 BASE-TX
LAN cable (straight)
Note:
Touching the LAN port with your hand (or body) when you are carrying a static
charge may damage the equipment due to a discharge of static electricity.
Therefore, be careful not to touch the LAN port or metal parts of the LAN cable.
LAN cable (straight)
Hub
3
Projector Settings
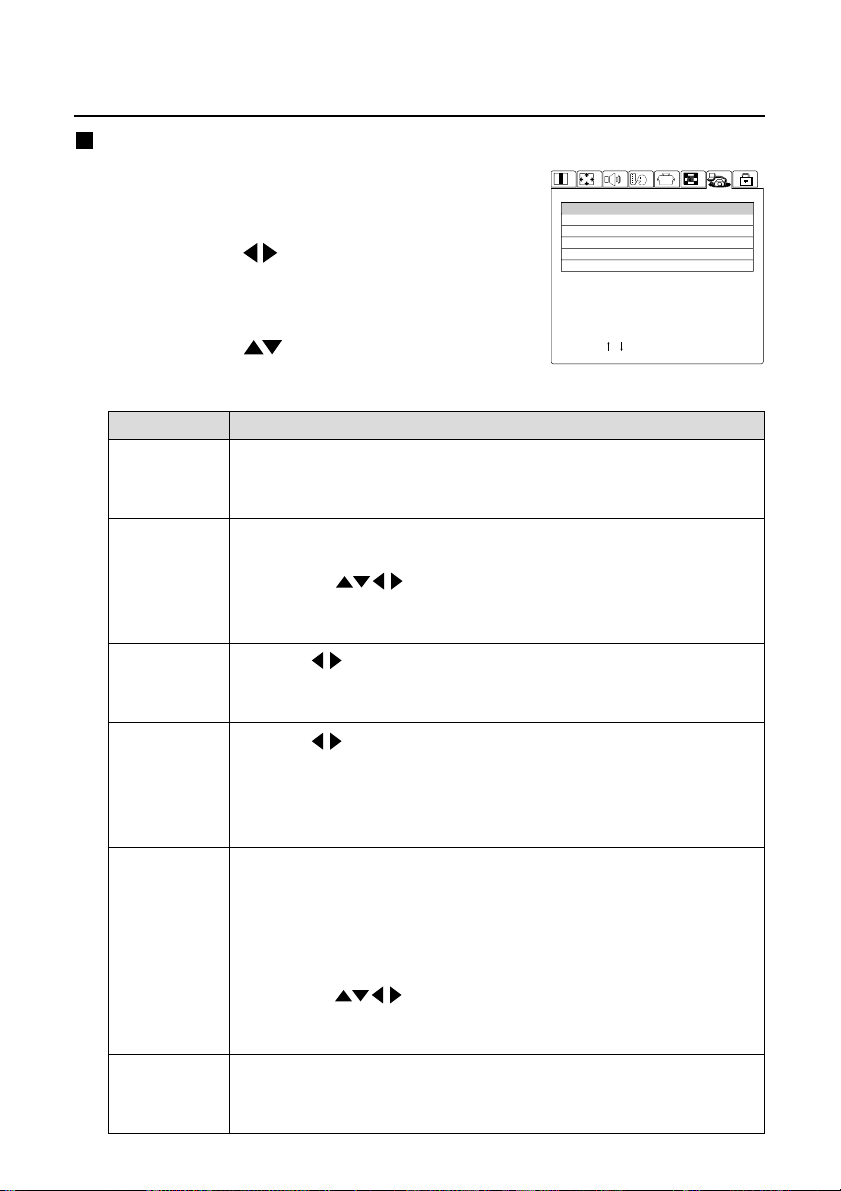
Network settings screen
Press the [MENU] button.
1
The menu screen appears.
Use the [ ] buttons to display
2
the Network Settings screen, then
press the [ENTER] button.
Use the [ ] buttons to select a
3
parameter, then change its setting.
Parameter
Select this parameter and press the [ENTER] button in order to
NETWORK
HOSTNAME
WEB
CONTROL
WEB
STANDBY
WEB
PASSWORD
MAC
ADDRESS
set DHCP, IP address, subnet mask, and gateway settings.
(See the next page for detailed information.)
1. Select this parameter and press the [ENTER] button in order
to set the name of the projector in the network.
2. Use the [ ] buttons to select alphanumeric characters
(up to 16 characters), then press the [ENTER] button.
3. Select [OK], then press the [ENTER] button.
Use the [ ] buttons to toggle web control ON/OFF.
ON: Enables control through a web browser.
OFF: Disables control through a web browser.
Use the [ ] buttons to toggle web standby ON/OFF.
ON: During standby, the lamp in the projector can be turned on
through web browser controls.
OFF: During standby, the lamp in the projector cannot be turned
on through web browser controls.
The default setting is “panasonic” (all lower case). Use the
following procedure to change the password. This procedure
sets the password which is entered on page 6.
1. Select this parameter to set the password to be entered when
the projector is accessed through a web browser, then press
the [ENTER] button.
2. Use the [ ] buttons to select alphanumeric characters
(up to 16 characters), then press the [ENTER] button.
3. Select [OK], then press the [ENTER] button.
A MAC address (Media Access Control Address) which is unique
to the network equipment is displayed here. The MAC address
may be needed when, for example, a DHCP server is used.
Description
NETWORK
NETWORK
HOSTNAME
WEB CONTROL
WEB STANDBY
WEB PASSWORD
MAC ADDRESS
SELECT : [ ] [ ] ENTER : [ENTER]
LAN1
PROJECTOR
OFF ON
OFF ON
00 : 0B : 97 : 41 : 00 : 00
ESC : [MENU]
4
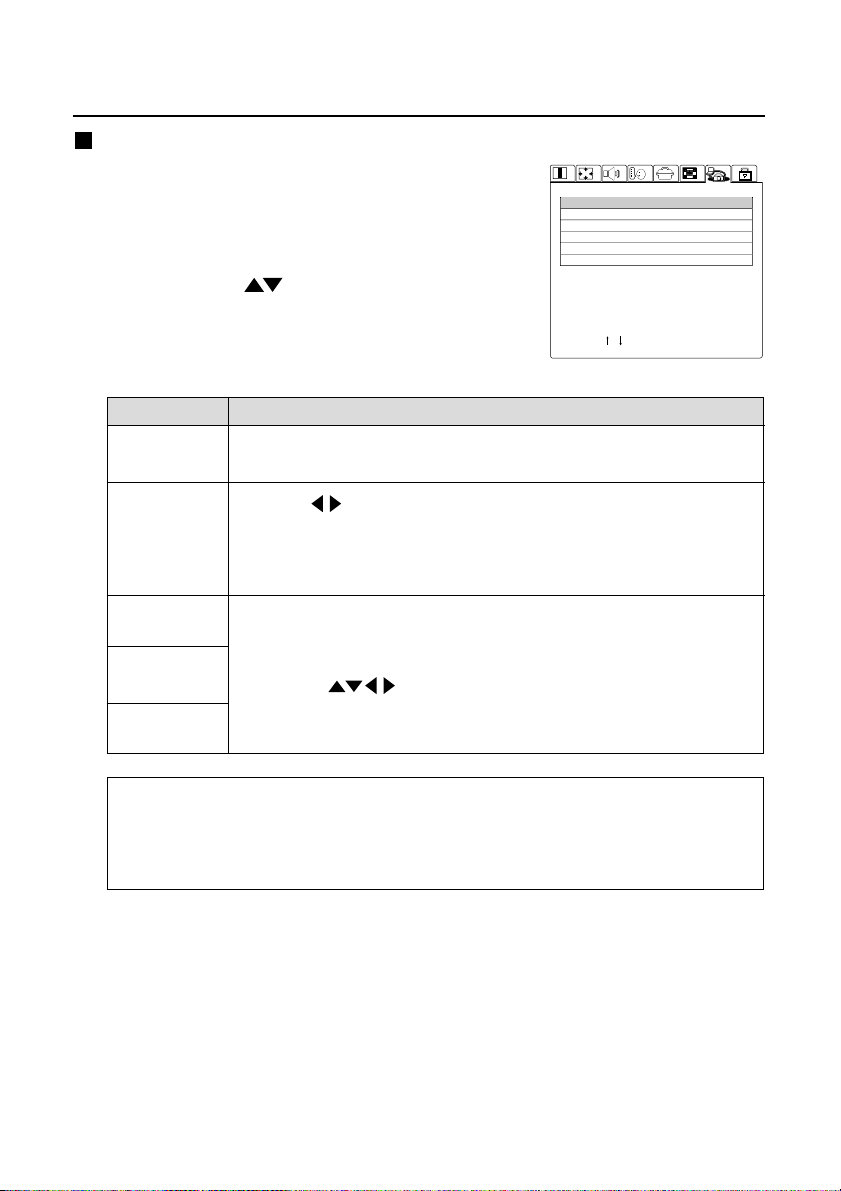
Network status screen
Select [NETWORK] on the screen
1
discussed on the preceding page,
then press the [ENTER] button.
Use the [ ] buttons to select a
2
parameter, then change its setting.
NETWORK
ID
DHCP
IP ADDRESS
SUBNET MASK
GATEWAY
ENTER
SELECT : [ ] [ ] ENTER : [ENTER]
LAN1
OFF ON
192.168.0.8
255.255.255.0
192.168.0.254
ESC
ESC : [MENU]
Parameter
ID
IDs are identification numbers under which settings are stored.
Three different IDs can be stored (LAN1 through LAN3).
Description
Use the [ ] buttons to toggle this setting ON/OFF.
DHCP
ON: Select this setting to automatically acquire an IP address
using a DHCP server.
OFF: Select this setting if you are not using a DHCP server.
IP
ADDRESS
SUBNET
MASK
Enter settings in these parameters if you are not using a DHCP
server.
1. Select a parameter, then press the [ENTER] button.
2. Use the [ ] buttons to select numbers and periods, then
press the [ENTER] button.
GATEWAY
3. Select [OK], then press the [ENTER] button.
Notes:
• If you are using a DHCP server, make sure it is on and ready.
• IP address, subnet mask, and gateway settings should be obtained from your
network administrator.
5
Using Web Browser Control
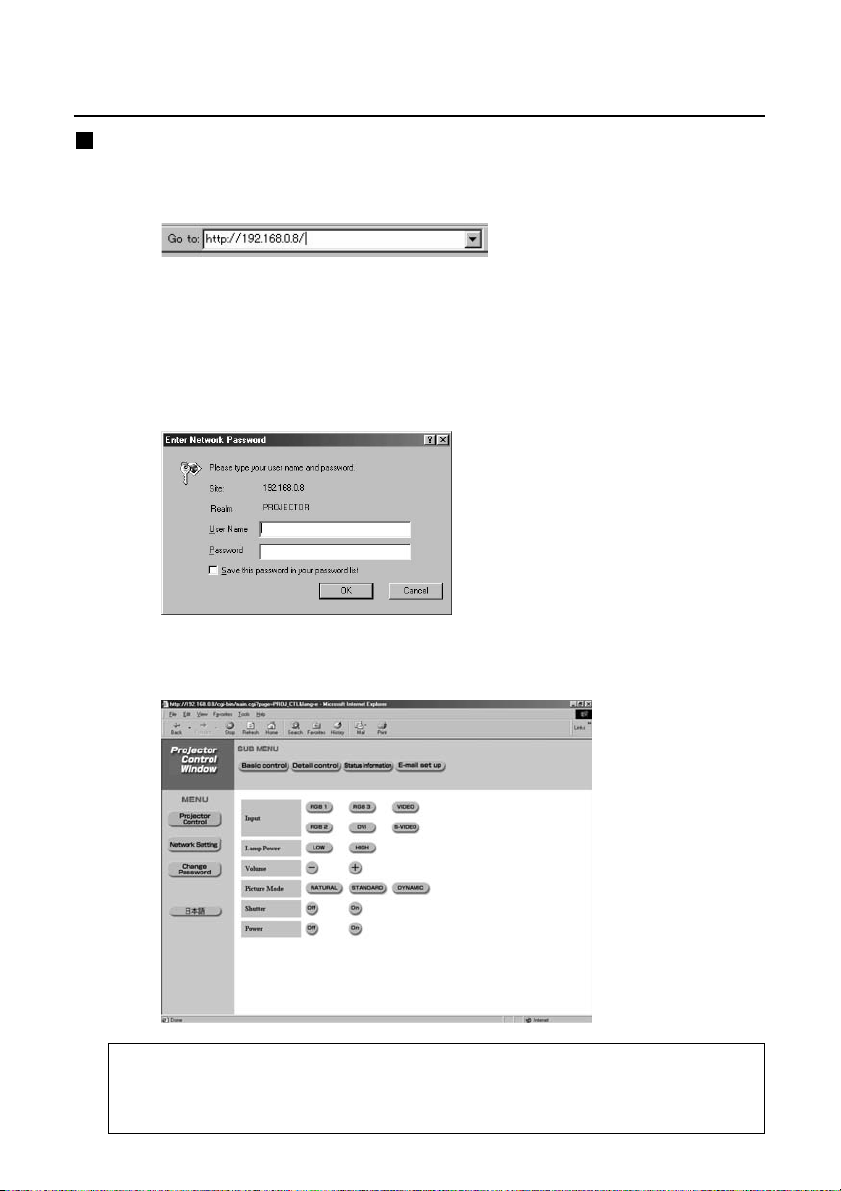
Access procedure
Start the web browser on your PC, then enter the IP
1
address which was set in the projector.
Enter “user1” in the user name field, then enter the
2
password in the password field.
The default setting is “panasonic” (all lower case). If you have changed the
password, enter the new password here. If you forget your password, set a
new password using the procedure described on page 4.
The host name set in the projector is displayed in the “Realm” field.
Click [OK].
3
The Basic Control page is displayed.
Note:
Do not enter settings or perform controls with multiple web browser windows open at
the same time.
6
 Loading...