

Page 1
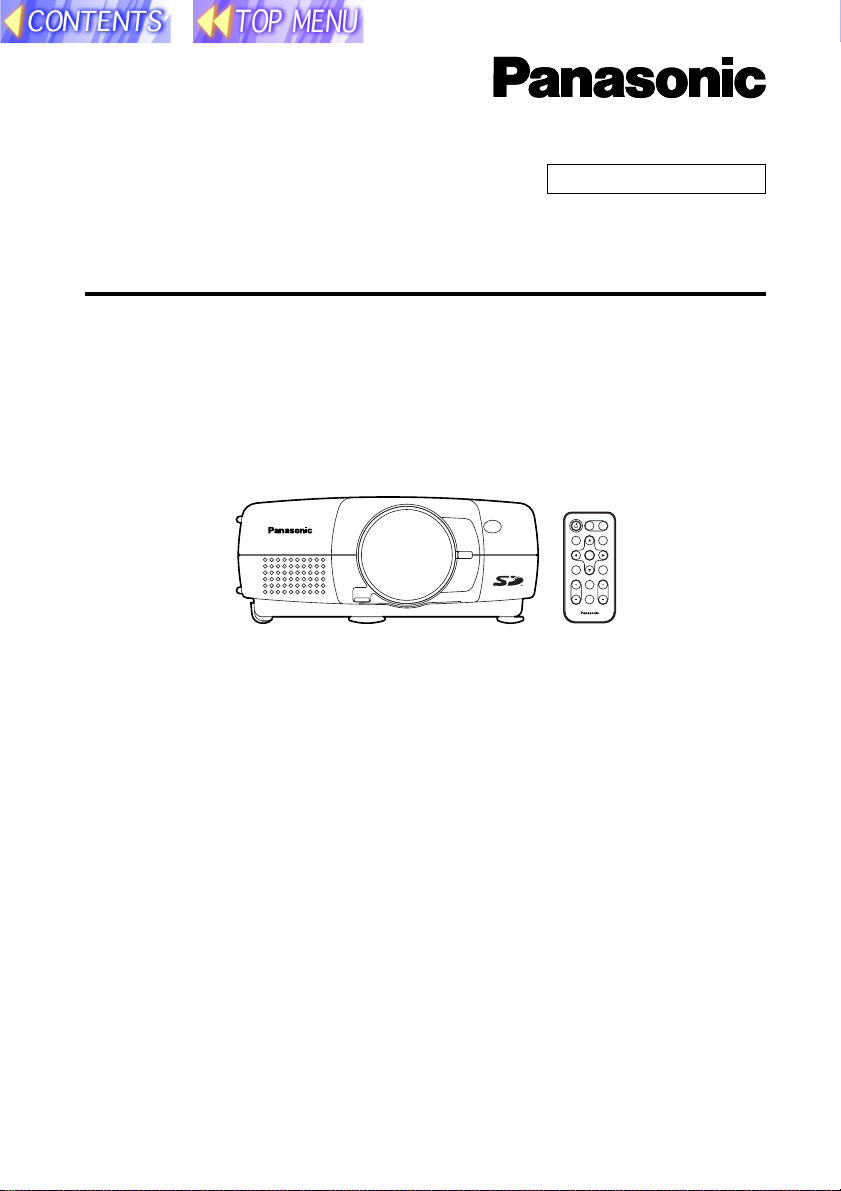
SD memory card compatible
LCD Projector Commercial Use
Operating Instructions
(SD Memory Card Functions)
Model No. PT-L702SDE
PT-L701SDE
POWER
INPUT
VIDEO
RGB
AUTO
MENU
SETUP
ENTER
FREEZE
SHUTTER
STD
VOLUME D.ZOOM
INDEX
WINDOW
PROJECTOR
B This LCD projector is designed to be compatible with the SD memory
card.
These operating instructions explain how to use the SD memory card and
how to play back images which have been recorded on the card. Please
refer to the separate PT-L702E or PT-L701E Operating Instructions for
details on how to use the LCD projector.
B Before using the SD memory card, be sure to read all documentation,
including the "Read this first" booklet, these Operating Instructions and
the Operating Instructions for the PT-L702E or PT-L701E LCD projector
and also the Warranty card provided.
TQBH9001-3
GBR
1
Page 2

Contents
Dear Panasonic Customer: ................ 3
Safety Precautions ............................. 3
Notes on using the PC card adapter ... 4
Check accessories ............................. 5
Names of each part (SD memory card
slot) ................................................ 5
What is the SD memory card? ........... 6
Examples of using
the SD memory card ...................... 6
Notes on handling the SD memory
card ................................................ 7
Notes on handling ................................ 7
Notes on storage .................................. 7
Protecting valuable data ...................... 7
Making backups of the data in the SD
memory card .................................. 8
Write-protect switch ............................. 8
Notes on using the projector ............. 8
Explanation of terms .......................... 9
Inserting and removing the SD
memory card ............................... 10
Inserting the SD memory card ........... 10
Removing the SD memory card ......... 10
On-screen menus ............................. 11
List of menu screens .......................... 11
Capturing projected images onto the
SD memory card ......................... 12
Enabling the FREEZE button for making
capture recordings ....................... 12
Capturing images ............................... 13
Using the SD memory card in a
Windows PC ................................ 14
Inserting the SD memory card ........... 14
Removing the SD memory card ......... 15
Using the SD memory card in a
Macintosh .................................... 16
Inserting the SD memory card ........... 16
Saving JPEG files onto the SD memory
card .............................................. 17
Removing the SD memory card ......... 18
DCF standard .................................... 19
Limits on directory names .................. 19
File names ......................................... 19
File format .......................................... 19
Using JPEG Convertor ..................... 20
What JPEG Convertor can do ........... 20
Starting JPEG Convertor ................... 20
Main screen functions ........................ 21
Importing presentation files created
using Microsoft PowerPoint .......... 22
Importing JPEG, BMP and TIFF files
created using other applications .. 23
Importing files using drag-and-drop ... 23
Checking, sorting and
deleting images ............................ 24
Conversion settings for saving
images .......................................... 25
Saving imported images onto the SD
memory card ................................ 26
Saving to other folders ....................... 27
Playing back images using
the projector ................................ 28
Selecting the folder (directory) ........... 28
Playing back images .......................... 29
Setting the playback method.............. 29
Moving and deleting images .............. 30
Keystone correction in CARD mode .. 30
Troubleshooting................................ 31
Before asking for service ................. 31
Specifications ................................... 32
Trademark Information ..................... 34
2
Page 3

Dear Panasonic Customer:
These instructions provide all the necessary operating information that
you may require. We hope it will help you get the best performance from your
new product, and that you will be pleased with your Panasonic LCD
projector.
Safety Precautions
WARNING
Keep the SD memory card out of the reach of infants.
B If the memory card is swallowed, death by suffocation may result. If you
believe that the memory card may have been swallowed, seek medical
advice immediately
Caution
Do not insert the SD memory card into devices which are not
compatible with the SD memory card (for example, devices which only
use multimedia cards).
B If this is not observed, it may not be possible to remove the SD memory
card, and damage to the card or to the device may result.
Do not remove the SD memory card from the projector while the card is
being accessed for reading or writing (while the SD memory card
access indicator inside the card slot cover at the rear of the projector is
flashing).
B If this is not observed, the data on the card may become corrupted or
erased.
Do not insert any foreign objects into the card slot at the rear of the
projector.
B Inserting foreign objects may damage the projector. If the SD memory
card is inserted while some foreign object is inside the card slot, it may
damage the card and the projector.
3
Page 4

Notes on using the PC card adapter
Caution
Do not remove the accessory PC card adapter or the SD memory card
while the computer is accessing the SD memory card for reading or
writing.
B If this is not observed, the data on the card may become corrupted or
erased.
Do not install the accessory PC card adapter to any device other than a
PC card slot.
B If this is not observed, damage to the device may result. Before installing
the accessory PC card adapter, check that the card slot on the device
being used is a PC card (PCMCIA) Type II or Type III card slot.
Do not insert any foreign objects into the card slot of the accessory PC
card adapter.
B Inserting foreign objects may damage the device. If the SD memory card
is inserted while some foreign object is inside the card slot, it may damage
the card and the device.
4
Page 5
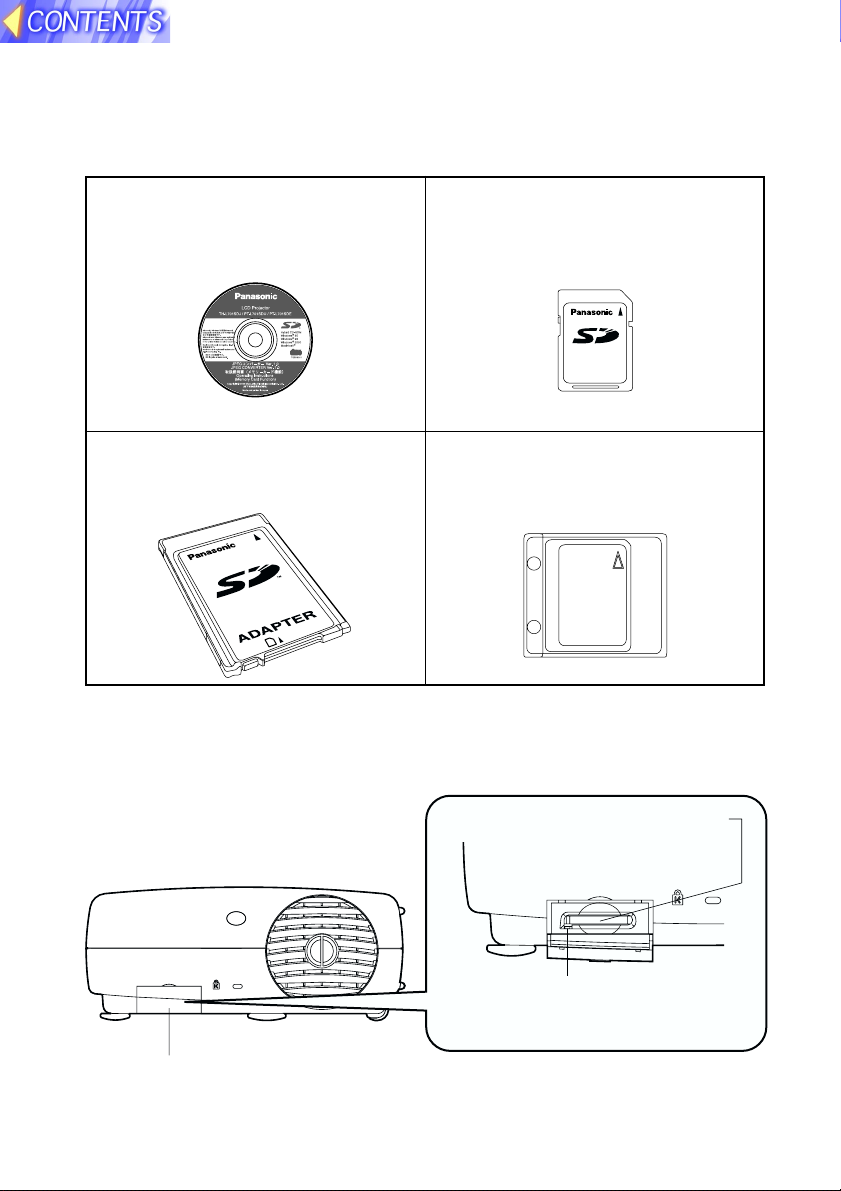
Check accessories
The following accessories are included, in addition to the accessories which
are listed in the separate Operating Instructions for the PT-L702E or PTL701E LCD projector.
CD-ROM ... 1 pc. (JPEG Convertor,
Operating Instructions)
SD memory card (16 MB) ... 1 pc.
16
MB
PC card adapter for SD memory
card ... 1 pc.
D
R
A
C
Protective case for SD memory
card ... 1 pc.
Names of each part (SD memory card slot)
SD memory card slot
Rear of projector
SD CARD
Card slot cover
Covers the SD memory card slot.
Access indicator
Flashes when the SD memory card is
being accessed for reading and writing.
Insert the SD memory
card in here.
5
Page 6

What is the SD memory card?
The SD memory card is a semiconductor memory which at 24 mm x 32 mm x 2.1 mm is
about the size of a postage stamp. It is a next-generation recording medium which can
be used instead of conventional storage devices such as MDs (mini discs), CDs
(compact discs) and cassette tapes. In addition, it allows data to be repeatedly recorded, played and erased. The SD memory card can be used to store computer image
files, video images (still pictures) and presentations created using Microsoft PowerPoint
which have been converted into JPEG images using the accessory JPEG Convertor
software, letting you make "PC-free" presentations using just the LCD projector.
Examples of using the SD memory card
Capturing images using the projector
Tuner
Computer
The freeze function can be used to capture the
moving pictures as still pictures.
Video signal
Projector
Image file
SD memory card
Saving images directly using a computer
Computer
RecordingPlayback
PC card adapter
Exporting data
D
R
A
C
SD memory card
The accessory JPEG Convertor software can be used
to convert image files in other formats (PowerPoint,
TIFF, BMP) into JPEG files which can then be saved
onto the SD memory card. (Windows only)
Projecting JPEG images PC-free (using just the
projector)
Insert
16
MB
Projector
SD memory card
Images can also be sorted and deleted.
Projection
Projected
image
Screen
Refer to "Capturing projected
images onto the
SD memory card"
on page 12.
16
MB
Refer to "Using
the SD memory
card in a Windows
PC" on page 14
and "Using the SD
memory card in a
Macintosh" on
page 16.
Refer to "Playing
back images using
the projector" on
page 28.
6
Page 7

Notes on handling the SD memory card
Be sure to read the following before
using the accessory SD memory
card.
Front
Notes on handling
Be sure to observe the following.
B Do not disassemble or modify
the card.
B Do not subject the card to
strong shocks, and do not twist
it, bend it, drop it, step on it or
immerse it in liquids.
B Do not rub the card with cloth or plastic, or bring it close to objects which
may generate static charges or magnetic fields.
B Do not touch the metal terminals with hands or metal objects, attach
stickers to them, or allow them to become contaminated in any way.
B Do not remove the attached label from the card.
B Do not attach any other labels or stickers to the card.
16
MB
Write-protect switch
Rear
LOCK
Notes on storage
After removing the SD memory card from the projector or other device,
always insert it into its protective case.
B Do no leave the card inside hot vehicles or in other places with high
temperatures such as places exposed to direct sunlight.
B Do not leave the card in places which are exposed to substances such as
corrosive gases.
Protecting valuable data
B Do not turn off the projector power supply or remove the SD memory card
from the projector while the card is being accessed for reading or writing
(while the SD memory card access indicator inside the card slot cover at
the rear of the projector is flashing). Failure to observe this may result in
loss of data.
B Always make a backup of the data which is stored in the SD memory card.
Accidental mistakes in using the card may sometimes result in the loss of
valuable data.
7
Page 8

Making backups of the data in the SD memory card
B Double-click on the drive icon (refer to page
15) for the SD memory card in My Computer
(or on the Desktop if you are using a
Macintosh), and then drag the DCIM directory
to the Desktop (while clicking the Option button
if you are using a Macintosh). This will create a
backup copy on your computer of all data in
the DCIM directory.
Write-protect switch
B If the write-protect switch on the SD memory card is moved to the LOCK
position, it will not be possible to capture images using a projector or to
use any file editing functions such as deleting or moving image files. (An
error message will be displayed if you try to use any of these functions.)
B If the SD memory card is inserted into a computer using the PC card
adapter while the write-protect switch is at the LOCK position, a blue
warning screen will be displayed when the computer attempts to access
the card. If this happens, press any key on the computer's keyboard to
clear the error display. Check that the write-protect switch is not at the
LOCK position when using the SD memory card in a computer.
Notes on using the projector
Be sure to observe the following.
B Do not drop the projector or subject it to strong shocks.
B Keep the projector dry at all times.
B Do not use excessive force when opening and closing the card slot cover.
B Do not use the card if it is cracked or bent.
B Do not use the projector in humid environments such as bathrooms, or in
dusty environment such as warehouses.
Please make sure that you understand the following before using the
SD memory card.
B Panasonic shall not be liable for any damage or losses suffered by the
user, either directly or through claims from a third party, arising from or
in connection with the use of or problems with the projector or the SD
memory card.
B Panasonic shall not be liable for any damage or losses suffered by the
user arising from loss of data stored on the SD memory card.
8
Page 9

Explanation of terms
Following are definitions for some of the terms used throughout these Operating Instructions.
PowerPoint
Application software for creating presentations which is included as part of
Microsoft Office. 95, 97 and 2000 versions are available, but the JPEG
Convertor software which is bundled with
the projector is only compatible with the
97 and 2000 versions.
JPEG
Abbreviation for Joint Photographic
Experts Group. JPEG is the name of an
international organisation which was
jointly established by the ISO and the
ITU-TS (formerly the CCIT), but the term
is normally used to refer to the specifications for the still picture compression
algorithm which was formulated by the
JPEG. This algorithm allows still images
such as photographs, single frames of
moving images and scanned images to
be compressed to up to 1/100th of their
original sizes. However, images which are
compressed in this way cannot be fully
restored to their original quality (some
deterioration in quality occurs), so that
compression rates of 1/5 to 1/30 are
normally used. Because of differences in
colour separation, two format sub-types
are used: RGB (red, green and blue) and
CMYK (cyan, magenta, yellow, black).
The projector and the JPEG Convertor
software do not support the CMYK subtype of JPEG file.
BMP
Abbreviation for BitMaP. This is the
standard image format for the bitmapped
files (image files consisting of a collection
of dots) which are handled by Windows.
Colour levels of monochrome, 16 colours,
256 colours and 16.7 million colours are
supported.
RLE
Abbreviation for Run Length Encoding. It
can be used to achieve high rates of
compression for image files which contain
large areas of a single colour. RLE can be
used with monochrome, 16-colour and
256-colour BMP image files. (JPEG
Convertor does not support files compressed using RLE.)
TIFF
Abbreviation for Tagged-Image File
Format. This type of file is used to
exchange documents between computers. Colour levels of monochrome, 256
colours and 16.7 million colours are
supported. TIFF files in 16.7 million colour
format can include transparent colour.
LZW
Abbreviation for Lempel-Ziv-Welch. LZW
is a compression method used for TIFF
files, and is named thus because it was
developed by three people named
Lempel, Ziv and Welch. It compresses the
files by converting patterns within the
images into short codes. There is no
deterioration in image quality resulting
from compression, but high rates of
compression which are comparable to
JPEG files cannot be expected to be
obtained. (JPEG Convertor does not
support files compressed using LZW.)
DCF
Abbreviation for Design rule for Camera
File system. DCF is a standard which was
established by the Japan Electronic
Industry Development Association
(JEIDA) with the aim of realising a
common image file format, directory
name format and file name format for the
images used with digital still cameras. It is
based on recommendations such as Exif
Version 2.1.
Exif 2.1
Abbreviation for Exchangeable Image File
Format. This is an image file format which
was established by the Japan Electronic
Industry Development Association
(JEIDA). It defines the common information format and range of application for
images used with digital still cameras,
centring around TIFF and JPEG-format
images. Version 2.1 is the latest version of
the Exif standard.
9
Page 10
Inserting and removing the SD memory card
Inserting the SD memory card
Make sure that the SD memory card
is the right way up when inserting it.
##
# Open the card slot cover.
##
SD CARD
$$
$ Insert the SD memory card as
$$
shown below.
Insert the SD memory card so
that the side with the label is
facing upwards and the end with
the cut-away corner is towards
the front. Push the card in until it
locks into place.
Removing the SD memory card
##
# Open the card slot cover.
##
$$
$ Check that the access indicator
$$
at the lower left of the slot is
not flashing (the SD memory
card is not being accessed for
reading or writing).
Note:
B Before removing the SD memory
card, make sure that the access
indicator is not flashing. If the
card is removed while the access
indicator is flashing, it may result
in loss of data on the card.
%%
% Push the centre of the SD
%%
memory card to unlock it, and
then remove the card.
Access indicator
Note:
B If you try to force the SD memory
card into the slot the wrong way, it
may damage the card and the slot.
%%
% Close the card slot cover.
%%
&&
& Close the card slot cover.
&&
10
Page 11
On-screen menus
List of menu screens
The projector allows various settings to be adjusted and changed using onscreen menu operations. The overall structure of the projector menus is
shown below.
MAIN MENU SD CARD menu
MENU
KEYSTONE
PICTURE
POSITION
INDEX WINDOW
SHUTTER
AUDIO
LANGUAGE
OPTION
SD CARD
CAPTURE
SELCT ENTER
CAPTURE function
(Page 13)
FILE EDIT menu
(Page 30)
FILE EDIT
MOVE
DELETE
SELCT ENTER ESC
PICTURE
PICTURE
PICTURE MODE NATURAL
COLOR 32
BRIGHT 32
CONTRAST 32
SELCT ADJ ESC
Directory selection screen
(Page 28)
(Pages 12, 29 and 30)
VIDEO or RGB mode
SD CARD
CAPTURE MENU
AUTO PLAY 60SEC
AUTO LOOP OFF ON
SELCT ADJ ESC
CARD mode
SD CARD
CAPTURE MENU
FILE EDIT
AUTO PLAY 60SEC
AUTO LOOP OFF ON
PICTURE
DIR SELECT
SELCT ADJ ESC
Image selection
screen
(Page 28)
100-0005
[5/17]
REST 2.1MB
DIR 100[1/7]
REST 2.1MB
SELCT ENTER
Note:
B Refer to the separate PT-L702E or PT-
L701E Operating Instructions for details
on the MAIN MENU items other than "SD
CARD" and "CAPTURE" and for details
on the items in the PICTURE menu.
Image playback
screen
(Page 29)
11
Page 12

Capturing projected images onto the SD memory card
It is possible to capture images which are being projected from a source such
as a connected computer or VCR, and save these captured images onto the
SD memory card which has been inserted into the SD memory card slot of the
projector. Images can be captured in one of two ways: by using menu screen
operations (used principally for still images), or by using the FREEZE button on
the remote control unit (used principally for moving images). YPBPR signals and
video signals which include copy-protection signals cannot be captured.
Enabling the FREEZE button for making capture recordings
##
# Press the MENU button.
##
The MAIN MENU screen will be displayed.
$$
$ Press the
$$
select "SD CARD".
%%
% Press the ENTER button.
%%
The SD CARD screen will then be
displayed.
FF
GG
F or
G arrow button to
FF
GG
MENU
KEYSTONE
PICTURE
POSITION
INDEX WINDOW
SHUTTER
AUDIO
LANGUAGE
OPTION
SD CARD
CAPTURE
SELCT ENTER
Note:
B If "CARD" is selected using the input select (INPUT, RGB) button, the SD
CARD screen will be displayed when the MENU button is pressed, instead
of the MAIN MENU screen.
&&
& Press the
&&
select "CAPTURE".
((
( Press the
((
that "FREEZE" is set.
If set to "MENU", the capture function will
not operate even when the FREEZE
button is pressed.
FF
GG
F or
G arrow button to
FF
GG
II
HH
I or
H arrow button so
II
HH
SD CARD
CAPTURE FREEZE
AUTO PLAY 60SEC
AUTO LOOP OFF ON
SELCT ADJ ESC
Note:
B If the capture setting is set to "FREEZE", only the vertical keystone
correction function will be inoperable. (The picture image on the screen
will appear to be distorted in the vertical direction, but the captured image
will not have this distortion.)
If the FREEZE button is not required for capturing images, or if you do not
want the image to appear distorted while projection is paused, change the
capture setting to "MENU".
12
Page 13

Capturing images
Using the FREEZE button Using the MAIN MENU
##
Insert the SD memory card into the projector according to
#
##
the procedure given on page 10.
$$
$
Project the screen image to be captured.
$$
Use the input select (INPUT, RGB, VIDEO) button to select the input
signal, or operate the signal source (such as the computer or VCR) to
project the screen image to be captured.
%%
Press the FREEZE button on the
% Press the MENU button to
%%
remote control.
display the MAIN MENU screen.
&&
& Use the
If the image being projected is okay
&&
as it is, press the FREEZE button.
A confirmation screen will be
displayed. Use the I or H arrow
button to select "YES", and then
press the ENTER button.
If the confirmation screen does not
appear, make the setting described
on page 12.
((
Capturing will then start, so wait
(
((
select "CAPTURE", and then
press the ENTER button.
until it is complete (approx. 30
seconds [for a RGB signal]).
When capturing is complete, the directory number and file number for the
saving location of the captured image
will be displayed as shown at right.
))
)
Press the MENU button to end the capture procedure.
))
To capture another image, repeat the procedure from step $.
FF
GG
F or
G arrow button to
FF
GG
MENU
KEYSTONE
PICTURE
POSITION
INDEX WINDOW
SHUTTER
AUDIO
LANGUAGE
OPTION
SD CARD
CAPTURE
SELCT ENTER
FILE NAME IS
100-0068
REST 2.0MB
Freespace on SD memory
card
Directory numberFilenumber
Note:
B If there is not enough free space on the SD memory card, "CARD FULL"
or "ERROR" will be displayed.You can either delete unwanted images by
following the steps given on page 30, or you can insert another SD
memory card which has sufficient free space available.
B If the write-protect switch of the SD memory card is set to the LOCK position,
"WRITE PROTECTED" will be displayed.Remove the SD memory card from the
projector and move the write protect switch from the LOCK position to continue.
B If the SD memory card is removed before the capturing operation is
complete, it may result in loss of data on the card.
13
Page 14

Using the SD memory card in a Windows PC
The accessory PC card adapter can be used to insert the SD memory card
into a computer with a built-in PC (PCMCIA) card slot which is either Type II
or Type III compatible. The accessory JPEG Convertor software can then be
used to edit and save images onto the card.
Inserting the SD memory card
##
# Insert the SD memory card into the PC
##
card adapter as shown in the
illustration at right.
Push the card in until it locks into place.
Make sure that it is facing the correct way.
Note:
B If the SD memory card is inserted into a computer using the PC card
adapter while the write-protect switch is at the LOCK position, a blue
warning screen will be displayed when the computer attempts to access
the card. If this happens, press any key on the computer's keyboard to
clear the error display. Check that the write-protect switch is not at the
LOCK position when using the SD memory card in a computer.
$$
$ Insert the PC card adapter into the PC card slot of the computer.
$$
%%
% If using the SD memory card for the first
%%
time on a computer running Windows, the
Add New Hardware Wizard will start. Click
Next.
Note:
B When using the SD memory card for the
second time onwards, the following setting
steps are not necessary.
&&
& Select "Display a list of all drivers in a
&&
specific location, so you can select the
driver you want." and then click Next.
((
( Select "Standard IDE/ESDI Hard Disk
((
Controller" and then click Next.
Follow the prompts which appear on the
screen to continue with the installation. Lastly,
click End to finish.
SD memory card
PC card adapter
CARD
14
Page 15

))
) Open My Computer on the Desktop, and
))
check that the icon for the new drive
appears.
The drive icon is the same icon as that used
for hard disks, but you can check which icon is
which by looking at the disk capacity (14.1 MB
for a 16-MB SD memory card). (The drive letter
will appear as D:, E:, F: or something similar,
depending on the computer you are using.) If
the drive capacity does not appear as shown in
the illustration at right, select the drive icon,
and then press [ALT] + [ENTER] to display the
Properties dialog box in order to check the
capacity.
SD memory card drive
icon
Note:
B The screens shown for each of the installation steps are Windows 98
screens. The appearances of these screens will vary depending on which
version of Windows you are using. If you are prompted to select a driver at
the New Hardware screen, select Standard Windows driver and then click
OK. Refer to the Windows online help for further details.
B Operations such as deleting, copying or renaming files and creating or
deleting folders (directories) can be carried out in the same way as for a
normal hard disk. For details, refer to the documentation and help files for
the operating system being used.
B The projector can only handle DCF-compliant directories and files. If the
directories and files on the SD memory card are not DCF-compliant, the
projector will not be able to recognise them. For further details, refer to
page 19.
Removing the SD memory card
Follow the procedure below to remove the SD memory card.
##
# Close all applications software which is using the SD memory card.
##
$$
$ Left-click the PC Card icon (
$$
) in the taskbar at the bottom-right of
the screen.
Note:
B If the PC Card icon does not appear in the taskbar at the bottom-right of
the screen, click Start, point to Settings, click Control Panel and then open
PC Card. Click the Show control on taskbar check box and then click OK.
15
Page 16

%%
% Select and click Stop Standard IDE/ESDI
%%
Hard Disk Controller or Stop BN-SD
SeriesPCMCIA Disk Controller.
&&
& The screen shown at right will appear. Click
&&
OK to remove the PC card adapter.
((
( Press the eject button of the PC card
((
adapter and take out the SD memory card.
Note:
B Be sure to follow the removal procedure
correctly. If the correct procedure is not
followed, it may result in damage to the card
or loss of data on the card.
Eject button
CARD
Using the SD memory card in a Macintosh
The accessory PC card adapter can be used to insert the SD memory card
into a Macintosh with a built-in PC (PCMCIA) card slot which is either Type II
or Type III compatible. You can then save images from the Macintosh onto the
SD memory card and edit these images.
Inserting the SD memory card
##
# Insert the SD memory card into the PC
##
card adapter as shown in the illustration
at right.
Push the card in until it locks into place.
Make sure that it is facing the correct way.
Note:
B If the SD memory card is inserted into a Macintosh using the PC card
adapter while the write-protect switch is at the LOCK position, it will take a
long time (a few minutes depending on the case) for the Macintosh to
recognise the card, and an error message may appear. If this happens,
take the SD memory card out of the Macintosh by following the steps on
page 18, and change the position of the write-protect switch so that it is
not at the LOCK position.
SD memory card
PC card adapter
CARD
16
Page 17

$$
$ Insert the PC card adapter into the PC card slot of the Macintosh.
$$
The drive icon will be added automatically to the Desktop.
%%
% Files can then be save and edited in the same way as when using a
%%
floppy disk or MO drive.
Note:
B For Macintosh computers, a System Extension
such as PC Exchange or File Exchange is
required. If such a System Extension has not
been installed, a message such as "This disk is
unreadable by this Macintosh. Do you want to
initialize the disk?" will appear. Do not initialise
the SD memory card under any circumstances. If the SD memory card is
formatted (initialised for Macintosh use), the SD memory card will no
longer be recognised by the projector. Always click the Eject button to
remove the SD memory card, and then install the require System Extension such as PC Exchange or File Exchange. (For details, refer to the
instruction manual or help files for the Mac OS.)
B Operations such as deleting, copying or renaming files and creating or
deleting folders (directories) can be carried out in the same way as for a
normal hard disk. For details, refer to the documentation and help files for
the operating system being used.
B The projector can only handle DCF-compliant directories and files. If the
directories and files on the SD memory card are not DCF-compliant, the
projector will not be able to recognise them. For further details, refer to
page 19.
Saving JPEG files onto the SD memory card
JPEG files which have been created using a graphics program or transferred
from a digital camera to the Macintosh can be saved onto the SD memory
card, and these files can then be played back using the projector.
Note:
B Make sure that you have read the section titled "DCF standard" on page
19 before working with files in this way.
##
# Open the drive icon for the SD memory card, press the " " and
##
"N" keys to create a new folder (directory), and rename the directory
to "DCIM".
If you have already used SD memory card to capture images by the
projector, or if the SD memory card already contains files which were
photographed by a DCF-compliant digital camera, the "DCIM" directory
will already exist, and there is no need to create a new directory.
17
Page 18

$$
$ Open the "DCIM" directory which has been created, press the " "
$$
and "N" keys to create a new folder (directory), and change the name
of the directory to a name that conforms to the DCF standard
(example: 100abcde).
In the same way as in step # above, an existing directory which is already DCF-compliant can be used.
%%
% Drag and drop the JPEG file you would like to save into the directory.
%%
The file will be copied into the directory. (The original file will not be deleted from the Macintosh.)
&&
& Change the name of the copied file to a name which is DCF-
&&
compliant (example: abcd0001.jpg).
After the file copying is complete, take the SD memory card out of the
Macintosh by following the steps below and then insert it into the projector
to play back the file.
Removing the SD memory card
Remove the SD memory card from the Macintosh by following the steps
below. Close all applications which are using the SD memory card.
##
# Drag the drive icon for the SD memory card on the Desktop to the
##
Trash, and take out the PC card adapter.
$$
$ Press the eject button on the PC card
$$
adapter and take out the SD memory
card.
Note:
B Be sure to follow the removal procedure
correctly. If the correct procedure is not
followed, it may result in damage to the
card or loss of data on the card.
Eject button
CARD
18
Page 19

DCF standard
This projector can only play back image files which comply with the DCF specification. The DCF specification imposes the following conditions. Image files or directories which do not conform to these conditions cannot be recognised by the projector.
Limits on directory names
Directories must be created as sub-directories of the DCIM directory on
the SD memory card.
B Data which is contained within any directory other than the DCIM directory
cannot be recognised.
Directory names must consist of three numerals (directory number)
followed by five alphanumeric characters. (Example: 100abcde)
B The three numerals must make up a number between 100 and 999, and
the alphanumeric characters can be taken from the following set of 37
characters: 0123456789abcdefghijklmnopqrstuvwxyz_ (No distinction is
made between upper-case and lower-case alphabetic characters. Doublebyte characters cannot be used.)
Multiple directories using the same three-digit combination (directory
number) cannot be created.
B For example, if two directories exist named "100abcde" and "100fghij"
respectively, the projector will not recognise them.
Directory sub-hierarchies are not supported.
B
For example, if a directory called "323fghij" is created as a sub-directory of the
"102abcde" directory, the projector will not be able to recognise the sub-directory.
File names
File names must consist of four alphanumeric characters followed by
four numerals (file number), followed by ".jpg". (Example: abcd0001.jpg)
B The four numerals must make up a number between 0001 and 9999, and
the alphanumeric characters can be taken from the following set of 37
characters: 0123456789abcdefghijklmnopqrstuvwxyz_ (No distinction is
made between upper-case and lower-case alphabetic characters. Doublebyte characters cannot be used.)
Multiple file names using the same four-digit combination (file number)
cannot be created.
B For example, if two files exist named "abcd0001.jpg" and "efgh0001.jpg"
respectively, the projector cannot recognise them normally.
File format
B Only JPEG image files which comply with the Exif 2.1 standard are
recognised.
19
Page 20

Using JPEG Convertor
The CD-ROM which is included with the projector contains the JPEG Convertor
software (for Windows only). To use this software, read the "Read this first" booklet
which is also included, and then install the JPEG Convertor.
What JPEG Convertor can do
The functions of JPEG Convertor are shown below.
Conversion of PowerPoint files (.ppt extension) to DCF-compliant
JPEG images
PowerPoint 97/2000 must be installed on the computer which is being used to do
the conversion.
Conversion of JPEG, BMP and TIFF images to DCF-compliant JPEG images
Changing image sizes and compression rates
XGA SXGA SVGA XGA XGA XGA
Sorting of images
B C AA B C
Saving images to locations such as a SD memory card, hard disk or
MO drive
SD memory card
16
MB
MO HD
Starting JPEG Convertor
To start JPEG Convertor, click Start, point to
Programs, point to JPEG Convertor Ver 1.0 and
then click JPEG Convertor Ver 1.0.
20
Page 21

Main screen functions
When JPEG Convertor is started, the main screen shown in the illustration
below appears.
**
* Slide size list box
**
Lets you select the image size for
presentation files created using
Microsoft PowerPoint when they are
imported into JPEG Convertor.
++
+ Picture quality slider
++
Lets you adjust the quality (compression rate) of the JPEG images when
they are being saved using the Save
to SD Memory Card and Save to
other folder commands.
--
- Save to SD Memory Card
##
# Import Slide button
##
Imports presentation files created
using Microsoft PowerPoint into
JPEG Convertor.
$$
$ Import file button
$$
Imports image files (JPEG, BMP or
TIFF format) created using other
applications into JPEG Convertor.
%%
% Thumbnail screen
%%
Displays small previews of the
images which have been imported
into JPEG Convertor. If you rightclick on any of the thumbnail images
in this screen, the images can be
displayed in actual size, sorted or
deleted.
&&
& File menu
&&
Commands such as Import Slide,
Import file, Save to SD Memory
Card, Save to other folder and Close
can be selected from this menu.
((
( Setting menu
((
Lets you select the various settings
to be applied (such as DCF format
conversion, thumbnail creation and
size conversion) when images are
imported.
))
) Version
))
Lets you check the software version
information for JPEG Convertor.
--
button
Converts imported images into
JPEG images and saves them onto
an SD memory card. When an image
is saved, a new directory is created
in the DCIM directory (created
automatically at this time if it does
not already exist) on the SD memory
card.
..
. Minimize ( ) button
..
Minimizes the JPEG Convertor
window and makes it appear as a
button on the taskbar.
//
/ Maximize ( ) button
//
Enlarges the JPEG Convertor
window so that it fills the whole of
the screen. When the window is
maximized, click the Restore button
) to return the window to its
(
previous size.
00
0 button
00
Closes JPEG Convertor. It works in
the same way as the Close button.
11
1 Save to other folder button
11
Saves the JPEG images to some
other location such as a hard disk or
MO drive.
22
2 Close button
22
Works in the same way as the
button.
21
Page 22

Importing presentation files created using Microsoft PowerPoint
##
# Check the size in the Slide size
##
drop-down list box.
The projector can project JPEG images
which are of XGA size, so Slide size
should be set to "XGA (1024 x 768)".
Note:
B
If Slide size is set to SXGA size, you
can create JPEG files with the
maximum quality, but they will be
converted to XGA size when they are
projected by the projector. Furthermore, the file size will also become
bigger. (This will reduce the number
of images which can be stored on a
single SD memory card.) In addition,
Slide size can be set to SVGA size to
reduce the file size, but when such
images are projected by the projector,
they will be increased to XGA size,
resulting in losses in picture quality.
$$
$ Click Import Slide, and then select
$$
the presentation file to import.
An Open window such as the one
shown in the illustration will
appear. Use the drop-down list
box or double-click the folder
icons to navigate to the location
of the presentation file to be
converted, and then select the file
to be converted and click Open.
Note:
B
Only presentation files which are in
PPT format (which have a .ppt exten-
sion) can be imported. For files in other
formats (such as those with .pps
extensions), open the file in PowerPoint
and re-save it in PPT format.
%%
% An import window such as the
%%
one in the illustration will appear.
If you wish to import all slides in
the presentation, click Import All.
If you wish to import selected slides,
click Prev Slide or Next Slide to
display a slide you wish to import,
and then click Import. When the
import is finished, click Cancel/Exit.
Note:
B The impor ted slides will be con-
verted to an aspect ratio of 4:3. It
is not recommended that you
import slides which do not have a
4:3 aspect ratio, as the image
may not reproduce correctly.
B If you wish to cancel the import
after clicking Import All, click
Cancel/Exit.
B An error may occur when the files
are converted on a computer
which has PowerPoint 97 installed. If this happens, the error
may disappear if the files are
converted on a computer which
has PowerPoint 2000 installed.
22
Page 23

Importing JPEG, BMP and TIFF files created using other applications
Click Import file, and then select
the folder and then the image you
wish to import.
An Open window such as the one
shown in the illustration will appear.
Use the drop-down list box or
double-click the folder icons to
navigate to the location of the image
file(s) to be converted, and then
select the file(s) to be converted and
click Open. If you click Import All, all
image files in the folder which is
currently open will be imported.
Images which cannot be
imported
It may not be possible to import
some files with the following properties, even if they are in JPEG, BMP
or TIFF format.
B Files which are more than 10,000
pixels in width or height
B BMP files which have been
compressed using RLE compression
B TIFF files which have been
compressed using LZW compression
B JPEG or TIFF images in CMYK
(Cyan, Magenta, Yellow, Black)
format
Importing files using drag-and-drop
JPEG Convertor is compatible with drag-and-drop operations. Select the
folder and then the file to be converted, and then drag it onto the JPEG
Convertor shortcut icon on the Desktop, or drag it to the open JPEG Convertor window. If JPEG Convertor is not already running, it will then start and the
selected file will be imported.
Dragging and dropping onto the
shortcut icon
Dragging and dropping into the
application window
23
Page 24

Checking, sorting and deleting images
JPEG Convertor lets you enlarge the imported images which are displayed in the
thumbnail screen for checking, and also lets you sort the images into a particular
order for displaying during a presentation. You can also delete unneeded images.
Checking images
Double click on the image you wish to check.
An enlarged view of the image will appear, so that
you can check that the image has imported correctly.
Note:
B You can also enlarge thumbnail images by
right-clicking on them and selecting Display
picture from the pop-up menu.
Sorting images
Drag the thumbnail image and drop it in the
place where you wish the image to appear.
A green dividing line appears between the images. If you
release the mouse button when the thumbnail image is in
the desired location, the image will move to that location.
Note:
B You can also move thumbnail images by right-
clicking on them and selecting Sort from the
pop-up menu, and then using the Arrange
Images dialog box which appears.
Deleting images
Select the image you wish to delete.
You can select multiple images by pressing the
Ctrl key while clicking on each image to be selected. You can also press the Shift key to select
all images within a range between two images.
Right-click in the thumbnail image screen, and then
select Delete slide from the pop-up menu to delete
the selected images from the thumbnail screen.
If you select Delete All in the pop-up menu, all
imported images will be deleted.
Click Yes in the confirmation dialog box.
The selected image files will be deleted from the thumbnail screen.
Note:
B The original image files will not be deleted. Only the imported files will be
deleted.
24
Page 25

Conversion settings for saving images
The conversion settings to be used when saving images onto the SD memory
card or into other folders can be set using the Preferences dialog box which
appears when Preferences is selected from the Setting menu, or using the
Picture quality slider in the main application window.
Save as DCF check box
If this check box is selected, the file
name and folder name will be converted to DCF format (refer to page
19) when the file is saved.
If this check box is not selected, the
file will be saved with the file name
which appears below the image in
the thumbnail screen.
Note:
B When saving the image onto an
SD memory card, the format will
automatically be converted to DCF.
Prepare thumbnail check box
If this check box is selected, a
thumbnail image will be created and
embedded in the JPEG file when the
file is saved.
Note:
B When saving the image onto an
SD memory card, thumbnail
images will be created automatically regardless of this check box
setting.
Save as different size check box
If this check box is selected, the file
will be converted to the size specified in the Converted size list box
when the file is saved.
Note:
B When converting from PowerPoint
presentation files, the file will be
saved at the same size which was
set at the time of importing, regardless of this check box setting.
Converted size list box
The projector can project JPEG
images which are of XGA size, so
Converted size should be set to "XGA
(1024 x 768)". If the Save as different
size check box is not selected, the
Converted size setting will be ignored.
Picture quality slider
This adjusts the image quality (compression rate) for JPEG images when
they are being saved using the Save to
SD Memory Card and Save to other
folder commands. If a higher image
quality is selected, the resulting file size
will be greater, and if a lower quality is
selected, the resulting file size will be
smaller (about 1/5 the size compared to
when high quality is selected).
Note:
B JPEG is an effective compression
method for natural images such as
photographs. Presentations
created using PowerPoint and
illustrations created using graphics
programs may show some deterioration in image quality even if a
high-quality setting is used.
25
Page 26

Saving imported images onto the SD memory card
Once the images have been imported and sorted, you then need to
save them onto the SD memory
card.
##
# Use the PC card adapter to
##
insert the SD memory card into
the computer. (Refer to page 14.)
Check that the write-protect
switch on the SD memory card is
not at the LOCK position.
$$
$ Click Save to SD memory card.
$$
%%
% Select the destination drive
%%
and directory in the Save into
SD Memory Card window.
The Save into drive list box
shows all of the drives which can
be used by the computer. Furthermore, you can use the
direction keys ( ) next to the
destination directory number to
select the desired directory
number. (The directory number
will be set automatically to an
unused number.) Furthermore,
you can also use the numeric
keys to enter a directory number
directly, but be sure to enter a
number between 100 and 999.
Note:
B If you are not sure of the designa-
tion for the destination drive (the
SD memory card drive), refer to
page 15 for instructions on how to
check.
&&
& Click OK to save the image.
&&
If the specified directory number
is already in use, a confirmation
window will appear. If you click
No, the save operation will be
cancelled, and you can then enter
a new directory number.
If you click Yes, the Over write to
destination dialog box will appear.
Select one of the following
operations.
Over write
The existing file will be deleted and
the new file will be saved in its place.
No
The file will not be saved, and the
operation will skip to the next file.
Subsequent
The next-largest file number for that
directory will be used in saving the
file.
Over write all
The same operation as Over write
will be carried out for all remaining
files.
Stop
Saving of files will be cancelled and
the main application window will
reappear.
26
Page 27

Saving to other folders
You can save images to a location such as the computer's hard disk or a MO
drive by clicking on Save to other folder.
Click Save to other folder and select the
destination folder for saving.
A Select folder window such as the one in the
illustration will appear. Use the drop-down list box
or double-click the folder icons to open the folder
you wish to save the file in, and then click Save.
Note:
B You can create new folders by clicking Create
new folder ( ).
27
Page 28

Playing back images using the projector
Selecting the folder (directory)
##
# Use the input select (INPUT,
##
RGB) button to select
"CARD".
$$
$ At the directory selection
$$
II
screen, use the
I or
II
HH
H
HH
arrow button to select the
directory.
A thumbnail image of the first
image in each directory and the
directory information will be
displayed.
DIR 100[1/7]
REST 2.1MB
SELCT ENTER
Free space on SD memory card
Directory number [Directory
sequence/Total number of
directories]
%%
% Press the ENTER button.
%%
The image selection screen will
be displayed and a 3 x 3 arrangement of thumbnail images of the
files in the directory will appear.
The selected file will be spotdisplayed. Use the F, G, I or H
arrow button to move the spot,
and use the F or G arrow button
to scroll up and down if there are
more than nine images. Furthermore, the image information for
the currently-selected image will
be displayed in the top-left corner
of the screen.
100-0005
[5/17]
REST 2.1MB
Free space on SD memory
card
[File sequence/Total number
of files]
Directory number/File number
Note:
B If there is no thumbnail image already embedded in an image file, it will
take extra time to display a thumbnail image for that file.
B Directories which do not contain any image files cannot be selected.
28
Page 29

Playing back images
Press the ENTER button at the image selection screen. The selected image
will then be played back. If the MENU button is pressed during playback, the
display will return to the image selection screen.
100-0005
[5/17]
REST 2.1MB
II
Pressing the
This will play back the image immediately before or after the current image.
However, if AUTO PLAY has been enabled (in other words, if it is not set to
OFF), playback returns to the image immediately before the current image
and then pauses when the I arrow button is pressed. When the H arrow
button is pressed, playback resumes.
Pressing the
playback
This will display the thumbnail image in the centre
of the screen. You can then press the F or G
arrow button again to select an image, and then
press ENTER to play back the selected image.
HH
I or
H arrow button during playback
II
HH
FF
GG
F or
G arrow button during
FF
GG
100-006
[4/17]
REST 2.1MB
SELCT ENTER
Setting the playback method
The following playback methods can be set using the SD CARD menu.
Automatic playback (AUTO PLAY)
When images are being played back, this
sets the time interval for projecting a single
image before switching to the next image. It
can be set to between 5 and 60 seconds, in
steps of 5 seconds. If set to "OFF", automatic switching of images is not carried out.
SD CARD
CAPTURE MENU
FILE EDIT
AUTO PLAY 60SEC
AUTO LOOP OFF ON
PICTURE
DIR SELECT
SELCT ADJ ESC
Note:
B The setting time is a guide only. Actual playback times will vary according
to the sizes of the images.
Automatic looping (AUTO LOOP)
If AUTO LOOP is set to ON when a time for automatic switching of images
has been set using the above item, once the last image in a directory has
been played back, playback automatically returns to the first image in the
directory.
29
Page 30

Moving and deleting images
Deleting Moving
##
#
At the image selection screen, press the
##
FF
F,
FF
GG
G,
GG
II
I or
II
HH
H arrow
HH
button to select the desired image.
$$
Press the MENU button. The SD CARD screen will be displayed.
$
$$
FF
%%
Press the
%
%%
GG
F or
G arrow button to
FF
GG
select "FILE EDIT", and then
press the ENTER button.
FF
Use the
&&
&
&&
GG
F or
G arrow button to
FF
GG
select the desired operation
(DELETE or MOVE), and then
SD CARD
CAPTURE MENU
FILE EDIT
AUTO PLAY 60SEC
AUTO LOOP OFF ON
PICTURE
DIR SELECT
SELCT ENTER ESC
FILE EDIT
MOVE
DELETE
SELCT ENTER ESC
press the ENTER button.
((
(
At the confirmation screen, use
((
II
the
HH
I or
H arrow button to
II
HH
select "YES", and then press the
ENTER button.
The selected image file will be
deleted. If you select "NO", the
display will return to the image
selection screen.
The display will return to the
image selection screen. Press
FF
GG
II
the
F,
FF
G,
GG
HH
I or
H arrow button
II
HH
to move the image to the desired
location, and then press the
ENTER button.
The selected image will be moved
to the point before the selected
position.
Note:
B Each directory must contain a minimum of one JPEG image file that can
be recognised by the projector. An image cannot be deleted if it is the only
image in a directory.
Keystone correction in CARD mode
When the projector is in CARD mode, the MAIN MENU screen will not be
displayed. This means that the menu cannot be used to make keystone
correction settings, but automatic keystone correction can still be carried out
by pressing the AUTO SETUP button. However, if "AUTO KEYSTN" in the
OPTION menu is set to "OFF", the automatic setup function will not operate.
Note:
B In any other mode (RGB1, RGB2, VIDEO or S-VIDEO), the MAIN MENU
screen will be displayed, so keystone correction can be carried out in
these modes. If keystone correction is carried out in some other mode,
there is no need to do it again in CARD mode.
30
Page 31

Troubleshooting
NO FILE
CARD FULL
WRITE
PROTECTED
NON STANDARD
CARD
COPY GUARD
SIGNAL
LAST FILE
NO CARD
ERROR
There are no image files that can be displayed by the
projector on the SD memory card.
There is no free space on the SD memory card.
The write-protect switch on the SD memory card is set
to the LOCK position. Capturing, deleting and moving
files is not possible.
A non-standard card has been inserted.
The video signal being input includes a copy guard
signal. Capturing is not possible with such signals.
The directory contains only one file, and this file cannot
be deleted.
No SD memory card has been inserted.
An error has occurred with some operation. If the error
cannot be reset by pressing the input select (INPUT,
RGB, VIDEO) button, turn off the projector power by
following the procedure given under "Turning off the
power" in the PT-L702E or PT-L701E Operating Instructions, and then turn the power back on again.
Before asking for service
Check the following before asking for service.
Symptom
Computer cannot
recognise the SD
memory card
Writing is not
possible
Video signals
from the computer
cannot be projected.
Check the following
B Has the PC card adapter been securely inserted
into the PC card slot of the computer?
B Has the SD memory card been securely inserted into
the SD memory card slot of the PC card adapter?
B Has the driver been installed correctly?
B Are insufficient computer system resources avail-
able? (Refer to the Windows online help.)
B Is the write-protect switch on the SD memory card
set to the LOCK position?
B If using a notebook computer, has the external
output been configured properly? (It may be possible to toggle the external output settings by pressing the Fn key and the F3 key at the same time. This
depends on the type of computer you are using.
Check the computer documentation for details.)
31
Page 32

Specifications
Some of the following specifications are also given in the separate PT-L702E
or PT-L701E Operating Instructions, but refer to the following for specifications pertaining to this particular model (PT-L702SDE or PT-L701SDE).
Power supply: 100 V–240 V ~, 50 Hz/60 Hz
Power consumption: 240 W Approx. 5 W–10 W when in standby mode
(when fan is stopped)
LCD panel:
Panel size (diagonal): 0.9 type (22.86 mm)
Aspect ratio: 4:3 (16:9 compatible)
Display method: 3 transparent LCD panels (RGB)
Drive method: Active matrix method
Pixels: 786 432 (1024 x 768) x 3 panels
Lens: Manual zoom (1–1.3) / focus lens
Lamp:
PT-L702SDE: UHM lamp (165 W)
PT-L701SDE: UHM lamp (160 W)
Luminosity:
PT-L702SDE: 1200 lm/ANSI
PT-L701SDE: 1000 lm/ANSI
Scanning frequency: (for RGB signals)
Internal data (point scanning) method
Horizontal scanning frequency 24 kHz–97 kHz
Vertical scanning frequency 50 Hz–120 Hz
Dot clock frequency 135 MHz or less
YPBPR signals: NTSC (480i), 480p, PAL (625i), 720p, HDTV (1080i/
1035i)
Colour system: 6 (NTSC/NTSC 4.43/PAL/PAL-M/PAL-N/SECAM)
Projection size: 762 mm–7620 mm (30"–300")
Throw distance: 1.1 m–11.7 m (3'8"–38'4”)
Optical axis shift: 9:1 (fixed)
Screen aspect ratio: 4:3
Installation: Front/Rear/Ceiling/Desk (Menu selection method)
Speakers: 2.8 cm round x 2
Max. useable volume output:
Connection terminals:
RGB/YPBPR IN: Dual-line D-SUB HD 15-pin (female)
During YPBPR input:
Y: 1.0 V [p-p] (including sync signal), 75 Ω
PB,PR: 0.7 V [p-p], 75 Ω
2 W (1 W + 1 W) (stereo)
32
Page 33

Connection terminals
During RGB input:
R.G.B.: 0.7 V [p-p], 75 Ω
G.SYNC: 1.0 V [p-p], 75 Ω
HD/SYNC: TTL high impedance, automatic plus/minus polarity
compatible
VD: TTL high impedance, automatic plus/minus polarity
compatible
AUDIO IN (for RGB): Double-line 0.5 V [rms] M3 jack (Stereo MINI)
VIDEO IN: Single-line, RCA pin jack
1.0 V [p-p], 75 Ω
S-VIDEO IN: Single-line, Mini DIN 4-pin
Y 1.0 V [p-p], C 0.286 V [p-p], 75 Ω
AUDIO IN
(for S-VIDEO/VIDEO): 0.5 V [rms] RCA pin jack x 2 (L-R)
AUDIO OUT: Single-line 0.5 V [rms] M3 jack (Stereo MINI)
(Monitor output/stereo compatible)
0 V [rms]–2.0 V [rms] (variable)
Serial connector: D-sub 9-pin (female) RS-232C compatible
SD memory card slot: Single-line, SD memory card/multimedia card
compatible
For JPEG still images (DCF/EXIF2.1 compliant)
Cabinet: Moulded plastic
Dimensions:
Width: 233 mm (9 5/32")
Height: 98 mm (3 27/32")
Length: 330 mm (13")(with lens cover fitted)
Weight: 3.9 kg (8.6 lbs.)
Operating environment:
Temperature: 0 °C–40 °C (32 °F–104 °F)
Humidity: 20%–80% (no condensation)
Certifications: EN60950, EN55022, EN61000-3-2, EN61000-3-3,
EN55024
Remote control unit:
Power supply: 3 V DC (Lithium CR2025 battery x 1)
Operating range: Approx. 7 m (23')(when operated directly in front of
signal receptor)
Weight: 18 g (0.6 ozs.) (including battery)
Dimensions:
Width: 40 mm (1 9/16")
Height: 6.5 mm (1/4")
Length: 86 mm (3 3/8")
Options: Ceiling bracket ET-PK701
Full function remote control unit ET-RM100
33
Page 34

Trademark Information
B The SD logo is a trademark.
B Windows and Powerpoint are trademarks or registered trademarks of
Microsoft Corporation in the United States of America and other countries.
B Macintosh and Mac are registered trademarks of Apple Computer Inc.
B All other model names, company names or product names are trade-
marks or registered trademarks of their respective owners. TM and (R)
symbols identifying trademarks and registered trademarks are not otherwise used throughout this manual.
Matsushita Electric Industrial Co., Ltd.
Web Site : http://www.panasonic.co.jp/global/
Made in Japan
S1200-2081C
34
 Loading...