

Panasonic PT-56D30X, PT-51D30V, PT-61D30V, PT-61D30X, PT-51D30 Operating Instructions Manual
...
nasonlc o
ColorVideo Projection System
Operating Instructions
PT-61 D30
PT-61 D30V
PT-61 D30X
PT-51 D30
PT-51 D30V
PT-51D30X
PT-56D30
PT-56D30V
PT-56D30X
For assistance, please call: 1-800-211-PANA (7262)or TQB2AA0349 00208
send e-mail to: consumerproducts@panasonic.com PRINTED IN USA
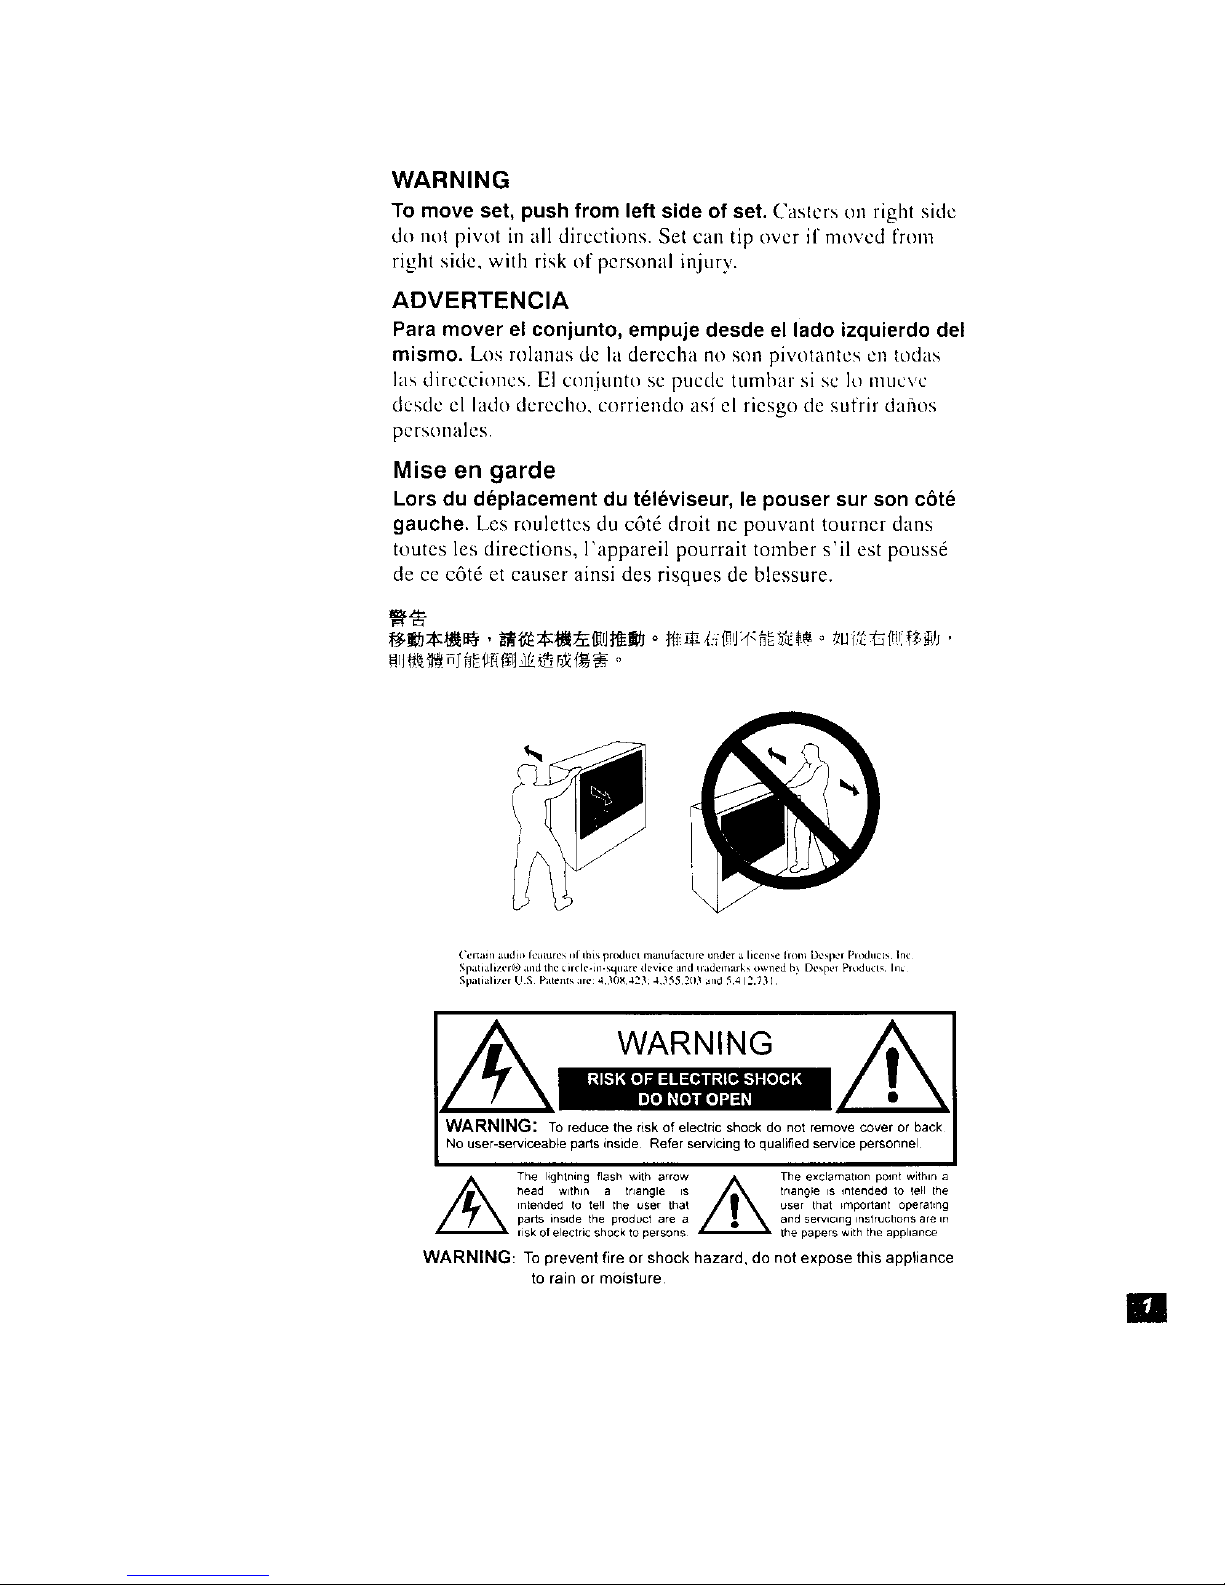
WARNING
To move set, push from left side of set. Caslers on right sidc
do not pivot in all directions. Set can tip over if movcd from
right side, with risk of personal injury.
ADVERTENCIA
Para mover el conjunto, empuje desde el lado izquierdo del
mismo. Los rolanas de la derccha no son pivotantcs on todas
]as dircccioncs. El conjtlnto se [ucdc tumbar si se 1o illUCVC
desdc cl lado dcrecho, corriendo as/el riesgo de sufrir danos
pcrsonales,
Mise en garde
Lors du deplacement du t_leviseur, le pouser sur son c6te
gauche. Les roulettes du c6td droit ne pouvant tourner dans
toutes les directions, l'appareil pourrait tomber s'il est poussd
de ce c6td et causer ainsi des risques de blessure.
('umkm ;LLIdiO leaLures Ifl this i_r(xlucl manufaclure under a license Iiolll l)¢sp¢r Ploducls Inu
_;patializer(0 and the _il¢le-in.squarr device and uademarks owned b! Desper Products¸ InL
Spaliali_ur U S Patents are 4 30_ 42_: 4¸355¸203 *rod 5412.731
WARNING
WARNING: To reduce the risk of electric shock do not remove cover or back
No user-serviceable parts inside Refer servicing to qualified service personnel
The lightning flash with arrow
head Wit hlrl a trlarlgle is
inlended Io tell the user that
parts inside the prodLJct are a
ri_k of electric shock to persons
The exclamation point within a
triangle IS intended to tell the
user that _mportant operating
and servicing instructions are in
the papers with the appliance
WARNING: To prevent fire or shock hazard, do not expose this appliance
to rain or moisture
I
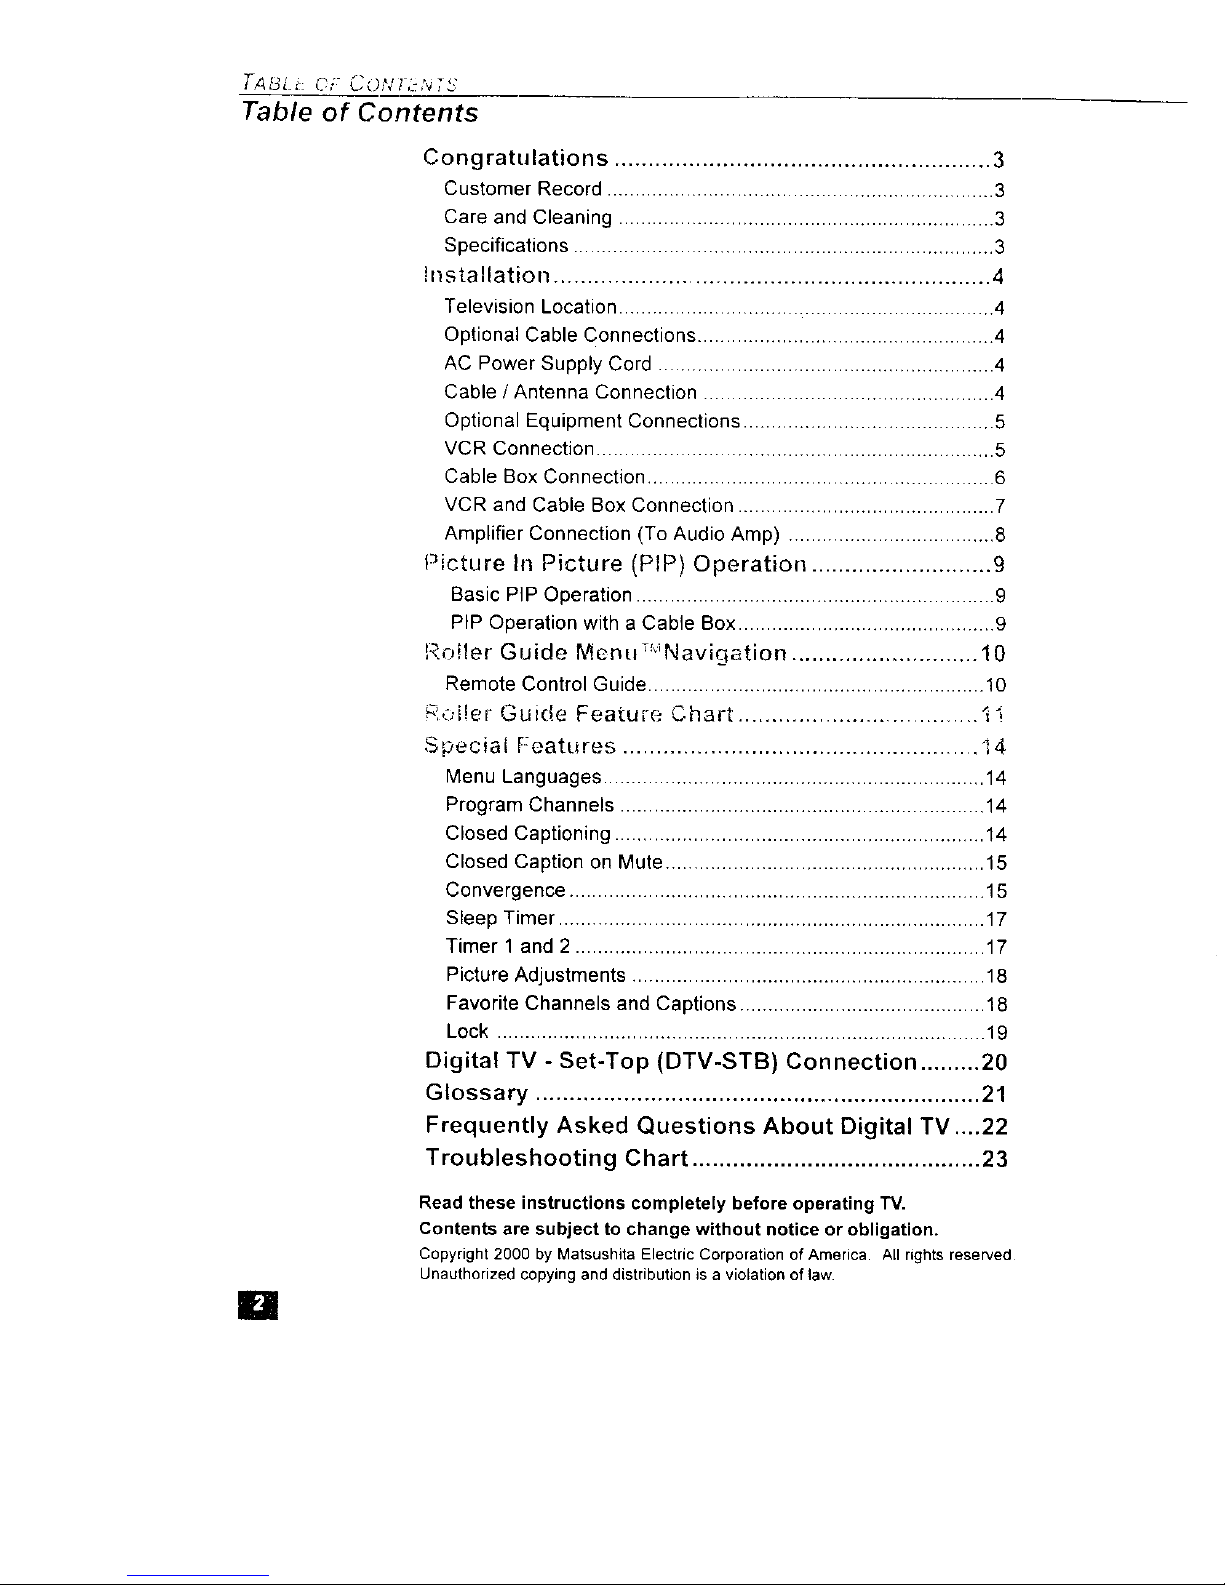
TABLL: C,": CONT,2,'vTS
Table of Contents
Congratulations ........................................................ 3
Customer Record ..................................................................... 3
Care and Cleaning ................................................................... 3
Specifications ........................................................................... 3
!nstallation ................................................................. 4
Television Location ................................................................... 4
Optional Cable Connections ..................................................... 4
AC Power Supply Cord ............................................................ 4
Cable / Antenna Connection .................................................... 4
Optional Equipment Connections ............................................. 5
VCR Connection ....................................................................... 5
Cable Box Connection .............................................................. 6
VCR and Cable Box Connection .............................................. 7
Amplifier Connection (To Audio Amp) ..................................... 8
Picture In Picture (P1P) Operation ........................... 9
Basic PIP Operation ................................................................ 9
PIP Operation with a Cable Box .............................................. 9
Ro!ler Guide MenuT_"Navigation ............................ 10
Remote Control Guide ............................................................ 10
£oi!er Guide Feature Chart .................................... I 1
Special Features ..................................................... i 4
Menu Languages .................................................................... 14
Program Channels ................................................................. 14
Closed Captioning .................................................................. 14
Closed Caption on Mute ......................................................... 15
Convergence .......................................................................... 15
Sleep Timer ............................................................................ 17
Timer 1 and 2 ......................................................................... 17
Picture Adjustments ............................................................... 18
Favorite Channels and Captions ............................................ 18
Lock ....................................................................................... 19
Digital TV - Set-Top (DTV-STB) Connection ......... 20
Glossary .................................................................. 21
Frequently Asked Questions About Digital TV ....22
Troubleshooting Chart ........................................... 23
Read these instructions completely before operating "IV.
Contents are subject to change without notice or obligation.
Copyright 2000 by MatsushitaElectric Corporation of America. All rights reserved
Unauthorizedcopying and distribution is a violation of law
n
CON GRA TUL A T!ONS
_ongratulations
Your new Projection Television (PTV) features state-of-the-art technology for high
quality picture and sound with complete audio/video connections for your home
theater system. Your PTV is designed to give you many years of enjoyment It was
thoroughly tested and tuned at the factory for best performance
:ustome_ Record
The model and serial number of this product are located on the back of the TV You should
note the model and serial number in the space provided and retain as a permanent record
of your purchase. This will aid in identification in the event of theft or loss Product
registraton for US customers is available at: www.prodreg.comlpanasonic
Model
Number
Serial
Number
Projection Screen (Turn PTV Off)
The projection screen is a high precision lens system which has a protective screen.
The protective screen is fully washable with the following precautions:
[3 Use a mild soap solution or window cleaner and a clean cloth.
DO NOT USE ABRASIVE CLEANERS.
Do not use laundry detergent or automatic dishwasher soap.
Do not use alcohol, ammonia, or petroleum based products.
[] Avoid excessive moisture and wipe dry.
Prevent solution from running into the receiver below
[] Avoid bumping or scraping the screen.
Note: Do not spray any type of cleaning flutd dtrectly on the screen
Cabinet and Remote Control
[] For cabinets and remote control, use a soft cloth dampened with water or a mild
detergent solution. Avoid excessive moisture and wipe dry.
[] Do not use benzene, thinner or other petroleum based products.
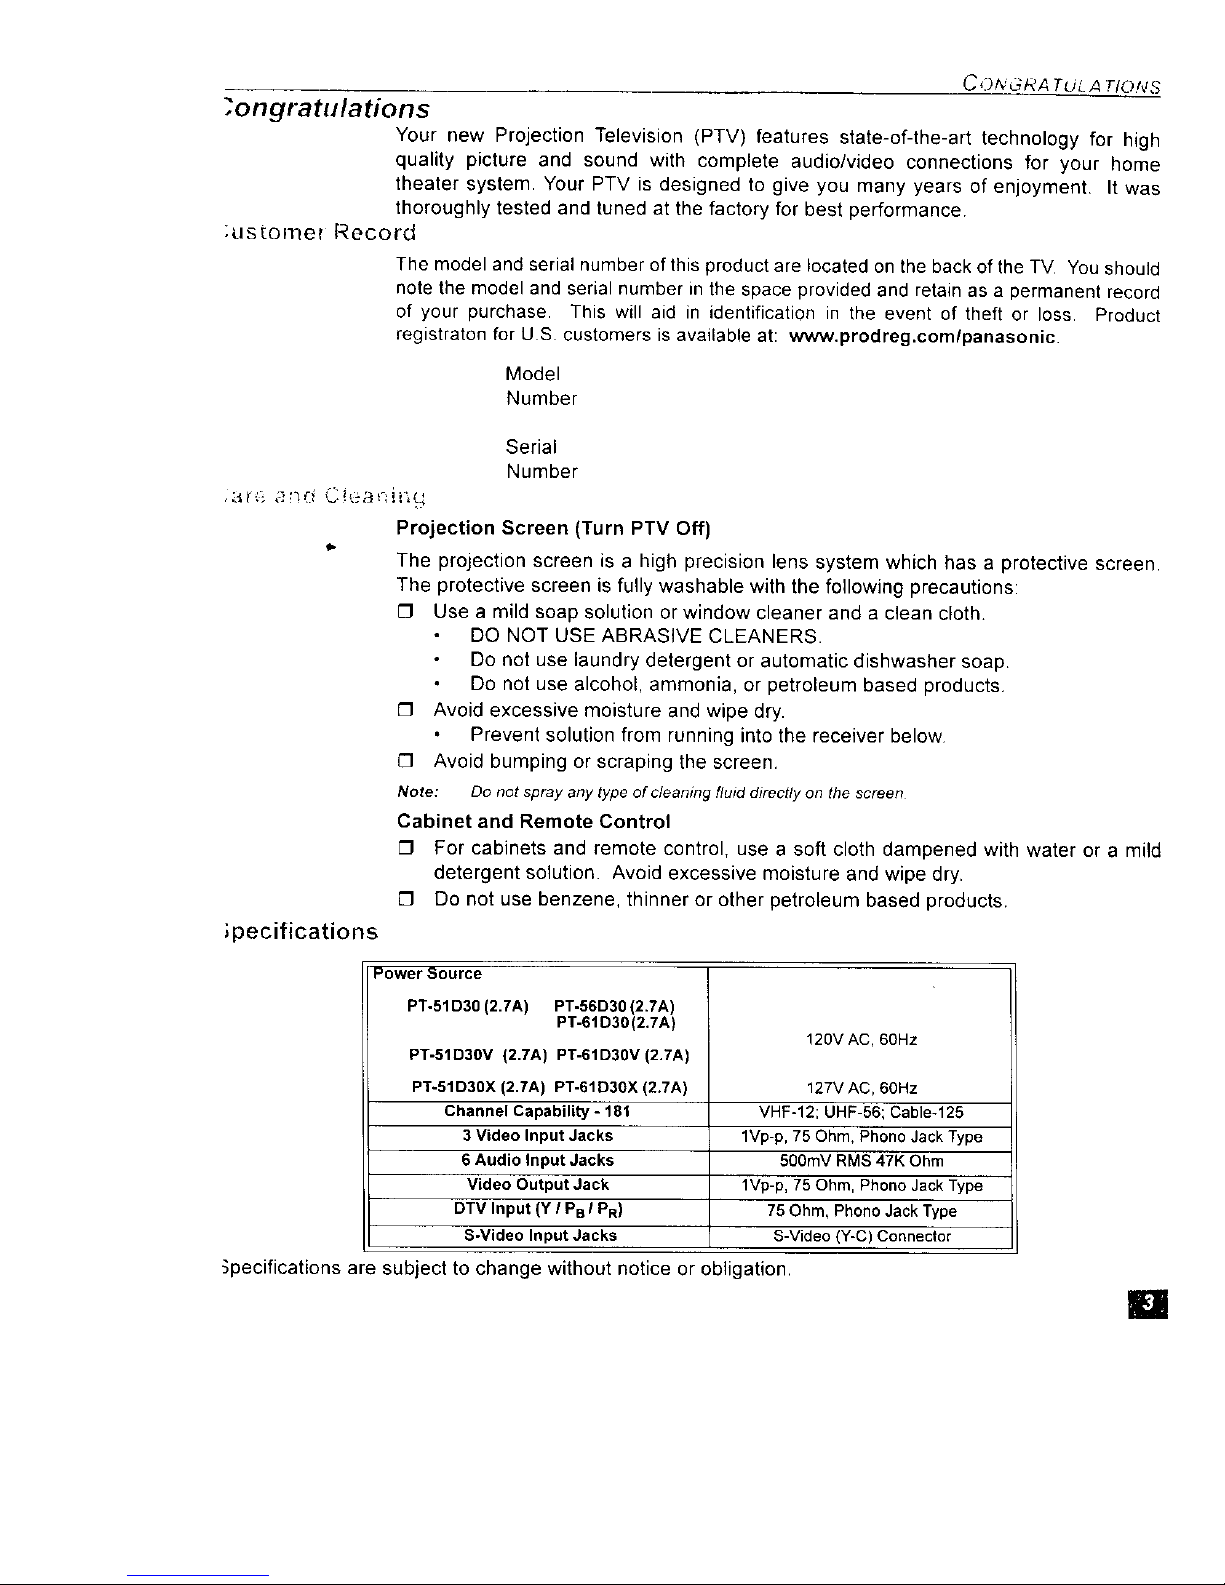
;pecifications
Power Source
PT-51D30 (2.7A) PT-56D30 (2.7A)
PT-61D30(2.7A)
120V AC, 60Hz
PT-51D30V (2.7A) PT-61D30V (2.7A)
PT-51D30X (2.7A) PT-61D30X (2.7A) 127V AC, 60Hz
Channel Capability - 181 VHF-12; UHF-56; Cable-125
3 Video Input Jacks 1Vp-p, 75 Ohm, Phono Jack Type
6 Audio Input Jacks 500mV RMS 47K Ohm
Video Output Jack 1Vp-p, 75 Ohm, Phono Jack Type
DTV Input (Y I PB I PR) 75 Ohm, Phono Jack Type
S-Video Input Jacks S-Video (Y-C) Connector
_pecifications are subject to change without notice or obligation.
ml
INS TALL A TION
Installation
Television Location
This unit can be used as an entertainment center Consult your dealer for available options
[] Avoid excessive sunlight or bright lights, including reflections
[] Keep away from excessive heat or moisture Inadequate ventilation may cause internal
component failure
[3 Fluorescent lighting may reduce remote control transmitting range
[] Keep away from magnetic equipment including motors fans and external speakers
Optional Cable Connections
Shielded audio and video cables should be used between components For best results:
[3 Use 75-ohm coaxial shielded cables
O Use appropriate input and output connectors that match your component connectors
O Avoid long cables to minimize interference
AC Power Supply Cord
*" CAUTION: TO PREVENT ELECTRIC SHOCK MATCHWIDE BLADE OF PLUG TO
WIDE SLOT OF AC OUTLET AND FULLY INSERT DO NOT USEA PLUG WITH A
RECEPTACLE OR OTHER OUTLET UNLESS THE BLADE CAN BE FULLY
INSERTED TO PREVENT BLADE EXPOSURE FOR SOME MODELS THAT ARE
NON-POLARIZED, THE USE OF AN AC ADAPTOR CONNECTOR MAY
BE NECESSARY
4:1 _ °
Polarized plug
Non-Polarized plug
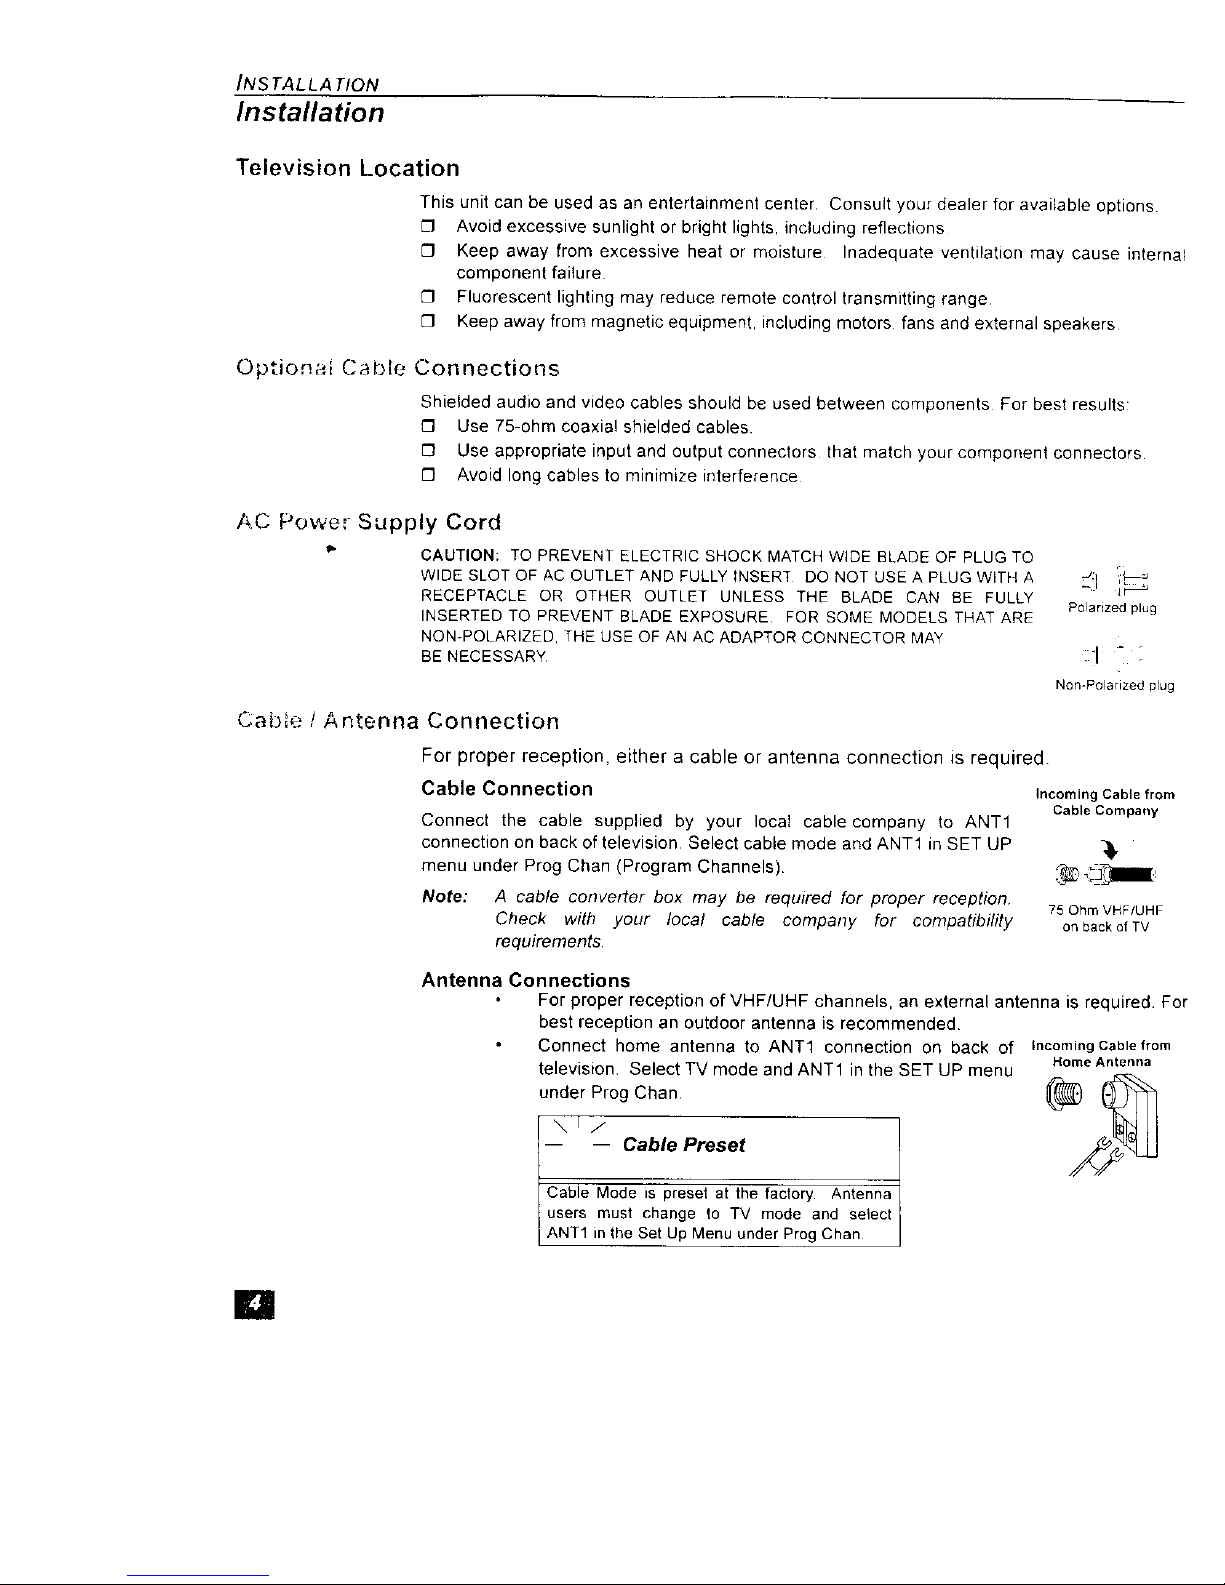
Cable ! Antenna Connection
For proper reception, either a cable or antenna connection is required.
Cable Connection
Connect the cable supplied by your local cable company to ANT1
connection on back of television Select cable mode and ANT1 in SET UP
menu under Prog Chan (Program Channels)
Incoming Cable from
Cable Company
Note: A cable converter box may be required for proper reception
Check with your local cable company for compatibility
requirements
75 Ohm VHF/UHF
on back of TV
Antenna Connections
For proper reception of VHF/UHF channels, an external antenna is required.For
best reception an outdoor antenna is recommended
Connect home antenna to ANT1 connection on back of
television Select TV mode and ANT1 in the SET UP menu
under Prog Chan
\l/
-- _i Cable Preset
Cable Mode is preset at the factory Antenna
j ANT_ imtUh_et sChtugpeMte°nuTVdmr°dreogcdhaSnelect
Incoming Cable from
Home Antenna
[]
INS TALLA TION
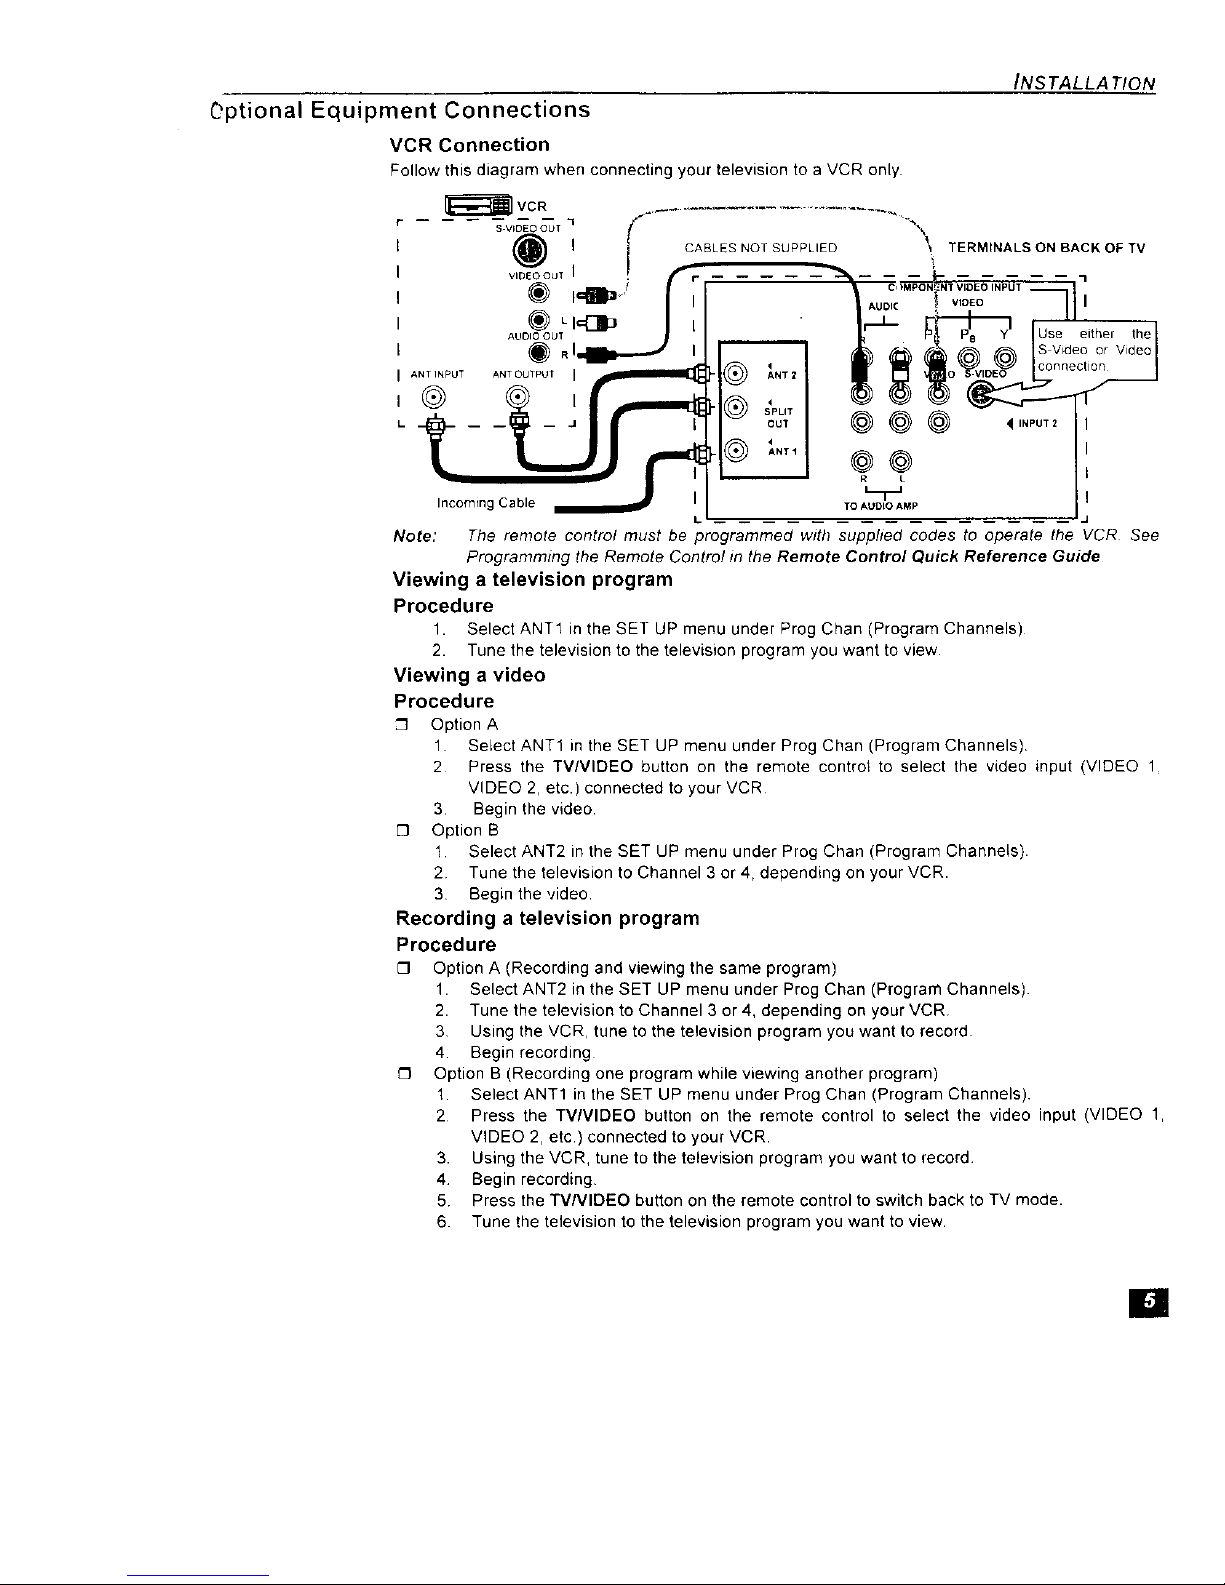
Optional Equipment Connections
VCR Connection
Follow this diagram when connecting your television to a VCR only
[_ VCR _ .............................
..... •1 .f_
S VIDEO OL}T _' _*_
l_ ' _ GABLES NOT SUPPLIED _ TERM'NALS ON BACK OF TV
v oo,, I ,"-r' .... - - ;- .....
® I,I
AUDIOOUT H_ He Y net the
I I _ _ _ ISVideo or Video
.... NpUT ANT O{JTPU f I --i_IlII_ _ _NTq I _ _ O _V_IDE_/_ L_nneC' O_ ]
Incoming Cable TOAUDIOAMP
Note: The remote control must be programmed with supphed codes to operate the VCR See
Programming the Remote Control in the Remote Control Quick Reference Guide
Viewing a television program
Procedure
1. Select ANT1 in the SET UP menu under Prog Chan (Program Channels)
2. Tune the television to the television program you want to view
Viewing a video
Procedure
CI Option A
1 Select ANT1 in the SET UP menu under Prog Chan (Program Channels)
2 Press the TV/VIDEO button on the remote control to select the video input (VIDEO 1
VIDEO 2, etc.) connected to your VCR
3 Begin the video.
[] Option B
1 Select ANT2 in the SET UP menu under Prog Chan (Program Channels).
2 Tune the television to Channel 3 or 4, depending on your VCR.
3 Begin the video
Recording a television program
Procedure
Option A (Recording and viewing the same program)
1. Select ANT2 in the SET UP menu under Prog Chan (Program Channels).
2. Tune the television to Channel 3 or 4, depending on your VCR
3 Using the VCR, tune to the television program you want to record
4. Begin recording
[3 Option B (Recording one program while viewing another program)
1. Select ANT1 in the SET UP menu under Prog Chan (Program Channels)
2 Press the TV/VIDEO button on the remote control to select the video input (VIDEO 1,
VIDEO 2, etc) connected to your VCR.
3. Using the VCR, tune to the television program you want to record
4 Begin recording
5 Press the TVNIDEO button on the remote control to switch back to TV mode.
B Tune the television to the television program you want to view.
I
INS TA LLA TION
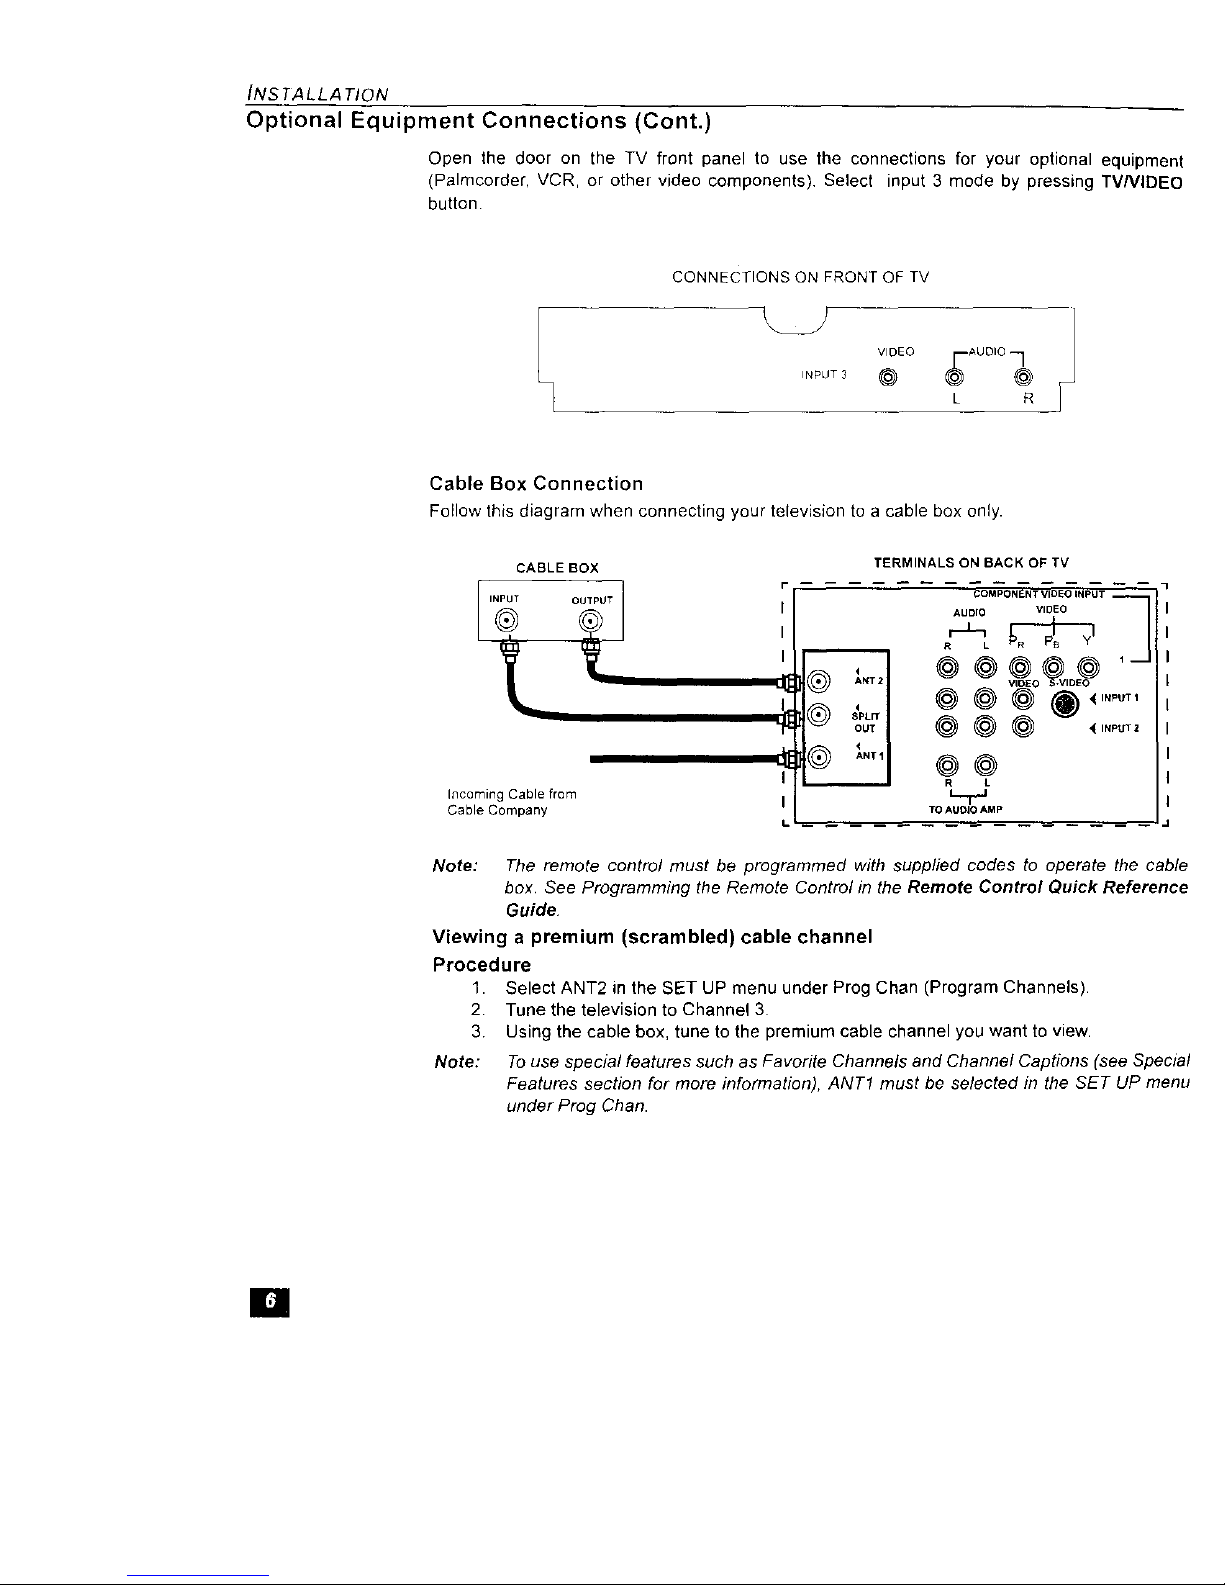
Optional Equipment Connections (Cont.)
Open the door on the TV front panel to use the connections for your optional equipment
(Palmcorder, VCR, or other video components) Select input 3 mode by pressing TVNIDEO
button
CONNECTIONS ON FRONT OF TV
VIDEO _ -AUDIO
INPUT 3 @
L R _--
Cable Box Connection
Follow this diagram when connecting your television to a cable box only.
CABLE BOX
Incoming Cable frem
Cable Company
i-
I
I
I
J_
I
I
L
TERMINALS ON BACK OF TV
COMPONENT VIDEO INPUT --
AUDIO VIDEO
@@@@@ ,-
® ®v4 °
@@@ _,.PUT,
@@
R L
TO AUO_1_O AMp
Note: The remote control must be programmed with supplied codes to operate the cable
box. See Programming the Remote Control in the Remote Control Quick Reference
Guide.
Viewing a premium (scrambled) cable channel
Procedure
1. Select ANT2 in the SET UP menu under Prog Chan (Program Channels).
2 Tune the television to Channel 3
3 Using the cable box, tune to the premium cable channel you want to view.
Note: To use special features such as Favodte Channels and Channel Captions (see Special
Features section for more information), ANT1 must be selected in the SET UP menu
under Prog Chan.
[]
INS TA LLA TION
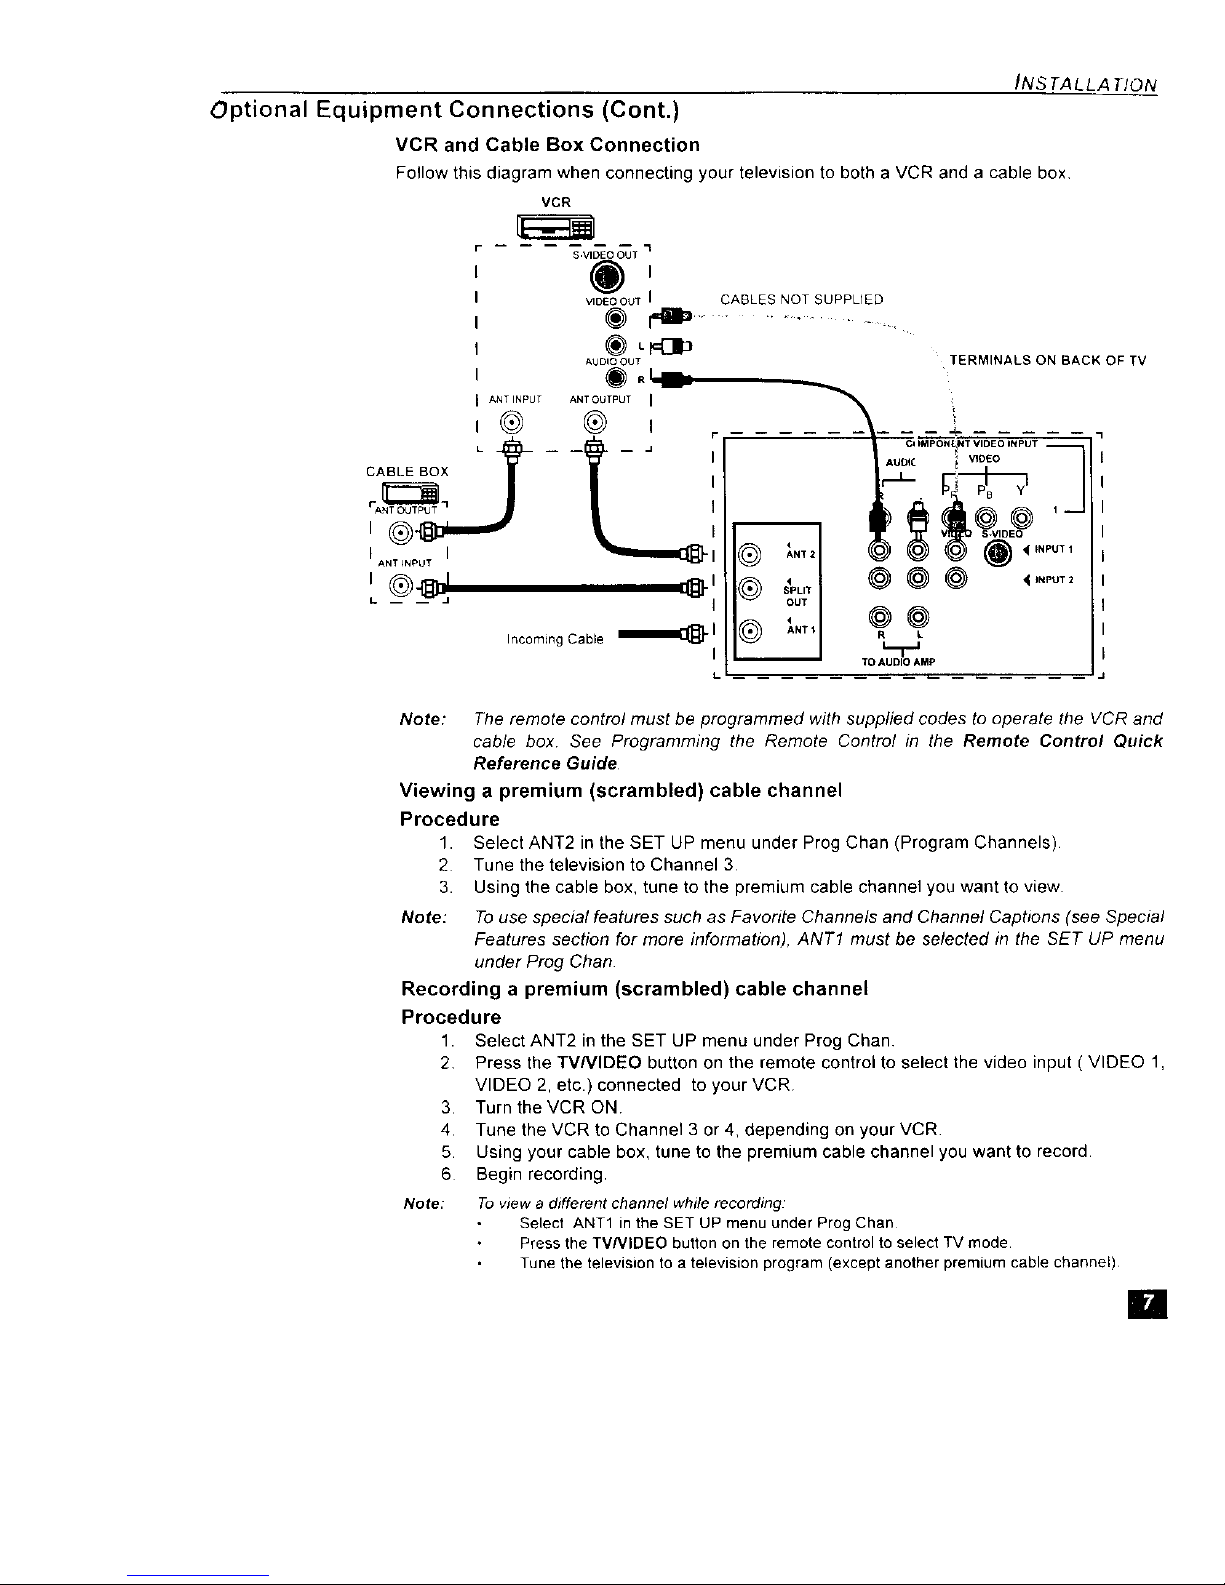
Optional Equipment Connections (Cont.)
VCR and Cable Box Connection
Follow this diagram when connecting your television to both a VCR and a cable box
VCR
$.VIDEQ OUT "3
_) I
VIDEOOUT I CABLES NOT SUPPLIED
® ri_ ...................
AUDIOOtJT TERMINALS ON BACK OF TV
ANT,NPUT ANTOU_UT R i1_1__ _
0 ® , __ ....
4e_- -_ - -; : .... _- -_,,.;o._.TV,'-.oo..Po--.---
CABLEBOX / / I Ir_L- --_
C_ / / ' [' _4P' Y'
FANT OUT_UT 1I • / I II_ {1_ _l @ @ I --
,..,,.oo,, _---_e, ® _4 @ @@_)"""
-- --'_'j _l '_' OU T I
_, _ _,1 @@
Incoming Cable _ _ _"' '1 R[_.jL
I _ TO AUDIO AMP
Note: The remote control must be programmed with supplied codes to operate the VCR and
cable box See Programming the Remote Control in the Remote Control Quick
Reference Guide
Viewing a premium (scrambled) cable channel
Procedure
1. Select ANT2 in the SET UP menu under Prog Chan (Program Channels)
2 Tune the television to Channel 3
3. Using the cable box, tune to the premium cable channel you want to view
Note: To use special features such as Favorite Channels and Channel Captions (see Special
Features section for more information), ANT1 must be selected in the SET UP menu
under Prog Chan
Recording a premium (scrambled) cable channel
Procedure
1. Select ANT2 in the SET UP menu under Prog Chan.
2, Press the TVNIDEO button on the remote control to select the video input ( VIDEO 1,
VIDEO 2, etc.) connected to your VCR
3 Turn theVCR ON
4 Tune the VCR to Channel 3 or 41depending on your VCR
5 Using your cable box, tune to the premium cable channel you want to record
6 Begin recording,
Note: To viewa different channel whilerecording:
Select ANT1 in the SET UP menu under Prog Chan
Pressthe TMNIDEO button on the remotecontrol to select TV mode
Tune the television to a television program (except another premium cable channel)
[]
 Loading...