

Panasonic PPRM30G Operating Instructions
Manufactured by:
81-IN3056-9922
Before attempting to connect or operate this product, please read these instructions completely.
for
MODEL:
PPRM30G, PWM30G
STANDARD INSTALLATION PROCEDURE
INCLUDES MODELS: PPRM30G, PWM30G
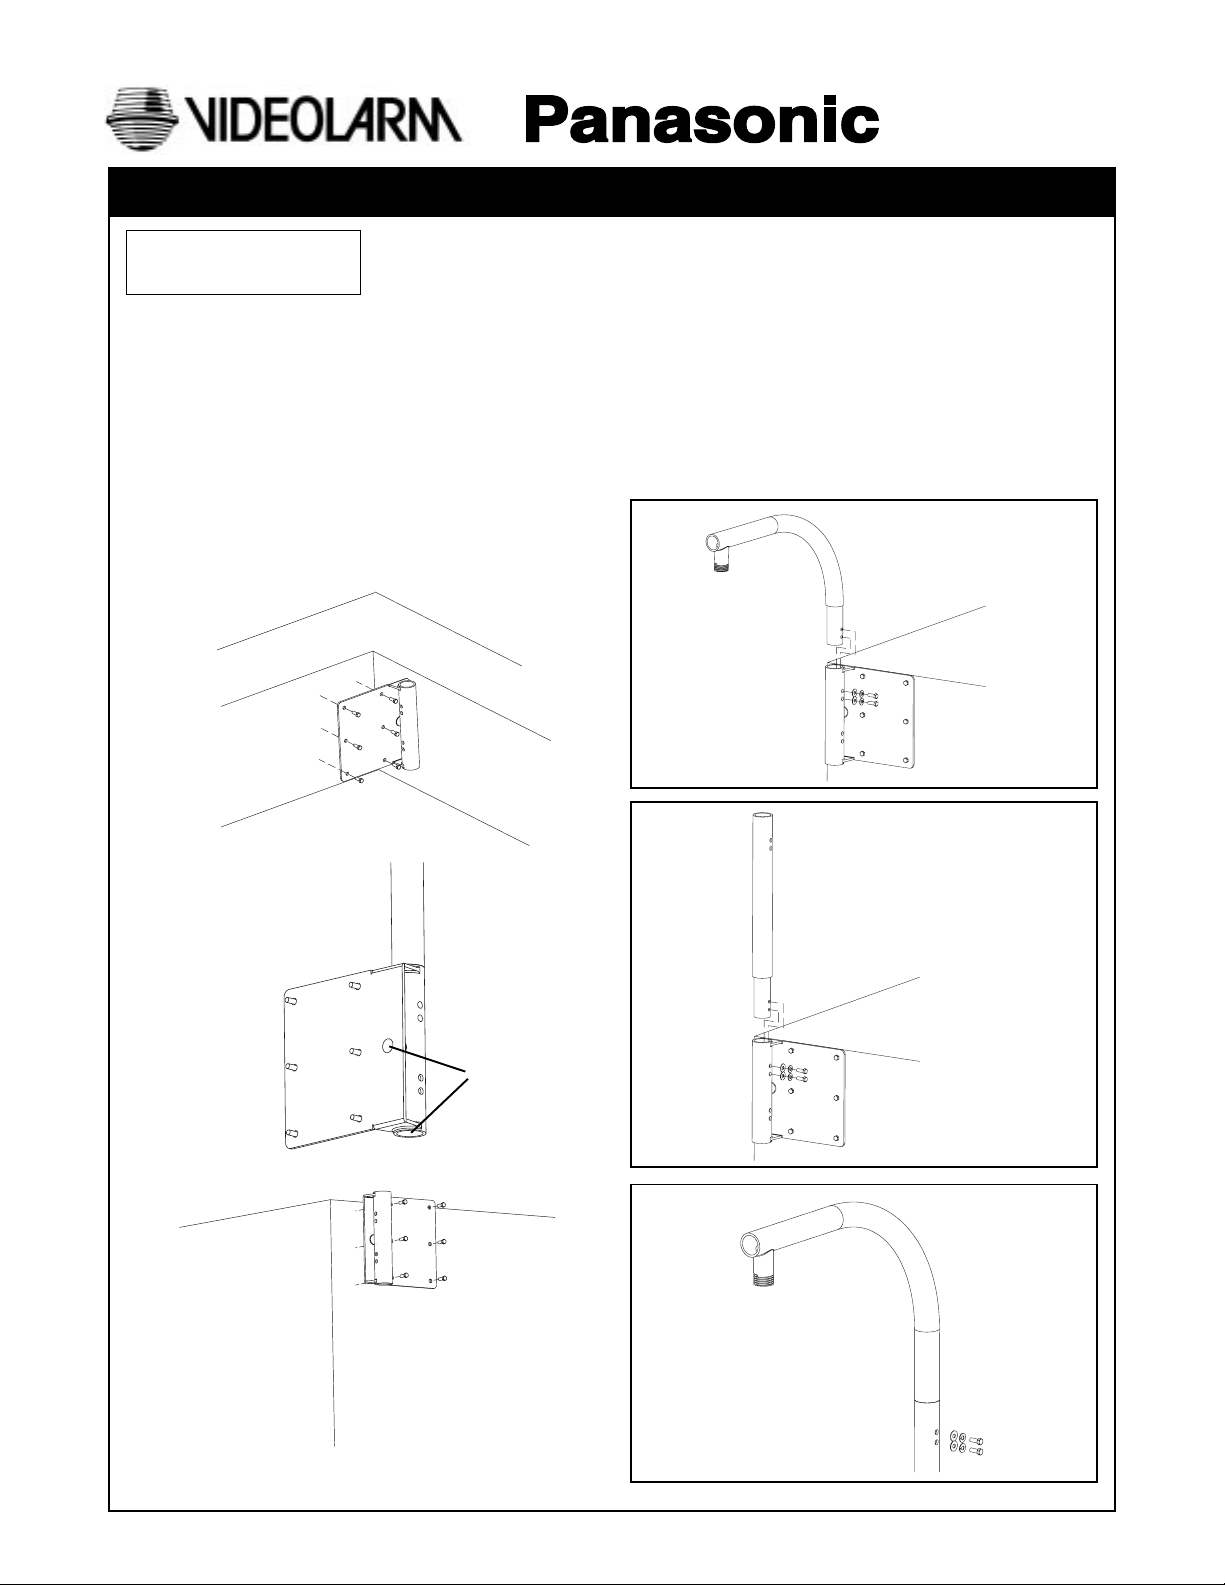
1. Choose an appropriate location and mount the bracket
base (hardware not included). It may be mounted on
the inside or outside of a parapet, in either a left or right
hand configuration (Figure 1).
PRODUCT INSTRUCTIONS
2. PWM30G:
Place the bracket top into the top hole of the bracket
base and secure with the (2) screws, (2) lock washers,
and (2) flat washers provided (Figure 2) (Figure 2).
PPRM30G:
Place the bracket midsection into the top hole of the
bracket base and secure with (2) screws, (2) lock
washers, and (2) flat washers (Figure 3). Then, place the
bracket top into the top hole of the bracket midsection
and secure with (2) screws, (2) lock washers, and (2) flat
washers (Figure 4).
Wiring Inputs
Figure 2
Figure 3
Figure 1
Figure 4
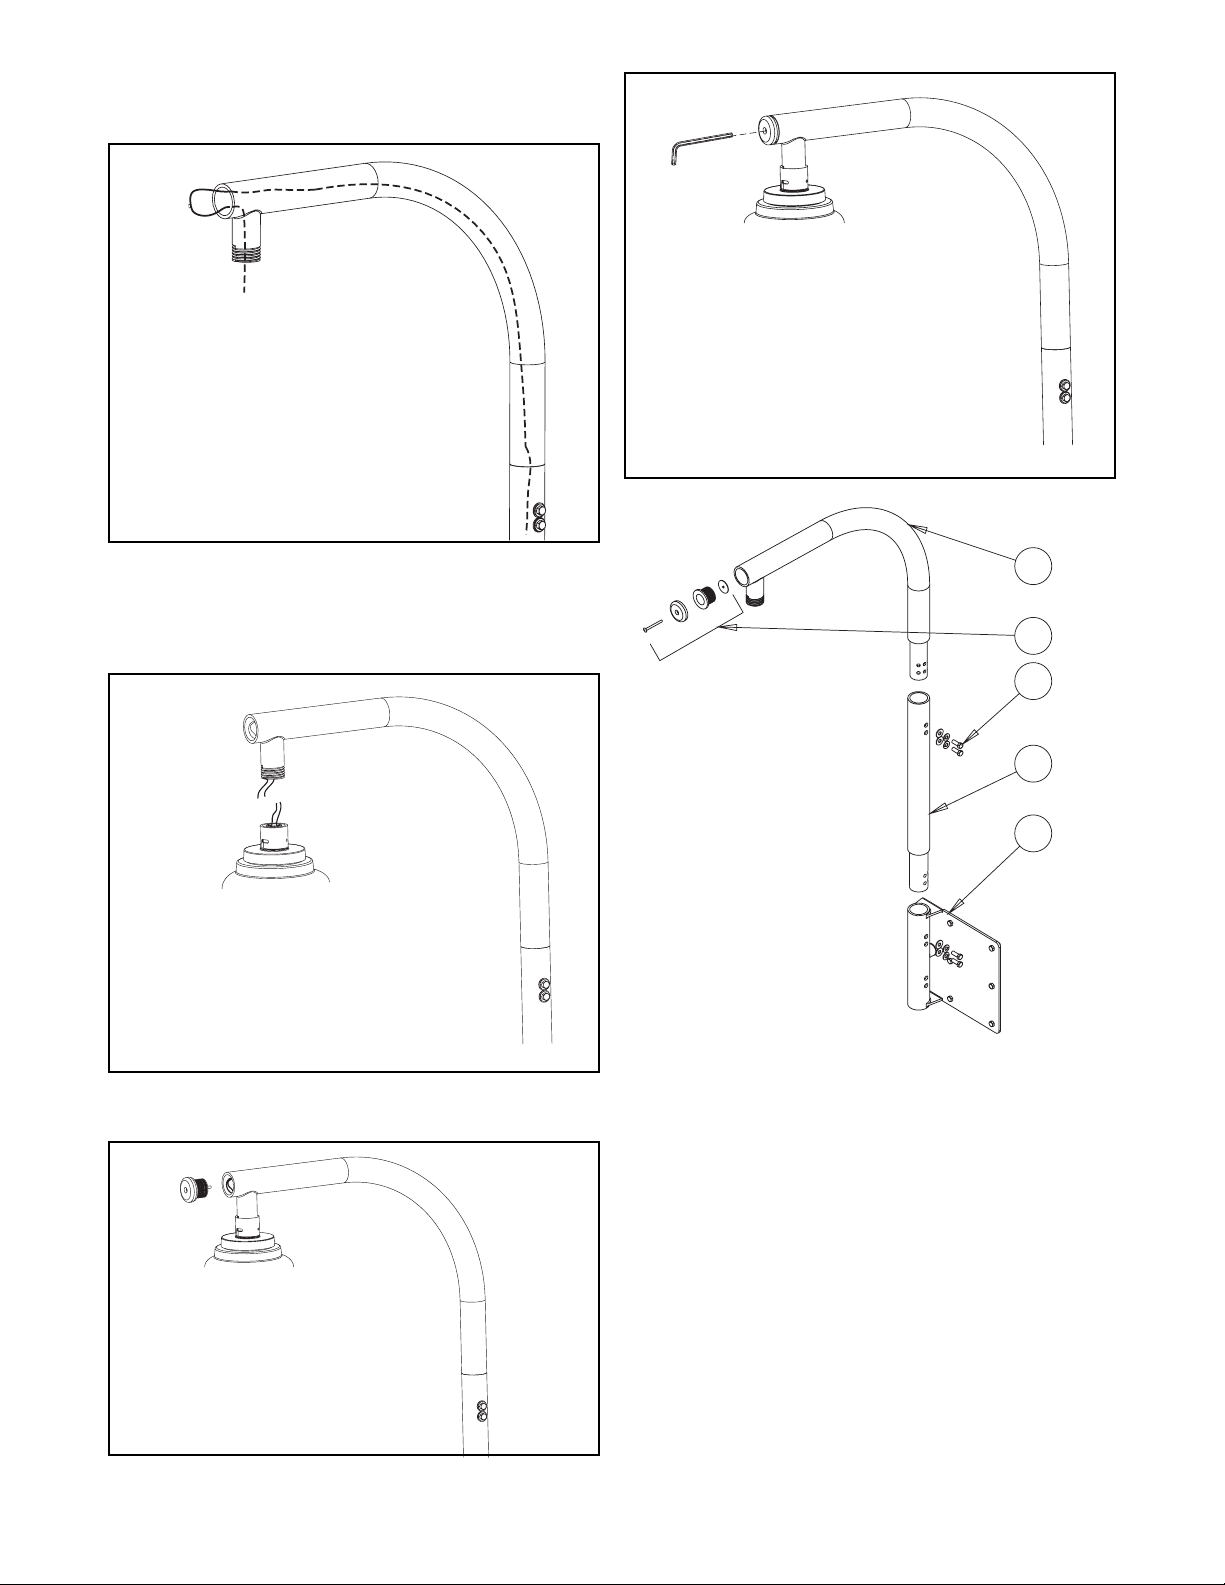
3. Run electrical and video wiring through the inside of the
bracket and out through the dome attachment arm
(Figure 5).
Figure 5
Figure 8
4. Attach the dome to the bracket, making wiring connections
per manufacturer's instructions (Figure 6)
NOTE: If wiring connections are made outside the housing,
make the connections before attaching the housing
to the bracket.
NOTE: Use Teflon™ tape or silicone
to seal the threads
Figure 6
7. Remove the end cap from the parts bag and secure to the
bracket end using an Allen head tool (Figures 7 and 8).
Figure 7
11
22
33
44
55
Parts List
Description Qty.
1 Bracket top 1
2 End Cap Assembly 1
Allen tool 1
3 Phillips screws (PWM30G) 2
(PPRM30G) 4
Lockwashers (PWM30G) 2
(PPRM30G) 4
Flat washers (PWM30G) 2
(PPRM30G) 4
4 PRM30G Extension 1
5 Bracket base 1
- 2 -
 Loading...