

Microwave Cookery Book
Magnetron Kookboek
Mikrowellen Kochbuch
Livre de recettes pour micro-ondes
Recetario para Microondas
Mikrowellen Kochbuch Livre de recettes pour micro-ondes
Książka kucharska dla kuchni mikrofalowej
NN-GD459W / NN-GD469M
PolskiFrançaisDeutsch Italiano
English
Nederlands
Español

For further information, please also refer to the operating instructions.
Weitere Informationen entnehmen Sie bitte der beigelegten Bedienungsanleitung.
Voor meer informatie verwijzen wij U naar de gebruiksaanwijzing.
Pour plus dʼinformations veuillez vous référer à notre mode dʼemploi.
Para más información, consulte el manual de instrucciones.
Pour plus dʼinformations veuillez vous référer à notre mode dʼemploi.
Bliższe szczegóły dotyczące danego modelu podane są w instrukcji obsługi.
© Copyrighted by Panasonic Manufacturing ltd. 2009

En-1
English
The items in this book are guidelines only. The total time will vary depending on the starting
temperature of the food and the container used. Always check if the food is piping hot before
consumption.
Inverter technology is the key
Inverter technology for microwave ovens has been developed by a Panasonic initiative over a
period of more than 10 years. It is the key technology for making a very different type of
microwave oven which has a number of special qualities:
• It makes possible the first oven in the industry which controls the amount of microwave energy
linearly. This new distribution system allows cooking and defrosting food without losing its
flavour.
• It provides efficient conversion of electrical energy to microwave energy, resulting in minimizing
power requirements without sacrificing microwave output.
• It allows a dramatic enlargement of oven cavity size even in a compact oven body, due to the
small size of the inverter circuit, which replaces the currently used bulky transformer.
• Finally, at the end of the productʼs useful life, not using bulky transformers made of iron makes
the process of recycling discarded ovens environmentally friendly.
Contents
Cooking with Microwave Energy. . . . . . . . . . . 2
General Guidelines. . . . . . . . . . . . . . . . . . . 2-5
Quick Check Guide to Cooking Utensils. . . . . 6
Microwave Power Levels. . . . . . . . . . . . . . . . .7
Grilling. . . . . . . . . . . . . . . . . . . . . . . . . . . . . . . 7
Combination Cooking. . . . . . . . . . . . . . . . . . . 8
Accessories to Use. . . . . . . . . . . . . . . . . . . . . 8
Reheating. . . . . . . . . . . . . . . . . . . . . . . . . 9-10
Combination Cooking and Reheating Charts. .
. . . . . . . . . . . . . . . . . . . . . . . . . . . . . . . . .11-17
Microwave Cooking Tips. . . . . . . . . . . . . . . .18
Defrosting Guidelines. . . . . . . . . . . . . . . 19-20
Defrosting Common Foods. . . . . . . . . . . 21-22
Meat & Poultry. . . . . . . . . . . . . . . . . . . . . 23-26
Fish. . . . . . . . . . . . . . . . . . . . . . . . . . . . . 27-28
Vegetables. . . . . . . . . . . . . . . . . . . . . . . .29-30
Eggs & Cheese. . . . . . . . . . . . . . . . . . . . . . .30
Dry Starchy Foods and Vegetables. . . . . . . 31
Common Queries Answered. . . . . . . . . . 32-33
En-2
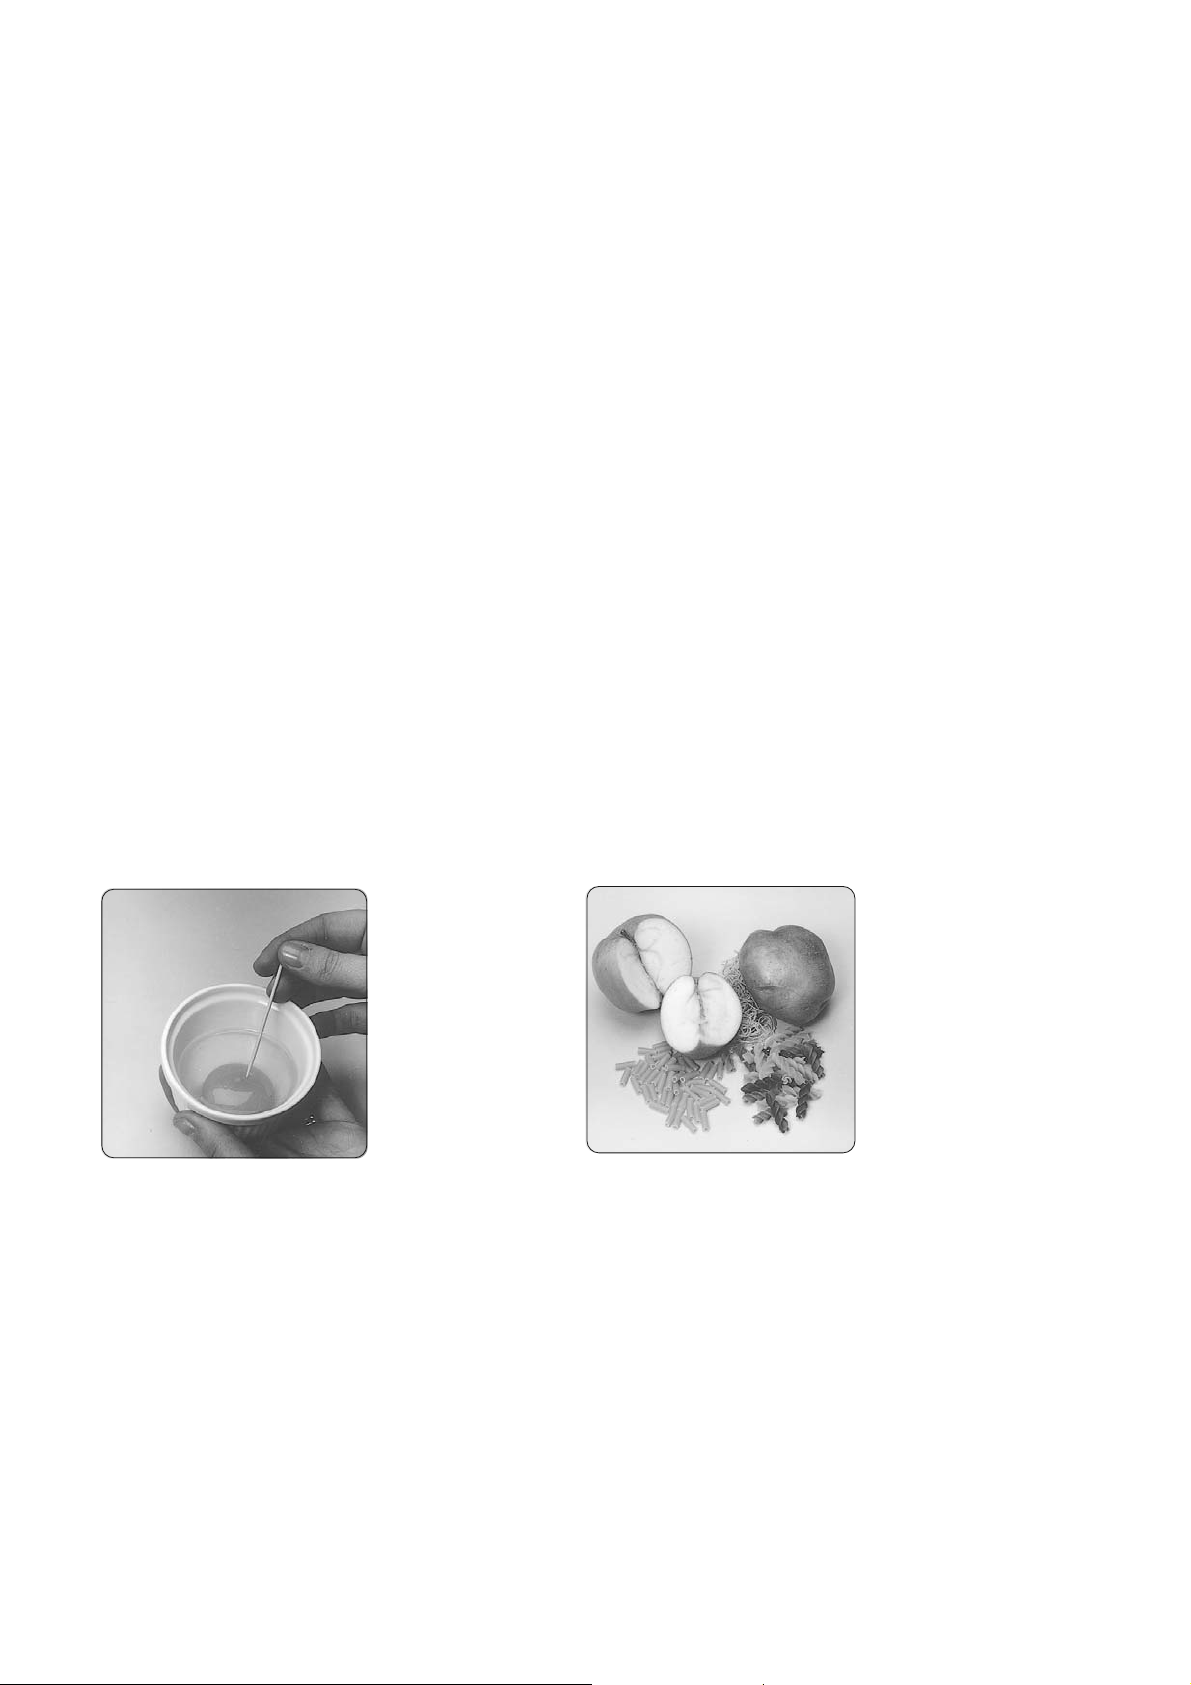
Moisture
content
Many fresh foods
e.g. vegetables
and fruit, vary in
moisture content
throughout the
season. Jacket
potatoes are a
particular
example of this. For this reason cooking times
may have to be adjusted throughout the year.
Dry ingredients e.g. rice, pasta, can dry out
further during storage and cooking times may
differ from ingredients freshly purchased.
Piercing
The skin or
membrane on
some foods will
cause steam to
build up during
cooking. These
foods must be
pierced or a strip
of skin should be
peeled off before cooking to allow the steam to
escape. Eggs, potatoes, apples, sausages etc,
will all need to be pierced before cooking. DO
NOT ATTEMPT TO BOIL EGGS IN THEIR
SHELLS.
General guidelines
Cooking with microwave energy
Microwaves are a form of high frequency
electromagnetic waves similar to those used in
radios. Electricity is converted into microwave
energy by a magnetron tube. The microwaves
travel from a magnetron tube to the oven
cavity where they are reflected, transmitted or
absorbed.
Reflection
Microwaves are reflected by metal similar to the
way a ball would bounce off a wall. Most metal
cookware and utensils are not recommended
for microwave cooking, since they would
produce uneven cooking. Also, if a metal dish is
placed close to the oven wall (which is also
metal), arcing (bluish sparks) could occur.
Arcing can damage an oven or cause a fire.
Transmission
Microwaves pass through some materials such
as paper, glass and plastic much like sunlight
shining through a window. Because these
substances do not absorb or reflect the
microwave energy, they are ideal materials for
microwave cooking containers. However, they
will get hot during cooking, because as food
cooks, heat is conducted from the food to the
dish.
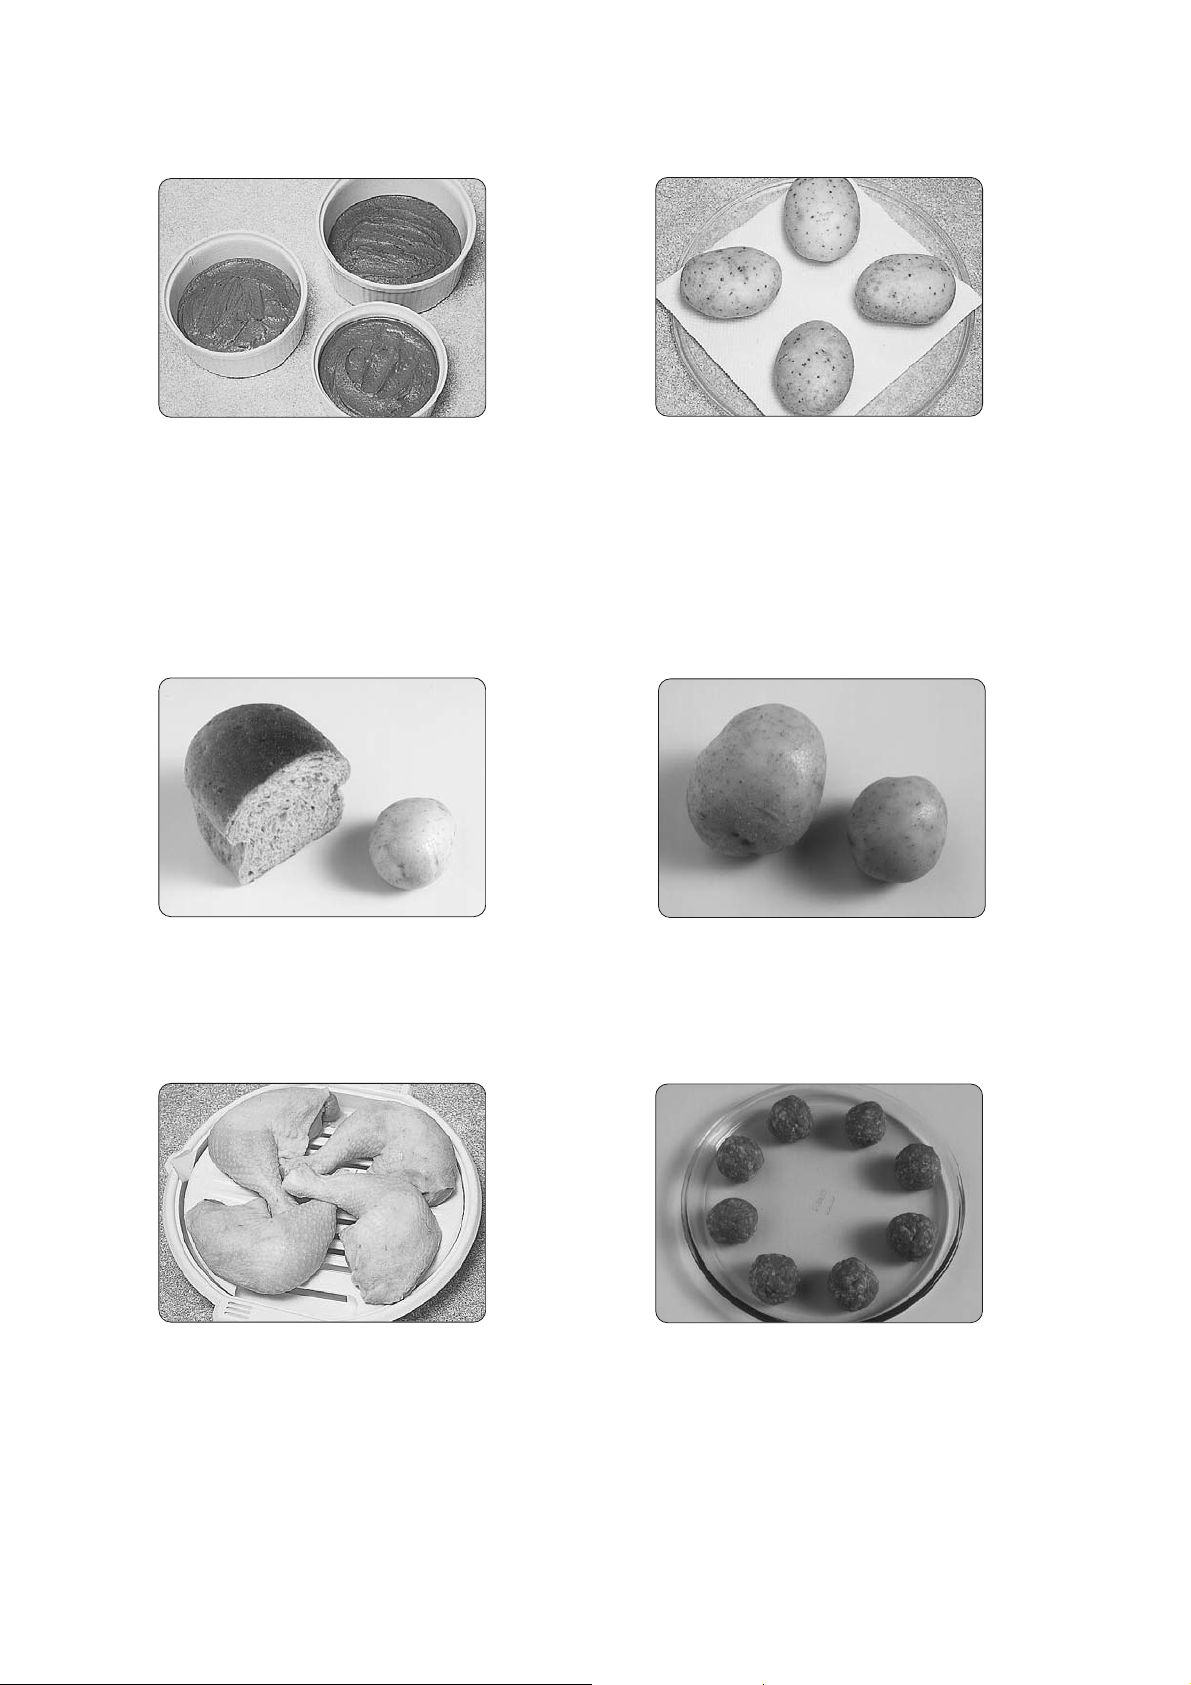
Absorption
Microwaves are absorbed by food. They
penetrate to a depth of about 2-4 cm.
Microwave energy excites the molecules in the
food (especially water, fat and sugar
molecules), and causes them to vibrate very
quickly. The vibration causes friction and heat is
produced. In large foods, the heat which is
produced is conducted to the centre to finish
cooking the food.

Dense foods e.g. meat, jacket potatoes and
cakes, require a Standing time (inside or
outside of the oven) after cooking, to allow
heat to finish conducting to cook the centre
completely.
En-3
English
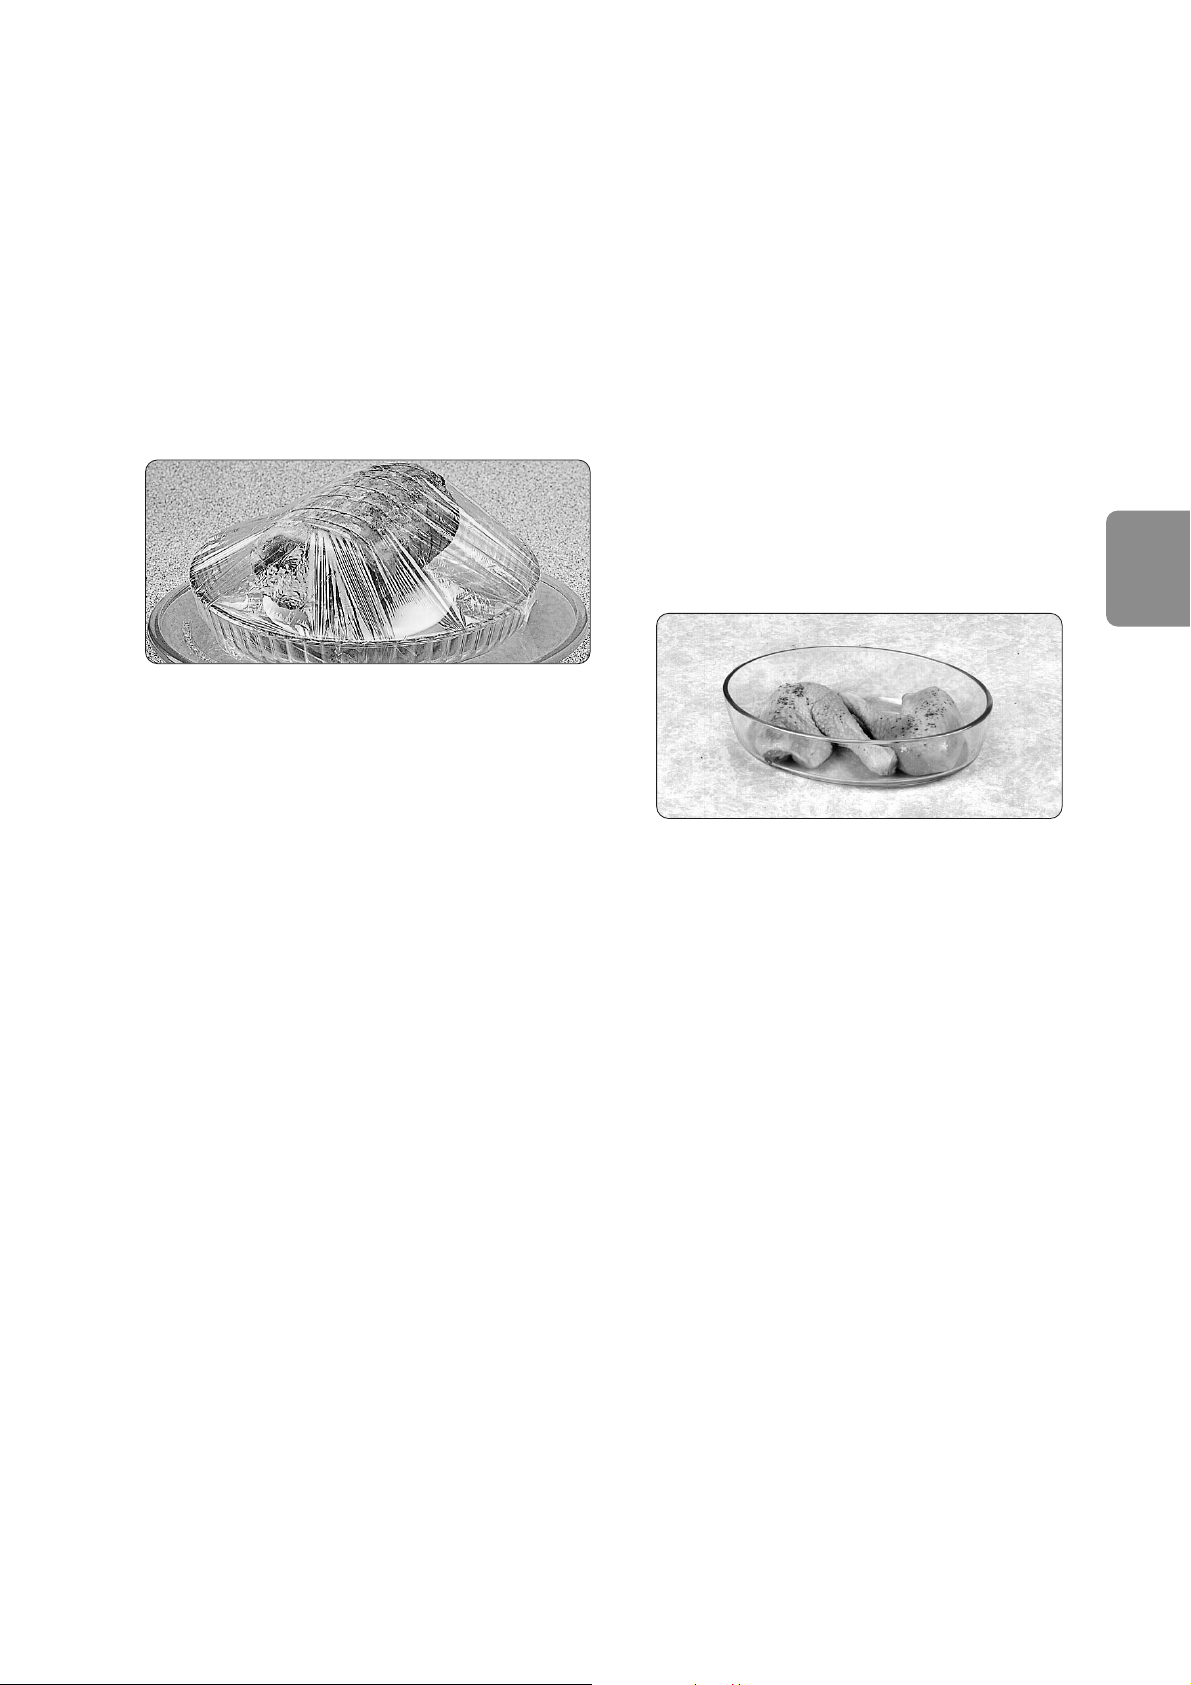
Cling film
Cling film helps
keep the food
moist and the
trapped steam
assists in
speeding up
cooking times.
However, it should
be pierced before
cooking, to allow
excess steam to escape. Always take care
when removing cling film from a dish as the
build-up of steam will be very hot. Always
purchase cling film that states on the packet
“suitable for microwave cooking” and use as a
covering only. Do not line dishes with cling film.
Standing time
Meat joints -
Stand 8 - 10 mins. wrapped in aluminium foil.
Fish, vegetables, egg dishes,
convenience foods, cakes
- Stand 2 to 5
minutes (wrapped in aluminium foil for jacket
potatoes).
Defrosting - It is essential to allow standing
time to complete the process. This can vary
from 5 mins. e.g. raspberries, to up to 2 hours
for a joint of meat.
If food is not cooked after
standing time,
return to oven and cook for additional time.
General guidelines
En-4
General guidelines
Dish size
Follow the dish sizes given in the recipes, as
these affect the cooking and reheating times. A
quantity of food spread in a bigger dish cooks
and reheats more quickly. Food cooks better
by microwave when in a round container
rather than square.
Quantity
Small quantities cook faster than large
quantities, also small meals will reheat more
quickly than large portions.
Density
Porous airy foods heat more quickly than
dense heavy foods.
Shape
Even shapes cook evenly. Whenever possible,
cut the vegetables and other foods in regular
pieces.
Arranging
Individual foods e.g. chicken portions or
chops, should be placed on a dish so that the
thicker parts are to the outside.
Spacing
Foods cook more quickly and evenly if spaced
apart. NEVER pile foods on top of each other.
En-5
English
Ingredients
Foods containing fat, sugar or salt heat up very
quickly. The filling may be much hotter than the
pastry. Take care when eating. Do not overheat
even if the pastry does not appear to be very hot.
Starting temperature
The colder the food, the longer it takes to heat
up. Food from a fridge takes longer to reheat
than food at room temperature.
Covering
Cover foods with microwave cling film or a
self-fitting lid. Cover fish, vegetables,
casseroles, soups. Do not cover cakes, sauces,
jacket potatoes, pastry items.
Turning and stirring
It is necessary to stir large quantities during
cooking. Meat and poultry should be turned
after half the cooking time.
Liquids
All liquids must be stirred before and during
heating. Water espe cially must be stirred
before and during heating, to avoid eruption.
Do not heat liquids that have previously been
boiled. DO NOT OVERHEAT.
Cleaning
As microwaves work on food particles, keep your
oven clean at all times. Stubborn spots of food
can be removed by using a branded oven cleaner,
sprayed onto a soft cloth, always wipe the oven
dry after cleaning. Avoid any plastic parts and
door area.
General guidelines
En-6
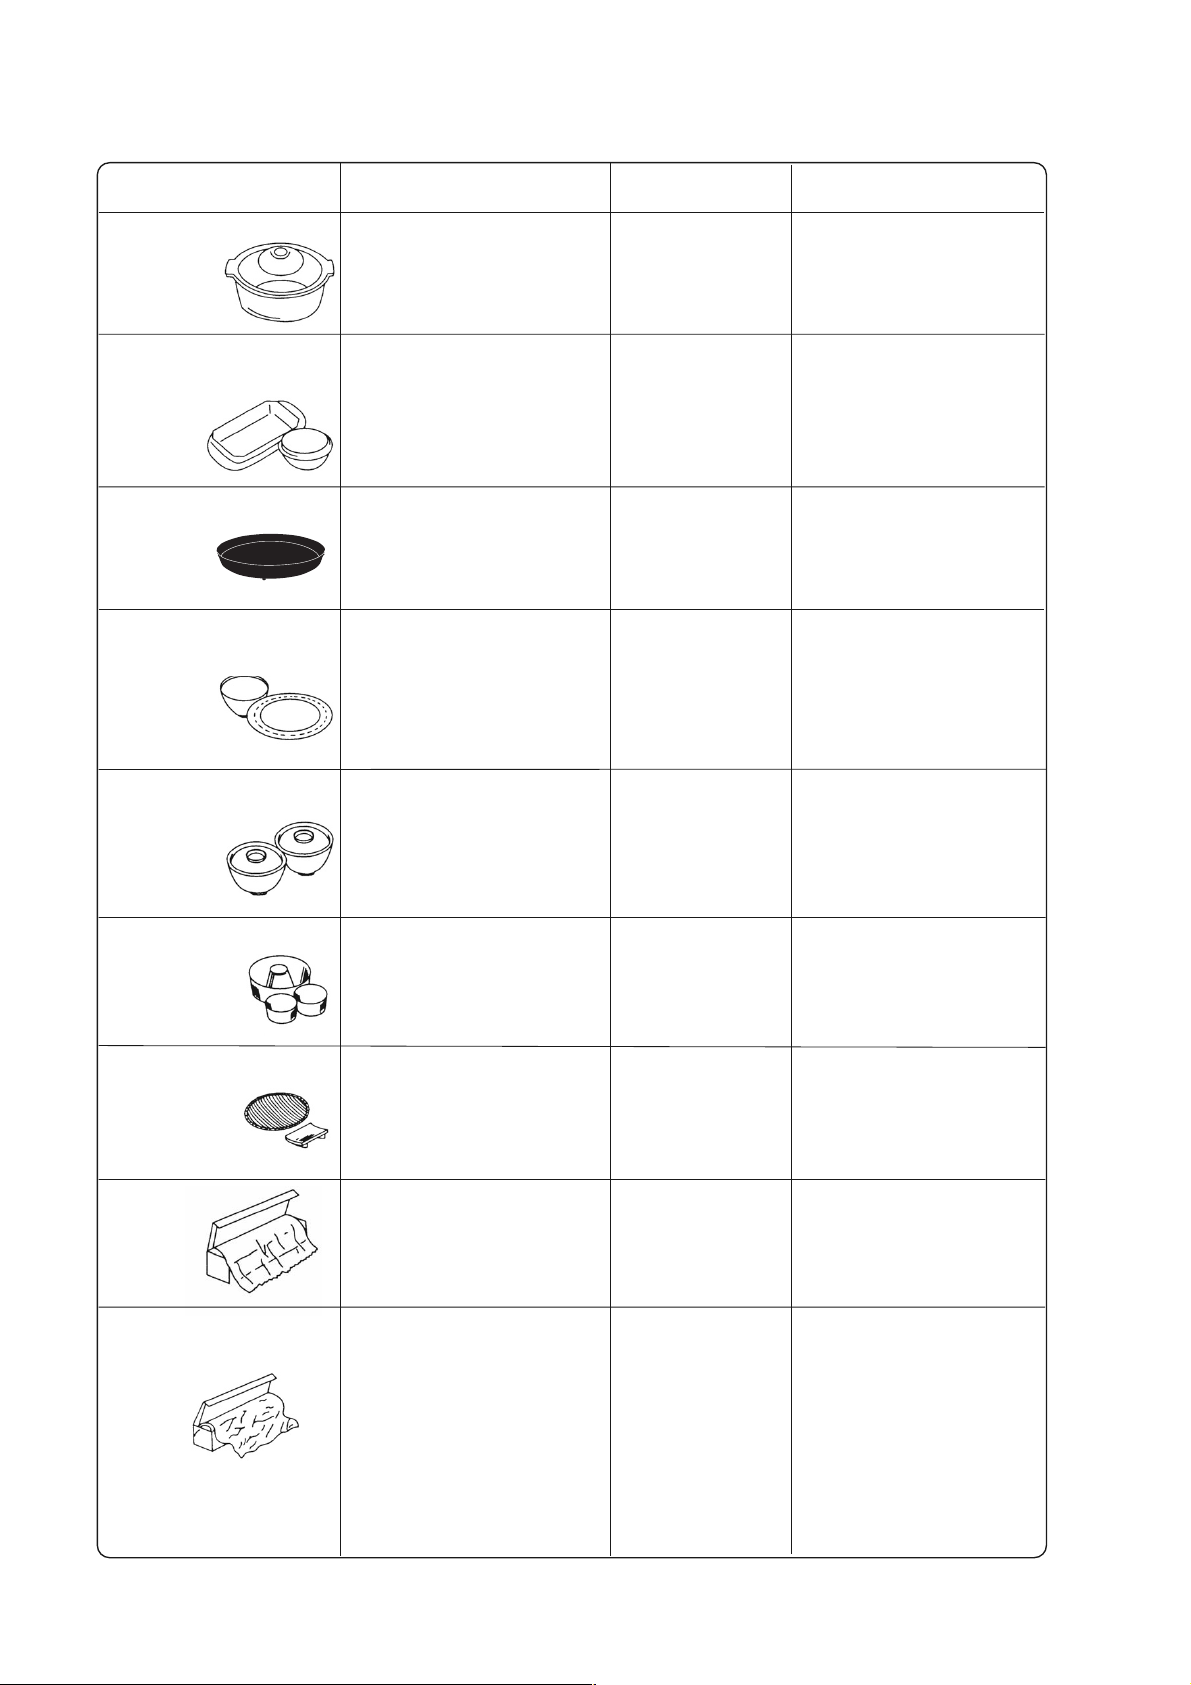
Quick check guide to cooking utensils
Heat resistant china
and ceramics
Pottery,
Earthenware,
Stoneware
Aluminium foil
Cling film
Wicker, Wood, Straw
baskets
Foil/Metal
containers
Heat resistant
glass
Microwave-safe
plastic cookware
Do not use dishes with a
metal rim or pattern; or
jugs or mugs with glued
handles.
Small amounts of
aluminium foil can be
used to SHIELD and
prevent food from
overheating when cooking
or defrosting. Take care
that the foil does not
touch the sides or top of
the oven.
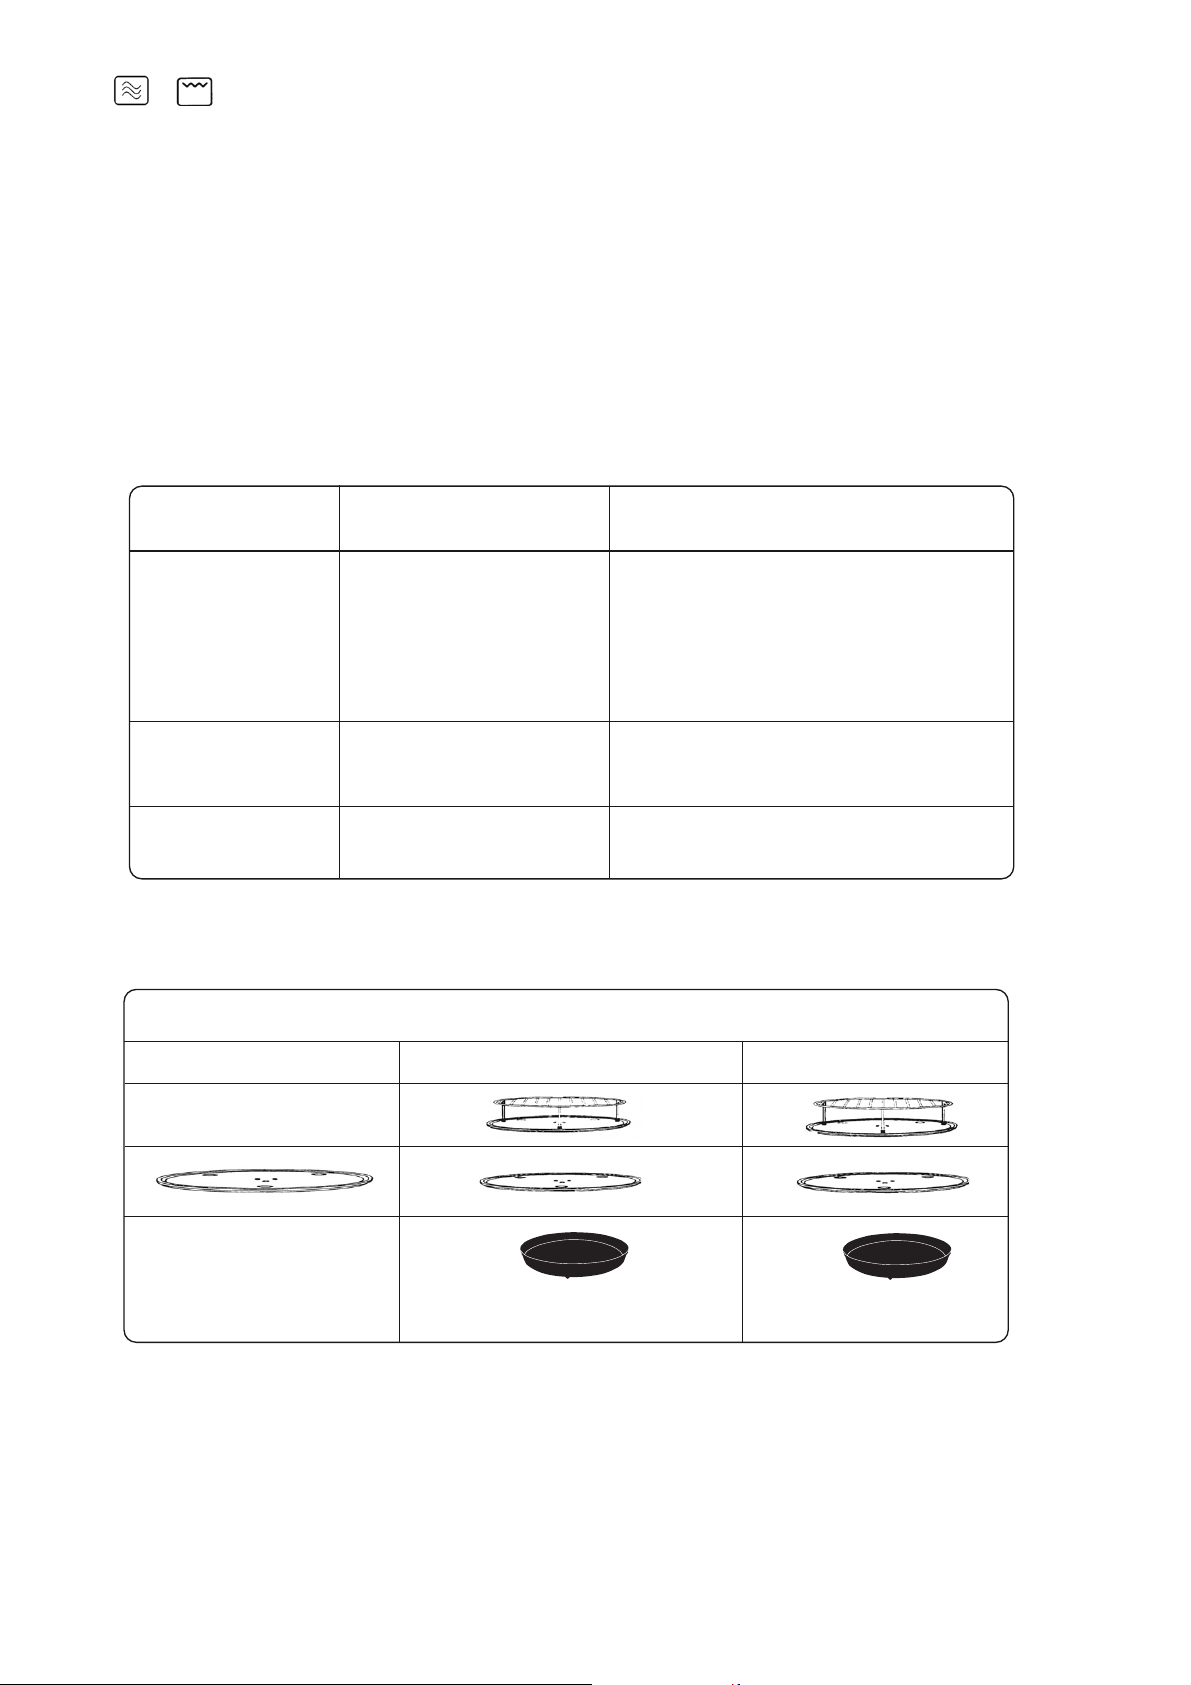
Cookware
For Microwave
For Grill
For Combination
Panacrunch pan

Microwave power levels
Power level Use
Max. Power: 1000 W
270 W (*)
600 W
440 W
250 W
100 W
Reheating meals and sauces; Cooking fish, vegetables, sauces,
and preserves.
Defrosting frozen foods
Roasting; Cooking egg sauces and sponge cakes; Heating milk
Cooking and reheating chicken casseroles and quiches
Cooking stews, casseroles, rice puddings, rich fruit cakes, and egg
custards
For warming up butter, cheeses, fruits or ice-creams; to keep warm
your main dishes.
Approximate Times for Grilling (Grill 1)
First side Second side
Rib of beef 850-900 g
Sausages
1 chicken leg 300 g
Toast
16 to 18 min.
8 to 10 min.
13 to 14 min.
4 min 30 s to 5 min.
approx. 16 to 18 min
approx. 8 min.
13 to 14 min.
3 to 4 min.
En-7
English
Note: (*) CYCLIC DEFROST with automatic standing time (see page 19).
DO NOT ATTEMPT TO PREHEAT THE GRILL.
The quartz Grill on your oven browns and
crisps for a wide variety of foods.
The Grill provides 3 Grill Settings:
1 Press Grill 1 1100 W
2 Press Grill 2 950 W
3 Press Grill 3 700 W
Place food to be grilled on the wire rack or in a
shallow dish on wire rack. Place this on the
turntable. For large weight foods, place the
dish directly on the turntable.
The food being grilled should normally be
turned over after half the grilling time.
Never cover foods when grilling.
There is NO MICROWAVE POWER ON THE
GRILL ONLY PROGRAM
Grilling
min
Accessories to Use
Microwave Grill Combination
Grill Level
1, 2 or 3 600 W
Cooking pork or turkey (white meats),
Whole poultry, preheating the
Panacrunch pan, Reheating chilled
lasagne or gratins. Baking a quiche
from raw on the Panacrunch
(G 3 + 600 W)
1, 2 or 3 440 W
Sausages, red meats, fish, reheating
chilled lasagne or gratins
1, 2 or 3 250 W or 100 W
Light cakes, egg dishes, poultry pieces,
braised fish.
En-8
Combination cooking
+
NOTE:
• Never cover foods when cooking on a
Combination program.
• For small quantities do not cook by
Combination, cook by Grill or
Microwave only for best results.
• Do not preheat the oven on Combination
except when preheating the Panacrunch
pan.
Combination cooking is ideal for many foods.
The Microwave power cooks them quickly,
while the Grill provides traditional browning and
crisping; all of this happening simultaneously.
The following 3 combination modes are
available:
Microwave power
level
Cooking uses

En-9
English
Many convenience foods are readily available
in supermarkets. You may also wish to reheat
homecooked food or leftovers. This can all be
done safely in your oven, however you must
check the food carefully to see if it is piping hot
before serving, just as you would in a
conventional oven.
Chilled foods to be reheated must also be
stored correctly.
How do I choose which method to
reheat by?
The heat method i.e. Microwave only or
Combination depends on the type of food to
be reheated. For foods that do not require
browning, reheat by microwave only.
For foods that do require browning, reheat by
Combination For crispy foods that require bottom heating to stay crisp, use the Panacrunch.
The base of the pan absorbs microwaves and
turns them into radiant heat. It is the ideal accessory for reheating chilled or frozen quiches,
pizzas, sausage rolls or feuilletés.
How long do I reheat foods for?
There are reheating charts for Microwave and
Combination: these charts give timings that
are a guideline ONLY, as the exact time will
depend on the weight of the food, size of the
dish used and start temperature.
The charts on the following pages use
microwave only or combination depending on
the type of foods. Make sure that you carefully
follow the recommended instructions and
accessories used to get a fair result and check
the food towards the end of reheating.
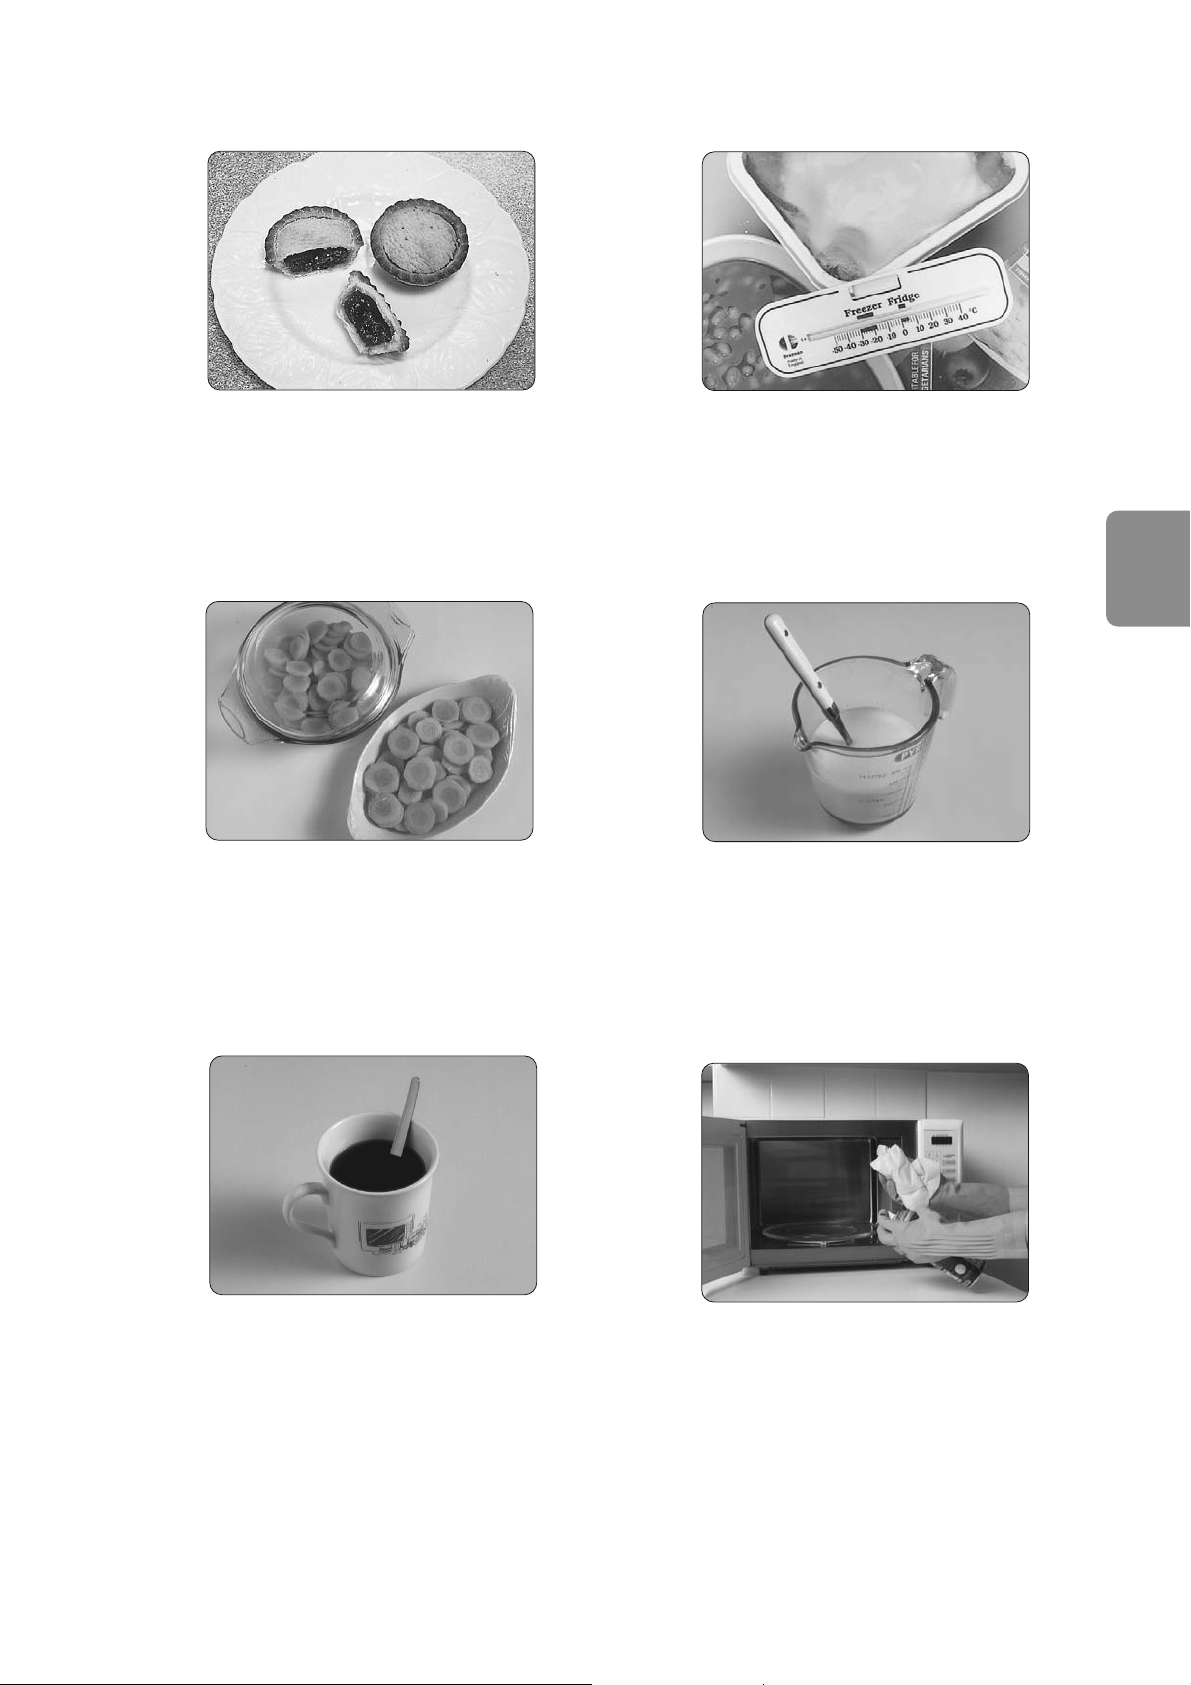
What should I do if the food I am
reheating does not appear in the
charts?
It is not possible to test every food available for
the following charts, however we have
selected a great variety of foods, and suggest
that by following the guidelines given, you can
reheat safely and successfully.
Stirring and turning
Whenever possible, foods should be stirred or
turned over during reheating. This helps
ensure that the food reheats evenly on the
outside and in the centre.
Standing time
Many foods require a STANDING TIME after
reheating. Standing time is a rest time which
allows the heat in the food to continue to
transfer to the centre, thus eliminating cold
spots. If the food has been covered during the
reheating time, then leave the covering on
during the standing time. Stand time is
particularly important for dense foods e.g.
Lasagnes, Gratins, etc and those foods that
cannot be stirred during reheating.
Autoprograms:
for food such as chilled or ambient meals, a
bowl of soup or a cup of coffee, canned food,
frozen lasagne, chilled or frozen pizzas, chilled
quiches or frozen
potato products, REMEMBER that you can use
the Autoprograms on your oven (details on
pages En-12 -14 of your Operating
Instructions).
Reheating with Auto programs:
Please follow the Min/Max weights noted in
your Operating Instructions as well as the
accessories in display.
Beeps sounds:
it is absolutely necessary to turn or stir the
foods at beeps sounds. Failure to do so may
affect the results of reheating with Automenus.
Panacrunch pan:
the Automenus for Pizzas, Quiches and Oven
fries require the preheating of the Panacrunch
pan; Check on page 15 of your Operating
Instructions.
Reheating

En-10
Auto Menu advice:
Cup/Bowl; the final temperature can vary up to
20°C according to the starting temperature
(chilled soup or milk straight from the fridge).
Check accordingly and take care to stir before
and after reheating. Cover the soups.
Ready meals:
Unpack all foods in vacuumed sealed bags,
cover and stir at beeps. The foods that are fatter (sausages), drier (rice, pastas) or in smaller
pieces (raviolis, beans) will be much hotter than
the foods with sauce or stock or foods containing more water (stuffed courgettes) or with
large chunks (whole chicken legs or whole
potatoes). Test the food, stop or prolong the reheating consequently. This Automenu can also
reheat soups, mashed and cooked vegetables;
It doesn't suit the "portionnable" frozen foods.
Pizzas:
On the preheated Panacrunch. Doesn't suit the
raw pizzas, nor the Flammekueche, nor the
frozen pizzas "bake and rise type" (refer to the
charts for the latter). Can reheat the thin already baked salty tartes.
Quiches:
With preheated Panacrunch pan. Doesn't suit
the double crust pies nor the very thick quiches.
The end temperature can vary between a
quiche with lots of cheese and a quiche with
lots of vegetables; The latter will be far less hot
at end of reheating. The chill quiche Automenu
can also reheat Tielles and Tortillas.
Frozen gratins (already cooked):
Depending on the main ingredient (vegetables
or pastas) and the amount of cheese on the
topping, the final temperature and color may
vary. Check before end of reheating and test
the core temperature by cutting open with a
knife. Rest for 3 to 6 min before serving.
Oven fries:
the Menu can also reheat the pommes
Noisettes, Röstis, country potatoes and
Pommes allumettes; The final browning varies
depending on the brand. Stir at beep. The
menu doesn't suit Pommes Croquettes nor big
sized Pommes Dauphines.
When is food reheated?
As long as good hygiene practices have been
followed during the preparation and storage of
the food, then reheating by microwave or
Combination present no added safety risks.
Foods that cannot be stirred should be cut with
a knife to test that they are well heated through.
Even if manufacturerʼs instructions or the times
in the reheating charts have been
followed, it is still important to check that the
food is piping hot. If in doubt, always return the
food to your oven for further reheating.
BABY BOTTLES and FOOD JARS CAUTION
Milk or formula MUST be stirred or shaken
thoroughly before heating and again at the end,
and
tested carefully before feeding a baby.
For 210-240 ml of milk at fridge temperature,
remove top and teat. Heat on 1000 W for
25-30 secs.
CHECK CAREFULLY.
N.B. Liquid at the top of the bottle will be much
hotter than at the bottom of the bottle and must
be shaken thoroughly before checking the
temperature.
Reheating

Food item
Weight or
Quantity
Fresh Frozen
ENTRÉES TRAITEUR
Toasted ham and cheese
sandwich (P & 5)
100 g 1 pce
150 g 1 pce
200 g 2 pcs
3 min G 1 + 440 W then 2 min G 1
3 min 30 s G 1 + 250 W then 2 min G 1
4 min G 1 + 250 W then 3 min G 1
3 min G 1 + 440 W then 2 min G 1
2 min 30 s G 1 + 600 W then 3 min G 1
4 min G 1 + 440 W then 3 min G 1
Fish served in scallop shells
140 g 1 pce
400 g 4 pcs
Approx 3 min G 1 + 440 W.
-
3 min 40 to 4 min G 2 + 600 W.
10 min G 1 + 600 W then 2 min G 1
- Ham/cheese croissant (P)
- Puff pastry roll with cheese filling (P)
- Gnocchi au gratin (P)
- Diced pork baked in puff pastry (P)
- Pretzels with grilled cheese (P)
140 g 1 pce
130 g 1 pce
140 g 1 pce
180 g 2 pcs
220 g 2 pcs
3 min 20 s G 1 + 250 W
1 min 40 s G 1 + 600 W
3 min G 1 + 440 W then 2 min stand.
2 min 20 s G 1 + 250 W then 2 min standing time.
-
2 min 40 s G 1 + 600 W then 3 min standing time
3 min 10 s G 2 + 600 W then repos 2 min
4 min G 1 + 600 W then 3 min 30 s standing time.
-
Auto PIZZA ***
Hot Dog Knackis ® (Strasbourg)
sausage) (P)
- Panini (2 & 5)
- Hot Pockets (P)
125 g 1 pce
260 g 1 pce
125 g 1 pce
2 min 10 s G 1 + 440 W
Approx 4 min G 1 + 250 W
-
3 min 20 s G 1 + 600 W then 1 min standing time
-
3 min G 1 + 600 W then stand 1 min 30 s
or MAX 2 min in its packaging (3) and leave to stand
- Meat pasties (P)
- Vegetable pasties (P)
200-240 g
2 pcs
130 -150 g
1 pce
130 g 1 pce
Approx 3 min G 1 + 250 W then 3 min standing
time.
Approx. 3 min 30 s G 1 + 250 W
then 2 min standing time
3 min 10 s G 1 + 250 W then 2 min standing time
Approx 3 min G 1 + 600 W then 3 min standing time
3 min 30 s G 1 + 600 W then 2 min standing time
2 min 50 s G 1 + 600 W then 3 min standing time
Chicken vol-au-vent (P) 150 g 1 pce 2 min G 1 + 600 W then stand 3 min 4 min G 2 + 600 W then 3 min standing time.
Sausage roll (P & 5) 400 g 1 pce 6 min 30 s G 2 + 440 W then 4 min standing time 8 min G 3 + 600 W then 8 min standing time
En-11
English
Combination Cooking and Reheating Charts
Microwave heating guide for fresh or frozen food.
Heating instructions:
G indicates “Grill”, and P indicates using a pre-heated Pizza pan (3 minutes on Combination Setting GRILL 1 + 600 W).
Unless marked with “(for cooking)”, the foods listed are assumed to have already been cooked and this guide is for heating them. The times
indicated for the Pizza pan are for foods with the packaging entirely removed.
Standing time:
It is important to allow the food to stand after heating: 3 to 6 minutes for light dishes and snacks, bread, cakes and pastries,
liquids and main dishes, and 10 minutes for dishes such as gratins and pies. Preferably, leave to stand in the microwave oven.

Food item
Weight or
Quantity
Fresh Frozen
LIGHT DISHES AND SNACKS
- Mini puff pastry snacks (for cooking) (P)
- Tartlets (P)
- Mini cheese pastries (P)
- Savoury breads (olive bread, ham bread
etc) (3)
160 g 10 pcs
300 g 24 pcs
225 g 30 pcs
340 g 1 pce
-
-
-
-
Approx 7 min G 1 + 600 W then 2 min standing
time
3 min 10 s G 1 + 600 W then 2 min standing time
1 min 30 s G 1 + 600 W then 2 min standing time
5 min G 2 + 600 W then 5 min standing time
- Large nems (P & 5)
- Meat samosas (P & 5)
- Vegetable samosas (P & 5)
150 g 2 pcs
270 g 4 pcs
110 g 2 pcs
120 g 2 pcs
3 min G 1 + 250 W
4 min 30 s to 5 min G 1 + 250 W
Approx 3 min G 1 + 250 W
Approx 4 min G 1 + 250 W
4 min G 1 + 600 W then 2 min standing time
5 min G 1 + 600 W then 2 min standing time
2 min 10 s G 1 + 600 W then 2 min standing time
2 min 30 s G 1 + 600 W then 2 min standing time
Baked stuffed potatoes (1) 130 -150 g 1 pce Approx 5 min 30 s G 1 + 250 W 4 min 40 s G 1 + 600 W then 2 min standing time
Seafood pastries/tarts (P) 330 g 1 pce Auto fresh QUICHE
-
- Pancakes / Filled baguette (P)
- Savoury filled pancakes (P)
- Blinis (P & 5)
250 g 2 pces
150 g 1 pce
80 g 2 pcs
3 min G 1 + 600 W then 1 min standing
time.
2 min G 1 + 440 W
1 min G 1 + 250 W
-
3 min G 1 + 600 W
2 min 20 s G 1 + 250 W then 1 min standing time
Snails (3 & 4) 160 g 12 pcs 250 W Approx 4 min 440 W Approx 3 min then 3 min. standing time
Plain or onion omelette (P & 5)
200 g
500 g
Auto fresh QUICHE
Auto fresh QUICHE
-
-
- Mini-pizzas 3 cheeses (P)
- Tomato and mozzarella pizza (P)
- Pizza with uncooked dough (P)
270 g 9 pcs
90 g 3 pcs
200 g 1 pce
290 g
600 g
420 g 1 pce
-
-
Approx 1 min 40 s G 1 + 440 W then 2
min standing time (5)
-
3 min G 1 + 250 W then 2 min standing
time
3 min 30 s G 1 + 600 W then 4 min G 1
4 min G 1 + 250 W then 3 min G 1
Auto PIZZA***
7 min G 1 + 600 W then 3 min G 1
15 min G 1 + 600 W then 3 min 30 s G 1
-
En-12
Combination Cooking and Reheating Charts
Microwave heating guide for fresh or frozen food.
Heating instructions:
The “+” symbol indicates a combination setting, G indicates “Grill”, and P indicates using a pre-heated Pizza pan (3 mi-
nutes on Combination Setting GRILL 1 + 600 W). Unless marked with “(for cooking)”, the foods listed are assumed to have already been cooked
and this guide is for heating them.
Standing time:
It is important to allow the food to stand after heating: 3 to 6 minutes for light dishes and snacks, bread, cakes and pastries, li-
quids and main dishes, and 10 minutes for dishes such as gratins and pies. Preferably, leave to stand in the microwave oven.

Food item
Weight or
Quantity
Fresh Frozen
LIGHT DISHES AND SNACKS
Quiche lorraine, vegetable quiche or
cheese quiche (P)
Leek tart (P)
Ham/cheese pie (P)
Savoury tart (for cooking) (P)
100 g 1 pce
160 g 1 pce
400 g 1 pce
800 g 1 pce
400 g 1 pce
500 g 1 pce
290 g 1 pce
Auto QUICHE
Auto QUICHE
Auto QUICHE
Auto QUICHE (enter 750 g)
-
-
-
1 min 40 s to 2 min G 2 + 600 W then 4 min standing
time
3 min to 3 min 30 s G 2 + 600 W then 4 min standing
time
5 min 30 s G 2 + 600 W then 4 min standing time
8 min G 3 + 600 W then 6 min standing time
6 min G 2 + 600 W then 4 min standing time
8 min G 1 + 600 W then 7 min standing time
Approx 9 min G 1 + 600 W then 2 min rstanding time
on wire rack
Bacon, cream and onion flan (P pre-hea-
ted for 4 min)
140 g 1 pce 3 min G 1 + 250 W then 3 min G 1 2 min 30 s G 1 + 600 W then 3 min 30 s G 1
MAIN DISHES
Gratins (potato gratin, moussaka, la-
sagne, tartiflette, cottage pie, macaroni
cheese)
- Individual portions of potato gratin (1)
300 - 350 g
1000 g
240 g 2 pcs
5 min to 8 min G 1 + 600 W (1)
11 min G 1 + 600 W then 2 min G 1
(1)
-
Auto GRATIN *** (3)
Auto GRATIN *** (3)
6 min 30 s G 1 + 600 W then 2 min standing time
Vegetable gratin (with or without meat) 1000 g 12 to 13 min G 1 + 600 W (1) Auto GRATIN *** (3)
Gratins to be used as side dishes (cauliflo-
wer cheese, potato gratin, tartiflette) (3)
900 g
-
17 min G 1 + 600 W then 5 min G 1
Quenelles (3,4 & 5) + 2 serving spoons of
water
MAX 1 min then 250 W 5 min
-
Stuffed tomatoes (3 & 4)
Stuffed cabbage (3,4 & 5)
300 g 2 pcs
1000 g 8 pces
1050 g 6 pcs
MAX 3 min 30 s then 2 min standing
time
MAX 10 -11 min
-
-
-
MAX 24 to 25 min
Fish in sauce (3) 400 g
-
9 min G 1 + 600 W then 5 min G 1
En-13
English
Combination Cooking and Reheating Charts
(1) Remove packaging and place onto a heat-resistant, microwave-transparent dish on the roller ring. (2) Remove packaging and place onto the
roller ring directly or on baking paper. (3) Use a microwave-transparent dish on the glass turntable. (4) Cover dish. (5) Turn or stir half-way
through heating time.

Food item Weight or Quantity Fresh Frozen
SIDE DISHES
Pasta and pulses (3, 4 & 5) 300 g 600 W 1 min 30 s to 2 min -
Oven chips, chopped potatoes, potato
Rösti, sauteed potatoes and other
potato dishes (P & 5)
- Dauphine/croquet potatoes (P & 5)
300-600 g
200 g - 300 g
-
-
-
-
-
Auto CHIPS ***
5 min G 1-600 W then 3 min G 1
Vegetables (3, 4 & 5)
100 g
200 g
MAX 1 min to 1 min 10 s
MAX 1 min 30 to 1 min 40 s
-
-
Purée/Mash (3, 4 & 5)
- mashed potato
- vegetable purée
200 g
200 g
380 g
1000 g
MAX 1 min 30 s
MAX 1 to 2 min
MAX 2 min 30 s
-
MAX 3 min
MAX 3 min 30 s
MAX 8 min
MAX 12 to 13 min
Rice (3, 4 & 5)
200 g
500 g
MAX 1 min 30 s
MAX 3 min 30 s to 4 min
MAX 2 min 30s
MAX 6 to 7 min
Spaghetti in sauce (3, 4 & 5)
200 g
500 g
1000 g
MAX 2 min
MAX 4 min
MAX 7 to 8 min
-
-
MAX 13 to 14 min
MEAT & FISH
Duck confit (1)
250 g 1 pce
450 g 2 pcs
7 min 30 to 8 min G 1 + 250 W
9 min to 10 min G 1 + 250 W
-
-
Tripe (3, 4 & 5) 500 g MAX 4 min to 4 min 30 s MAX 7 to 8 min
En-14
Combination Cooking and Reheating Charts
Microwave heating guide for fresh or frozen food.
Heating instructions:
The “+” symbol indicates a combination setting, G indicates “Grill”, and P indicates using a pre-heated Pizza pan (3 minutes
on Combination Setting GRILL 1 + 600 W). Unless marked with “(for cooking)”, the foods listed are assumed to have already been cooked and this
guide is for heating them.
Standing time:
It is important to allow the food to stand after heating: 3 to 6 minutes for light dishes and snacks, bread, cakes and pastries,
liquids and main dishes, and 10 minutes for dishes such as gratins and pies. Preferably, leave to stand in the microwave oven.

Food item Weight or Quantity Fresh Frozen
MEAT & FISH
Cocktail sausages (3, 4 & 5)
120 g 440 W 1 min to 1 min 30 s
-
Cooked meat (3, 4 & 5)
- steak burger
- white meat
- red meat
- chicken leg
100 g
100 g 2 slices
120 g 3 slices
200 g 1 pce
600 W 30 to 40 s
600 W 50 to 60 s
440 W 50 to 60 s
MAX 1 min 30 s
-
-
-
-
- Chicken cordon bleu (P & 5)
- Chicken nuggets (P & 5)
- Breaded fish fillet (P & 5)
- Salmon steak (for cooking) (P & 5)
110 g 1 pce
200 g 10 pcs
100 g 1 pce
130 g 1 pce
2 min G 1 + 600 W
2 min 30 s G 1 + 600 W
2 min 20 s G 1 + 440 W
2 min to 2 min 20 s G 1 + 600 W
3 min 30 s G 1 + 600 W then rest 1 min
3 min 30 s G 1 + 600 W
3 min G 1 + 600 W
-
VARIOUS
Sauce/gravy (4 & 5)
Drinks
- 1 cup
- 2 cups
- 3 cups
250 g
300 g
500 g
240 ml
480 ml
700 ml
MAX 2 min
MAX 2 to 3 min
MAX 3 to 4 min
MAX 1 min 50 s
MAX 3 min. 20 s
MAX 4 min 30 s
MAX 3 min 30 s
-
MAX 6 min--
-
Milk
- 1 bowl/mug
- 1 jug (3, 4 & 5)
250 ml
600 ml
600 W 2 min or Auto BOWL (if 300 ml)
600 W 4 min 30 s
-
-
En-15
English
Combination Cooking and Reheating Charts
(1) Remove packaging and place onto a heat-resistant, microwave-transparent dish on the roller ring. (2) Remove packaging and place onto the
roller ring directly or on baking paper. (3) Use a microwave-transparent dish on the glass turntable. (4) Cover dish. (5) Turn or stir half-way
through heating time.

Food item
Weight or
Quantity
Fresh Frozen
VARIOUS
- Baby food (jar without lid) (4)
- at room temperature
- refrigerated
130 g
200 g
130 g
200 g
600 W 50 s Stir and test before serving
600 W 60 s to 70 s Test before serving
600 W 60 to 70 s Test before serving
600 W 1 min 20 to 1 min 30 s Test before
serving
-
-
-
-
- Mini cakes and pastries
(pre-cooked) (2 & 5)
50 g 2 pcs
125 g 5 pcs
-
Auto BREAD ***
Auto BREAD ***
Bread
- Country loaf (3 & 5)
- Whole grain loaf (3 & 5)
500 g
400 g
-
-
8 min G 1 + 250 W on Auto BREAD*** then 12 min
standing time.
5 min 30 s G 1 + 250 W then 8 min standing time or
Auto BREAD*** then leave to stand.
DESSERTS
Coconut balls (3 & 4 ) 6 pcs 250 W 2 to 3 min (5) 440 W 3 to 4 min (5)
Waffles (2 & 5)
70 g 1 pce
140 g 2 pcs
-
-
2 min G 1-250 W
3 min G 1-250 W
Sweet pancakes (3 & 4)
50 g 1 pce
100 g 2 pcs
MAX 20 to 30 s
MAX 35 to 40 s
MAX 40 s (5)
MAX 80 s (5)
Canneles/small cakes (3) 3 pcs 180 g - Defrost 3 to 4 min
Apple crumble (1) 170 g -
2 min 40 to to 3 min G 1-600 W then 2 min standing
time
En-16
Microwave heating guide for fresh or frozen food.
Heating instructions:
The “+” symbol indicates a combination setting, G indicates “Grill”, and P indicates using a pre-heated Pizza pan (3 mi-
nutes on Combination Setting GRILL 1 + 600 W). Unless marked with “(for cooking)”, the foods listed are assumed to have already been cooked
and this guide is for heating them.
Standing time:
It is important to allow the food to stand after heating: 3 to 6 minutes for light dishes and snacks, bread, cakes and pastries, li-
quids and main dishes, and 10 minutes for dishes such as gratins and pies. Preferably, leave to stand in the microwave oven.
Combination Cooking and Reheating Charts

Food item
Weight or
Quantity
Fresh Frozen
DESSERTS
Donuts/fritters (P preheat 4 min & 5)
50 g 1 pce
100 g 2 pcs
-
-
40 s G 1 + 250 W then 2 min standing time
1 min 10 s G 1 + 250 W then 2 min standing time
Puff pastry cake (2 & 5)
1 pers 120 g
6 pers 400-500 g
30 s G 1 + 250 W then 2 min G 3
then leave to stand
2 min to 2 min 30 s G 1 + 250 W
1 min 40 s G 1 + 250 W then 2 to 3 min G 3
4 à 5 min G 1 + 440 W then 4 min standing time
Chocolate fondant (P) 470 g 1 pce - 4 min G 1 + 250 W then 8 min standing time
Macaroons (3) 16 pces 190 g - 250 W 1 min to 1 min 20 s then 5 min standing time
Chocolate cake with a molten centre
(for cooking) (1)
1 pce 70 g
1 pce 100 g
2 pcs 200 g
2 to 2 min 20 s G 1 + 250 W
-
-
-
2 min to 2 min 10 s G 1 + 440 W
Approx 3 min 30 s G 2 + 440 W
- Lemon meringue pie (P)
- Thin apple tart (P)
- Tarte Tatin (2) (apple side down)
- Apple Tart Normande (P)
- Apple and rhubarb tart (P)
- Apple tart (P)
- Sugar pie (5)
500 g 1 pce
100 g 1 pce
260 g 1 pce
120 g 1 pce
630 g 1 pce
800 g 1 pce
500 g 1 pce
680 g 1 pce
90 g 1 portion
180 g 2 portions
700 g 6 portions
800 g
350 g
---
-
-
-
-
-
-
-
-
-
-
4 min G 2 + 250 W then 8 min standing time
1 min 40 s G 1 + 600 W then 4 min standing time
3 min 20 s G 1 + 600 W then 3 min standing time on wire rack
2 min 20 s G 1 + 440 W then 2 min standing time
6 min G 1 + 600 W then 6 min standing time
10 min G 1 + 600 W then 10 min standing time
4 min G 1 + 600 W then 10 min standing time
5 min 40 s G 1 + 600 W then 10 min standing time
2 min G 1 + 250 W then 3 min standing time
3 min G 1 + 250 W then 4 min standing time
7 min G 1 + 440 W then 11 min standing time
7 min G 1 + 440 W then 12 min standing time
2 min 30 s G 1 + 250 W then 5 standing time
Popcorn with sugar (3) 1 x 100 g
-
MAX 2 min 30 s to 3 min
En-17
English
(1) Remove packaging and place onto a heat-resistant, microwave-transparent dish on the roller ring. (2) Remove packaging and place onto the
roller ring directly or on baking paper. (3) Use a microwave-transparent dish on the glass turntable. (4) Cover dish. (5) Turn or stir half-way
through heating time.
Combination Cooking and Reheating Charts

En-18
Microwave cooking tips
To soften butter for easy spreading on
removal from the fridge
Soften for 35-40 seconds on (for 150g).
Remove any foil beforehand.
Swelling dried fruit
Add 4 tablespoons of water to 200 g of raisins
or prunes, (they can be swollen with rum for
cakes). Stir and heat on 1000 W for 2 to 3 minutes. Allow to stand for 30 minutes.
Restoring cheese to room temperature
Cheese removed from the refrigerator must be
placed in the oven and "warmed" for 30
seconds -1 minute (depending on the size of
the cheese) at 250 W.
Blanching almonds or hazelnuts
Cover with hot water and cook for 3-6 minutes
on 1000 W (return to boil). Cool, drain and the
skin is then easy to remove.
Drying herbs
Place absorbent paper on the glass turntable.
Carefully spread out the finely chopped, fresh
herbs on the paper. Repeat several times if
necessary. Heat on 1000 W for a few minutes,
checking them every 30 seconds until the
herbs begin to dry. Extreme care must be taken
to ensure that the herbs do not remain in the
oven too long; otherwise, they will
disintegrate, and possibly catch fire. Leave the
herbs on the absorbent paper for a further 2
hours at room temperature, then store in
air-tight containers.
Making caramel
Cook 100 g of sugar with 2 tablespoons of
water in a bowl for 2-3 minutes on 1000 W,
checking halfway-through cooking time.
Remove caramel before it becomes darkened
since it will continue to cook outside. You can
stop the cooking with 2 tablespoons of very hot
water (beware of sharp edges).
Liquifying hardened honey
Remove the lid to the pot, place in oven and
heat on 250 W for 30-50 seconds, depending
on the quantity. Stir and repeat if necessary.
Min
Croutons in minutes
Cut two slices of white bread into small cubes.
Spread out these cubes on a plate. Heat on
1000 W for 2 minutes then allow to stand for 5
minutes. You can rub a clove of garlic on the
slices of bread before cutting them or drizzle
with a few drops of olive oil.
How to obtain more juice from an orange or
a lemon
Before squeezing, place orange or lemon in
microwave for 30-40 seconds on 1000 W, then
squeeze immediately; this will produce more
juice.
Melting butter
100 g of butter in a ramekin dish covered with a
saucer will melt in around 1 minute at 600 W.
Melting chocolate
Break 100 g chocolate into little pieces into a
bowl and heat at 600 W for 2-2
1
/2 minutes (the
time may vary depending on the cocoa and
sugar content). Stir at least once during
cooking.
Leaving dough to prove
Place the covered dough in the oven and heat
for around 5 minutes on (for 500 g of
dough). Leave the dough in the oven (away
from air currents) until it has doubled in volume.
Making mulled wine
In an ovenproof glass (or mug), mix together 20
CL of red wine, the zest of a lemon, a pinch of
cinnamon, one clove and 2-4 teaspoons of
sugar according to taste. Heat on 1000 W for
1-1
1
/2 minutes.
"Deodorise" your oven
To rid your oven of that "fishy" smell, place a
bowl of white wine vinegar or water with the
juice of a lemon inside the oven. Heat on 1000
W for 5 minutes. Wipe off the steam that
collects on the oven walls.
Preparing a hot compress
Heat a clean, damp, folded cloth on a plate for
1-2 minutes on 1000 W. Check temperature
before applying the cloth.
Min
En-19
English
Defrosting guidelines
The biggest problem when defrosting food in a
microwave is to get the inside defrosted before
the outside starts to cook.
For this reason Panasonic have made the
defrosting on your oven CYCLIC DEFROST,
just select the 270 watts DEFROST pad
and set the required time. The oven then
divides this time into 8 stages. These stages
alternate between defrosting (total of 4) and
standing (total of 4).
During the standing stages there is no
microwave power in the oven, although the
light will remain on and the turnatable will turn.
The automatic stand times ensure a more even
defrost and for small items the usual stand
time can be eliminated.
Min
Check the defrosting several times, even if you use the automatic programs. Observe the standing
times.
Standing times
Individual portions of food may be cooked almost
immediately after defrosting (5 minutes standing
time for steaks, 15 minutes for fruit and pastry). It
is normal for large portions of food to be frozen in
the centre. Before cooking, allow to stand for a
minimum of one hour. During this standing time,
the temperature becomes evenly distributed and
the food is defrosted by conduction. NB If the food
is not going to be cooked immediately, store it in
the refrigerator. Never refreeze defrosted food
without first cooking it.
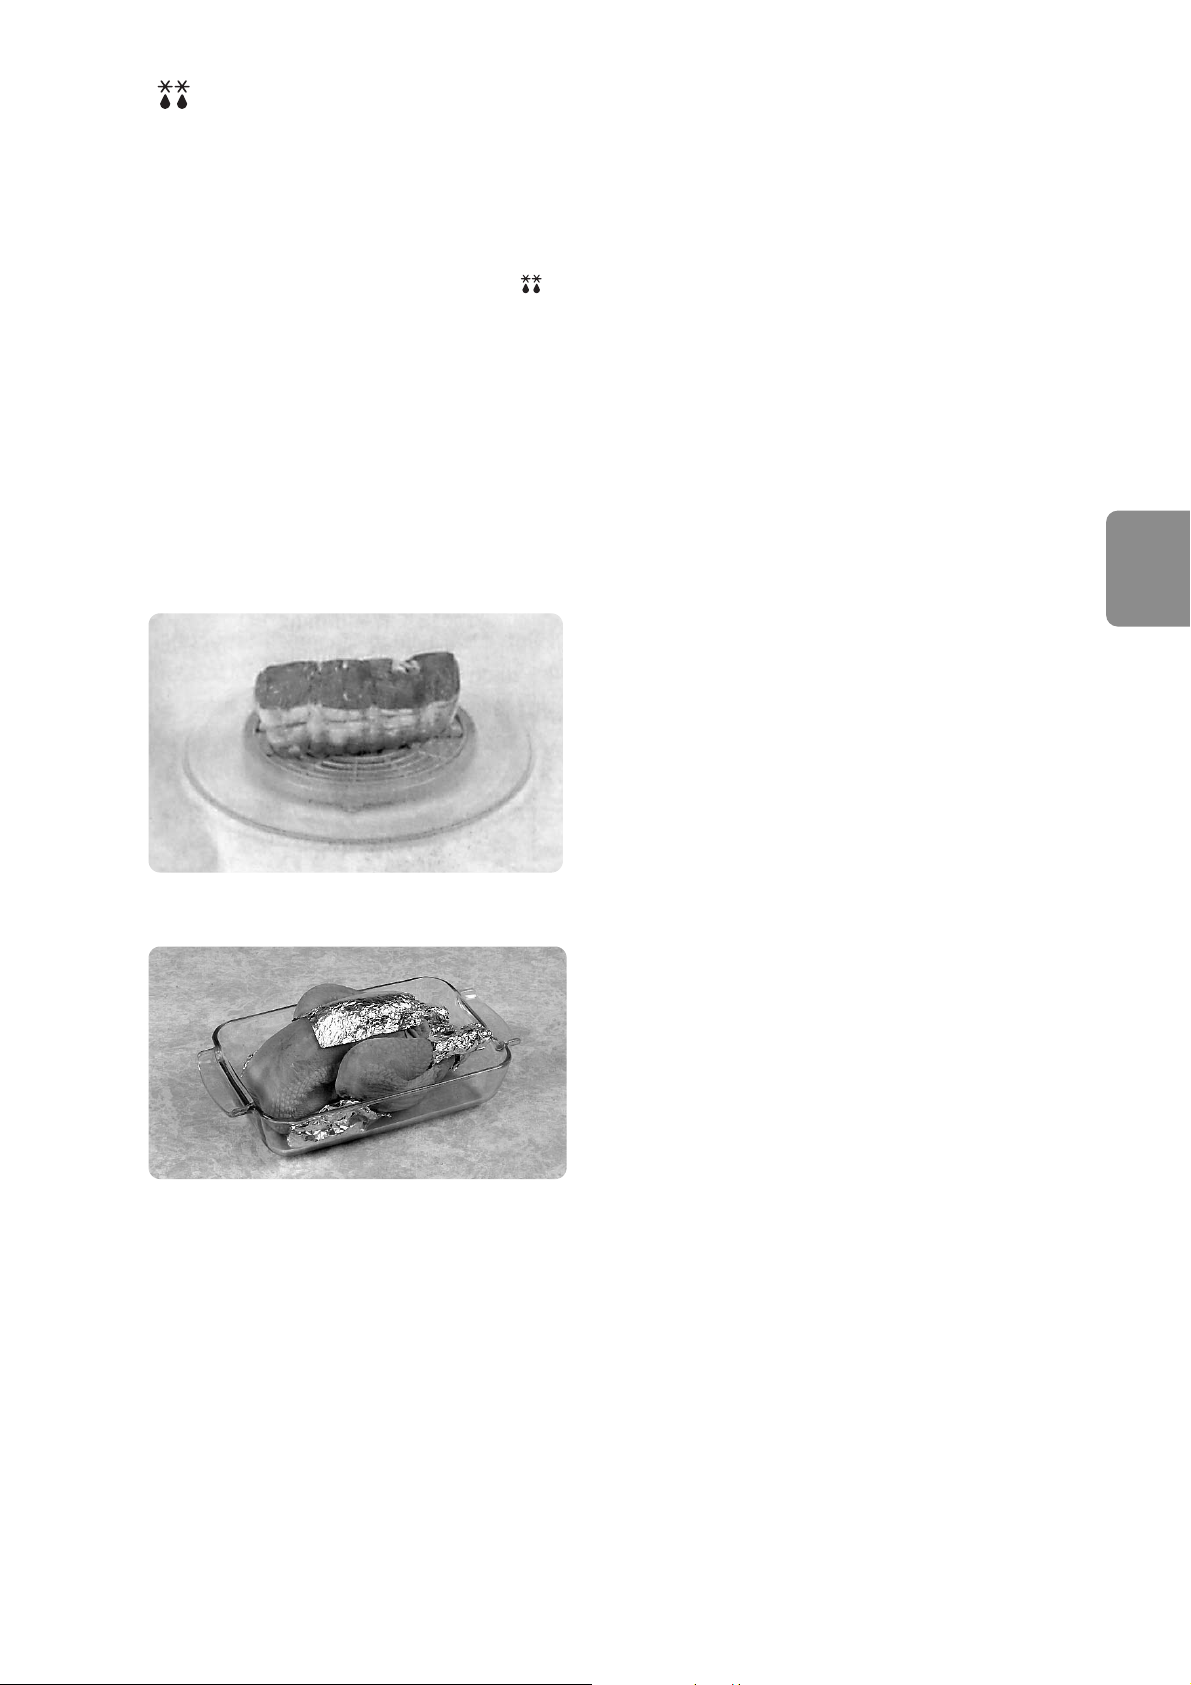
Joints and poultry
It is preferable to place the joints on an upturned
plate or plastic rack so that they are not resting in
the juices. It is essential to protect delicate or
projecting parts of this food with small pieces of
foil to prevent these parts from cooking. It is not
dangerous to use small pieces of foil in your oven,
provided they do not come into contact with the
oven walls.
Tips for defrosting
Number of program
and its uses
Recommended weight
(Min. - Max.)
1. Small pieces
e.g. Fish/Chops,
Sausages,
Chicken Portions
200 - 1600 g
2. Big pieces
e.g. Meat Joints,
Whole Chicken
400 - 2400 g
3. Bread/croissants
Sliced Frozen bread,
small bread rolls,
croissants, chocolate
and raisin rolls. Place
on wire rack. Turn at
beep.
50 - 500 g
En-20
Auto Weight Defrost
This feature allows you to enter the weight
in grams and the oven will select the
correct defrosting time for the foods
described. Do not use for porous foods e.g.
bread, cakes and convenience foods etc.
See Operating Instructions for selection of
the grams. During the defrosting process,
the oven will beep to remind you to check
the food i.e. turn, shield or break the food
apart, as shown above.
There are three categories for Auto Weight
Defrost:
BREAD menu - Caution: in order to get a
crispy bread result, the Defrost Menu for
Bread operates on Combination mode. You
must use the rack and take care when taking out or turning the bread pieces as the
accessory will be very hot.
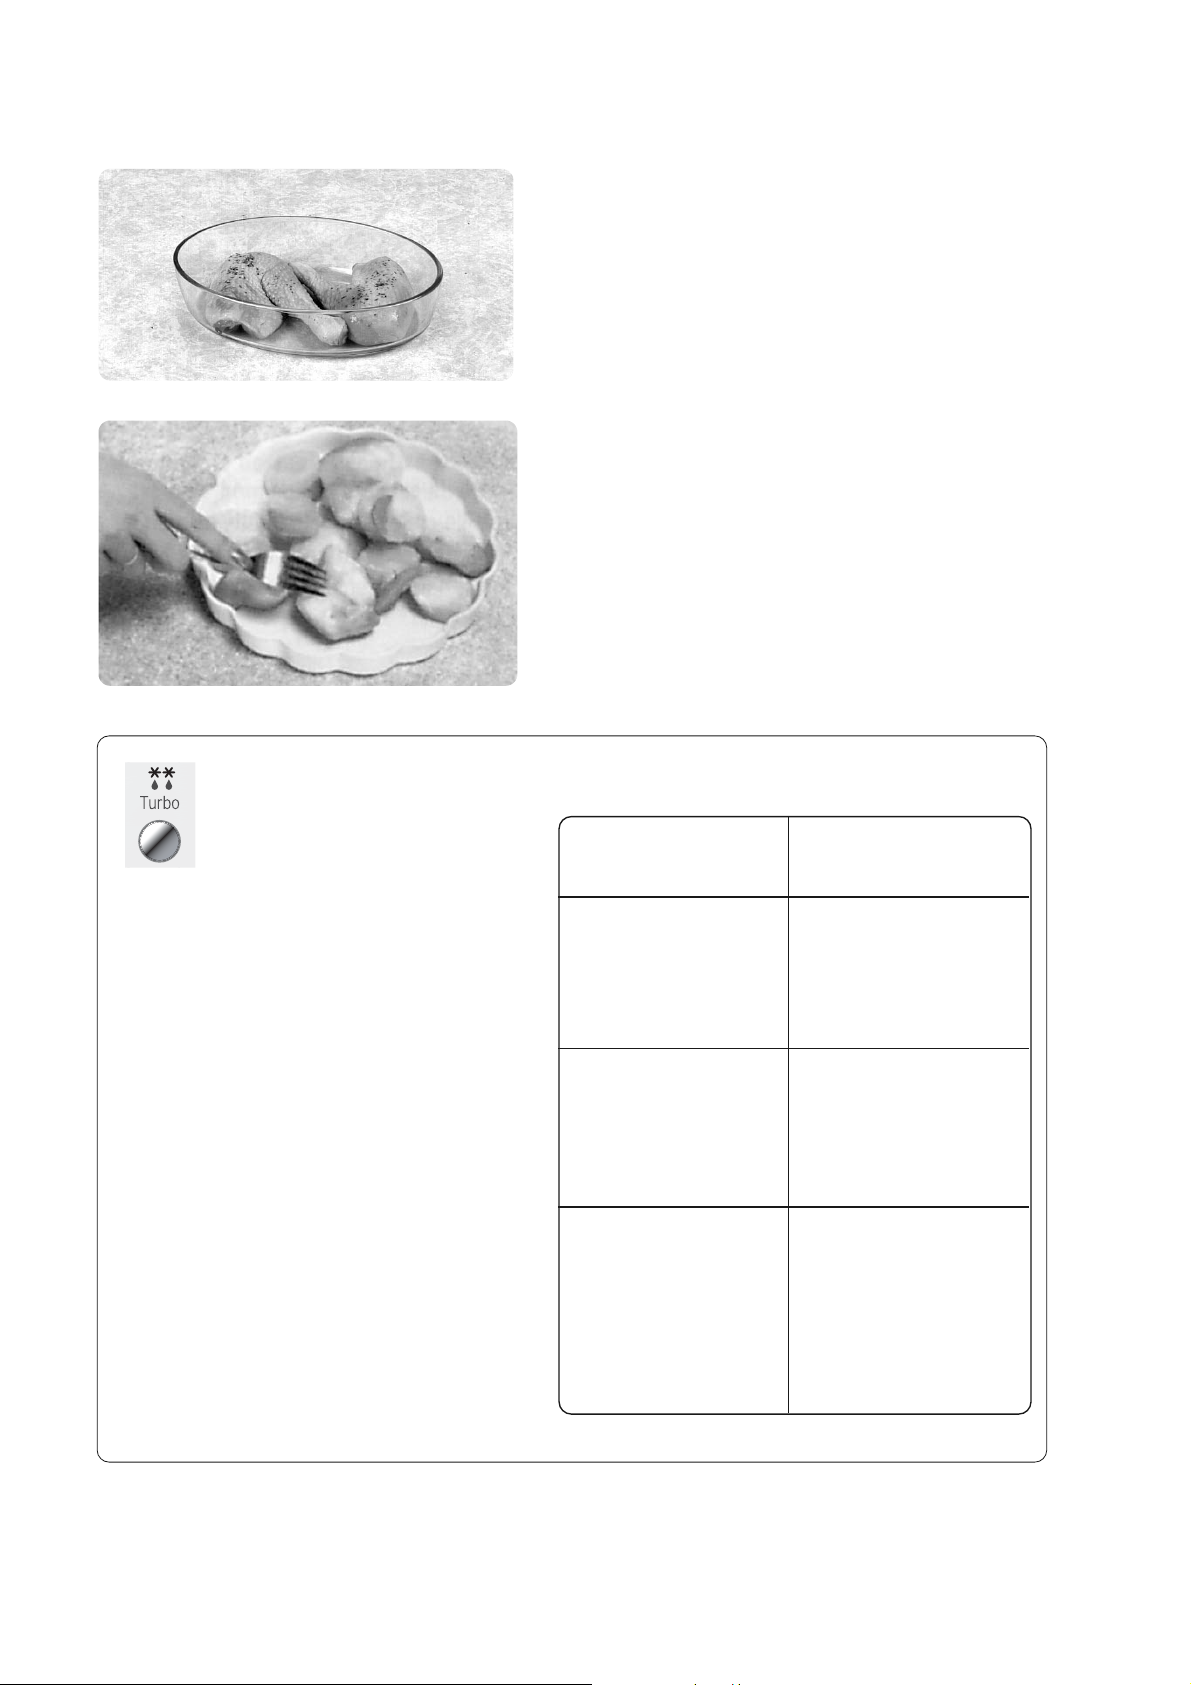
Small portions of food
Chops and chicken pieces must be separated
as soon as possible so that they defrost evenly
throughout. Fatty parts and the ends defrost
more quickly. Place them near the centre of the
turntable or protect them.
Minced meat or cubes of meat and
seafood
Since the outside of these foods quickly defrosts,
it is necessary to separate them, break the
blocks into pieces frequently while defrosting and
remove them when they have defrosted.

Select Defrost Power 270 W then the approximate time given below.
The times given below are guidelines only. Always check the progress of the food by opening
the oven door and then re-starting. For larger quantities adjust times accordingly. It is not essential to cover food during defrosting
Food Weight/quantity Time in minutes
Standing times
(minimum)
Meat
- joints with bone# 500 g 18 - 20 60
- roast filleted# 500 g 20 - 22 70
- chops# 500 g 8 - 12
15
- cutlets# 250 g 6 - 7 10
- kidneys* 250 g 7 - 8
10
- lean beef* 430 g (2) 11 - 12
10
- entrecôte* 150 g 4 - 6 10
- minced beef, sausage meat,
pork mince*
500 g 10 - 12 10
- hamburger*
200 g (2) 6 - 7 10
400 g (4) 10 - 12 10
- meat for stewing/braising* 500 g 12 - 14 15
- whole poultry# 500 g 12 - 13 60
- poultry pieces# 1 kg (4) 22 - 24 30
- poussin# 400 g 15 30
- rabbit# 500 g 14 - 15 30
- pork sausages* 300 g (2) 10 - 11 15
En-21
English
NOTES
# turn this food halfway through defrosting and protect ends and projecting parts with foil.
* stir, turn or separate several times during defrosting.
min
Defrosting Common Foods

Food Weight/quantity Time in minutes
Standing times
(minimum)
BUTTER 250 g 2 10
FRUIT COULIS 200 g 3 - 4 10
CHEESE* 450 g 3 10
RED FRUIT*
200 g 5 - 6 10
300 g 9 10
500 g 12 10
CAKES AND PUDDINGS
- Victoria Sandwich Cake 400 g (1) 7 10
- Black Forest 500 g (1) 4 - 5 15
- Bavarois 110 g (1 portion) 8 seconds 15
- Raspberry tart 470 g (1 portion) 10 15
- Opera cake 500 g (1 pce) 5 60
- Lemon tart 110 g (1 pce) 3 5
CONCENTRATED
FRUIT JUICE
200 ml 4 4
PASTRY
- sweet flan or shortcrust*
300 g (block) 4 - 5 20
250 g (roll) 2 min 30 sec 20
- puff*
250 g (block) 4 20
250 g (roll) 2 min 30 sec 20
- Pizza*
240 g (block) 4 20
350 g (roll) 5 20
FISH
- whole# 400 g (2) 10 - 12 15
- fillets# 500 g (4) 13 - 14 15
- fish steak with bone** 380 g (2) 10 15
- thick steaks without bone* 200 g (2) (4) 9 15
- shrimps/prawns* 200 g 7 10
- breaded fish fillets* 120 g (2 pces) 5 10
En-22
NOTES
# turn this food halfway through defrosting and protect ends and projecting parts with foil.
* stir, turn or separate several times during defrosting.
Defrosting Common Foods
En-23
English
Meat & poultry
Defrosted joints
If the meat has previously been frozen, ensure
it is properly thawed before cooking by
microwave. Defrosted joints of meat must be
allowed to STAND for a minimum of 1 hour
before cooking to ensure the centre is fully
defrosted.
Fat
Large amounts of fat absorb microwave
energy and can cause the meat next to it to
overcook. Always choose joints that are not
excessively fatty.
Cooking with microwave only
Place joints on an upturned plate in a
microwaveable dish and on the turntable.
It is important that the joint should not soak in
its juice. The upturned plate is not needed for
pieces of meat or poultry if fricasseed or
cooked with an accompaniment.
It is advisable to cover the meat with a lid or
cling-film to speed up cooking and prevent
splashes.
Standing time
Meat and poultry require a minimum of 15
mins. STANDING TIME wrapped in
aluminium foil after cooking by microwave.
Roast meat is always easier to carve after
STANDING and the meat will continue to cook
during the STAND TIME.
Bone
Bone tips on legs of lamb and crown roasts
may need shielding when cooked by
microwave, to prevent overcooking.
How to cook small cuts of meat by
microwave
Some cuts of meat can be cooked by
microwave although due to their short cooking
times and no heat source, they will not crisp
and brown.
They should always be cooked on a
microwave rack to lift them out of their juices.
Arrange drumsticks so the fleshiest part is
towards the outside.
Turning
Joints and poultry should be turned over
halfway through cooking.
Shielding
Large joints may need shielding with pieces of
smooth aluminium foil after half the cooking
time to avoid overcooking on the outside
edges. Turkeys and large chickens should
have their breast meat, legs and wings
protected. Secure foil with toothpicks and do
not allow foil to touch the walls of the oven.
How to roast a joint by Combination
Refer to charts on next page when roasting a
meat joint; For poultry pieces, use the
Auto program Chicken pieces - Take care to
use the correct accessory.
DO NOT cover.
Tips for stews and ragouts
Before: The accompanying vegetables must
be cut into regular pieces and pre-cooked,
otherwise they may stay crunchy when
cooking is completed. Lightly cover the pieces
of meat with flour, to ensure the sauce cooks
properly.
During cooking, it is essential to keep the
pieces of meat covered by the liquid using an
upturned saucer or plate (to prevent the meat
from drying out). Since cooking stews takes a
long time and sometimes there is a lot of
evaporation, do not hesitate to add liquid while
cooking if necessary. Cover the vessel with a
lid to restrict evaporation. Bring to the boil on
1000 W for 10 to 12 mins. then continue
cooking for the desired length of time at 250W.
En-24
Cooking small cuts of meat by Grill or
Combination
Place food on the wire rack. Place the wire rack
on the turntable. Use a heatproof dish to catch
grease/drips.
For larger pieces or pieces of meat that will not
fit without touching the roof or catching on the
grill, place in a heatproof dish on turntable. The
grilling action will still brown the food, but may
take slightly longer.
Meat & poultry
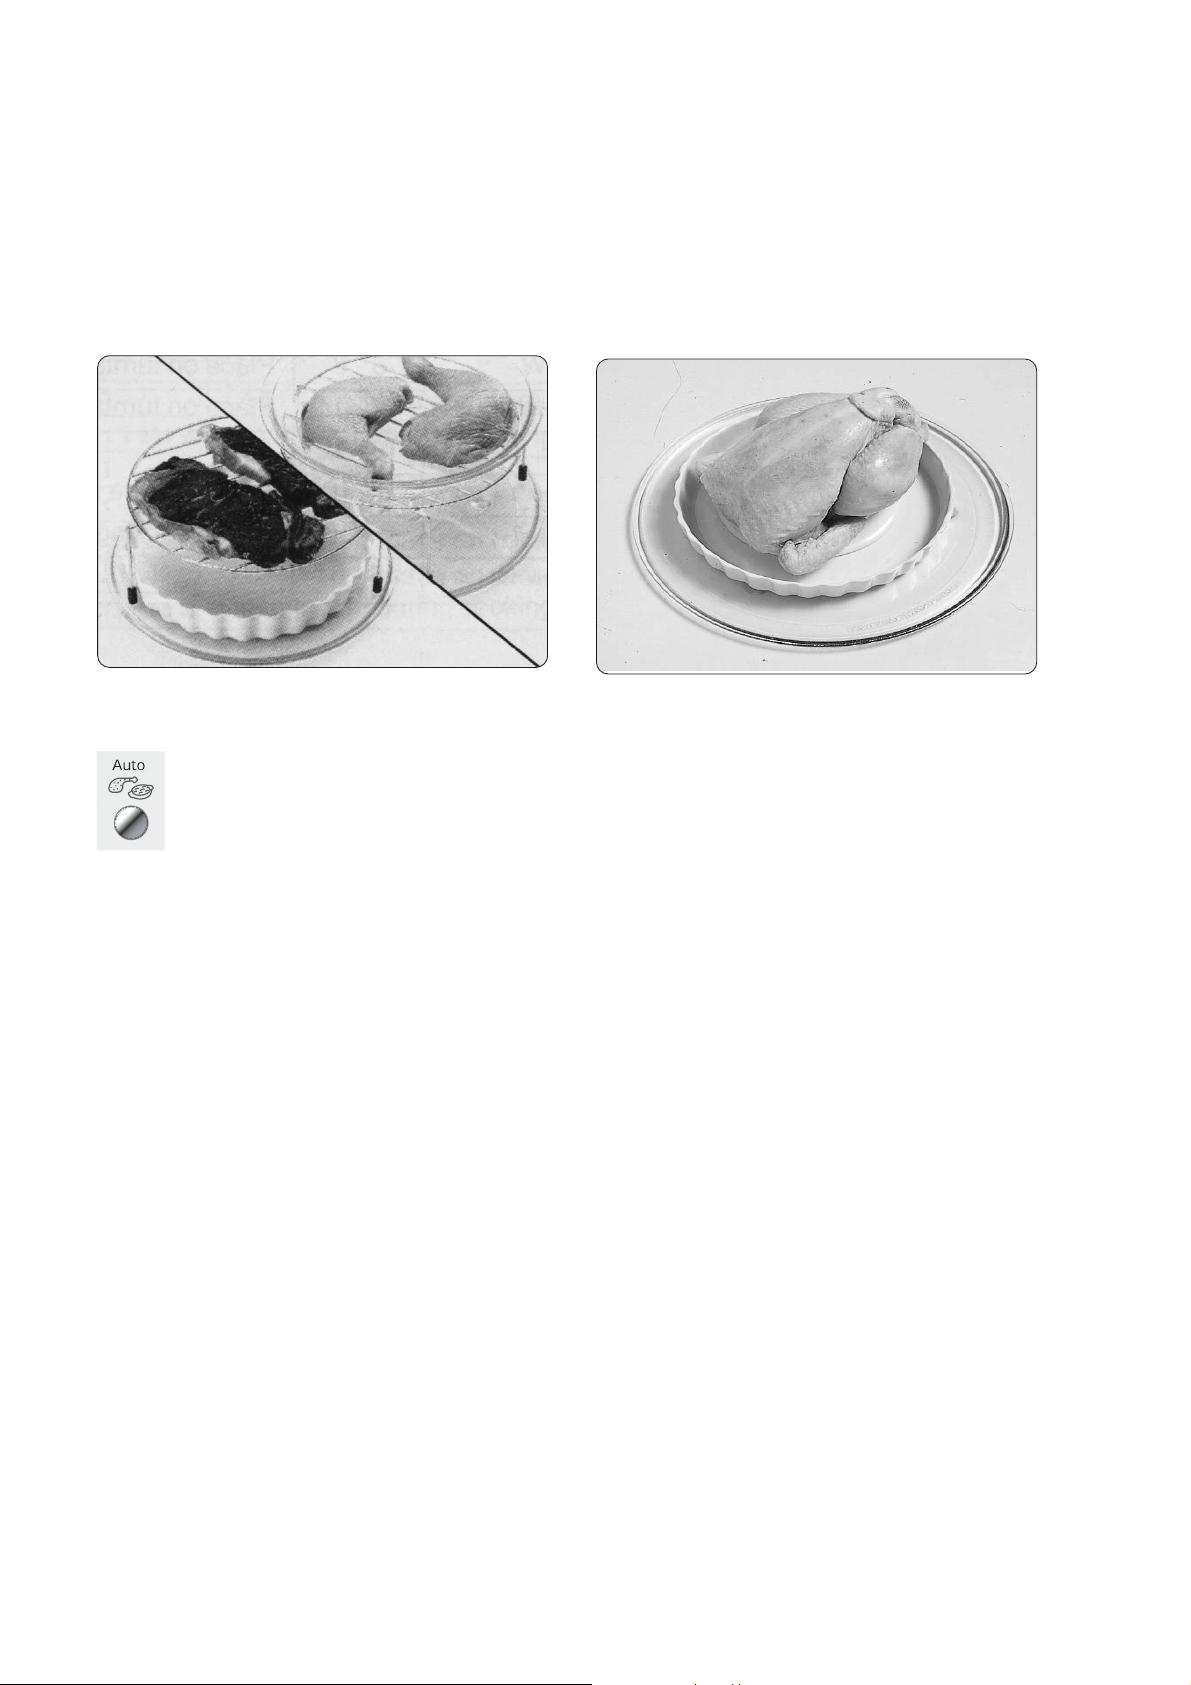
The Poultry Pieces Auto program:
This auto program is suitable for
chicken, duck or guinea fowl's pieces. It
isn't fit for chicken fillets, duck magrets,
nor turkey or goose meat. The dish with
chicken pieces must be placed on the rack.
Turn the pieces at beep. Rest 5 mins at end of
roasting.

Cooking times for meat and poultry
• As meat will not be browned when cooking with the microwave setting only, the microwave cooking times indicated below are for meat
that has first been browned in a frying pan on all sides (pork, veal, lamb and beef) or for meat that does not need to be browned (poultry
fillets, rabbit).
• In all cases, meat should be turned during cooking and left to stand after cooking is complete.
Type of meat
Grill or Combination
Setting
Duration in minutes
Microwave
only
Duration in minutes
Beef
stew - - Max then 250 W
10-12 then 60 to 75
roasting joint (1) G 1 + 250 W then G 1 11 -12 per 500 g then 5 min 600 W 5 to 6 per 500 g
1 rib on the bone 850 g (1)
Gril 1 or
G 1 + 250 W then G 1
33 - 35
9 then 15-16
- -
Lamb
saddle (< 900 g) (1)
shoulder (> 900 g) (1)
rolled shoulder (1)
G 1 + 600 W
G 1 + 600 W
G 1 + 600 W
7- 8 per 500 g
9 -10 per 500 g
10-11 per 500 g
600 W
600 W
600 W
8 - 9 per 500 g
9 - 10 per 500 g
11- 12 per 500 g
stew - - Max then 250 W 10 -12 then 40 to 50
Veal
shoulder roast (2) G 1 + 600 W 11-12 per 500 g 600 W 14-15 per 500 g
Pork
fillet roast (1) G 1 + 600 W 11-12 per 500 g 600 W 15-16 per 500 g
shoulder roast (1) G 1 + 600 W 13 - 14 per 500 g 600 W 16-17 per 500 g
En-25
English
Meat & poultry

Type of meat
Grill or Combination
Setting
Duration in minutes
Microwave
only
Duration in minutes
Chicken - Guinea-fowl -Turkey
- whole roasting bird (1) (< 1500 g)
- whole roasting bird (1) (> 1500 g)
G 1 + 600 W
G 1 + 600 W
9-10 per 500 g
10 per 500 g
- -
- 1 chicken leg 250 - 300 g (1)
Gril 1or
G 1 + 250 W or
Auto POULTRY pieces
26 to 27 min
11 to 12 min
-
- pieces, boned - - Max 7-8 per 500 g
Duck
- whole roasting bird G 1 + 600 W then G 1
7 to 8 min per 500 g
5 to 6 min
- -
1 breast 250-300 g (2) `G 1 + 250 W Approx 6 min - -
Rabbit
- - Max 7-8 per 500 g
Other meat
1 Andouillette sausage (tripe
sausage) 125 g
- fresh (2)
- frozen (2)
G 1 + 600 W
G 1 + 600 W
4 min 30 s
5 min 30 s
-
-
-
-
2 Toulouse sausages 200 g
- fresh (2)
- frozen (2)
G 1 + 600 W
G 1 + 600 W
3 min 40 s
5 to 6 min
-
-
-
-
- 2 chipolatas 110 g
- fresh (2)
- frozen (2)
G 1 + 440 W
G 1 + 600 W
3 min 30 s
3 min 30 s
-
-
-
-
En-26
NB: For boned or stuffed meat, add at least 7 minutes to the cooking time (for all weights/quantities). (1) : When using a
combination setting or grill, if the meat is large enough, place the dish directly onto the roller ring, otherwise use the turntable. (2) Use a pre-
heated (3 min on G 1 + 600 W) and oiled Pizza pan on the turntable.
Meat & poultry
En-27
English
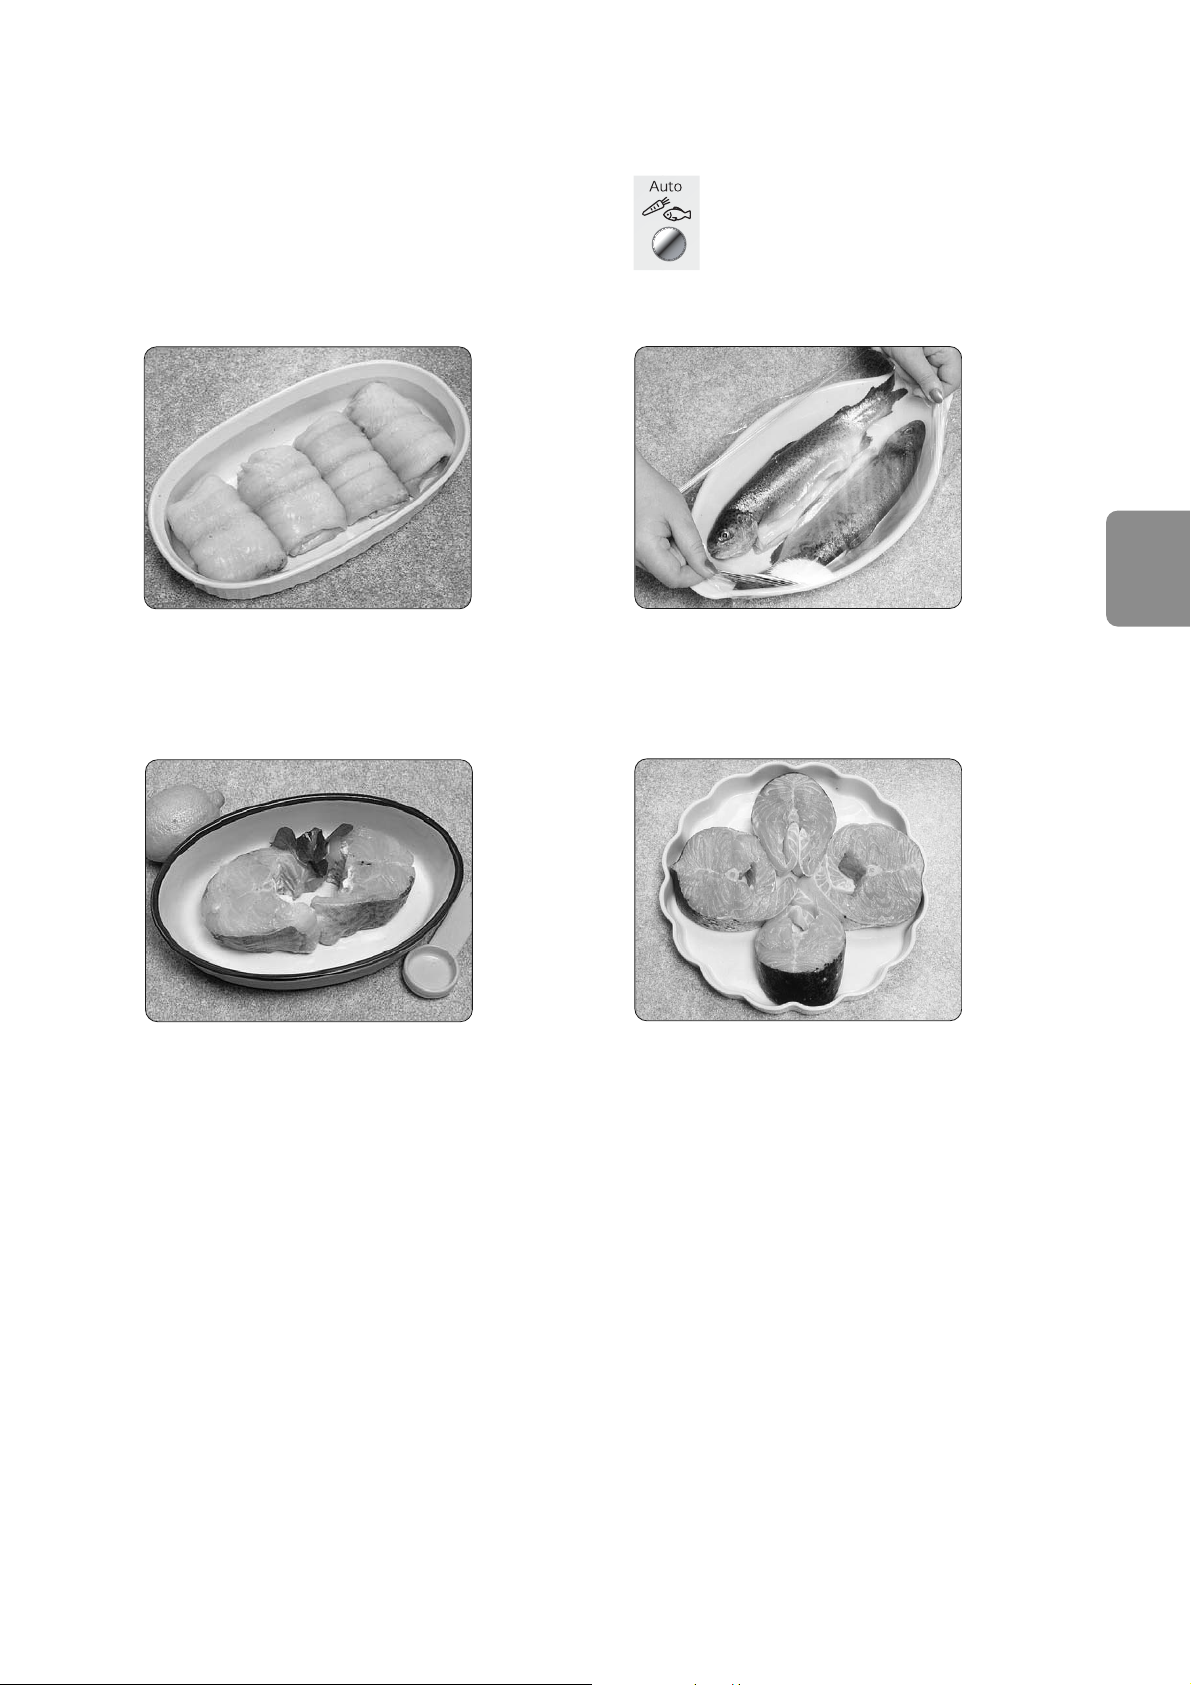
Fish
Arranging
Thin fillets of fish i.e. plaice, should be rolled
up prior to cooking to avoid overcooking on the
thinner outside edge and tail.
Covering
Always cover fish with either microwave cling
film or use a dish with a self-fitting lid.
Liquid
Fresh fish can be sprinkled with 30 ml (2 tbsp)
of lemon juice or white wine. When cooking
Frozen fish, add liquid as above for even
cooking.
Fish steaks
Fish steaks should be arranged in a circle thicker part to the outside - to avoid overcooking and disintegration of the tail ends.
Fish cooks very well by microwave as it stays
moist and the lingering fish smells left in
conventional ovens are avoided.
When is fish cooked?
Fish is cooked when it flakes easily and
becomes opaque. Remember that fatty fishes
(salmon, mackerel, halibut) are cooked more
quickly than leaner fishes (cod, Nile perch,
Tilapia,); When using the Auto program, you
can either add some wine to the fat fishes in
order to slow down the cooking process or
slightly reduce the displayed weight to shorten
the cooking time.
Big fish (more than 400 g)
You are recommended to turn them over
halfway through cooking time and to protect the
head and tail with a small piece of aluminium foil
to avoid overcooking. (Attention: the aluminium
must not touch the walls of the oven).
Weight Auto Cook:
REMEMBER that you can use the Fish
Auto programm for fresh fish
fillets, "pavés" (thick boneless fish cuts)
and whole fish (below 300 g). (Check
on page En-13 of your Operating Instructions)
En-28
Fish
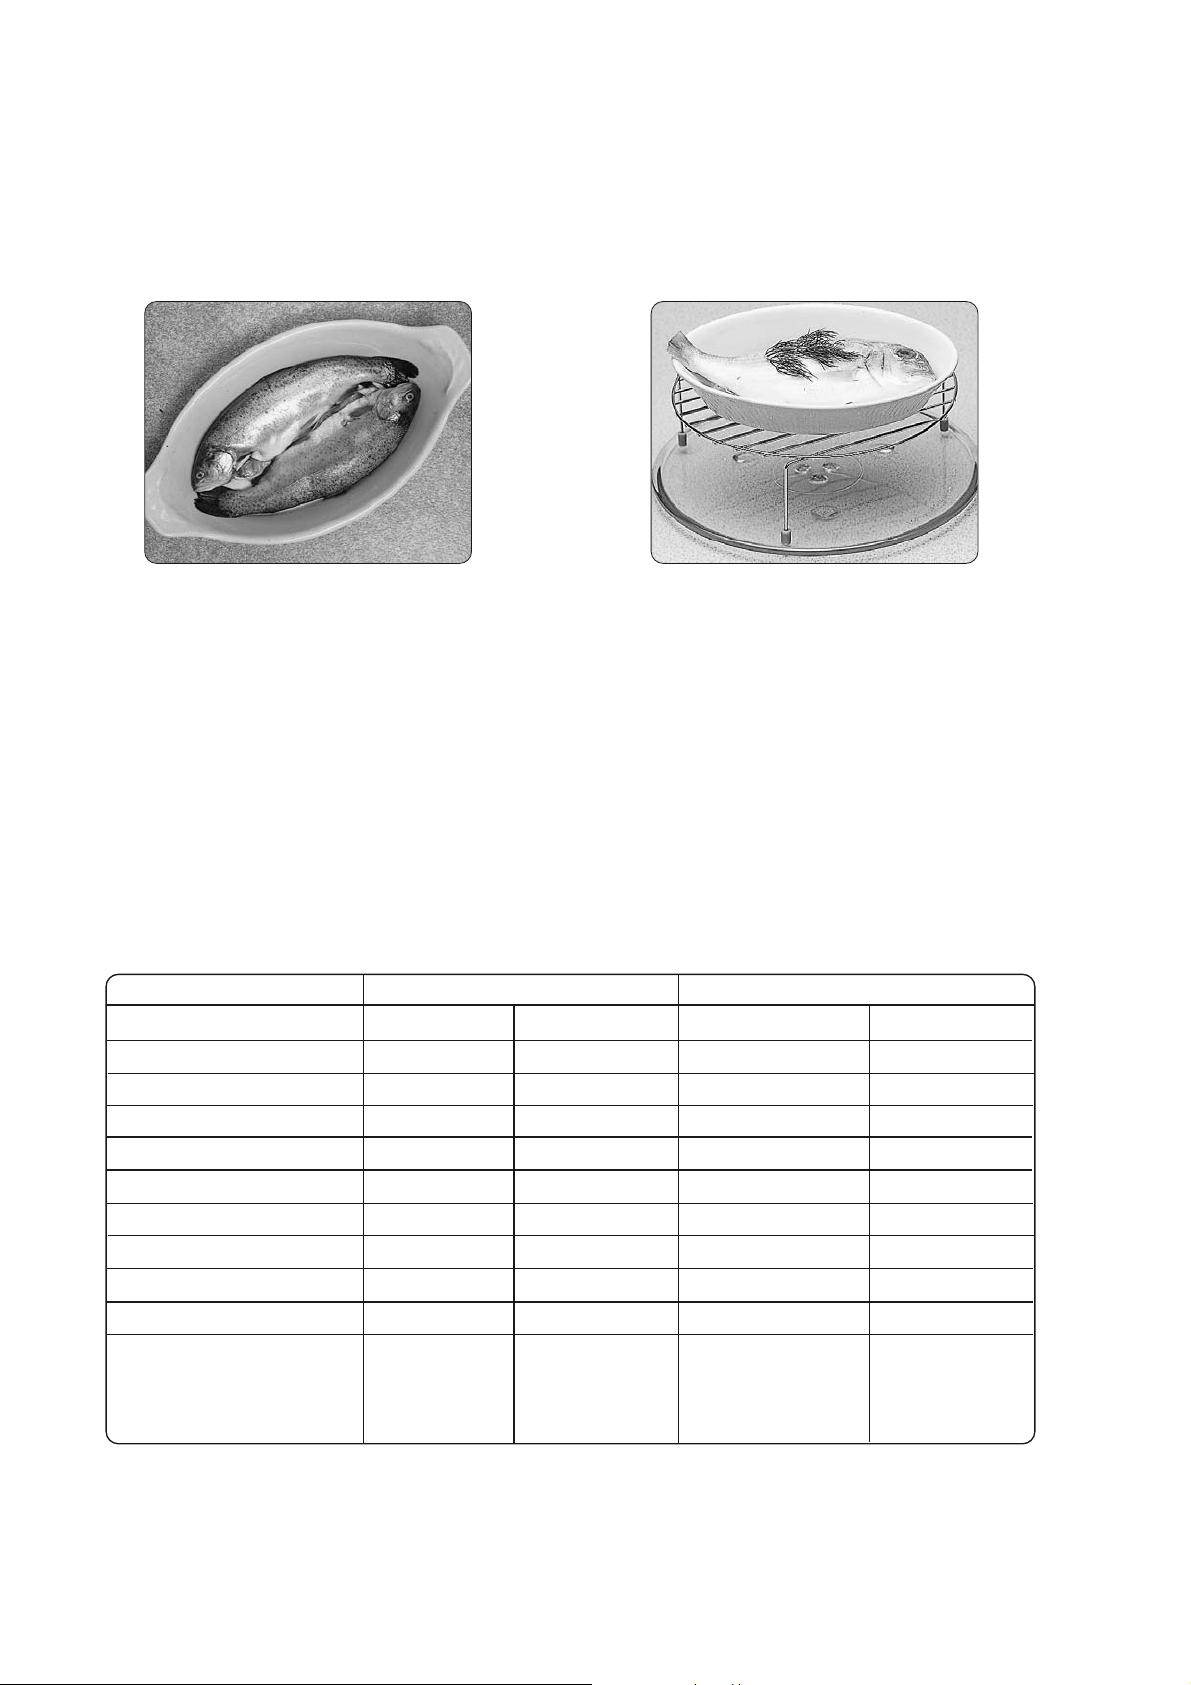
Whole fish
If cooking 2 whole fish together, they should be
arranged head to tail for even cooking.
Large whole fish must have the tail and head
shielded halfway through cooking with smooth
pieces of tin foil secured with toothpicks.
Salt
DO NOT sprinkle salt onto fish before cooking
as this may make the fish dry.
Cooking fish by grill or
combination
Brush fish with melted butter or oil to keep fish
moist. Place on wire rack. DO NOT add salt,
however sprinkle with pepper or herbs if required. Use Combination Grill 1 + 250 W.
Cooking time for 500g in minutes
Food Fresh FROZEN
Power Time Power Time
Fish in thin fillets 600 W 4 - 5 MAX 10
Fish in thick fillets 600 W 5 - 6 MAX 11 - 12
Fish steaks 600 W 5 - 7 MAX 11 - 13
Whole fish 600 W 5 MAX 12
Shrimp* 600 W 4 - 5
Mussels* 600 W 5 - 6
Scallops* 600 W 6 - 7
Squid* 600 W 5 - 6 MAX 11
Crab* 600 W 5 - 6
Fish croquettes
(1 piece=50 g)*
-
-
MAX
3 min 30
(2 pces)
or 5 min
(4 pces)
*We do not recommend cooking with the Auto menu for these fish.
Stand time
Fish should STAND after cooking for 2-3 mins.
This can be outside the oven to enable the
oven to be used for futher cooking.
Fish en papillote
You can make papillotes of fish by replacing the
aluminium foil with microwaveable
greaseproof paper (or parchment paper).
 Loading...